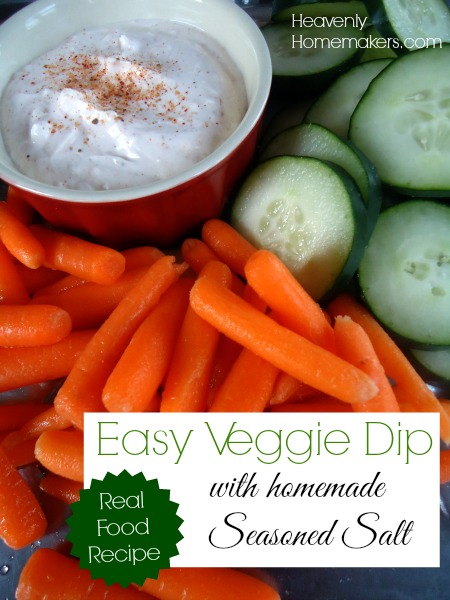
It’s been exactly 21 hours and 4 minutes since I posted the Homemade Seasoned Salt recipe, so I’m assuming all of you have some mixed up and ready by now? Perfect. You’ll be needing it for this Veggie Dip recipe. You have cucumbers and carrots on hand, right? Perfect.
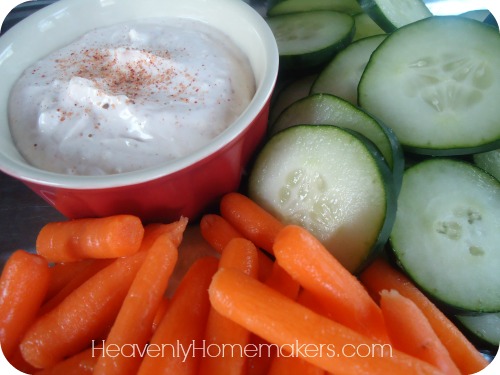
One of the recipe cards that we made to go with your Seasoned Salt gift package shares this Easy Veggie Dip idea. Right after mixing up my first batch of seasoned salt, I made some Perfect Potato Wedges (a recipe also found on the free recipe card printable) and some of this Easy Veggie Dip. It was so….well, easy. The only way I can get my family (including the mother – that’s me) to eat cucumbers is if I supply dip. Typically, I go for ranch. But cucumbers with this Easy Veggie Dip is delicious. Even my hubby, who doesn’t really dig cucumbers, was enjoying the combo. Yay – another great way to eat veggies!
Easy Veggie Dip
- 1 Tablespoon dried minced onion
- 2 cups sour cream
- 2 Tablespoons real mayonnaise (I use Hain safflower mayo)
- Seasoned Salt to taste
- In a bowl, mix together minced onion, sour cream, and mayonnaise. Add Seasoned Salt until mixture changes color (it should become a light peach color), tasting as you go for desired flavor. Chill for at least one hour before serving. Serve as a dip with assorted raw vegetables.
You’ll find our Seasoned Salt recipe here, along with this recipe (and 3 others) on cute printable recipe cards. This makes a great gift! This dip is great for holiday parties, or simply as a way to get your family to eat vegetables (like cucumbers!) any day of the week. <—- I’m looking at you Coppinger Clan.
Can’t wait to hear how you like this Seasoned Salt and the recipes to go with it!