Heavenly Homemakers

Encouraging women in homemaking, healthy eating and parenting

  • Home
    • About
    • FAQs
  • Recipes
    • Bread and Breakfast
    • Condiments
    • Dairy
    • Main Dishes
    • Side Dishes and Snacks
    • Desserts
    • Gluten Free
    • Instant Pot
    • Crock Pot
    • Heavenly Homemaker’s Weekly Menus
  • Homemaking
    • Real Food Sources
  • Store
  • Contact
    • Advertise
    • Disclosure
    • Privacy Policy
  • Simple Meals
  • Club Members!

Make Your Own Frozen Hashbrowns

April 27, 2010 by Laura 311 Comments

This post may contain affiliate links. For more information, please see our disclosure policy.

It’s remarkably easy to make your own frozen hashbrowns!
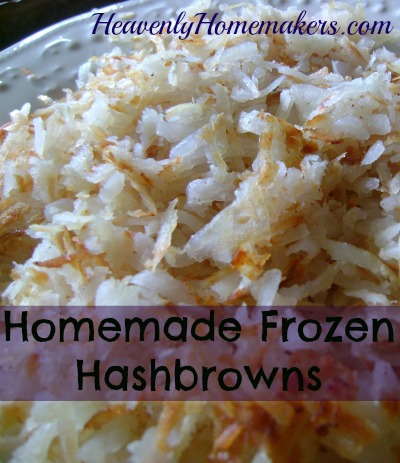
Homemade_Frozen_Hashbrowns

Yum

I’ve always had a hard time making good homemade hashbrowns. When my friend Brenda shared this little trick with me…I gave it a try and it WORKS!

Not only does this make delicious homemade hashbrowns, it is a great way to use up an abundance of potatoes before they start sprouting. Remember how I got 50 pounds for such a good price last week? I plan on putting up several pounds of them into the freezer in hashbrown form. That way, I’ve preserved some of my good organic potatoes, plus I’ve got EASY hashbrowns ready to pull out and cook up for breakfast or dinner anytime I need them!

Oh, and can you say “inexpensive”? Yes, I thought you could. These hashbrowns are so inexpensive, especially when you’ve taken advantage of a good deal on potatoes. So let’s get started, shall we?

How to Make Frozen Hashbrowns

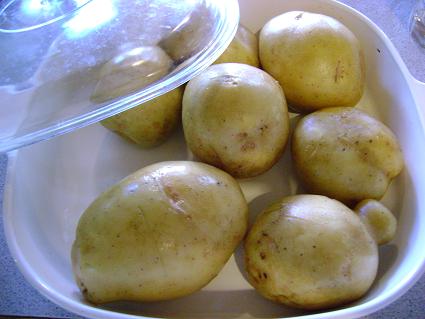
First, scrub your potatoes…as many as you want.
bakedpotatoessm

Bake the potatoes. I avoid using aluminum foil if at all possible in baking, so I always just place my scrubbed potatoes into a covered dish and bake them for about 1 1/2 hours at 350°. Be sure to stab each potato with a knife before baking so you don’t have a massive potato explosion in your oven. Unless you want a massive potato explosion in your oven. Then feel free to leave them unstabbed.
hashbrowns7sm

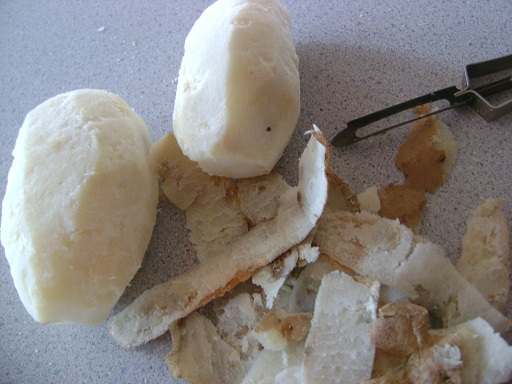
Allow your baked potatoes to cool. Peel the potatoes.

hashbrowns8sm

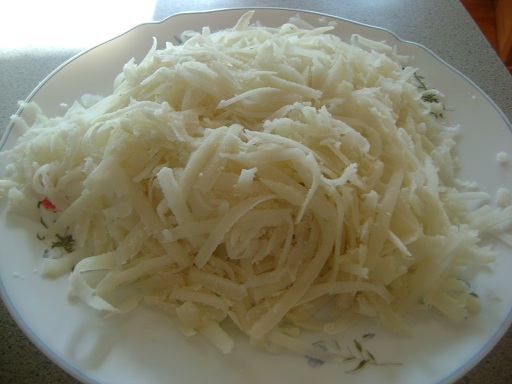
Shred your potatoes with a cheese grater. They shred very easily because they are soft after baking.
hashbrowns1sm

See how lovely?

At this point, you can either cook them, or freeze them. To freeze them, lay them flat on a parchment paper lined cookie sheet. Put the cookie sheet into the freezer for a couple of hours or until the potatoes are frozen, then transfer them into freezer bags to cook up when you’re ready. Oh so convenient!
hashbrowns2sm

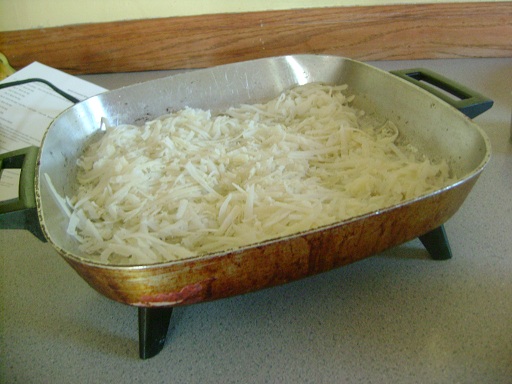
I usually cook my hashbrowns in my electric skillet or in a cast iron skillet on the stove.
I use a generous amount of butter, because I love the flavor butter gives my taters.
I also use quite a bit of sea salt or onion salt.

If the hashbrowns are frozen, you can cook them the same way as if they were not frozen…it will just take a few more minutes.

Cook them on one side for 4-5 minutes, then turn. Try not to turn them too much so they don’t get mushy. Cook until the potatoes are golden brown and slightly crispy.
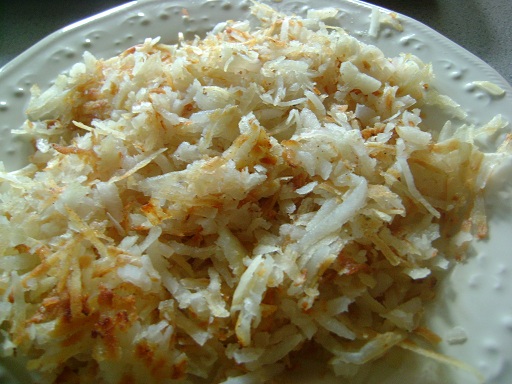
hashbrowns3sm

Yum, yum, yum! Ever since I discovered this hashbrown making trick…we have the most delicious hashbrowns. Before, I had simply shredded a raw potato, then tried to fry it. I always ended up with a mushy mess. Blech.  The trick:  Bake the potatoes first. It works so well! PLUS, the baked potato does not turn brown and ugly like a raw potato does once you shred it.

You can use this same trick to make and freeze diced potatoes or potato chunks. Fry those up in butter and you’ve got some wonderful fried potatoes!



Heavenly Homemaker's Club Members: Access your homepage and all your fantastic resources here! Not a member yet? Please join us!

Homemade Chewy Granola Bars (without corn syrup!)

March 25, 2010 by Laura 420 Comments

This post may contain affiliate links. For more information, please see our disclosure policy.

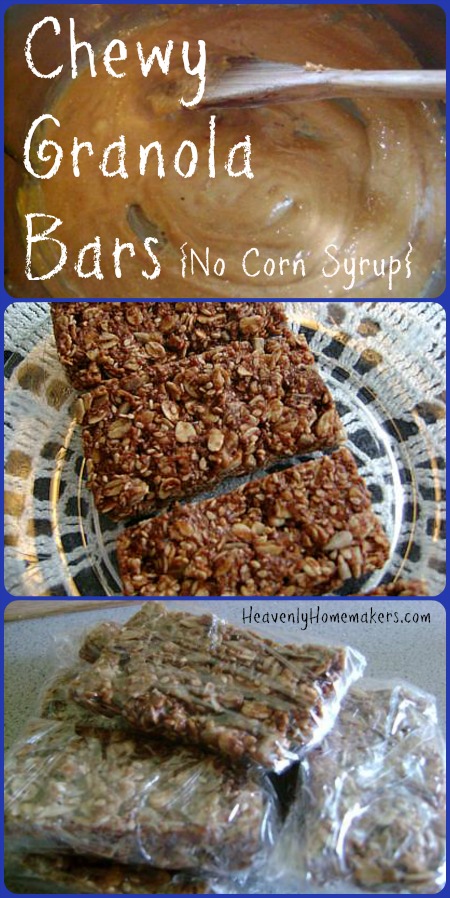
Chewy Granola Bars. No corn syrup. Easy recipe. Grab-and-go snack option. Fantastic.

Chewy Granola Bars - No Corn Syrup

Every homemade chewy granola bar recipe I’ve ever seen includes corn syrup and/or marshmallow cream (not ingredients we feel okay about eating or feeding my family). Even most pre-made granola bars I have seen at the store (even the organic ones) have ingredients I don’t like feeding my family.

I finally figured out a chewy granola bar recipe that we like! It’s easy and includes all natural sweeteners and ingredients! These bars are way cheaper than store bought granola bars! Plus you can customize it according to your family’s taste and allergies! They can be easily wrapped individually to take in the car or packed in a lunch!

Homemade Chewy Granola BarsYum

5.0 from 2 reviews
Homemade Chewy Granola Bars (without corn syrup!)
 
Save Print
Author: Laura
Ingredients
  • ½ cup peanut butter or sunbutter
  • ⅓ cup honey
  • ¼ cup coconut oil (or another oil of your choice)
  • 1 cup oats
  • 1 cup total of any combination of: sesame seeds, coconut flakes, sunflower seeds, dried fruit, mini chocolate chips
Instructions
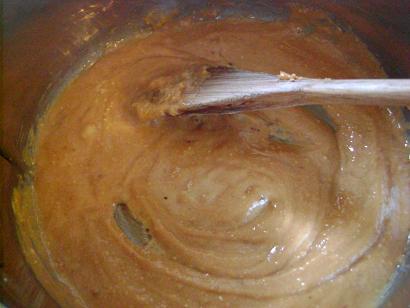
  1. In a medium sized saucepan, melt together peanut butter, honey and coconut oil.
  2. Remove from heat and add one cup of oats.
  3. Choose your favorite combination of coconut flakes, sesame seeds, sunflower seeds, dried fruit and mini chocolate chips, to equal a total of ONE CUP. (I just got out my one cup measuring cup and poured in the ingredients until the cup was full.)
  4. Pour in and stir well.
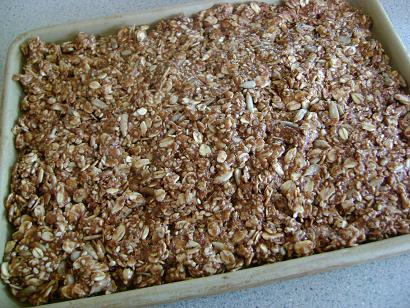
  5. Spread mixture into a 8x8 or 9x4 pan.
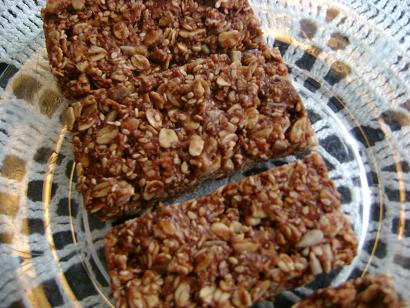
  6. Chill for two hours, then cut into bars.
3.4.3177

granola_bars_1

granola_bars_2

granola_bars_3

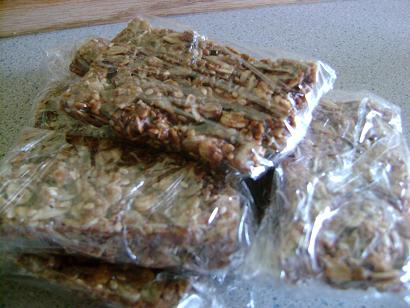
Wrap in plastic wrap for a quick grab and go snack!

granola_bars_4

Many have said that these taste similar to the oldie-but-goodie No Bake Cookie recipe we’re all familiar with. How fun that these are quite a bit healthier!

I’ve found that these keep best in the fridge as they get a little bit too soft if left out for too long. What a perfect grab-and-go snack!

Heavenly Homemaker's Club Members: Access your homepage and all your fantastic resources here! Not a member yet? Please join us!

Winter Comfort…Warm Vanilla Soother

December 3, 2009 by Laura 92 Comments

This post may contain affiliate links. For more information, please see our disclosure policy.

Lately, this drink has been my favorite breakfast. It’s warm, filling and nourishing. As I drink this, I always feel like someone just handed me a delicious mug of comfort. Mmmmm Warm Vanilla Soother.

Warm Vanilla Soother

Warm Vanilla SootherYum

5.0 from 4 reviews
Winter Comfort...Warm Vanilla Soother
 
Save Print
Author: Laura
Serves: 3-5
Ingredients
  • 3 cups whole milk
  • 4 egg yolks
  • ⅓ cup real maple syrup
  • 2 Tablespoons arrowroot powder or corn starch
  • 1 Tablespoon butter
  • 1 teaspoon vanilla extract
Instructions
  1. In a medium saucepan, whisk together milk, egg yolks, maple syrup and arrowroot powder.
  2. Cook over medium heat, stirring constantly (I use a whisk) until mixture begins to thicken.
  3. Remove from heat and add butter and vanilla.
  4. Stir until creamy.
  5. Pour into mugs and serve warm.
3.4.3177

Sprinkle a little nutmeg on top or add a dollop of whipped cream for an extra special touch!

Ever since I bought a gallon of vodka started my big batch of homemade vanilla, I’ve been experimenting with new ways to use vanilla extract. Yum, homemade vanilla is so good! (You’ll find more great recipes like this one in our What to Do With the Vanilla in Your Kitchen ebook.)

This Warm Vanilla Soother was the beginning of several other comfort food drinks that were born in my kitchen. Chocolate, chocolate mint, pumpkin – they are all so comforting and yummy! They are the perfect way to warm up on a chilly day – perfect for breakfast because they are nourishing and filling. If you chill the leftovers, it turns into pudding – also delicious!

Here are the other recipes you’ll want to try:

  • Chocolate Mint Soother
  • Warm Chocolate Soother
  • Warm Pumpkin Custard

If you have any other flavor ideas for this comforting drink, I’d love to hear them. I’m always up for experimenting in the kitchen – especially when I can take a basic recipe and tweak it to a slightly different variation of something we already love!

Heavenly Homemaker's Club Members: Access your homepage and all your fantastic resources here! Not a member yet? Please join us!

Holiday Help: What to Do With Leftover Mashed Potatoes and Sweet Potatoes

November 29, 2009 by Laura 7 Comments

This post may contain affiliate links. For more information, please see our disclosure policy.


I seem to almost always over-shoot when I estimate how many potatoes to make for a holiday meal. Just in case you also have a few leftover mashed potatoes…here are some ideas for ways to use them up:

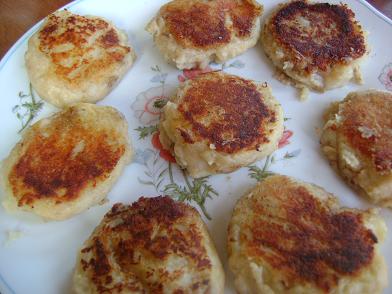
Mashed Potato PancakesYum

Leftover mashed potatoes
1/4 cup whole wheat flour (for every 2 cups of mashed potatoes)
Butter

Mix mashed potatoes and flour together. Melt a little butter in the bottom of a skillet. Spoon scoops of mashed potato mixture into hot butter and flatten a bit. Flip potato cake several times to ensure than you don’t burn the sides…but so that the cake is heated through and through.

potatopancakessm

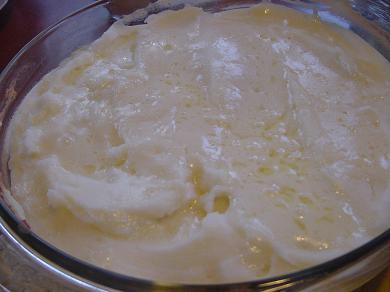
Cheesy Mashed Potatoes

Leftover mashed potatoes
1/2 cup sour cream (for every 3 cups of mashed potatoes)
Shredded cheddar cheese (I use raw white cheddar)

Re-warm mashed potatoes. Remove potatoes from heat and stir in sour cream. Spread into a casserole dish. Sprinkle with cheese and heat in the oven until cheese is melted and bubbly.

cheesypotatoes2sm

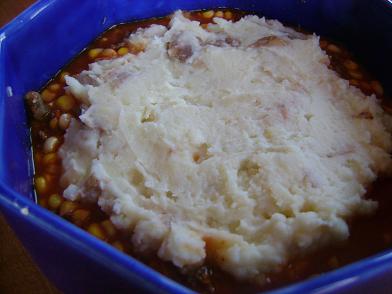
Shepherd’s Pie

You’ll find the recipe for Shepherd’s Pie here. Just mix it up and spread the leftover mashed potatoes over the top. So easy!

shepherdspienewsm

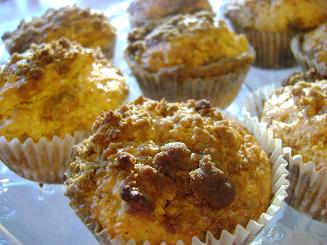
Have leftover sweet potatoes?

Stir them into these Sweet Potato Streusel Muffins!

sweetpotatomuffins2smThese muffins taste as good as they look and smell!

Both mashed potatoes and sweet potatoes can also be frozen to save for another time. It’s wonderful to have frozen mashed potatoes and mashed sweet potatoes ready to add to one of the above recipes!

Share how you use up your mashed potato and sweet potato leftovers!

Heavenly Homemaker's Club Members: Access your homepage and all your fantastic resources here! Not a member yet? Please join us!

Holiday Help: Simplify Making Mashed Potatoes

November 23, 2009 by Laura 37 Comments

This post may contain affiliate links. For more information, please see our disclosure policy.

holidayhelpsm

Yum

Learning this little potato trick changed my mashed potato making life forever. 

Instead of preparing your potatoes to be mashed on the day of your big holiday meal…prepare them the day before.

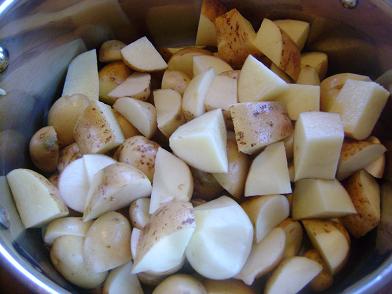
Scrub them (or peel them, whichever you like to do)….chop them…and throw them into your cooking pot.

mashedpotatoessm

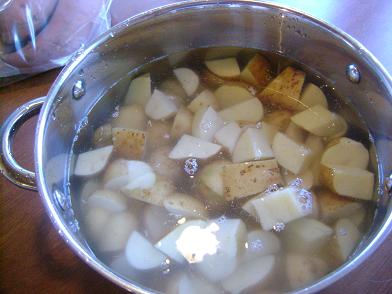
Cover them with cool water.

mashedpotatoes2sm

Put a lid on your pot. 

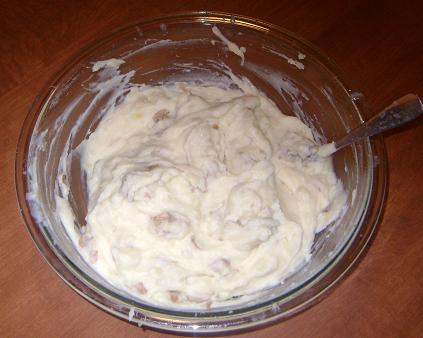
When it’s time to cook your meal, boil your potatoes and mash your potatoes, then serve your potatoes (with lots of melted butter!). 

mashedpotatoes3sm

I’m telling you, this little trick will save so much back pain on Thanksgiving day. I always prep my potatoes on the Wednesday before. They sit in the water waiting patiently until it is time to cook them Thursday. 

Between prepping my potatoes the day before and cooking my bird several days before I need to serve it…I practically have nothing to do on Thanksgiving day. 

Okay, not really nothing. 

You know what I mean.

P.S. I use this little trick almost every time I make mashed potatoes any day of the year. If we’re having mashed potatoes for dinner…I prep them in the morning or whenever I have a spare minute during the day. Then, when it’s time to cook dinner, all I have to do is turn on the burner to cook the taters. Love it!
————————————————–

This post is linked to Kitchen Tip Tuesdays.

Heavenly Homemaker's Club Members: Access your homepage and all your fantastic resources here! Not a member yet? Please join us!

Ever Tried Cinnamon Apple Toast?

November 15, 2009 by Laura 14 Comments

This post may contain affiliate links. For more information, please see our disclosure policy.

I mentioned here that I may be getting sixty pounds of apples in my co-op order this week. (UPDATE!!! Click here to see if the apples all came in or not!)  If they all actually come in, I have no doubt that they will all get eaten. The kids love snacking on apples…they are SO nice to have on hand! The apples I mean. Well actually, the kids are pretty nice to have on hand too.

I ordered twenty pounds each of Gala (my favorite!), Yellow Delicious and Spartan. I’ve never even heard of Spartan apples before. Have you? Are they good? I ordered them because they were $11 for 20 pounds!!! I can’t wait to try them (if they come in)!

Here’s a very simple apple idea we’ll be snacking on with all of our apples:

Cinnamon Apple ToastYum

Your favorite whole grain bread (I use this homemade Honey Whole Wheat Bread…or Whole Wheat Sourdough if I have it made.)
Apples, sliced thinly
butter
cinnamon

Place slices of bread on a baking pan. Butter each slice. Lay three or four apple slices on each piece of bread. Sprinkle with cinnamon.

Broil Cinnamon Apple Toast in the oven for 2-3 minutes.

Cinnamon_Apple_Toast
So simple, your bigger kids can help you or make these themselves!

Other ways to eat apples…

  • My kids eat them big, in slices, or cut into chunks…depending on what Mama has time for. :)
  • Applesauce Bread
  • Applesauce
  • Apple Fruit Leather
  • Caramel Apple Dip
  • Strawberry Yogurt Fruit Dip
  • Apple crisp
  • I may experiment with individual apple pie pockets. Doesn’t that sound fun?

What are your favorite ways to eat apples? If you have one, feel free to leave a recipe link in your comment! Really, because sixty pounds of apples? I might need to get creative!

Heavenly Homemaker's Club Members: Access your homepage and all your fantastic resources here! Not a member yet? Please join us!

High Five Recipes: Super Simple Chip Dip

September 1, 2009 by Laura 10 Comments

This post may contain affiliate links. For more information, please see our disclosure policy.

High Five Recipes 2

Here is a very easy recipe to put together for a quick lunch or snack. Or, double the recipe to take to a party when you’ve been asked to bring a finger food.

Super Simple Chip DipYum

1/2 pound hamburger meat
1 cup salsa
1 cup sour cream or kreme fresh
Tortilla chips (We like Kettle brand, which is made with organic corn)

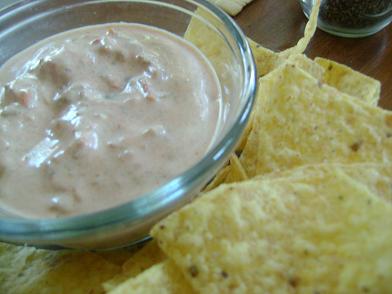
Brown hamburger meat. Stir in salsa and sour cream or kreme fresh. Serve with chips. (See? Simple.)

supersimplechipdipsm

What kinds of High Five Recipes are you interested in seeing more of? Main dishes? Side dishes? Desserts?

Heavenly Homemaker's Club Members: Access your homepage and all your fantastic resources here! Not a member yet? Please join us!

High Five Recipes: Homemade Barbeque Sauce

July 7, 2009 by Laura 46 Comments

This post may contain affiliate links. For more information, please see our disclosure policy.

I’ve had several requests for my homemade barbecue sauce recipe. Turns out…it’s a high five recipe! Doesn’t get much easier than that!

High Five Recipes 2

Homemade Barbecue SauceYum

High Five Recipes: Homemade Barbeque Sauce
 
Save Print
Author: Laura
Ingredients
  • ¾ cup ketchup (I use an organic, no high fructose corn syrup variety)
  • 2 Tablespoon minced onion
  • ¼ teaspoon garlic powder
  • 1 teaspoon liquid smoke
  • 1 Tablespoon molasses, honey or sucanat (optional)
Instructions
  1. Mix ingredients in a small sauce pan.
  2. Simmer for a few minutes until flavors are blended.
3.4.3177

As for the ketchup, I use an organic, no high fructose corn syrup variety. Muir Glen is my favorite.

I mix this Barbecue Sauce up as a dip for our meatballs or Popcorn Chicken…YUM!

bbq_sauce

Sometimes I put a few pieces of chicken into the crock pot, dump the sauce over the top, and let it cook slowly for a few hours. It’s the easiest main dish ever! Get the details on my Crock Pot Barbecue Chicken Breasts here. It’s also fantastic on Grilled Barbecue Chicken.

Or, sometimes I add it to leftover roast beef for BBQ beef sandwiches. Even more fun? Make your BBQ Beef into Barbecue Beef and Cheese Hot Pockets. They are freezable so you can make them ahead and pull them out as needed.

So let’s review.

Recipes that use Homemade Barbecue Sauce

  • Crock Pot Barbecue Chicken Breasts
  • Grilled Barbecue Chicken
  • Barbecue Beef and Cheese Hot Pockets
  • Use it as a dip for Popcorn Chicken

What all do you put barbecue sauce on?

Easy Homemade Barbecue Sauce

Oh, and by the way – I really have no idea what “liquid smoke” is. I’m assuming that it isn’t the healthiest ingredient in the world. BUT…it makes for a yummy, easy BBQ sauce. This version is MUCH healthier than the HFCS versions I could buy at the store.

If I ever figure out how to turn smoke into a liquid and put it into a bottle all by myself, you’ll be the first to know.

Heavenly Homemaker's Club Members: Access your homepage and all your fantastic resources here! Not a member yet? Please join us!

High Five Recipes: Justus’ Shaved Ice

May 14, 2009 by Laura 15 Comments

This post may contain affiliate links. For more information, please see our disclosure policy.


High Five Recipes 2

Yum

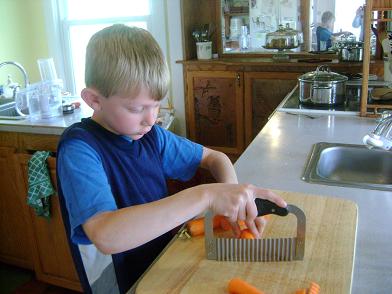
I’m not sure how often I’ve emphasized to you how much Justus (my nine year old) LOVES cooking. He wants to be a “restaurant worker” someday…he calls himself a chef (I am sometimes privileged to be his assistant)…and he really just can’t get enough of the kitchen. He LOVES it.

justuscookingmay09sm.JPG

Of course I love it too. While the other boys mostly love to cook so that they can lick a beater, Justus truly loves everything there is about cooking.

He got a new cookbook for Christmas and has been waiting for a warm day to make the shaved ice recipe he found in it. We adapted it to make it healthier (ah yes, I’m teaching him how to change a recipe already!) and here’s what he came up with:

Justus’ Shaved Ice

1 cup fresh or frozen peach slices
1 cup fresh or frozen raspberries
1 1/2 cups warm water
1/4 cup orange juice
1/4 cup honey

If your fruit is frozen, place it in a bowl with warm water (not the water mentioned in the above list of ingredients) for about fifteen minutes to thaw. Drain.

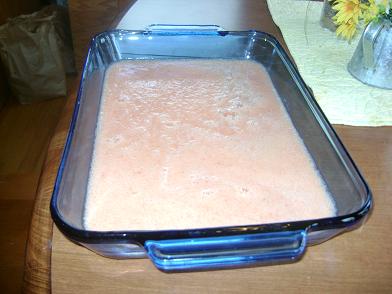
Put fruit, water, orange juice and honey into a blender or food processor. Blend until smooth. Poor mixture into a 9×13 inch baking dish. Cover with plastic wrap and freeze for about 6 hours.

justusshavedice2sm.JPG

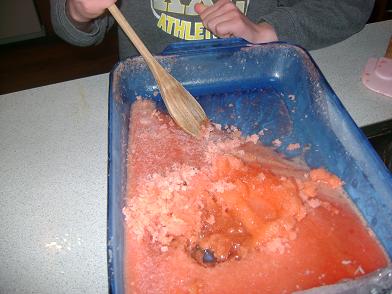
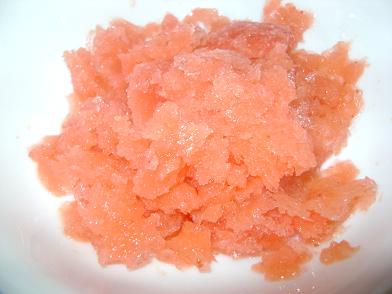
Remove from freezer and allow it to sit on the counter about ten minutes. Use a large wooden spoon to “shave” icy mixture into serving bowls.

justusshavedice3sm.JPG

justusshavedicesm.JPG

The “bummer” about this recipe is that we had to wait for SIX whole hours before we could eat it. Not much instant gratification there! However, it was worth the wait!

All the boys (and the parents) loved this treat! It was super refreshing on a hot afternoon.

And, of course, it’s a wonderful recipe to help you get another great serving of fruit. (Are you taking the challenge?!)

Any other recipes you’d like Justus to come up with for us?!

Heavenly Homemaker's Club Members: Access your homepage and all your fantastic resources here! Not a member yet? Please join us!

High Five Recipe: Creamy Mac and Cheese

April 27, 2009 by Laura 251 Comments

This post may contain affiliate links. For more information, please see our disclosure policy.

High Five Recipes 2

I’ve been searching my whole life (give or take) for a good homemade mac and cheese recipe. The recipes I’ve come up with in the past are decent….but not great.

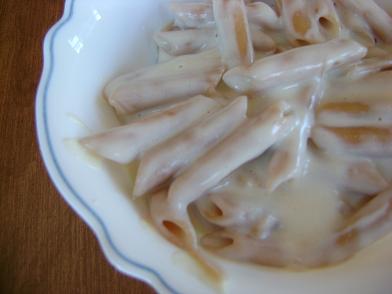
A couple of months ago, a friend told me how she makes it. I adapted it a bit and now we can’t seem to get enough! It is THE creamiest mac and cheese ever.

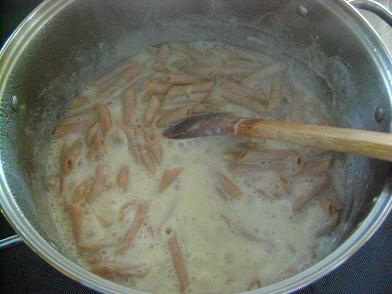
Here’s the secret:  Cook your pasta in MILK instead of water. The milk makes it super creamy. The starch from the pasta thickens the milk into a sauce. Add your cheese after the pasta is finished cooking.

macandcheese3sm.JPG

Uh-huh…comfort food at it’s best.

Creamy Mac and CheeseYum

5.0 from 1 reviews
High Five Recipe: Creamy Mac and Cheese
 
Save Print
Author: Laura
Ingredients
  • 2½ cups whole wheat pasta
  • 3 cups whole milk
  • ½ t. sea salt
  • 1 cup shredded cheese (I use white cheddar)
Instructions
  1. Mix pasta, milk and salt in a large sauce pan.
  2. Cook over medium-high heat STIRRING ALMOST CONSTANTLY until the pasta is tender (10-15 minutes).
  3. Remove from heat. (IMPORTANT!)
  4. Add cheese and stir until melted.
  5. Serve immediately.
3.4.3177

Be very sure to remove this from the heat before you stir in the cheese. Otherwise you’ll have a gritty mess. :)

macandcheesesm.JPG

You can use any shape of pasta you want. I have found that elbow noodles cook quite a bit faster so I use those when I need a quick lunch.

Every time I make this, we can not believe how creamy and delicious it is. My lifelong search for awesome homemade macaroni and cheese has come to an end. We should have some sort of mac and cheese ceremony.

The Creamiest Mac and Cheese


If you haven’t ever tried cooking your pasta in your milk, you must do this! You can enjoy it for an easy meal as is. Or you can use this base recipe to make:

  • Easy Tuna Casserole
  • Cheeseburger Macaroni
  • Three Cheese Garlic Chicken Pasta
  • Baked Three Cheese Chicken Pasta

Life as you know it just got better. Serve any of these with a salad and some steamed veggies. It’s amazing!

Heavenly Homemaker's Club Members: Access your homepage and all your fantastic resources here! Not a member yet? Please join us!
« Previous Page
Next Page »

Join Our Community!

 Facebook Twitter E-mail Instagram Pinterest

Popular Posts

~ Will All of the Real Moms Please Stand Up?
~ Easy! Stir-and-Pour Whole Wheat Bread
~ How to Make Gatorade
~ 31 Real Food Breakfast Ideas
~ Dear Teenage Girls...
~ When Mom Takes a Step Back
~ The Inexpensive Health Insurance We Love!
~ Let's Talk Real Food Grocery Budgets

Check out our latest posts!

  • Big Family Food and Fun: August 16-22, 2026
  • Big Family Food and Fun: August 9-15, 2026
  • Big Family Food and Fun: August 2-8, 2026
  • Big Family Food and Fun: July 26-August 1, 2026
  • Big Family Food and Fun: July 19-25, 2026
Home  ~  Simple Meals  ~  Club Membership  ~  Shop  ~  Privacy Policy  ~  Disclosure  ~ Contact

Copyright © 2026 · Beautiful Pro Theme on Genesis Framework · WordPress · Log in