Heavenly Homemakers

Encouraging women in homemaking, healthy eating and parenting

  • Home
    • About
    • FAQs
  • Recipes
    • Bread and Breakfast
    • Condiments
    • Dairy
    • Main Dishes
    • Side Dishes and Snacks
    • Desserts
    • Gluten Free
    • Instant Pot
    • Crock Pot
    • Heavenly Homemaker’s Weekly Menus
  • Homemaking
    • Real Food Sources
  • Store
  • Contact
    • Advertise
    • Disclosure
    • Privacy Policy
  • Simple Meals
  • Club Members!

Too Many Emails? Here’s a Solution!

March 29, 2016 by Laura 3 Comments

This post may contain affiliate links. For more information, please see our disclosure policy.

Many of you have chosen to be a “daily newsletter subscriber.” That means that whenever I post something on my blog – which is just about every weekday – you get an email sharing that information. Love this? Great! You don’t need to change anything!

But for the rest of you? I continue to see people unsubscribe saying, “My inbox is too full!”

email-message-lite-plus-icon_zJNV9pUO_L

Oh how I hear you. I think we’re all at a place in our lives where we want a less cluttered email inbox. (I’d also like a less cluttered house and yard. Would someone please unsubscribe me from the constant flow of dirty dishes???)

While I completely understand people’s desire to see fewer emails, I really don’t want to lose you as a reader and subscriber! You mean a lot to me!

Here are some solutions to your “I get too many emails!” conundrum:

1. Subscribe to our Weekly Newsletter Instead

You’ll still get all the information I post here, but it all comes in one email on Monday afternoons. The only drawback to this is that sometimes I post something that is time sensitive and by the time you read about it on Monday, the deal has expired. That’s rare though, I and do my best to avoid this issue if I possibly can.

Want to switch from daily newsletter to weekly newsletter? Do that here.

2. Join our Heavenly Homemaker’s Savings Club

These emails go out roughly twice each week and they share the best money saving tips and deals I have found. You might want this newsletter in addition to the regular one, or you might want it instead of. Either way, you can count on this email to offer you great ways to save money in your healthy homemaking endeavors!

3. Join our Heavenly Homemaker’s Learning Zone

This one is specifically for those of you who are looking for educational resources for kids. Many of these resources are free!! I continue to have fun putting together Educational Learning Packets to share with members of the Learning Zone. (Right now if you subscribe you get free Springtime Activity Packets.) Again, you might want this one in addition to any of the other subscriptions. You make the call.

Love reading what I share at Heavenly Homemakers daily as it comes out? Continue reading directly on the blog here or subscribe to our daily newsletter!

I just wanted to catch you all up on all the options available. We aim to please!

What’s your preference? Does your inbox overwhelm you?

~~~~~~~~~~~~~~~~~~~~~~~~~~~~~~~

MockMill Giveaway Winner!!

Suz: belauvibes@ – you win the Mockmill Grain Mill Giveaway from Pleasant Hill Grain! Email me and I’ll forward your info on for your prize!

Heavenly Homemaker's Club Members: Access your homepage and all your fantastic resources here! Not a member yet? Please join us!

54-Ounces of Organic Virgin Coconut Oil – Just $11.94!

March 29, 2016 by Laura 2 Comments

This post may contain affiliate links. For more information, please see our disclosure policy.

I posted this a couple weeks ago, but (brace yourself) THE PRICE JUST GOT LOWER!!!! Get this while it’s available. We bought them out when I posted before, so I wouldn’t wait. Plus, you never know when the price will go up!

spectrum coconut oil

Heavenly Homemaker's Club Members: Access your homepage and all your fantastic resources here! Not a member yet? Please join us!

Communication in Marriage: The Tale of Two French Fries

March 28, 2016 by Laura 23 Comments

This post may contain affiliate links. For more information, please see our disclosure policy.

I originally posted this in 2012. Since that time, Matt and I have spent quite a bit of time mentoring and counseling couples who are soon to be married. This is the story we always tell when we’re introducing the topic of communication. Since it’s so good for all of us to be reminded of this truth, I felt this story was worth posting for you again…

What French Fries Teach Us About Communication

Matt and I have some wonderful friends who once shared with us a fun story of something they learned within the first year of their marriage. This story has everything to do with french fries…but really nothing at all to do with french fries. Hang with me here.

I’ve taken a little bit of literary license here since I don’t know the exact details of how everything went for our friends, plus, I’m really just trying to make a point. Also, while telling this story, I’ll call our friends Gertrude and Hank, because shucks, thinking of fictitious names for our friends is just downright fun.

Gertrude and Hank were delighted to be newlyweds and as with all couples in love, they were eager to please each other in every way. As you can imagine, this desire to please each other was quite apparent when they dined together on french fries. Isn’t it always? I mean, this is the stuff Hallmark cards are made of.

Gertrude absolutely loves the fat, soggy type of french fries. Hank, on the other hand, much prefers the thin, crispy, crunchy french fries. And so, in this couple’s desire to show love and care for one another, each was sure to give the other the best, most tasty french fries.

Gertrude, because of her love of big, soggy fries, always placed the fattest, soggiest french fries on Hank’s plate. He cheerfully accepted them and sacrificially ate the plump potatoes, knowing that he would then be allowing his beloved to eat the choicest of fries – the thin, crispy, crunchy ones. Both Gertrude and Hank were thrilled to be pleasing one another by giving up what they knew to be the best of the fries.

And so it went for months, every time the couple ate french fries together.

Until finally, one day, Gertrude and Hank participated in a little bit of french fry communication. Somehow, the truth came out about each person’s french fry preference and their desire to give up what they each really wanted in order to please the other one. Lo and behold, in their effort to please each other, and in their failure to communicate, they had both been wrong in their assumption of what the other truly wanted. Thus, they had both been choking down french fries that neither of them really liked.

The End.

The moral of the story is that you and your spouse need to always be very up front about your french fry preferences. And also, you should communicate often about other, more important details in life and in your marriage. It is important to be selfless as you work to please your spouse, but for goodness sake, communicate.

Gertrude and Hank were doing what they thought was best for one other. They were both playing the martyr, sacrificing their own desires, in the name of love, for their spouse. But the end result was that no one was happy with their french fries. What a waste of good ketchup. 

Talk to your spouse. Be up front with your desires. And for the love (or not) of crispy french fries, always communicate.

P.S. Gertrude and Hank – you guys rock. Thank you for the way Jesus shines through your godly marriage.

~~~~~~~~~~~~~~~~~~~~~~~~~~~~~~~~~~~~~~~~~~~~~~

[wp_eStore_fancy1 id=24]


Heavenly Homemaker's Club Members: Access your homepage and all your fantastic resources here! Not a member yet? Please join us!

Low Sugar Chocolate Fudge Cookies

March 27, 2016 by Laura 7 Comments

This post may contain affiliate links. For more information, please see our disclosure policy.

I didn’t think I could make it happen. Why did I doubt? Cutting down the sugar in chocolate cookies is entirely possible and now we can all enjoy Low Sugar Chocolate Fudge Cookies!

low sugar chocolate cookies

Now, it doesn’t take much for me to think a treat is “plenty sweet” when, according to my boys, it is only “barely sweet” or “not even sweet.” But who was I to argue when Malachi grabbed the spoon to lick it off before it went into the dishwasher? I mean, it did look lickable.

Then when the cookies were done baking and all the boys wanted to try one, who was I to argue? I warned them. I told them the cookies might have more of a dark chocolate taste as opposed to a super sweet chocolate cookie they might be expecting.

You should have heard Malachi when he tried his first cookie. Actually, maybe you did. He was pretty loud. “Mmmm! Mom, these are so good! They taste like a brownie!” The brothers agreed.

Of course then I assumed maybe they’d be too sweet for me. I mean, if my boys thought they were great, that just might mean I’d go straight from one bite to migraine in a matter of minutes. Before trying one myself, I double checked, “Are they going to be too sweet for me? Are you sure I can eat these?” They assured me that the cookies weren’t too sweet, they just tasted good.

They were right.

This is how we know we have a winning recipe: when all the people eating it don’t realize or care that the sugar has been cut drastically and they just happily eat all the cookies like it’s just a “normal” treat.

As always I come back to the question: WHY IS THERE SO MUCH SUGAR IN ALL THE RECIPES???

Not only do we not need it, we don’t even need it. What I mean is: Our bodies don’t need the sugar overload AND treats don’t need as much sugar as we think they need in order to taste good. I’m learning that 1/2 cup of sugar is enough when a recipe calls for 1 1/2 or 2 cups. That’s a drastic cut in sugar without compromising taste.

This calls for a cup of coffee. What better way to celebrate the eating of Low Sugar Chocolate Fudge Cookies?

Low Sugar Chocolate Fudge CookiesYum

Low Sugar Chocolate Fudge Cookies
 
Save Print
Author: Laura
Serves: 24-30
Ingredients
  • 1 cup melted butter
  • ½ cup sucanat or brown sugar
  • ⅓ cup unsweetened cocoa powder
  • 2 eggs
  • ½ teaspoon baking powder
  • 1 teaspoon vanilla extract
  • 2⅓ cups whole wheat pastry flour (give or take)
Instructions
  1. Stir together melted butter, sucanat, and cocoa powder.
  2. Add eggs, baking powder, and vanilla, mixing well.
  3. Mix in flour until your dough has reached a nice consistency (moist but not runny).
  4. If you've added all the flour and the dough is still too runny, add a little more or chill the dough in the refrigerator for 30 minutes to an hour.
  5. Scoop 1" sized cookie dough balls onto a cookie sheet.
  6. Bake in a 350° oven for about 10 minutes.
3.4.3177

Low Sugar Chocolate Fudge Cookies

Now of course you’ll want our other Low Sugar Cookie recipes:

  • Easy {Low} Sugar Cookies
  • Low Sugar Lemon Melt-Away Cookies
  • Low Sugar Almond Melt-Away Cookies
  • Low Sugar Orange Melt-Away Cookies
  • Low Sugar Lime Melt-Away Cookies

You should also be very excited because I don’t think it will be difficult at all to tweak this a little bit and make Low Sugar Brownies. You can bet I’ll be working on that after these cookies are gone from my house which will likely be sometime in the next couple of minutes.

Heavenly Homemaker's Club Members: Access your homepage and all your fantastic resources here! Not a member yet? Please join us!

Whole Wheat Stir-and-Pour Cinnamon Swirl Bread

March 24, 2016 by Laura 14 Comments

This post may contain affiliate links. For more information, please see our disclosure policy.

It would appear that there is a theme this week in the Stir-and-Pour Bread category. First, a Stir-and-Pour Pizza Crust, now a Stir and Pour Cinnamon Swirl Bread. Hey, I’m just trying to make your lives easier, one recipe at a time.

Stir and Pour Cinnamon Bread Recipe
Or in this case I guess I would have to say that it’s the same recipe over and over made with a few variations. This in and of itself keeps life easy because after a while, you’ll have the basic recipe memorized and the variations will come naturally.

So let’s review.Yum

Get to know this basic and incredibly easy Stir-and-Pour Sandwich Bread recipe. That recipe has forever changed my bread-making life and I will never (probably) knead bread again. Why would I when I can just stir and pour – then take a nap?

With this basic recipe, we’ve learned that we can make Stir-and-Pour Rolls and Stir-and-Pour Pizza Crust. Today we learn that we can make Stir-and-Pour Cinnamon Swirl Bread. If you want, you can add raisins to make Cinnamon Raisin Bread. Or you can add dried cranberries to make Cinnamon Cranberry Bread. Or you can add dried apples to make Cinnamon Apple Bread. Or you can add nuts to make Cinnamon Nut Bread.

Or you can add all of the above to make Cinnamon Apple Raisin Cranberry Nut Bread.

How happy are all of us right now that this recipe offers so many wonderful possibilities? We are all so, so happy.

You might notice that since originally posting the basic recipe, I have ditched the optional cream and egg. They are optional, after all. I’ve found after making the recipe so many times that the egg and cream didn’t make much difference so I skip those steps which cuts out a good 32 seconds in bread making time. Every 32 seconds counts.

Whole Wheat Stir-and-Pour Cinnamon Swirl Bread

5.0 from 1 reviews
Whole Wheat Stir-and-Pour Cinnamon Swirl Bread
 
Save Print
Author: Laura
Serves: 1 loaf
Ingredients
  • 4 cups whole wheat flour (I use freshly ground hard white wheat)
  • 2 teaspoons active rise yeast
  • 2 Tablespoons sucanat or sugar or honey
  • 1 teaspoon sea salt
  • 2 cups warm water
  • 3 Tablespoons sucanat or brown sugar mixed with 1 Tablespoon ground cinnamon
Instructions
  1. Stir together flour, yeast, sucanat, salt, and water.
  2. Cover and allow it to sit for 30 minutes.
  3. Pour ⅓ of the mixture into a well-buttered loaf pan.
  4. Sprinkle ½ of the cinnamon/sugar mixture over the dough.
  5. Spread another ⅓ of the dough over the cinnamon/sugar layer.
  6. Sprinkle remaining ½ of the cinnamon/sugar mixture over the dough.
  7. Spread remaining dough over the top.
  8. Bake in a 350° for 50-60 minutes or until evenly browned.
  9. Allow it to sit in the pan for 15 minutes.
  10. Remove the loaf to let it cool completely before slicing.
3.4.3177

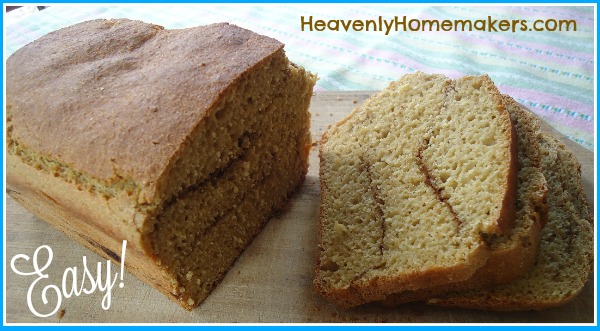
As you can see, instead of actually swirling the cinnamon-sugar, we’re actually layering it. This method works great!

Whole Wheat Stir and Pour Cinnamon Swirl Bread

I am super excited about all these great Stir and Pour options! Have you tried any other variations you can let us know about?

Heavenly Homemaker's Club Members: Access your homepage and all your fantastic resources here! Not a member yet? Please join us!

Mockmill Grain Mill Kitchen-Aid Attachment Giveaway!

March 24, 2016 by Laura 413 Comments

This post may contain affiliate links. For more information, please see our disclosure policy.

Who has a Kitchen Aid?

How nice are they?! I hear nothing but good about Kitchen Aids and guess who doesn’t have one? This girl.

No matter. I’ve gotten along just fine without one all these years and have plenty of other great kitchen appliances that make my life easier. But several months ago, Pleasant Hill Grain contacted me asking if I’d be interested in reviewing their Mockmill Grain Mill Attachment for a Kitchen Aid. I jumped on the idea knowing that many of you have Kitchen Aids and would want to know more about the grain mill attachment.

Enter: My friend Emily. She has a Kitchen Aid.

I gave her my Mockmill Grain Mill attachment in exchange for her experimentation and feedback on the product. How fun to bless a friend with a new toy and to bless you here to with a chance to win one!

Emily was very thorough in her experimentation. She tried both hard and soft wheat. She tested it against my flour that I grind with a Nutrimill. She did blind tests with her husband who didn’t know which flour was which. It was fun to read about her results!

mockmill grain mill

It sounds like overall, Emily liked the Mockmill.

There was a slight difference in the results of grain ground in a Nutrimill and grain ground in a Mockmill. The Mockmill grain was slightly more course – though barely noticeable – especially once stirred into a baked good. She noted that if you’re wanting to switch your family from white flour to whole wheat, you’d probably want to transition them slowly since going straight to whole wheat flour ground in a Mockmill is a pretty drastic change compared to white flour.

Emily read the instructions thoroughly before setting up the Mockmill so that she could use it correctly. She also was careful to clean it correctly – because there are right ways and wrong ways to do this and you never want to get water inside the body. As with anything, there is a learning curve to getting the Mockmill figured out, but it sounds like once you’ve read through the instructions and get used to setting this up and taking it apart, you can do it pretty easily.

Can’t eat wheat? No problem! The Mockmill also grinds non-oily grains, medium-sized beans, corn, and non-oily spices.

And now the fun part!

Pleasant Hill Grain is giving one of you a Mockmill Grain Mill!

If you have a Kitchen Aid and would like to win a free Mockmill Grain Mill, leave a comment here for a chance to win. Want additional chances?

  1. You must leave a comment on this blog post to be entered in the giveaway.
  2. Like Pleasant Hill Grain on Facebook and leave another comment on this post letting us know you did.
  3. Subscribe to our new Homemaker’s Savings Club and leave another comment on this post letting us know you did.

I’ll draw one random winner on Wednesday, March 30. Be sure to check out the Mockmill at Pleasant Hill Grain!

Heavenly Homemaker's Club Members: Access your homepage and all your fantastic resources here! Not a member yet? Please join us!

Free Spring Activity Packets – Make Learning Fun!

March 22, 2016 by Laura Leave a Comment

This post may contain affiliate links. For more information, please see our disclosure policy.

I have an awful lot of fun putting together free activity packets for you, and it’s even more rewarding when I get emails like this one from Lindsay:

I wanted to say THANK YOU for the March activity packets that you put together. I have been a regular reader of yours for a couple of years, but have never looked into your Learning Zone until now. The Lord orchestrated it at just the right time too – I was needing a “boost” with my 1st grade daughter (6 yrs old). Homeschool has been like pulling teeth for a few months now – not sure why. I have been asking myself lately, “What can I do differently?”. And then I got your post/e-mail! Perfect! I printed out both packets and used the younger version for my 4-year-old son. We started them today and IT WAS FUN! Woo hoo!

Lindsay even sent pictures of her kids using the packets. I love this soooo much! She gave me permission to show off her kids to you here.

Fun Free March Activity Packets

March is about to go out like a lamb. (Or something like that. I think March got mixed up in Nebraska this year, but it’s still been a great one.) There’s still time to get your FREE March In Like a Lion, Out Like a Lamb Activity Packets. Click here to sign up and grab the freebies.

Now I have new Spring Activity Packets ready for you too!

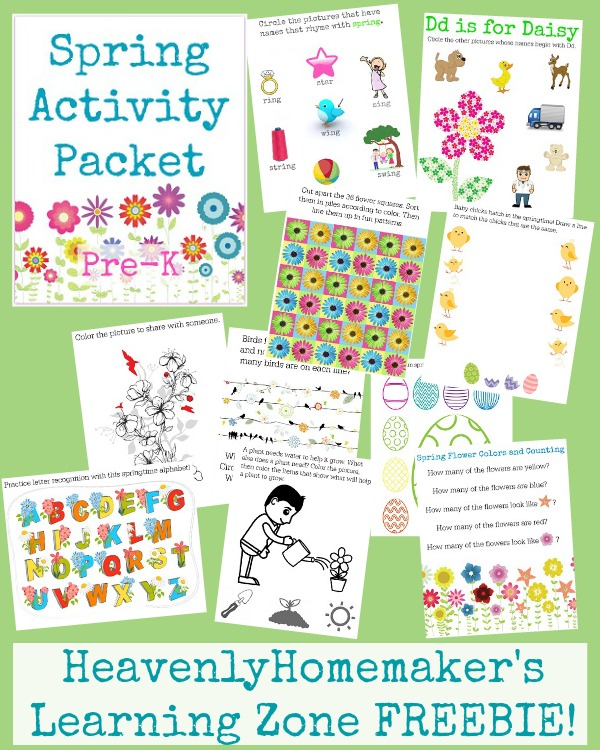
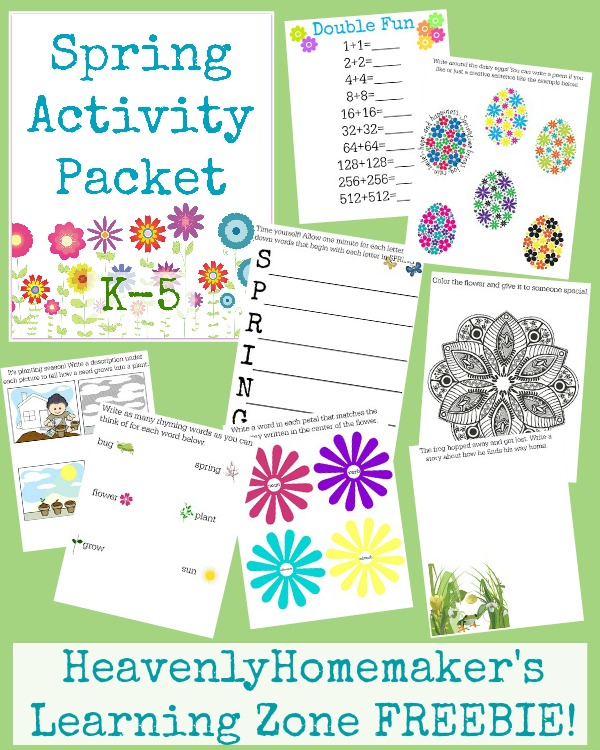
Just like the March Packets, there is a Spring Activity Packet for both Pre-K and for K-5. You can download one or both. (I mean, they’re free, right?) They include fun springtime learning activities and a few coloring pages too. I like coloring pages for read-aloud time. I always found that my kids listened better when I was reading if they were doing something to occupy their hands! Plus, your kids can give away their colored pages to someone to offer them some springtime cheer!

Spring Activity Packet Pre-K FREEBIE!

Spring Activity Packet K-5 FREEBIE!

If you’re reading from the daily or weekly newsletter, the Learning Zone sign up form is likely not showing up. You can click here to sign up and grab the freebies!

I’m super excited to share that signing up for these freebies will connect you to our new Heavenly Homemaker’s Learning Zone. It’s free, of course. You can unsubscribe at any time, your info will never be shared or sold, and being on this list means that you’ll be the first to know of the other fun (yes, FUN!) educational tools we’re putting together!

P.S. If you are already subscribed to Heavenly Homemaker’s Learning Zone, you should have received an email yesterday giving you instant access to this freebie. Look in your inbox for the subject: New FREE Spring Activity Packets for You!

Heavenly Homemaker's Club Members: Access your homepage and all your fantastic resources here! Not a member yet? Please join us!

Stir-and-Pour Whole Wheat Pizza Crust

March 21, 2016 by Laura 22 Comments

This post may contain affiliate links. For more information, please see our disclosure policy.

Remember the Whole Wheat Stir-and-Pour Bread recipe I shared a few months ago? Not too long after I shared that, a reader Shelby, and then others, emailed to let me know they’d been using that recipe to make pizza crust.

Stir and Pour Pizza

Bless you. Bless you all. Now our homemade pizza making lives are easier than ever! Mix the dough, let it sit, spread the dough on baking sheets, let it bake. Your hands won’t even get messy. 

It took a little tweaking for me to get this crust just right. The recipe is the same as the bread, but it took a few tries for me to learn how thick or thin to spread this dough. I’m not a big fan of a thick crust, but the beauty of this recipe is that you can make it as thin or thick as you like!

I spread the dough into two large pizzas and could probably spread it into three if I tried. This recipe goes a long way toward a big pizza meal!

Whole Wheat Stir-and-Pour Pizza CrustYum

5.0 from 3 reviews
Stir-and-Pour Pizza Crust
 
Save Print
Author: Laura
Serves: 2 large pizzas
Ingredients
  • 4 cups whole wheat flour (I use freshly ground hard white wheat)
  • 2 teaspoons active rise yeast
  • 2 Tablespoons sucanat or sugar or honey
  • 1 teaspoon sea salt
  • 2 cups warm water
Instructions
  1. Stir all ingredients together.
  2. Cover and allow it to sit for 30 minutes.
  3. Spread dough on two *well-buttered* large pizza pans (three if you want a thinner crust)
  4. Bake in a 375° oven for 10 minutes.
  5. Pull partially baked crust out of the oven and top it however you like.
  6. Bake for 10-15 minutes more or until cheese has melted and becomes bubbly.
3.4.3177

Whole Wheat Stir and Pour Pizza Crust

I found that spreading the dough onto my baking pans with a rubber spatula worked best. I always use baking stones (like these) for pizza because I think they turn out the best crust. I’ve not tried them on metal baking sheets, so you may need to adjust the baking time if you don’t use stoneware.

You can definitely make these crusts ahead of time and freeze them until you are ready to bake pizza. This means that the easiness just gets easier. Amen and amen.

Have you tried the Whole Wheat Stir-and-Pour Bread recipe? How about Pizza Crust? Have you tried using it for pizza crust?

Just wait until later this week! I’ve got another great way to use this recipe that I’ll share with you!

Heavenly Homemaker's Club Members: Access your homepage and all your fantastic resources here! Not a member yet? Please join us!

Fresh Thyme Farmer’s Market – My New Favorite Grocery Store and Pics of This Week’s Food

March 20, 2016 by Laura 24 Comments

This post may contain affiliate links. For more information, please see our disclosure policy.

First let me say that sometimes, but not always, when I take pictures on my phone, they upload upside-down to my computer. I edit them to turn them right-side-up, and they appear as such here on my blog. But if you are a subscriber, you will see that they still appear upside-down in the newsletter. This is because I am a professional and always do things professionally.

Some of you are seeing this first picture right-side-up. Others of you are like, “Why are the peppers and avocados spilling out all over the grocery store? Who is going to clean that up? Why did Laura do that? This is not okay.”

groceries 3183

That right-side-up-upside-down picture was taken on Friday when I was introduced to what may now be my favorite grocery store. A brand new Fresh Thyme Farmer’s Market just opened up in Lincoln. Since Elias and I had doctor appointments there last week, we stopped in. I decided that this store is a cross between Trader Joe’s and Whole Foods, with prices that beat both places. I filled my cart in a way that made the cashier question my sanity (what’s new?) and I left super pumped up.

“Elias!! Wasn’t that so much fun! That is my new favorite store! Didn’t you just love that!?!?!?”

He was like, “It was a store.”

Ok fine. Not everyone geeks out when grocery shopping. But 88¢ for huge and beautiful red peppers, people!!! Chicken for $1.57 a pound! Strawberries for $1.50!

The beauty of this is that while I don’t go to Lincoln very often, I can price-match this store’s produce prices weekly at my local Walmart. I am going to save so much money!

Elias and I hit Aldi while we were in Lincoln, then went to Fresh Thyme, then ran into Walmart when we got back into town. We are well stocked up now. Here’s the breakdown, but as you can see…

Fresh Thyme Farmer’s Market was the most fun.

  • Aldi – a case of organic salsa, 4 packages of brown sugar, 1 cantaloupe, and 8 cans of knock-off rotel
  • Fresh Thyme – tons of butter, lots of chicken breasts and thighs, a beef roast, full-fat yogurt (a great treat I can’t find locally), 12 pounds of strawberries, 2 bunches of asparagus, 5 huge red peppers, 4 packages of organic prepped hashbrowns (because they were a great price and will be a fun treat), and 6 kiwi (for a dollar!)
  • Walmart – 5 bottles of 100% apple juice (because I could Price-match them for 98¢ and like to have juice on hand for company/treats), 2 huge blocks of cheese, half-and-half, and 3 buckets of ice cream (not pictured) for our homeschool basketball banquet dinner.

groceries 318

Saturday I was actually home for the entire day – something that hasn’t happened in quite a while! I baked bread and got caught up on some work, made a menu plan, and had my kids help me grate one of those huge hunks of cheese in our food processor. Not that you were asking, but my two favorite ways to use my food processor are:

  • Grate Cheese (It took about 10 minutes from start to clean-up to grate a 5-pound block.)
  • Make Peanut Butter (I also make it this way sometimes to make it more spreadable.)

grated cheese

My kids do not miss grating cheese by hand.

This week we’ll be eating:

  • Roast with carrots, potatoes, and gravy
  • Real Food “Velveeta” Rotel Dip
  • Spicy Mac-and-Cheese
  • Homemade chicken strips and fries
  • Easy Noodle Stir Fry with asparagus, carrots, broccoli, and zucchini
  • Italian Grilled Chicken with grilled veggies
  • BLT Chopped Salad

With all of this, we will be eating lots of strawberries and other fruit. I have plenty of different veggies and greens on hand. It’s shaping up to be a very tasty week!

Do you have a Fresh Thyme Farmer’s Market close-by? I think they are fairly new, and I’m not sure where they build their stores. What is your favorite grocery store?

Heavenly Homemaker's Club Members: Access your homepage and all your fantastic resources here! Not a member yet? Please join us!

Weddings, Guns, and Green Fingernails

March 17, 2016 by Laura 9 Comments

This post may contain affiliate links. For more information, please see our disclosure policy.

gratituesday[2]

Nothing much usually goes on around here, so I always have a hard time knowing what to talk about. Life is so boring. (She says, as she looks at her to-do list and passes out.)

We’ve been running and running and running since the Youth Rally in January. Life is full, life is fun, hard stuff happens, and I am forever behind. While I’ve known this for a while, I am absolutely convinced now that loving relationships are more important than keeping a perfect house or staying ahead of laundry. This is my sweet and precious way of saying, “wow my house is a mess.” Slowly but surely, we’ll get caught up. (You know, since life slowed down and we have nothing to do.)

I thought I’d share some of the fun events of the past couple weeks, and guess what? Thirty or so thousands of years after most everyone else on the planet, I am finally on Instagram! Please come follow me and you’ll be rewarded with something amazing like one photo from my life every month or two.

So what’s been going on in my life? Well, for the past few weeks, our family has been working hard preparing for an annual church event – Leadership Training for Christ. Our boys have been studying for a Bible Bowl, working on some individual projects like photography, speech, and sculpture, and getting together with groups to prep for choirs and dramas. Below you’ll see Malachi (in blue) painting a car for the “Terror 2000” – part of the roller coaster the 3-5 graders are using for their drama.

malachi ltc

All the kids loved how it turned out, though one of the boys came in later and suggested, “It’s okay, but I think it would be better if we painted on a skull.” Yeah. I’ll get right on that.

Two weekends ago our family traveled to Kansas where our middle two boys competed in the NDII Homeschool Basketball Tournament. We spent three days cheering for our kids and having a blast with friends. I went all out and painted my fingers and toes green in support of our team. I felt a little sheepish about it as I pulled out my fingers to show one of the other moms at the first game. She smiled and pulled out her fingers WHICH WERE THE SAME COLOR! #momsofboys #gogreenorgohome

tourney weekend2

My dad and his wife met us at the tournament – such a blessing to have their love and support! Then my brother’s family surprised our boys and came to watch their final game. It was fun to see the boys’ faces when their cousins walked in!

tourney weekend1

tourney weekend3

The very next week, we had not one but two weddings that we were highly involved in. I had our schedule carefully mapped out so we wouldn’t miss anything and we were blessed that both couples worked around our schedule so we could make it work. The craziness began on Thursday with a bachelorette party, then a rehearsal, then a bridal shower.

So the bachelorette party. Who goes to a shooting range to celebrate her upcoming wedding? Only my friend Jen. She loves all things sports and guns. Good friends that we are, we went shooting with her.

What do you think? Do I look almost ready to shoot a gun?

wedding weekend4

There. Is that better?

wedding weekend2

wedding weekend3

I had fun for about 20 minutes, then I announced, “Ok. I totally need to go bake something now.” I don’t know why everyone laughed. I was absolutely serious.

The weekend went fabulously while we celebrated with our whole hearts the marriages of our friends. I have very few pictures so far of either wedding, but what I do have…

We took this picture of Jen to send to her almost hubby just before their ceremony started. Really, Jen we just feeling warm and opening a window to get some air. But it looked like she was scared and making a run for it, so out came the camera. ;)

wedding weekend1
After three full days of running and celebrating, as all events were drawing to a close, I asked a friend to get a picture of my true love and me. I love this picture so much I can’t stop staring at it.

my heart

This man is my best teammate and serving with him is my greatest blessing and joy in this life.

Thanks for allowing me to share a snippet of my life the past few weeks. I’ve been trying to rest the past few days while catching up on everything I’m behind on. As always, my boys have been rock stars helping me out and in general, putting up with me when I can’t finish my sentences as a result of too many days with too little sleep.

Dare I mention that soccer season began about five minutes after basketball season ended? My life is blessed, full, and God is ever showing me His strength through my weaknesses.

Care to share what you’ve been up to this month? I’d love to hear!

~~~~~~~~~~~~~~~~~~~~~~~~~~~~~~~~~~~~~~~~~~~~~

P.S. Sunday after the Saturday wedding, I still had great curls in my hair (and a lot of hairspray). I spent 30 seconds to pull it up in a Flexi-Clip and it looked great! What would I do without my Flexi-Clips?? Which leads me to…

This weekend Lilla Rose is offering 30% Off Select Styles and 10% Off Everything Else!

Lilla Rose Easter Sale
Sale starts Friday, March 18 at 7am PST, and ends Sunday, March 20 at 11:59 pm PST. Get the info here!

Heavenly Homemaker's Club Members: Access your homepage and all your fantastic resources here! Not a member yet? Please join us!
« Previous Page
Next Page »

Join Our Community!

 Facebook Twitter E-mail Instagram Pinterest

Popular Posts

~ Will All of the Real Moms Please Stand Up?
~ Easy! Stir-and-Pour Whole Wheat Bread
~ How to Make Gatorade
~ 31 Real Food Breakfast Ideas
~ Dear Teenage Girls...
~ When Mom Takes a Step Back
~ The Inexpensive Health Insurance We Love!
~ Let's Talk Real Food Grocery Budgets

Check out our latest posts!

  • Big Family Food and Fun: September 13-19, 2026
  • Big Family Food and Fun: September 6-12, 2026
  • Big Family Food and Fun: August 30-September 5, 2026
  • Big Family Food and Fun: August 23-29, 2026
  • Big Family Food and Fun: August 16-22, 2026
Home  ~  Simple Meals  ~  Club Membership  ~  Shop  ~  Privacy Policy  ~  Disclosure  ~ Contact

Copyright © 2026 · Beautiful Pro Theme on Genesis Framework · WordPress · Log in