Heavenly Homemakers

Encouraging women in homemaking, healthy eating and parenting

  • Home
    • About
    • FAQs
  • Recipes
    • Bread and Breakfast
    • Condiments
    • Dairy
    • Main Dishes
    • Side Dishes and Snacks
    • Desserts
    • Gluten Free
    • Instant Pot
    • Crock Pot
    • Heavenly Homemaker’s Weekly Menus
  • Homemaking
    • Real Food Sources
  • Store
  • Contact
    • Advertise
    • Disclosure
    • Privacy Policy
  • Simple Meals
  • Club Members!

Switching to Whole Food Sweeteners Without Breaking the Bank

November 2, 2014 by Laura 16 Comments

This post may contain affiliate links. For more information, please see our disclosure policy.

Money Saving Monday Banner

While switching from processed food to nourishing food doesn’t have to be terribly expensive, there’s no way around this one:  White and brown sugar are cheap. Sucanat, real maple syrup, muscovado, honey, and stevia are not cheap. I can get a 2-pound bag of brown sugar at the store for $1.78. Sucanat, on the other hand, is usually $5.00 for 1.5 pounds. Ouch! It’s worth it to buy the good stuff, but it isn’t fun to pay for.

While I don’t have any earth shattering advice about finding fantastic deals on these wholesome sweeteners, I do have some suggestions based on what works for me.

Switching to Whole Food Sweeteners Without Breaking the Bank

1. Stop eating so many sugary desserts.

I know. You’re rolling your eyes. I feel your pain on this one because I’m a recovering sugar addict. Pray about this and let God’s power be your will-power. You don’t have to cut out desserts altogether (unless you feel called to). You simply need to keep sugary foods a treat instead of pouring on the sugar like it’s a food group. You’ll be amazed at how much money you save on sucanat, honey, and maple syrup when you stop eating so much.

2. Cut the sugar in half.

When baking muffins, quick breads, and breakfast bars, I find that half the sugar called for in many recipes (even mine!) works just fine. The baked goods are still sweet and tasty. This saves quite a bit of money on wholesome sugars!

3. Drizzle your syrup.

Dousing your pancakes or waffles in real maple syrup? That’s an expensive breakfast! A little drizzle of rich, flavorful maple syrup goes a long way. It’s also fun to pour a tiny quarter-sized bit of syrup onto your plate, then dip the corner of each bite to sweeten it just a touch.

4. Pull out the cheap stuff when feeding a crowd.

If I’m feeding 40 teenagers, I leave my sucanat in the pantry and pull out the cheap brown sugar. There’s no need to use $6 worth of sucanat when I can use $1.50 worth of brown sugar for a big group of kids who really don’t care about whether or not the brownies were made with organic sugar or not. I certainly don’t mind sharing “the good stuff” with company occasionally, but it just really isn’t worth spending extra money when three pans of dessert are going to be devoured in two minutes. I never compromise on using real butter (instead of margarine), and I always use my freshly ground flour (no one can even tell) – but compromising on sugar? At least it’s actual sugar instead of artificial sugar or high fructose corn syrup. Which leads me to…

At the end of the day…

It’s all sugar.  Sucanat is healthier because it’s processed very little and still contains nutrients. Real maple syrup is straight from the tree. Honey is made by bees and is as natural as it comes. But to our bodies? It’s all sugar. Read this post about Breaking Free of Sugar Addiction for more of my thoughts on this.

This means you may decide that switching to sucanat (and paying the higher price tag) is just not worth it.

I believe the bigger focus needs to be on cutting back on sugar (in all its forms). Focus on filling up on fruits and vegetables instead. You’ll be amazed at how sweet your fruits and vegetables taste when your palate isn’t coated with a cookie.

I’d love to hear your thoughts on this. Which sugars do you choose to purchase and use for your family?

Heavenly Homemaker's Club Members: Access your homepage and all your fantastic resources here! Not a member yet? Please join us!

Menu Plan for the Week

November 2, 2014 by Laura 6 Comments

This post may contain affiliate links. For more information, please see our disclosure policy.

It never fails. Every time I load my cart with vodka so that I can start a new batch of Homemade Vanilla Extract, the cashier always asks, “Having a party?” I always answer, “Nope, I’m making vanilla extract.” It takes about three more questions from the cashier before they understand that I’m talking about vanilla extract, not some sort of vanilla flavored party drink. This happened over the weekend. And guess what? I got carded!!! My 41 year-old self loves it when that happens. :)

Once the guy had all my vodka rung up, he wrote down my website info so that he, too, could learn how to make vanilla extract. It was rather cute. I’ve said it before, and I’ll say it again, Laura at Heavenly Homemakers influences people all over the place to buy liquor. This is one time it is okay to give in to peer pressure. (Go ahead. Make vanilla. Everyone is doing it.)

~~~~~~~~~~~~~~~~~~~~~~~~~

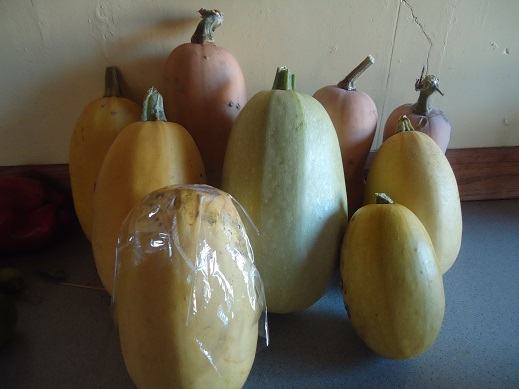
We had our first hard freeze, so we are officially finished picking produce from our garden. Wow, did we have a long growing season this year! We pulled in all of our spaghetti squash, green beans, tomatoes, peppers, and honey dew melon before the freeze, so we’ll enjoy eating our way through those this week.

spaghetti squash garden 2014

My current menu planning system seems to be working quite nicely. I’ll stick with this for now, then change things up if and when this stops working. Here’s a bullet list of menu items I’ll be choosing from to make each day this week:

Breakfast

  • Waffles with Peach Syrup
  • Scrambled cheesy eggs
  • Peanut Butter on homemade Honey Whole Wheat Bread
  • Instant Oatmeal Packets
  • Pumpkin Chocolate Chip Muffins
  • Pumpkin Donuts
  • Poptarts

Lunch

  • Spanish Rice (for today’s potluck after church)
  • Bacon, Egg, and Avocado Salad
  • BLT Wraps
  • Salmon Patties
  • Popcorn Chicken
  • Hot Spinach and Artichoke Dip
  • Sweet Pepper Fritata

Dinner

  • Potato Soup (for youth group Huddle tonight)
  • Lasagna Casserole (doubling up on this so I can get one in the freezer for another day)
  • Italian Cream Cheese Chicken
  • Teriyaki Chicken and Veggies
  • Shepherds Pie
  • Flounder (Not sure what I’m doing with this yet, but found some “wild caught” and decided to go for it. Suggestions on how to cook it?)
  • Orange Chicken

Fruit and Veggie Side Dishes (I always serve 1-4 fruits and veggies with each meal)

  • Spaghetti Squash
  • Ranch Potato Wedges
  • Strawberries
  • Applesauce
  • Pears
  • Peas
  • Sweet Potato Fries
  • Green Beans
  • Steamed Broccoli
  • Cheesy Cauliflower Cakes
  • Mixed Greens
  • Fresh Spinach
  • Apples
  • Fresh Pineapple
  • Canned Peaches
  • Raw Carrots and Cucumber Slices with Ranch
  • Home Canned Dill Pickles

Are you still eating garden produce this time of year? If you have any ideas for cooking flounder, I’d love to hear!

~~~~~~~~~~~~~~~~~~~~~~~~~~~~~~

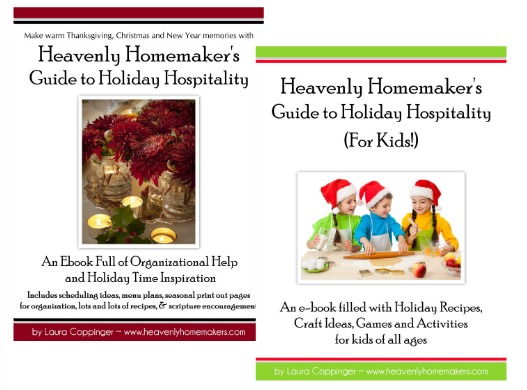
Don’t forget! Today’s the final day we’re offering our Holiday Hospitality eBooks for just $1 each!

Heavenly Homemakers Guide to Holiday Hospitality

$6.95 
$1.00

Add to Cart

Heavenly Homemakers Guide to Holiday Hospitality for Kids

$6.95
$1.00

Add to Cart

Heavenly Homemaker's Club Members: Access your homepage and all your fantastic resources here! Not a member yet? Please join us!

It’s Almost Holiday Time. Are You Ready!?

October 30, 2014 by Laura 3 Comments

This post may contain affiliate links. For more information, please see our disclosure policy.

You know how I always think about food? This time of year, my obsession is worse. (This is something you didn’t think was possible.)

It’s like the falling leaves trigger a simultaneous cinnamon and turkey craving, which of course leads me to order 50 pounds of oats and 12 bags of chocolate chips. If this doesn’t make sense to you, I’m not sure I can find words to explain. I just love food. Holidays mean I have an excuse to do extra baking, which makes me very, very happy. It also makes me stock up on potatoes. Don’t try to understand me. Just nod and smile.

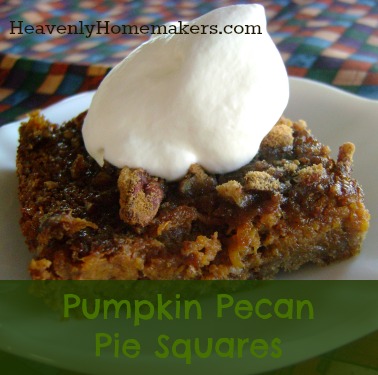
Pumpkin_Pecan_Pie_Squares

Pumpkin Pecan Pie Squares Recipe, part of this balanced holiday season

When I close my eyes at night, all I see is apples. This is because everywhere I turn in my kitchen, apples are taunting me with their, “I know you’ve already made applesauce and apple pie filling with 314 pounds of us this year, but when are you going to get around to turning me into a pie?” I’ve got two pumpkins and four butternut squash on my countertop right now, waiting to become pies, soup, and muffins. (You know you can switch pureed butternut squash out with pureed pumpkin and no one knows the difference, right? True fact.)

In my spare time, which of course is never, but if I happen to walk past my pantry to get the broom, I open the door to stare for a half-second at the beautiful contents within. Cocoa powder, next to a tall jar of sucanat, next to a container of sea salt, next to a jar of baking powder? Just think of the culinary possibilities.

You know me. I love the heat and sunshine in the summertime more than any other season. But if it’s going to turn chilly (and then frigid, thank you Nebraska), I figure I may as well start looking forward to the holiday pie, right? I can’t help it anyway, because here I am, gazing with longing at the vanilla and sweet potatoes. Summer with its salads and grilled veggies and cook-outs are awesome, but God is good to make fall and winter food just as exciting. Cheeseburger Soup is rocking my world right now, and I think it goes without saying that the smell of Pumpkin Bread is the definition of comfort.

What does all this mean? (Besides the fact that I love food.)  All of this means that there are only 27 days until Thanksgiving and 53 days until Christmas. Bring on the holiday parties, delicious recipes, and joy with friends and family! Specifically, bring on the Honey Pecan Pie. Thank you very much.

To keep joy in your holidays, we are excited to offer our Heavenly Homemakers Guide to Holiday Hospitality eBook and our Heavenly Homemakers Guide to Holiday Hospitality for Kids eBook for just $1 each, now through Sunday, November 2. These books are full of organizational guides, recipes, menu plans, and more – to help you enjoy your holiday season and encourage you as you love others during this time. The organizational tips in this book begin on November 1. That’s why we’re offering a sale this weekend. You need these books starting…NOW! :)

Holiday Hospitality Package

Leave a comment sharing what you love about this time of year! (Me? I love the food. My goodness, I believe I mentioned that already.)  Grab these now while they are just a buck each!

Heavenly Homemakers Guide to Holiday Hospitality

$6.95 
$1.00

Add to Cart

Heavenly Homemakers Guide to Holiday Hospitality for Kids
$6.95
$1.00

Add to Cart


Heavenly Homemaker's Club Members: Access your homepage and all your fantastic resources here! Not a member yet? Please join us!

Cooking for a Family of 7 Living in a Travel Trailer ~ Share Your Story

October 29, 2014 by Laura 6 Comments

This post may contain affiliate links. For more information, please see our disclosure policy.

Share Your Heavenly Homemakers Recipe Story

The stories you send in continue to be such an inspiration and encouragement to me! You will love reading Cantina’s story of how she is finding ways to make do in a tiny kitchen with very little to work with after her home burned down. God is so good to provide and equip us. Here’s Cantina:

~~~~~~~~~~~~~~~~~~~~~~~~~~~~~~~~~~

Dear Laura,

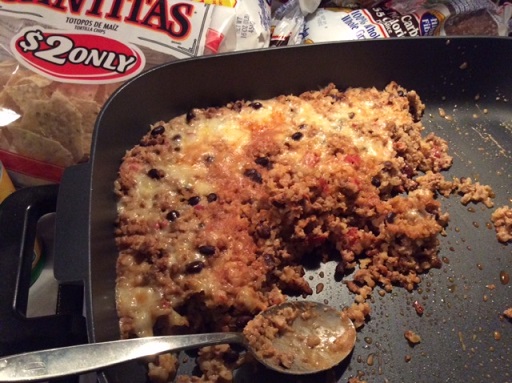
I started following you a couple of years ago and our family has loved some of your recipes. One of our favorites is Cheesy Beef and Rice (I add black beans and diced tomatoes to make it a “mexican” meal).

Last December we lost our home to a house fire and it has been extremely difficult to fix the meals that I used to. For a few months we lived with an older couple and then in May our family of 7 moved into a travel trailer on the land where we are rebuilding our home. It has been a challenge to fix anything, but God is so good and I have learned to use a Fry Daddy in ways I never thought were possible. And we bought an electric skillet and crock pot. :)

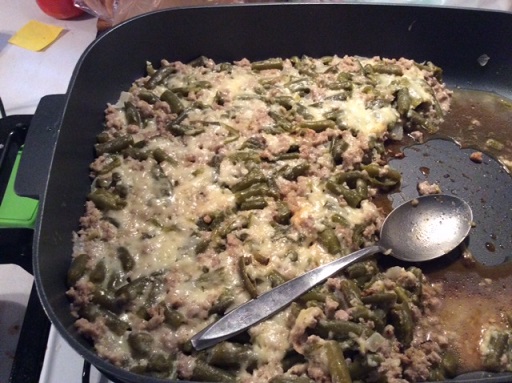
I have fixed the Cheesy Beef and Rice by browning the meat in the Fry Daddy and then cooking the rice in the Fry Daddy and finally mixing it all together in a large bowl and baking it in the electric skillet. My family is so happy that we can have some of your delicious recipes again. I have also made the Hearty Green Bean Casserole the same way. Looking forward to our house getting done, buying new kitchen items, and being able to cook in a real kitchen again.

cantina 1

cantina 2
We also love your Giant Breakfast Cookies and Baked Oatmeal for breakfast! In the past month we have visited family that lives out of town and I baked several batches of Giant Breakfast Cookies to freeze and eat on when we returned back home. The day we left from the visit with family I baked a dish of Baked Oatmeal and we had it for breakfast the next morning at the travel trailer.

cantina 3
Although this time in our lives has been tough our prayer is that God would be glorified through our family and our situation. He has continued to provide for us and meet our every need! We serve an amazing God!

Thank you Laura for all you do!
Cantina

~~~~~~~~~~~~~~~~~~~~~~~~~~~~~~~~~~~~~~~~~

This sure makes me appreciate my kitchen! I believe it can also help us all recognize that none of us have to have perfect circumstances in order to feed our families well. We just need to be creative and trust God!

Please keep sending in your stories! These have become my favorite emails to receive. Getting a peek into your lives is refreshing and encouraging. You are all amazing!

Heavenly Homemaker's Club Members: Access your homepage and all your fantastic resources here! Not a member yet? Please join us!

How to Make Frozen Hashbrown Patties

October 28, 2014 by Laura 16 Comments

This post may contain affiliate links. For more information, please see our disclosure policy.

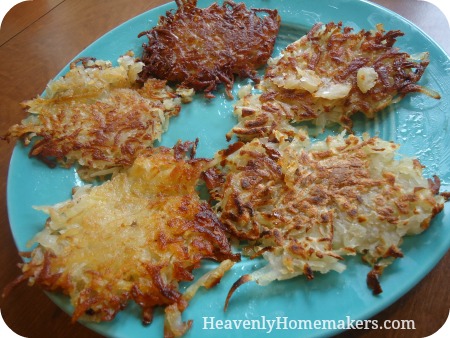
Homemade Hashbrown Patties

I always get my best ideas from you, my adorable readers. A few weeks ago, Camilla left a comment on my Homemade Hashbrowns post asking, “How would I do this if I wanted to make frozen patties?” I left a reply, telling her what I would suggest, then I promptly hollered at my boys to start scrubbing potatoes. What a fantastic idea – to make hashbrowns ahead of time in the shape of patties so that all we have to do is pull them out and fry them up!

25 consumed Hashbrown Patties and 72 frozen Hashbrown Patties later, here I am to share all the fun details with you! This idea is a great one – plus it’s easier than you would think. Don’t you love it when delicious, healthy, and easy all make it into the same sentence?

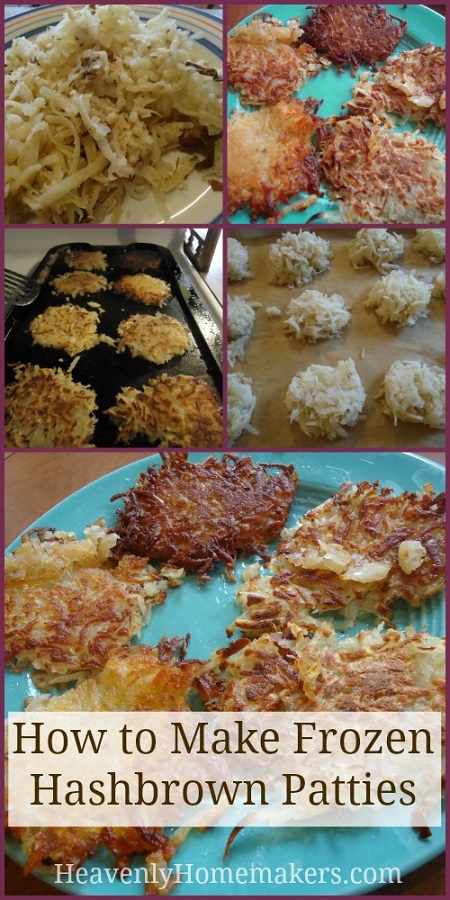
How to Make Frozen Hashbrown PattiesYum

1. Scrub and bake as many potatoes as you like. We fill a big roasting pot with scrubbed potatoes, cover, and bake for about an hour and a half.
2. Allow the potatoes to cool. You can even refrigerate overnight if you like.
3. Shred the cooled baked potatoes as if grating cheese.
4. Use a large cookie scoop or spoon to scoop out nice portions of shredded potatoes. Put the scoops directly into hot oil to fry OR –
5. Place the scoops of shredded potatoes onto a parchment paper-lined cookie sheet.
6. Freeze the mounds of shredded potatoes on the cookie sheets. Transfer them to a freezer bag once frozen solid.
7. Store frozen hashbrown patties in the freezer in freezer bags until ready to cook and serve.
8. To cook frozen hashbrown patties, heat palm shortening or coconut oil in a skillet or on a griddle. Do not thaw hashbrown patties. Put patties into the hot oil and fry for about 2 minutes on each side or until golden brown and as crispy as you like. Salt and serve!

How to Make Frozen Hashbrown Patties

Do you love this idea?! Let’s hear it for another great freezer cooking idea to help us get ahead!

Heavenly Homemaker's Club Members: Access your homepage and all your fantastic resources here! Not a member yet? Please join us!

Gratituesday: One Thing at a Time

October 27, 2014 by Laura 14 Comments

This post may contain affiliate links. For more information, please see our disclosure policy.

gratituesday[2]

I woke up this morning with a huge to-do list. What’s new, right? Right. Today was a little different though. On Saturday, we made a decision to use a tiny window of time we have this week to go on a college visit for Asa, our high school senior. Seeing as we ended soccer season yesterday and basketball season begins next week – this week is pretty much our only option. :)

So, we’re squeezing in the trip and making lots of last minute plans. If only it was as simple as packing a bag and gassing up the van. Nope. Our Azure Standard food co-op order will be coming in while we’re gone, so I needed to make arrangements for someone else to pick it up. What about our Tuesday farm-fresh milk pick-up? Justus desperately needed a hair cut. I had to update Asa’s high school transcript to take with us. I have an article due for our local newspaper. We needed to follow up with family members for sleeping arrangements while we’re traveling. What about making/packing food for the road? Writing and scheduling posts to go up while I’m away from the computer? Switching piano lesson day and time for Malachi? The list went on forever, and it needed to be completed by tonight.

My brain kicked into high gear the moment my feet hit the floor this morning. This means that I could have gone from peaceful sleep to freak-out mode in a matter of two minutes, especially when I walked into the kitchen and saw the undone dishes from yesterday (blech). Thankfully, after years of going about life the hard way, God is teaching me to do better. Never, ever does it work for me to fly into becoming a crazy mom/wife/blogger/friend/organizer/homemaker. That’s when I say hurtful words to my husband and kids, leaving God completely out of my day. So I did what I know to do now: I told my brain to hush.

My brain put up a bit of a fight, but prayer, my Bible, and a cup (okay fine, 2 cups) of coffee (with cream) won the battle. We got the boys started on their school work and kitchen clean-up, then started tackling all the phone calls and work that needed to be done. One thing at a time, tasks were checked off the to-do list.

By lunchtime, I was amazed at how much had come together even if (don’t tell) I still hadn’t made it back upstairs to get out of my pajamas yet. My work-from-home, school-from-home life is glamorous, no doubt.

I decided to make One-Hour Whole Wheat Yeast Rolls for travel sandwiches (easiest rolls ever!). Didn’t they turn out pretty?

one hour rolls for trip

I’m grateful for how details of our week came together. We’ll now be one more step closer to helping Asa find out God’s plan for him next year. And I didn’t even have to freak out to make it happen. God’s way is best – every single time.

What are you thankful for this Gratituesday? Leave a comment to share!

Heavenly Homemaker's Club Members: Access your homepage and all your fantastic resources here! Not a member yet? Please join us!

Make Homemade Broth ~ Money Saving Monday

October 26, 2014 by Laura 13 Comments

This post may contain affiliate links. For more information, please see our disclosure policy.


Money Saving Monday Banner

Welcome to our very first Money Saving Monday tip! I have to start with talk about making broth. Why? Here’s the back story…

Once upon a time (otherwise known as two weeks ago), we were having a houseful of company for the weekend. I had the meals planned, and worked to get as much cooking done ahead of time as possible so that I could enjoy my guests once they arrived.

The only task left on my list was “make broth for soup” which kept getting pushed down because of everything else that kept getting added to my list – you know how it is. I decided, “Fine, I’ll just buy the broth. No need to kill myself and be exhausted before guests arrive.” So I checked “make broth for soup” off my to-do list and added “broth for soup” to my grocery list. (This has got to be the most intriguing story you’ve ever read…)

Fast-forward to the part where I was standing at the store in the aisle of broth. I saw the tiny little box of broth along with its price tag. Out loud to the shelf, the broth, the price tag, and likely to a few other shoppers passing by, I said, “Ugh. $2 – for this??” I cringed as I put three boxes in my cart. I cringed even more when I poured the watery broth into my soup pot. When I make broth, it’s thick and rich, full of vegetables, fat, and gel from the bones.

Purchasing broth that day really was a life saver. But a money saver it was not. Plus, what I make at home is much more nutrient packed. So Money Saving Monday tip for today:

Make Your Own Nutrient-Packed Broth

For the price of three boxes of store-bought (watery) broth, I can make 2 gallons of homemade, nourishing broth. I pack it full of veggies. I cook it slow and low until the good fat and nutrients seep out of the bones. You haven’t had broth until you’ve had homemade bone broth. This is incredibly delicious, and so very good for you!

Even better, beef bones are very inexpensive to purchase. I purchase beef bones from a local farmer who raises grass-fed beef. You can also check butcher shops and your grocery store meat department to see about getting a good deal on beef bones.

I personally love how easy beef bone broth is to make. In addition, I often make Chicken Broth, which is also incredibly nourishing and rich. But it does take a little more effort if you are starting with whole chickens. Making broth from beef bones requires very little effort – and very little money – just to restate one of our main points today!

Below you’ll find links to our Beef Broth and Chicken Broth instructions:

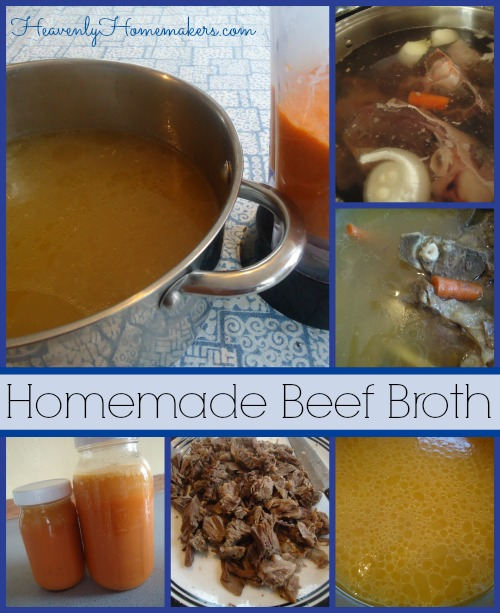
How to Make Beef Broth

Homemade Beef Broth

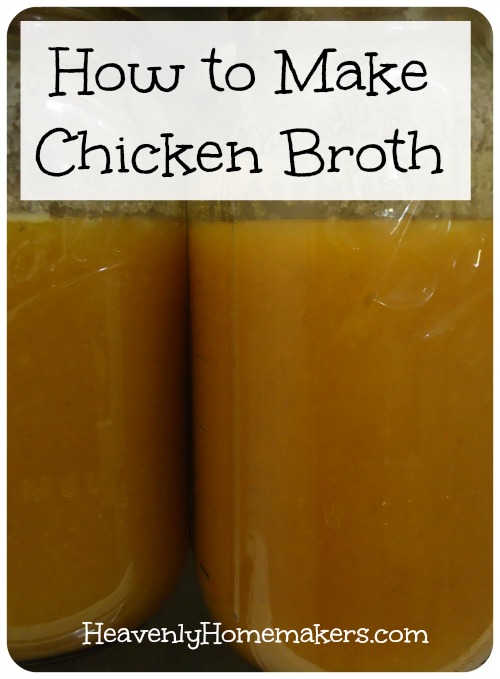
How to Make Chicken Broth

How to Make Chicken Broth

So, three cheers for homemade bone broth! It’s one of the most inexpensive ways to get loads of nourishment into your family.

What to do with Beef Bone Broth or Chicken Broth:

  • Cook brown rice in it (instead of water) for delicious flavor and added nutrients
  • Drink it as-is
  • Make Beefy Vegetable Soup
  • Make Cheeseburger Soup
  • Make Chicken Noodle Soup (or use the same idea for Beef and Noodle Soup)
  • Cook rice in it for Cheesy Beef and Rice
  • Use it in Chicken Pot Pie
  • Make Chicken Tortilla Soup
  • Cook rice in it for Creamy Chicken and Rice Casserole
  • Make Pizza Soup
  • Make Potato Soup

In case you lost count, that’s 12 amazing ways to fill yourself and your family with nourishment in a very inexpensive way. Homemade Beef and Chicken broth are amazing!

Make it Ahead

Beef and Chicken Broth can easily be made ahead and frozen for future use. This means you are not only saving money, you’re saving time! To freeze broth, be sure it has completely cooled. Pour it into jars, leaving 2-3 inches of space at the top of the jar to allow for the broth to expand as it freezes. You can also freeze the broth in freezer bags. Just be sure the bags are sealed well before putting them in the freezer. Otherwise, they will spill and leak, creating broth-sicles all over the freezer – ask me how I know. :(

What are your favorite ways to make and use beef or chicken broth?

Heavenly Homemaker's Club Members: Access your homepage and all your fantastic resources here! Not a member yet? Please join us!

Menu Plan for the Week ~ With a Fun Menu Planning Resource Announcement

October 26, 2014 by Laura 2 Comments

This post may contain affiliate links. For more information, please see our disclosure policy.

Last week’s new (to me) menu planning idea worked out pretty well! I loved the flexibility, knowing I could make anything on the list for any meal of the week.

The great thing about menu planning is that there are so many ways to go about getting yourself organized. One thing is for sure though – menu planning always saves money, time, and energy. This is why I talk about it so often here and share my menu plans with you.

Want to know a little secret? It’s about menu planning, and it’s different from anything we’ve offered here before.

We’re almost finished creating a really fun menu planning resource packet to add to our shop. It’s full of printables for you to pick and choose from. Then based on your needs and preferences, you build your own menu planning notebook. It’s a never ending resource of fun and organization. Who says menu planning can’t be FUN!?!?!?!

Coming early November…

Build Your Menu Planning Notebook 550x

That’s a sneak peek at the cover of the “Build Your Menu Planning Notebook” packet. More details to come as we finish it up and offer it for sale. I can’t wait to share more about what this is like. Watch for it soon!

In other news around the Coppinger household, we are still buried under apples. It’s a wonderful and tasty “problem” to have. :)  I made 17 more quarts of Applesauce this weekend. Then I mixed up 9 quarts worth of Apple Pie Filling. Instead of canning the filling, I froze it in bags. This girl, if you can believe it, is almost out of jars! That’s what happens when you are having a fantastic produce year!

apple work 2

I also made a big Apple Crisp for a Fall Festival at church Saturday night. Apples, apples everywhere!

apple work 1

Like last week, I’m listing meal ideas for the week according to the meal instead of scheduling them specifically for each day. I’ll mix and match depending on how much time I have each day. Here are our food lists for this week:

Breakfasts

  • Apple Crisp
  • Raspberry Oatmeal Bars
  • Poppyseed Bread with Orange Glaze (recipe in {Healthy} Make-Ahead Meals and Snacks eBook)
  • Scrambled Cheesy Eggs
  • Warm Vanilla Soother
  • Honey Cinnamon Muffins
  • Scrambled Egg Sandwiches

Lunches

  • Baked Potatoes in the Crock Pot with Ham and Cheese
  • Creamy Mac and Cheese
  • Healthier Cheese Dip with chips
  • Pasta Salad Bar
  • Tuna Salad
  • Sloppy Joes
  • Leftovers

Dinners

  • Pizza Soup
  • Italian Cream Cheese Chicken
  • Potato Soup
  • Popcorn Chicken
  • Spanish Rice
  • Teriyaki Chicken and Veggies
  • Homemade Pizza

Fruit and Veggie Side Dishes (I always serve 1-4 fruits and veggies with each meal)

  • Applesauce
  • Pears
  • Kiwi
  • Peas
  • Spicy Avocado Dip
  • Sweet Potato Fries
  • Green Beans from the Garden
  • Steamed Broccoli and Carrots
  • Creamy Coleslaw
  • Cheesy Cauliflower Cakes
  • Mixed Greens
  • Fresh Spinach
  • Apples
  • Fresh Pineapple
  • Canned Peaches
  • Raw Carrots and Cucumber Slices
  • Sweet Peppers from the garden
  • Home Canned Dill Pickles

 What’s on your menu plan this week? Praying your week is off to a great start!

Heavenly Homemaker's Club Members: Access your homepage and all your fantastic resources here! Not a member yet? Please join us!

Fun Fall Crafts and a “Share Your Story” Service Challenge

October 24, 2014 by Laura 3 Comments

This post may contain affiliate links. For more information, please see our disclosure policy.

Service challenge time. Gather the family. :)

Share Your Story Service Challenge 2

I’m not a very artsy-craftsy person. In fact, once when I was a teenager, I was trying to make a basket that looked like a bunny rabbit. When I handed it to the recipient she exclaimed, “Oh what a cute kitten!” Whenever I attempt to make Snowman Pancakes, they look like blobs with a chocolate chip face. It was a miraculous feat when I pulled off making a piñata in the shape of a Lego with a shoe box, eight bottle lids, and sheets of tissue paper.

This is why, when I got a fun idea to make gift sacks with owls on them, I was not very confident. My boys didn’t help matters. “Nice turkey, Mom,” said one. When I asked another what he thought it was, he said, “I can definitely tell it’s a bird. If it was black, I’d say penguin. I’ll just stick with bird.” But then, when one of my friends walked into my house while I was putting the finishing touches on my gift sacks, she exclaimed, “Oh look at your owls! You are so clever!”

YESSSSSSSS! My owls look like owls! (and turkeys and penguins)

owl gift sacks

Are you up for a service challenge?

While I’m a far better cook that I am a craft creator, I do really enjoy putting together simple projects – especially if it means I can bless someone. This project happens to involve food too, so yay for me! I’ll fill the gift sacks with homemade goodies and deliver them to our “adopted college students.” Even if they can’t tell it’s an owl, I’m pretty sure they’ll recognize the Chocolate Chip Brownies inside, right?

So here’s what I’m thinking:  Crafty or not, you should join me by blessing someone! We have some fun (and easy!) free printables for you, as well as plenty of recipes to choose from. Pick a project or three, get your whole family involved, and love up on the people around you.  The best way for your kids to learn to serve others is by serving right along side you! Let’s all do this together. It’ll be fun!

Serve With Your Family

1. Pray with your family about who you would like to bless.
2. Pick your project. Make a craft and/or choose a recipe from our site to make and take to someone.
3. Work on the project together.
4. Deliver your goodies.

You’ve already got oodles of ideas for ways to serve people with your kids if you have our Learn Your Letters, Learn to Serve curriculum. Keep at it! Your kids are learning so much about how to bless people! Need more ideas? Well, here’s what we’ve worked up for you:

Owl Gift Sacks Free Printable

Download the cut-outs for the Owl Gift Sacks here. Grab some lunch sacks, scissors, and a glue stick and have fun making your sacks. Fill them with goodies and go bless someone!

Be Thankful Owl Craft Share on Blog

Download your Build-an-Owl Be Thankful Craft.  Make it into a card for someone, an ornament for someone, or a treat topper. Bake up some goodies, attach your owl, and make your delivery.

Pumpkin and Apple Stickers

Here are some fun sticker labels for delicious fall treats to go with recipes you’ll find here at Heavenly Homemakers. Get the download links and details about these stickers here. Below, you’ll find the links to each Fall Recipe.

  • Applesauce Bread
  • Apple Butter
  • Applesauce
  • Apple Pie
  • Pumpkin Chocolate Chip Muffins
  • Pumpkin Pie
  • Pumpkin Chocolate Chip Cake
  • Warm Pumpkin Custard

More treat ideas you’ll find here to help you bless someone:

  • Blueberry Streusel Muffins
  • Cream Cheese Pumpkin Muffins
  • Pumpkin Chocolate Chip Bread
  • Homemade Caramel Sauce (you can download free printable gift tags to go with this!)
  • Caramel Brownies
  • Chocolate Chip Brownies
  • Cream Cheese Fruit Dip with a basket of apples
  • Hot Chocolate Mix
  • Lemon Pound Cake
  • Peanut Butter Apple Cookie Bars
  • Pumpkin Pecan Pie Squares
  • Zucchini Carrot Bread

The possibilities are limitless. Have fun serving with your family!

Want more freebies?

Want more free printables and fun activities to do with your kids? Sign up for the Heavenly Homemaker’s Learning Zone free newsletter. We’ll supply you with fun freebies and share ways you can learn and serve with your family on the cheap!

Heavenly Homemaker's Club Members: Access your homepage and all your fantastic resources here! Not a member yet? Please join us!

Whole Wheat Zucchini Carrot Bread & Natural Value Foods 25% off Plus 20% off at Amazon

October 23, 2014 by Laura 5 Comments

This post may contain affiliate links. For more information, please see our disclosure policy.

The more nutrients you can stuff into one recipe, the better, right? My friend Emily tried this idea of adding shredded carrots into zucchini bread, then let me know that I should try it. Great idea. Mmmmm, so good!

Zucchini Carrot BreadYum

3 cups whole wheat flour
2 teaspoon cinnamon
1 teaspoon baking soda
1/2 teaspoon sea salt
1/2 teaspoon nutmeg
1/2 teaspoon baking powder
1 cup honey
1 1/2 cups shredded zucchini
1 cup shredded carrots
1/2 cup melted butter
2 eggs

In a large mixing bowl combine flour, cinnamon, baking soda, sea salt, nutmeg and baking powder. Stir in honey, zucchini, carrots, eggs, and melted butter. Mix ingredients until dry ingredients are moistened. Pour into two well buttered loaf pans. Bake at 350° for 45-60 minutes or until a toothpick inserted in the middle comes out clean.

zucchini carrot bread

Slices of this Zucchini Carrot Bread would be perfect in your Make-Ahead Lunch Box! Simply allow the bread to cool, slice, wrap individually, then freeze. Pull a wrapped slice of bread out of the freezer, then toss it into your lunch box for a dessert or snack!

What other veggie combinations have you thrown together in quick breads?

Heavenly Homemaker's Club Members: Access your homepage and all your fantastic resources here! Not a member yet? Please join us!
« Previous Page
Next Page »

Join Our Community!

 Facebook Twitter E-mail Instagram Pinterest

Popular Posts

~ Will All of the Real Moms Please Stand Up?
~ Easy! Stir-and-Pour Whole Wheat Bread
~ How to Make Gatorade
~ 31 Real Food Breakfast Ideas
~ Dear Teenage Girls...
~ When Mom Takes a Step Back
~ The Inexpensive Health Insurance We Love!
~ Let's Talk Real Food Grocery Budgets

Check out our latest posts!

  • Big Family Food and Fun: September 13-19, 2026
  • Big Family Food and Fun: September 6-12, 2026
  • Big Family Food and Fun: August 30-September 5, 2026
  • Big Family Food and Fun: August 23-29, 2026
  • Big Family Food and Fun: August 16-22, 2026
Home  ~  Simple Meals  ~  Club Membership  ~  Shop  ~  Privacy Policy  ~  Disclosure  ~ Contact

Copyright © 2026 · Beautiful Pro Theme on Genesis Framework · WordPress · Log in