Heavenly Homemakers

Encouraging women in homemaking, healthy eating and parenting

  • Home
    • About
    • FAQs
  • Recipes
    • Bread and Breakfast
    • Condiments
    • Dairy
    • Main Dishes
    • Side Dishes and Snacks
    • Desserts
    • Gluten Free
    • Instant Pot
    • Crock Pot
    • Heavenly Homemaker’s Weekly Menus
  • Homemaking
    • Real Food Sources
  • Store
  • Contact
    • Advertise
    • Disclosure
    • Privacy Policy
  • Simple Meals
  • Club Members!

Cheesy Beef and Rice and Bacon Cheeseburger Casserole ~ Freezer Cooking Week One

March 30, 2014 by Laura 12 Comments

This post may contain affiliate links. For more information, please see our disclosure policy.

Here’s hoping you got all your grocery shopping done for this challenge. If not, you can certainly join this challenge at any time!

Did you brown 8 pounds of hamburger in preparation for the freezer cooking? How long did it take?

Wait.  You didn’t time yourself cooking the hamburger meat? It’s possible that you aren’t as much of a food geek as I am. Be thankful.  I just get a kick out of knowing how much time it saves to double – or octuple, as the case may be in this beefy situation – in order to get ahead.

Today, we’re going to make both Cheesy Beef and Rice and Bacon Cheeseburger Casserole.

  • Cheesy Beef and Rice
  • Bacon Cheeseburger Casserole (recipe in {Healthy} Make-Ahead Meals and Snacks eBook)

Why are we making both recipes in one day? Because they both call for rice. It makes sense, then, to cook up all the rice we need for both recipes, then divide it up and make our four casseroles. Oh the efficiency. Oh the productivity. Oh the smell of bacon…

Yeah, by the way, prepare yourself for the fact that your family will likely get excited about eating bacon once they smell it cooking today. If you weren’t planning to serve the Bacon Cheeseburger Casserole tonight, you may need to change your plan to accommodate all the bacon sniffers and the sad I can’t believe you’re making bacon and we can’t eat it faces in your home.

So let’s get started. 

I’m assuming you’ve already cooked your meat. If not, well – cook your meat. Because we’re making four casseroles today, you’ll need four pounds of cooked hamburger.

Now, begin by getting the rice cooking since that’s what takes the longest. The beauty of this: while your rice cooks, you can do 45 minutes of other work or play. Unless, of course, you want to stand at the stove watching your rice get plump and tender.  snore

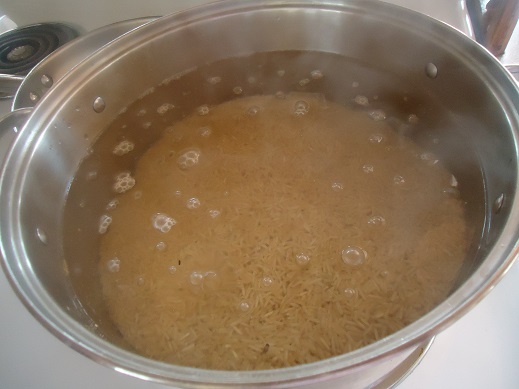
We need 5 cups of brown rice for these four casseroles, so measure out 10 cups of water and bring it to a boil. Stir in 5 cups of rice, turn down your burner to simmer, cover the pot, then walk away. Here are more detailed instructions on cooking brown rice.

beef freezer cooking 1

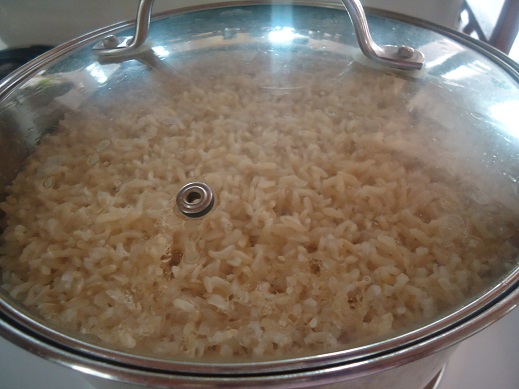
There it is. It can cook all by itself and will actually turn to mush if you stir it.
So put the lid on, set a timer, and walk away. 

In the meantime, you can cut your bacon into bite-sized pieces and get it cooking. You can also get out your casserole dishes, set out your other needed ingredients, and trim your fingernails – though not all at the same time or all in the same place.

beef freezer cooking 2

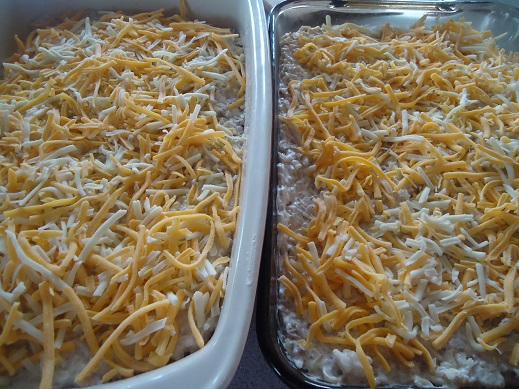
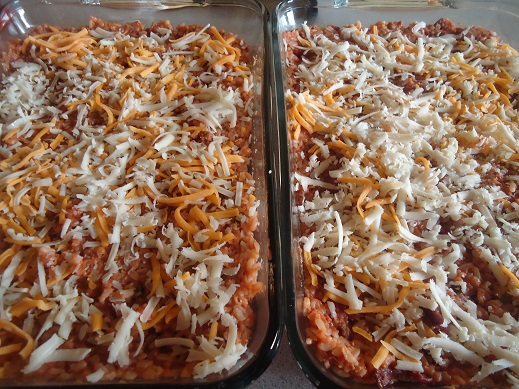
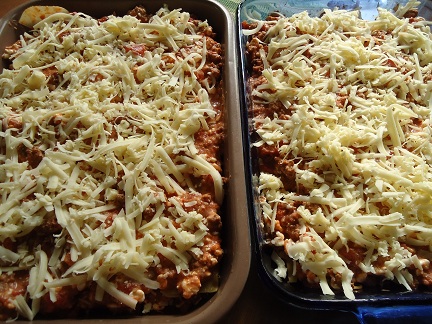
Once your rice and bacon are finished cooking, divide the rice according to the recipes. Stir in remaining ingredients to create your four casseroles. I found that it was easiest to use two huge bowls – one for each recipe. Then I divided the contents of the bowl into two casserole dishes for each recipe.

beef freezer cooking 4

Cheesy Beef and Rice x2

You might notice that since I was making so many cheesy casseroles this week, I cheated and bought a big bag of pre-shredded Colby jack cheese. I know.  There are healthier options, and I always recommend the healthier options. But it’s still cheese, right? At least I didn’t purchase a pre-shredded Snicker bar (which doesn’t even make sense, but I was trying to divert your attention away from my orange cheese).

beef freezer cooking 5

Bacon Cheeseburger Casserole x2

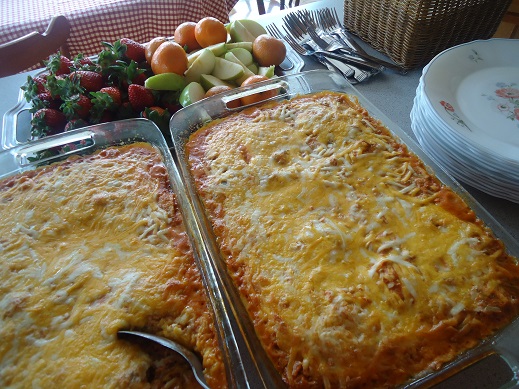
I actually made these four casseroles over the weekend so that I could get ahead a little bit on putting together these challenge posts. How lovely it was to put a Cheesy Beef and Rice plus a Bacon Cheeseburger Casserole into the freezer. I then put one Cheesy Beef and Rice into the oven too cook and serve for dinner, and put the additional Bacon Cheeseburger Casserole into the fridge to serve another day this week. One big mess, four great meals!

beef freezer cooking 7

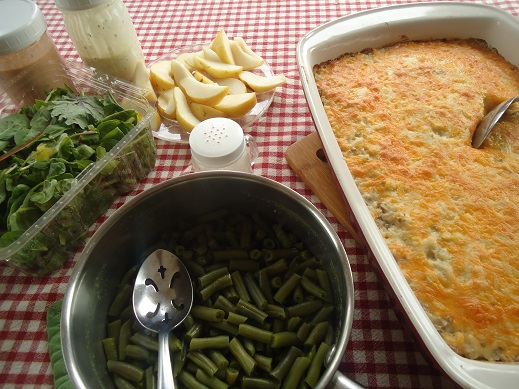
See how easy it was to set out delicious and healthy veggie and fruit side dishes with this Cheesy Beef and Rice? I cooked some frozen green beans, set out a package of mixed greens along with some homemade dressings that were already made and in the fridge, sliced a couple of pears, and called in the family. Except for about one serving of greens, this entire spread was gone in about a half hour.

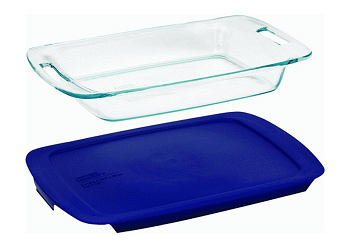
Need more Pyrex? I found a 9×13 dish with lid for just $11.79 with free shipping if you have Amazon Prime. If you order today, it would arrive in two days, which works out great for this challenge!

pyrex 5

Be sure to leave a comment letting us know how you’re coming in this challenge!

Just a reminder, Let’s Do This! eCourse and {Healthy} Make-Ahead Meals and Snacks eBook are discounted to just $5 for the whole package.

Heavenly Homemaker's Club Members: Access your homepage and all your fantastic resources here! Not a member yet? Please join us!

Menu Plan for the Week – Freezer Cooking Plans

March 30, 2014 by Laura Leave a Comment

This post may contain affiliate links. For more information, please see our disclosure policy.

Since the Freezer Cooking Challenge plan for this week includes making food for each evening, along with making extra for the freezer, you’ll see all of those casseroles sprinkled into this week’s menu plan. I love the simplicity of this getting ahead system! (Please make plans to join us for this challenge! Tonight I’ll post the next steps we’ll be taking.)  If my freezer cooking plan gets shifted around, I’ll simply shift around my menu plan.

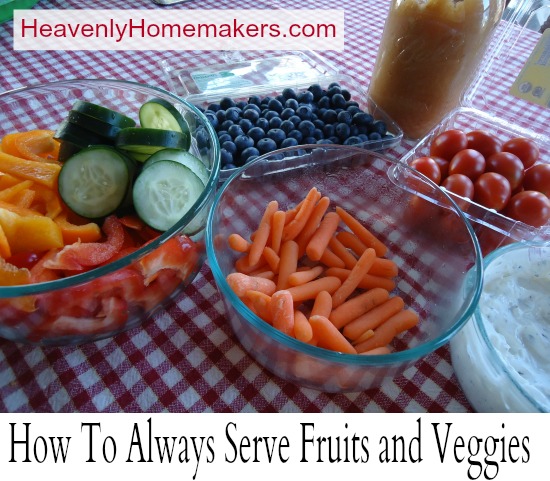
Notice all of the easy fruit and vegetable side dishes that go along with our main dishes. It is so much fun to fill the cart with fresh or frozen produce, and then to load the table with a variety of these great and colorful foods during each meal time.

How to Serve Fruits and Veggies

Here’s our full menu plan for this week:

Sunday, March 30
Homemade instant oatmeal, blueberries
Cheesy salsa enchiladas, fresh fruit plate
Afternoon road trip, packing food to go

Monday, March 31
Cream cheese pumpkin muffins, scrambled eggs, applesauce
Creamy mac and cheese, peas, sliced cucumbers and carrots with ranch, strawberries
Cheesy beef and rice, tossed salad, green beans, pear slices

Tuesday, April 1
Honey cinnamon muffins, green machine milkshakes, apples
Potato soup, sweet peppers, sliced cucumbers and carrots with ranch, oranges
Bacon cheeseburger casserole (recipe in {Healthy} Make-Ahead Meals and Snacks eBook), tossed salad, asparagus

Wednesday, April 2
Oatmeal Breakfast Bars, blueberries, clementines
Homemade tomato soup, cheesy cauliflower cakes, sweet peppers, canned peaches
Cheesy beef and pasta casserole (recipe in {Healthy} Make-Ahead Meals and Snacks eBook), tossed salad, steamed carrots and broccoli

Thursday, April 3
Peanut butter pancakes, bananas
Spanish rice, strawberry peach yogurt smoothies, sliced cucumbers and carrots with ranch
Creamy salsa enchiladas (recipe in Let’s Do This! eCourse), tossed salad, fresh pineapple

Friday, April 4
Whole wheat donuts, clementines
Popcorn chicken, creamy coleslaw, sweet peppers, pears
Whole wheat pizza, tossed salad, pineapple mango smoothies

Saturday, April 5
Fried eggs on toast, oranges
Leftovers
Tuna casserole, peas, tossed salad

 How is the Freezer Cooking Challenge going for you so far? 

Just a reminder to go sign up for our BudgetFocus giveaway!

Heavenly Homemaker's Club Members: Access your homepage and all your fantastic resources here! Not a member yet? Please join us!

The Plan ~ Getting Ready For Freezer Cooking, Week One

March 28, 2014 by Laura 24 Comments

This post may contain affiliate links. For more information, please see our disclosure policy.

350x350_Challenge

I hope you’re planning to join me for Week One of our newest Freezer Cooking Challenge! I figured if I needed to spend some time getting ahead, you might too. Why not cook together, right?

For Week One, we’ll be focusing on beef recipes. If I’m going to brown one pound of hamburger meat, I might as well brown eight or ten. I still just dirty up one pot, and the time I save overall is amazing. So, we’ll be browning 8 pounds of meat at once, then we’ll put together 8 meals with the meat we prepared.

We’ll do this over the course of a week – so really, the time it takes each day to do the work is very minimal. I’ll walk you through all the steps! Here’s what is on my list to prepare during the upcoming week. My idea is to make two of each casserole listed below – one for our evening meal, and an additional one for the freezer. So easy! (All of these recipes can be made gluten free if you use GF pasta and corn tortillas.)

  • Cheesy Beef and Rice – catch the details in this post
  • Bacon Cheeseburger Casserole (recipe in {Healthy} Make-Ahead Meals and Snacks eBook) – catch the details in this post
  • Cheesy Beef and Pasta Casserole (recipe in {Healthy} Make-Ahead Meals and Snacks eBook) – view details here
  • Creamy Salsa Enchiladas (recipe in Let’s Do This! eCourse, Lesson 2) or if you prefer, you can make the Cheesy Salsa Enchiladas version of this recipe – catch the details in this post

Don’t want to make them all? No problem. Want to make three of each? Okay. This needs to benefit you, not cause you stress – so you just grab hold of whatever part of this challenge works for you and drop kick the rest. The grocery list below assumes you’ll be making two of each casserole. You can adjust it accordingly.

What you’ll need:

  • 5-6 Casserole Dishes (I use 9×13 inch Pyrex Dishes with lids)
  • 8 pounds hamburger meat
  • 1 pound bacon
  • 16 ounces pasta (I use whole wheat)
  • 5 cups brown rice
  • 5 cups sour cream (40 ounces)
  • 4 cups salsa (32 ounces)
  • 4 cups tomato sauce (32 ounces)
  • 2 eight-ounce cream cheese packages
  • 1/2 cup dry minced onion
  • 14 cups shredded cheese (4-ounces equals one cup; you’ll need approximately 56 ounces – less is fine if you would like to save money by skimping on the cheese)
  • 12 whole wheat tortillas (homemade tortillas are awesome)
  • 1 cup ketchup
  • 2 cans black olives
  • 2/3 cup milk

Be sure you have:

  • mustard
  • chili powder
  • sea salt
  • pepper
  • garlic powder

I’ve created a downloadable and printable grocery list for you here:  Freezer Cooking Grocery List ~ Week One

Be sure to add plenty of fruits, vegetables, and salad items to your list to go with your casseroles!

Here are your first assignments:

  1. Pick up all needed items at the grocery store.
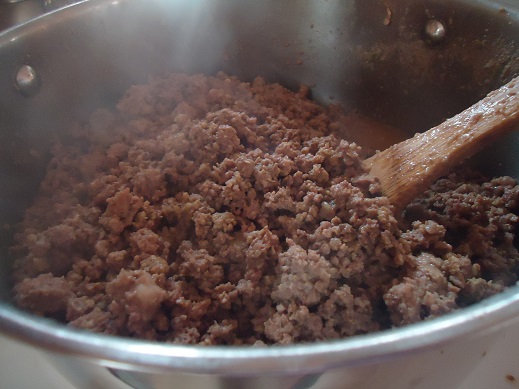
  2. Brown 8 pounds of ground beef, along with about a half cup of minced onion.

Once your meat has been cooked, let it cool, then put it into the fridge to be worked with later. You can divide it into 4 equal(ish) sized portions if you would like, just to make it easier later. I personally just put my whole pot into the fridge and will scoop out 1/4 of the contents each time I need it.

beef freezer cooking 3
You’re welcome to put together recipes as your own pace, of course. But for the sake of those who want to do this freezer cooking in stages, I plan to break all tasks down into small chunks so that it will be doable for all who only have a few minutes to spend on this at one time.

On Monday, we’ll continue on by putting together our first round of casseroles. Don’t forget, Let’s Do This! eCourse and {Healthy} Make-Ahead Meals and Snacks eBook are discounted to just $5 for the whole package.

Hope your freezer cooking prep time goes well! Let me know how these first assignments go for you.

Heavenly Homemaker's Club Members: Access your homepage and all your fantastic resources here! Not a member yet? Please join us!

You. Me. Freezer Cooking. Let’s Do This! {Take the Challenge}

March 28, 2014 by Laura 13 Comments

This post may contain affiliate links. For more information, please see our disclosure policy.

350x350_Challenge

I am in freezer cooking mode for two reasons:

1. I’m out of prepared food in the freezer. All my pyrex dishes are empty and forlorn. They sit stacked and weepy in my cabinet.
2. Spring soccer season is starting, which means that our evenings and weekends will be full, and my cooking time will be very limited. I need food that is healthy, hearty, and ready to put into the oven with no effort.

I want you to join me! Think of it:  Together we cook and get ahead. We all save money. We all save time. We all drop kick the stress that comes with busy evenings, full weekends, and hungry families.

The best news:

As we do this, not only will we be making food for our freezers, we’ll be practicing the Cook Once, Eat Twice (or More) method. This means we’ll be making two of everything – one to eat the day we make it, the other for our freezer. You’ll be making tonight’s dinner (something you need to do anyway), and an additional dinner for another day. See how efficient we’ll be?

Is freezer cooking intimidating to you?  Do you have trouble being motivated to get ahead in the kitchen? No problem. I’m going to walk you through this process during the next few weeks.

Don’t have time for freezer cooking or getting ahead?  Not to worry. We’re not going to spend hours at a time on this. We’re going to break this down into small tasks. You’ll be amazed at all you can do to get ahead when you just do a little bit at a time. That means that even if you have a house full of little ones, even if you work outside the home, even if you really don’t see how you can fit anything else into your day – you can make this work.

I’m excited to walk you through this freezer cooking thing! And I believe we all know how excited I am to use my Pyrex.

I reserve the right to change my plan once I get going with this and hit it hard in the kitchen, but here’s what I’m looking at for the next few weeks of freezer cooking.

Week One ~ Filling the Freezer With Beef Dishes
Week Two ~ Filling the Freezer With Chicken Dishes
Week Three ~ Filling the Freezer With Breakfast Items
Week Four ~ Filling the Freezer With Meatless Meals

See, it just makes sense to focus on one “food group” at a time. If I’m going to brown one pound of hamburger meat, I might as well brown eight or ten. It saves loads of time and energy! That’s why we’ll focus on beef recipes during Week One. And so on.

All of the recipes we’ll use are family friendly, and use basic, real food ingredients. I will choose recipes that are either on my site or in our Let’s Do This! eCourse or {Healthy} Make-Ahead Meals and Snacks eBook. The eCourse and eBook have so many of our favorite recipes, plus many of you already have access to them. Still don’t have Let’s Do This! eCourse or {Healthy} Make-Ahead Meals and Snacks eBook? I just knocked to price down to $5 total for both. A steal of a deal! They are resources you’ll use over and over.

I will provide you with grocery lists and check lists. I will walk you through each step so that you can easily and efficiently feed your family each day, all while you fill the freezer too!

Tonight, I’ll post our plan for Week One so that you can learn all of the specifics and prepare yourself for the challenge. Ready to get ahead in the kitchen?!

Heavenly Homemaker's Club Members: Access your homepage and all your fantastic resources here! Not a member yet? Please join us!

Quick and Easy Shortbread Recipe

March 27, 2014 by Laura 24 Comments

This post may contain affiliate links. For more information, please see our disclosure policy.

High Five Recipes 2

Three ingredients. A super quick snack. Amazing deliciousness. Supplies you always have on hand…

Wait, you do have butter on hand, right? Okay. I mean, we can still be friends even if you have run out of butter, but don’t let it happen again. This has nothing to do with me and my butter obsession. I’m just looking out for you, that’s all. I have your best interests in mind. Opening the fridge or freezer to find that there is no more butter waiting – well, it is reason to panic. It’ll send a woman into a crazed frenzy, causing her to frantically toss a whole frozen chicken and eight packages of hamburger meat off a freezer shelf, hoping in vain to locate a forgotten pound of butter buried in the back under some frost.

It could be that I got going on that paragraph and couldn’t find a logical time to stop. Just save yourself (or me, apparently) the emotional trauma of running out of butter by always keeping a nice supply on hand.

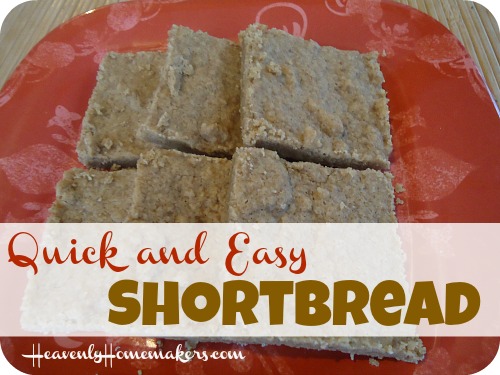
So butter. You’ll need it for this recipe. You’ll also need flour and sugar. Plus a bowl, a spoon, and a pan. That’s it. Could it be any easier?

Quick and Easy ShortbreadYum

1 1/2 cups whole wheat flour (I use freshly ground hard white wheat for this)
1/4 cup sucanat (or brown sugar if you prefer)
3/4 cup melted butter

Blend all ingredients well. Press mixture into a 9×9 inch baking pan. Bake in a 350° oven for 12-15 minutes or until golden brown. Cook and cut into 12 squares.

Quick and Easy Shortbread

As you can see, this is a no-brainer recipe. I discovered it as I’ve been working on a brand new healthy snacks eBook. This shortbread can be stirred up and put into the oven within just a few minutes. We love it because it is just lightly sweetened, and deliciously buttery. It is awesome with a cup of coffee or tea in the afternoon.

It is worthwhile to note that this is not a snack you’ll want to hand your kids while they are running into the living room you’ve just vacuumed. This shortbread is a bit crumbly and needs to be eaten while holding ones head directly over a plate while sitting at a table. Trust me. I know these things.

And one more thing. Go check your butter supply. We’ll all sleep better tonight knowing you’re well stocked.

‘Fess up. How much butter do you have right now? 

Heavenly Homemaker's Club Members: Access your homepage and all your fantastic resources here! Not a member yet? Please join us!

Is It Worth Spending Money On a Budgeting System? Plus a Budget Focus Giveaway!

March 26, 2014 by Laura 116 Comments

This post may contain affiliate links. For more information, please see our disclosure policy.

What can you get for five bucks? A coffee at your favorite coffee shop. A bucket of popcorn at the theater. A box of cereal and a container of cookies. All fun things, and items people often toss out five dollars for without much thought.

But what if? What if, for just five dollars per month, you could find financial security and peace? What if, instead of blowing a few bucks here and a few bucks there, with nothing to show for it, you could put just five dollars each month into getting yourself on the right track with your budget? Would it be worth it? Well, I’d say it would be very worth it.

If you are ready to be in control of your money, I really want to encourage you to sign up for BudgetFocus. It is such a simple system, and it will walk you through every aspect of setting up and sticking with a budget. For as little as $5/month ($59.99 for an annual plan), you’ll be all set up with a spread sheet, online envelope system, and all the guidance you need to set up and stick to a workable budget for your family.

ad3

Five dollars a month.  That is a tiny price to pay for a system that can change how you manage your money. What a breath of fresh air! BudgetFocus even offers everyone a free 14 day trial period just so you can get started and see how great it is. After that, you can pay monthly, or purchase a discounted twelve-month plan – a very inexpensive resource for budgeting!

Now here’s the very fun question for you:  Who wants to win a year’s worth of Budget Focus services for free?! BudgetFocus is giving away two annual plans this week. Interested in winning? Leave a comment on this post for a chance. I’ll draw two random winners on Wednesday, April 2. Be watching for a post stating the winners as you will be responsible for contacting me if your name is chosen.

In the meantime, check into the pricing plans offered by BudgetFocus. Try it for free, then consider investing in all they offer you. It’s money well spent. After all, what do you have after spending five dollars on cookies? I think we all know. :)  But five dollars for a budgeting system? Relaxed, stress free financial planning. Love it!

Heavenly Homemaker's Club Members: Access your homepage and all your fantastic resources here! Not a member yet? Please join us!

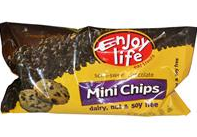
Now Is The Time To Stock Up On Enjoy Life Chocolate Chips (Buy-One-Get-One-Half-Off Deal, Plus $10 Off)

March 26, 2014 by Laura 7 Comments

This post may contain affiliate links. For more information, please see our disclosure policy.

Why is now a good time to stock up on chocolate chips if you’re ordering them online like I do? Because soon, it will be too hot and they will melt en route. I typically try to put several bags of these chocolate chips in my freezer this time of year – enough to last me through the summer.

Right now, Vitacost is offering their Enjoy Life Soy Free Chocolate Chips for buy-one-get-one-half-price. So, if one costs $4.09, the second one just costs just $2.05. This means the price averages to only $3.07 per bag!

AND, if you are a brand new customer with Vitacost, you can get an even better deal. Before ordering your chocolate chips, sign up through my referral link to receive a coupon code worth $10 of credit to use on your first purchase of $30 or more. That sweetens this deal even more!

Vitacost offers free shipping for all orders over $49, so you may want to take advantage of that too. Here’s where you’ll find all the items that are 65% off right now. I always find that it is worth it to get the food we’ll be needing anyway to fill the $49 requirement to receive free shipping. They also offer free shipping if you order at least $25 worth of Vitacost Brand products – so check to see if this is an option too.

Enjoy your $10 off!

Heavenly Homemaker's Club Members: Access your homepage and all your fantastic resources here! Not a member yet? Please join us!

How to Stretch a Meal When Extra Company Comes

March 25, 2014 by Laura 11 Comments

This post may contain affiliate links. For more information, please see our disclosure policy.

How To Stretch a Meal When Extra Company Comes 2

Matt only knew my paternal grandmother for a few years before she died. One of his favorite memories of her is the response she gave after being told that extra people were coming to join us for a meal. “Great! I’ll just add more water to the soup,” she said with a chuckle. Seeing as we weren’t having soup that day, he then watched in amazement as she “added water” to stretch the meal she had prepared.

Grandma seemed to make more food appear out of no where, and in record time, too. The table was soon filled with all varieties of goodness. The little bowls of this and the small dishes of that didn’t look like they would feed the number of people we were anticipating. But sure enough, just like the loaves and the fish, Grandma had enough to fill us all with twelve (give or take) baskets left over.

What was Grandma’s secret? Well, she just always had a good supply of food on hand. And not just frozen meat that would take hours of time to thaw and prepare. I’m talking about home-canned fruits and vegetables, homemade bread and cookies – food that she could pull out and feed people in a moment’s notice.

This Sunday, I was blessed with the opportunity to “add water to my soup.” We already had plans for another family of 6 to join us for lunch after church. Their 6 plus our 6 would equal 12. (Thank you, Laura, for stating the obvious.)  I was making a roast, carrots, potatoes, and gravy. My friend was bringing rolls. It would be a simple, nothing-fancy, but tasty meal.

Then, at the last minute, a friend of my brother’s family needed a meet-up place here in Nebraska. The friend would come here, my brother’s family would drive up from Kansas and pick him up, and guess what? They’d make it in time for church. Bliss! I got to worship with my brother and his family of 6 and feed them all afterward!

So let’s see here. Six plus six is twelve, plus six more – that’s 18. Then there was my brother’s friend who was meeting us by lunchtime. Did I mention he was a 6’8″ college athlete? And last but not least, a friend of Elias’ needed a place to hang out after church while his family headed out of town. That made a total of 20 people. Super fun.

Thankfully, I had decided to make two roasts instead of just one – just in case. I had loaded the roasting pan with potatoes and carrots. I caught my friend (the one already planning to come over with her family) between class and worship, filled her in on the crazy, and asked her to pick up extra rolls – plus maybe a bucket of ice cream? She was happy to help stretch our meal.

Once I got home after church and started making gravy, I also started a big pot of green beans and another big pot of corn. Our simple meal remained simple, yet because there were so many different foods to choose from (roast, potatoes, carrots, gravy, rolls, green beans, corn, ice cream), it looked like a feast. We had plenty to go around and even a little bit left over. Phew!

How to Stretch a Meal for Extra Company

All of that to say, when it comes to hospitality and being able to say, “The more the merrier!” always try to have a few key foods on hand to help stretch your meal. Here are a few items I’ve thought of that you might have on hand to pull out and serve quickly, or that you can grab at the store if you have time/accessibility:

  • Frozen food that cooks quickly like green beans, peas, or corn
  • Applesauce
  • Canned peaches, pears, or mandarin oranges
  • A jar of pickles
  • A can of olives
  • Quick breads or muffins you might have in your freezer
  • Fresh fruit like strawberries, sliced apples, oranges, or grapes
  • A fruit salad, mixing several different fruits you have on hand
  • Canned or fresh pineapple poured into a nest of cottage cheese
  • Raw veggies like carrots sticks, celery, sweet peppers, or cucumber slices
  • Crackers and sliced cheese
  • Tossed salad
  • Grape or cherry tomatoes
  • Chips and salsa
  • Dessert such as cookies or ice cream

If you’re opening a can or jar, I suggest pouring its contents into a nice serving bowl to make your “spread” look tasty and welcoming for your guests. Did you grab a bag of prepared salad on the fly? Pour it into a bowl and throw in some grape tomatoes to make it pretty.

Don’t hesitate to ask your guests to pick something up at the store on their way to your house (especially if they offer or ask what they can bring). Most of the foods on the list above take little to no prep time, but will stretch your meal and offer your guests a delicious variety.

What would you add to this list? What have you found works well to stretch a meal to feed extra people?

Heavenly Homemaker's Club Members: Access your homepage and all your fantastic resources here! Not a member yet? Please join us!

Gratituesday: The Girls In My Life

March 24, 2014 by Laura 9 Comments

This post may contain affiliate links. For more information, please see our disclosure policy.

gratituesday[2]

“So Laura, don’t you ever wish you had little girls?”

People ask me that question quite often as they observe my boy-filled life. My answer is always “no.” God knew what He was doing when He gave me all sons and no daughters. Plus we snatched up little Gladis, who gets to be our daughter/sister/friend/delight in Honduras.

I didn’t have any sisters when I was growing up either – just one brother. You know what I have now? All kinds of sisters! My brother’s wife, Matt’s sister, Matt’s brothers wife, plus all the Christian sisters God has put in my life. So, do you know what I might have someday? Four daughters, if God sees fit that all of our boys get married.

Guess what else I have? Several nieces. Precious, sweet girls who give me excuses to buy pink, giggle, and talk about fingernail polish. Girls who tell me, “Hey, cute jeans” and “I like your sweater.”

I do sometimes wonder what my daughter might have looked like had I actually had one. I usually look no farther than my brother’s girls. If I had a daughter, I’m pretty sure she would look a lot like this:

niece

This niece of mine looks so much like I did when I was little. 

I got to see two of my Kansas nieces briefly this weekend. My oldest niece, who is 12, and also a lot like I was when I was her age, spent some time in the kitchen with me, helping me and chatting as we worked on lunch.

niece 1

Yep, except for the braces, I bet I could find some
12 year old pictures of me that would look a lot like this.

While we worked, she asked me, “Do you ever wish you had girls, Aunt Laura?” It was a moment I had not planned, but it was the perfect opportunity to stop my work and look right into her eyes. “Not even a little bit, Kailey,” I told her, “because God gave me nieces like you instead.”

You should have seen her smile. She’s old enough and mature enough to hear my heart. I’ve said it to others, but there was something pretty special about sharing it directly with her.

I’m so thankful for all the girls God put in my life to love on. Bring on the shopping trips, hair styling, and shared smiles as we watch the boys race through the room at lightening speed.

Now your turn. Share what you’re thankful for!  Leave a comment on this post letting us know how God is working in your life. If you’ve written a blog post about what you’re thankful for, leave the link in the comments so we can visit your blog to read about it. We love sharing and reading about God’s blessings!

Heavenly Homemaker's Club Members: Access your homepage and all your fantastic resources here! Not a member yet? Please join us!

Making Whole Wheat Quick Mix

March 24, 2014 by Laura 4 Comments

This post may contain affiliate links. For more information, please see our disclosure policy.

On my agenda this week:  Get out the Whole Wheat Quick Mix and make use of it!

I decided to scrap our Friday night menu plan last week and make Quick Mix Pancakes, eggs, and fruit instead. Easy, and perfect for a laid back Friday night. My guys love it when I make breakfast for dinner. Since I used my Quick Mix, which meant that making dinner took only a few minutes.

I have some strawberries and kiwi in the fridge so I think I’ll also make a Quick Mix Fruit Pizza. Click on the picture below to grab the Quick Mix recipe, plus many recipes you can make with the mix!

Also, take note that Tropical Traditions, my favorite source for the palm shortening I use in this quick mix is offering a great deal today (hurry!).

Whole Wheat Quick Mix

Heavenly Homemaker's Club Members: Access your homepage and all your fantastic resources here! Not a member yet? Please join us!
« Previous Page
Next Page »

Join Our Community!

 Facebook Twitter E-mail Instagram Pinterest

Popular Posts

~ Will All of the Real Moms Please Stand Up?
~ Easy! Stir-and-Pour Whole Wheat Bread
~ How to Make Gatorade
~ 31 Real Food Breakfast Ideas
~ Dear Teenage Girls...
~ When Mom Takes a Step Back
~ The Inexpensive Health Insurance We Love!
~ Let's Talk Real Food Grocery Budgets

Check out our latest posts!

  • Big Family Food and Fun: September 13-19, 2026
  • Big Family Food and Fun: September 6-12, 2026
  • Big Family Food and Fun: August 30-September 5, 2026
  • Big Family Food and Fun: August 23-29, 2026
  • Big Family Food and Fun: August 16-22, 2026
Home  ~  Simple Meals  ~  Club Membership  ~  Shop  ~  Privacy Policy  ~  Disclosure  ~ Contact

Copyright © 2026 · Beautiful Pro Theme on Genesis Framework · WordPress · Log in