Heavenly Homemakers

Encouraging women in homemaking, healthy eating and parenting

  • Home
    • About
    • FAQs
  • Recipes
    • Bread and Breakfast
    • Condiments
    • Dairy
    • Main Dishes
    • Side Dishes and Snacks
    • Desserts
    • Gluten Free
    • Instant Pot
    • Crock Pot
    • Heavenly Homemaker’s Weekly Menus
  • Homemaking
    • Real Food Sources
  • Store
  • Contact
    • Advertise
    • Disclosure
    • Privacy Policy
  • Simple Meals
  • Club Members!

My Adventures in Making Homemade Nutella

February 24, 2016 by Laura 5 Comments

This post may contain affiliate links. For more information, please see our disclosure policy.

Homemade Nutella, anyone?
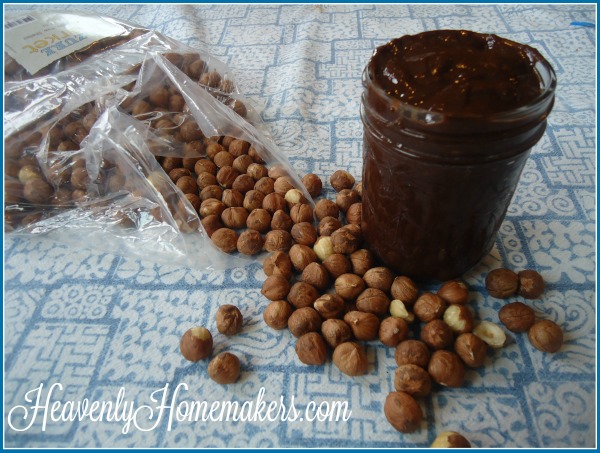
Nutella

It all began at Asa’s graduation party with two other graduates last May. The moms and I planned it together and they decided to go all out. One of the items on our menu was “crusty bread with different topping options” like meats, cheeses, and nutella (though probably not all at the same time). My friends and I set out a lovely buffet. I was the one in charge of purchasing the condiments, sauces, and Nutella.

grad party 4

Not knowing how many hundreds of people might show up and how many of those hundreds would want to spread Nutella on their bread – I bought four enormous containers of it. We went through exactly 1.5 of those huge tubs, so guess what we’ve been eating since May?

My boys have been so sad about this.

We finally finished them off, and now the boys are having Nutella withdrawals. I can’t stand to buy more, so I determined to figure out a healthier option that I can feel better about. Some of you might remember that I attempted Homemade Nutella a few years ago. That was tasty, though still had quite a bit of sugar. I had a terrible time actually finding Hazelnuts this go around – but part of my problem was that the price was throwing me off.

The good news is (now that I’ve attempted this recipe and learned a few tricks) – it takes only a few hazelnuts to make a batch of nutella. So my purchase will go a long way to providing a healthier nutella option for the fam.
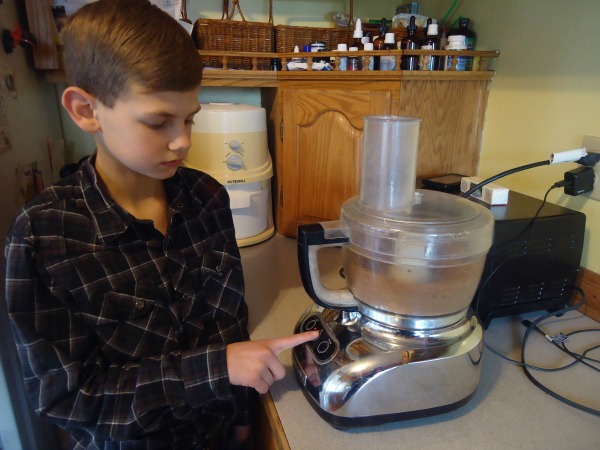
nutella2

Malachi’s been my chef-in-training the past few weeks and was very excited to enjoy Nutella again. He joined me in putting together this recipe. Here he is pushing a button. (Cooking is so hard.)

I’m excited that this version of Homemade Nutella is lower in sugar than most. If you prefer, use expeller pressed coconut oil since it is flavorless and won’t effect the taste.

Make Your Own Nutella

My Adventures in Making Homemade Nutella
 
Save Print
Author: Laura
Serves: half pint
Ingredients
  • ⅔ cup hazelnuts
  • ¼ teaspoon sea salt
  • ½ cup cocoa powder
  • ½ cup melted coconut oil
  • ½-2/3 cup real maple syrup
Instructions
  1. Lay the hazelnuts on a cookie sheet and toast them in a 350° oven for about 10 minutes.
  2. Remove skins if necessary.
  3. Whirl toasted hazelnuts in a food processor until smooth.
  4. Add remaining ingredients and blend until creamy.
  5. Store in a half-pint jar for up to three weeks.

3.4.3177

Make Your Own Nutella

Have you tried making Nutella before?

It’s fun, easy, and yummy – and unlike Homemade Peanut Butter Captain Crunch – this one is worth the small time investment. :)

Heavenly Homemaker's Club Members: Access your homepage and all your fantastic resources here! Not a member yet? Please join us!

The Time I Made “Peanut Butter Captain Crunch” But Couldn’t Decide If It Was Worth It

February 23, 2016 by Laura 25 Comments

This post may contain affiliate links. For more information, please see our disclosure policy.

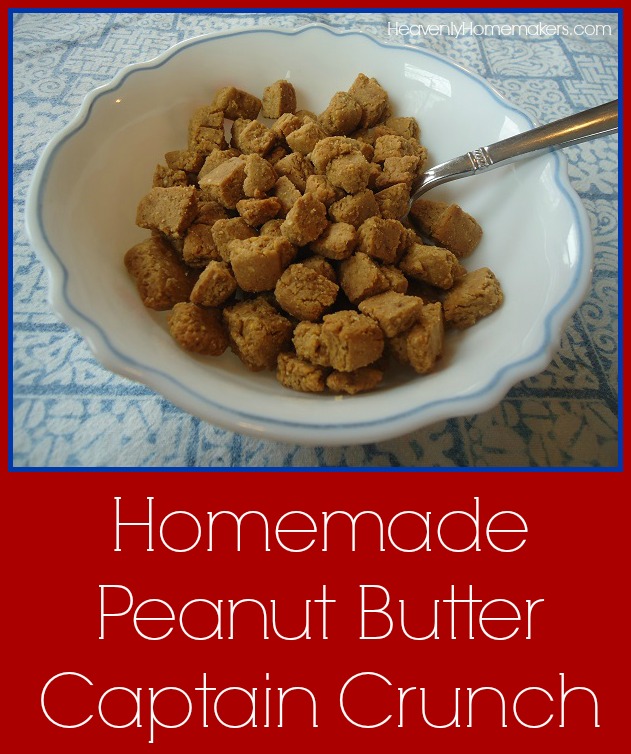
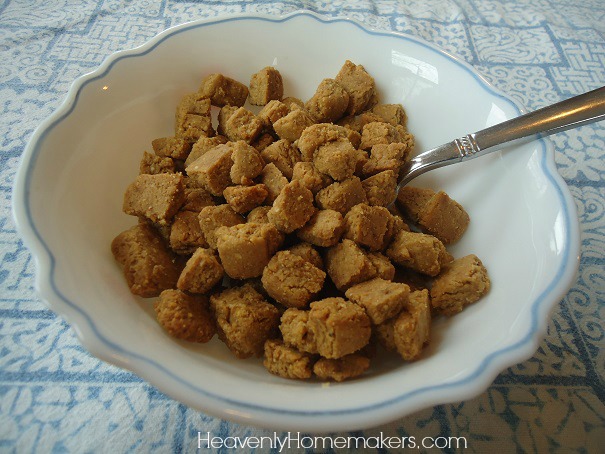
This is what Homemade Peanut Butter Captain Crunch looks like:

Captain Crunch

I’m your friend that loves real food and home cooking but can’t stand it when a recipe is high maintenance. You’ve watched me pare down my “from scratch” cooking methods through the years.

  • Cutting in butter? I don’t think so.
  • Knead bread? Why – when I can do this?
  • 5-minute granola on the stove-top? Uh-huh.
  • Tedious side dishes? Pretty much never.
  • Freezer meals in minutes? Absolutely, yes.

So why I decided to attempt making Homemade Peanut Butter Captain Crunch, I do not know.

Wait. Yes, I do know. That was my very favorite cereal as a kid. Of course, we never had it in our house. We only had the “healthy” kinds of cereal like Rice Krispies, Corn Flakes, and Cheerios. But when I went to my cousin’s house? They always had Peanut Butter Cap’n Crunch!! I decided I’d never tasted anything so amazing.

This is why, when I ran across this recipe yesterday, I got all giddy and excited. I determined to make it with the ingredients I had on hand and cut down the sugar and see what happened.

Well, I tell ya – it’s good. It’s obviously not the same as what you pour out of a box. It’s not nearly as sweet the way I made it – though lightly sweetened is good enough for me. The fact that there is real, natural peanut butter in these is nice for a punch of protein. And the little cereal bits really are crunchy – which means you can pour actual milk over them and eat them like actual cereal and pretend you are a kid at your cousin’s house again. (Thank you Uncle Howard and Aunt Ruth for providing this fun memory from childhood!)

The draw back? Well, this is not a quick stir-pour-bake recipe. I’m not sure it’s really worth it for me to stand in the kitchen for over an hour making one box worth of cereal that we consume in one meal. I probably won’t make this very often – but if I ever get a hankering for Peanut Butter Captain Crunch, the recipe is here. Sometimes it’s worth going to the trouble.

Homemade Peanut Butter Captain Crunch

adapted from this recipe

5.0 from 2 reviews
"Peanut Butter Captain Crunch"
 
Save Print
Author: Laura
Serves: 8-10 cups
Ingredients
  • 1⅔ cup natural peanut butter
  • ¼ cup butter
  • 2 Tablespoons coconut oil
  • ½ cup brown sugar or sucanat
  • ½ cup milk
  • 1 teaspoon sea salt
  • 1 teaspoon vanilla extract
  • 1½ teaspoons baking soda
  • 3-4 cups flour (+ -) any combination of oat, wheat, or corn flour
Instructions
  1. Melt peanut butter, butter, and coconut oil together on the stovetop.
  2. Measure sugar or sucanat into a large bowl.
  3. Pour melted peanut butter mixture over the sugar and stir.
  4. Add milk, salt, vanilla, and baking soda, stirring well.
  5. Slowly stir in flour until dough becomes stiff enough to roll out.
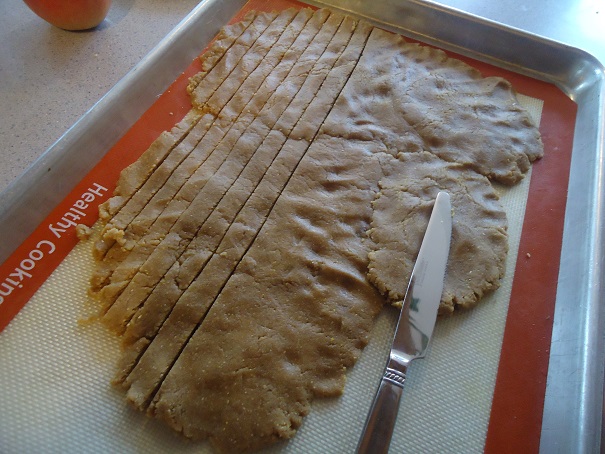
  6. Press or roll dough into a cookie sheet until it is about ¼-inch.
  7. Use a butter knife to cut thin strips about ¼-inch wide.
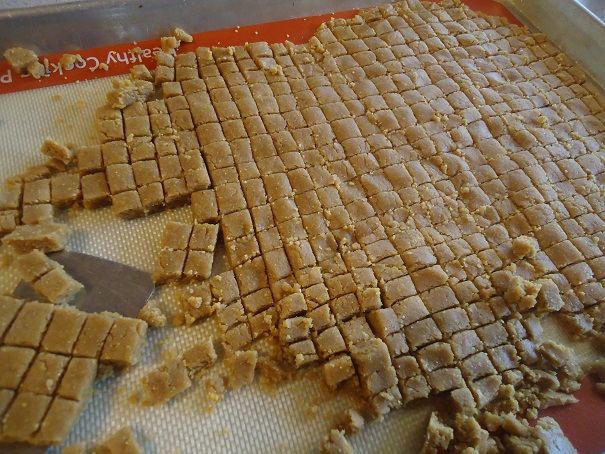
  8. Turn dough and cut strips again the same size to form tiny squares.
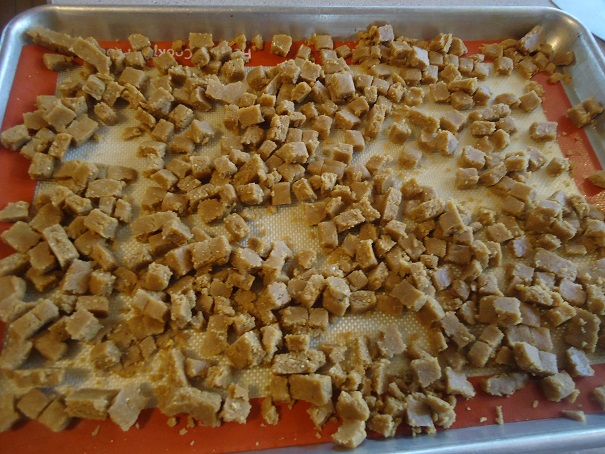
  9. Separate the pieces so they will bake more evenly.
  10. Bake in a 325° oven for 15-20 minutes, stirring half-way through.
  11. Pieces will become crispier once they come out of the oven.
3.4.3177

capn1

capn2

capn3

Homemade Peanut Butter Captain Crunch

You’ll definitely want to check out my homemade peanut butter, which makes everything better (unless you’re allergic to peanuts).

What do you think? Do you love Peanut Butter Captain Crunch enough to think this is worth the effort? It IS yummy! It’s even hearty and great for a snack.

Heavenly Homemaker's Club Members: Access your homepage and all your fantastic resources here! Not a member yet? Please join us!

Simple Taco Soup

February 9, 2016 by Laura 1 Comment

This post may contain affiliate links. For more information, please see our disclosure policy.

taco soup 1

I can’t get a good picture of this soup. This is so easy to make and it’s amazing to eat and the picture looks like eh, whatever. So just glance over the picture and know that you need to make this soup.

Here’s my happy little soup secret: This Taco Soup is made with none other than this Real Food “Velveeta” and Rotel Recipe. See, you make that recipe and you double or triple it because it just makes sense because it is so delicious. You eat it with chips, or you boil some pasta and make it into Spicy Mac and Cheese. Or if you’re feeling soupy, you stir in some chicken or beef broth and top it with crunched chips. It becomes Taco Soup and you love it so much you can’t even stand it. Or maybe it’s just me.

Simple Taco Soup

Simple Taco Soup
 
Save Print
Author: Laura
Serves: 6-8
Ingredients
  • 1 pound hamburger meat
  • 2-4 Tablespoons butter
  • 2 heaping Tablespoons corn starch
  • 1 cup water
  • 1 teaspoon chili powder
  • sea salt to taste
  • 2 cups heavy cream
  • 10-ounce can diced tomatoes with green chilies (Rotel)
  • 1-2 cups shredded cheddar or colby jack cheese
  • 2-3 cups chicken or beef broth
Instructions
  1. Brown the hamburger meat in a large pot.
  2. Add butter to the meat, melting it throughout the pot.
  3. Sprinkle in corn starch, coating the meat.
  4. Pour in water, chili powder, and salt.
  5. Turn heat up and stir until the mixture thickens.
  6. Add cream, continuing to stir as the mixture thickens. (This all happens quickly in my experience.)
  7. Stir in Rotel and broth, heating for about 5 more minutes.
  8. Remove from heat.
  9. Add shredded cheese, stirring until the cheese has melted and the dip is smooth.
  10. Serve with tortilla chips.
3.4.3177

I know I’ve said it before, but I really, really love making triple batches of Real Food “Velveeta” and Rotel. It’s super easy and it is so versatile! Every few weeks I make it and store it in my fridge to pull out for easy meals. Now we use it to make soup too!

Here are some pictures of your options to entice you:

Real Food “Velveeta” and Rotel, served as a dip:

Real Food Velveeta and Rotel Dip

The very same dip, stirred into boiled pasta and served as Spicy Mac and Cheese: 

Spicy Mac and Cheese

Same dip again, with broth stirred in, served as Taco Soup:

Simple Taco Soup

Do you see why I make big batches of this?? 

If you’d like to take a look at my favorite way to make nourishing broth for soups like this, check out this post:

How I Make Veggie-Packed Chicken Broth and Beef Broth

Have you made the Real Food “Velveeta” and Rotel recipe? What’s your favorite way to eat it?

Heavenly Homemaker's Club Members: Access your homepage and all your fantastic resources here! Not a member yet? Please join us!

Real Food Bacon Ranch Chip Dip

February 4, 2016 by Laura 7 Comments

This post may contain affiliate links. For more information, please see our disclosure policy.

Bacon Ranch Chip Dip

I was looking through Pricematerz.com this week to see what produce I could get for great prices, and what do I see? Oodles of sale prices for chips, frozen pizza, and crackers. It must be Super Bowl Week.

I’d forgotten all about it. For us right now it’s Blizzard Week, and we are in preparation for Youth Rally Weekend (where our church hosts 120+ teens for a fun and spiritually encouraging weekend). Therefore, I’m very much out of football mode. This is not such a shocker, since I’m always out of football mode and don’t even know who’s playing this weekend. Denver? And some other team? Forgive me.

Now that I’m (only barely) caught up on what most Americans are thinking about this week, I’ve decided to share a new chip dip recipe in case you want to make this for your Super Bowl party. It includes bacon, sour cream, cream cheese, ranch dressing mix, and shredded cheese – so you know that means it is delicious. Since the recipe is coming from me – so you know that means it is easy.

Our family tested it with corn chips, potato chips, and baked tortilla chips. We all preferred a different chip – which basically means that anything goes.

Why do we have so many chips on hand? Oh my goodness, you do not want to see my stash of chips right now. It has just a little something to do with my preparations for Youth Rally Weekend where somewhere between 15-20 teenage boys will be staying at our house from Friday-Sunday. They’ll eat their meals at the church building, but it’s so weird that they are all hungry again when they come back here for the night. It’s like they’re normal or something.

For this dip recipe, you’ll need this Homemade Ranch Dressing Mix recipe. Make it by the jar-full because that mix is what makes the world go ’round.

Real Food Bacon Ranch Chip Dip

Real Food Bacon Ranch Chip Dip
 
Save Print
Author: Laura
Serves: 10
Ingredients
  • 1 pound bacon
  • 8 ounces softened cream cheese
  • 3 Tablespoons homemade ranch dressing mix
  • 2 cups shredded cheese (I used colby jack)
  • 2 cups sour cream
Instructions
  1. Cut bacon into ½-inch strips.
  2. Cook the bacon to your liking, then drain.
  3. Stir cooked bacon into a bowl with all other ingredients.
  4. Spread mixture into a 2-quart baking dish.
  5. Bake in a 400° oven for 20-25 minutes or until dip is bubbly and hot.
  6. Serve with corn chips, potato chips, or baked tortilla chips.
3.4.3177

Easy Real Food Bacon Ranch Chip Dip

Are you in Super Bowl Week mode? Or Blizzard Week mode? Or Something Else Week mode? Or all/none/some of the above?

Heavenly Homemaker's Club Members: Access your homepage and all your fantastic resources here! Not a member yet? Please join us!

Easy Low Sugar Orange Melt-Away Cookies

February 2, 2016 by Laura 24 Comments

This post may contain affiliate links. For more information, please see our disclosure policy.

orange sugar cookies

In case by now you’re wondering if I’m obsessed with creating these Low Sugar Melt-Away Cookie varieties, the answer is obvious that of course I am obsessed. After two attempts at creating this here orange flavored variety, I have definitely decided that of all the flavors – orange is my new favorite.

Why two attempts, you ask? Oh well. I just burned the first batch, that’s all. Guys, it is so weird what happens to cookies when you put them in the oven, walk away, and then forget that there is actual life going on outside your office door. So weird. Someone should have warned me about this. We can’t even leave cookies unattended in a 350° oven for 27 minutes. Did you know that???

Set a timer much, Laura?

You know what? Just…I know, okay? I should have set a timer. I used to have one of those clicky, clicky, clicky timers but it got dropped four too many times so its spinner stopped spinning. Then Matt got me a digital timer that was persnickety and sometimes decided to shut itself off because it was selfish and couldn’t care less about the company coming over to eat in exactly 52 minutes. After a few months of this behavior, I declared it to be faulty and went to the store to purchase another one just like it. It, however, had the same exact issues as its brother and that is what tipped me off that maybe that brand couldn’t be trusted.

After that, I decided I could just use the timer app on my phone. This is a great idea except that it takes so many difficult and tedious steps to get to the point of actually setting the timer (find phone, turn phone on, unlock screen, find timer app, open timer app, think about how much time has elapsed since I started this whole process so I can figure out how long to set the timer at this point, so on and so forth). Also, I really hate to touch my phone when I have egg white on my fingers.

I think you can all see now how challenging it has been to accurately time my baked goods. I have mostly resorted to trusting my nose to be my timer. Typically, cookies and casseroles smell “just right” when they are ready to come out of the oven. What more do I need?

Oh yeah, just someone to remind me that I am actually baking cookies in the first place.

So the first batch burned. They were edible, just really, really crispy and not at all picture worthy. Over the weekend, I tried again. Oh my goodness, I will (go to the trouble to) set a timer from now on. It is worth it to pull the perfect cookies out of the oven when they are perfectly perfect in every way.

Easy Low Sugar Orange Melt-Away Cookies

Easy Low Sugar Orange Melt-Away Cookies
 
Save Print
Author: Laura
Serves: 24
Ingredients
  • 1 cup melted butter
  • ½ cup sucanat or raw sugar
  • 2 eggs
  • 1 teaspoon vanilla extract
  • The juice of one medium-sized orange
  • grated orange rind
  • 1 teaspoon baking powder
  • 3 cups of whole wheat pastry flour (give or take)
Instructions
  1. Stir together melted butter and sugar.
  2. Add eggs, vanilla, orange juice, and baking powder.
  3. Grate orange rind into the mix for extra flavor.
  4. Stir in flour until a solid ball of dough forms.
  5. Drop teaspoon-sized balls of dough onto a cookie sheet, about an inch apart.
  6. Bake in a 350° oven for 10-12 minutes or until cookies are lightly browned.
3.4.3177

grate orange rind

In other scatterbrained related news – the second time I made these cookies, I was talking to a friend and didn’t realize until later (like 9 hours later) that I hadn’t put eggs into the mixing bowl. These still turned out to be my favorite cookies. So eggs in this recipe? Take ’em or leave ’em. These turn out fine either way. This is further proof that I can’t talk and cook at the same time. Like you needed more proof.

Low Sugar Orange Melt-Away Cookies

Want to try the other varieties of these cookies?

  • Easy {Low} Sugar Cookies
  • Low Sugar Lemon Melt-Away Cookies
  • Low Sugar Almond Melt-Away Cookies

Hey, just curious. What kind of timer do you use??

~~~~~~~~~~~~~~~~~~~~~~~~~~~~~~~

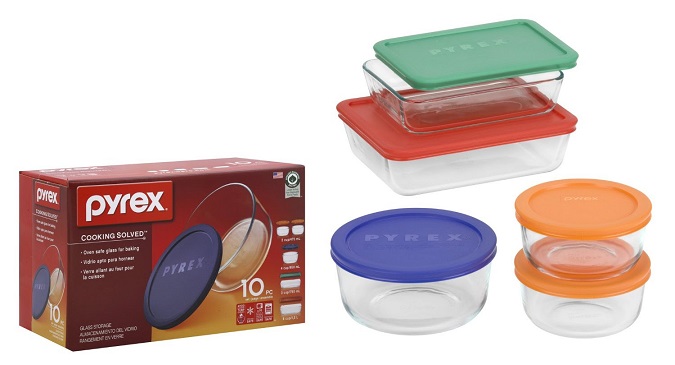
Pyrex Storage Set Deal Alert!!

Christine emailed to tell me of this great deal on a 10-Piece Pyrex Storage Set. Get the entire set right now for just $12.63. No guarantees on how long this price will last. I have these, love them, and use them all the time!!

pyrex

Heavenly Homemaker's Club Members: Access your homepage and all your fantastic resources here! Not a member yet? Please join us!

Simple No-Bake Granola Bar Bites

January 27, 2016 by Laura 9 Comments

This post may contain affiliate links. For more information, please see our disclosure policy.

No-Bake Granola Bites
This is a non-recipe recipe. This means that you can sub out ingredient for ingredient as you have preferences, allergies, and stock piles. Love flax seeds? Throw ’em in. Can’t have peanut butter? Use the nut butter you like. Prefer maple syrup? Use it instead of honey. Running low on raisins? Oh well. Don’t like chocolate chips?

Wait. Who doesn’t like chocolate chips??

Here’s how this non-recipe works:

  1. Plop 1/2 cup peanut butter (or whatever butter) and 1/4 cup honey (or maple syrup) into a bowl. I really do mean plop. Just eye-ball it. An exact 1/2 cup of peanut butter is not necessary here.
  2. Stir in 1 1/3 cups total of whatever dry ingredients you want. Oats, flax, sunflower seeds, sesame seeds, raisins, chocolate chips, anything else you like.
  3. Scoop the mixture into balls and enjoy.
  4. Store them in the refrigerator.

Here’s the printable version:

Simple No-Bake Granola Bar BitesYum

5.0 from 3 reviews
Simple No-Bake Granola Bar Bites
 
Save Print
Author: Laura
Serves: 16
Ingredients
  • ½ cup peanut butter (or any nut butter)
  • ¼ cup honey (or maple syrup)
  • 1⅓ cups total dry ingredients of your choice (oats, flax, seeds, raisins, chocolate chips)
Instructions
  1. Plop ½ cup peanut butter (or whatever butter) and ¼ cup honey (or maple syrup) into a bowl.
  2. Stir in 1⅓ total cups of whatever dry ingredients you want. Oats, flax, sunflower seeds, sesame seeds, raisins, chocolate chips, anything else you want.
  3. Scoop the mixture into balls and enjoy.
  4. Store them in the refrigerator.
3.4.3177

Simple No-Bake Granola Bar Bites

As you can see, these Granola Bites are easy to put together in just a few minutes. They are great to take on the road or pack in a lunch. Of course, if you just want to sit right down at your kitchen table and eat them, that’s okay too. You could even make them at night and eat them for breakfast the next morning. Basically, this is one of the most versatile recipes in your whole wide kitchen. Everyone wins!

Heavenly Homemaker's Club Members: Access your homepage and all your fantastic resources here! Not a member yet? Please join us!

5-Ingredient Sour Cream Drop Biscuits

January 25, 2016 by Laura 10 Comments

This post may contain affiliate links. For more information, please see our disclosure policy.

Sour Cream Drop Biscuit

My friend Emily is the one who told me about these Sour Cream Drop Biscuits as we stood in the church foyer solving all the world’s problems and talking about recipes. (The two go hand in hand.) She told me these included only four ingredients and that sour cream was one. “Let me guess then,” I said. “Sour cream, flour, baking powder, and salt?” Yep! With some butter drizzled in for flavor.

Well, yeah. Of course. Butter. Butter drizzled in for flavor, and a large pat of butter melted onto both halves of the biscuit immediately following their removal from the oven.

She promised to send me the recipe, and I was planning to wait patiently. But the next morning, all I could think of was how much I wanted a Sour Cream Biscuit. Surely I could figure out the correct proportions of the ingredients in these biscuits. So I got out the goods and experimented. How hard could it be?

Not hard. (Would I be sharing these with you if they were?)

The trick is that you’re going to need to get your hands messy. The ingredients get tossed in a bowl all together, then you can begin to stir. After a short while, the stirring spoon will likely be thrown into the sink and your hands become your greatest kitchen tool. Mix and squish, friends. Mix and squish.

Since your hands are already messy, use them to pull out bits of dough (whatever size you want your biscuits). Roll the dough in your hands and press the ball down gently onto a baking sheet. This is so much easier than rolling and cutting and cleaning up the mess afterward. I mean, you will have to wash your hands.

5-Ingredient Sour Cream Drop BiscuitsYum

2.0 from 1 reviews
5-Ingredient Sour Cream Drop Biscuits
 
Save Print
Author: Laura
Serves: 12
Ingredients
  • 3 cups whole wheat flour (I use freshly ground hard white wheat)
  • 1 teaspoon sea salt
  • 1 teaspoon baking powder
  • 3 Tablespoons melted butter
  • 2 cups sour cream
Instructions
  1. Stir together flour, baking powder, and salt.
  2. Mix in sour cream and melted butter.
  3. You may need to use your hands to get the ingredients mixed thoroughly.
  4. Roll dough into balls with your hands, then flatten slightly and place them side by side on a baking sheet.
  5. Bake at 450° for 12-15 minutes or until golden brown.
  6. Serve with butter, honey, jelly, or gravy.
3.4.3177

Please don’t ask if you can sub buttermilk for the sour cream. There are plenty of Buttermilk Biscuit recipes out there. But these are Sour Cream Biscuits, so subbing another dairy or non-dairy item would make them a Not Sour Cream Biscuit.

5 Ingredient Sour Cream Drop Biscuits

Tall and Fluffy Biscuit Tip:

Put your biscuits onto the baking sheet side by side – rubbing shoulders, getting cozy. This way they have no choice but to bake up, not out. See, biscuits need their friends to come along side them to help them grow. This is, of course, a perfect and wonderful analogy to help you and I see our need for friends to come alongside us to build us up. Thank you, Fluffy Biscuit Tip.

Ever tried stirring sour cream into your biscuits?

Heavenly Homemaker's Club Members: Access your homepage and all your fantastic resources here! Not a member yet? Please join us!

Easy Cheesy Cauliflower Hashbrowns

January 22, 2016 by Laura Leave a Comment

This post may contain affiliate links. For more information, please see our disclosure policy.

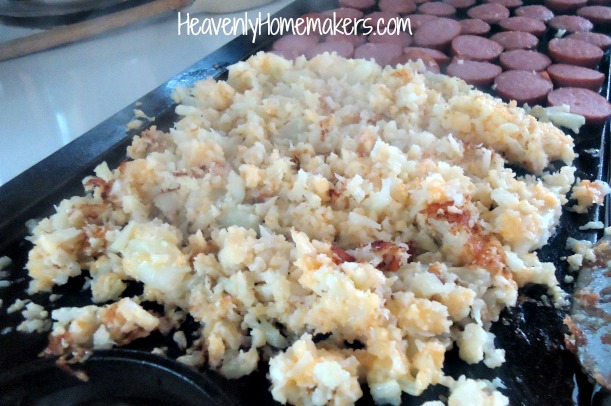
cauliflower hashbrowns

Let me just say that it’s hard (for me) to take a good picture of hashbrowns while they are steaming on a griddle.

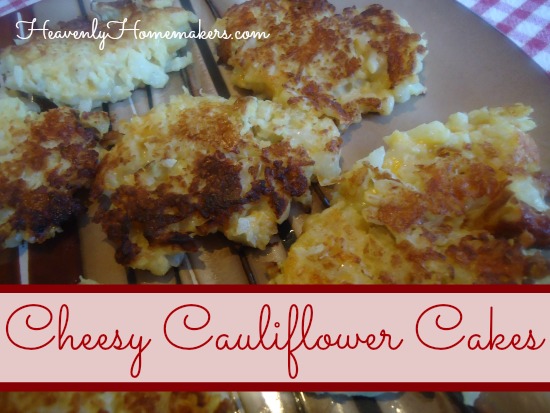
Below is a picture of the original recipe for these hashbrowns. I worked a little harder, added a few extra ingredients, and made them into Cheesy Cauliflower Cakes. My family loves them and the recipe makes us actually like cauliflower.

Cheesy Cauliflower Cakes

This is all well and good, except that:

  • the cakes don’t always stay together
  • they have bread crumbs in them which I don’t always have available
  • the bread crumbs mean I can’t serve them to anyone who can’t have gluten
  • making them into cakes is one more step in the cooking process

I act like that’s a huge ordeal. It’s not. But I wanted you to know that you can cut out a few ingredients (eggs and bread crumbs), then pour the entire mixture onto a griddle or skillet and fry them like hashbrowns. They taste the same if you ask me, and they are easier!

Cheesy Cauliflower HashbrownsYum

Easy Cheesy Cauliflower Hashbrowns
 
Save Print
Author: Laura
Serves: 4-6
Ingredients
  • 1 head cauliflower
  • ¾ cup shredded cheddar or Colby jack cheese
  • 2 Tablespoons dried minced onions
  • ½ teaspoon sea salt
  • Palm shortening or expeller pressed coconut oil for frying
Instructions
  1. Cut cauliflower into florets.
  2. Steam for about 10 minutes or until tender.
  3. Drain.
  4. Mash with a potato masher. (I found that this created what looked like shredded potatoes.)
  5. Stir in shredded cheese, minced onions, and salt until well combined.
  6. Melt 1-2 Tablespoons of palm shortening or coconut oil in a skillet or on a griddle.
  7. Pour cauliflower mixture into hot oil.
  8. Fry over medium heat until brown and crispy – about 5 minutes on each side.
  9. Serve right away.
3.4.3177


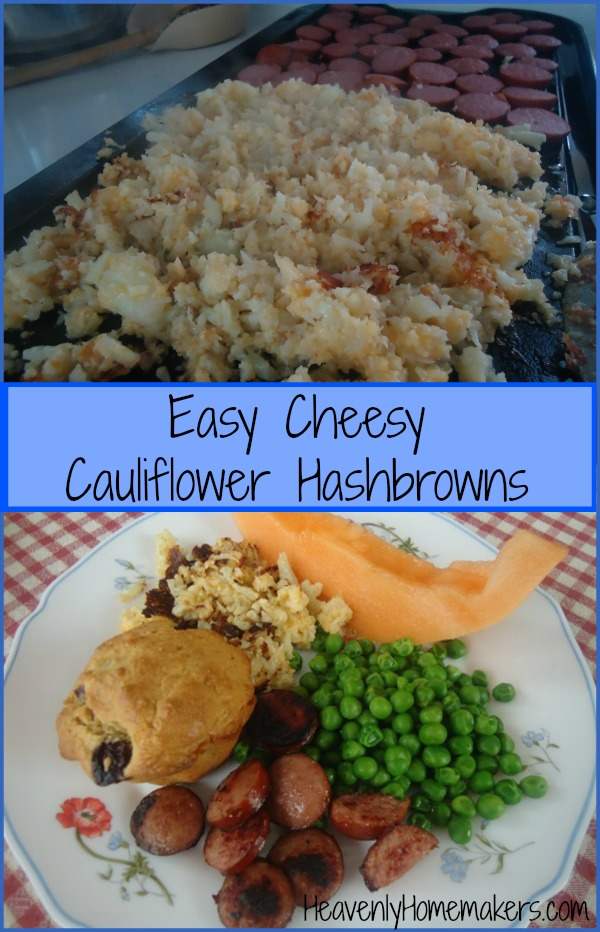
Easy Cheesy Cauliflower Hashbrowns

Yesterday when we made these Cheesy Cauliflower Hashbrowns, I served them with cantaloupe, peas, blueberry muffins, and fried turkey sausages. It’s was a super easy – fruit and veggie packed meal. (I keep finding coupons for Oscar Mayer preservative-free, uncured turkey sausage. We’re loving it for quick additions to our meals!)

Have you tried the Cheesy Cauliflower Cakes recipe I shared a few months ago? Try this hashbrown variety. It’s even easier!

Heavenly Homemaker's Club Members: Access your homepage and all your fantastic resources here! Not a member yet? Please join us!

Easy Low Sugar Almond Melt-Away Cookies

January 18, 2016 by Laura 19 Comments

This post may contain affiliate links. For more information, please see our disclosure policy.

This Almond Melt-Away Cookies recipe is a direct result of me sharing my Low Sugar Lemon Melt-Away Cookies and several of you saying, “Sounds good! I think almond extract would be a great idea to try in these cookies too!”

Easy Almond Cookies

Thanksgiving and Christmas happened in the meantime – so three months later, it took me five minutes to try your idea. No sense rushing into anything. 

I was also waiting to see how my attempt at Homemade Almond Extract would turn out. What a bummer. Making Homemade Vanilla Extract is a total no-brainer so I was hoping almond extract would be the same. I soaked the nuts in vodka as recommended by several sites, then I even simmered off some of the alcohol – but it didn’t turn out extract like I’m used to using. Then I looked at the ingredients on my purchased extract and there is “almond oil” included. Is that what gives my purchased extract the yummy smell and flavor? If any of you have successfully made Almond Extract, will you please share all your secrets?!

In the meantime, taking my basic Easy {Low} Sugar Cookie recipe and adding different flavors has been super simple and yummy. Here’s a quick link list for you:

  • Easy {Low} Sugar Cookies
  • Low Sugar Lemon Melt-Away Cookies
  • Low Sugar Orange Melt-Away Cookies
  • Low Sugar Lime Melt-Away Cookies
  • And now these…

Low Sugar Almond Melt-Away Cookies

Yum

Easy Low Sugar Almond Melt-Away Cookies
 
Save Print
Author: Laura
Serves: 24
Ingredients
  • 1 cup melted butter
  • ½ cup sucanat or raw sugar
  • 2 eggs
  • 1 teaspoon vanilla extract
  • 2 teaspoons almond extract
  • 1 teaspoon baking powder
  • 3 cups of whole wheat pastry flour (give or take)
Instructions
  1. Stir together melted butter and sugar.
  2. Add eggs, extracts, and baking powder.
  3. Stir in flour until a solid ball of dough forms.
  4. Drop teaspoon-sized balls of dough onto a cookie sheet, about an inch apart.
  5. Bake in a 350° oven for 10-12 minutes or until cookies are lightly browned.
3.4.3177

Low Sugar Almond Melt-Away Cookies

I learned on accident that you can forget the eggs in these cookie recipes and while they are a bit more crumbly, they are still great! Just a little bonus for those of you who have to avoid eggs.

I love it when I can cut the sugar so drastically in a recipe and my kids can’t tell a difference. These are perfectly sweetened and the almond extract makes them taste fancy with no additional effort!

I should also mention that these lightly sweetened cookies taste amazing with a steamy cup of coffee or a cold glass of milk. Ah, life’s simple pleasures. :)

I’d love any other flavor suggestions to try with these cookies. And if you’re an almond extract maker, please tell me how you do it!!

Heavenly Homemaker's Club Members: Access your homepage and all your fantastic resources here! Not a member yet? Please join us!

My New Year’s Resolution to Stop Making Breakfast

January 5, 2016 by Laura 16 Comments

This post may contain affiliate links. For more information, please see our disclosure policy.

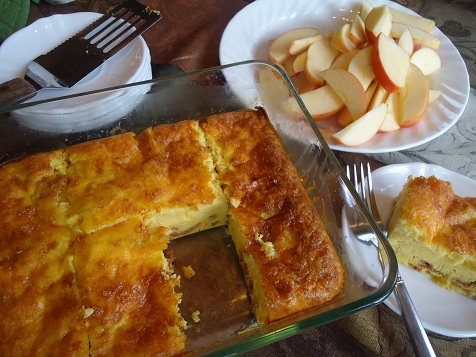
egg_casserole_meal
For all of my (18+) parenting years I have been making breakfast for our family. Cereal has been a rarity, saved only for the “I can’t even” mornings. Big breakfasts for our family have been necessary and good for the following reasons:

  • Our growing boys need to eat something substantial to keep them full until lunchtime.
  • Fixing one big breakfast for everyone has been easiest up until now.
  • Eating our meal together has been a special time as we begin our days together with yummy food and Bible time.

I’ve always been a careful planner, adding a breakfast plan into our overall meal plans for the week. I’ve worked to make breakfast foods the night before to make the mornings simpler. This has all been working well for years and years. It’s been working so well, in fact, that it has been a part of our nightly routine for the boys to ask in anticipation, “What’s for breakfast tomorrow?!”

The past few months, however, I’ve been growing a bit burned-out on breakfast prep. Our days are constantly full, our evenings are super busy, and lately when the boys have asked the nightly question, “What’s for breakfast tomorrow?” I’ve had an unseemly urge to grunt loudly and throw a pillow at them. Sweet, huh? Bet you wish I was your mom.

Breakfast? I am so over it. Ask me again in a few years when my daily life-with-teenagers schedule demands aren’t so…demanding. Of course, by then there will be fewer people here to feed in the mornings and I’ll not know how to make less than a triple batch of waffles. So basically I’ll be having breakfast issues for the rest of my life.

It’s Time for a ChangeYum

I am giving in to a new way of doing breakfast around here. My morning God time before all the boys get up is so dear to me and basically necessary to my family’s survival – even more than food. This mom needs her quiet chair time in which she spends time seeking Jesus while drinking coffee and soaking in the Word. My sanity depends on it, so I think we can all agree that staying in the chair for as long as possible each morning is much more important than baking muffins.

Instead of cutting into my sleep (no, no, no, no, no!) or my God time (we’ve been through this already) I’m checking breakfast off my to-do list. I’m not done eating this meal, mind you. We will all continue to eat breakfast. I’m just done regularly cooking big breakfasts for everyone on a regular basis. Deciding this has been a pleasantly nice relief. I didn’t even know it was bothering me that much. (The urge to throw pillows woke me up to the truth.)

The New Breakfast Plan

We still need to eat breakfast. We still want to eat this meal as a family. We still want to have our family Bible time together first thing in the mornings. But from now on, the boys will figure out their own breakfasts (except for the rare occasion I find my sanity at an earlier hour and surprise them with French toast).

Remember how I told you that teaching your kids to cook when they are young (or old) comes back to bless you one hundred fold when they are older? This is one of those glorious times. My boys are so capable! They can all prepare a simple breakfast for themselves each morning. Then we can all sit down together as normal and instead of starting my day overwhelmed, I’ll sit down with everyone and enjoy our morning devotional.

Breakfast Food Options

There will almost always be eggs and fruit for the boys to start with as they figure out their breakfast plan each morning. They can all scramble or fry eggs. Here are other options that will be available (though not always at the same time):

  • Stir-n-Pour Bread

    Because this bread is so easy to make, we frequently have some hanging out and ready to eat. It toasts up nicely and makes a tasty part of breakfast.stir and pour bread loaf 5
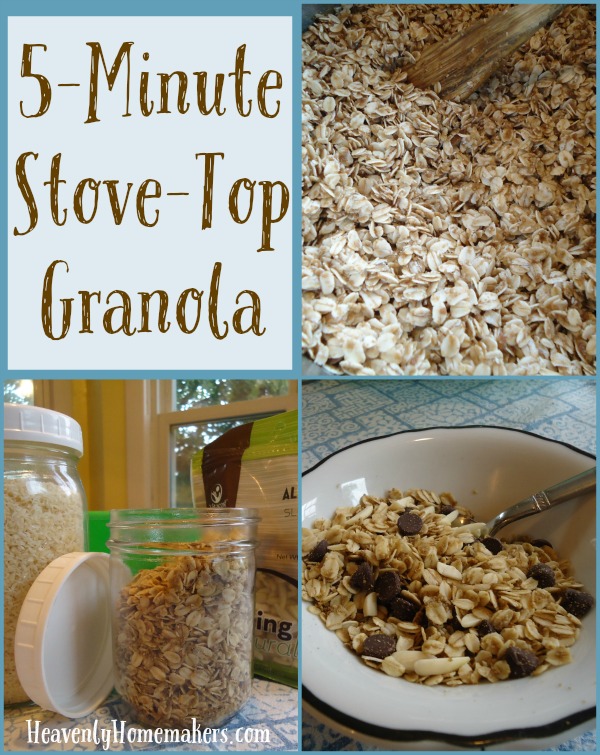
  • Granola ~ 5-Minute Stove-Top Version
    I can easily whip up a batch of this or have one of the boys do it. It keeps for quite a while too, so making huge batches is a good idea – then we have it for breakfast options for a few weeks.5-Minute Stove-Top Granola
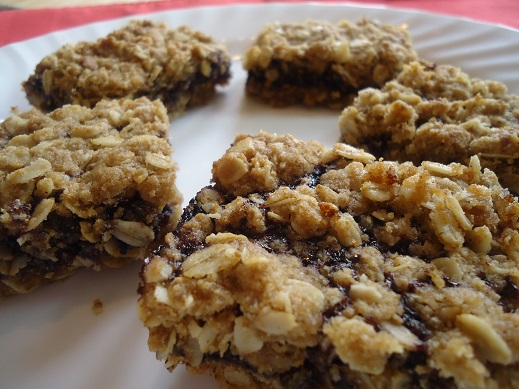
  • Muffins or Bars (loads of recipes here!)If one of us finds ourselves with time the afternoon or night before, we can prep some baked goods to go with breakfast the next day. It is so helpful to have these on hand IF we can squeeze it in.raspberry_bars_8
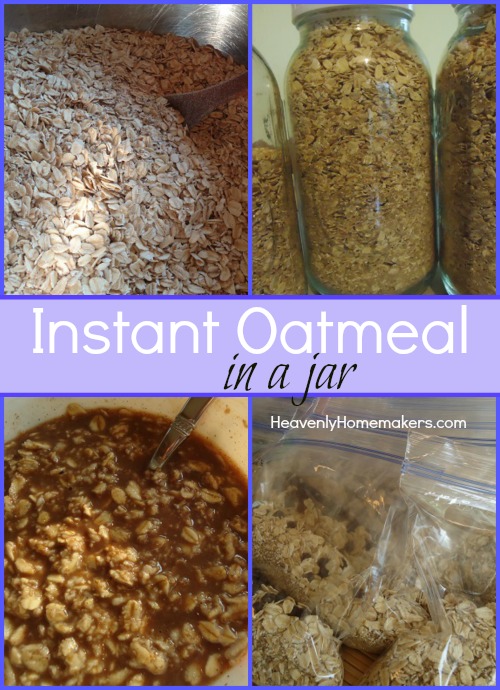
  • Homemade Instant Oatmeal
    I always have a big jarful of instant oatmeal ready for the boys to make for themselves. It is a life-changing recipe. Make some of this if you haven’t already.Instant Oatmeal in a Jar
  • Giant Breakfast CookiesOne of the boys can mix these up and bake them. Then we can keep them in the freezer to pull out as needed.
    breakfast_cookies

Those basic options, along with eggs and fruit will take care of our breakfasts just fine. When I do have time to make pancakes or waffles, I’ll be sure to make extra for the freezer for additional options.

So there you have it. My new breakfast plan for our family. I no longer feel like throwing pillows. Now to figure out a new and improved laundry system…

How do you do breakfast at your house?

Heavenly Homemaker's Club Members: Access your homepage and all your fantastic resources here! Not a member yet? Please join us!
« Previous Page
Next Page »

Join Our Community!

 Facebook Twitter E-mail Instagram Pinterest

Popular Posts

~ Will All of the Real Moms Please Stand Up?
~ Easy! Stir-and-Pour Whole Wheat Bread
~ How to Make Gatorade
~ 31 Real Food Breakfast Ideas
~ Dear Teenage Girls...
~ When Mom Takes a Step Back
~ The Inexpensive Health Insurance We Love!
~ Let's Talk Real Food Grocery Budgets

Check out our latest posts!

  • Big Family Food and Fun: September 6-12, 2026
  • Big Family Food and Fun: August 30-September 5, 2026
  • Big Family Food and Fun: August 23-29, 2026
  • Big Family Food and Fun: August 16-22, 2026
  • Big Family Food and Fun: August 9-15, 2026
Home  ~  Simple Meals  ~  Club Membership  ~  Shop  ~  Privacy Policy  ~  Disclosure  ~ Contact

Copyright © 2026 · Beautiful Pro Theme on Genesis Framework · WordPress · Log in