Heavenly Homemakers

Encouraging women in homemaking, healthy eating and parenting

  • Home
    • About
    • FAQs
  • Recipes
    • Bread and Breakfast
    • Condiments
    • Dairy
    • Main Dishes
    • Side Dishes and Snacks
    • Desserts
    • Gluten Free
    • Instant Pot
    • Crock Pot
    • Heavenly Homemaker’s Weekly Menus
  • Homemaking
    • Real Food Sources
  • Store
  • Contact
    • Advertise
    • Disclosure
    • Privacy Policy
  • Simple Meals
  • Club Members!

The Easiest Cheesecake With The Lowest Amount of Sugar

March 5, 2015 by Laura 12 Comments

This post may contain affiliate links. For more information, please see our disclosure policy.

I push and I push when it comes to eating fruits and veggies. (We call these “freggies,” by the way. I’m determined to get this word into the dictionary. Freggies. Freggies.  Freggies.  Keep saying. Keep writing it. Pass it on. Freggies is a word because we all say so.)

So I highly encourage us to all eat an enormous amount of freggies each day. Our bodies need them and love them. I also encourage us to cut way back on the sugar. Our bodies need us to. Therefore this recipe, and all my recent healthier treat recipes are:

1) Your reward for eating so many freggies.
2) Your opportunity to enjoy a dessert that won’t give you sugar overload.

See, we can have our cake and eat it too. We just need to use wisdom. Sweets are a treat, not a food group.

I encourage you to read:  Breaking Free of Sugar Addiction ~ Should We Be Eating Stevia? for more of my thoughts on this subject. Then, I would like you to file this newest recipe away for the next time you need to make an easy treat to share. It is very low in sugar, but you’ll still be enjoying a rich, delicious treat!

When I posted the recipe for this Chocolate Cheesecake Dessert, several asked, “How can I make this without chocolate?” Ah…very simple. Just leave out the cocoa. And while you’re at it, if you’d like a pumpkin variety of this dessert, you’ll find it here:  Low Sugar Pumpkin Cheesecake
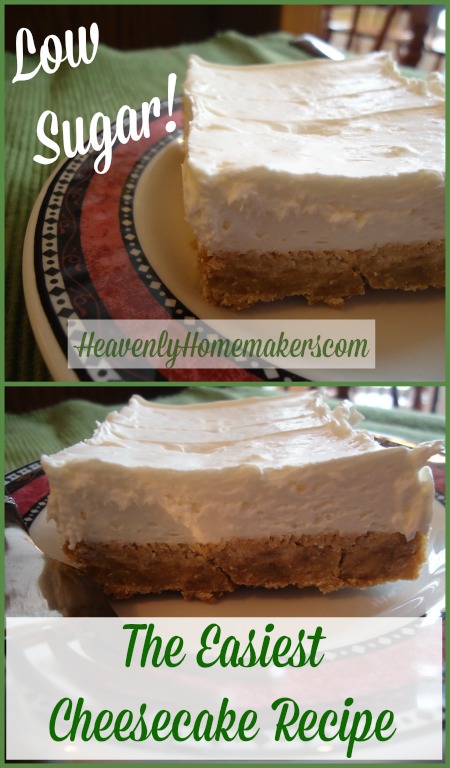
Easiest Cheesecake Recipe

Easy Cheesecake DessertYum

Shortbread Crust:

3 cups whole wheat flour (I use freshly ground hard white wheat for this)
1/2 cup sucanat (or brown sugar if you prefer)
1 1/2 cups melted butter

Stir flour and sucanat together in a bowl. Add melted butter, combining well. Press mixture into a 9×13 inch baking pan. Bake in a 350° oven for 12-15 minutes or until golden brown.

Cheesecake Filling:

2 8-ounce packages cream cheese, softened
1 teaspoon vanilla extract
Liquid stevia to taste (I use 30-40 drops)
2 1/2 cups heavy whipping cream
Baked and cooled Shortbread Crust

Cream together softened cream cheese, vanilla, and stevia. Set aside. Whip cream until soft peaks form. Fold in cream cheese mixture until smooth. (I actually throw all ingredients together in my BlendTec and let it do all the work of whipping and blending at the same time.)  Spread mixture over cooled Shortbread Crust. Cover and chill for about two hours until set. Makes about 18 servings.

So freggies first, low sugar cheesecake second. It’s a win-win.

Which of the cheesecake recipes will be your favorite? The plain, the pumpkin, or the chocolate?

Heavenly Homemaker's Club Members: Access your homepage and all your fantastic resources here! Not a member yet? Please join us!

The Best Mocha You’ll Ever Need

February 22, 2015 by Laura 37 Comments

This post may contain affiliate links. For more information, please see our disclosure policy.

Aside from telling you that I have a mocha recipe for you, I have nothing cute to say. That time of year has hit in which not only is it still winter, it is also still winter.

Yesterday I saw a picture of myself wearing a sun dress and sporting a healthy tan. “Oh, oooh!! Remember that!?” I exclaimed to my husband. “That picture was taken on that really fun day when our family did that really fun stuff because the SUN WAS SHINING and it was HOT OUTSIDE.” He just grinned and handed me another blanket.

I’m thankful for every day and all that. God is good all the time, you can bet on it. If summer never comes, it really is okay because I have Jesus.  Look at me, I’m like Paul. I have learned to be content in any and every situation, whether well fed or hungry, whether living in plenty or in want. Whether I’m freezing or freezing or even if I’m freezing. I can do all things through Christ who gives me strength.

That’s from Philippians chapter 4 in case you want to find more encouragement from that passage, to read it within its context, or maybe to be sure I quoted it accurately. My brain gets a little fuzzy after enduring forty-three months of winter in a row.

I know that really, I have nothing to complain about. I have a roof over my head, a beautiful fireplace, and a husband to pat me on the head and hand me another blanket when I burst into tears over a picture of myself in a sun dress from last summer. I’m very blessed, the sun will shine again, and someday soon but probably not for at least 68 more days – I will be warm. Can we just talk about something else now?

I came up with a little something to help me cope with my issues this afternoon. Some might call it a Mocha. Some might call it a Warm Chocolate Soother with a little coffee stirred in. I’d like to call it the answer to every cold, desperate woman’s need for warmth and sunshine. Not that I really have issues or am what one might call desperate.

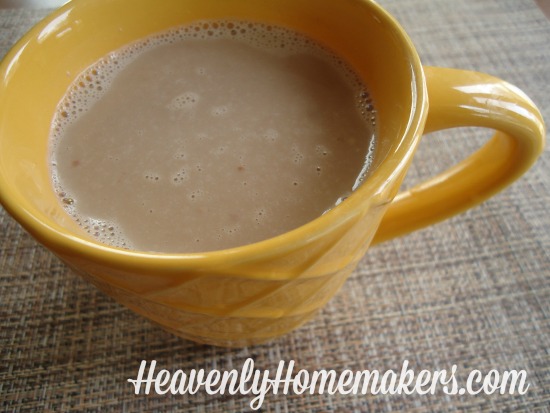
mocha 1

Yum
I just need some sunshine, okay?

So this. This mug of goodness saved the day…

Warm Nourishing Mocha 2

It’s Warm Chocolate Soother mixed with coffee. The idea came from a dear reader, Missy, from South Carolina. She sent me the idea months ago, then I remembered it while huddled beside my space heater this afternoon. Here’s part of her email:

Good morning! It’s a cold, wet, blustery day here in South Carolina. I awoke to the sound of wind and rain hitting my windows. My first thought was to brew a cup of coffee, but then I thought of my 2 boys and wondered what they would like to have warm and yummy. I thought about your Warm Chocolate Soother and knew it would be perfect!
I gathered all the ingredients and set about making the soother. I tweaked the recipe and used half whole milk and half unsweetened almond milk. I love using real food ingredients to make treats for my family. It all came together and I served my boys a mug full. They loved it!
I served myself a cup of chocolate soother and tasted it – yum! Then I remembered that I had wanted a cup of coffee. I decided to mix the two. Oh boy – it was GOOD! I have my coffee and the warm chocolate soother in my mug and I am a happy girl! I know how you have begun enjoying coffee and wanted to share this with you, if you haven’t already discovered this! Thank you for your Warm Chocolate Soother recipe – now to try coffee and Warm Vanilla Soother next! Many blessings for today! :)
Everyone (probably, especially, and mostly my husband) thanks you, Missy, for the fantastic idea. Not only is this drink warm, comforting, and delicious – it is also very nourishing and can double as a filling breakfast or snack.

How to Make a Warm, Nourishing Mocha

Mix 1 cup Warm Chocolate Soother with 1 cup coffee. Or 5 cups Warm Chocolate Soother with 5 cups coffee. Or whatever it takes for you to survive these last few weeks of winter.

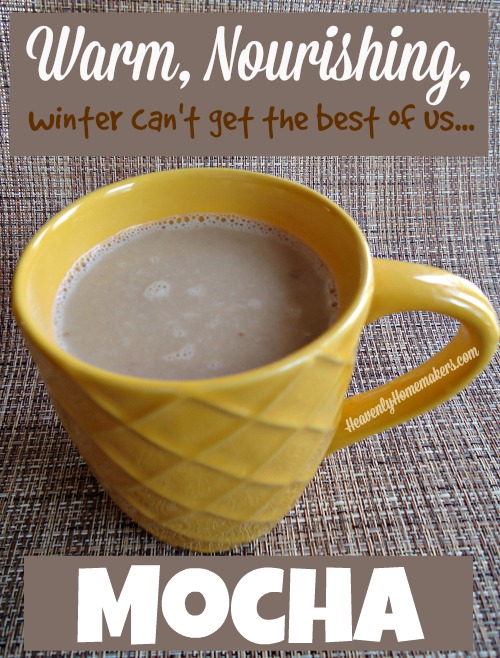
Warm, Nourishing Mocha

You’ll notice that I put my mocha in a bright yellow cup just so that I could pretend I was was drinking from a cup of sunshine. And look. I’m all better now.
mocha 2
Winter won’t get the best of us, friends. We’ve got this!  Now hand me another blanket.

(How’s winter treating you, by the way?)

Heavenly Homemaker's Club Members: Access your homepage and all your fantastic resources here! Not a member yet? Please join us!

How To Make Your Own Frozen Pizza

February 17, 2015 by Laura 14 Comments

This post may contain affiliate links. For more information, please see our disclosure policy.

Remember how busy last Saturday was for me? It was a crazy morning filled with broccoli blanching and valentine pancake making, then basketball gaming the rest of the day. This is why cooking dinner when I got home at 6:45 didn’t sound fun. Plus, you should (not) have seen how messy my kitchen was after the morning insanity when I was running late to serve concessions at the games, so I had to decide between washing dishes and getting dressed in actual clothes that weren’t pajama pants. I chose the latter. Everyone was grateful. But this choice meant that I came home to an exploded kitchen.

If ever there was an excuse to want frozen pizza, this one was it. We all have those times, right? We talked about this just last week. Some of you mentioned wishing you knew how to make your own frozen pizza, then others chimed in about how to do it, and since this has been on my list to tell you about anyway – I decided there was no better time.

So frozen pizza everyone: You can make them yourself. With real ingredients and whole foods, keeping your very own people and their preferences in mind.  With little effort.

And all the mothers everywhere shed a tear.

How to Make Your Own Frozen PizzaYum

1. Mix up your favorite pizza dough. I suggest this very easy Whole Wheat Pizza Crust recipe. I also suggest doubling or tripling or octupling (I was going for 8x there, how’d I do?) the recipe. It just makes sense to create only one mess in order to make several meals worth of pizza for your freezer.

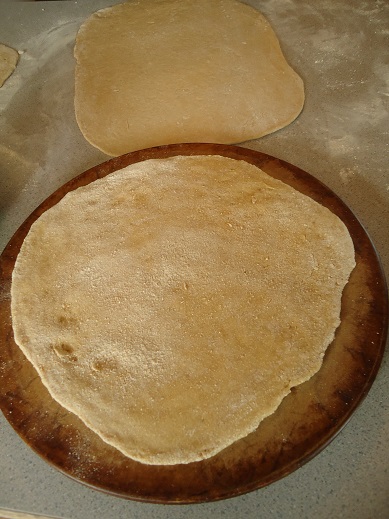
2. Roll out the dough to your desired sizes, thickness, and shapes. Make personal sized crusts, make rectangle crusts to fit your pans, make circle crusts to fit your pans. Make whatever works best for your freezer, your oven, and your family.

frozen pizza 1

Life is too short to roll dough perfectly.

3. Bake each crust in a 375° oven for 5 minutes (assuming you are using this crust recipe), then remove them from the oven. They will be only lightly baked at this point – just done enough to be perfect for preparing your pizza for the freezer.

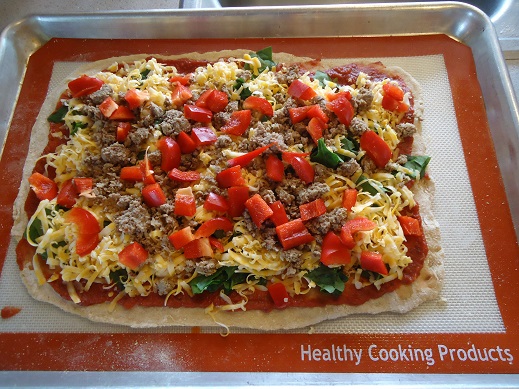
4. Top each pizza crust with toppings of your choice – any sauce, meats, cheeses, and veggies you like. Make a variety to suit your family’s preferences.

frozen pizza 2

I topped this one with sauce, spinach, colby jack cheese, hamburger meat, and red peppers.
We are still loving our silicone mats from Healthy Cooking Products!

5. Wrap each unbaked pizza well with plastic wrap. (I like Natural Value Brand.)  If it fits, you might also consider putting your wrapped pizzas into a 2-gallon size freezer bag for additional protection. (Be sure to reuse your freezer bags to get more bang for your buck!)

6. When you are ready to bake your frozen pizza, thaw it if you wish. Otherwise, just take it directly from the freezer, unwrap it, and put it on your baking pan. Bake in a 375° oven for 10-18 minutes or until the cheese is melty and perfect.

Aren’t you excited about how easy this is, about how much time this will save you, and how fun this will be to serve to your family?! It will be effortless to pull out some mixed greens and fruit to go with your pizza – so your meal prep on a homemade frozen pizza night will be nil!

I highly recommend making several pizzas for your freezer in one setting. If you’re going to mix up crust and make a little mess rolling it out, if you’re going to grate cheese, if you’re going to chop veggies, if you’re going to cook meat – you really might as well just hit it hard and get several pizzas stacked up in your freezer if you have the space.

In addition, consider prepping pizza ahead of time for a busy day and just keeping it in your fridge to bake at dinner time.

Now – go pin this time saving, money saving, health saving idea so that you won’t forget about it. :)

Make Your Own Frozen Pizza

Ever tried making homemade frozen pizza? How excited are you to try this idea?!

Heavenly Homemaker's Club Members: Access your homepage and all your fantastic resources here! Not a member yet? Please join us!

Easy Ham and Egg Breakfast Bowls – a Quick and Filling Breakfast To-Go!

February 5, 2015 by Laura 15 Comments

This post may contain affiliate links. For more information, please see our disclosure policy.

Oh man (lady – whatever). You are going to love this idea! Unless you don’t like eggs.  But for those of you who love eggs, and for everyone who wants an easy, real food meal that will pack a punch with nutrition and keep you full until the next meal…

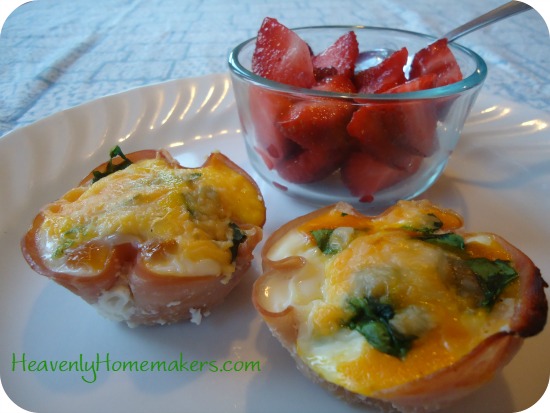
Please allow me to introduce you to these delightful little Ham and Egg Breakfast Bowls:

ham and egg cups1

See that? The ham is the bowl. Isn’t that clever? I didn’t think of this myself, but was enlightened by my friend who was excited to tell me about her fun breakfast of the day. She knew I’d need to know about this idea. She knows me (and my hungry crew) well, don’t you think?

Everyone get out your muffin tins and get ready to have some fun.

How to make Ham and Egg Breakfast BowlsYum

You will need:

Muffin Tins
Thin Slices of Ham
Eggs
Shredded Cheese
Sea Salt
Garnish like Fresh Spinach, Green Chilies, Mushrooms, Peppers, Onion, Broccoli, or Salsa

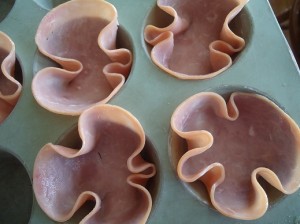
Push a piece of thinly sliced ham down into each muffin cup.

ham and egg bowls 4

Crack an egg into each “ham bowl.” Poke each egg yolk with a fork and carefully scrambled it around inside the bowl. Sprinkle with salt, top with cheese, and garnish however you like. Bake in a 350° oven  for 10-20 minutes or until the eggs are cooked through.

You can make these ahead of time, then rewarm them for a quick, ready-made breakfast or lunch! (That’s my favorite part, of course.)

You can also scrambled up your eggs in a dish, and then scoop some out into each ham bowl if you prefer. My kids like the texture of these better if I do it that way.

5.0 from 1 reviews
Easy Ham and Egg Breakfast Bowls - a Quick and Filling Breakfast To-Go!
 
Save Print
Prep time
10 mins
Cook time
20 mins
Total time
30 mins
 
Author: Laura
Ingredients
  • Muffin Tins
  • Thin Slices of Ham
  • Eggs
  • Shredded Cheese
  • Sea Salt
  • Garnish like Fresh Spinach, Green Chilies, Mushrooms, Peppers, Onion, Broccoli, or Salsa
Instructions
  1. Push a piece of thinly sliced ham down into each muffin cup.
  2. Crack an egg into each "ham bowl."
  3. Poke each egg yolk with a fork and carefully scrambled it around inside the bowl.
  4. Sprinkle with salt, top with cheese, and garnish however you like.
  5. Bake in a 350° oven for 10-20 minutes or until the eggs are cooked through.
3.4.3177


Easy Ham and Egg Breakfast Bowls

Is this idea genius, or what? You must try this! :)

Heavenly Homemaker's Club Members: Access your homepage and all your fantastic resources here! Not a member yet? Please join us!

Chocolate Cheesecake Dessert

February 3, 2015 by Laura 14 Comments

This post may contain affiliate links. For more information, please see our disclosure policy.

Not that you have to wait until Valentine’s Day to make this, but just in case you’re starting to think about hearts and chocolate and treats with the ones you love – I thought you might be interested in this recipe. You should probably make one now, then another early next week, then another on Valentine’s Day. Or would that be considered cheesecake overkill? (Is there such a thing?)

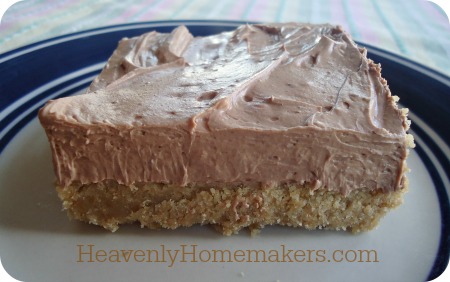
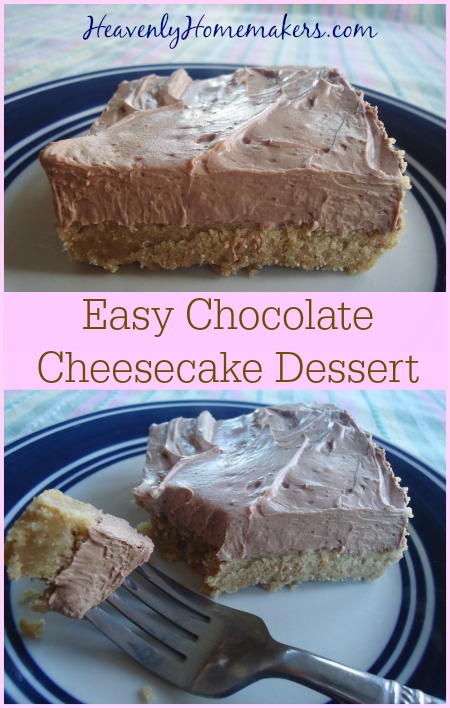
Remember this Chocolate Cheesecake Pie recipe I shared about this time last year? Here’s another similar idea using stevia to lightly sweeten. I also used my Shortbread recipe for the crust this time since I’ve discovered what a great, buttery crust it makes. It does not get any easier than this! (Here are Pumpkin Pie Bars with shortbread crust and Pumpkin Cheesecake with the same crust. Told you I love it.)

chocolate cheesecake
Easy Chocolate Cheesecake DessertYum

2 8-ounce packages cream cheese, softened
1/2 cup cocoa powder
1 teaspoon vanilla extract
Liquid stevia to taste (I use 30-40 drops)
2 cups heavy whipping cream
Baked and cooled Shortbread Crust

Cream together softened cream cheese, cocoa powder, vanilla, and stevia. Set aside. Whip cream until soft peaks form. Fold in cream cheese mixture until smooth. (I actually throw all ingredients together in my BlendTec and let it do all the work of whipping and blending at the same time.)  Spread mixture over cooled Shortbread Crust. Cover and chill for about two hours until set. Makes about 18 servings.

Easy Chocolate Cheesecake Dessert

Heavenly Homemaker's Club Members: Access your homepage and all your fantastic resources here! Not a member yet? Please join us!

Honey Peanut Bars ~ Like a Healthy Payday Candy Bar

January 22, 2015 by Laura 25 Comments

This post may contain affiliate links. For more information, please see our disclosure policy.

Ladies and um, other Ladies (although surely there is a gentleman or three around here too):  We have a winner! Honey Peanut Bars it is!

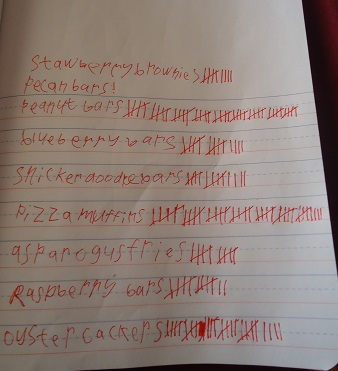
Thanks to all who put in their vote as to which of the new healthy snack recipes from our upcoming eBook we should reveal early. It was a pretty close call on several. I put Malachi to work making tally marks as votes came in (a great school project for him). He had a lot of fun with it…

counting votes

Here’s how my afternoon sounded:

“Pizza Muffins are in the lead. They’re going to win for sure!”
“Mom! Peanut Bars have a ton of votes. They caught up to Pizza Muffins.”
“I think Oyster Crackers are going to pull ahead!”
“It’s back to the Peanut Bars. Why is everyone choosing that one?”

Yeah, Malachi doesn’t like peanuts. ;)

When it was all said and done, the Honey Peanut Bars won by several votes. Not to worry though. Our 227 Healthy Snacks eBook is almost finished. Then you’ll have access to all the recipes forever! (Our goal is to have the book ready for you by Sunday night.)

I mixed up a batch of these Honey Peanut Bars tonight again, just because they sounded good. Our older boys will probably finish them all off once they get home from basketball practice. What a perfect post-workout/bedtime snack for them. (With apples and cheese and whatever else they get out because…do I really need to explain?)

You should be excited to know that it only took about five minutes for me to mix these up tonight. Their simplicity is of the many reasons I love them. :)

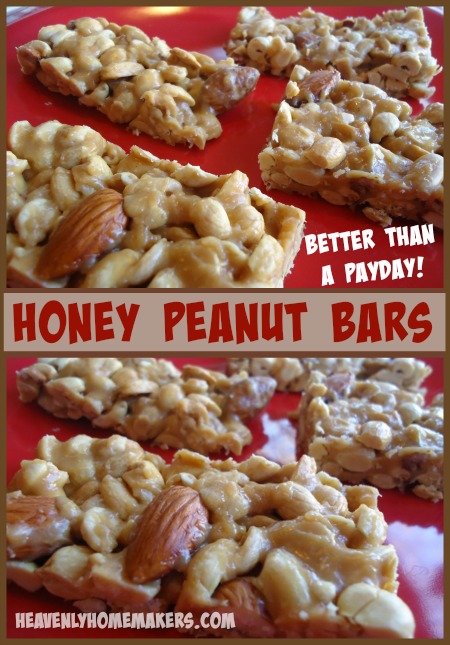
Honey Peanut BarsYum

Honey Peanut Bars ~ Like a Healthy Payday Candy Bar
 
Save Print
Author: Laura
Serves: 8-10
Ingredients
  • 1¼ cup roasted, unsalted peanuts
  • ¼ cup roasted, unsalted almonds
  • ⅓ cup honey
  • 3 Tablespoons natural creamy peanut butter
  • ⅛ teaspoon sea salt
Instructions
  1. In a small saucepan stir honey, peanut butter, and salt together over low heat until well combined. Remove from heat.
  2. Stir in peanuts and almonds.
  3. Spread mixture into an 8x8 inch pan.
  4. Chill for 2 hours.
  5. Cut into bars.
3.4.3177

Honey Peanut Bars - Better Than a Payday

Told you they were easy to make! Go grab your simple ingredients and get busy on these bars. You will love them as much as we do (well, everyone but Malachi).

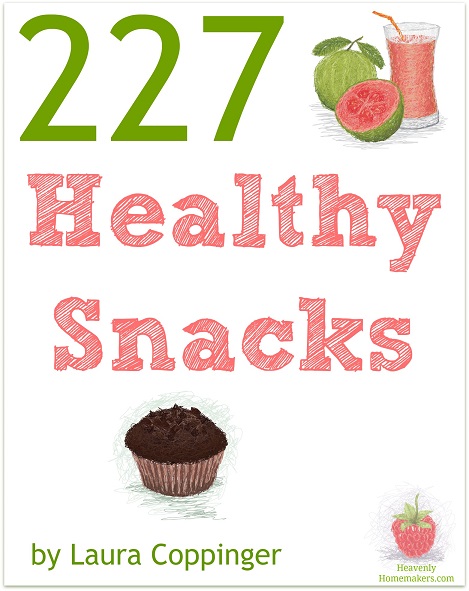
Grab your copy of 227 Healthy Snacks which includes this recipe and 226 more recipes and snack ideas that are super delicious!

227 Healthy Snacks 2

Heavenly Homemaker's Club Members: Access your homepage and all your fantastic resources here! Not a member yet? Please join us!

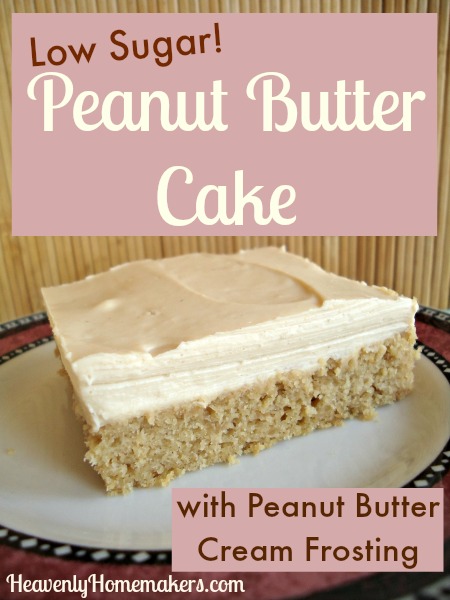
Low Sugar Peanut Butter Cake with Peanut Butter Cream Frosting

January 9, 2015 by Laura 24 Comments

This post may contain affiliate links. For more information, please see our disclosure policy.

Hallelujah, this peanut butter cake has less sugar than most breakfast muffins! This isn’t difficult, of course, because who decided it was a good idea to stir a bunch of sugar, corn syrup, and white flour together and call it “breakfast?” My apologies to all the donuts, poptarts, and poofy-puffs out there who just got their feelings hurt. It’s really not your fault.

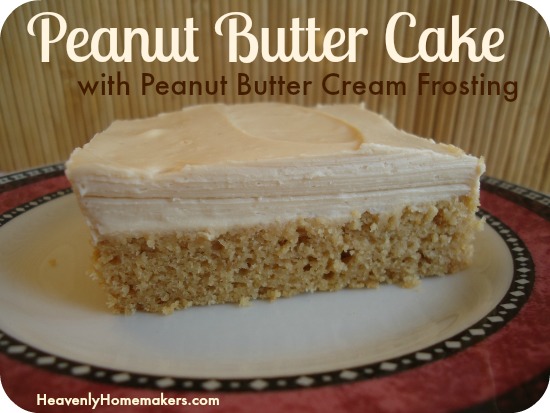
Peanut Butter Cake

Indeed, not only do I serve this for desserts or snacks, I have been known to serve it for breakfast.

Now I know what you’re thinking. “This girl makes cake for breakfast all the time!” Okay fine. You caught me. (Other breakfast cake recipes: My Original Breakfast Cake and Pumpkin Breakfast Cake)

We do quite a few breakfast cakes around here, and I keep inventing more ideas. This is because breakfast cakes are easy and filling. My current favorite way to make breakfast is to bake a cake the night before, frost it with stevia sweetened frosting, then wake up to a ready-made meal. Pull out applesauce and fresh berries, and breakfast is served.

Here’s a little known secret about muffin and quick bread recipes: The batter can usually be spread into a 9×13 inch pan and baked into a cake. If you sub out white flour with whole wheat, replace the large amount of white sugar for a smaller amount of sucanat or honey, you have yourself a delicious and fun breakfast.

Serve meat or eggs with your cake if you need additional protein to start your day. Always serve fruit with your breakfast. (Sometimes I’m bossy.)

Low Sugar Peanut Butter CakeYum

5.0 from 1 reviews
Low Sugar Peanut Butter Cake with Peanut Butter Cream Frosting
 
Save Print
Author: Laura
Ingredients
  • ¼ cup butter
  • ¼ cup peanut butter
  • ½ cup sucanat
  • 2 eggs
  • 1 cup buttermilk
  • ½ teaspoon baking soda
  • ½ teaspoon baking powder
  • 1 teaspoon vanilla extract
  • 1½ cups whole wheat flour
Instructions
  1. In a small saucepan, melt together the butter and peanut butter.
  2. Stir melted mixture into the sucanat.
  3. Add eggs, buttermilk, baking soda, baking powder, and vanilla.
  4. Mix well, then stir in flour and mix until smooth.
  5. Pour batter into a 9x13 inch baking dish.
  6. Bake in a 350° oven for about 25 minutes or until a toothpick inserted in the middle comes out clean.
  7. Allow cake to cool before frosting.
3.4.3177

Peanut Butter Cream Frosting

1/4 cup butter, softened
1/2 cup natural peanut butter, softened
8 ounces cream cheese, softened
1/2 cup heavy whipping cream
1 teaspoon vanilla extract
Liquid stevia

Whip together all ingredients until thick and smooth, sweetening with stevia to taste. Spread over cooled cake.

Low Sugar Peanut Butter Cake with Peanut Butter Cream Frosting

Before anyone else can say it, I’m going to. “Did you see how much fat is in that frosting?!?!”

Mm-hmm. If it isn’t obvious to you by now by reading posts from this butter and coconut oil loving girl, it should be very clear to you how important I believe it is to eat plenty of healthy, real fats. Our brains need fat to thrive! (Why yes I have researched this for hours and hours.) It just so happens I’m nourishing my brain by eating this cake with a thick layer of frosting.

The low amount of sugar in this cake (which I cut into 24 pieces, by the way) combined with whole grains and healthy fats makes for a very nourishing treat. In case you’re wondering, the reason I use cream cheese and cream in my stevia sweetened frosting recipes is because when whipped together, those cream products provide bulk (taking the place of three cups of powdered sugar). Also – it’s cream cheese and cream! Does life get any yummier?

So there you go. If you haven’t served cake for breakfast yet, do this. Tell your kids I said, “You’re welcome.”

What’s your breakfast cake status? Tried it yet?

Heavenly Homemaker's Club Members: Access your homepage and all your fantastic resources here! Not a member yet? Please join us!

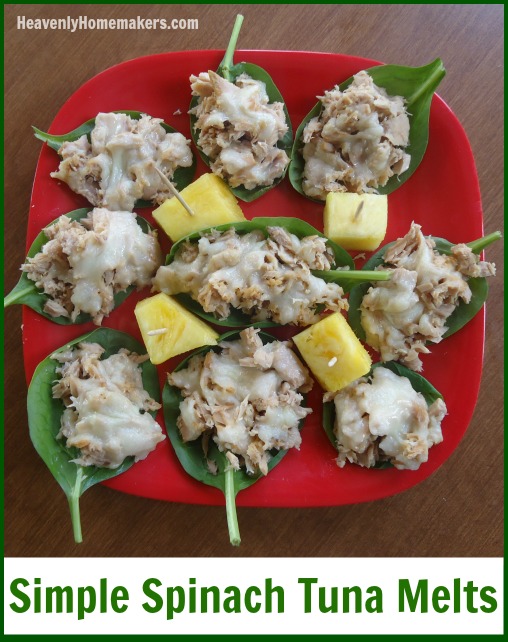
Simple Spinach Tuna Melts – Don’t Knock it Until You’ve Tried It

January 1, 2015 by Laura 8 Comments

This post may contain affiliate links. For more information, please see our disclosure policy.

Now that we’ve realized how easy it is to add spinach to our meals, I think we’re working it onto our table at least once each day. The day these Spinach Tuna Melts were invented, Matt was the guy in charge of figuring out lunch.

We almost always have several cans of tuna on hand, our freezer held plenty of cheese, and I think it goes without saying that we had spinach in the fridge. Here’s what Matt came up with:

Simple Spinach Tuna Melts

These were awesome.  I lost track of how many he had to make, as these are one or two bite tuna melts – and I’m not sure if you’ve seen our boys eat lately, but let’s just say they eat a lot of bites at each meal. We went through a lot of spinach, and not one boy complained that there was no bread involved in this meal.

This meal is perfect for days you’re limited on time to cook, days you don’t have meat thawed, and days you want extra nourishment in the form of spinach. (Every day is the day you want extra nourishment in the form of spinach. Join the spinach-eating bandwagon.)

How to Make Spinach Tuna MeltsYum

Open and drain a can of tuna. Use a fork to separate the tuna pieces, then place about a tablespoon on each leaf of spinach. Top with about a teaspoon of shredded cheddar cheese. Place prepared spinach/tuna/cheese on a baking sheet and broil in the oven for 1-2 minutes until the cheese is melted.

One 5-ounce can of tuna makes 6-8 Spinach Tuna Melts. If feeding teenage boys, open many cans of tuna and be prepared to make many pans of tuna melts.

So there you go! A super easy meal you can make that packs a big nutritional punch.

How are you doing on eating spinach? Have you found fun ways to work it into your meals?

Heavenly Homemaker's Club Members: Access your homepage and all your fantastic resources here! Not a member yet? Please join us!

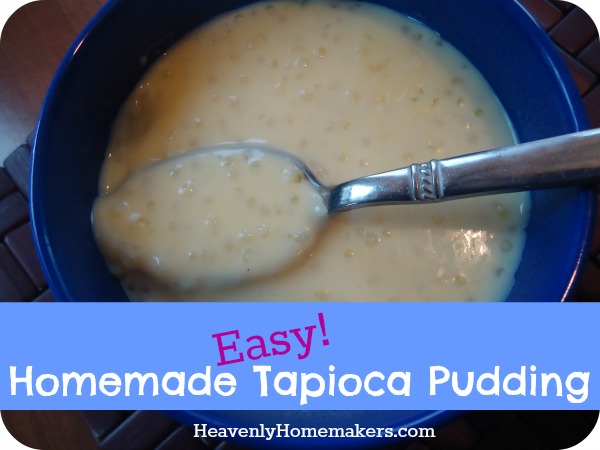
Homemade {Easy} Tapioca Pudding

December 31, 2014 by Laura 41 Comments

This post may contain affiliate links. For more information, please see our disclosure policy.

You know what’s bad about feeding my family beans? (Well, besides that.)  It’s that I almost always forget to soak the beans ahead of time. This does not work, even a little bit, unfortunately. Crunchy beans do not make good chili.

As you can imagine, then, when it comes to making Tapioca Pudding, I am never prepared. Every recipe I’ve found calls for soaking the tapioca pearls overnight or longer. Then, most of them tell me to cook the tapioca pudding for a bazillion minutes in a double boiler.

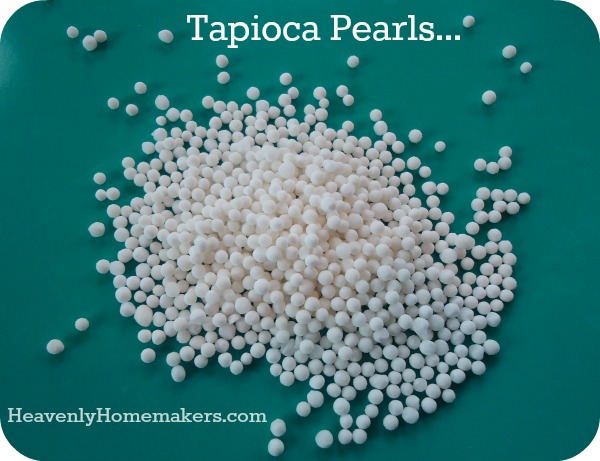
tapioca pearls

See, I’m just not into recipes that require all kinds of thought and effort. Plus, I don’t even own a double boiler. My rebellious “yeah, I don’t want to go to the trouble to do it that way” recipe reading self sometimes gets into trouble. Usually though, I find that I can take short-cuts and still turn out a good product.

Real food recipes become easy, time consuming tasks become effortless, and recipes with twenty-seven steps become no-brainers. This is how this Tapioca Pudding recipe came to be. I suddenly got hungry for the comfort food Tapioca Pudding…and I wanted some right now. “Soak the tapioca pearls in milk then cook it in a double-boiler until Christmas morning 2019” just wasn’t going to cut it. What if? I thought. What if I just pour the tapioca into the milk along with my other delicious ingredients, and start cooking it in a plain ol’ saucepan?

But then the Follow All Instructions Exactly Police showed up at my door, so I’m actually writing this post from prison.

At least we can now all benefit from knowing this is super easy and delicious way to make Tapioca Pudding. Here’s how I did it:

Homemade {Easy} Tapioca PuddingYum

5.0 from 2 reviews
Homemade {Easy} Tapioca Pudding
 
Save Print
Author: Laura
Serves: 4-6
Ingredients
  • 1 cup tapioca pearls (unsoaked, booyah!)
  • 4 cups whole milk
  • 4 egg yolks (save the whites for something else)
  • ¼ teaspoon sea salt
  • ¼ cup real maple syrup (more if you like)
  • 1 teaspoon real vanilla extract
Instructions
  1. Measure tapioca pearls, milk, egg yolks, sea salt, and maple syrup into a medium sauce pan.
  2. Use a whisk to cook and stir constantly over medium-low heat for about 15 minutes or until tapioca pearls have "popped" and pudding is thick.
  3. Remove from heat and stir in vanilla.
  4. Serve right away, or refrigerate.
  5. This tastes great hot or cold.
3.4.3177

Homemade Tapioca Pudding - Easy!

I have yet to convince my boys that Tapioca Pudding is the bomb-diggity of comfort foods. You’d think me calling cooked tapioca pearls “eye-balls” would have at least intrigued them a little bit, but nope. They think those tapioca things are weird. My youngest actually suggested that perhaps Tapioca Pudding might taste good “without those tapioca things.” Oh well, more for me.

Do take heed of the “stir constantly” instructions in this recipe. While I’m obviously always eager to break rules and go about cooking my own way without following recipes word-for-word, walking away from your cooking tapioca pudding would be a very, very bad idea. Scorched milk, crunchy uncooked tapioca pearls, and black floaties in your pudding really will cause the I Told You So Police to show up at your door. Ask me how I know.

Are you a fan of tapioca pudding, or would you rather it didn’t have those tapioca things in there?

Heavenly Homemaker's Club Members: Access your homepage and all your fantastic resources here! Not a member yet? Please join us!

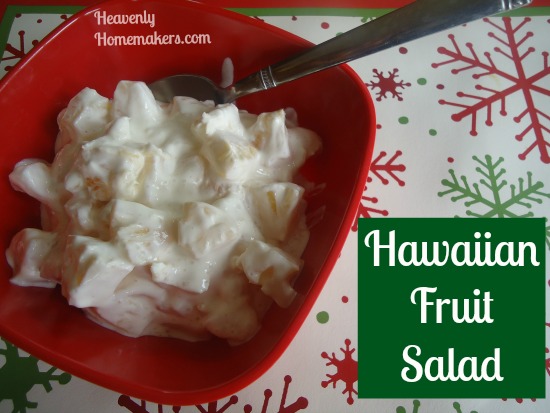
Hawaiian Fruit Salad

December 21, 2014 by Laura 43 Comments

This post may contain affiliate links. For more information, please see our disclosure policy.

XmasBrunch2011

This salad is super easy to make and super refreshing to eat. It is perfect for our Christmas Brunch!

Hawaiian Fruit SaladYum

Mix together three cups combination of any of the following:

Fresh or canned pineapple chunks or tidbits
Canned mandarin oranges or fresh clementines
Sliced bananas
Coconut flakes

Stir in:

1 cup sour cream
1 teaspoon vanilla extract

Mix well and serve. See how easy that is?!

Hawaiian Fruit Salad

Be sure to leave a comment on this post for a chance to win one of five $10 gift certificates to our Heavenly Homemakers Shop!

Heavenly Homemaker's Club Members: Access your homepage and all your fantastic resources here! Not a member yet? Please join us!
« Previous Page
Next Page »

Join Our Community!

 Facebook Twitter E-mail Instagram Pinterest

Popular Posts

~ Will All of the Real Moms Please Stand Up?
~ Easy! Stir-and-Pour Whole Wheat Bread
~ How to Make Gatorade
~ 31 Real Food Breakfast Ideas
~ Dear Teenage Girls...
~ When Mom Takes a Step Back
~ The Inexpensive Health Insurance We Love!
~ Let's Talk Real Food Grocery Budgets

Check out our latest posts!

  • Big Family Food and Fun: September 6-12, 2026
  • Big Family Food and Fun: August 30-September 5, 2026
  • Big Family Food and Fun: August 23-29, 2026
  • Big Family Food and Fun: August 16-22, 2026
  • Big Family Food and Fun: August 9-15, 2026
Home  ~  Simple Meals  ~  Club Membership  ~  Shop  ~  Privacy Policy  ~  Disclosure  ~ Contact

Copyright © 2026 · Beautiful Pro Theme on Genesis Framework · WordPress · Log in