Heavenly Homemakers

Encouraging women in homemaking, healthy eating and parenting

  • Home
    • About
    • FAQs
  • Recipes
    • Bread and Breakfast
    • Condiments
    • Dairy
    • Main Dishes
    • Side Dishes and Snacks
    • Desserts
    • Gluten Free
    • Instant Pot
    • Crock Pot
    • Heavenly Homemaker’s Weekly Menus
  • Homemaking
    • Real Food Sources
  • Store
  • Contact
    • Advertise
    • Disclosure
    • Privacy Policy
  • Simple Meals
  • Club Members!

Whole Wheat Quick Mix Pancakes {Sneak peek into our new Oh, For Real! book}

February 23, 2013 by Laura 19 Comments

This post may contain affiliate links. For more information, please see our disclosure policy.

Now that I always keep a large batch (often a double batch) of the Whole Wheat Quick Mix on hand, I have been so grateful for the time it saves me in meal preparation. And let’s be real (since, after all, the upcoming book this recipe is featured in is called Oh, For Real):  I really like that having this mix on hand saves my brain energy. Who really wants to think about the process of making pancakes when there are so many other things to think about?

These pancakes require three little ingredients. I can make these in my sleep…which, without a doubt, is something that I have done.

Whole Wheat Quick Mix PancakesYum

2 cups Whole Wheat Quick Mix
1 cup milk
2 eggs

Whisk ingredients together thoroughly. Cook them in a well greased skillet, turning after they are bubbly. Makes about 12 three inch pancakes.

quick_mix_pancakes

Ever made pancakes in your sleep?  :)

P.S. These pancakes taste best when made on a cast iron griddle. I have this Lodge 20-Inch Cast Iron Griddle and love it so much! I can make pancakes three times as fast because it covers two burners. Check it out here (affiliate link).

cast iron griddle

Heavenly Homemaker's Club Members: Access your homepage and all your fantastic resources here! Not a member yet? Please join us!

Whole Wheat Quick Mix “Very Vanilla” Cookies {Sneak peek into our upcoming Oh, For Real! book}

February 21, 2013 by Laura 43 Comments

This post may contain affiliate links. For more information, please see our disclosure policy.

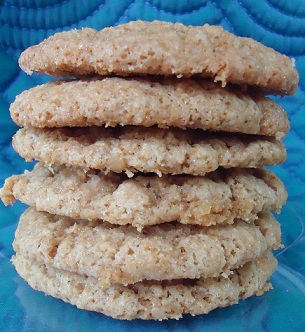
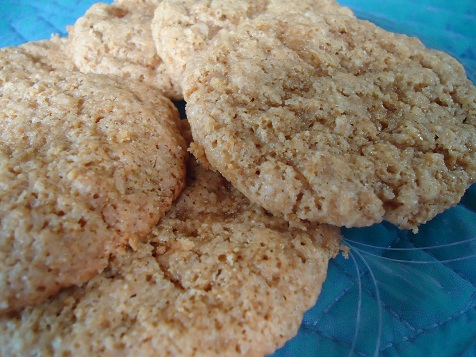
vanilla_cookies

I have to say thank you for giving my younger two boys a bit of educational entertainment this evening. I called them in to help me count the “votes” to determine which Whole Wheat Quick Mix recipe I would share with you first. They made a list of the options, and then made tally marks as I called out “cookies”, “fruit pizza”, “pancakes”, etc.

You know boys. Everything is a competition. As we went through each of your comments, the excitement grew. Who knew that counting recipe votes would be so much fun? At one point early on, Malachi shouted, “Muffins are in the lead!!” And so it went.

Ah, it’s the simple things in life that are the most fun, right?

Malachi and Elias are excited to share that Very Vanilla Cookies won the vote, with Fruit Pizza and Pancakes trailing in very close behind. They personally each wanted to vote for Fruit Pizza. I think they thought I was going to drop everything and immediately make the recipe that won the vote. Sorry boys. Cute as you are, your vote doesn’t count this time. Besides, I don’t have any fresh strawberries on hand. ;)

So here you go – a very easy and delicious cookie recipe that you can stir together in no time using your Whole Wheat Quick Mix. If you happen to have homemade vanilla extract to use in this recipe, yay! But even if you don’t, I bet you’ll still be able to choke these down. :)

Very Vanilla CookiesYum

3 cups Whole Wheat Quick Mix
1 1/4 cup sucanat
3 eggs
2 teaspoons vanilla extract

Mix all ingredients together. Scoop 1 ½ teaspoons of dough onto a cookie sheet, about 3 inches apart. Bake in a 375° oven for 12-15 minutes. Makes about 2 dozen cookies.

More of our new Oh, For Real recipes coming soon – in particular, recipes that use this Whole Wheat Quick Mix.

I’m curious (and this has nothing to do with cookies, books, or quick mixes):  Is it snowing where you are?  We’re getting several inches right now. Fun!

Heavenly Homemaker's Club Members: Access your homepage and all your fantastic resources here! Not a member yet? Please join us!

Red(less) Velvet Cake

February 12, 2013 by Laura 38 Comments

This post may contain affiliate links. For more information, please see our disclosure policy.


Have a recipe you’d like me to try and make over?
Submit your recipes on this Real Food Recipe Makeover Submission Page.

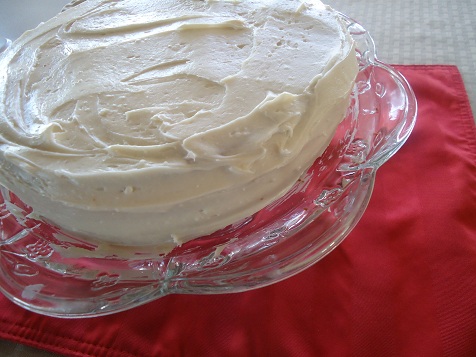
Looking for a special treat for Valentine’s Day? How about a Red Velvet Cake? Without the red. While the red food coloring is pretty, it doesn’t add anything to the cake (except for freakish fake color that I don’t really want in my gut).

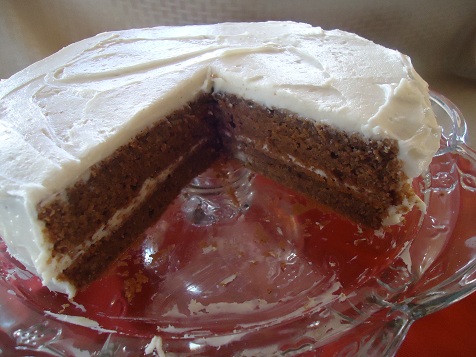
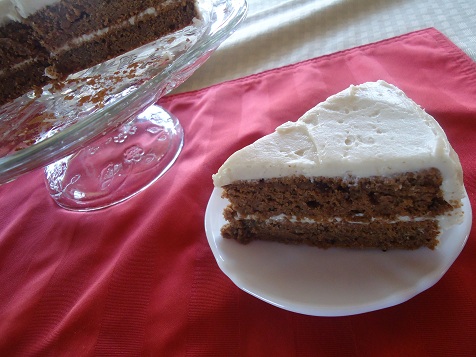
This cake experiment became a treat that is super moist and delicious, with a mild chocolate flavor. And hey, if you squint and look through pretend red colored glasses, the light brown color of this cake really does have a reddish tint. It’s true. Can you see it? 

velvet_cake_1

Red(less) Velvet CakeYum

1 cup butter
1/2 cup cocoa powder
4 Tablespoons water
2 1/2 cups whole wheat flour (I recommend using flour made from hard or soft white wheat)
1/2 cup organic cornstarch
1 1/2 teaspoons baking powder
1 1/2 cups sucanat, made into “powdered sugar”
3 eggs
1 cup buttermilk
1 teaspoon vanilla
Cream Cheese Frosting

Place butter, water, and cocoa powder in a small saucepan. Cook over low heat until butter is melted and ingredients are well combined. In a large mixing bowl stir together flour, cornstarch, baking powder, and powdered sucanat. Pour in butter mixture, and the eggs, buttermilk, and vanilla. Beat the ingredients together until smooth.

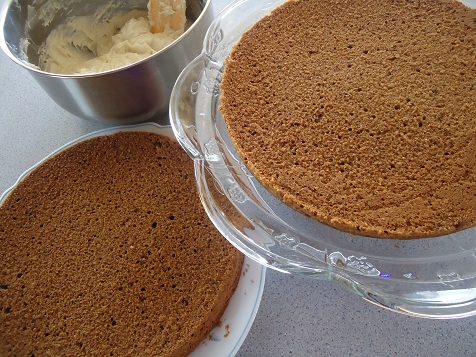
Pour batter into two well-buttered 9 inch round cake pans. Bake in a 375° oven for 25-30 minutes or until a toothpick inserted in the middle comes out clean. Be careful not to overbake these cakes or they will become dry. Allow cakes to cool for a few minutes, then carefully turn them out onto two separate plates. Allow them to cool completely.

Frost with Cream Cheese Frosting, beginning with a layer in the middle of the cakes, then on the top and around the sides.

velvet_cake_2

See how pretty?

velvet_cake_3

See the red?

velvet_cake_5

 Okay, fine. It really is red(less). But it is crazy delicous. :)

Heavenly Homemaker's Club Members: Access your homepage and all your fantastic resources here! Not a member yet? Please join us!

Easy Chicken Pot Pie {Real Food Dollar Menu}

January 16, 2013 by Laura 87 Comments

This post may contain affiliate links. For more information, please see our disclosure policy.

FAQs of Easy Chicken Pot Pie…

Question:  What do you get when you mix one cup of milk, one cup of mayonnaise, and one cup of whole wheat flour?

Answer:  The most amazingly delicious crust you can imagine.

Question:  What is the easiest way to make a crust for a Chicken Pot Pie?

Answer:  You know the “one cup of milk, one cup of mayonnaise, and one cup of flour” I referred to? Mix it up and pour it over the top of your pot pie filling, then bake. It doesn’t get any easier. No mess. No rolling. No problem.

Question:  How much does it cost to make this healthy, hearty Chicken Pot Pie?

Answer:  Would you believe me if I told you that it only costs $6.00*? It’s true. This recipe feeds 8-10 people. (Eight if you’re my family. Ten if you aren’t feeding teenage boys.)  That makes the cost of this recipe between $0.60 and $0.75 per person. And it’s a complete, filling, healthy meal.

Question:  Is the rest of this post going to be as cheesy as what I’ve read so far?

Answer:  Ummm…no. But I do want you to know that I’m currently working on more ideas for this milk/mayo/flour crust mixture. I got the idea from Matt’s cousin Monica, and I’m thinking that the possibilities are definitely not limited to Chicken Pot Pie. Can’t wait to figure out more ideas!

chicken_pot_pie_1

Easy Chicken Pot Pie

Yum

6 cups chicken broth
2 cups cooked chicken, cut into bites
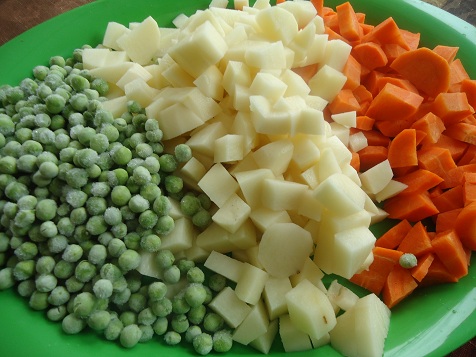
4 large carrots, peeled and cut into bite sized pieces
6 medium potatoes, peeled and cut into bite sized pieces
2 cups frozen peas
Sea salt and pepper to taste
1/3 cup cold water
2 Tablespoons organic corn starch or arrowroot powder
1 cup milk
1 cup mayonnaise (I use Hain Safflower Mayonnaise)
1 cup whole wheat flour (I use freshly ground flour from hard white wheat)

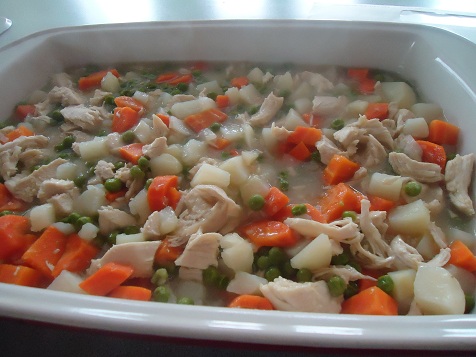
In a large cooking pot, boil broth, chicken, carrots, potatoes, and peas until veggies are tender. Mix cornstarch with water until smooth. Stir mixture into the broth/veggies, cooking for about one minute on the stove to help the mixture thicken. Pour contents into a 9×13 inch baking dish.

chicken_pot_pie_2

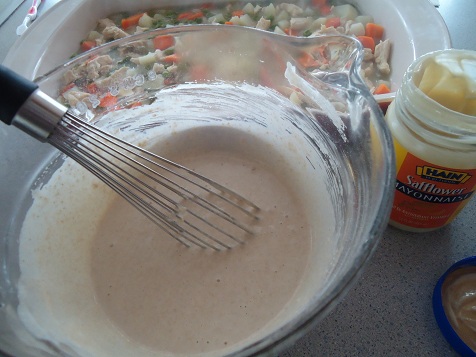
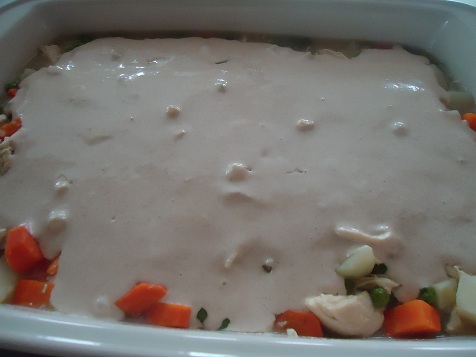
In a separate bowl, stir together milk, mayo, and flour. Spread mixture over the veggies in the baking dish.

chicken_pot_pie_3

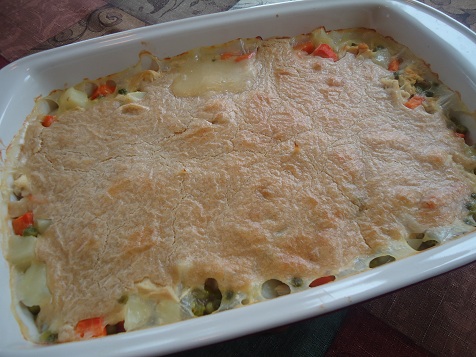
Bake in a 350° oven for about 45 minutes or until the crust is golden brown.

chicken_pot_pie_4

chicken_pot_pie_5

Easy Chicken Pot Pie {Real Food Dollar Menu}
 
Save Print
Author: Laura
Serves: 10 servings
Ingredients
  • 6 cups chicken broth
  • 2 cups cooked chicken, cut into bites
  • 4 large carrots, peeled and cut into bite sized pieces
  • 6 medium potatoes, peeled and cut into bite sized pieces
  • 2 cups frozen peas
  • Sea salt and pepper to taste
  • ⅓ cup cold water
  • 2 Tablespoons organic corn starch, arrowroot powder, or wheat flour
  • 1 cup milk
  • 1 cup mayonnaise (I use Hain Safflower Mayonnaise)
  • 1 cup whole wheat flour (I use freshly ground flour from hard white wheat)
Instructions
  1. In a large cooking pot, boil broth, chicken, carrots, potatoes, and peas until veggies are tender.
  2. Mix cornstarch with water until smooth.
  3. Stir mixture into the broth/veggies, cooking for about one minute on the stove to help the mixture thicken.
  4. Pour contents into a 9x13 inch baking dish.
  5. In a separate bowl, stir together milk, mayo, and flour.
  6. Spread mixture over the veggies in the baking dish.
  7. Bake in a 350° oven for about 45 minutes or until the crust is golden brown.
3.4.3177


Chicken Pot Pie

This is a great way to use up leftover chicken and broth. And I love one-dish meals!

This is just one more recipe that proves that healthy eating doesn’t have to be expensive!

Looking for more meals on our Real Food Dollar Menu? Here are the recipes I’ve shared so far:

  • Hearty Chili
  • Spanish Rice
  • Pasta Alfredo
  • Crock Pot Barbecue Chicken
  • Crock Pot Beef Stew

Stay tuned for many more recipes and ideas for our Real Food Dollar Menu!

*I calculated my cost based on the food sources and prices I have available to me. Most of the ingredients I use are organic. Your cost may be slightly more or less depending on where you find your ingredients.

P.S. I think this recipe would work great for creating personal sized frozen Chicken Pot Pies. :)

Heavenly Homemaker's Club Members: Access your homepage and all your fantastic resources here! Not a member yet? Please join us!

Homemade Nutella ~ Real Food Recipe Makeover

January 15, 2013 by Laura 44 Comments

This post may contain affiliate links. For more information, please see our disclosure policy.

“Homemade Nutella” is a recipe request I’ve had over and over. I never got around to making it (and I have excuses). But do you remember how I told you that my friend Anne and I exchange Christmas stockings each year? Well this year, one of the items she put in my stocking was Homemade Nutella! I begged her for the recipe – and here it is.

You really don’t want to know all of this, but just in case you do, even though you really don’t, here is the background information on how I managed to get this recipe from Anne:

  1. I emailed Anne after I got back from California to thank her for the lovely stocking and to tell her that later that day when Matt came to pick up our milk, I would send over some of the fresh oranges we’d brought back from our trip. And I asked her for her Nutella recipe.
  2. She emailed back to say that she had also loved what I’d put in her stocking and that her mouth was watering while she waited for an orange. But she said nothing about the Nutella.
  3. Matt went and picked up the milk, but I was upstairs doing laundry when he left, so I forgot to send oranges.
  4. I found mouse poop in some red wheat I had in storage and emailed Anne asking if it would be okay to feed that to her chickens. And I apologized for not sending oranges and told her I’d eat one on her behalf, and that at that very moment, I had the juice from a delicious orange running down my chin.
  5. Then she emailed me back and told me that I was evil to eat her oranges. And she said, “rats” about the mouse poop. See her rodent inspired play-on-words there?
  6. I giggled and emailed her back and said that yes I was evil, and full of citrus, and that really and truly, I’d get her some oranges.
  7. Then I kept forgetting to take over the oranges.
  8. But I really wanted the Nutella recipe. So I emailed her again a few days later and said, “You know how I asked for the nutella recipe and you forgot to give it to me? (Kind of like I told you I would bring oranges and then didn’t?) Any chance you could throw that my way? A few thousand HHM readers would love to hear about it… :) I have a small sack of oranges ready for you by the way. And some poopy wheat.”
  9. She emailed back to say, “Very clever” and then she gave me the recipe.
  10. Then today I finally remembered to give her the oranges.
  11. The end.

You’ve got to admit. That story was a lot more fun than me simply stating, “I got this recipe from my friend Anne.”

Homemade NutellaYum

1 1/2 cup whole hazelnuts
1 1/2 cups whole milk
3/4 cup powdered milk (not an ingredient I typically use, but an okay compromise for this recipe)
1 Tablespoon mild-flavored honey
pinch salt
1 heaping cup chopped bittersweet or semi-sweet chocolate, or chips
1 scant cup chopped milk chocolate, or chips

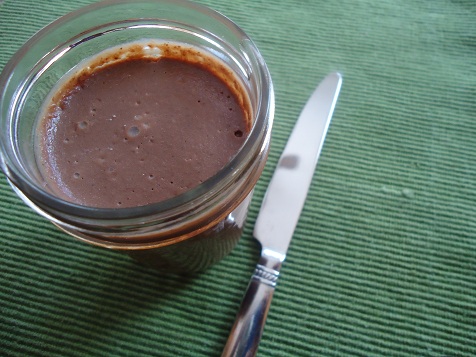
On a rimmed baking sheet, toast the nuts in a 400º oven for 10 minutes, or until fragrant and their skins begin to pop. Transfer to a tea towel, gather into a bundle and rub together to remove as much of their skins as possible. While warm, transfer to the bowl of a food processor and blend until they go from finely ground to pasty and thick, like natural peanut butter.

Meanwhile, warm the milk, powdered milk, honey and salt in a small saucepan just until it starts to boil. Remove from heat. In a glass or stainless steel bowl set over a pan of simmering water, melt the chocolates, stirring occasionally until smooth.

Add the melted chocolate to the ground nuts and continue to process the mixture, stopping to scrape down the sides of the bowl as necessary. Add the warm milk mixture and process until everything is well blended and as smooth as you can get it. Makes about 2 cups.

nutella_2

 What’s your favorite way to use Nutella?

Heavenly Homemaker's Club Members: Access your homepage and all your fantastic resources here! Not a member yet? Please join us!

Homemade Caramel Brownies

December 30, 2012 by Laura 3 Comments

This post may contain affiliate links. For more information, please see our disclosure policy.

How’s this for a great way to begin the new year?! :)

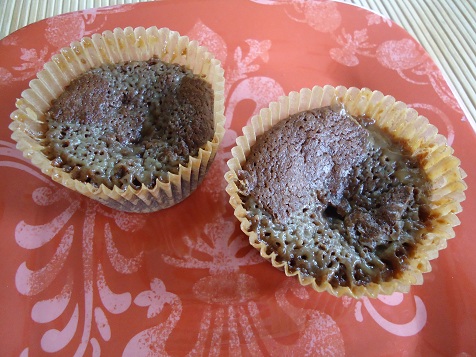
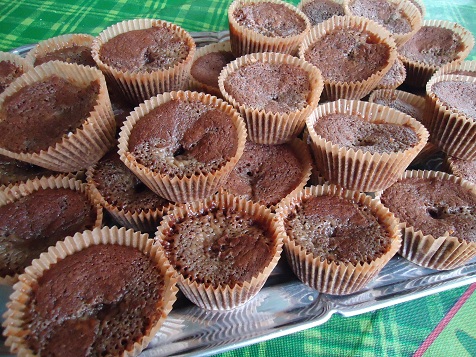
I got this idea from my friend Kim. Smart! You can either bake these in a 9×13 inch pan, or in muffin cups for fun, individual servings.

Caramel BrowniesYum

2 sticks butter, melted
2 cups sucanat
1/2 cup cocoa powder
2 eggs
1 teaspoon vanilla
1 1/2 cups whole wheat flour
1/4 recipe of Homemade Caramel Sauce

Stir together butter, sucanat and cocoa. Mix in egg and vanilla. Stir in flour and mix until combined.

To make a 9×13 inch pan of these brownies, spread the brownie batter into the pan. Drizzle the Homemade Caramel Sauce over the top and “cut it in” with a butter knife. Bake at 350° for about 25 minutes or until a toothpick inserted in the middle comes out clean.

To make individual Caramel Brownies:

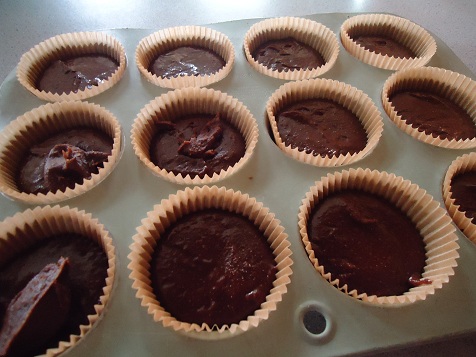
Divide brownie batter evenly into 12-15 paper lined muffin cups.

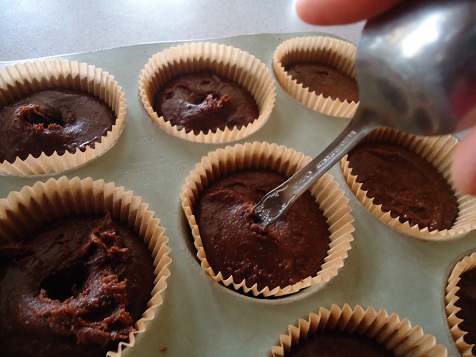
Make a small “well” in the middle of each brownie cup. I used the end of the spoon to do this, since I’m so professional and fancy.

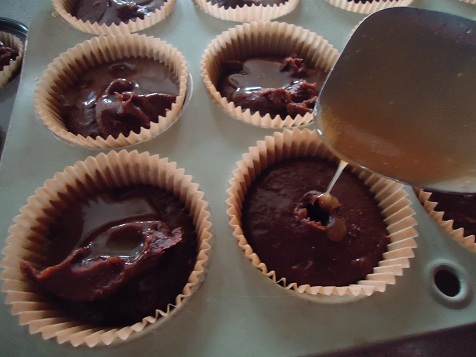
Next, drizzle warm caramel sauce into the well and over the brownie – one or two tablespoons for each.

Bake in a 350° oven for 25 minutes.

Not interested in the Caramel Brownies? How about Peanut Butter Brownies? :)

Heavenly Homemaker's Club Members: Access your homepage and all your fantastic resources here! Not a member yet? Please join us!

Crock Pot Beef Stew ~ Real Food Dollar Menu

December 28, 2012 by Laura 12 Comments

This post may contain affiliate links. For more information, please see our disclosure policy.

Yum

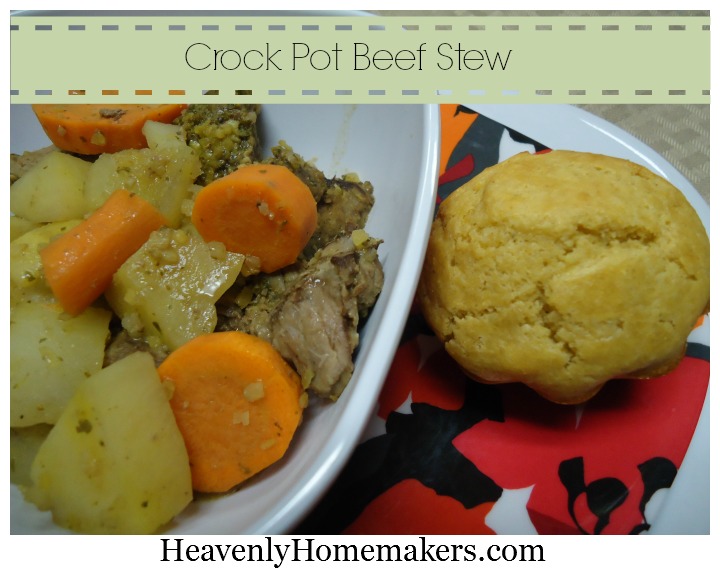
Here is another healthy meal that is super easy, quick to make, and low in cost. There is really nothing fancy about this meal. But it’s comforting and warm and perfect for a chilly evening.

Crock Pot Beef Stew with Cornbread Muffins

1 pound stew meat, cut into bit-sized chunks
2 pounds potatoes, scrubbed and cubed
1 pound carrots, peeled and sliced
1 medium onion or 2 Tablespoons Onion Soup Mix
1/2 cup water
Sea salt to taste

Combine all ingredients in a crock pot. Cook on low for 5-6 hours or on high for 3 hours.

The cost of this meal, including the cornbread, added up to $8.29*. It fed 9 people. Cost per plate (um, bowl) =  $0.92. I love this price!!!

beef_stew

Looking for more meals on our Real Food Dollar Menu? Here are the recipes I’ve shared so far:

  • Hearty Chili
  • Spanish Rice
  • Pasta Alfredo
  • Crock Pot Barbecue Chicken

Stay tuned for many more recipes and ideas for our Real Food Dollar Menu!

*I calculated my cost based on the food sources and prices I have available to me. Most of the ingredients I use are organic. Your cost may be slightly more or less depending on where you find your ingredients.

Heavenly Homemaker's Club Members: Access your homepage and all your fantastic resources here! Not a member yet? Please join us!

Peanut Butter Chocolate Chip Balls {Christmas Brunch}

December 21, 2012 by Laura 94 Comments

This post may contain affiliate links. For more information, please see our disclosure policy.

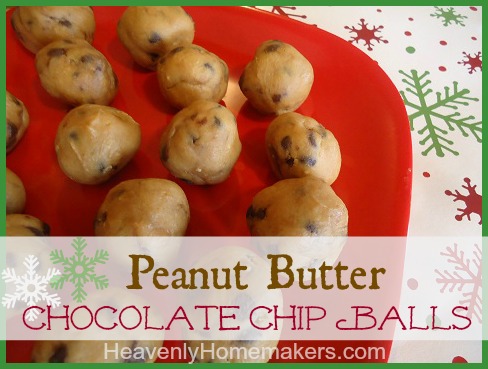
I love treats like these Peanut Butter Chocolate Chip Balls that are on the healthy side, plus they are very easy to put together! With four simple ingredients that many of us have on hand – I’ll bet some of you will hop right off your chair and get them started right away. I highly recommend that you do.

But beware – these are little balls of peanut butter, chocolatey, coconutty addictiveness. You’ve been warned.

Peanut Butter Chocolate Chip BallsYum

Peanut Butter Chocolate Chip Balls {Christmas Brunch}
 
Save Print
Author: Laura
Ingredients
  • 1 cup natural peanut butter
  • ¼ cup coconut oil
  • 2 Tablespoons honey
  • ½ cup mini chocolate chips
Instructions
  1. Melt coconut oil and honey together in a saucepan.
  2. Remove from heat and stir in peanut butter until mixture is smooth.
  3. Fold in chocolate chips.
  4. Spread mixture into a 9x9 inch pan.
  5. Refrigerate for about two hours.
  6. Roll mixture into 1 inch balls.
  7. Refrigerate until ready to serve.
3.4.3177

I use homemade peanut butter, which makes all the difference in every recipe if you ask me. You can’t beat the taste of fresh peanut butter. (It’s easier to make than you think!)

Peanut Butter Chocolate Chip Balls

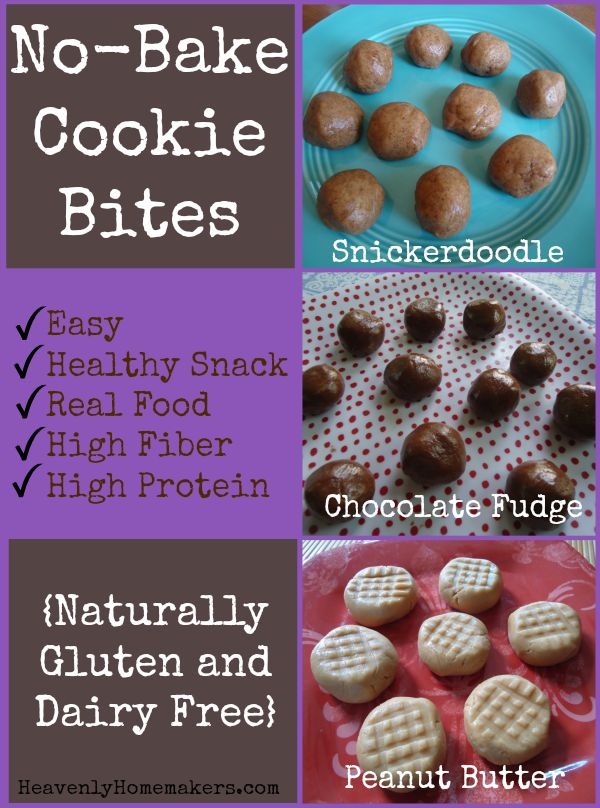
Find more No-Bake Snack and Dessert Ball recipes here:

  • No-Bake Granola Bar Bites
  • No-Bake Peanut Butter Cookie Bites
  • No-Bake Chocolate Fudge Cookie Bites
  • No-Bake Snickerdoodle Bites
  • No-Bake Chocolate Fudge Bites

I use Homemade Almond Butter in most of these recipes. Once you learn to make nut butters, you’ll never go back to store-bought!

No-Bake Cookie Bites - Easy Recipes!

Keep these recipes on hand – especially in the summer time when you don’t want to turn on the oven but you want to make a treat. I love that all of these No-Bake Balls are filling and offer nourishment too. Protein, fiber, lightly sweetened…they are the perfect dessert of snack!

These also work great in a lunch box. To top it all off, these freeze well so you can make several ahead of time and store them in the freezer until you need them!

Heavenly Homemaker's Club Members: Access your homepage and all your fantastic resources here! Not a member yet? Please join us!

100% Juice Punch {Christmas Brunch}

December 20, 2012 by Laura 99 Comments

This post may contain affiliate links. For more information, please see our disclosure policy.

Many of you know how much I used to love drinking Pepsi – and how giving it up has been a great decision for my health. But you probably also know how much I miss that “burn”!

For the occasional treat, I like to put seltzer water into a small amount of 100% juice. It’s not too sweet – but just sweet enough to make the fizzy water taste better. And it gives me that burn I love and miss.

For our Christmas Brunch, I wanted to suggest this simple punch idea. It’s 100% juice – no added sugar or corn syrup!

Christmas Brunch PunchYum

12 ounces 100% cranberry juice concentrate, thawed but cold
12 ounces 100% grape juice concentrate, thawed but cold
2 (or 3) liters seltzer water

Mix all ingredients together in a punch bowl or large pitcher. The amount of seltzer water you use is up to you – depending on how sweet or fizzy you like your drinks.

Christmas Brunch Punch {with 100 juice!}

Feel free to add different kinds of juice depending on your taste.

Are you like me – do you like the “burn”?

Heavenly Homemaker's Club Members: Access your homepage and all your fantastic resources here! Not a member yet? Please join us!

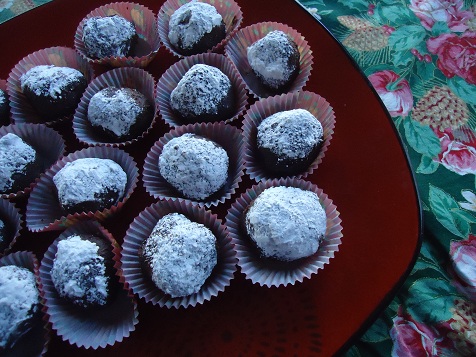
Christmas Truffles and Easy Peanut Butter Fudge

December 20, 2012 by Laura 10 Comments

This post may contain affiliate links. For more information, please see our disclosure policy.

Need a couple more yummy treat recipes?

Try my recipe for Chocolate Caramel Truffles or Chocolate Peanut Butter Truffles. Both of these make great gifts!

Yum

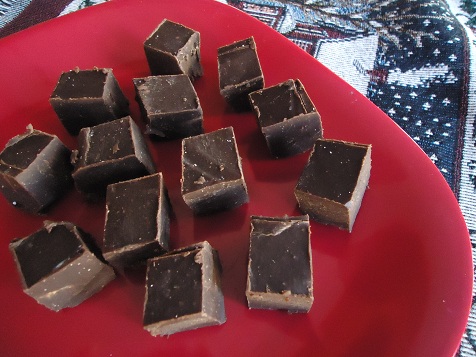
And, you can use the Peanut Butter Chocolate Truffle recipe to make fudge! Simply mix it up and spread the mixture into an 8×8 inch pan. Chill the mixture, then cut it into squares. It is SO easy!

 What are your favorite treats to make (and eat) this time of year?

Heavenly Homemaker's Club Members: Access your homepage and all your fantastic resources here! Not a member yet? Please join us!
« Previous Page
Next Page »

Join Our Community!

 Facebook Twitter E-mail Instagram Pinterest

Popular Posts

~ Will All of the Real Moms Please Stand Up?
~ Easy! Stir-and-Pour Whole Wheat Bread
~ How to Make Gatorade
~ 31 Real Food Breakfast Ideas
~ Dear Teenage Girls...
~ When Mom Takes a Step Back
~ The Inexpensive Health Insurance We Love!
~ Let's Talk Real Food Grocery Budgets

Check out our latest posts!

  • Big Family Food and Fun: September 6-12, 2026
  • Big Family Food and Fun: August 30-September 5, 2026
  • Big Family Food and Fun: August 23-29, 2026
  • Big Family Food and Fun: August 16-22, 2026
  • Big Family Food and Fun: August 9-15, 2026
Home  ~  Simple Meals  ~  Club Membership  ~  Shop  ~  Privacy Policy  ~  Disclosure  ~ Contact

Copyright © 2026 · Beautiful Pro Theme on Genesis Framework · WordPress · Log in