Heavenly Homemakers

Encouraging women in homemaking, healthy eating and parenting

  • Home
    • About
    • FAQs
  • Recipes
    • Bread and Breakfast
    • Condiments
    • Dairy
    • Main Dishes
    • Side Dishes and Snacks
    • Desserts
    • Gluten Free
    • Instant Pot
    • Crock Pot
    • Heavenly Homemaker’s Weekly Menus
  • Homemaking
    • Real Food Sources
  • Store
  • Contact
    • Advertise
    • Disclosure
    • Privacy Policy
  • Simple Meals
  • Club Members!

Hashbrown Sausage Casserole {Christmas Brunch}

December 19, 2012 by Laura 147 Comments

This post may contain affiliate links. For more information, please see our disclosure policy.

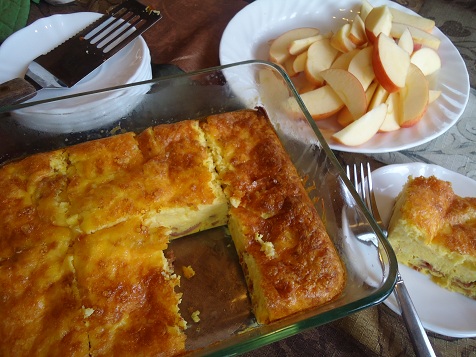
There’s nothing fancy about this casserole – but it is very tasty. It’s perfect for our Christmas Brunch!

I especially love putting this together if I have Homemade Frozen Hashbrowns and Premade Turkey Sausage crumbles. Then all I have to do is throw everything into a dish and bake it. If you prefer, you could substitute browned hamburger meat for the turkey sausage. Just shake in some chili powder and/or garlic powder to spice it up a little. It’s a great, versatile recipe!

Hashbrown Sausage CasseroleYum

6 cups frozen hashbrowns  (partially thawed)
1 pound browned turkey sausage
6 eggs
1/2 cup cream (or milk)
2 cups shredded cheddar cheese
salt and pepper to taste

Stir hashbrowns and cooked sausage together in a 9×13 inch baking dish. In a bowl, whip eggs and cream together. Pour mixture over the hashbrowns and sausage. Sprinkle with shredded cheese, salt, and pepper. Bake in a 350° oven for 45-50 minutes or until eggs are no longer runny and cheese is melted and beginning to brown.
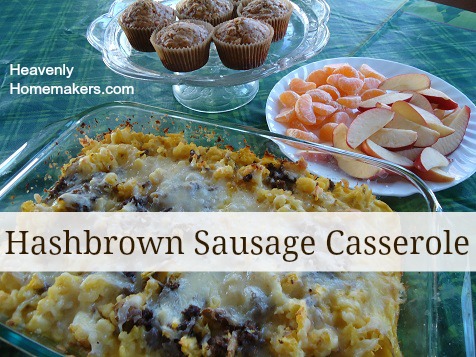
Hashbrown Sausage Casserole

Heavenly Homemaker's Club Members: Access your homepage and all your fantastic resources here! Not a member yet? Please join us!

Orange Cranberry Scones {Christmas Brunch}

December 18, 2012 by Laura 160 Comments

This post may contain affiliate links. For more information, please see our disclosure policy.

Welcome to our Third Annual Christmas Brunch. I decided that I had to begin with this Orange Cranberry Scone recipe. Wow, they are yummy!

My favorite ingredient is the orange juice because of the amazing flavor it gives this treat. But my actual favorite ingredient is the dried cranberries, because no matter how you use those, they are delicious. It is a fact that my real favorite ingredient in these scones is the butter, because I think we all know how much I love butter. Plus butter is what makes these scones so yummy and “pastry like”.

This takes me back to the orange juice (which is my favorite scone ingredient, in case you were not aware) – because this is the ingredient you use to make the delicious glaze that you drizzle over the top once the scones are baked.

By the way – did you know that scones are very, very easy to make? They are especially simple if you have a food processor and let that machine “cut in your butter” for you. I’m all for working hard, but remember how I’m not a butter cutter inner?

Orange Cranberry SconesYum

2 cups whole wheat flour (I use freshly ground flour from hard white wheat)
2 teaspoons baking powder
1/2 teaspoon baking soda
1/2 teaspoon sea salt
3/4 cup chopped dried cranberries
1/2 cup butter
1 egg
3 Tablespoons honey
2 Tablespoons orange juice concentrate
1/4 cup milk

Mix flour, baking powder, baking soda, and sea salt, and dried cranberries. Cut in butter until mixture resembles crumbs. (I use my food processor for this, and to mix the remaining ingredients.)  Add egg, honey, orange juice concentrate, and milk. Stir until a nice ball of dough forms.

Form dough into a ball on a floured surface. Roll dough into a circle about 8 inches in diameter. Place on a cookie sheet or baking stone. Cut circle into 8 equal pieces.

Bake in a 400° oven for 12-18 minutes or until scones are golden brown. While the scones are baking, mix up the glaze.

Orange Glaze

1 cup powdered sugar (I use organic unbleached or homemade)
4 Tablespoons orange juice
1/2 teaspoon vanilla extract

Drizzle glaze over the scones right after you remove them from the oven.

Orange Cranberry Scones

Which do you suppose will be your favorite ingredient in these Orange Cranberry Scones?  :)

Heavenly Homemaker's Club Members: Access your homepage and all your fantastic resources here! Not a member yet? Please join us!

Crock Pot Barbecue Chicken – Real Food Dollar Menu

December 13, 2012 by Laura 29 Comments

This post may contain affiliate links. For more information, please see our disclosure policy.

It might sound kind of silly for me to say this, but I’ve typically thought that making a meal of Barbecue Chicken Breasts is a bit of a “splurge” for us. Why? Because hardly ever do I just cook boneless, skinless chicken breasts as our “main dish” without spreading them out within a casserole to make them “stretch”.

Even so, this meal costs just a tiny bit more than one dollar per plate. Sweet! I’m so glad to know the price breakdown on this, because we love it. Plus, this meal is super fast and easy to prepare. I’m talking five minutes tops. I can quickly throw chicken breasts and homemade barbecue sauce into the crockpot on a Sunday morning before church, or right after lunch on a weekday – and a few hours later, our main dish is ready! Add a veggie or two, and maybe some bread, and your meal is complete.

We used (free) green beans from our garden for this meal, but to be fair to those who don’t have garden beans in their freezer, I included the price of purchased, frozen beans as I calculated the cost of this meal. Altogether with the chicken, sauce, beans, and muffins, this meal ends up being $1.09/plate. (I calculated my cost based on the food sources and prices I have available to me. Most of the ingredients I use are organic. Your cost may be slightly more or less depending on where you find your ingredients.)

In case you’re wondering – I use Smart Chicken Brand boneless skinless chicken breasts in recipes like this. That is the best I can find around here – and I wait for them to go on sale. (My friend recently got me a case at a great price from her local store. Smart Chicken breast for just $2.71/pound…so exciting!)

Crock Pot Barbecue ChickenYum

Crock Pot Barbecue Chicken - Real Food Dollar Menu
 
Save Print
Author: Laura
Ingredients
  • 2 pounds boneless, skinless chicken breasts
  • ½ recipe of Homemade Barbecue Sauce (about ½ cup)
Instructions
  1. Cut chicken breasts into portion sized pieces.
  2. Place in a crock pot, top with barbecue sauce, and cook on low for about four hours or until meat is no longer pink.
  3. BONUS: Don't have time for the crock pot? Simply put the chicken and sauce into a saucepan over medium heat on the stove. Cook for 20-30 minutes until cooked through. Serve!
3.4.3177

Here’s my Homemade Barbecue Sauce recipe. :)

crock_pot_bbq_chicken

Do you often use boneless, skinless chicken breasts for a main dish…or do you typically try to “stretch” them into more meals?

Looking for more meals on our Real Food Dollar Menu? Here are the recipes I’ve shared so far:

  • Hearty Chili
  • Spanish Rice
  • Pasta Alfredo


Heavenly Homemaker's Club Members: Access your homepage and all your fantastic resources here! Not a member yet? Please join us!

Whole Wheat Butterhorns ~ Real Food Makeover

December 12, 2012 by Laura 52 Comments

This post may contain affiliate links. For more information, please see our disclosure policy.

Have a recipe you’d like me to try and make over?
Submit your recipes on this Real Food Recipe Makeover Submission Page.

Did you know that I really, really love butter?

Let’s see – which do I love more? Butter…or jars? That’s a toss up. Hey, did you know you can make butter IN a jar? That tidbit of information is irrelevant to this post, but still worth mentioning…just because it involves two of my favorite things.

It is a fact that Matt’s eyes got really big as I was buttering my biscuit last week – even though he obviously knows how much I love butter. I mean – it was enough to stop our conversation at the time.

“What?” I said,  “You’ve never seen me butter my biscuit before?”

“Yes,” he said, “I’ve seen you. But there is almost more butter than biscuit this time.” (At which point I grinned – and got just a tiny bit more butter because there was a spot on my biscuit not yet covered…)

Alrighty. So I like a little biscuit with my butter. And I like it to be all melty down the sides. Then I like to sop the buttery drippings off of my plate as I eat my biscuit. It’s just best that way if you ask me.

Which is why I was excited to make over this recipe. I mean, they are called Butterhorns! I didn’t have to make many changes in this recipe – just a few minor tweaks. And wow is it delicious!

With Christmas coming, many of you are looking for a yummy, whole grain roll to make with your holiday meal. This would be perfect if you ask me. :)

Whole Wheat Butterhorns

Whole Wheat ButterhornsYum

2 Tablespoons dry yeast
1/3 cup warm water
9 cups whole wheat flour, divided (I use freshly ground hard white wheat)
2 cups warm milk
1 cup butter, melted
1 cup sucanat or 3/4 cup honey
6 eggs
2 teaspoons salt
3-4 Tablespoons butter, melted

In a large mixing bowl, dissolve yeast in water. (Water should be warm, but not so warm that you can’t comfortably put your finger in it to test the temp.)  Add 4 cups flour, milk, butter, sucanat, eggs, and salt. Beat with an electric mixer until contents are smooth.

Add enough remaining flour to form a soft dough. I found it easiest to do this by hand. Although if you have a Kitchen Aid type mixer, I’m sure that would work well too! Turn mixture onto floured surface and knead for 3-4 minutes.

Place dough in a bowl, cover, and let rise in a warm place until doubled (1-3 hours).

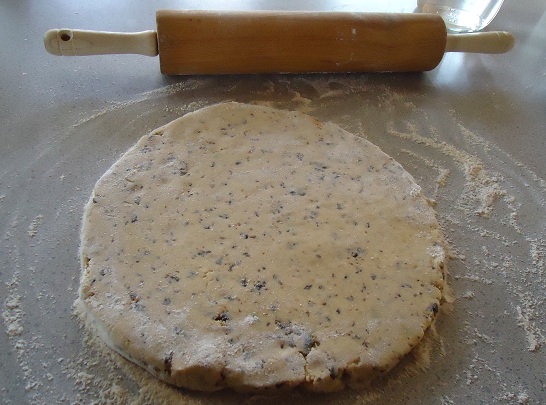
Punch dough down and divide into four equal parts. Roll each part into a 12-inch circle and brush with melted butter.

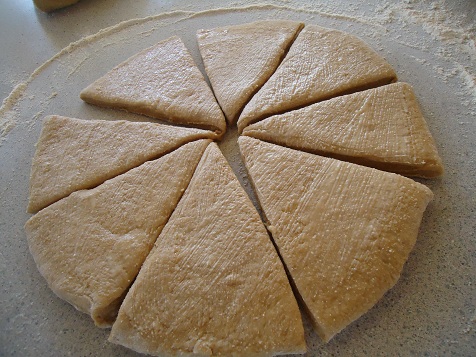
Cut each circle into 8 pie-shaped wedges.

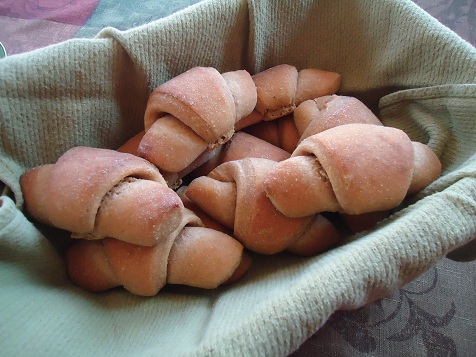
Roll up each wedge from wide edge to tip of dough and pinch to seal. Place rolls, top down, on baking sheets.


Allow rolls to rise again for about 30 minutes or until they have doubled in size. Bake at 375° for 10-20 minutes (every oven is different!) or until they are lightly browned. Brush with melted butter as soon as they come out of the oven. Remove and serve immediately or cool on wire racks.

This recipe makes about 30 rolls. These freeze very well! I found that having a batch of these in the freezer is wonderful when I need something additional to help stretch a meal! I simply take out the amount we  need, warm them in our toaster oven, and serve them with…you guessed it…butter.

Who loves butter as much as I do?  Do tell.

Heavenly Homemaker's Club Members: Access your homepage and all your fantastic resources here! Not a member yet? Please join us!

Cream Cheese Cookie Cutouts

December 11, 2012 by Laura 18 Comments

This post may contain affiliate links. For more information, please see our disclosure policy.

In preparation for a Christmas Cookie Exchange with several of my friends tonight, I made our favorites – Cream Cheese Cookie Cutouts. The cookies have cream cheese in them and the frosting is made with cream cheese. Let’s just say these cookies are soft, rich, and I have to work hard to keep myself out of them.

Cream Cheese Cookie CutoutsYum

1/2 cup melted butter
4 ounces softened cream cheese
1 cup sugar (sucanat works, as does brown sugar)
1 egg
1/2 teaspoon baking powder
1/2 teaspoon vanilla extract
2 cups flour (I use freshly ground hard white wheat flour)

Stir together melted butter, softened cream cheese, and sugar. Add egg, baking powder, and vanilla. Stir in flour until well combined. (Use a little less or a little more flour as needed.)  Place dough in the refrigerator for at least two hours.

Once dough is chilled, roll on a well floured surface and cut out into desired shapes. Bake in a 350° oven for 10-15 minutes or until cookies are lightly browned. (I prefer mine just barely done so that they stay soft!)  Allow cookies to cool completely before frosting.

Cream Cheese Frosting

1/2 cup butter, softened
8 ounces cream cheese, softened
4 1/2 cups unbleached organic powdered sugar
1/2 teaspoon vanilla extract

Whip butter and cream cheese with beaters until fluffy. Add vanilla and powdered sugar and beat until mixed thoroughly.

Makes about 30 cookies.

My (poor, deprived, starving) boys were not very happy with me when I told them that most of the cookies were  going to the Christmas Cookie Exchange. Not to worry, I told them. They could have all the broken cookies. Considering the fact that I am not a perfectionist, I’d say they made out just fine with a lovely assortment of broken stars, branchless trees, and torn stockings. 

 
If you’d like a printout of the Cream Cheese Cookie Cutouts recipe, you can download it here. I needed to print off the recipe anyway for the cookie exchange, so thought I’d share it with you too!

Heavenly Homemaker's Club Members: Access your homepage and all your fantastic resources here! Not a member yet? Please join us!

Honey Pecan Pie ~ Real Food Makeover

December 4, 2012 by Laura 31 Comments

This post may contain affiliate links. For more information, please see our disclosure policy.

Yum
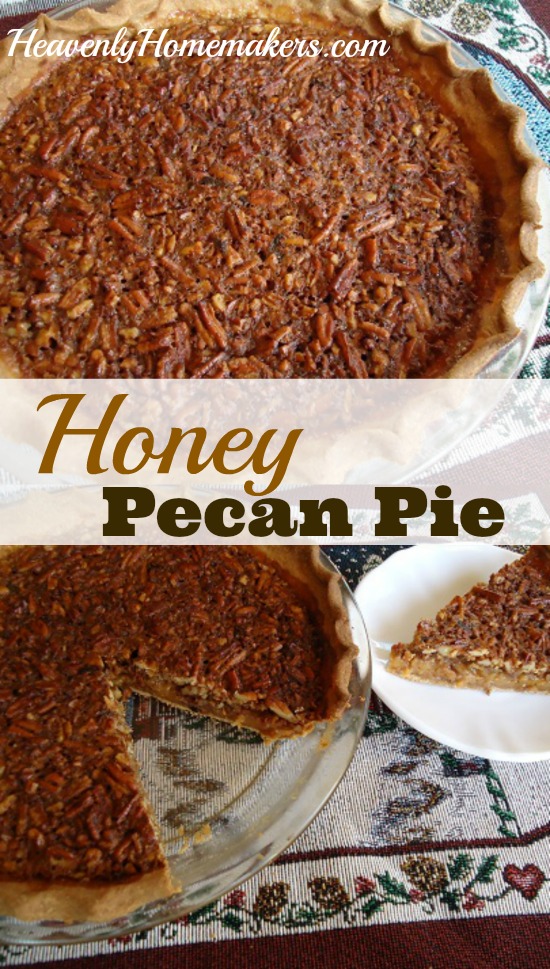
I have had several requests for a healthier Pecan Pie – one that didn’t call for corn syrup. My family was happy for me to try this experiment. I’m excited to share that I was easily able to adapt a recipe to use honey in exchange for corn syrup. Simple as that! (If only all of the Real Food Makeovers were this easy…)
Hey, guess what else? Not only was this recipe simple to figure out – the filling for this pie only has five ingredients. It’s super quick to put together!
Honey Pecan Pie
Honey Pecan Pie
Honey Pecan Pie ~ Real Food Makeover
 
Save Print
Author: Laura
Ingredients
  • 1 cup honey
  • 3 eggs
  • ⅓ cup melted butter
  • 1 teaspoon vanilla
  • 1¼ cups crushed pecans
Instructions
  1. Whisk first four ingredients together until eggs are beaten and everything is well mixed.
  2. Add pecans and stir.
  3. Pour mixture into an unbaked Whole Wheat Pie Crust.
  4. Bake in a 350° oven for about 45 minutes or until the middle of the pie no longer jiggles.
3.4.3177
Here’s my Whole Wheat Pie Crust recipe.
(My use of the word jiggles proves how professional I am in my use of cooking terms.)
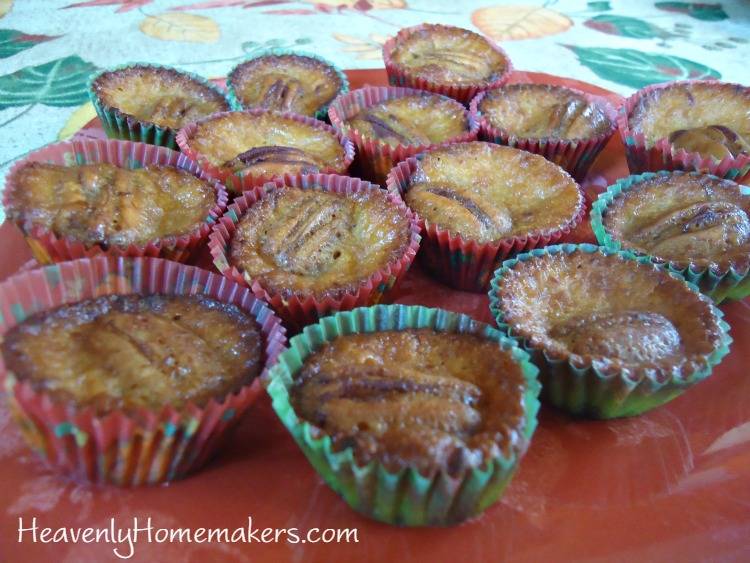
pecan pie bites4
How about another, even easier Pecan Pie idea? Try these Easy Pecan Pie Bites! They are wonderful for your holiday dessert table because people can pop one or two in their mouths and still enjoy other favorite desserts too! Not that we all need more than one dessert. But that’s pretty much a holiday reality, right?
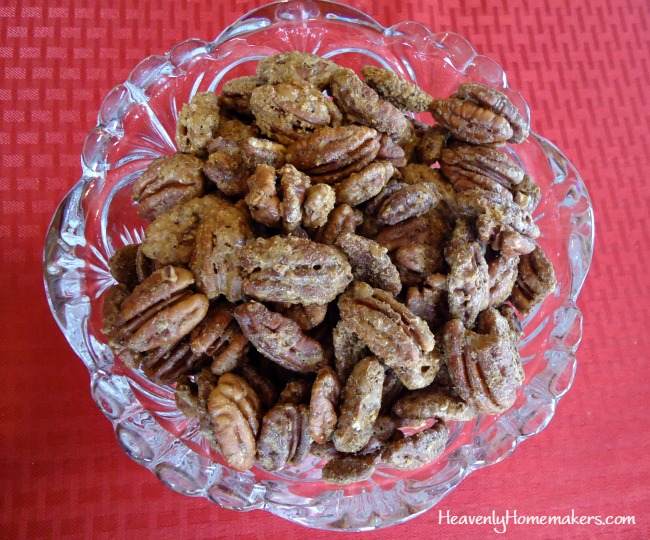
Cinnamon Sugar Pecans
And while you’re working with pecans, you might try these great Cinnamon Sugar Pecans! They are a great gift or snack!
Heavenly Homemaker's Club Members: Access your homepage and all your fantastic resources here! Not a member yet? Please join us!

Real Food MakeOver: Crock Pot Chocolate Peanut Butter Pudding Cake (and Cake Boys Episode 7!)

November 13, 2012 by Laura 21 Comments

This post may contain affiliate links. For more information, please see our disclosure policy.

Yum
 
Have a recipe you’d like me to try and make over? Submit your recipes on this Real Food Recipe Makeover Submission Page.
 

Remember that cake I tried to make in a crock pot that ended up being tedious and difficult? After that, my friend Jenny emailed me a recipe for Crock Pot Chocolate Peanut Butter Pudding Cake, figuring that I could surely make over the ingredients to make this a healthier recipe.
 

I was excited, yet given my experience with cake in a crock pot, I couldn’t help but wonder:  Would this cake be a lot of work? Would it be tasty in the end?
 

The answer to those questions are:  No, this cake is not a lot of work…and YES this cake is incredibly tasty.
 

I actually handed the recipe to the Cake Boys (aka Justus and bros) to make this for Matt’s birthday last week. It was so easy for them to adapt that they did it without any help from me. Yes indeed, this Real Food Makeover is brought to you by the Cake Boys. :)

 
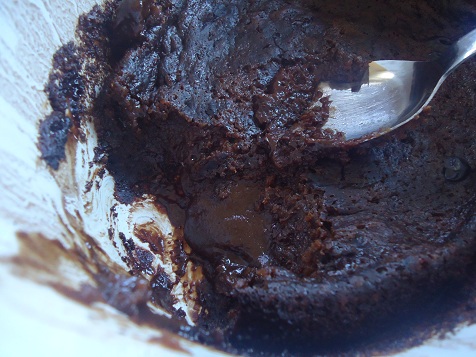
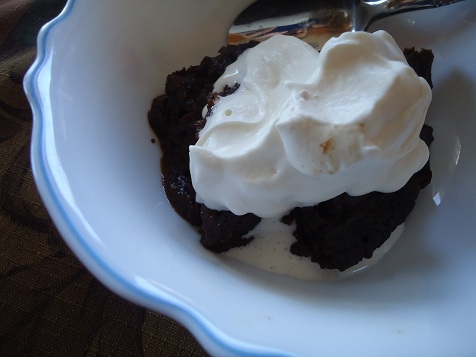
You simply pour the batter into the crock pot, then drizzle over a layer of boiling water/cocoa/sucanat. The cake bakes in a crock pot for two hours, and when it’s finished, the cake has baked over the top and a layer of fudgy pudding is on the bottom.
 

This cake is dreamy, rich deliciousness. We all loved it!


Chocolate Peanut Butter Pudding Cake

 
1 cup whole wheat flour
2 Tablespoons unsweetened cocoa powder
1/2 cup sucanat
1 1/2 teaspoon baking powder
1/4 teaspoon salt
1/2 cup milk
2 Tablespoons melted butter (or coconut oil)
1 teaspoon vanilla
1/2 cup natural peanut butter
1/2 cup semi-sweet chocolate chips

 
Combine flour, cocoa, sucanat, baking powder, and salt. Mix well. Make a well in the center and add milk, butter, and vanilla. Stir well, until batter is smooth. Stir in peanut butter (heat if needed, to thin). Stir in chocolate chips. Spread the batter evenly into a well greased slow cooker. Make the topping:
 
Topping:

 
3 Tablespoons cocoa powder
3/4 cup sucanat
1 1/2 cups boiling water
 

Mix cocoa and sucanat, whisk in boiling water until smooth. Gently pour over batter in crock pot, but don’t stir. Cover and cook on HIGH until puffed and the top layer is set, about 2- 2 1/4 hours. Turn off crock pot and let stand, covered for at least 30 minutes. Serve the cake (which is now on top) with ice cream or whipped cream and drizzle the fudgy pudding from the bottom over both.

 
Makes 6-8 servings


And now, you can enjoy Episode 7 of Cake Boys, which includes a ridiculous commercial break by Asa. Wow, our boys have tooooo much fun putting these together. Also, I should note:  Justus says that he added “shortening” to the cake. He really added butter. He was just reading the original recipe when he recorded. :)  And then we had a little lesson about what shortening is and why we don’t eat it unless it’s Palm Shortening. But anyway…


Heavenly Homemaker's Club Members: Access your homepage and all your fantastic resources here! Not a member yet? Please join us!

High Five Recipe: Easy Breakfast Casserole

November 3, 2012 by Laura 9 Comments

This post may contain affiliate links. For more information, please see our disclosure policy.

High Five Recipes 2

I don’t believe I had originally categorized my Easy Breakfast Casserole as a High Five Recipe. But as I put the recipe together one night, preparing to bake it the next morning, it occurred to me that the way I typically make this for my family – it has just four simple ingredients.

I love how easy this is to make:  Eggs, cream, bacon, and cheese – that’s it. You can add more to it (it’s great with peppers!!), but our boys like it best when it’s made with very basic ingredients. Every time I’ve fed this to guests, it’s been a hit. And it could not get any easier to put together!

I like mixing it up the night before, then getting up and putting it in the oven to bake while I get dressed and ready for the day.

Easy Breakfast Casserole

Quality recipes, five ingredients or less. Does healthy cooking get any easier?

P.S. I used bacon that I get from a very trustworthy farmer. Sometimes I use turkey bacon from the store or from my health food co-op. I think this recipe is healthiest when made with Homemade Turkey Sausage. Since I usually make up a big batch of Turkey Sausage, brown it, and freeze it in meal sized portions, that makes putting together this casserole a piece of cake! Um…a piece of casserole. Well, you know what I mean. ;)

Heavenly Homemaker's Club Members: Access your homepage and all your fantastic resources here! Not a member yet? Please join us!

High Quality Recipes – Five Ingredients or Less

November 1, 2012 by Laura 4 Comments

This post may contain affiliate links. For more information, please see our disclosure policy.

High Five Recipes 2

It’s been a while since I posted a new High Five Recipe. Just in case you’re new here, or have forgotten about this feature on my site – I wanted to take a minute to draw your attention to one of my favorite sets of recipes!

You all know that I try to keep life in the kitchen simple. But I also try to keep it as healthy as possible. I’m trying to prove to all of us that simple, inexpensive, and healthy are words that can be used in the same sentence!

It doesn’t get much easier than a recipe with five or fewer ingredients. And all of these recipes call for real foods that are very basic. Most likely, you have many of these ingredients in your kitchen just waiting to be used.

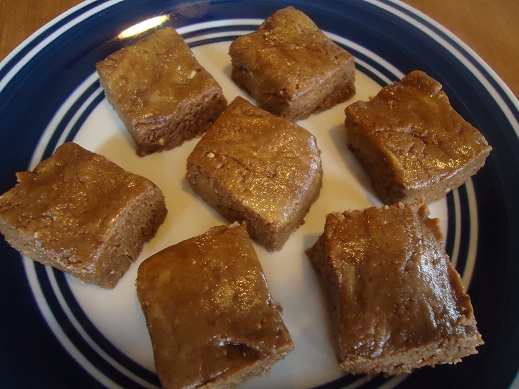
You want simple, healthy, inexpensive, and delicious? Try a High Five Recipe. Scroll through all these pages of High Five main dishes, side dishes, and desserts. I had forgotten about half of those recipes. I just finished looking through all of the ideas once again. Now, I’m feeling the need for some Popcorn Chicken and Peanut Butter Honey Fudge.

With some vegetables, of course. :)

Heavenly Homemaker's Club Members: Access your homepage and all your fantastic resources here! Not a member yet? Please join us!

Pizza Boats – A Quick Throw-it-Together Meal

October 19, 2012 by Laura 15 Comments

This post may contain affiliate links. For more information, please see our disclosure policy.

Yum

Apparently, it’s pizza week around here. :)

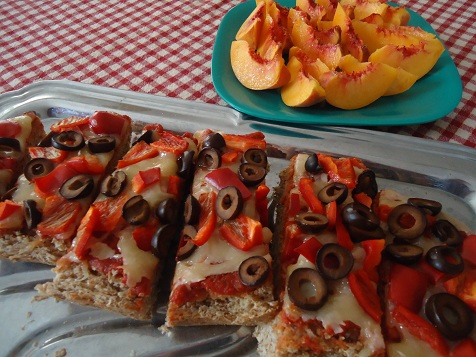
It’s great to have homemade Whole Wheat Pizza Crusts in the freezer. But if you don’t, or if you’re wanting just a little something different…might I recommend Pizza Boats?

(Warning to children:  These Pizza Boats don’t float. Do not take these into the bathtub.)

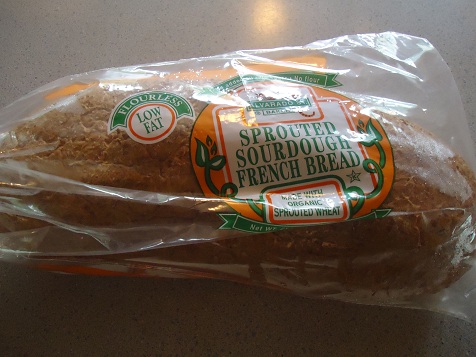
I have been ordering Alvarado Sprouted Sourdough French Bread from my health food co-op, Azure Standard. In a pinch, I grab one out, slice it and quickly put together two big Pizza Boats. These are perfect for an easy lunch, or for a quick supper before we run out to soccer games.

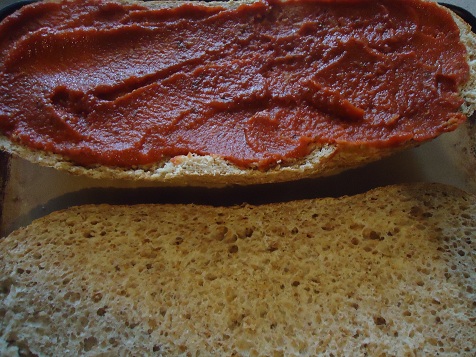
You’ll need 2 cups (16 ounces) of pizza sauce. Simply slice the french bread in half the long way.

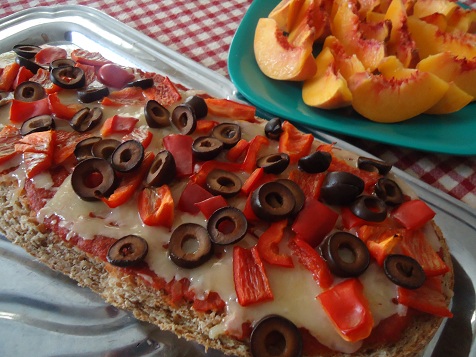
Top any way you wish.

Bake in a 375° oven for 10-15 minutes or until cheese is melted and bubbly.

I’m telling you. Healthy eating does not have to be difficult or take a lot of time. And it can be a lot of fun. Who wouldn’t want a Pizza Boat for dinner?

But don’t take them into the bathtub.

Why yes. I have been raising boy children for 15 years.

~~~~~~~~~~~~~~~~~~~~~~~~~~~~~~~~~~~~~~~~~~~~~~

Pizza Boats are the definition of a Simple Meal, wouldn’t you say?

We invite you to join all who are benefiting from Simple Meals. Save time, save energy, save money –  let us do the hard work for you! Check out Simple Meals here!

page_header

Heavenly Homemaker's Club Members: Access your homepage and all your fantastic resources here! Not a member yet? Please join us!
« Previous Page
Next Page »

Join Our Community!

 Facebook Twitter E-mail Instagram Pinterest

Popular Posts

~ Will All of the Real Moms Please Stand Up?
~ Easy! Stir-and-Pour Whole Wheat Bread
~ How to Make Gatorade
~ 31 Real Food Breakfast Ideas
~ Dear Teenage Girls...
~ When Mom Takes a Step Back
~ The Inexpensive Health Insurance We Love!
~ Let's Talk Real Food Grocery Budgets

Check out our latest posts!

  • Big Family Food and Fun: September 6-12, 2026
  • Big Family Food and Fun: August 30-September 5, 2026
  • Big Family Food and Fun: August 23-29, 2026
  • Big Family Food and Fun: August 16-22, 2026
  • Big Family Food and Fun: August 9-15, 2026
Home  ~  Simple Meals  ~  Club Membership  ~  Shop  ~  Privacy Policy  ~  Disclosure  ~ Contact

Copyright © 2026 · Beautiful Pro Theme on Genesis Framework · WordPress · Log in