Heavenly Homemakers

Encouraging women in homemaking, healthy eating and parenting

  • Home
    • About
    • FAQs
  • Recipes
    • Bread and Breakfast
    • Condiments
    • Dairy
    • Main Dishes
    • Side Dishes and Snacks
    • Desserts
    • Gluten Free
    • Instant Pot
    • Crock Pot
    • Heavenly Homemaker’s Weekly Menus
  • Homemaking
    • Real Food Sources
  • Store
  • Contact
    • Advertise
    • Disclosure
    • Privacy Policy
  • Simple Meals
  • Club Members!

Warm Chocolate Soother

January 19, 2010 by Laura 74 Comments

This post may contain affiliate links. For more information, please see our disclosure policy.

Warm Chocolate Soother

So, chocolate…or vanilla? That is the question.

I’d almost always say “chocolate” and yet…depending on the day, the occasion or the item…I may want vanilla. I’d say just about nothing beats this Warm Vanilla Soother.

And yet, last week the boys asked if I could try making my Warm Vanilla Soother into a Warm Chocolate Soother, just for fun. The kids thought it sounded yummy and hey, who am I to argue when it comes to making something chocolatey?

This recipe is almost exactly like Warm Vanilla Soother…just a couple of ingredients added.

Warm Chocolate SootherYum

Warm Chocolate Soother
 
Save Print
Author: Laura
Serves: 4-6
Ingredients
  • 3 cups whole milk
  • 4 egg yolks
  • ¼ cup real maple syrup
  • 3 Tablespoons brown sugar or sucanat
  • ¼ cup cocoa powder
  • 2 Tablespoons arrowroot powder or corn starch
  • 1 Tablespoon butter
  • 1 teaspoon vanilla extract
Instructions
  1. In a medium saucepan, whisk together milk, egg yolks, maple syrup, sucanat, cocoa and arrowroot powder.
  2. Cook over medium heat, stirring constantly (I use a whisk) until mixture begins to thicken.
  3. Remove from heat and add butter and vanilla.
  4. Stir until creamy.
  5. Pour into mugs and serve warm.
3.5.3251


Once this finally cooled down enough to drink, my eight year old proclaimed, “Mom!! It tastes just like you’re drinking a brownie!”

For real?!  Drinking a brownie?  I want to drink a brownie!!!

Mmmm, he was right!

This has the appearance of hot cocoa, but it’s thicker and heartier. Oh. My.

So chocolate…or vanilla? That is still the question.

Maybe we’ll assign days to flavors.

Monday, Wednesday, Friday and every other Sunday will be Warm Chocolate Soother days. Tuesday, Thursday, Saturday and every other Sunday will be Warm Vanilla Soother days.

Unless I have a hankering for vanilla on a Friday or feel a deep need for chocolate on a Tuesday, which I very well may. I’ll have to be flexible and leave the options open.

Let’s see, today is Tuesday. Which one are you gonna make?

Heavenly Homemaker's Club Members: Access your homepage and all your fantastic resources here! Not a member yet? Please join us!

High Five Recipes: Cheddar Ranch Burgers

January 12, 2010 by Laura 24 Comments

This post may contain affiliate links. For more information, please see our disclosure policy.

These burgers are my favorite way to use my homemade ranch dressing mix . Well, second favorite I guess, next to making the actual ranch dressing for salads. You’ll love how the ranch dressing mix gives these burgers such great flavor!

High Five Recipes 2

Now that the busy-ness of the holiday season is over and it’s a  new year, I’ve been excited to experiment with new simple and healthy recipes to share! I’ve been spending some time working up more High Five Recipes for us because a simple, healthy recipe with only five (0r fewer) ingredients?! Perfect!

These Cheddar Ranch Burgers are SO easy to stir together and cook up for a quick lunch or dinner. My kids (even the ones who usually don’t like meat as much) devour these! Such a fun variation to regular hamburgers!

Cheddar Ranch Burgers

High Five Recipes: Cheddar Ranch Burgers
 
Save Print
Author: Laura
Ingredients
  • 2 pounds hamburger meat (beef, venison or turkey)
  • ¾ cup shredded cheddar cheese ( I use Landmark raw white cheddar)
  • 2 Tablespoons ranch dressing mix (or ½ package ranch dressing pouch)
  • Whole wheat hamburger buns (or regular store-bought buns)
Instructions
  1. Stir all ingredients together in a bowl.
  2. Shape burger into 8-10 patties.
  3. Fry in a skillet or on the grill until cooked through and through.
3.4.3177

Cheddar Ranch Burgers
These are the bunless burgers shown in the picture. Really, they are delicious with or without a bun! This is great, since I’m often behind in keeping up with making our homemade buns.

Be sure to try making this Homemade Ranch Dressing Mix to use in your Cheddar Ranch Burgers…SO easy and good for you!

I’ve got several more High Five Recipes in the works! I’ll try to share one every two weeks or so!

Question:  Are you a ranch lover…or not? I’ve visited with several people lately that just don’t like ranch dressing. What is that about?

Do you think I could get away with feeding them these burgers and just call them something else? ;)

Heavenly Homemaker's Club Members: Access your homepage and all your fantastic resources here! Not a member yet? Please join us!

Homemade Whole Wheat Vanilla Wafers

December 17, 2009 by Laura 65 Comments

This post may contain affiliate links. For more information, please see our disclosure policy.

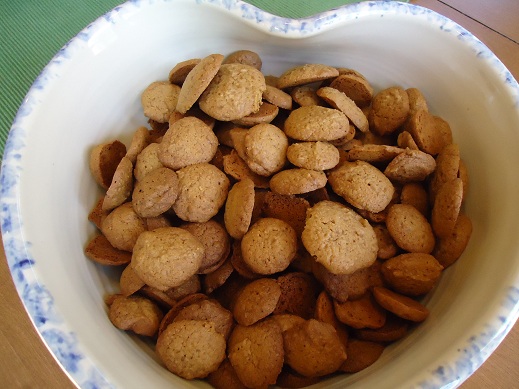
We have become a household of the “eat it while you can because it won’t be around long, hurry they’re almost gone already” sort. That’s definitely how it was the day I first made homemade vanilla wafers. Now I double the recipe when I make these.

Homemade Whole Wheat Vanilla WafersYum

5.0 from 1 reviews
Homemade Whole Wheat Vanilla Wafers
 
Save Print
Author: Laura
Ingredients
  • ½ cup butter, softened
  • ½ cup sucanat or brown sugar
  • 1 egg
  • 1 teaspoon vanilla extract (this is a great recipe to use with your homemade vanilla extract!!)
  • 1 cup whole wheat flour (I use freshly ground whole wheat flour made from hard white wheat)
  • ¼ teaspoon sea salt
  • ½ teaspoon baking powder
Instructions
  1. Cream butter and sucanat together. Beat in egg and vanilla extract. Stir in flour, salt and baking powder.
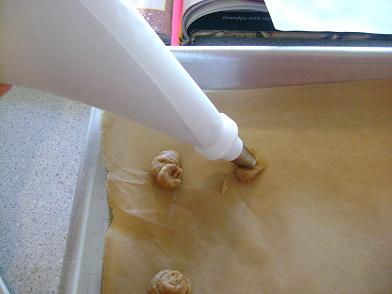
  2. Line a baking sheet with parchment paper. Scrape the dough into a pastry bag with a large, plain piping tip.
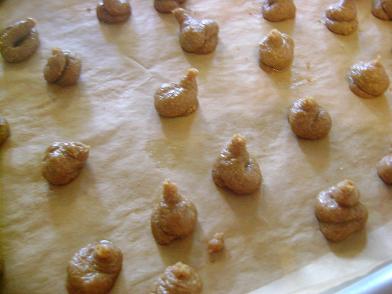
  3. Pipe nickel sized amounts of dough onto the parchment paper. (If you don't have the tools you need to "pipe" these onto your cookie sheet...I think just plopping tiny plops down with a spoon will work okay too.)
  4. If, after you are done piping dough, you have a big pan full of ugly, weird shaped blobs, you have done very, very well.
  5. Bake at 325° for five to fifteen minutes. (This is a broad range of time, but each oven is different. Check them after five minutes to see how they're doing!)
  6. Turn off the oven and let the cookies sit inside for a half hour or so to crisp up.
3.4.3177

vanillawafers1sm

vanillawafers2sm

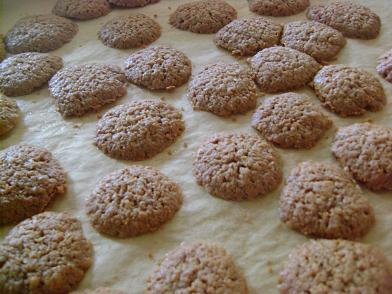
vanillawafers3sm

See? The ugly blobs spread out while they bake and make nice circle shaped Vanilla Wafers that your children will devour before their daddy comes home.

vanilla_wafers

And two days later when their daddy hears about the homemade vanilla wafers he will say to you, “What? Vanilla wafers? You made vanilla wafers? I never saw any vanilla wafers.”

Or something like that.

I have got to remember to set some of these aside next time.
————————————————————————–

Other snacks you might be interested in making:  Homemade Graham Crackers; Crispy Cheese Crackers; Chewy Granola Bars

Heavenly Homemaker's Club Members: Access your homepage and all your fantastic resources here! Not a member yet? Please join us!

Winter Comfort…Warm Vanilla Soother

December 3, 2009 by Laura 92 Comments

This post may contain affiliate links. For more information, please see our disclosure policy.

Lately, this drink has been my favorite breakfast. It’s warm, filling and nourishing. As I drink this, I always feel like someone just handed me a delicious mug of comfort. Mmmmm Warm Vanilla Soother.

Warm Vanilla Soother

Warm Vanilla SootherYum

5.0 from 4 reviews
Winter Comfort...Warm Vanilla Soother
 
Save Print
Author: Laura
Serves: 3-5
Ingredients
  • 3 cups whole milk
  • 4 egg yolks
  • ⅓ cup real maple syrup
  • 2 Tablespoons arrowroot powder or corn starch
  • 1 Tablespoon butter
  • 1 teaspoon vanilla extract
Instructions
  1. In a medium saucepan, whisk together milk, egg yolks, maple syrup and arrowroot powder.
  2. Cook over medium heat, stirring constantly (I use a whisk) until mixture begins to thicken.
  3. Remove from heat and add butter and vanilla.
  4. Stir until creamy.
  5. Pour into mugs and serve warm.
3.4.3177

Sprinkle a little nutmeg on top or add a dollop of whipped cream for an extra special touch!

Ever since I bought a gallon of vodka started my big batch of homemade vanilla, I’ve been experimenting with new ways to use vanilla extract. Yum, homemade vanilla is so good! (You’ll find more great recipes like this one in our What to Do With the Vanilla in Your Kitchen ebook.)

This Warm Vanilla Soother was the beginning of several other comfort food drinks that were born in my kitchen. Chocolate, chocolate mint, pumpkin – they are all so comforting and yummy! They are the perfect way to warm up on a chilly day – perfect for breakfast because they are nourishing and filling. If you chill the leftovers, it turns into pudding – also delicious!

Here are the other recipes you’ll want to try:

  • Chocolate Mint Soother
  • Warm Chocolate Soother
  • Warm Pumpkin Custard

If you have any other flavor ideas for this comforting drink, I’d love to hear them. I’m always up for experimenting in the kitchen – especially when I can take a basic recipe and tweak it to a slightly different variation of something we already love!

Heavenly Homemaker's Club Members: Access your homepage and all your fantastic resources here! Not a member yet? Please join us!

A Whole Lot of Baking Going On

December 2, 2009 by Laura 8 Comments

This post may contain affiliate links. For more information, please see our disclosure policy.

The past couple of days the boys and I have been doing some holiday baking. By that I mean that I’ve been grinding flour and kneading dough and washing dishes…and the boys have been licking beaters and using cookie cutters and begging me to please make frosting for the cookies. It’s been messy, loud and my whole house smells like Christmas!

We started off with Orange Cream Cheese Cut-Out Cookies. I used sucanat instead of the organic sugar crystals I had originally used in the recipe, just to see if it would work. Oh yeah…it worked. They turned out dark in color…but oh well. They are delicious and the citrus flavor is SO good. 

orangecookies2sm

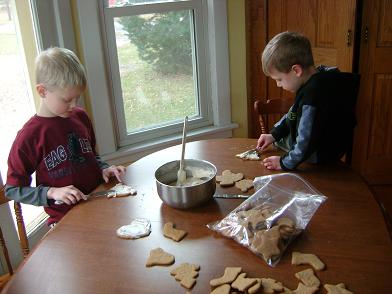
Malachi (age 4) was so excited to frost his Christmas cookies that he pulled a stool around the kitchen and got out all the ingredients we would need all by himself. I hated telling him that we didn’t need eggs or baking powder for the frosting. ;)

orangecookiessmHere’s Elias and Malachi finally getting to frost the cookies. You MUST try the Orange Cream Cheese Frosting with these cookies. And don’t forget that you can pretend that the cookies are good for you and packed with Vitamin C since they have orange juice in them. Uh-huh…cookies to boost your immune system. That’s right.
breadsm

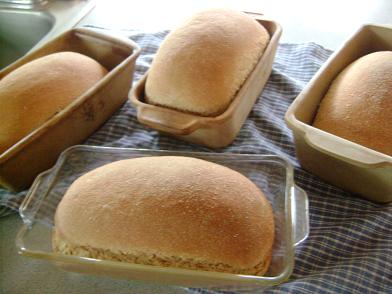
We (the Mom part of we) got a double batch of Honey Whole Wheat Bread made. We’ve been out of bread for about a week…so it’s about time I got that job done. 

coconutmacaroonssm

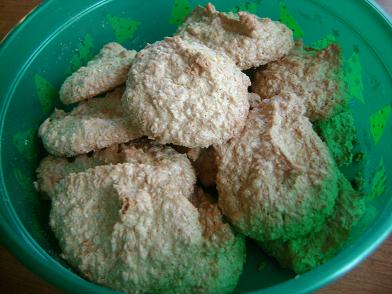
We also made a batch of Coconut Macaroon Cookies to take to a friend who can’t have gluten (and who happens to love Coconut Macaroons). These cookies are so easy!

Next week, I plan to share a big list of food ideas that make GREAT Christmas gifts! Stay tuned!

Been doing any baking lately?!

Heavenly Homemaker's Club Members: Access your homepage and all your fantastic resources here! Not a member yet? Please join us!

Holiday Help: What to Do With Leftover Mashed Potatoes and Sweet Potatoes

November 29, 2009 by Laura 7 Comments

This post may contain affiliate links. For more information, please see our disclosure policy.


I seem to almost always over-shoot when I estimate how many potatoes to make for a holiday meal. Just in case you also have a few leftover mashed potatoes…here are some ideas for ways to use them up:

Mashed Potato PancakesYum

Leftover mashed potatoes
1/4 cup whole wheat flour (for every 2 cups of mashed potatoes)
Butter

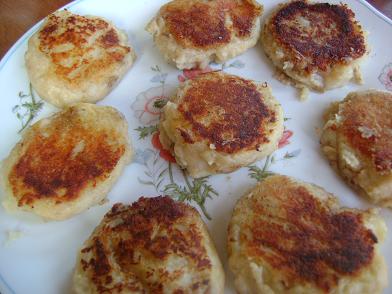
Mix mashed potatoes and flour together. Melt a little butter in the bottom of a skillet. Spoon scoops of mashed potato mixture into hot butter and flatten a bit. Flip potato cake several times to ensure than you don’t burn the sides…but so that the cake is heated through and through.

potatopancakessm

Cheesy Mashed Potatoes

Leftover mashed potatoes
1/2 cup sour cream (for every 3 cups of mashed potatoes)
Shredded cheddar cheese (I use raw white cheddar)

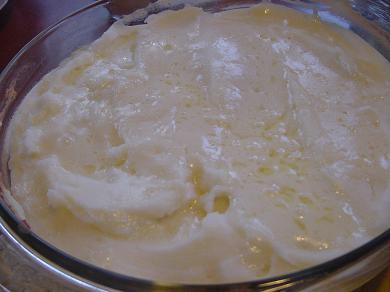
Re-warm mashed potatoes. Remove potatoes from heat and stir in sour cream. Spread into a casserole dish. Sprinkle with cheese and heat in the oven until cheese is melted and bubbly.

cheesypotatoes2sm

Shepherd’s Pie

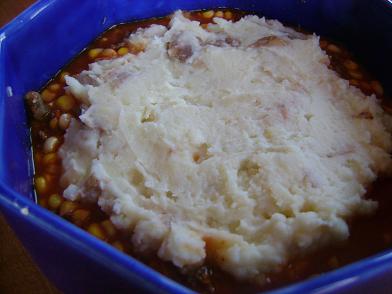
You’ll find the recipe for Shepherd’s Pie here. Just mix it up and spread the leftover mashed potatoes over the top. So easy!

shepherdspienewsm

Have leftover sweet potatoes?

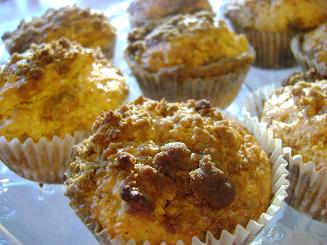
Stir them into these Sweet Potato Streusel Muffins!

sweetpotatomuffins2smThese muffins taste as good as they look and smell!

Both mashed potatoes and sweet potatoes can also be frozen to save for another time. It’s wonderful to have frozen mashed potatoes and mashed sweet potatoes ready to add to one of the above recipes!

Share how you use up your mashed potato and sweet potato leftovers!

Heavenly Homemaker's Club Members: Access your homepage and all your fantastic resources here! Not a member yet? Please join us!

Holiday Help: Simplify Making Mashed Potatoes

November 23, 2009 by Laura 37 Comments

This post may contain affiliate links. For more information, please see our disclosure policy.

holidayhelpsm

Yum

Learning this little potato trick changed my mashed potato making life forever. 

Instead of preparing your potatoes to be mashed on the day of your big holiday meal…prepare them the day before.

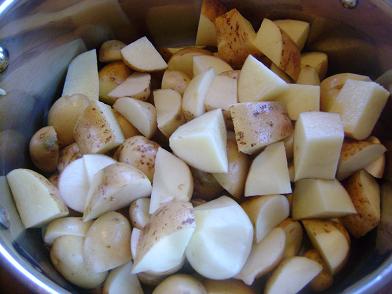
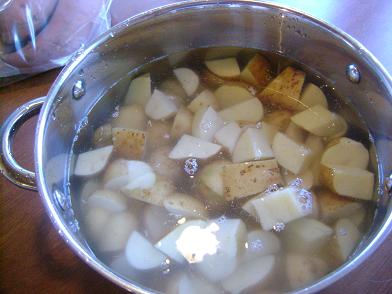
Scrub them (or peel them, whichever you like to do)….chop them…and throw them into your cooking pot.

mashedpotatoessm

Cover them with cool water.

mashedpotatoes2sm

Put a lid on your pot. 

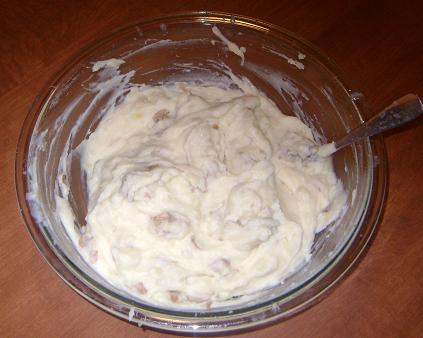
When it’s time to cook your meal, boil your potatoes and mash your potatoes, then serve your potatoes (with lots of melted butter!). 

mashedpotatoes3sm

I’m telling you, this little trick will save so much back pain on Thanksgiving day. I always prep my potatoes on the Wednesday before. They sit in the water waiting patiently until it is time to cook them Thursday. 

Between prepping my potatoes the day before and cooking my bird several days before I need to serve it…I practically have nothing to do on Thanksgiving day. 

Okay, not really nothing. 

You know what I mean.

P.S. I use this little trick almost every time I make mashed potatoes any day of the year. If we’re having mashed potatoes for dinner…I prep them in the morning or whenever I have a spare minute during the day. Then, when it’s time to cook dinner, all I have to do is turn on the burner to cook the taters. Love it!
————————————————–

This post is linked to Kitchen Tip Tuesdays.

Heavenly Homemaker's Club Members: Access your homepage and all your fantastic resources here! Not a member yet? Please join us!

Holiday Help: How to Make Turkey Gravy

November 18, 2009 by Laura 14 Comments

This post may contain affiliate links. For more information, please see our disclosure policy.

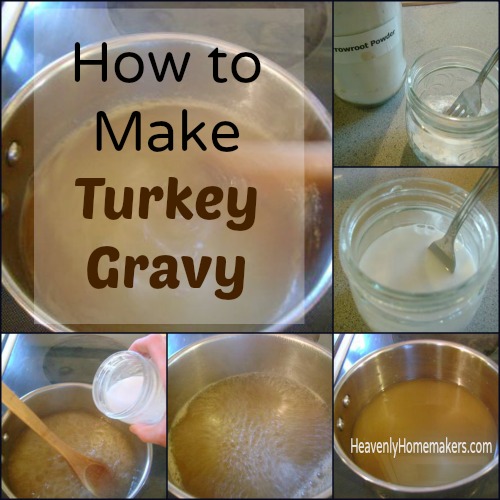
Turkey Gravy is easy when you follow these steps!

How to Make Turkey Gravy

I think gravy is my family’s favorite part of the holiday meal. “You want any potatoes with that gravy?!”

I know some people are intimidated by making gravy…afraid to make it lumpy and all that. (And then there are people who like lumps in their gravy. “What are these delicious lumps you put in your gravy?”)

Here’s the easiest way I’ve found to make turkey (or chicken or beef) broth gravy:

Easy Turkey GravyYum

You will need:

  • Turkey broth  (Hopefully you saved your broth after you made your turkey.)
  • Arrowroot powder, cornstarch or flour (about 3 teaspoons for every 2 cups of broth)
  • Water (about 1/3 cup for each of your 3 teaspoons of arrowroot powder)
  • Salt

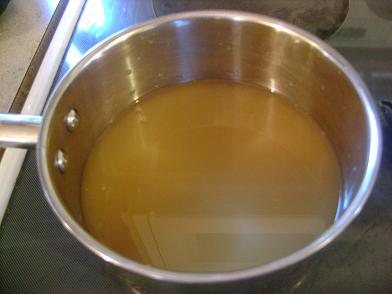
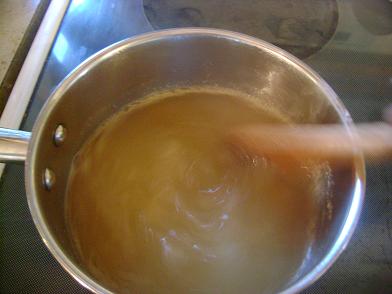
Step One: Pour broth into a medium saucepan.

gravy2sm

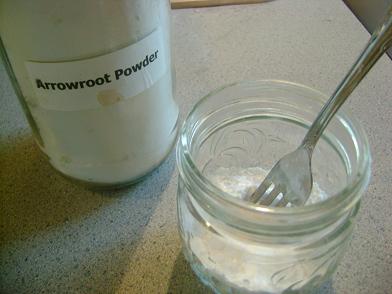
Step Two: Spoon arrowroot powder (or cornstarch or flour) into a small jar or glass.
(Surprise, surprise…I use  a jar.)

gravy1sm

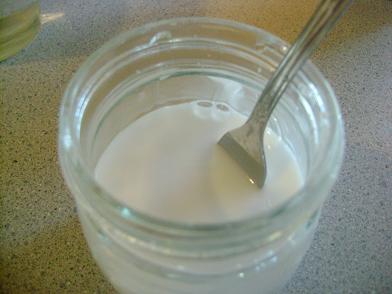
Step Three: Add water to arrowroot powder and whisk smooth with a fork.

gravy3sm

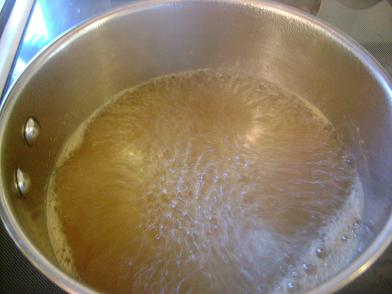
Step Four: Bring broth to a boil  (Try saying “bring broth to a boil” five times fast.)

gravy4sm

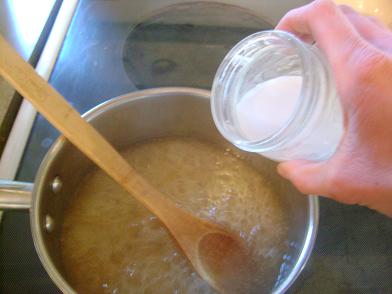
Step Five: Slowly pour arrowroot powder (or cornstarch, or flour)/water mixture into boiling broth, stirring while you pour. (I usually make gravy with a whisk. On picture taking day, I used a wooden spoon. Either one works, but a whisk usually helps in case lumps want to form.

gravy5sm

Step Six: Stir at medium to high heat until gravy thickens.
Turn down the heat and allow the gravy to simmer for a minute or two.
Salt to taste and serve your gravy.

gravy6sm

Trouble Shooting:

  • If gravy refuses to thicken, stir in tiny bits of arrowroot powder (or cornstarch, or flour)/water mixture until it is thick enough for your liking.
  • If gravy is too thick, stir tiny bits of water or milk to thin it out.
  • If gravy doesn’t have enough lumps for your liking, add sprinkles of arrowroot powder or flour and just try to stir them in. They won’t stir in no matter what you try, thus causing lumps.
  • If conversation around the Thanksgiving Table is lagging…challenge your guests to say “Bring Broth to a Boil” five times fast. That’s sure to liven up any party.
Heavenly Homemaker's Club Members: Access your homepage and all your fantastic resources here! Not a member yet? Please join us!

Ever Tried Cinnamon Apple Toast?

November 15, 2009 by Laura 14 Comments

This post may contain affiliate links. For more information, please see our disclosure policy.

I mentioned here that I may be getting sixty pounds of apples in my co-op order this week. (UPDATE!!! Click here to see if the apples all came in or not!)  If they all actually come in, I have no doubt that they will all get eaten. The kids love snacking on apples…they are SO nice to have on hand! The apples I mean. Well actually, the kids are pretty nice to have on hand too.

I ordered twenty pounds each of Gala (my favorite!), Yellow Delicious and Spartan. I’ve never even heard of Spartan apples before. Have you? Are they good? I ordered them because they were $11 for 20 pounds!!! I can’t wait to try them (if they come in)!

Here’s a very simple apple idea we’ll be snacking on with all of our apples:

Cinnamon Apple ToastYum

Your favorite whole grain bread (I use this homemade Honey Whole Wheat Bread…or Whole Wheat Sourdough if I have it made.)
Apples, sliced thinly
butter
cinnamon

Place slices of bread on a baking pan. Butter each slice. Lay three or four apple slices on each piece of bread. Sprinkle with cinnamon.

Broil Cinnamon Apple Toast in the oven for 2-3 minutes.

Cinnamon_Apple_Toast
So simple, your bigger kids can help you or make these themselves!

Other ways to eat apples…

  • My kids eat them big, in slices, or cut into chunks…depending on what Mama has time for. :)
  • Applesauce Bread
  • Applesauce
  • Apple Fruit Leather
  • Caramel Apple Dip
  • Strawberry Yogurt Fruit Dip
  • Apple crisp
  • I may experiment with individual apple pie pockets. Doesn’t that sound fun?

What are your favorite ways to eat apples? If you have one, feel free to leave a recipe link in your comment! Really, because sixty pounds of apples? I might need to get creative!

Heavenly Homemaker's Club Members: Access your homepage and all your fantastic resources here! Not a member yet? Please join us!

Holiday Help: The Easiest Way (in My Opinion) to Cook a Turkey

November 10, 2009 by Laura 70 Comments

This post may contain affiliate links. For more information, please see our disclosure policy.

Ready to learn the easiest way to cook a turkey? Lean in. This is so helpful!

turkey

Yum

Clearly the easiest way to cook a turkey is to let someone else cook the turkey. ;)  But, if you’re the one in charge of preparing the meal this year…let me share the easiest way I’ve found to cook a turkey.

I remember being so intimidated to cook a turkey the first time I hosted a Thanksgiving dinner. I called my mom a million times to ask questions. Could it really be that cooking a turkey is as simple as taking out the innards, putting it in a pan, covering it, and baking it? Yes, it is that easy.

My holiday turkeys are not fancy. I don’t stuff them. I don’t slather them with anything. I just put them into the oven and cook them. They create their own broth…smart little birds that they are.

Easiest Way to Cook a Turkey

How to Cook a Turkey the Easy Way

Pick your turkey:  You will need about 1 ½ pounds of turkey per person you are serving. Buy your turkey accordingly. Or, buy a larger one if you want to have lots of turkey leftovers. (Here are all kinds of ideas for what to do with leftover turkey.)

Thaw your turkey: Place the turkey in the refrigerator for 3-4 days until thawed.

Prepare your turkey: Once the turkey is thawed, reach in and grab out the bag of giblets. (This is by far every one’s favorite step, right?!)  Empty the giblets into your roasting pan as they help make a good, rich broth. Place the turkey, breast side up, into a large baking pan or roaster.

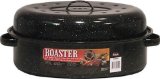
turkeyroaster

These are my favorite kinds of turkey roasters.
I picked mine up at a garage sale one year for 50 cents!

Cook your turkey: Season your turkey any way you like. I find a turkey to be so flavorful as-is, I rarely do much with seasonings. Though salt, pepper, garlic, and onion make the turkey a step above!

Cover with foil or with your roaster lid. Cook at 325° for 15-20 minutes per pound. (For instance, a 20 pound turkey would need to bake for five hours.)  You know your turkey is done cooking when the little red button pops up, or when the legs start to pull away from the body. Your turkey should be golden brown and slightly crisp looking. (Light brown and slick looking? Mr. Turkey is not done yet.)

To Cook your Turkey ahead of time (I highly, HIGHLY recommend doing this!!):

You can cook your Thanksgiving turkey as many days ahead of time as you want. I know most of you like turkey fresh out of the oven on Thanksgiving Day. But, here’s what I learned from my mom, and it really saves a lot of trouble on the big day when I’d really enjoy visiting instead of messing with a big bird.

Cook and cool your turkey any day before Thursday. De-bone and put meat in baggies. Pour broth into jars (3/4 full). Freeze or refrigerate, depending on how far in advance you cooked the turkey. If frozen, thaw in refrigerator the day before serving.

To reheat turkey, put as much light and dark meat as you think you will need for the Thanksgiving meal in a 9×13 pan. Drizzle a liberal amount of broth over turkey, cover and warm in 300° oven for 30-45 minutes or until meat is hot and steamy.

No one will ever know that you prepared your turkey ahead of time (except for the fact that you won’t be carving the turkey in front of them). It is always juicy and moist. I do it this way every year, and I’m always so thankful that the messy part is over before Thanksgiving day!

Are you in charge of cooking a turkey this year?! Do you stuff your turkey? Have any more helpful turkey cooking tips to share?

The Easiest Way to Cook a Turkey

You might also want to know:  How to Make Turkey Gravy.

Subscribe for FREE to Heavenly Homemakers so you won’t miss all the new Simple Recipes and ideas we share to save you money!

Heavenly Homemaker's Club Members: Access your homepage and all your fantastic resources here! Not a member yet? Please join us!
« Previous Page
Next Page »

Join Our Community!

 Facebook Twitter E-mail Instagram Pinterest

Popular Posts

~ Will All of the Real Moms Please Stand Up?
~ Easy! Stir-and-Pour Whole Wheat Bread
~ How to Make Gatorade
~ 31 Real Food Breakfast Ideas
~ Dear Teenage Girls...
~ When Mom Takes a Step Back
~ The Inexpensive Health Insurance We Love!
~ Let's Talk Real Food Grocery Budgets

Check out our latest posts!

  • Big Family Food and Fun: September 6-12, 2026
  • Big Family Food and Fun: August 30-September 5, 2026
  • Big Family Food and Fun: August 23-29, 2026
  • Big Family Food and Fun: August 16-22, 2026
  • Big Family Food and Fun: August 9-15, 2026
Home  ~  Simple Meals  ~  Club Membership  ~  Shop  ~  Privacy Policy  ~  Disclosure  ~ Contact

Copyright © 2026 · Beautiful Pro Theme on Genesis Framework · WordPress · Log in