Heavenly Homemakers

Encouraging women in homemaking, healthy eating and parenting

  • Home
    • About
    • FAQs
  • Recipes
    • Bread and Breakfast
    • Condiments
    • Dairy
    • Main Dishes
    • Side Dishes and Snacks
    • Desserts
    • Gluten Free
    • Instant Pot
    • Crock Pot
    • Heavenly Homemaker’s Weekly Menus
  • Homemaking
    • Real Food Sources
  • Store
  • Contact
    • Advertise
    • Disclosure
    • Privacy Policy
  • Simple Meals
  • Club Members!

Simple Crock Pot Cranberry Apple Cider

December 17, 2017 by Laura 2 Comments

This post may contain affiliate links which won’t change your price but will share some commission.

It is a fact that the first time I made this Cranberry Apple Cider, a young boy visiting our home looked into the crock pot, saw the floating cranberries, and asked, “Are those berries poisonous?”

cranberry cider33

Hey. It was a fair question. He’s been taught well. Never eat berries without first asking what they are and checking to be sure that they are safe to eat. Smart kid, that one.

I assured him that the berries floating in my cider were merely cranberries, but my proclamation meant nothing at all to him. So he stood waiting for me to answer his actual question, “Are those berries poisonous?”

cranberry cider22

I’ll admit that for at least two seconds, my mind started heading down the path of possible answers I could but should not give. “We’re not really sure, but we decided to try them and see what happened.” Or maybe, “Yes, but they were so pretty we decided it didn’t matter.”

But only a terrible hostess would scare visiting children, so even though this kid is a regular guest in our home and knows we specialize in sarcasm, I ignored the untrue answers threatening to come out of my mouth and told him, “Yes. But only if you chew them up and swallow them. If they’re just floating in your cup, they won’t hurt you.”

I kid, I kid.

I actually didn’t have to say anything at all because while I was quietly saying, “Nope, they’re just cranberries. Not even a little bit poisonous.” My almost 13-year old was sharing his own scary remarks about how his mom sometimes, but not always, puts poisonous berries in the cider so the family never knows which batch is safe, then ended with, “So. You want to try some?”

cranberry cider11

It’s so much fun to be a guest at our house. You should definitely come drink cider with us sometime. If you dare. Mooh-ha-ha.

Well now that we got all the sarcasm out of the way (a Christmas miracle), let’s get on with the niceties about this recipe.

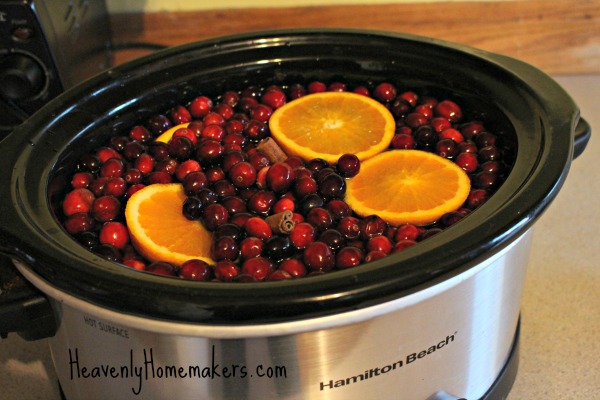
This Simple Crock Pot Cranberry Apple Cider actually smells like Christmas. Yes, if you’ve ever wondered what Christmas smells like, this is your answer. It also looks like Christmas because what is more festive looking than (potentially poisonous) red berries, oranges, and cinnamon sticks in a crock pot? So pretty!

The best news is that this may be the simplest recipe you can make during the holiday season. Put ingredients into crock pot. Turn on crock pot. Let the smell of Christmas fill your home.

Simple Crock Pot Cranberry Apple Cider

Simple Crock Pot Cranberry Apple Cider
 
Save Print
Author: Laura
Serves: 8-10
Ingredients
  • 64 ounces unsweetened apple juice
  • 1-2 whole oranges, sliced
  • 16-ounces fresh cranberries
  • 3-5 cinnamon sticks
Instructions
  1. Place all ingredients into a slow cooker.
  2. Heat on low for 3-4 hours.
  3. Serve and enjoy!
3.4.3177

TIP: After you make the first round of cider, save the cinnamon sticks, oranges, and cranberries to reuse in another batch of hot cider.

Simple Crock Pot Cranberry Apple Cider

This cider is fun to leave in a crock pot for several hours during the day so that at all times the house smells wonderful and at any time a cup can be refilled!

Heavenly Homemaker's Club Members: Access your homepage and all your fantastic resources here! Not a member yet? Please join us!

Hot Vanilla Milk (3 Ingredients)

January 1, 2017 by Laura 4 Comments

This post may contain affiliate links which won’t change your price but will share some commission.

Hot cocoa is wonderful. Hot tea hits the spot. I think we all know how I feel about a lovely cup of coffee. (Best thing ever, in case you weren’t sure.) But this Hot Vanilla Milk is a fun option to offer when you need a little variety in your hot drink repertoire.

vanilla-milk

If you want to make it really special, add one of the fun Flavored Whipped Cream options I shared below. As fun as it is to hit a coffee shop sometimes for a special treat, it is not fun to pay $4-$5 per cup of delicious drink. This Hot Vanilla Milk and all the other fun drink options I listed below will save us all loads of money because we can make many great hot drinks at home!

Hot Vanilla MilkYum

Hot Vanilla Milk (3 Ingredients)
 
Save Print
Author: Laura
Serves: 3-4
Ingredients
  • 3 cups milk (I use whole milk)
  • 2 Tablespoons real maple syrup (give or take)
  • 1 teaspoon vanilla extract
Instructions
  1. Whisk milk and maple syrup together in a small sauce pan.
  2. Stir over low heat until milk mixture begins to bubble.
  3. Remove from heat and stir in vanilla extract.
  4. Serve right away.
3.4.3177

hot-vanilla-milk

I will now make a list for you of all the hot drink recipes I’ve shared here through the years. With this Hot Vanilla Drink recipe, there’s a hot drink for every day of the week! Plus I included a few fun add-ins to the list. Hot drinks are fun. Hot drinks with flavored whipped creams are even better!

Homemade Hot Cocoa

  • Easy Hot Chocolate Mix
  • The Best Hot Cocoa
  • Homemade Healthier Eggnog
  • Warm Vanilla Soother
  • Warm Chocolate Soother
  • Warm Pumpkin Custard
  • Chocolate Caramel Coffee Creamer
  • Peppermint Cream for your hot chocolate or coffee
  • Chocolate Whipped Cream for Coffee

What are your favorite hot drinks? Do you live in a cold-weather area? My family (here in Nebraska) is doing everything we can to stay warm right now.

Heavenly Homemaker's Club Members: Access your homepage and all your fantastic resources here! Not a member yet? Please join us!

Homemade Whole Wheat Graham Crackers

April 13, 2016 by Laura 187 Comments

This post may contain affiliate links which won’t change your price but will share some commission.

This Whole Wheat Graham Crackers recipe was originally posted in 2008. My current big 11-year old was a tiny 3-year old back then and I can’t stop looking at the pictures in this post.

I updated this post to have an easy-to-print recipe option for you. These crackers are crunchy-crispy…and taste SO GOOD. Oh, I hope you love them like we do.

If you like the Honey Graham Cracker recipe, you’ll love the fact that you can also make CHOCOLATE Graham Crackers! Just add 1/3 cup cocoa to the recipe.

Whole Wheat Graham Crackers Yum

5.0 from 1 reviews
Healthy Treat for Today: Homemade Whole Wheat Graham Crackers!
 
Save Print
Author: Laura
Ingredients
  • 2 ¼ cups whole wheat flour
  • ½ cup sucanat (dehydrated cane sugar juice)
  • 1 teaspoon baking powder
  • ½ teaspoon baking soda
  • ½ teaspoon salt
  • ¼ teaspoon cinnamon
  • 4 Tablespoons honey
  • ¼ cup water
  • 1 teaspoon vanilla
  • ½ cup butter, melted
Instructions
  1. Preheat oven to 350°.
  2. Melt stick of butter in a pan on the stove. Set aside.
  3. In a mixing bowl, stir together the flour, sucanat, baking powder, baking soda, salt and cinnamon.
  4. Add the liquids: honey, water, vanilla and melted butter.
  5. Stir well until a nice ball of dough is formed.
  6. Cut two pieces of Parchment paper the size of the cookie sheet.
  7. Lay one piece of parchment paper on the cookie sheet.
  8. Place the ball of dough on the parchment paper.
  9. Lay the other piece of parchment paper on top of the ball of dough. Squish dough down a little with your fist.
  10. Use the rolling pin to roll the dough between the pieces of parchment paper. Roll until the dough covers the whole cookie sheet.
  11. Remove the top piece of parchment paper. Cut rolled dough into 2 inch squares, or cut shapes with cookie cutters, being sure to separate the shapes from the surrounding dough a little.
  12. Bake in oven for 18 minutes.
  13. Turn oven off, but leave crackers in the oven to get crisp.
  14. Remove from oven after 30 minutes to one hour. Break graham crackers apart.
  15. Store in a air tight container.
3.4.3177

grahamcrackers1sm.JPG
Malachi is finishing up the rolling for Mama!

chocgrahamcrackers1sm.JPG
Here’s a shot of the chocolate graham crackers
cut into squares and ready to bake.

grahamcrackers3sm.JPG
Malachi is using little cookie cutters to make “animal crackers”!

chocgrahamcrackers3sm.JPG
Here’s a plate of the Chocolate Graham Crackers.
(Got milk?)

My kids get so excited when I make these. They are a great snack to have on hand. Try them and see what you think! :)

Homemade Graham Crackers

Heavenly Homemaker's Club Members: Access your homepage and all your fantastic resources here! Not a member yet? Please join us!

How to Set Up an Iced Coffee Bar

August 5, 2015 by Laura 10 Comments

This post may contain affiliate links which won’t change your price but will share some commission.

Need a party idea? Set up an Iced Coffee Bar!

Monday was my birthday. (Yay, 42!) Since most of my favorite peeps (aka three outa four of my boys) were still at church camp and thus not home to help me celebrate – we instead invited a few friends over. It was such a blessed time.

Not planned or appreciated is the fact that our grill chose to die at the very moment we were ready to begin cooking our meat (for 13 hungry people). I mean the grill didn’t just die. It also became very dead. So, so dead.

One of our friends who had just left her house to come over saved the day by bringing her grill (hi, can you come to my birthday get-together and if it’s not too much to ask can you load up and bring an entire grill when you come? k thanks.) So we ate a little bit late. It made for a longer celebration, and then the food tasted even better than if we’d eaten an hour and a half before during the regularly scheduled program. This is what memories are made of. And also this…

While the men were outside looking under the hood of the grill, and one of my friends was loading up her grill to bring over, and some other friends were outside throwing around a football, and some kids were in the lego room upstairs – this was happening in my kitchen:

birthday bouquet1

birthday bouquet2

I am loved and richly blessed by these dear people.

After we finally ate the most delicious dinner (grilled steak and chicken and amazing side dishes brought by friends), out came a brand new buffet I had been working on for a couple of days. Allow me to introduce you to the very wonderful Iced Coffee Bar. This idea came to me as I was thinking about my favorite foods and drinks while planning the get-together. What did I want for my birthday meal? Steak, for sure. And wouldn’t it be fun to serve iced coffee, thought I. One thing led to another until this:

Iced Coffee Bar

Yes, the White Chocolate and the Caramel are in vases.
What a great way to re-purpose those, don’t ya think?

I brewed/chilled coffee and made coffee ice cubes all day in preparation. I made sweet sauces. I had absolutely wayyyyy too much fun. And then during the party? Let me just say that you must do this sometime. It was a blast seeing what people put together. Some drinks got blended. Some used ice cream. Some mixed all three sauces. Some made fun of me for having to drink decaf. Hey, I wanted to sleep after my party, okay? Caffeine can’t happen after 5pm for this (very young) 42 year old.

How to Make an Iced Coffee Bar

Suggestions for options to include in your Iced Coffee Bar

  • Jars of chilled regular coffee
  • Jars of chilled decaf coffee
  • Regular and decaf coffee ice cubes
  • Cream
  • Half and Half
  • Homemade Hot Fudge (with a bit more cream in it to make it runnier)
  • Homemade Caramel Sauce (also with a bit more cream added)
  • Homemade White Chocolate Sauce (recipe coming soon!!)
  • Vanilla Ice Cream
  • Glasses
  • Straws
  • A blender for those who wanted frappes

Explain the options to your guests, then let them have at it.

It was so much fun to see what people came up with for their special drink. We all took turns building our concoction, then we all stood around sipping and saying “yum” over and over while talking and laughing. Bliss.

iced coffee

This Iced Coffee Bar is going to be my new go-to idea for special gatherings. Come winter, we’ll just switch it to a Hot Coffee Bar with fun fixin’s. Do this!!! It is so much fun!

Want to borrow my Coffee Bar Labels? These made it easy for guests and added cuteness to the fun.

coffee bar labels

Download and Print These Free Coffee Bar Labels

What else can you think of to add to this Iced (or hot) Coffee Bar?

P.S. If you are in my local Bunco group, you are not allowed to use this idea until after I host, mmkay?

Heavenly Homemaker's Club Members: Access your homepage and all your fantastic resources here! Not a member yet? Please join us!

Cool Pineapple Cream Dessert – Dairy Free, No Sugar Added – 100% Delicious

May 29, 2014 by Laura 22 Comments

This post may contain affiliate links which won’t change your price but will share some commission.

pineapple dessert 3

I found this recipe and decided to make it on Sunday night for our small group. A couple of my friends who were coming can’t eat dairy, so I figured it would be perfect. I had it whipped together and served into cups by the time friends began arriving. And then, it just sat there, looking ever so inviting and refreshing.

Seeing as this is sort of like ice cream, and seeing as the cups of Cool Pineapple Cream Dessert were just sitting there on the counter while my friends and I waited for the burgers to come off the grill so we could eat, and seeing as my stomach was growling as loud as a mack truck – I interrupted our visiting and said something like, “Forget it. I’m not waiting for a burger. I’m going to try one of these. You guys want one?”

And so it was that three of us gals stood in the kitchen, eating our desserts before dinner even began. Hey, the kids were all outside running around. Nobody even knew. Except that I just ratted us out to all of you. But you’ll never tell, right?

Cool Pineapple Cream Dessert. It’s a dessert, it’s a snack, it’s breakfast, it’s lunch, it’s a cool treat in the evening while you’re sitting outside on the porch. This recipe can be whatever you want or need it to be. Why? Because it’s sweet enough to be a dessert, but it’s healthy enough to be a part of your meal. With only three, whole food ingredients, and no added sugar – this recipe is perfect.

My friends and I decided it tasted a bit like pineapple sherbet from the store. If you want this to taste a little sweeter, simply add a few drops of real maple syrup. I thought it was great without any added sugar. In fact, after I was a good girl and ate my dinner, I went ahead and ate two more cups of this goodness, guilt free. I just couldn’t help myself.

Cool Pineapple Cream DessertYum

4 cups (give or take) frozen pineapple chunks
1 can (13.5 ounces) chilled coconut milk
1 teaspoon vanilla extract

Blend all ingredients together in a food processor or blender until smooth and creamy. Serve right away. Makes 6-10 servings.

Cool Pineapple Cream Dessert

Can other milk options work in this recipe? I don’t see why not. Regular cow milk should work just fine (1 1/2 cups), and I’m guessing almond or rice milk would work – although I don’t have much experience with either of those. Coconut milk gives this extra great nutrients, plus a mixture of pineapple and coconut will help you make believe you are vacationing in Hawaii. Especially if you are eating dessert before dinner, right? Ah the beauty of being a grown up. :)

Ever snuck dessert before dinner when the kids weren’t around to catch you?

Heavenly Homemaker's Club Members: Access your homepage and all your fantastic resources here! Not a member yet? Please join us!

Homemade Pudding Pops

July 19, 2011 by Laura 122 Comments

This post may contain affiliate links which won’t change your price but will share some commission.

You know how all your friends growing up always had the cool snacks at their house? (Although I’m sure my friends thought I was the one with the cool snacks.)  One of my friends always had Jello Pudding Pops at her house. Visiting her in the summer was always a treat. Don’t worry – I liked her for more than just her pudding pops. I mean, she also had really cool Cabbage Patch Dolls. No really – I liked my friend for who she was – not just for her pudding pops and dolls (and cool play room and cute puppy).

I can not recreate a Cabbage Patch Doll, nor do I think my boys would want me to. But Beth at Turn 2 the Simple reminded me a few days ago with her comment on my Creamy Pudding recipe that I can recreate a Pudding Pop! I love how tasty these are, how refreshing they are on a hot day – and how they actually offer some nourishment and keep my kids full for a little while.

I simply followed my Creamy Pudding recipes and froze the mixture into pudding pops. EASY!!! I made both chocolate and vanilla. I didn’t try butterscotch, but I think I might next time just for fun!

How to Make Pudding Pops:

Make a batch (or two or three) of pudding. You can use my healthy varieties of Creamy Pudding if you want!

Yum

Pour the pudding into popsicle containers or 3 ounce sized bathroom cups.
Each batch of pudding made about 15 Pudding Pop cups.
I found it easiest to put all the cups on a large cookie sheet for easier transport the freezer.


Allow the pudding to cool and set up (about 45 minutes). Place a popsicle stick in each cup:


Put the Pudding Pops into the freezer for at least 4 hours. I was surprised that it took quite a while for these to be frozen through and through. Oh, but when they were frozen – it took me back to my days as a little girl playing with Cabbage Patch Dolls with my friend, and eating pudding pops on her porch.


Do you have any Pudding Pop or Cabbage Patch Doll memories to share? Oh dear, or are some of you too young to remember Cabbage Patch Dolls?

Heavenly Homemaker's Club Members: Access your homepage and all your fantastic resources here! Not a member yet? Please join us!

Chocolate Chocolate Chip Muffins

April 15, 2010 by Laura 118 Comments

This post may contain affiliate links which won’t change your price but will share some commission.

I’m not sure if you are a chocolate lover like I am, but any recipe that has the words chocolate and chocolate written side by side makes me very happy and excited.

Chocolate_Chocolate_Chip_Muffins

My biggest hint on this recipe is to use sour cream instead of milk. (The recipe lists either one.) Sour cream makes these super moist.

This recipe is a definite family favorite. They taste amazing with a glass of milk or a cup of coffee!

Chocolate Chocolate Chip MuffinsYum

1 1/2 cups whole wheat flour
1/3 cup sucanat
1/4 cup cocoa powder
1/2 teaspoon sea salt
1/2 teaspoon baking powder
1/4 cup melted coconut oil or butter
2/3 cup milk or sour cream
1 egg
1/4 cup chocolate chips (I recommend these organic chips without soy lecithin)

Stir together dry ingredients. Mix in coconut oil, milk and egg. Fold in chocolate chips. Scoop into 9-12 paper lined muffin tins. Bake at 400° for 20  minutes. Makes about 9 muffins. (I double the recipe for my family of six.)

5.0 from 1 reviews
Chocolate Chocolate Chip Muffins
 
Save Print
Prep time
10 mins
Cook time
20 mins
Total time
30 mins
 
Author: Laura
Serves: 9 muffins
Ingredients
  • 1½ cups whole wheat flour
  • ⅓ cup sucanat
  • ¼ cup cocoa powder
  • ½ teaspoon sea salt
  • ½ teaspoon baking powder
  • ¼ cup melted coconut oil or butter
  • ⅔ cup milk or sour cream
  • 1 egg
  • ¼ cup chocolate chips
Instructions
  1. Stir together dry ingredients.
  2. Mix in coconut oil, milk and egg.
  3. Fold in chocolate chips.
  4. Scoop into 9-12 paper lined muffin tins.
  5. Bake at 400° for 20 minutes.
3.4.3177

If you have some good quality coconut oil, I highly recommend using it in this recipe. The coconut flavor with the chocolate is SO GOOD.

How about Chocolate Chip Bread?

Don’t mind if I do. Indeed, you can also make this recipe into a quick bread instead of muffins. Just spread the batter into a buttered loaf pan and bake at 350° for 50 minutes! Get all the details here.

chocolate_pumpkin_bread_2


Heavenly Homemaker's Club Members: Access your homepage and all your fantastic resources here! Not a member yet? Please join us!

Homemade Chewy Granola Bars (without corn syrup!)

March 25, 2010 by Laura 420 Comments

This post may contain affiliate links which won’t change your price but will share some commission.

Chewy Granola Bars. No corn syrup. Easy recipe. Grab-and-go snack option. Fantastic.

Chewy Granola Bars - No Corn Syrup

Every homemade chewy granola bar recipe I’ve ever seen includes corn syrup and/or marshmallow cream (not ingredients we feel okay about eating or feeding my family). Even most pre-made granola bars I have seen at the store (even the organic ones) have ingredients I don’t like feeding my family.

I finally figured out a chewy granola bar recipe that we like! It’s easy and includes all natural sweeteners and ingredients! These bars are way cheaper than store bought granola bars! Plus you can customize it according to your family’s taste and allergies! They can be easily wrapped individually to take in the car or packed in a lunch!

Homemade Chewy Granola BarsYum

5.0 from 2 reviews
Homemade Chewy Granola Bars (without corn syrup!)
 
Save Print
Author: Laura
Ingredients
  • ½ cup peanut butter or sunbutter
  • ⅓ cup honey
  • ¼ cup coconut oil (or another oil of your choice)
  • 1 cup oats
  • 1 cup total of any combination of: sesame seeds, coconut flakes, sunflower seeds, dried fruit, mini chocolate chips
Instructions
  1. In a medium sized saucepan, melt together peanut butter, honey and coconut oil.
  2. Remove from heat and add one cup of oats.
  3. Choose your favorite combination of coconut flakes, sesame seeds, sunflower seeds, dried fruit and mini chocolate chips, to equal a total of ONE CUP. (I just got out my one cup measuring cup and poured in the ingredients until the cup was full.)
  4. Pour in and stir well.
  5. Spread mixture into a 8x8 or 9x4 pan.
  6. Chill for two hours, then cut into bars.
3.4.3177

granola_bars_1

granola_bars_2

granola_bars_3

Wrap in plastic wrap for a quick grab and go snack!

granola_bars_4

Many have said that these taste similar to the oldie-but-goodie No Bake Cookie recipe we’re all familiar with. How fun that these are quite a bit healthier!

I’ve found that these keep best in the fridge as they get a little bit too soft if left out for too long. What a perfect grab-and-go snack!

Heavenly Homemaker's Club Members: Access your homepage and all your fantastic resources here! Not a member yet? Please join us!

A Whole Lot of Baking Going On

December 2, 2009 by Laura 8 Comments

This post may contain affiliate links which won’t change your price but will share some commission.

The past couple of days the boys and I have been doing some holiday baking. By that I mean that I’ve been grinding flour and kneading dough and washing dishes…and the boys have been licking beaters and using cookie cutters and begging me to please make frosting for the cookies. It’s been messy, loud and my whole house smells like Christmas!

We started off with Orange Cream Cheese Cut-Out Cookies. I used sucanat instead of the organic sugar crystals I had originally used in the recipe, just to see if it would work. Oh yeah…it worked. They turned out dark in color…but oh well. They are delicious and the citrus flavor is SO good. 

orangecookies2sm

Malachi (age 4) was so excited to frost his Christmas cookies that he pulled a stool around the kitchen and got out all the ingredients we would need all by himself. I hated telling him that we didn’t need eggs or baking powder for the frosting. ;)

orangecookiessm
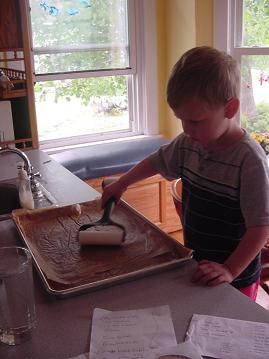
Here’s Elias and Malachi finally getting to frost the cookies. You MUST try the Orange Cream Cheese Frosting with these cookies. And don’t forget that you can pretend that the cookies are good for you and packed with Vitamin C since they have orange juice in them. Uh-huh…cookies to boost your immune system. That’s right.

breadsm

We (the Mom part of we) got a double batch of Honey Whole Wheat Bread made. We’ve been out of bread for about a week…so it’s about time I got that job done. 

coconutmacaroonssm

We also made a batch of Coconut Macaroon Cookies to take to a friend who can’t have gluten (and who happens to love Coconut Macaroons). These cookies are so easy!

Next week, I plan to share a big list of food ideas that make GREAT Christmas gifts! Stay tuned!

Been doing any baking lately?!

Heavenly Homemaker's Club Members: Access your homepage and all your fantastic resources here! Not a member yet? Please join us!

Zucchini Recipes: Zucchini Brownies

August 11, 2009 by Laura 28 Comments

This post may contain affiliate links which won’t change your price but will share some commission.

If you know me very well, you know I love brownies. These fudgy brownies to be exact. So while coming up with zucchini recipes, of course I experimented to come up with a zucchini brownie recipe. 

Zucchini BrowniesYum

1/2 cup butter, melted
1 1/2 cups sucanat or rapadura
1/3 cup cocoa
1 cup shredded zucchini
1 egg
2 cups whole wheat flour

Mix butter, sucanat and cocoa. Stir in zucchini and egg. Gradually mix in flour until well combined. Pour batter into a 9×13 inch pan. Bake in a 350° oven for 25 minutes or until a toothpick inserted into the middle comes out clean.

zucchinibrowniessm

Since I’m getting vegetable in every moist, chocolaty bite…do you think I can justify eating twice as many?

Just wondering. :)

Be sure to check out these zucchini recipes also: 

  •  Zucchini Cake
  • Cheeseburger Zucchini Boats
  • Whole Wheat and Honey Zucchini Bread and Muffins
  • Chocolate Chip Zucchini Cookies and Bars

AND, if you want even more zucchini recipes, check out Tammy’s Recipe swap today! We really might just all turn into zucchinis.
—————————————————————

This post is linked to the In Season Recipe Swap and Works for me Wednesday.

Heavenly Homemaker's Club Members: Access your homepage and all your fantastic resources here! Not a member yet? Please join us!
« Previous Page
Next Page »

Join Our Community!

 Facebook Twitter RSS E-mail Instagram Pinterest

Popular Posts

~ Will All of the Real Moms Please Stand Up?
~ Easy! Stir-and-Pour Whole Wheat Bread
~ How to Make Gatorade
~ 31 Real Food Breakfast Ideas
~ Dear Teenage Girls...
~ When Mom Takes a Step Back
~ The Inexpensive Health Insurance We Love!
~ Let's Talk Real Food Grocery Budgets

Check out our latest posts!

  • Simple Bran Muffin Recipe
  • Easy Meatballs with Sweet Sauce (Freezer Friendly)
  • How to Make Uncrustables
  • The Easiest No-Bake Cheescake
  • Do I Still Buy Organic Food?
Home  ~  Simple Meals  ~  Club Membership  ~  Shop  ~  Privacy Policy  ~  Disclosure  ~ Contact

Copyright © 2023 · Beautiful Pro Theme on Genesis Framework · WordPress · Log in