
As I’ve been developing this idea for High Five Recipes…I am AMAZED at how many yummy dishes you can make with five ingredients or less. Cooking healthy food really, really is simple. I have a big (and ever growing) list of recipes to share with you ranging from main dishes to side dishes to desserts and snacks…all that only require FIVE or less high quality ingredients!!
I mentioned here that we’re trying to add more fish to our diets. A friend of mine told me about how she makes Salmon Patties and what an EASY lunch they are. Ooh, she was right.
These Salmon Patties are SO easy and super delicious. I used Rubinstein’s Wild Alaskan Pink Salmon. (This is a very inexpensive dish to make!)
Not only are these a perfect lunch idea…it’s a great “rescue me” dinner too if you’re on the run in the evening since you don’t have to plan ahead to thaw meat for this dish!
Lunchtime Salmon Patties
14 oz can salmon
1 egg
1/2 cup bread crumbs
1 t. lemon juice
oil for cooking (I use palm shortening or coconut oil)
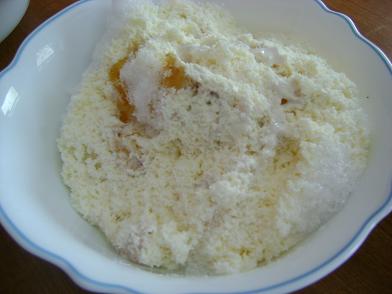
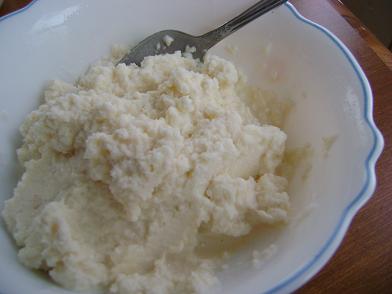
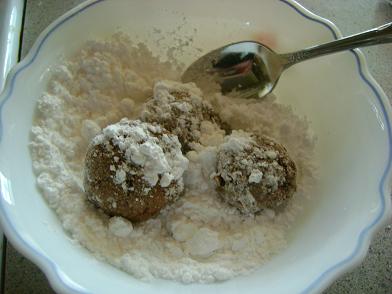
In a bowl, mix together salmon, egg, bread crumbs and lemon juice. (You can mix the bones from the salmon in if you’d like…they cook right in and are good for you. However, I get a little wigged out about them and take out the biggest ones.)
Heat a small amount of oil in a skillet. Spoon tablespoon sized balls of the salmon mixture into the oil, flatten and cook for about five minutes, turning once. The salmon patties should be golden brown.
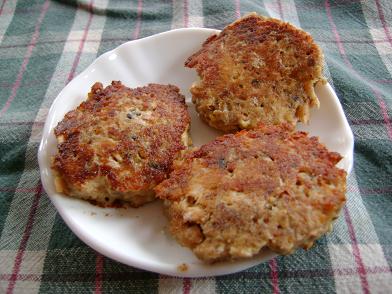
If you’re not a big fan of fish…I encourage you to give this simple recipe a try. I think you’ll probably be surprised!! And…this is one of those recipes that not only takes five ingredients…it only takes about five minutes to prepare. Yay!


