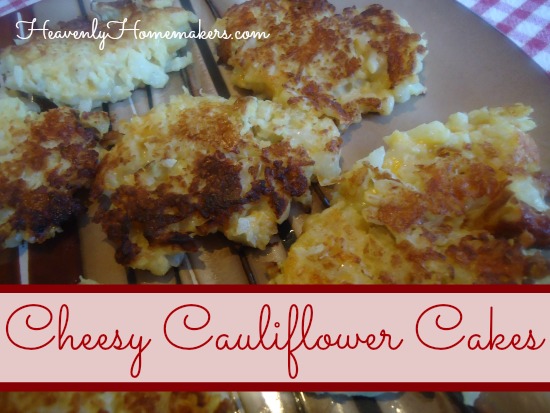
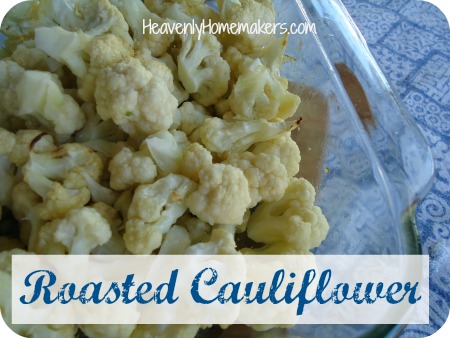
Heavenly Homemakers

Encouraging women in homemaking, healthy eating and parenting

  • Home
    • About
    • FAQs
  • Recipes
    • Bread and Breakfast
    • Condiments
    • Dairy
    • Main Dishes
    • Side Dishes and Snacks
    • Desserts
    • Gluten Free
    • Instant Pot
    • Crock Pot
    • Heavenly Homemaker’s Weekly Menus
  • Homemaking
    • Real Food Sources
  • Store
  • Contact
    • Advertise
    • Disclosure
    • Privacy Policy
  • Simple Meals
  • Club Members!

Peppermint Cream ~ A Non-Guilty Pleasure in Coffee, Hot Cocoa, and Crio Bru

February 11, 2014 by Laura 10 Comments

This post may contain affiliate links. For more information, please see our disclosure policy.

Peppermint Cream on Crio Bru

Yum

I super love this pick-me up and treat in the afternoons while I’m working at the computer. If you haven’t tried the Peppermint Cream recipe I shared at Christmas time, you really must take a few minutes to whip some up (literally). It has zero sugar, is all real, and it tastes delicious in hot drinks.

My favorite use for Peppermint Cream is in and on a hot mug of Crio Bru. What is Crio Bru, you ask? It is ground cocoa beans, which you brew just like coffee. Yup, straight chocolate, no sugar. Sounds bitter? Actually, it really is delicious all on its own without sugar. (You can also doctor it up with maple syrup and milk and make it into the most delicious hot chocolate you’ve ever had.)  I love it all by itself – but topped with this Peppermint Cream? Well, it is amazing. Rich, hot, creamy, and all real. Delicious!

I order Crio Bru from Amazon, iHerb, or Azure Standard. It’s a little pricey, so I definitely consider it a treat. But it’s a no-sugar treat that warms me from the inside out. Love it!

Peppermint Cream

Have you tried Crio Bru? And more importantly, have you tried Peppermint Cream?  Yum, yum, yum, and then some.

Heavenly Homemaker's Club Members: Access your homepage and all your fantastic resources here! Not a member yet? Please join us!

How to Roast Vegetables {31 Days of Real Food Reality ~ Day 29}

January 28, 2014 by Laura 29 Comments

This post may contain affiliate links. For more information, please see our disclosure policy.

31 Days 300

Yum

Vegetables just keep coming up during this series, don’t they? They are the best real food out there, so I can’t say enough about the importance of working them into our diets in a big way!

When I mentioned a couple of weeks ago on our menu plan that I was determined to make and eat cauliflower that week – you all really came through on some great ideas for ways to prepare it! Many of you told me that I had to try roasting the cauliflower. That definitely seemed like the easiest first idea to try.

Here’s what I’ve learned since then:  Not only is it a delicious way to eat vegetables, it’s also one of the easiest ways to prepare them. Roasting offers a slight variety in taste and texture, compared to steaming the vegetables as I usually do. I’m loving this, and can’t wait to continue roasting more varieties of vegetables as we work to expand our menu options.

If you are taking baby steps in your real food journey, I encourage you to try roasting vegetables to serve with your meals. Healthy eating doesn’t get much easier!

roasted cauliflower

How to Roast Vegetables:

1. Wash the fresh vegetables.
2. Cut vegetables into small pieces. (The smaller they are, the easier they are to pop into your mouth!)
3. Place vegetable pieces into a casserole dish.
4. Drizzle on 1-2 Tablespoons of olive oil or melted coconut oil.
5. Sprinkle generously with sea salt.
6. Stir veggies to coat with olive oil and salt.
7. Bake in a 375° oven for 15-20 minutes or until veggies are lightly browned and tender.

It really is that simple. Makes me wonder why I haven’t tried this before.

Carrots, broccoli, squash, asparagus…what else would be a tasty roasted veggie?

Heavenly Homemaker's Club Members: Access your homepage and all your fantastic resources here! Not a member yet? Please join us!

Easy Homemade Nacho Cheese Pretzel Dip

November 14, 2013 by Laura 31 Comments

This post may contain affiliate links. For more information, please see our disclosure policy.

Obviously, this nacho cheese pretzel dip can be eaten with other foods beyond pretzels. I’m thinking tortilla chips, steamed veggies, popcorn chicken…

pretzel_bites_4

But with these Homemade Soft Pretzel Bites? So delicious!

What’s fun about this recipe is that you can make it as spicy or as mild as you like. In fact, our family made individual bowls of the cheese dip, then added as much hot sauce as we each preferred.

Easy Nacho Cheese Pretzel DipYum

Easy Homemade Nacho Cheese Pretzel Dip
 
Save Print
Author: Laura
Ingredients
  • 4 ounces cream cheese
  • 8 ounces cheddar cheese, cut into cubes
  • 1 to 1½ cups milk
  • hot sauce to taste (we like Cholula)
Instructions
  1. In a medium saucepan, slowly melt cream cheese and cheddar cheese cubes on medium low heat, stirring constantly.
  2. Once melted, gradually add milk and whisk together while continuing to heat.
  3. Once the sauce reaches the consistency you desire, remove from heat and serve - adding hot sauce to taste.
3.4.3177

nacho_cheese_pretzel_dip_1

My boys were so impressed that I was able to make something that tasted so much like the canned fake cheese dip. But never fear – because this is made with real ingredients, it tastes much better than what comes out of a can.

Let’s take a vote: Who likes the cheese stuff that pours out of a can?  Love it? Hate it? Don’t feel bad admitting that you like it. We all have our lingering non-food cravings (says the lady who still chooses Nacho Cheese Doritos when given the opportunity).

But speaking of Doritos and Velveeta (which we weren’t actually speaking of but hang with me here). If you want to avoid cheese from a can and cheese from a box – but you really love Nacho Cheese Dip – I have a recipe you are going to love!

After years of trying, I came up with Real Food “Velveeta” and Rotel Dip.

Real Food Velveeta and Rotel Dip

You guys. This recipe changed my life and I now make this dip every couple of weeks because we love it so much. I exaggerate frequently and am sarcastic often – but I am very serious about this dip.

So there you go. You now have two amazing homemade, real food dips to try so that you can forever and always avoid processed cheese. Amen and amen.

Heavenly Homemaker's Club Members: Access your homepage and all your fantastic resources here! Not a member yet? Please join us!

Cranberry Nut Trail Mix

November 7, 2013 by Laura 4 Comments

This post may contain affiliate links. For more information, please see our disclosure policy.

This healthy, make-ahead snack is kind of a no-brainer, and not really a recipe at all. But it’s still worth mentioning as we focus on getting ahead with healthy snacks. Why? Because there’s chocolate in it. Obviously.  And also because it’s easy and good for you and all that other stuff.

Last week, I mixed up a big bowl of Cranberry Nut Trail Mix with items we had on hand. Then, I scooped it into individual grab-and-go baggies. Don’t like the dried fruit and nut options I mention below? No biggie – just use what you have and what you like. No matter what, you’ll be putting together a healthy snack. (Unless you add candy corns or m&ms, c’mon.)

And have you purchased bagged trail mix? Talk about pricey! They can’t help but be. Ingredients like nuts and dried fruit can be expensive. Therefore, I’ve decided that I don’t need to pay someone to stir my ingredients and put them into a bag for me. I can do that myself thankyouverymuch and save some bucks while I’m at it. (I buy my nuts in bulk at Braga Farms.)

Cranberry Nut Trail Mix

So here you go – Cranberry Nut Trail Mix, the recipe. Which isn’t a recipe. Far be it for me to tell you how nutty you should be on any given day.

Cranberry Nut Trail MixYum

Almonds
Cashews
Dried Cranberries
Golden Raisins
Dark Chocolate Chips

Stir any combination of the ingredients together in a bowl. Store in an airtight container (like a jar!), or scoop mixture into individual baggies for grab-and-go snacks.

What other trail mix combinations do you like?

Heavenly Homemaker's Club Members: Access your homepage and all your fantastic resources here! Not a member yet? Please join us!

Homemade Soft Pretzel Bites Recipe

November 5, 2013 by Laura 31 Comments

This post may contain affiliate links. For more information, please see our disclosure policy.

How’s the Getting Ahead {Snacks} Challenge going for you? I’m having a blast in the kitchen, but I can’t say I’m really getting ahead. We’re eating the food as fast as I make it. And by we, I mean my four boys. Okay fine, except for the Raspberry Oatmeal Bars. I took care of those very well without much help. {grins sheepishly}

You are going to love today’s idea! This one really did help me get ahead. I turned out so many pretzel bites, we ate on them all day, then I was able to stash some in the freezer too. This recipe is more time consuming than the other easy snack recipes I’ve shared. But trust me, these are worth the extra work! I didn’t stop and count how many pretzel bites this recipe makes (for obvious sanity reasons), but I would say this recipe would fill a two gallon ziplock bag and then some. Yep! You’ll get ahead with this recipe for sure!

pretzel_bites

Yum

Homemade Soft Pretzel Bites (Adapted from my Soft Pretzel Recipe)

1 cup water
2 Tablespoons yeast
2 teaspoons honey
2 1/2 cups milk
1 stick butter
1/2 cup honey
4 teaspoons sea salt
8 cups whole wheat flour (more or less as necessary)
butter
salt

In a large bowl, mix 1 cup warm water, yeast, and 2 teaspoons of honey. Stir this together and allow it to sit. Meanwhile, heat butter, milk, 1/2 cup honey, and salt in a medium saucepan on the stove until mixture has reached 120°. Stir contents in saucepan into the yeast mixture. Begin adding flour, two cups at a time until a nice dough has formed. Knead for 3-4 minutes. Place dough in bowl, cover, and allow it to rise for 1-2 hours.

On a well floured surface, roll fistful sized balls of dough into “snakes.” Cut into one inch bites.

pretzel_bites_1

Place on a baking sheet or stone. No need to allow for rising time, but if they sit there a while, that’s okay too. Bake in a 350° oven for 15-20 minutes or until golden brown.

pretzel_bites_3
Place baked pretzel bites in a bowl, drizzle on some melted butter, toss until coated, then sprinkle sea salt and toss again. Serve warm, serve cold, or cool and freeze the bites in a freezer bag for up to three months. Thaw and reheat in the oven.
pretzel_bites_2
I experimented with a Nacho Cheese Dip for these pretzel bites. Check it out here!

pretzel_bites_4

 Give me more dipping ideas for these soft pretzel bites!!

Heavenly Homemaker's Club Members: Access your homepage and all your fantastic resources here! Not a member yet? Please join us!

Easy Peanut Butter Snack Bars

November 3, 2013 by Laura 22 Comments

This post may contain affiliate links. For more information, please see our disclosure policy.

Here’s another super easy snack recipe to help us along in the Getting Ahead {Snacks} Challenge. These were a huge hit at our house – and so easy that I can definitely make these frequently!

peanut butter snack bars

Easy Peanut Butter Snack BarsYum

Easy Peanut Butter Snack Bars
 
Save Print
Author: Laura
Serves: 20
Ingredients
  • 1 cup natural peanut butter (I use homemade creamy peanut butter)
  • ½ cup butter
  • ⅔ cup sucanat or brown sugar
  • 3 eggs
  • 1 teaspoon vanilla extract
  • ½ teaspoon sea salt
  • 1 cup whole grain flour
  • ¼ cup chocolate chips (optional)
Instructions
  1. In a small saucepan, melt together peanut butter and butter.
  2. Pour mixture into a medium-sized bowl and stir in sucanat until creamy.
  3. Add eggs, vanilla, and salt, stirring well.
  4. Mix in flour until well combined.
  5. Spread mixture into a 9x13 inch baking dish.
  6. Bake in a 350° oven for about 25 minutes.
  7. Remove from oven and sprinkle chocolate chips on top if desired.
  8. Cut into about 20 bars.
3.5.3251


To freeze:  Allow bars to cool completely. Wrap them individually to keep the bars moist. Place wrapped bars in a freezer bag and freeze for up to 3 months. Thaw for at least one hour before serving.

These make for great grab-and-go snacks!

Heavenly Homemaker's Club Members: Access your homepage and all your fantastic resources here! Not a member yet? Please join us!

Raspberry Oatmeal Bars

October 31, 2013 by Laura 76 Comments

This post may contain affiliate links. For more information, please see our disclosure policy.

Raspberry Oatmeal Bars are pretty much amazing.

Raspberry Oatmeal Bars 11

Yum

I’m on a mission to create new healthy snack recipes so that my boys will have some great options on hand. But here’s what happened after I made these Raspberry Oatmeal Bars:  I dug into them while I was in the kitchen by myself and loved them so much that I forgot to call in the kids. Then when I realized I was like, “Eh, the kids can have a piece of cheese.” And then I kept eating the bars. Great mom moment, huh? :)

This may be one of the best snack recipes ever, hands down. The kids thought so too, once I remembered to share.

Raspberry Oatmeal Bars

Raspberry Oatmeal Bars
 
Save Print
Author: Laura
Ingredients
  • 1½ cups whole wheat flour
  • 1½ cups rolled oats
  • ½ cup sucanat
  • ½ teaspoon baking powder
  • ¼ teaspoon sea salt
  • 1 cup melted butter
  • ½ cup raspberry jam (100% fruit)
Instructions
  1. Mix together flour, oats, sucanat, baking powder, and salt.
  2. Stir in melted butter until the mixture resembles crumbs.
  3. Press half of the mixture into an 8x8 inch baking pan.
  4. Spread jam over the top.
  5. Sprinkle remaining oat mixture on top of the jam layer, pressing down to cover.
  6. Bake in a 350° oven for 30 minutes or until lightly browned.
3.4.3177

Raspberry Oatmeal Bars 12

You can definitely change these up by using a different variety of jelly or jam. I think apricot would be awesome in these, or strawberry, or peach…

If they last long enough, you can freeze them: Allow them to cool completely, then wrap individually for a quick grab and go snack. Place individually wrapped bars in a large freezer bag and store in the freezer for up to two months.

Here are some pictures to show more specifically how to put these bars together. They are really so easy!

First,  mix together the dry ingredients. Then pour in the melted butter.

raspberry-bars_1

 Stir until the mixture resembles buttery crumbs.
raspberry_bars_2

Press half of the crumbs into an 8×8 inch baking dish.

raspberry_bars_3
Spread the jam over the first layer of oat mixture. Spoon the remaining oat mixture over the jam and press down to cover.
raspberry_bars_4

Bake in a 350° oven for about 30 minutes. Cut them while they are warm, or allow them to cool first.

raspberry_bars_7

Try to remember to share them with others.

raspberry_bars_8

Not only will I be making these frequently for snacks in the future, I think they will be wonderful for breakfast. And I’ll even try to remember to serve them to my children. ;)

Heavenly Homemaker's Club Members: Access your homepage and all your fantastic resources here! Not a member yet? Please join us!

Pineapple Mango Smoothies (No Sugar Added – Dairy Free Option)

May 21, 2013 by Laura 15 Comments

This post may contain affiliate links. For more information, please see our disclosure policy.

This Pineapple Mango Smoothie is more refreshing that you can imagine. Mmmm!

High Five Recipes 2

We were on our way home from Kansas City after a weekend event our boys had participated in. The event had been awesome, our boys had done great, and we were all flying high. Except for Asa (our 15 year old) and me. It appeared that the two of us were coming down with the flu. Our throats hurt, our chests burned, and we both began to get feverish. Our eyes were red and achy. Our heads pounded.

(Great story so far, eh?)

We were both a little bit hungry, although nothing really sounded good to eat. We had packed food, but all of it seemed too difficult to eat. Funny how the normally simple act of chewing takes so much energy when you’re sick. All I could think of was, “I just want a smoothie.” (Well, and “I just want my bed.” But out on the interstate, a few hours from home, that was not an option.)

Matt, bless his heart, was determined to find his feverish bride a smoothie. We finally managed to find a place that had some decent options (without too many funky, sugary ingredients). I chose a pineapple mango variety and aside from the fact that it was cold and made my chills just a little bit more miserable – I had never enjoyed a smoothie more. It was so refreshing. It was just what Asa and I needed. We slept the rest of the way home.

Asa and I are all better now. In fact, this all happened a couple of months ago. But ever since, I’ve been craving a Pineapple Mango Smoothie. I typically make my smoothies with berries – which we love. But the refreshment that comes from pineapple, mango, and orange juice all blended up in a glass? I knew I needed to recreate this treasure.

It’s not hard to make – you just need five simple ingredients. Add a little maple syrup or stevia if it’s not sweet enough for you. We think it’s sweet enough as is. Coconut milk makes it taste great and offers a dairy free option if you need it. We like it with plain, whole milk yogurt. I think I may make these every single day this summer.

pineapple_mango_smoothie_2

Pineapple Mango SmoothieYum

Pineapple Mango Smoothies (No Sugar Added - Dairy Free Option)
 
Save Print
Author: Laura
Serves: 4-6
Ingredients
  • 1½ cups frozen mango chunks
  • 1½ cups frozen pineapple chunks
  • 1 cup orange juice
  • 2 cups plain yogurt or coconut milk
  • 1 teaspoon vanilla extract
Instructions
  1. Place all ingredients into a blender or food processor together.
  2. Blend until smooth.
3.4.3177

Pineapple Mango Smoothie

What’s your favorite fruit smoothie combination?  For the record, I don’t recommend getting the flu before trying this. It’s much more fun to eat when you can hold your head up off the pillow.

Heavenly Homemaker's Club Members: Access your homepage and all your fantastic resources here! Not a member yet? Please join us!

Homemade Sweet Potato Fries

May 15, 2013 by Laura 63 Comments

This post may contain affiliate links. For more information, please see our disclosure policy.

sweet_potato_fries

It really pays to listen to your friends. (Not all of them though, because if they’re encouraging you to do things that aren’t good for you, maybe you should consider getting new friends.) Well where did that piece of parenting advice come from?

Anyway, I happen to have good friends, so I feel that it is okay to listen to them. It just so happens that I had two friends in one week tell me that I was missing out by not adding sweet potatoes to my menus more often. When the first friend said it, I kind of nodded and smiled. But when a second friend mentioned it a few days later, I sort of wondered if God was trying to tell me something. Okay, I’m pretty sure He is working in bigger ways in my life than sweet potato consumption encouragement. But still. I figured there might be something to this sweet potato thing since it came up twice in one week with two different people at two separate times. (Am I making too much of this? I mean, should I just get around to sharing the recipe already?) Why have I not been eating or feeding my family sweet potatoes very often, as in, pretty much never?

It’s very simple really. As a child, the only way I had been served sweet potatoes was in a casserole with brown sugar and marshmallows at Thanksgiving and I didn’t like it one bit. If I’m going to eat something sweet, I want it to be a dessert – not as a side dish with my turkey. But that’s just me. I’m the one who needs chocolate with my sugar. What can I say? But, per my friends’ suggestions, I decided to try making sweet potato fries. They looked and smelled great. I ate one. Hmmm, it was okay, I guess. But I kept thinking about marshmallows, and couldn’t get past it. By the way, I don’t like marshmallows. But I’m a big girl, and all grown up, so I made myself eat a second sweet potato fry. And then a third. Oh wait. They suddenly began to taste good to me. Then, before I knew it, I had to tell myself to stop eating the sweet potato fries and save some for my family. (I didn’t feel bad though, because usually it’s the other way around and I’m the one asking my family to save me some food before they inhale all of it.)

So it turns out that while I think my friends may have helped me become an addict in this regard, it does pay to give in to sweet potato peer pressure.

How to Make Sweet Potato Fries

Scrub and cut sweet potatoes into wedges or fries – as thin as you like. Toss them in olive oil or coconut oil (about 1 Tablespoon per sweet potato). Place them in a single layer on a baking pan. Sprinkle on sea salt and bake in a 400° oven for 30-40 minutes. or Deep fry the cut sweet potatoes in a fryer (we have this one, which works great) filled with Refined Coconut Oil or Palm Shortening for 3-4 minutes, remove, salt, and eat. These Homemade Sweet Potato Fries are AMAZING! They are so easy to make, and incredibly delicious. #sweetpotatofries #homemadefries #sweetpotatofryrecipe 
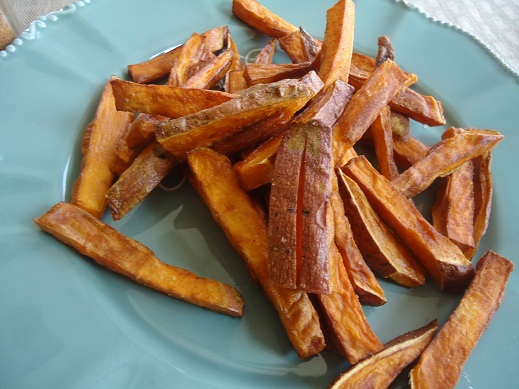
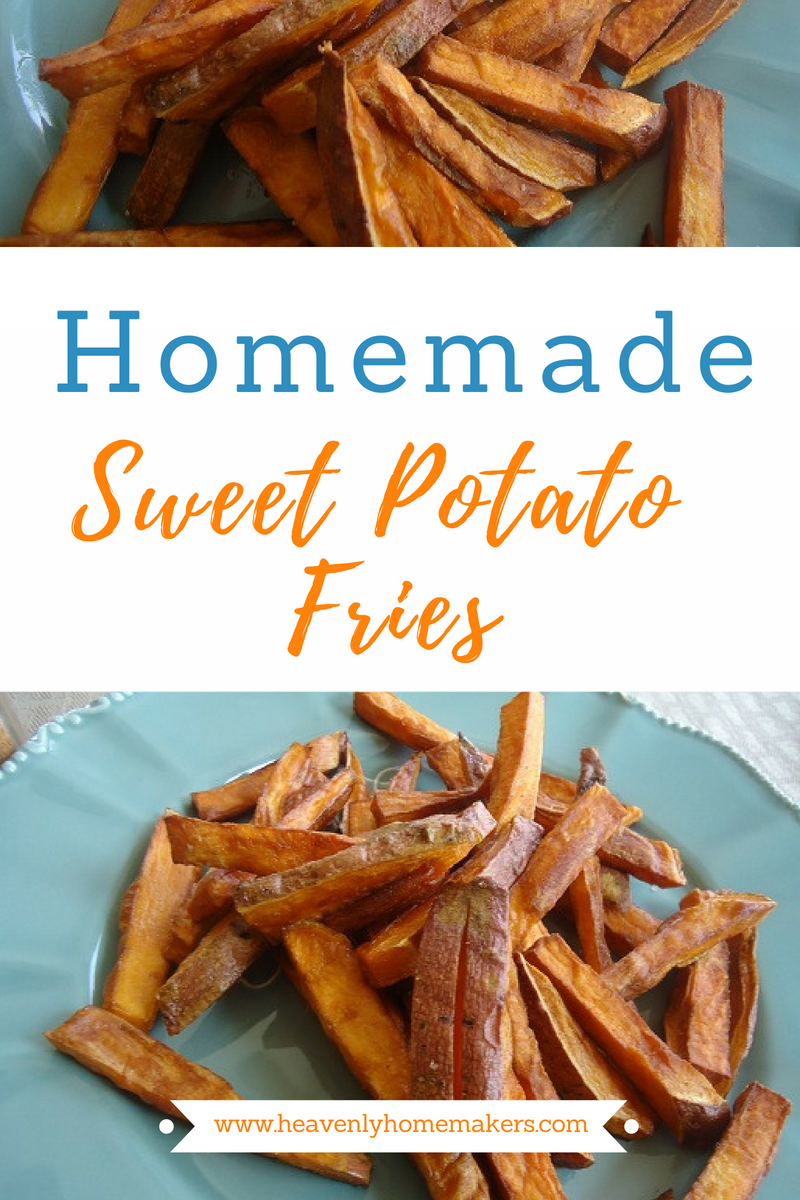
What is your relationship with sweet potatoes? How do you like them cooked? And while it’s completely irrelevant, I am curious. Do you like marshmallows?

Heavenly Homemaker's Club Members: Access your homepage and all your fantastic resources here! Not a member yet? Please join us!

Healthy Crock Pot Recipes: Hot Spinach and Artichoke Dip

September 4, 2012 by Laura 192 Comments

This post may contain affiliate links. For more information, please see our disclosure policy.

I couldn’t decide. Should I tell my kids what was in this Spinach and Artichoke dip…or should I not?

Turns out, I didn’t have much choice, because they came into the kitchen and asked what I was making and what was in it. I wasn’t going to lie, obviously, but shucks, I was just sure that once Elias, our 10 year old, heard that there were artichokes and spinach in the dip, he’d suddenly be, “not very hungry right now.”

Thankfully, there were chips involved. ;)  Chips are always a good motivator for eating artichokes, right?

All of the boys decided to “give it a try”, which in Elias’ case, means putting a teeny bit of dip onto his chip. Much to my surprise, all of the boys loved the dip. And Elias was the one who raved about it the most.

The moral of this story? I give up on ever being able to predict which of my kids will like which foods, because about the time I think for sure my pickiest child will rebel against artichokes, I will be wrong.

Just a note:  When picking out Marinated Artichoke Hearts at the store, watch out! Many of them contain partially hydrogenated oils. Ick.  I was happy to find a healthier version at Vitacost which contains only artichoke hearts, water, salt and citric acid. Sweet!

As for chips, I recommend an organic variety of corn chips so you will be avoiding bad fats and GMO corn. Or, this dip also tastes great with carrot sticks and other veggies.

Hot Spinach and Artichoke DipYum

Healthy Crock Pot Recipes: Hot Spinach and Artichoke Dip
 
Save Print
Author: Laura
Ingredients
  • 1 - 14 ounce can marinated artichoke hearts, drained
  • 1 cup sour cream
  • 1 cup grated parmesan cheese
  • 1 cup fresh, torn spinach leaves
  • 1 - 4 ounce can diced green chiles
Instructions
  1. Mix all ingredients and place in a crock pot.
  2. Cook on low for 2-3 hours.
  3. Serve with tortilla chips.
  4. Alternate Cooking Method:
  5. Mix ingredients and spread in a pie dish or 8x8 inch baking pan.
  6. Bake in a 400° for 30 minutes and serve.
3.4.3177

Crock Pot or Oven Friendly Spinach and Artichoke Dip

Share with us: Are you a fan of artichokes? I dare you to try this dip whether you are or not. If Elias likes it, I’m pretty sure you will too. :)

Heavenly Homemaker's Club Members: Access your homepage and all your fantastic resources here! Not a member yet? Please join us!
« Previous Page
Next Page »

Join Our Community!

 Facebook Twitter E-mail Instagram Pinterest

Popular Posts

~ Will All of the Real Moms Please Stand Up?
~ Easy! Stir-and-Pour Whole Wheat Bread
~ How to Make Gatorade
~ 31 Real Food Breakfast Ideas
~ Dear Teenage Girls...
~ When Mom Takes a Step Back
~ The Inexpensive Health Insurance We Love!
~ Let's Talk Real Food Grocery Budgets

Check out our latest posts!

  • Big Family Food and Fun: May 10-16, 2026
  • Big Family Food and Fun: May 3-9, 2026
  • Help Your Kids Become Independent in the Kitchen!
  • Big Family Food and Fun: April 26-May 2, 2026
  • Big Family Food and Fun: April 19-25, 2026
Home  ~  Simple Meals  ~  Club Membership  ~  Shop  ~  Privacy Policy  ~  Disclosure  ~ Contact

Copyright © 2026 · Beautiful Pro Theme on Genesis Framework · WordPress · Log in