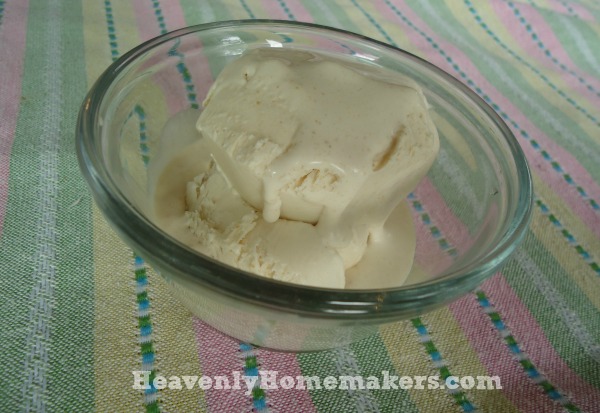
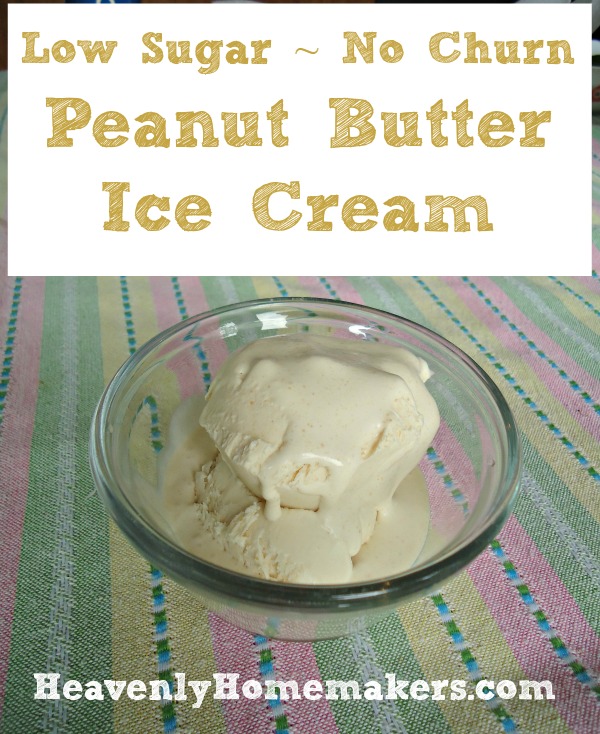
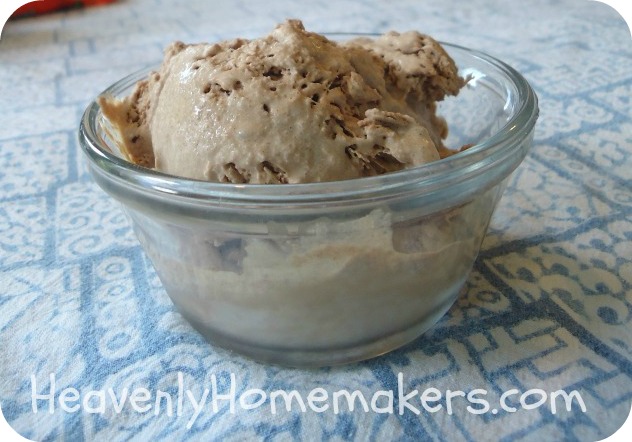
Heavenly Homemakers

Encouraging women in homemaking, healthy eating and parenting

  • Home
    • About
    • FAQs
  • Recipes
    • Bread and Breakfast
    • Condiments
    • Dairy
    • Main Dishes
    • Side Dishes and Snacks
    • Desserts
    • Gluten Free
    • Instant Pot
    • Crock Pot
    • Heavenly Homemaker’s Weekly Menus
  • Homemaking
    • Real Food Sources
  • Store
  • Contact
    • Advertise
    • Disclosure
    • Privacy Policy
  • Simple Meals
  • Club Members!

More Healthy Salad Dressing Recipes! Italian and Thousand Island

July 21, 2016 by Laura 70 Comments

This post may contain affiliate links. For more information, please see our disclosure policy.

I’m at church camp this week, loving life, swatting bugs, and trying to stay hydrated. While I’m gone, you can enjoy a re-posting of some of our most popular time-saving, money-saving, healthier eating mix recipes…

Originally posted June, 2009

After sharing the Ranch Dressing Mix recipe, several of you asked for different varieties of healthy salad dressing recipes. I’m excited to share my recipes for Italian Salad Dressing and Thousand Island Dressing!

What makes these salad dressing recipes better?

  • These use real food ingredients – choose to use healthy oils and other ingredients you feel good about feeding your family. I use olive oil for these.
  • These save money – they cost much less than buying them pre-made! The price of Italian Dressing Mix can add up!
  • You can make Italian Dressing Mix ahead of time so all you have to do when you need dressing is mix it up!

Italian Dressing MixYum

5.0 from 2 reviews
More Healthy Salad Dressing Recipes! Italian and Thousand Island
 
Save Print
Author: Laura
Ingredients
  • 1½ teaspoon garlic powder
  • 1 Tablespoon onion powder
  • 2 teaspoon oregano
  • 1 Tablespoon dried parsley
  • 2 teaspoons sea salt
  • 1 teaspoon pepper
  • ¼ teaspoon thyme
  • ½ teaspoon dried celery flakes
Instructions
  1. Shake ingredients together and store in a jar.
  2. To make Italian salad dressing: Mix 2 Tablespoons dry mix with ¼ cup vinegar (I prefer red wine vinegar), 2 teaspoons water and ½ cup olive oil.
3.4.3177

Homemade Italian Salad Dressing

Besides salad dressing, use the Italian Dressing Mix to make:

  • Italian Roast Wraps
  • Italian Cream Cheese Chicken
  • Italian Roasted Potatoes
  • Italian Stew with Green Beans

Use Italian Dressing to marinate chicken for the best grilled chicken!!

And now for another of our favorite salad dressing recipes:

Thousand Island Dressing

1 cup mayonnaise (I use Hain Safflower)
1/3 cup ketchup
1/4 cup pickle relish
1 Tablespoon minced onion
1 hard boiled egg, chopped (optional)

Mix ingredients, cover and chill.

Homemade Thousand Island Salad Dressing

So…what’s your favorite kind of salad dressing? (mine’s ranch)  Have I come up with enough healthier dressings (aka dressings with NO high fructose corn syrup or MSG) to tickle your fancy…or should I keep playing?

I’m determined to come up with Caesar and Blue Cheese. But my attempts at these so far are not share worthy!

Heavenly Homemaker's Club Members: Access your homepage and all your fantastic resources here! Not a member yet? Please join us!

Whole Wheat Quick Baking Mix

July 20, 2016 by Laura 180 Comments

This post may contain affiliate links. For more information, please see our disclosure policy.

I’m at church camp this week, loving life, swatting bugs, and trying to stay hydrated. While I’m gone, you can enjoy a re-posting of some of our most popular time-saving, money-saving, healthier eating mix recipes…

Originally posted February, 2013

Over the past few years, I have had many requests for a mix recipe which will replace boxed “Bisquick”. I had never used bisquick very much before we started our healthy eating journey, therefore I didn’t know that I’d have much use for a healthier version. And so, this recipe request continued to get pushed to the bottom of my “to-do” list.

Whole Wheat Quick Mix

For shame.  I didn’t know what I’d been missing! Last summer, I finally gave this recipe a try. Once I figured out the right combination of ingredients, I learned that it takes just a few minutes to put this mixture together. And the recipes you can quickly whip up once you have this convenience food on hand? Every single one we’ve tried has been a hit! I love this!  It is inexpensive, is made with real ingredients I feel good about feeding to my family, it saves time, and the food prepared with it tastes great. Does it get any better than that?

Whole Wheat Quick Mix

Yum

10 cups whole wheat flour (I use flour made from freshly ground hard white wheat)
1/2 cup baking powder
1/4 cup sucanat (optional)
2 teaspoons sea salt (I use Redmond Real Salt)
2 cups organic palm shortening or butter

In a large mixing bowl, mix together flour, baking powder, sucanat and salt. Thoroughly cut in palm shortening until mixture resembles fine crumbs. Store Whole Wheat Quick Mix in an air tight container in the fridge or freezer.

Here are several of the recipes you’ll find here at Heavenly Homemakers to use along with the lovely mixture you just put together. Think of how much time and effort you’ll save!

 Quick Mix Biscuits

Quick Mix Fruit Pizza

fruit_pizza_3

Quick Mix Honey Cinnamon Muffins

Quick Mix Very Vanilla Cookies

Quick Mix Pancakes

Beyond those, I’ve come up with a pie crust, waffles, and more muffin and cookie recipes. I’m telling you, this mix is so versatile and easy.

It’s recipes like this that make my Oh, For Real! Real Food, Real Family, Real Easy book so much fun. It’s all about making your life healthier and easier. Anytime you can take one recipe and adapt it to make many other healthy food recipes, we have a winner!

Like what you see here? We’d love to get to know you better! 

  • Subscribe to receive our daily posts in your inbox for free!
  • Subscribe to receive one email per week with all the content here (also free!).
Heavenly Homemaker's Club Members: Access your homepage and all your fantastic resources here! Not a member yet? Please join us!

Healthy Homemade Salad Dressing Ideas

July 19, 2016 by Laura 173 Comments

This post may contain affiliate links. For more information, please see our disclosure policy.

I’m at church camp this week, loving life, swatting bugs, and trying to stay hydrated. While I’m gone, you can enjoy a re-posting of some of our most popular time-saving, money-saving, healthier eating mix recipes…

Originally posted March, 2009

Lookie what’s growing in my garden! Those cute little lettuce leaves will soon be cute big lettuce leaves. I can’t wait! I’ll be needing my homemade salad dressing before we know it.

lettuceingardenmay09sm.JPG

I don’t actually have an exciting salad recipe for you. I’m not terribly creative like that. My salad recipes almost always look something like:

  1. Wash and tear up a bunch of lettuce or spinach and put it in a bowl.
  2. Add whatever other raw veggies you have.
  3. If you’re feeling especially crazy, throw in some dried cranberries or raisins.
  4. If you want your salad to be your main dish, add some chicken, cheese and hard boiled egg.
  5. Grab a fork.

Homemade Salad Dressing Ideas

This is why I’m so excited about the above carnivals. However, I do have a fun idea for a salad dressing that I discovered one day when I was dinking around in the kitchen. Are you ready? It’s a novel idea.

Orange juice.  The juice from an orange. Fresh squeezed orange juicy goodness.

It’s refreshingly simple. And yummy. And it contains no high fructose corn syrup or MSG.

spinachsaladsm.JPG

Now that I’ve shared that enlightening salad tid-bit, I’m very excited to share another healthy homemade salad dressing idea!

Rhonda sent me a wonderful Ranch Dressing Mix recipe!! I used to use Simply Organic brand because I trust it more than other brands. But now, thanks to Rhonda, I can make a super healthy (and much, much less expensive) Ranch Dressing any time I need to!

Ranch Dressing MixYum

3.0 from 2 reviews
Healthy Homemade Salad Dressing Ideas
 
Save Print
Author: Laura
Ingredients
  • 5 Tablespoons dried minced onions
  • 7 teaspoon parsley flakes
  • 4 teaspoon salt
  • 1 teaspoon garlic powder
Instructions
  1. Mix together and store in an air tight container.
  2. For dressing: Mix 2 Tablespoons dry mix with 1 cup mayonnaise and 1 cup buttermilk or sour cream.
  3. For dip: Mix 2 Tablespoons dry mix with 2 cups sour cream or kreme fresh.
  4. Mix up a few hours before serving, so the flavors all blend nicely.
3.4.3177

I use Hain Safflower mayo and Homemade Buttermilk.

Ranch Dressing and Dip Mix
The jar on the right is the mix, which costs pennies compared to a packaged mix! The jar on the left is the ranch dressing all made up and ready to go on our salad.

ranchdressin2sm.JPG
You HAVE to try this dressing! It tastes so…so real. And fresh. And pure. It’s delicious, simple and healthy! Obviously, you eat it on lettuce and other veggies – so that gives you wonderful, healthy…healthiness. (And of course, great servings of more fruits and veggies!)

Rhonda even suggested using this ranch dressing mix in my Ranch Potato Wedges recipe. It works GREAT!

I shall never buy another ranch dressing packet again. Rhonda – you rock!

And try squeezing an orange onto your salad sometime! See what you think! (Ever tried it before?) 

Heavenly Homemaker's Club Members: Access your homepage and all your fantastic resources here! Not a member yet? Please join us!

Homemade Onion Soup Mix (with No MSG!)

July 18, 2016 by Laura 208 Comments

This post may contain affiliate links. For more information, please see our disclosure policy.

Save money and use real food ingredients when you make Onion Soup Mix!

I’m at church camp this week, loving life, swatting bugs, and trying to stay hydrated. While I’m gone, you can enjoy a re-posting of some of our most popular time-saving, money-saving, healthier eating mix recipes…

Originally posted March, 2011

So far in this Heavenly Homemakers Recipe Challenge, we’ve come up with recipes for Homemade Tator Tots, Healthier Chocolate Milk and Teriyaki Sauce. I attempted a recipe for corn tortillas and while they tasted pretty good…they were NOT easy to make, they fell apart and looked ugly. I’m going to keep working on that one until I come up with a corn tortilla recipe that doesn’t take the whole afternoon to make. :)

This new recipe in The Challenge was super easy to put together! Vicki, one of our readers, sent me an Onion Soup Mix recipe to try and WOW is it simple! I tweaked it a teeny tiny bit, but really, this recipe is more Vicki’s than mine.

What I love about this recipe is that I didn’t have to look high and low for the ingredients. Many onion soup recipes I found call for some sort of bouillon. Almost always, bouillon has MSG. There are MSG free bouillon varieties out there, but what if they aren’t easily accessible to you? And so…I was very happy to see this recipe that contained just dried herbs and spices!

Onion Soup MixYum

Homemade Onion Soup Mix (with No MSG!)
 
Save Print
Author: Laura
Ingredients
  • ⅔ cup dried, minced onion
  • 3 teaspoons parsley flakes
  • 2 teaspoons onion powder
  • 2 teaspoons turmeric (optional)
  • 1 teaspoon celery salt
  • 1 teaspoon sea salt
  • 1 teaspoon sucanat (or sugar if you prefer)
  • ½ teaspoon ground pepper
Instructions
  1. Mix all ingredients in a jar, then give the jar a good shake.
  2. I'd recommend shaking the jar to mix the ingredients well before each use.
  3. Use 4 Tablespoons Onion Soup Mix in a recipe in place of 1 packet of onion soup mix. (I actually found that 2 Tablespoons was plenty in a beef stew recipe I tried.)
  4. Store this in a dry, cool place.
3.4.3177

onion_soup_mix

I used the Onion Soup Mix in this simple, one dish stew and YUM!
Find the recipe for Simple One Dish Meat and Potato Meal here.

And with that…I have to ask:

SO many of you requested this recipe that I’m guessing you all must have tons of wonderful ways of using Onion Soup Mix? I would LOVE for you to share what you do with this mix!!! I have exactly two recipes that call for Onion Soup Mix. I’m so excited to use this mix in those recipes because I’ve not made them for years. But what else??? What do you make with Onion Soup Mix??

Heavenly Homemaker's Club Members: Access your homepage and all your fantastic resources here! Not a member yet? Please join us!

Attention: Everyone With Hands and Feet! FREE Pocket Size BeeSilk Hard Lotion!

July 18, 2016 by Laura 3 Comments

This post may contain affiliate links. For more information, please see our disclosure policy.

If you have hands or feet that tend to get dry and cracked – you are really going to want to perk up to this. Come to think of it, if you have hands and feet at all – you need this. After all, who of us doesn’t from time to time struggle with dry skin? And then there are those of us who have chronically dry skin that can result in cracks in the fingers, toes, and heels.

If you’ve been around here long, you know my story. I suffered from terribly dry, rashy hands for my entire life until I was sent a sample of BeeSilk Hard Lotion Bar to try. I rubbed it on and immediately that little bar changed my hands and feet forever.

You know how I get sarcastic every once in a while around here? (Ha. Every once in a while.) Well when I say BeeSilk saved my hands there is zero sarcasm or exaggeration. I love this stuff and will never be without it.

Guess what’s happening today and tomorrow? We can all get a free lotion bar! (Offer expires at midnight Tuesday, July 19.)

BEESILK-HARD-LOTION-BAR-POCKET-2T

How To Get a Free Pocket Sized BeeSilk Lotion Bar:

  1. Click here to get to the special “BeeSilk Hard Lotion Bar” page.
  2. Put the bar (regularly $6.95) in your cart. Use the code HHJuly at check-out and the entire amount will turn to $0!
  3. Pay a minimal shipping fee when completing your order.
  4. Wait anxiously for your bar to arrive.
  5. Rub on your BeeSilk and watch your hands and feet become soft and smooth right away.
  6. Be very, very happy and relieved and love BeeSilk forever.
  7. Or even better…

How to Get Free Shipping with your Free BeeSilk Lotion Bar

I love freebie deals like this, but I much prefer to avoid shipping fees. Here’s what I’m doing:

MadeOn offers free shipping on orders over $45. Since I already know I love and use many MadeOn products, I will fill my cart with a few other of my favorite items to go along with the free lotion bar. Then I can get the freebie with free shipping too! I’ll get…

  • BeeSilk Refills
  • BeeSilk Sticks (for my purse)
  • Natural Lip Balm

I have to have plenty of these products on hand at all time because our whole family uses them – plus our oldest takes his own stash to the dorm.

Enjoy your freebie!! Don’t forget that this offer ends Tuesday, July 19 at midnight, so don’t put it off!

Get the FREE BeeSilk Pocket Sized Lotion Bar here.

This post includes my affiliate links.

Heavenly Homemaker's Club Members: Access your homepage and all your fantastic resources here! Not a member yet? Please join us!

Easy Crustless Skillet Pizza

July 14, 2016 by Laura 15 Comments

This post may contain affiliate links. For more information, please see our disclosure policy.

My profound conclusion after eating grain-free for three weeks is this:

No matter who we are, we could all stand to eat fewer grains. But no one should have to give up pizza.

Pizza is what I’ve missed the most, which is funny since I don’t typically eat much pizza anyway. I’ve given up on trying to figure this out.

I haven’t been very interested in finding lots of substitutes for many grain based foods and have instead focused on eating many meals that are naturally grain free (like egg and veggie scrambles, roast with veggies, grilled chicken with veggies, or loaded chef salads). That type of meal is very simple, so working three times as hard to make a grain free pizza crust didn’t appeal to me at all. But I did really want some pizza.

What’s a girl to do?

Aha! I have a Crustless Pizza Pie recipe right here on my site that is so easy my 11-year old can make it without help. But of course.

With that “problem” solved, I then had to figure out how to avoid heating up the house. Could I make this Crustless Pizza without turning on the oven on a super hot day? But of course.

Cast Iron Skillet to the rescue. (I have one like this that I use daily. You never know how long sale prices will last, but this one.

I began by “baking” the cream cheese layer over low heat on my stove-top. I almost got distracted and let it get too hot, but caught it just in time before it scorched. Phew.

skillet pizza1 (1)
In the meantime, I browned hamburger meat in a small pan. I kept the pizza pie veggie-less this time, knowing we would be eating salad and veggies on the side.

After cooking the cream cheese layer for about 10 minutes, I topped it with sauce and meat, then covered it for a few minutes to heat through.

Skillet Pizza

Then I piled on the cheese, covered it for about 2 minutes so it would melt, then we dug in. It completely met my need for pizza. Who even needs crust?? Especially when there is cream cheese involved.

Easy Crustless Skillet Pizza

Easy Crustless Skillet Pizza

Easy Crustless Skillet Pizza
 
Save Print
Author: Laura
Ingredients
  • 8 ounces cream cheese, softened
  • 2 eggs
  • ¼ teaspoon ground black pepper
  • ½ teaspoon garlic powder
  • ¼ cup grated parmesan cheese
  • 1 cup pizza sauce
  • 1½ cups shredded mozzarella, cheddar, or colby jack cheese
  • Any meat or veggie toppings you like
Instructions
  1. In a medium-sized bowl mix cream cheese, eggs, pepper, garlic powder, and parmesan cheese until creamy.
  2. Spread mixture into a 10-12 inch cast iron skillet.
  3. Cover and cook over low heat on the stove-top for about 10 minutes, checking every few minutes to be sure it isn't scorching.
  4. In the meantime, prepare pizza toppings.
  5. Spread pizza sauce over hot cream cheese layer.
  6. Top with any meat, veggies, and cheese you like.
  7. Cover and cook over low heat for 5-10 more minutes or until heated through and cheese is melted.
3.4.3177

No matter if you are a grain-free eater or not, I encourage you to make this easy skillet pizza! This was a great meal for our entire family and easy to serve with a tossed salad, fresh fruit, and raw veggies.

My Grain-Free Journey Update

The latest visit with my doctor assures me that I’m on the road to great health and will not have to eat grain-free forever!!! In the meantime, I’m learning that eating grain-free allows a person to eat loads of vegetables and other nutrient packed foods. So even when I add the grains back in, I’m going to continue on with many of the new habits I’m learning because they are so nourishing.

I’m heading to church camp next week (packing a lot of my own food), and afterward hope to find time to share some great new (to me) nourishing food tips I’m learning!

Heavenly Homemaker's Club Members: Access your homepage and all your fantastic resources here! Not a member yet? Please join us!

Low Sugar Chocolate Ice Cream – No Churn!

July 13, 2016 by Laura 8 Comments

This post may contain affiliate links. For more information, please see our disclosure policy.

If the Low Sugar Vanilla Ice Cream would work with three ingredients without being churned, I figured a Chocolate version would work.

I was right!

Low Sugar Chocolate Ice Cream Bowl

Several suggested that if we added whole milk to the cream/sweetener/vanilla combo it would scoop out nicely. I tried that on my round two of ice cream and didn’t find it to work as well as the milkless version. I’ve decided to stick with only cream and not add milk. I’m curious what you discovered if you tried the recipe!

The only adjustment you need to make to make a chocolate version is to simply add cocoa powder to the vanilla ice cream recipe. (And if you want Chocolate Mint, just switch the vanilla extract with some mint extract. Easy!)

Low Sugar Chocolate Ice CreamYum

Low Sugar Chocolate Ice Cream - No Churn!
 
Save Print
Author: Laura
Ingredients
  • 2 cups heavy whipping cream
  • 3 Tablespoons real maple syrup (more or less to taste)
  • 3 heaping Tablespoons unsweetened cocoa powder
  • 1 teaspoon vanilla extract
Instructions
  1. Blend ingredients together with a hand mixer or in a high power blender until they have thickened - but have not yet turned into stiff whipped cream. (The mixture should still be runny.)
  2. Pour mixture into a small casserole dish.
  3. Cover and freeze for about three hours.
  4. Scoop and serve right away.
  5. If ice cream has been in the freezer overnight, you may need to let it sit out to soften for a few minutes before serving.
3.4.3177

Low Sugar Chocolate Ice Cream

If you didn’t guess already, this ice cream tastes delicious in my favorite Coffee Milkshake. Follow the recipe here, scoop in some of this chocolate ice cream, and you’ll have a Chocolate Mocha Milkshake.

Still to come as I continue to experiment – Low Sugar Peaches and Cream, Strawberry, and Peanut Butter Ice Cream! Hmm, while I’m at it, I suppose I should try a Mocha Ice Cream. This is too much fun.

Heavenly Homemaker's Club Members: Access your homepage and all your fantastic resources here! Not a member yet? Please join us!

That One Time I Tried to Make My Own Dishwasher Detergent

July 12, 2016 by Laura 8 Comments

This post may contain affiliate links. For more information, please see our disclosure policy.

It was such a good idea. I was going to make these and give some away and use them always as a way to save money on dishwasher detergent.

Yep. It was a great idea.

dishwasher soap fail

I’m not sure what I did wrong. I’m sure it had nothing to do with how I skimmed over the recipe and rushed to get it done before leaving for a trip. It probably wasn’t that I tried popping the tabs out of my ice cube tray before they were fully dried.

Now I have a solid rock of dish soap on a plate. Once I get it to ever dissolve off of there, that is going to be the cleanest plate ever. But let’s just say, Laura won’t be sharing this recipe yet with you because something went terribly wrong.

Do you make your own dishwasher detergent? I want to!!! But I don’t want to use Borax. I’d be happy with a recipe for any form of liquid, powder, or tabs. I just think it will be a nice way to save money and avoid toxins.

If you have a great non-toxic dishwasher detergent recipe idea, will ya share?

Heavenly Homemaker's Club Members: Access your homepage and all your fantastic resources here! Not a member yet? Please join us!

22 years later, I got revenge.

July 7, 2016 by Laura 7 Comments

This post may contain affiliate links. For more information, please see our disclosure policy.

I have been so naughty this week. You never knew I had this in me.

The back story:

When Matt and I first started dating in college, then became engaged, we spent quite a bit of time at the Miller’s house. They probably didn’t even know how much they were mentoring us toward beginning a healthy marriage, but they were.

On our wedding day, we were so pleasantly surprised to see that they’d driven all the way from York, NE to little ol’ Isabel, KS to honor us. How sweet are they??

Not as sweet as you think.

No, but really. They are very sweet. It’s just this:

I didn’t dare put my honeymoon suitcase in our get-away car because as much as I love all the guys involved in our wedding, I wasn’t sure I trusted them with my “special things” I’d packed for our wedding night and…etc. So instead of putting it in the car, I put my suitcase in the women’s restroom where it would be safe. Uh-huh.

After the ceremony, the picture taking, the cake eating, and the wheat throwing (I’m from Kansas. I didn’t want rice. I wanted wheat.) – I grabbed my suitcase and away we went.

Well. When we got to our hotel, I opened my suitcase and what did I find?

Every one of my socks was full of wheat. What’s more? Every single article of clothing – even my “special things” – were all tied together so that when I pulled out one piece, I just kept pulling. And pulling. And pulling. (Like a clown. On her honeymoon).

It took me completely by surprise and I could not for the life of me figure out who to blame. When we got back home, I started accusing everyone I could think of. First I pointed to my cousin Dana, who had been a bridesmaid. “It was you!! You and Rebecca I bet! When did you do it??”

Nope, innocent.

I confronted the rest of my bridesmaids, other friends who were there, my sisters-in-law, my aunts. No one knew a thing about it. Grandma?!? Nope. It wasn’t Grandma.

This remained a mystery for years.

Then came the day so many years later when I was telling the story to a group of friends in which one very guilty lady named GAIL MILLER sat sheepishly in the back, trying to contain her laughter. “Ah-ha!!!” I screamed when I saw her face. “It was YOU!!!!” I could not believe it. No way. Not Gail Miller!

Yes, Gail Miller – along with an accomplice who now lives in another state but should probably watch her back. (You’re next, Robbie.)

We’ve gotten many a laugh out of this through the years. Gail continues to be a fantastic role model, friend, and mentor to me. But here’s the part where I tell you what I did last week and I am so very proud and not the least bit ashamed of myself.

Gail and her hubs went out of town for a couple of weeks. While they were gone, they employed my husband to finish working on the walls and a closet in their basement. They gave him a key, and I believe their exact words were, “Go in and out as needed. Make yourself at home.”

Well if you say so.

What started out as me (the sweet and supportive wife) telling Matt, “I want to run over there with you some day to see what you’re working on” turned into, “Oh my goodness, I can’t believe I didn’t think of this before!! I am soooo going with you some day while they are gone and I am going to tie a bunch of Gail’s stuff together for her to find when she gets home!! I will fill her socks with wheat! Revenge time!!!” at which point I’m sure Matt had never been so thankful for and proud of his meek and godly wife.

When the day came, I couldn’t bring myself to go in search of her “special things” drawer. (Because I’m nicer than Gail.) So I stayed in the kitchen and dining area. Not to worry, there was plenty of tying to be done so there’d be no doubt I’d been by for a visit. It was ever so much fun.

Now let the fuzzy selfie slide show begin (because it’s much harder than you think to tie things together and take pictures of yourself at the same time):

First, when she opened her potholder/tea towel drawer it looked like this as normal:

revenge7

But when she pulled out a tea towel, she found this:

revenge1

My arms weren’t long enough to show you all 7 towels tied together (cue evil laugh here). But here’s a FB picture of Gail’s daughter Lynn that made me laugh for five minutes:

revenge 8

This next pic is the fuzziest of all, but my favorite of the prank. Gail has a drawer full of decorative flags she hangs outside as the seasons change. I tied them all, which spread across the entire room.

revenge5

Oh look. She found them.

revenge9

Next I found that tying all the chairs together at the bar was a fantastic idea. “Can I get you a chair? How about three chairs?”

revenge4

All of her shopping bags were hanging together in the entry way. Assuming she will need all of them for a single shopping trip, I tied the handles all together. Just trying to help.

revenge6

Lastly, I found all her jackets. Just one last special surprise for the fall when it gets chilly.

revenge3

It was 45 minutes of pure silliness, of which Matt was finishing his work in the basement and shaking his head at me (while silently cheering me on, I’m sure). Malachi was there too, laughing that his old mom could possibly be so cool and fun. (Right, Malachi? That’s what you were thinking.)

Then, of course, I had to wait many days in silence before Gail and Ray got home to discover what I’d been up to. Finally, the Facebook message appeared:

“Took me a little while, but I finally put it together. It has taken a few years for some due payback, but you finally got me. Good one, Laura Coppinger. Good one!”

to which I answered,

“Welcome home, Gail!!!!!!!!!!!!!!!!!! But what are you even talking about? Payback? Payback for what? I’m just sitting here reading my Bible…”

I guess you all know now that if you play a prank on me, I will most certainly get my revenge – even if it does take 22 years. Watch yourself.

P.S. Love you, Gail Miller!!!

Heavenly Homemaker's Club Members: Access your homepage and all your fantastic resources here! Not a member yet? Please join us!

Easy Blue Raspberry Salad

July 7, 2016 by Laura 4 Comments

This post may contain affiliate links. For more information, please see our disclosure policy.

Blue Razz Salad

Back when we embarked on a Shaved Ice Business (which seems like thousands of years ago), the favorite flavor many kids chose was “Blue Razz.” Those were the early days of our healthy eating journey when I was learning more about the nastiness of artificial colors and flavors. I just couldn’t get over the fact that fun and gimmicky names really did market themselves well, even if they didn’t make sense. After all, raspberries aren’t blue.

I’m such a boring, practical mom type.

Me: Children, why would you want to eat something that isn’t true to its name?? Raspberries aren’t blue, you know.
Children: Maybe because we’re kids and it’s FUN!!?!?!!!!
Me: Fine. Turn your tongue, lips, and teeth blue. Rot your insides. I don’t even care.

None of these words were actually spoken out loud.

All of this is irrelevant to what I’m about to share, but it did occur to me as I was playing with this recipe that indeed, we were creating a Blue Razz Salad. But instead of a fake blue with a freak flavor, we’re using real blueberries and actual raspberries. Who knew real food could turn out something so fun and trendy? (We all knew this. None of this shocks us. We already know that real food tastes good and that actual fruit is very pretty.)

Blueberry Raspberry Salad

Blue Raspberry SaladYum

Easy Blue Raspberry Salad
 
Save Print
Author: Laura
Serves: 6
Ingredients
  • ¾ cup fresh or frozen blueberries
  • ¾ cup fresh or frozen raspberries
  • 2 cups heavy whipping cream
  • ½ teaspoon vanilla extract
  • Sweetener of choice (I used 10ish drops of stevia)
Instructions
  1. Make a blueberry "syrup" by cooking blueberries in a small saucepan on low until they have cooked down and thickened. (Add a little sugar or honey to this if you like.)
  2. In another saucepan, make a raspberry "syrup" in the same way. Both fruits take 10-15 minutes to cook down and thicken. Stir occasionally.
  3. If you want your salad to be creamy, blend the cooked fruits until smooth. If you don't mind chunks of fruit, leave the cooked fruit as-is.
  4. In the meantime, whip cream, vanilla, and sweetener until thick.
  5. Fold thickened fruit into the whipped cream until just mixed.
  6. Cover and chill salad for at least 2 hours before serving.
3.4.3177

Blue Raspberry Salad - no sugar added!

I find this salad to be perfectly sweet because of the fruit and stevia (read more about stevia here), but we all know I’m the one who likes unsweet tea and barely sweet treats. Therefore, if you find that you would like this to be sweeter than it is, simply add a few teaspoons of sugar or honey to your fruit while it is cooking.

Now I invite you to make and eat what tastes delicious and will not make your mouth look like you are turning into a Smurf.

Heavenly Homemaker's Club Members: Access your homepage and all your fantastic resources here! Not a member yet? Please join us!
« Previous Page
Next Page »

Join Our Community!

 Facebook Twitter E-mail Instagram Pinterest

Popular Posts

~ Will All of the Real Moms Please Stand Up?
~ Easy! Stir-and-Pour Whole Wheat Bread
~ How to Make Gatorade
~ 31 Real Food Breakfast Ideas
~ Dear Teenage Girls...
~ When Mom Takes a Step Back
~ The Inexpensive Health Insurance We Love!
~ Let's Talk Real Food Grocery Budgets

Check out our latest posts!

  • Big Family Food and Fun: May 31-June 6, 2026
  • Big Family Food and Fun: May 24-30, 2026
  • Free 7-Day Summer Menu Plan
  • Big Family Food and Fun: May 17-23, 2026
  • Easy Side Dishes for Summer
Home  ~  Simple Meals  ~  Club Membership  ~  Shop  ~  Privacy Policy  ~  Disclosure  ~ Contact

Copyright © 2026 · Beautiful Pro Theme on Genesis Framework · WordPress · Log in