Heavenly Homemakers

Encouraging women in homemaking, healthy eating and parenting

  • Home
    • About
    • FAQs
  • Recipes
    • Bread and Breakfast
    • Condiments
    • Dairy
    • Main Dishes
    • Side Dishes and Snacks
    • Desserts
    • Gluten Free
    • Instant Pot
    • Crock Pot
    • Heavenly Homemaker’s Weekly Menus
  • Homemaking
    • Real Food Sources
  • Store
  • Contact
    • Advertise
    • Disclosure
    • Privacy Policy
  • Simple Meals
  • Club Members!

Make Your Own “Jiffy” Cornbread Mix (the Healthier Way)

March 16, 2016 by Laura 13 Comments

This post may contain affiliate links. For more information, please see our disclosure policy.

You get to learn to make cornbread mix! Your day is now complete.
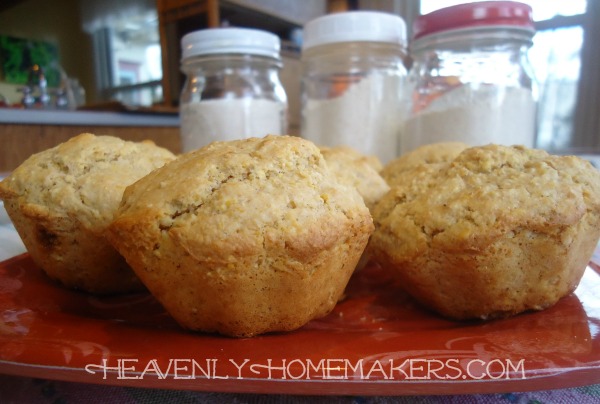
Homemade Cornbread Mix

It’s borderline ridiculous how little time I have to spend on meal prep now. #life with teenagers #workingfromhome Or maybe it’s how little time I want to spend on meal prep. This, from a girl who loves to cook.

The thing is – I love food and I love feeding people. But I also love efficiency and simplicity. I’ve learned to make a hearty main dish, then throw out the simplest fruit and veggie side dishes possible. It’s all nourishing and filling and it takes very little work. I love this so much.

So when it comes to “bread as a side dish,” I very rarely have time or spend time or choose to make it a priority. After all, there are many more nourishing side dishes to choose from (tossed salad anyone?).

Sometimes though, we all just need a good cornbread muffin. Like with chili or soup or well, with chili or soup. To me, that’s when cornbread muffins are the best. I haven’t made cornbread in over a year – not because it’s hard to make – but because it’s just one more thing to do and I don’t have time for one more thing. (I’m almost pitiful. Almost.)

Last week, two things happened:

  1. I ran across this recipe for homemade Jiffy mix.
  2. We shared a meal with some friends in which delicious soup and cornbread was served.

I decided that if I had cornbread mix on hand, it would save me a few minutes of meal prep and simplify my life. Instead of talking myself out of mixing up a batch of cornbread because of the extreme difficulty of getting out and measuring flour and baking powder (the struggle is real) I could just dump the pre-measured ingredients into a bowl and stir in the liquids.

I adapted the recipe (included whole grains and cut out some sugar), multiplied the recipe to make it more efficient, stirred ingredients into a big bowl, and had six jars of muffin mix in less than 10 minutes.
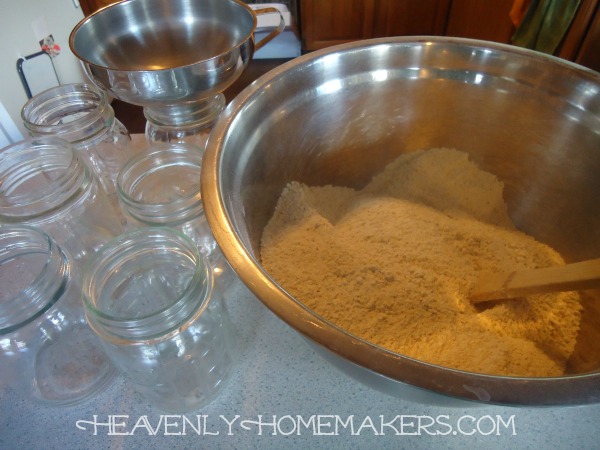
Cornbread Mix

Funny how this simple task of making a mix ahead of time is so helpful. It doesn’t take much, you know?
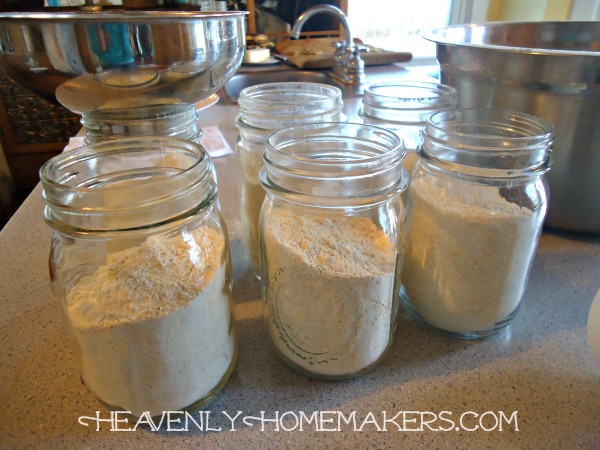
Cornbread Mix in Jars

Will you save money making this cornbread mix yourself? I don’t know. How much is a box of Jiffy these days? They used to be 33¢ but I haven’t looked at them in several years. I didn’t do the math on this mix (because if I don’t have time to make cornbread I probably don’t have time to break down the cost of cornmeal). But I’m almost sure it only takes a few cents to make this – and I used 100% whole grain flour and organic cornmeal.

Homemade Cornbread MixYum

Homemade "Jiffy" Cornbread Mix (the Healthier Way)
 
Save Print
Author: Laura
Serves: 6 mixes
Ingredients
  • 4 cups whole wheat flour
  • 3 cups cornmeal
  • ¼ cup sucanat or sugar
  • ¼ cup baking powder
  • 1 Tablespoon sea salt
Instructions
  1. Mix ingredients well in a large bowl.
  2. Scoop about 1⅓ cups of mix into six pint-sized jars.
  3. Store in the freezer until ready to use.
  4. To make cornbread: Empty contents of jar into a bowl. Add 1 egg, ½ cup milk, and 2 Tablespoons melted butter or coconut oil. Spread batter into an 8x8 inch baking pan or scoop into 6-7 prepared muffin cups. Bake in a 400° oven for 15-20 minutes.
3.4.3177

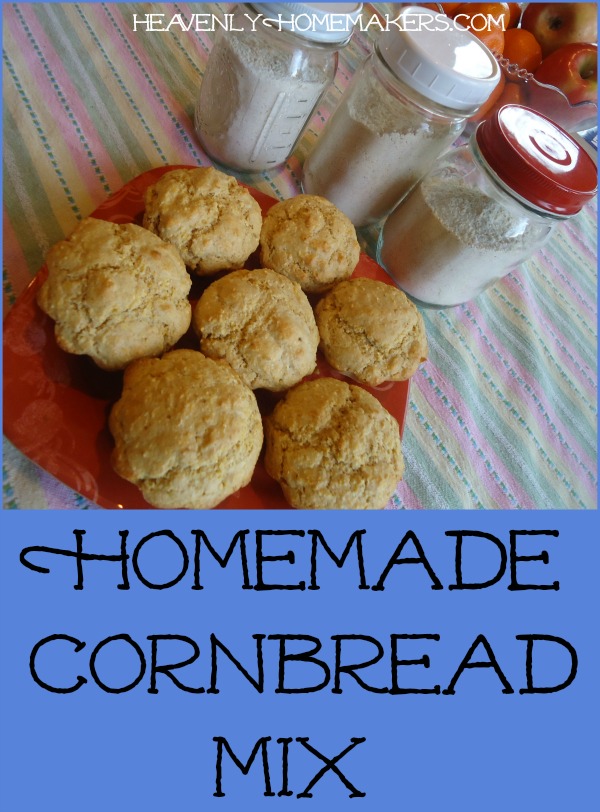
Homemade Cornbread Mix in Jars

Easy as that, you have cornbread.

Are you like me? Do you find that mixing up bread to go with a meal is just a little too much effort (pitiful)? What do you like to serve with cornbread?

Heavenly Homemaker's Club Members: Access your homepage and all your fantastic resources here! Not a member yet? Please join us!

Heavenly Homemaker’s Savings Club – Free Memberships for All!

March 15, 2016 by Laura 1 Comment

This post may contain affiliate links. For more information, please see our disclosure policy.

tablecloth

Frugal Homemakers Unite! (That sounded less cheesy in my head.)

I’ve been a (work outside the home, stay at home mom, or work from home) homemaker for over 21 years. While I recognize the value of investing in quality food and quality products, I also appreciate saving money in any area I can. How else could I afford to buy pants long enough for my ever-growing teenage sons?

tourney food1

The good news:

It is absolutely possible to feed a family well and manage a home well without over-spending. It is also possible to do this without spending hours in the kitchen, hours at the store, and hours online.

I come across many good deals because of the connections I have made with a wonderful online community throughout the past eight years. I pick and choose carefully the deals I choose to share here on my blog because there’s only so much time and space and I prefer to focus more on recipes and encouragement here (not that a good deal on coconut oil isn’t pretty encouraging!).

I’ll continue to share great deals here on my blog as I feel they will be a blessing to you. But now we’ve got something bigger and better to offer: the Heavenly Homemaker’s Savings Club.

What is it?

When you join Heavenly Homemaker’s Savings Club, you’ll be privileged to hear about all the great deals I come across but don’t have space to share here on my blog. I’ll compile the best of the best of money saving tips, ideas, and resources – and I’ll send them to you so that you can take advantage of and enjoy them as needed.

Savings Club Free Membership

Savings Club members will enjoy these perks:

  • Infrequent emails that pack a punch. I’m not going to load down your inbox. Neither you nor I have time for that! You can expect to see an email from the Savings Club a couple times each week – sometimes less, sometimes more. It’ll all depend on what great savings tips I come across and how many family activities I’m running off to during the week.
  • Information about great offers on nourishing groceries, non-toxic household and self-care products, and other resources. If I love it and use it and it saves us all money, I’ll let you know about it!
  • Money saving tips. Do you know how many ways I’ve learned to cut costs and save money during the past two decades? (I mean, I don’t have an exact number of ways. That was sort of rhetorical. It’s a lot though.) I don’t plan to stop learning more ways to save, so I’ll share what I know and share what I continue to learn. (Just last year I learned to make Gatorade!)
  • Freebies. You’d be surprised at the amount of free stuff I hear about but have to ignore because I just don’t have space in my blog schedule to share. I want to be able to tell you about these opportunities!

Speaking of Freebies and Deals

Let’s get your membership rolling with some freebies right from the start.

First of all, your membership for the Savings Club is now and forever will be free. Second, I created a free eBooklet for all members, which includes my Top 10 Money Saving Recipes. Plus, within that book, you’ll find a fun surprise coupon (or not so surprise, since I told you about it just now) so you can get another eBook from my shop for just a buck!

Top 10 Money Saving Recipes

I’ve got some great deals and goodies to share with you during the next couple of weeks, so join the club and be in the know!

Click through this link to sign up if the form isn’t showing up for you.

I’m super excited to share that signing up for this freebie will connect you to our new Heavenly Homemaker’s Savings Club. It’s free, of course. You can unsubscribe at any time, your info will never be shared or sold, and being on this list means that you’ll be the first to know any great deals or freebies that will bless your homemaking efforts!


Heavenly Homemaker's Club Members: Access your homepage and all your fantastic resources here! Not a member yet? Please join us!

High Five Recipes: Easy Butterscotch Bars

March 15, 2016 by Laura 101 Comments

This post may contain affiliate links. For more information, please see our disclosure policy.

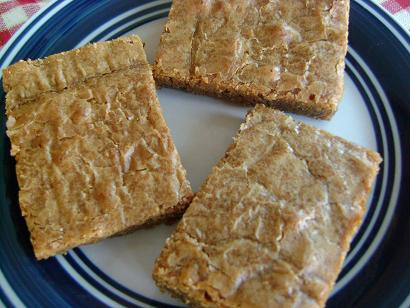
People can’t get enough of these butterscotch bars. They’re made with whole wheat flour but no one knows. They’re made with only five ingredients that you probably have on hand – so easy!

butterscotch_bars

I originally posted this recipe in 2010, but decided to post it again for you today. Why? Because butterscotch bars. And also because I have only been home 3 of the past 11 days so I’m behinder than ever. While I play catch up and work on new projects (wait till you see!), I wanted to bless you a recipe so you could bless others.

High Five Recipes 2

You’ll be glad to know that this is a High Five Recipe! (High quality recipes + five ingredients or less = High Five Recipe)

This is not a Low Sugar Recipe, however. So make them to share with others, and saver them slowly (as opposed to gobbling down half the pan before you realize what happened).


Easy Butterscotch BarsYum

4.3 from 7 reviews
High Five Recipes: Easy Butterscotch Bars
 
Save Print
Author: Laura
Ingredients
  • 1 cup melted butter
  • 1¾ cups sucanat or brown sugar
  • 2 eggs
  • 1 teaspoon vanilla extract
  • 1½ cups whole wheat flour
Instructions
  1. Stir melted butter and sucanat together.
  2. Add eggs and vanilla, mixing well.
  3. Stir in flour and mix until well combined.
  4. Pour batter into a 9x13 inch baking pan.
  5. Bake at 350° for 25 minutes.
3.4.3177

These bars are gooey, rich, and need I remind you to make them to share with friends?

Now that I’ve been making these butterscotch bars for so many years, I get frequent requests for them.

  • “Laura, would it be too much for me to ask you to make a batch of your butterscotch bars for me for my birthday? Like very year for the rest of my life?”
  • “Laura, my friends and I were talking about your butterscotch bars and now we want some. I told them I’d ask…can you make us a batch?”
  • “How much arm twisting would it take for you to make another pan of your butterscotch bars?”

These requests make my day, and since the bars are so easy to make, I almost always say yes! If you haven’t tried these bars yet, do it. They’re crazy easy, but beware: people will beg you to make more. You’ll have more friends than you ever had before and everyone will love you for providing the butterscotch bars. It’s hard, but you can handle it.

Easy Butterscotch Bars - Five Ingredients!

Heavenly Homemaker's Club Members: Access your homepage and all your fantastic resources here! Not a member yet? Please join us!

The Secret to Fluffy and Delicious Whole Wheat Baked Goods

March 13, 2016 by Laura 33 Comments

This post may contain affiliate links. For more information, please see our disclosure policy.

Dear Gluten Free Friends: This post is very whole wheaty and not at all helpful to your gluten free life. I’ve got your back though because as you know, many of the recipes here on my site are naturally gluten free. After all, while I do love freshly ground whole wheat flour, I also love variety and breadless recipes. So just for you: 100+ Gluten Free Recipes. Click on over and have at it. Love ya much!

wheat_fields_2

See the difference in grains?
We took this picture while traveling through Kansas a few years ago. 

As a newly-wed I remember visiting someone’s house where they served homemade rolls made exclusively with whole wheat flour. I tried to like the rolls, but I was used to white rolls made with all-purpose flour, and these rolls just weren’t the same. I decided that I simply didn’t like whole wheat flour, and really, I didn’t like anything considered to be a “health food.” (I thought eating healthy meant I had to eat rice cakes and bean sprouts for every meal.) I continued on my merry way where I ate very few fruits and veggies, drank about a liter of Pepsi every day, and made oodles of delicious cookies and cakes with white flour.

Many years (and way too many gallons of Pepsi) later, one of my friends started selling her homemade bread at our local Farmer’s Market. She had some leftover one night, so she sent a loaf home with me. We ate it for breakfast the next day, and we loved it down to the last crumb. I complimented her up and down next time I saw her, asking what kind it was. “It’s just my regular whole wheat bread recipe.” What?! That bread was whole wheat? Like, whole wheat and white flour mixed, right?! “Nope. 100% whole grain. I grind it myself.”

That is the moment I learned about the different varieties of wheat and the deliciousness of grinding grain into flour. (I never actually knew people did that. Grind your own flour? Seriously?!) I was intrigued. I researched. I asked questions. I saved up for a Nutrimill, stocked up on hard white wheat, and the rest is history.

white_wheat_flour

Red Wheat, White Wheat, Hard Wheat, Soft Wheat

Oh how many wheat you meet. Look at me. I’m Dr. Seuss. 

There is a big difference between red wheat and white wheat. Both produce whole wheat flour -but they bake up differently, creating different textures and flavors. I’ve covered this in detail in several other posts, which I’ll point you to now:

  • The Difference Between Red and White Wheats
  • How to Grind Flour in a Nutrimill
  • What Kind of Flour is Best if You Don’t Grind Your Own?
  • What is Pastry Flour, Where Do I Get it, How Do I Use It?

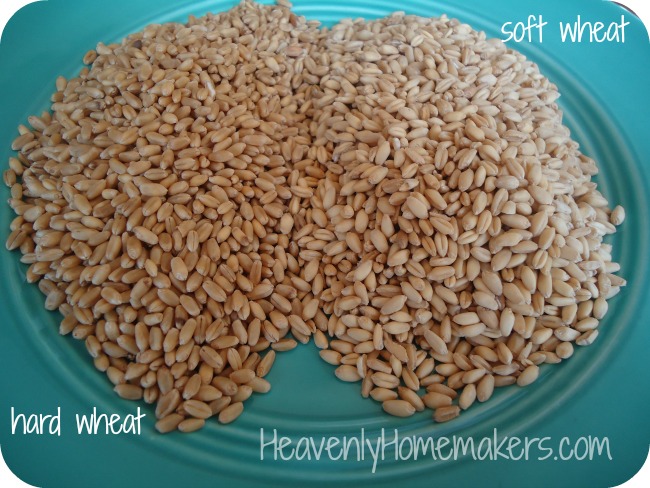
hard wheat soft wheat

It’s hard to see the difference in the picture.
Hard is more pointy. Soft is more round. There. Does that help?

The Secret to Fluffy and Delicious Whole Grain Baked Goods

Let’s talk about how you can make the most amazing whole grain cookies, cakes, muffins, pancakes, waffles, and pastries.

When I first started grinding flour to make all of our baked goods healthier and tastier, I used hard white wheat for everything. It did this because:

  • Hard white wheat flour works for any recipe, whether it is a yeast bread or a non-yeast product. (Soft wheat only works for non-yeast products.)
  • Grinding just one kind of flour made life easier.

Finally, after the recommendation from many of you, I gave soft white wheat a try. This is the variety of wheat that, when ground, produces whole grain pastry flour. I used it first for pancakes, then I used it for muffins, then I decided that I had waited way too long to try this. Pastry flour makes a huge difference in the density of baked goods!

Whole Wheat Pastry Flour (ground from soft white grain) is almost like using white all-purpose flour. It is light and fluffy and baked goods I make with it turn out really delicious.

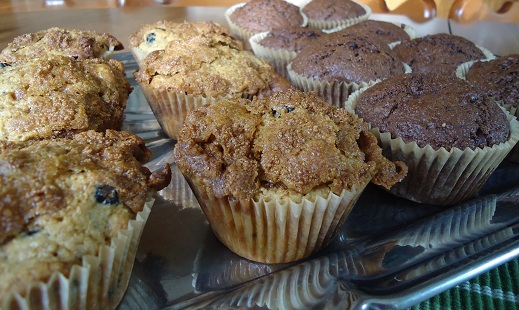
muffins

Simple as that, freshly ground Soft White Wheat is the secret to turning out amazing baked goods.

Remember though, if you’re making a yeast bread, you still have to use Hard White (or red) Wheat. I now love both hard and soft white varieties and keep them both on hand at all times for all our baking needs.

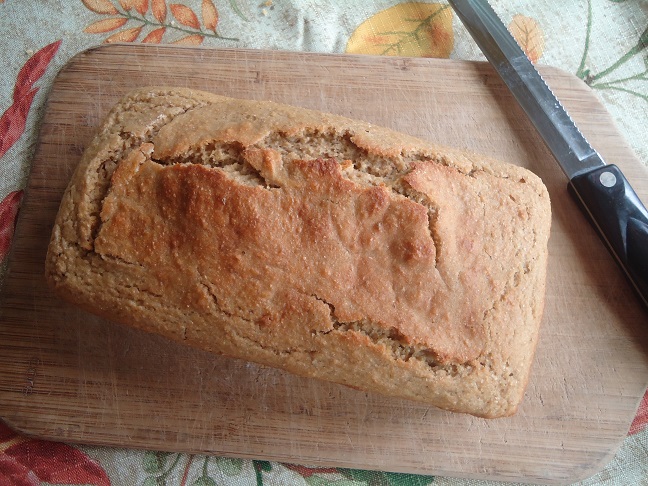
no-knead bread 3

If you’re afraid of baking yeast bread, or simply want to make life much easier –
you have to try this easy Stir-and-Pour Bread. Because of this recipe, I will never knead bread again.
(This bread requires hard wheat, not soft, because it is a yeast bread.)

So let’s review:

  1. Use hard wheat for yeast breads.
  2. Use soft wheat for everything else.
  3. Or use hard wheat for everything – but I’m telling you, soft wheat (which produces whole wheat pastry flour) is wonderful to work with!

The SECRET to Fluffy and Delicious Whole Wheat Baked Goods! You have to read this! #bakedgoods #wholewheat

Some of our favorite recipes which use Whole Grain Pastry Flour:

Most don’t even realize they are eating whole grains when they eat any of these goodies! For that matter, the recipes that are low in sugar don’t seem to phase people either. Who knew eating healthier could taste so good?!

  • Homemade Donuts
  • Easy Pancake Muffins
  • Low-Sugar Sunshine Cake
  • Low-Sugar Super Moist Chocolate Cake
  • Low-Sugar Peanut Butter Cake with Peanut Butter Cream Frosting
  • Low-Sugar Carrot Cake With Maple Cream Frosting
  • Cranberry White Chocolate Chip Breakfast Cookies
  • Chocolate Chocolate Chip Muffins
  • Blueberry Streusel Muffins
  • Breakfast Cake
  • Flaky Cream Cheese Pastry
  • Oatmeal Breakfast Bars
  • Peanut Butter Chocolate Chip Muffins
  • Peanut Butter Pancakes
  • Zucchini Carrot Bread
  • Banana Bread and Muffins
  • Bacon Cheese Muffins

Let me hear from you!

  • Do you grind your own flour?
  • What is your flour preference?
  • Have you tried soft wheat (pastry flour) or do you stick with hard wheat for every recipe?

Looking for a great Grain Mill?

I have and highly recommend a Nutrimill!

Heavenly Homemaker's Club Members: Access your homepage and all your fantastic resources here! Not a member yet? Please join us!

Strawberry Cream Muffin Recipe (And My Best Muffin-Making Tip)

March 10, 2016 by Laura 44 Comments

This post may contain affiliate links. For more information, please see our disclosure policy.

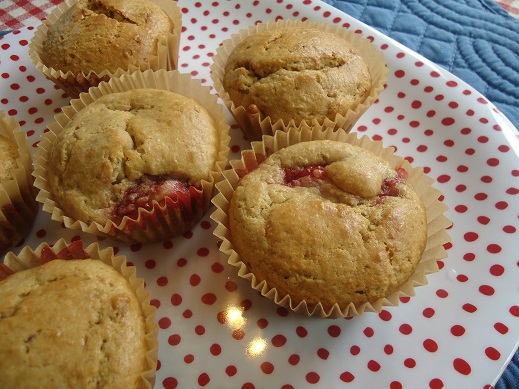
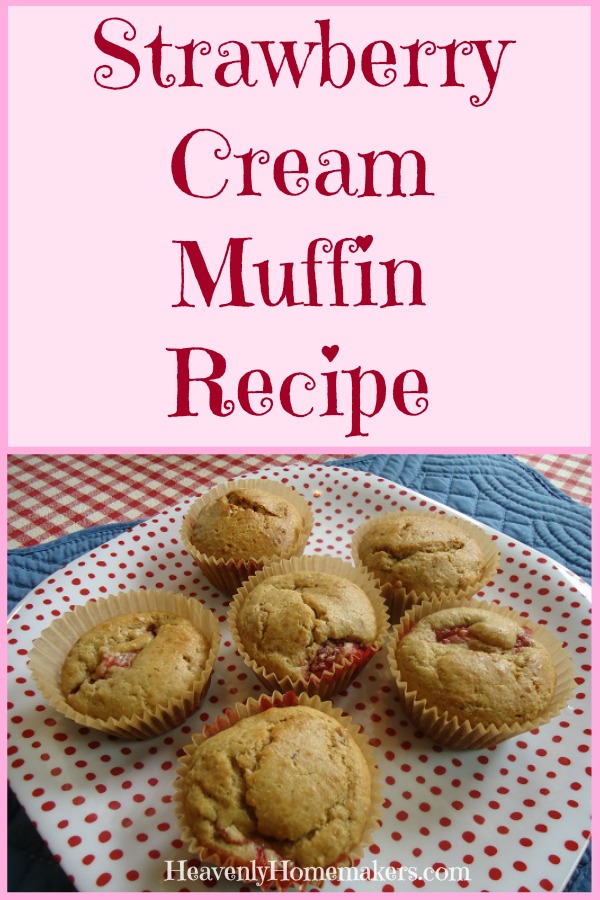
strawberry_muffins_2

You might remember when I posted this recipe three years ago. Now that it is strawberry season again and I am a tiny bit strawberry focused (or sure, we can call it obsessed if you prefer) – I decided to re-post this for you now.

This Strawberry Cream Muffin is so delicious, you’ll feel like you’re eating dessert for breakfast or snack. Take note that the sour cream in these muffins makes all the difference in how moist and delicious these are. Can you use milk or coconut milk (to make them dairy free) instead? Yes. But they will likely turn out just a little bit dry. Just eat them fresh out of the oven and you’re golden.

Strawberry Cream MuffinsYum

Strawberry Cream Muffins
 
Save Print
Author: Laura
Serves: 12
Ingredients
  • 1¾ cups whole wheat flour (I prefer freshly ground soft white wheat in these)
  • ½ cup sucanat or brown sugar
  • 1 teaspoon baking powder
  • ½ teaspoon sea salt
  • ⅓ cup coconut oil or butter, melted
  • 1 egg
  • 1 cup sour cream
  • 1 cup chopped fresh or frozen strawberries
Instructions
  1. Stir together flour, sucanat, baking powder, and salt.
  2. Add oil, egg, and sour cream, mixing well.
  3. Fold in strawberries.
  4. Scoop batter into 12 well greased or paper-lined muffin cups.
  5. Bake in a 375° oven for 18-20 minutes or until lightly browned.
3.4.3177

Strawberry Cream Muffin Recipe

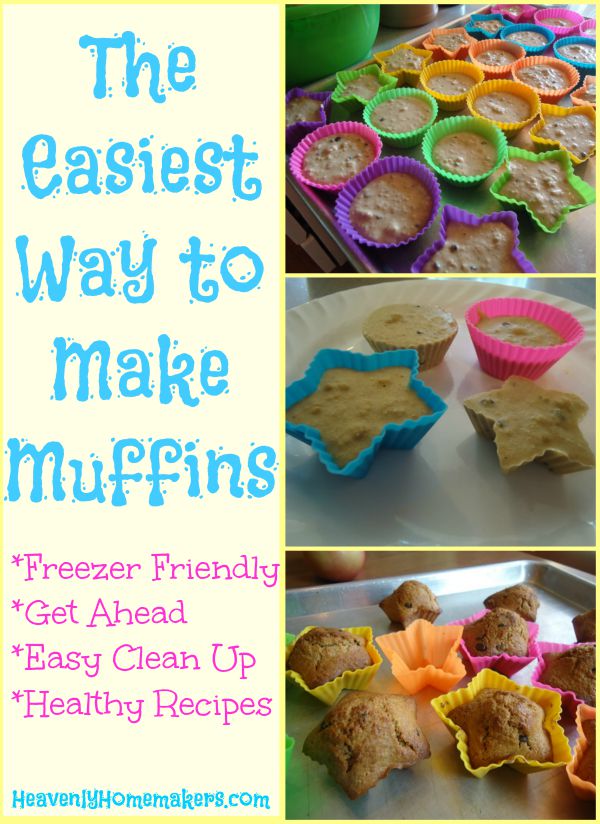
Now my best tip of all: Mix up the batter and freeze it to make your muffin baking/dish washing life easier! Then all you have to do is grab your frozen muffin batter cups out of the freezer, put them into muffin cups the night before you want to bake the muffins, then stumble into the kitchen in the morning and put them into the oven!

The Easiest Way to Make Muffins

I’m loving these Silicone Muffin Cups, by the way. I’ve been using them for a few months now and they make freezing muffin batter so easy! Plus I love that I’m saving money on paper liners. Read more details about this simple time and money saving process here.

Have you tried freezing muffin batter? How about silicone cups? Can’t wait to hear how you like the Strawberry Cream Muffins!

P.S. We have not one but two weddings we are heavily involved in this weekend! Starting yesterday, we have been/are running from party to shower to rehearsal to set up to other rehearsal to wedding to getting hair fixed to wedding. If you didn’t follow all of that, don’t worry. I have it all scheduled down the the minute on my calendar. All that to say, you have no idea how happy I was when I found some frozen muffin batter cups in my freezer on Wednesday. I tossed them at my kids to make for their breakfast Saturday. Perfect!

Heavenly Homemaker's Club Members: Access your homepage and all your fantastic resources here! Not a member yet? Please join us!

The Great Way We’re Drying our Clothes Now

March 10, 2016 by Laura 8 Comments

This post may contain affiliate links. For more information, please see our disclosure policy.

Did I ever tell you about the time I went for about a year and a half without a working dryer? Our boys were little, money was tight, and our dryer went out. Replacing it seemed like a bad idea at the time since buying groceries was also necessary. A dryer? Neh. I could do without.

And so I did. For over a year. In the spring, summer, and fall I used a clothesline. In the winter though? Oh boy. I had a tiny wooden clothes rack that my mom had used in college. That held a few things, but otherwise I hung or draped clothes and towels and little boy socks all over the house on any surface I could find. It worked. We survived. In the big scheme of things, it wasn’t a terrible hardship.

Eventually we bought a used dryer that is still working for us. (We always buy used appliances, by the way. We’ve learned that people are often trading in their “old” model for whatever is the latest and greatest. “Used” doesn’t always mean “dead.” Usually it just means “costs less.” We’re all over it.) We do at least two loads of laundry each day, so I’m very thankful for a working dryer now!

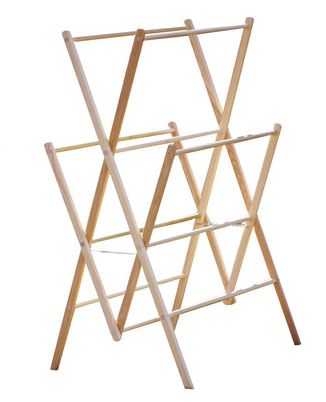
But for all the clothes we prefer not to put into the dryer, I’m excited to now have the Homestead Drying Rack that Homestead Store sent us a few weeks ago to review. This guy puts my tiny little drying rack to shame. Check it out:

drying rack2

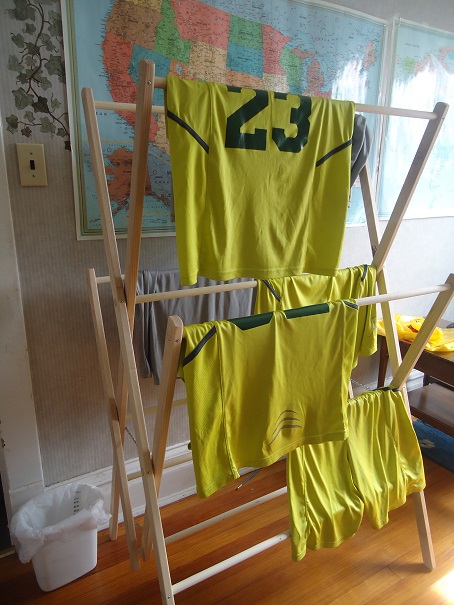
What I like most about this rack is how the rods are so efficiently spaced away from one another. It makes for much easier draping and drying, offering many places to hang our clothing. It’s big, but it grows up instead of out so it doesn’t take up any more space on the floor than my smaller one did. (They also carry an even bigger one, the Homesteader Drying Rack, which looks marvelous!)

Now that the boys are older, they have quite a few items of clothing they prefer not go into the dryer. We’re going to be getting years of use out of this gem, I can tell!

drying rack

Can’t put the nice basketball uniforms in the dryer, of course! 

Homestead Store offers several different sizes of drying racks, and originally I selected the small Tabletop Drying Rack thinking of saving space. I’m so thankful they came back with the suggestion that I try their bigger and most popular Pioneer Drying Rack instead! That is the way to go for a family as big as mine. We put it in our school room (hence the U.S. map on the wall), which works well for us now that the boys are older and only use the school room as a hub for all our books and software (and guitars and video equipment and microphones and…).

One thing to note: Putting this drying rack together was a two-man job. Matt and Elias (our 14-year old) worked together on this project that took just a little longer than we anticipated. It was worth it though. The rack is super sturdy. I have no doubt it will stand up to years of use.

A Homestead Drying Rack Discount!

Homestead Store is offering us all a 10% discount on all drying racks! Use the code homemaker10 for the discount. This offer is good through March 31, 2016. Be sure to check out their Facebook Page while you’re at it. They share some really fun info there!

Special thanks to Homestead Store for being a site sponsor this month and for providing our family with this wonderful drying rack

Heavenly Homemaker's Club Members: Access your homepage and all your fantastic resources here! Not a member yet? Please join us!

Low Sugar Chocolate Cheesecake Parfaits

March 9, 2016 by Laura 11 Comments

This post may contain affiliate links. For more information, please see our disclosure policy.

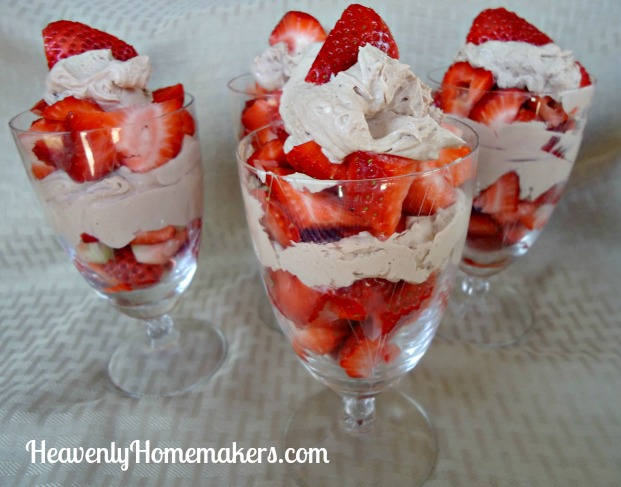
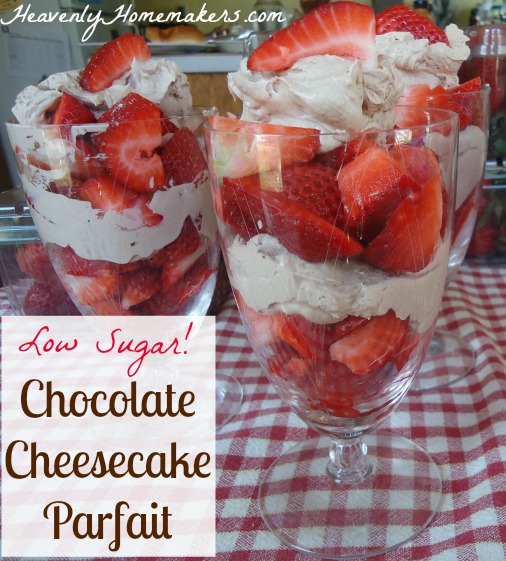
chocolate cheesecake parfait

There is a really weird thing about my dad.

No, no – hear me out. I don’t mean weird like weird. Actually though, if you think about it we all have our own variety of weirdness, do we not? Oh, we do. We are who we are and we think that anyone who isn’t like us is weird. News flash: We are all weird. Weirdo.

So about my dad. He’s super picky about all things fruits and vegetables. He only likes canned green beans, canned peaches in corn syrup, and iceberg lettuce. When he comes to visit and I offer beautiful trays of fresh fruit and steaming bowls of vegetables and he’s like, “What is this broccoli stuff? Hmm, peaches with fuzz. You mean people actually eat asparagus?”

And when it comes to strawberries? I can’t even believe I’m related to him because he will not touch a strawberry. He says it’s the seeds. Oh but he is missing out on one of the finest pleasures of this life on earth.

None of this in and of itself is weird. The weird part is that somehow in a conversation about what we do and not not like, when the subject of beets came up, my dad said, “Beets? Oh, I like beets.”

What?!? He won’t eat a fresh strawberry, a peach off a tree, or about fifty other fruit and vegetable options – but he’ll eat a beet? So weird.

I don’t even like beets. I think they taste like dirt. (Not that I’ve actually eaten dirt.) I’ve tried but I just can’t like them. See, and this makes me weird to those of you who do like beets. I told you we are all weird.

Since my dad won’t eat strawberries, I will continue to eat his share and my share plus all the other strawberries I can get my hands on. They are my favorite.

Our family recently combined two of our favorite recipe ideas: Low Sugar Strawberry Cheesecake Parfaits with Chocolate Whipped Cream. The result is a delicious Chocolate Cheesecake Parfait. Of course, I used strawberries with the chocolate cheesecake to make these. But you could use blueberries, bananas, and whatever other fruit you might like.

Low Sugar Chocolate Cheesecake Strawberry ParfaitsYum

5.0 from 2 reviews
Low Sugar Chocolate Cheesecake Strawberry Parfaits
 
Save Print
Author: Laura
Serves: 4-6
Ingredients
  • 2½ cups heavy whipping cream
  • 8 ounces softened cream cheese
  • 3 Tablespoons unsweetened cocoa powder
  • 1 teaspoon vanilla extract
  • 1 Tablespoon real maple syrup
  • Liquid stevia to taste (I use about 20 drops) (Use a few Tablespoons of sugar if you prefer.)
  • 1 -2 pounds fresh, sliced strawberries
Instructions
  1. Place all ingredients (minus the strawberries) into a blender.
  2. Whip until smooth and creamy.
  3. Spoon mixture into bowls or cups – layering them with sliced strawberries.
3.4.3177

Low Sugar Chocolate Cheesecake Parfait

If you have a tried and true you will like beets if you eat them this way recipe, please do let me know. Otherwise, I’ll stick with the other dozens of fruit and vegetable options I do like and I’ll eat strawberries like there’s no tomorrow. Never forget that you’re weird and I’m weird and everyone is weird.

Heavenly Homemaker's Club Members: Access your homepage and all your fantastic resources here! Not a member yet? Please join us!

Twelve More Pounds of Strawberries and a Whole Lotta Green Food

March 8, 2016 by Laura 18 Comments

This post may contain affiliate links. For more information, please see our disclosure policy.

It wasn’t very long ago that our family didn’t go through many fruits and veggies in a week. Even during the first few years of our real food journey when I was learning more about nutrition, I never made fruits and veggies a big part of our meals.

healthyeatingjourney

Slowly but surely, we’ve added more variety of produce to our diet. Gradually, we’ve noticed our bodies crave more and more fresh food. It’s pretty fun actually! (Don’t be thinking we’re all that though because we also still like chips. Meh.)

I love strawberries

I’ve probably already been pretty clear about how excited our family is that it’s strawberry season again! We recently went through 16 pounds of them in less than a week because they were in our house for the first time in months and we could not stop. As we ate the last few berries from that stash, we all started freaking out about being back down to zero strawberries again. (I exaggerate. No one was actually freaking out. Not even me. I was perfectly calm. Who even cares about strawberries?)

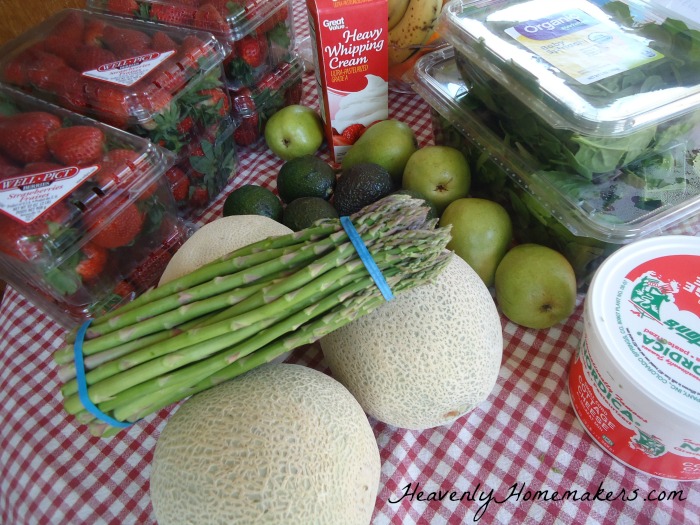
The next day, I went to the store with a plan to price-match a good deal on strawberries. While there, I found that the store had two-pound containers at a better deal than the one-pound price-match. I only put 6 containers in my cart because I’m nice and wanted to leave some berries for the other customers. Twelve pounds of strawberries ought to hold us for a few days, I think.

groceries3716

I’ve officially decided this is my favorite time of year to buy food. Oodles of goodness is starting to become available again at good prices. Not only did I get a cart full of strawberries, I also got pears, avocados, asparagus, mixed greens, cantaloupe, and spinach. You’ll see in the picture that I also got cream and cottage cheese. The cream is for the berries and the cottage cheese is going to taste marvelous with the fresh pineapple I got last week.

The post without a point

I would appear that I’m just rambling here, showing you all my berries and other fresh produce. What am I actually trying to say?

  1. Buy fresh produce!
  2. Eat fresh produce!
  3. Have fun trying new fresh produce items.
  4. Challenge yourself to enjoy more fresh produce than you might typically eat each day.
  5. I love strawberries.

If you aren’t eating many fruits and vegetables, you aren’t fueling your body with enough nourishment. Period. I care about this so much that if you came to my house, I would actually share my strawberries with you. Now that is a true friend.

Don’t just nod and smile and walk away. It’s time to commit. Leave a comment here telling us about some of your favorite fruits and vegetables, and let us know what you’re going to buy at the store next time you go. Increase the fruits and veggies, friends! Let’s do this!

Heavenly Homemaker's Club Members: Access your homepage and all your fantastic resources here! Not a member yet? Please join us!

Easy Low Sugar Key Lime Melt-Away Cookies

March 8, 2016 by Laura 10 Comments

This post may contain affiliate links. For more information, please see our disclosure policy.

I actually have no idea what makes something key lime rather than simply lime. I’d look it up, but there are fresh lime cookies to eat and also there is a lot of laundry to do since we have been gone all weekend. I would have just called these lime cookies, but key lime sounds more exciting.

Key Lime Cookies

Oh wait. I just looked it up. Did you know there are actually Key Limes? You probably did, so before you tease you have to remember that I am from Nebraska where there are no lime trees. Nebraska limes grow on trucks and in grocery stores.

Key limes are apparently great for cooking and baking because they are extra juicy and full of aroma and flavor. I will admit that I don’t know what kind of limes I used in these cookies. Therefore, maybe we should call these Easy Low Sugar On-Sale Lime Melt Away Cookies?

Either way, add these cookies to the collection of Low Sugar Cookies we’ve been enjoying here. These cookies are so much fun since all we have to do is use the base recipe, then add different flavors! Lime is just as amazing as the others.

Want to try the other varieties of these cookies?

  • Easy {Low} Sugar Cookies
  • Low Sugar Lemon Melt-Away Cookies
  • Low Sugar Almond Melt-Away Cookies
  • Low Sugar Orange Melt-Away Cookies

Easy Low Sugar Key Lime Melt-Away CookiesYum

4.0 from 1 reviews
Easy Low Sugar Key Lime Melt-Away Cookies
 
Save Print
Author: Laura
Serves: 24
Ingredients
  • 1 cup melted butter
  • ½ cup sucanat or raw sugar
  • 2 eggs
  • 1 teaspoon vanilla extract
  • The juice of two limes
  • grated lime rind
  • 1 teaspoon baking powder
  • 3 cups of whole wheat pastry flour (give or take)
Instructions
  1. Stir together melted butter and sugar.
  2. Add eggs, vanilla, lime juice, and baking powder.
  3. Grate lime rind into the mix for extra flavor.
  4. Stir in flour until a solid ball of dough forms.
  5. Drop teaspoon-sized balls of dough onto a cookie sheet, about an inch apart.
  6. Bake in a 350° oven for 10-12 minutes or until cookies are lightly browned.
3.4.3177

Easy Low Sugar Key Lime Melt-Away Cookies

If you’d like to learn a cool trick to make your lime squeezing easier, grab your limes and some tongs and read this handy information.

Do you live in an area where limes grow in your backyard? If so, I’m happy for you and not even jealous. After all, I live in a state where the wind blows so hard we don’t have to bother fixing our hair. Now who’s jealous?

Heavenly Homemaker's Club Members: Access your homepage and all your fantastic resources here! Not a member yet? Please join us!

What Are You Waiting For? (32 Recipes to Make With Your Kids)

March 6, 2016 by Laura 2 Comments

This post may contain affiliate links. For more information, please see our disclosure policy.

If you’re waiting for all the stars to align before you feel it is the right time to teach your kids to cook, stop waiting already. (After all, stars are prettier when they’re scattered about.)

Yes, there are moments you need to just get in the kitchen and get the job done without any helpers. But if you know your kids are ready to learn to cook, it’s time to stop making excuses about not doing it. It must be done. Now is the time. Stop making excuses. Don’t think I can’t hear you. ;)

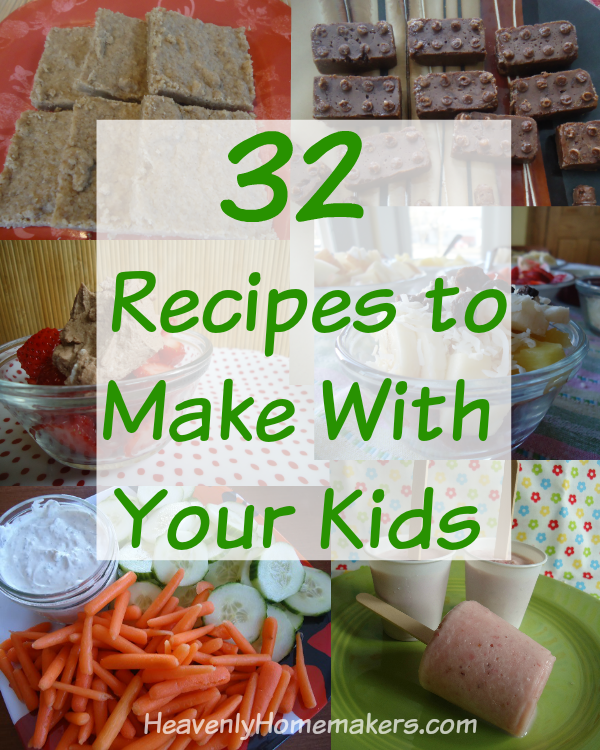
32 Recipes to Make With Your Kids

Today I’ve made you a list of fun recipes you should look through and make with your kids. In no particular order, here are 32 easy-to-make recipes. I encourage you to click around and look at them with your kids. Let them help pick out something to make – then go for it! Helping to pick the recipe will likely make them a little more excited. :)

32 Recipes You Can Make With Your Kids

  • Chocolate Chocolate Chip Muffins
  • Stir-n-Pour Bread
  • Pizza Boats
  • Corn Dog Muffins
  • BLT Wraps
  • Crock Pot Barbecue Chicken Breasts
  • Snowflake Quesadillas
  • Ranch Salad Dressing
  • Chewy Granola Bars
  • Coconut Fudge Bars
  • Easy Veggie Dip
  • Fruit Salad
  • Cream Cheese Salsa Dip
  • Mudballs
  • No-Bake Chocolate Fudge Bites
  • No-Bake Peanut Butter Cookie Bites
  • No-Bake Snickerdoodle Bites
  • Pineapple Fluff Salad
  • Spicy Avocado Dip
  • Strawberry Peach Slushie
  • Whole Wheat Graham Crackers
  • Shortbread
  • Baked Potatoes in the Crock Pot
  • Butterscotch Bars
  • Chocolate Whipped Cream on Strawberries
  • Dark Chocolate Peppermint Mousse
  • Hot Chocolate Mix
  • Mock Frozen Yogurt
  • Orange Creamsicles
  • Strawberry Creamsicles
  • Homemade Tootsie Rolls
  • Crustless Pizza Pie

The Kids Cook Real Food eCourse made all the difference for my son Malachi. He became much more interested in learning to cook – and then learn he did!! I also recommend you grab a couple of our resources here: Learn to Cook and Teaching Your Kids to Cook books. Together, they offer 222 pages of activities, instruction, lessons, and recipes!

LearnToCookcoversm

TeachingKidscoversm

Now that my kids are older, there are days I turn the kitchen over to them completely. They can make a meal from start to finish. How great for all of us!

Do your kids enjoy cooking?

Heavenly Homemaker's Club Members: Access your homepage and all your fantastic resources here! Not a member yet? Please join us!
« Previous Page
Next Page »

Join Our Community!

 Facebook Twitter E-mail Instagram Pinterest

Popular Posts

~ Will All of the Real Moms Please Stand Up?
~ Easy! Stir-and-Pour Whole Wheat Bread
~ How to Make Gatorade
~ 31 Real Food Breakfast Ideas
~ Dear Teenage Girls...
~ When Mom Takes a Step Back
~ The Inexpensive Health Insurance We Love!
~ Let's Talk Real Food Grocery Budgets

Check out our latest posts!

  • Big Family Food and Fun: September 13-19, 2026
  • Big Family Food and Fun: September 6-12, 2026
  • Big Family Food and Fun: August 30-September 5, 2026
  • Big Family Food and Fun: August 23-29, 2026
  • Big Family Food and Fun: August 16-22, 2026
Home  ~  Simple Meals  ~  Club Membership  ~  Shop  ~  Privacy Policy  ~  Disclosure  ~ Contact

Copyright © 2026 · Beautiful Pro Theme on Genesis Framework · WordPress · Log in