Heavenly Homemakers

Encouraging women in homemaking, healthy eating and parenting

  • Home
    • About
    • FAQs
  • Recipes
    • Bread and Breakfast
    • Condiments
    • Dairy
    • Main Dishes
    • Side Dishes and Snacks
    • Desserts
    • Gluten Free
    • Instant Pot
    • Crock Pot
    • Heavenly Homemaker’s Weekly Menus
  • Homemaking
    • Real Food Sources
  • Store
  • Contact
    • Advertise
    • Disclosure
    • Privacy Policy
  • Simple Meals
  • Club Members!

A Cat Update. I Don’t Even Know How To Say This.

October 15, 2015 by Laura 28 Comments

This post may contain affiliate links. For more information, please see our disclosure policy.

wiggams coffee 3

Several of you warned us. Many of you suggested that we do it sooner rather than later. But truly we don’t know what we’re doing here, and we didn’t know that sooner really meant, “No really. Soooooooner!” Like several weeks ago sooner.

eheh

Don’t mind me. I’m going to ramble on for a bit. I’m simply avoiding the issue. I’m hanging my head and peeking up at you sheepishly. I can’t quite come right out and say it. I’m trying. Really.

So it went something like this:

Malachi and I were outside together a few days ago. Wiggams walked up as she usually does, ready for a little snuggle. Suddenly, I gasped in shock. Malachi looked at me like I was crazy. In a weird little high pitched voice I said, “Wiggams. Whoa. Wiggams! Say it isn’t so. Wiggams, what in the world??” Malachi was like, “What, Mom? What?”

I told Malachi my suspicions. We asked Wiggams to spill it. “Out with it, Wiggams! Is it true? Is it??” Wiggams just purred and rubbed up against my leg. For a woman, she sure doesn’t add much to conversation around here.

I was in denial for the rest of the day. (I still can’t say the words.)

We showed her to Matt when he got home. We all circled around her, eyeing her with scrutiny. Together we decided resolutely that Wiggams had simply eaten an entire rabbit (family). Indeed. That had to be it. There was no other possible explanation for her widening belly.

Asa and Brittany came by later that evening. We told them our suspicions and asked Brittany what she knew about cats. She knew significantly more than we, and also she might be a little bit better at living in reality. She looked Wiggams over thoroughly, and said something like, “Well, your suspicions were correct. She did not eat a rabbit.”

So my friends. I guess it’s time to officially announce that Malachi is going to be a grandpa.

apples wiggams and malachi

I’m just. I can’t. It’s so…

eheh.

I can’t help but think that Bob Barker would be so disappointed in us. (If you’re in the Drew Carey generation, this makes no sense. Unless he says it too. I haven’t watched the show in a while. Does he say it too? Again, I’m rambling.)

My research tells me that 1-8 kittens should arrive….umm perhaps as soon as within the next couple of weeks?? (Apparently by the time a cat begins to widen in the middle there are only a couple weeks left. Help me out here, cat lovers. I only know about human babies.)

But speaking of cat lovers, so what if I am one now? Maybe I recovered from my shock and got really excited about seeing baby kitties on our place soon. Maybe I even sometimes let Wiggams crawl up on my lap while I’m having a cup of coffee in the sunshine.

wiggams coffee

Maybe I even make weirdo cutesy cat faces at her.

wiggams coffee 2

Thank you, Grandpa Malachi, for documenting my weird cat lady faces.

As soon as there is kitten news to share, you’ll be the first (few thousand) to know. We’ve already promised one kitten to our neighbor. Any other takers? And yes, Bob, Drew, and everyone else who told me to do this sooner rather than later – after the kittens are born and have been enjoyed, weaned, and shared – we will really and for real get Wiggams fixed.

eheh

Heavenly Homemaker's Club Members: Access your homepage and all your fantastic resources here! Not a member yet? Please join us!

Hamburger Pot Pie Recipe – Nourishing Comfort Food

October 14, 2015 by Laura 4 Comments

This post may contain affiliate links. For more information, please see our disclosure policy.

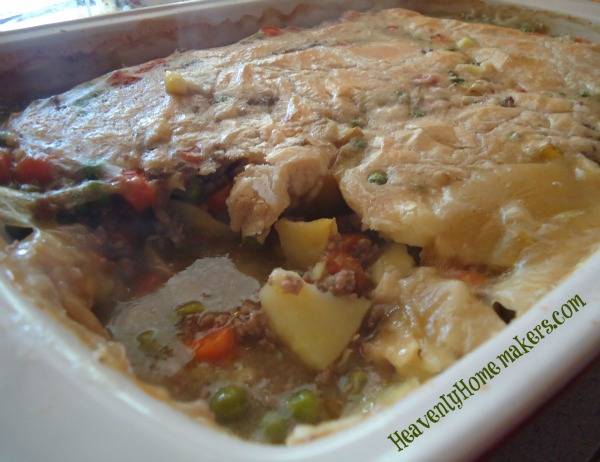
Hamburger Pot Pie22

Oh comfort food. You are so…comforting.

If you love Chicken Pot Pie, you will love this Hamburger Pot Pie. I actually think I like this one even better. (No surprise there. I’m a beef-loving girl.) Pin this recipe so you can use it to keep yourself warm all winter long.

For the record, if you need to eat gluten free – or if you’re like me and you’re more into meat and veggies than bread – you can skip the topping on this and just eat it in a bowl like Hamburger Soup.

Hamburger Pot PieYum

4.5 from 2 reviews
Hamburger Pot Pie
 
Save Print
Prep time
30 mins
Cook time
45 mins
Total time
1 hour 15 mins
 
Author: Laura
Serves: 8-10
Ingredients
  • 1 pound hamburger meat
  • 1 small chopped onion
  • 6 cups beef broth
  • 4 large carrots, peeled and cut into bite sized pieces
  • 6 medium potatoes, peeled and cut into bite sized pieces
  • 2 cups frozen peas
  • Sea salt and pepper to taste
  • ⅓ cup cold water
  • 2 Tablespoons organic corn starch, arrowroot powder, or wheat flour
  • 1 cup milk
  • 1 cup mayonnaise (I use Hain Safflower Mayonnaise)
  • 1 cup whole wheat flour (I use freshly ground flour from hard white wheat)
Instructions
  1. In a large cooking pot, brown hamburger and onion together.
  2. Stir in broth and prepared veggies.
  3. Cook until veggies are tender.
  4. Mix cornstarch with water until smooth. Stir mixture into the broth/veggies, cooking for about one minute on the stove to help the mixture thicken.
  5. Pour contents into a 9×13 inch baking dish.
  6. In a separate bowl, stir together milk, mayo, and flour.
  7. Spread mixture over the veggies in the baking dish.
  8. Bake in a 350° oven for about 45 minutes or until the crust is golden brown.
3.4.3177

To save money and add nourishment, I recommend making your own broth for recipes like this one. Here’s How to Make Beef Broth. While we’re at it, here’s How to Make Chicken Broth. :)

Hamburger Pot Pie

What are your favorite winter comfort foods? Which do you typically enjoy more – hamburger or chicken?

Heavenly Homemaker's Club Members: Access your homepage and all your fantastic resources here! Not a member yet? Please join us!

5 {Easy!} Real Food Dinners for About $1.00 Each

October 13, 2015 by Laura 6 Comments

This post may contain affiliate links. For more information, please see our disclosure policy.

Remember our $1.00 Real Food Breakfast ideas? I promised then that I would share some lunches and dinners too.

Undoubtedly, lunches and dinners are trickier than breakfasts if you want to eat on the cheap. And just to be clear – I’m not into cheap. I’m into nourishing. But it’s always great when cheap and nourishing collide, don’t you think? (I actually prefer the word inexpensive. Cheap sounds so…cheap.)

As I stated in my $1.00 Breakfast post, the following dinner servings are my size, not my teenage boys’ size. They usually eat what I eat multiplied times four or five. Technically, these dinners still cost about $1.00 per plate. It’s just that my kids eat 3-5 plates. Each. But who’s counting?

Ooh, good news not entirely related to food but about the cost of teenage boys! We just learned how to lower our 18-year old son’s car insurance bill. So now we shall proceed with allowing our 15-year old son to pursue his license. Hey, it was “you can either eat or you can drive, which do you want?” I’m kidding. Mostly.

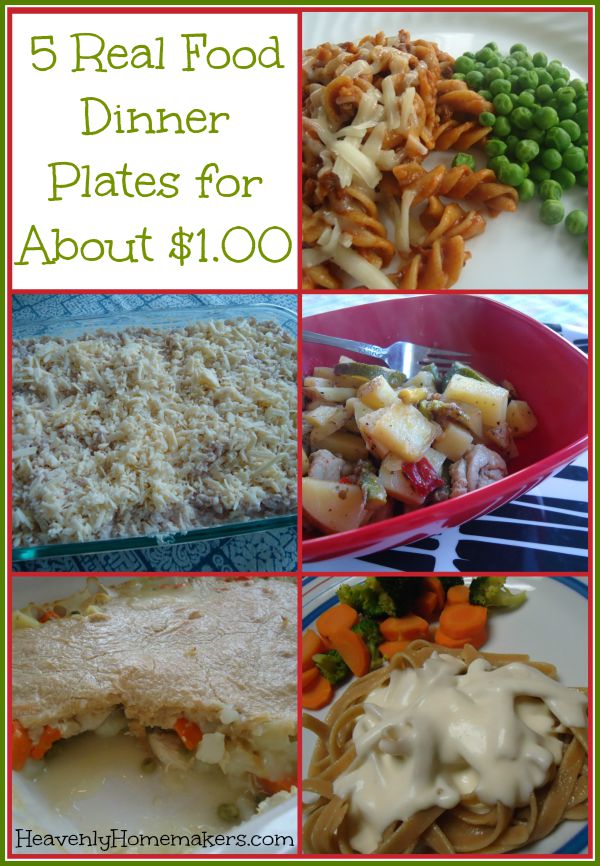
5 Real Food Dinner Plates for About $1.00

5 Real Food Dinners for $1.00Yum

Each of the following meals can be made for approximately $1.00 per plate. They are all made with real food ingredients. They are all served with 2-4 fruits or veggies (which ups the bill, but it’s worth it by a million).

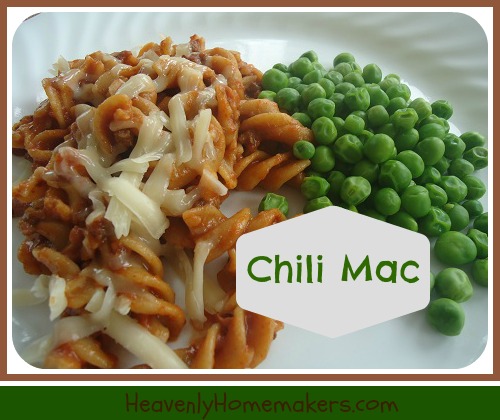
1. Chili or Chili Mac

The trick to this one is to go easy on the hamburger meat. Let the beans offer the protein. Stretch it with a little whole grain pasta. And if you happen to have home-grown, home-canned tomato sauce all the better on the money savings.

chili_mac_2

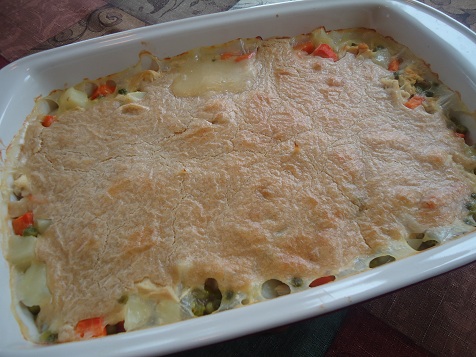
2. Chicken Pot Pie

The best thing about this recipe is that it is a one-pot meal. It comes with veggies baked right in. Serve a salad on the side. Maybe a fruit. It is so good.

chicken_pot_pie_5

P.S. I just figured out a Hamburger Pot Pie recipe that I’ll be sharing tomorrow!

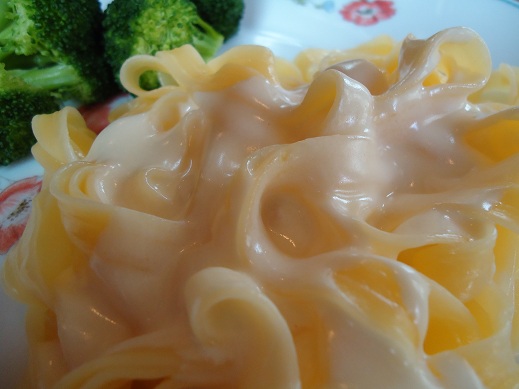
3. Pasta Alfredo

This is so delicious and tastes even better than a restaurant version (which you get for about twelve bucks a plate). Serve this with salad and steamed veggies. Adding some chicken will add to the cost, but it sure does taste delicious. If you have a little leftover chicken, stir it in, and you’ll still be keeping this low in cost.

alfredo_5

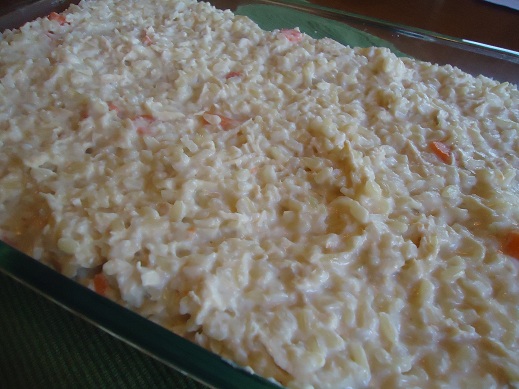
4. Creamy Chicken and Rice Casserole

This casserole is super nourishing because you’re cooking your rice in veggie-rich broth. Plus there are carrots in the casserole. Plus you can serve a salad on the side. Plus you can make extra and freeze it for another time. So convenient!

chicken_and_rice

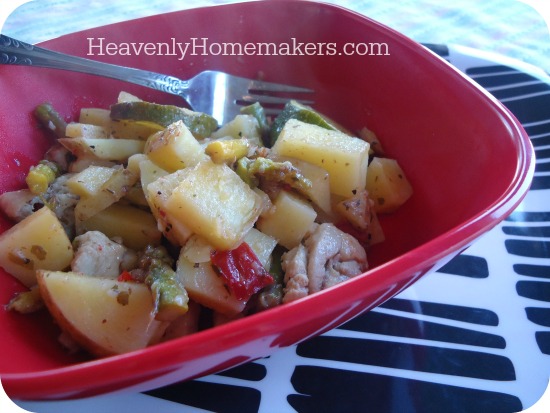
5. Garden Veggie Chicken Skillet

I love this recipe because you can use whatever veggies are on sale or that you have on hand. The potatoes help stretch this dish. Everything is flavorful.

Garden Veggie Chicken Skillet 2

I’ve got more $1.00 Breakfasts coming soon (here’s the first one I posted). Plus I’m working on some $1.00 Lunch ideas too!

I love all this proof that healthy eating doesn’t have to be expensive. :)

Heavenly Homemaker's Club Members: Access your homepage and all your fantastic resources here! Not a member yet? Please join us!

How to Make the BEST Pancakes (Psst…Cast Iron is On Sale!)

October 13, 2015 by Laura 4 Comments

This post may contain affiliate links. For more information, please see our disclosure policy.

Ever since I splurged on a Cast Iron Griddle, two things have happened:

  1. I can make three times as many pancakes at one time since the griddle covers two burners.
  2. My pancakes are three times as tasty.

Cast iron is simply the BEST.

There’s just something about how food tastes when cooked on cast iron. It is so good. (Unless it gets too hot. Then the food blackens and tastes, you know, blackened. I know this too well. Turn the burners up to hi heat to get the griddle hot, then turn them down to medium to maintain heat without burning your food.)

cast iron griddle

I’ve avoided Teflon for the past ten years or so – but for making pancakes, I struggled to find a good alternative. A well-buttered stainless steel skillet sort of works, but it’s not great. How in the world did people make pancakes before Teflon??! Cast iron, of course. My small cast iron skillet worked wonderfully, but I could only make one pancake at a time.

Do you know how long it takes to feed my family when I can only make one pancake at a time? Oy.

Big cast iron griddle to the rescue. Beyond pancakes, I also use this griddle for grilled cheese sandwiches. The best! (Both in taste and in the fact that I can whip out six sandwiches at once.)

I wanted to let you know that this Lodge Cast Iron Griddle is something to check it out. Help yourself to one, save yourself a lot of time, and make your family the best pancakes ever. Just don’t drop it on your foot. This sucker is heavy!

P.S. This is our favorite pancake recipe. We also love Quick Mix Pancakes. And while I’m sharing recipes, I’ll remind you that we are loving this Raspberry Pancake and Waffle Syrup right now. Mmm!

This post contains affiliate links.

Heavenly Homemaker's Club Members: Access your homepage and all your fantastic resources here! Not a member yet? Please join us!

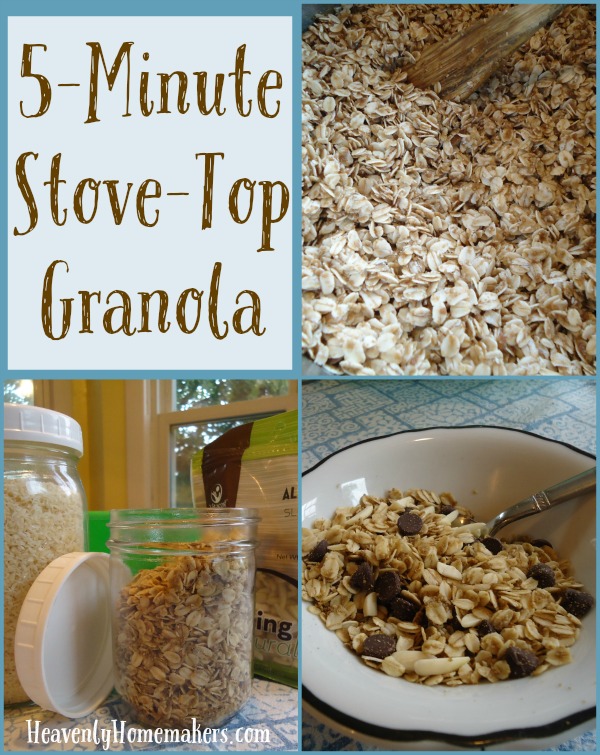
5-Minute Stove-top Granola Recipe – It is Too Easy!

October 12, 2015 by Laura 26 Comments

This post may contain affiliate links. For more information, please see our disclosure policy.

Stove-Top Granola

Once upon a time, I spent five minutes stirring together melted coconut oil, sucanat, and oats in order to top an Apple Crisp. (I was making it dairy free for a friend.) While making it, I didn’t measure my ingredients (surprise, surprise) so when it came time to top my apples, I had too much topping. Oh well. I’d store them for later. Into a jar they went (surprise, surprise).

Later, my 13-year old came into the kitchen and saw the jar of apple crisp topping, about which he said, “Ooh, what kind of granola is this?” It was at that moment that I realized that all we had to do was stir in coconut flakes, almonds, dried fruit – whatever we wanted – and we’d have granola.

It was in the next moment that I decided that I might make granola like this every single time because it only took five minutes and it was too easy.

Friends, I present to you:

5-Minute Stove-Top GranolaYum

Make it on the fly. Make it ahead of time. Serve it with add-in options. It will be one of the easiest breakfast or snack options ever.

4.7 from 3 reviews
5-Minute Stove-top Granola
 
Save Print
Prep time
5 mins
Total time
5 mins
 
Author: Laura
Serves: 6 servings
Ingredients
  • 4 cups whole oats
  • ¼ cup sucanat
  • 1 cup coconut oil
Instructions
  1. Melt coconut oil in a medium-sized pan on the stove.
  2. Remove from heat and stir in oats and sucanat.
  3. Serve immediately, or allow it to sit a while to dry somewhat. We like it both ways.
Notes
Add-in options:

Nuts like almonds, pecans, or walnuts
Coconut flakes
Dried fruit like cranberries, raisins, or blueberries
Chocolate Chips
3.4.3177

When you make granola this way, you can set it out with a variety of add-in options and have a Granola Bar. (Like my play on words there?) This is wonderful for people with food allergies or simply to appease people’s taste preferences.

5-Minute Stove-Top Granola

I’d love to hear your ideas for Granola Add-In options!

Heavenly Homemaker's Club Members: Access your homepage and all your fantastic resources here! Not a member yet? Please join us!

Easy Ways to Cook Once – Eat Twice (Some Pictures of My Kitchen Last Week)

October 11, 2015 by Laura 8 Comments

This post may contain affiliate links. For more information, please see our disclosure policy.

I have taken it upon myself to write what I consider to be insightful kitchen proverbs worth living by. I highly recommend that you pick your favorite and immediately begin to stitch it into a needlepoint creation for your wall.

Life is full. Cook extra chicken.

Life is Full. Cook Extra Chicken.

~~~~~~~~~~~~~~~~~~~~~~~~~~~~~~

 You Cook Some. You Cook Some More.

You Cook Some. You Cook Some More.

Ain’t that the truth?

~~~~~~~~~~~~~~~~~~~~~~~~~~~~~~

And my personal favorite:

Why dirty up more dishes tomorrow
when tomorrow will have enough
dirty dishes of its own?

Dirty Dishes Proverb. So profound, yes

This is so beautiful. We all want this in our homes. 

None of what I am about to tell you or show you is all that impressive. (I’m pretty sure my stitched proverbs have the impressive part of this post covered.) The following tips are simply how I survive in the kitchen. It is what makes sense to me.

When preparing any food, I always think to myself, “Self? If I cooked at least twice as much of this particular food, how might that make my work load lighter?”

It was in asking myself this question that I came up with several ways I find myself working half as hard for twice the outcome. (Perhaps we should stitch that one also.)

seriously

Cooking Once, Eating Twice (or More) Ideas

Cooking once and eating twice or more is my most productive way to multitask. Here are a few tricks that worked in my kitchen last week when cooking for my family:

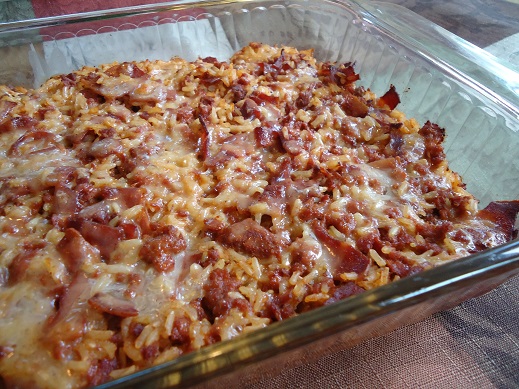
1. On Saturday, I cooked three pounds of hamburger meat with two pounds of chopped bacon and a bunch of onion. I put 1/3 of this cooked mixture away to make Calico Beans another day. I stirred the remaining mixture into two huge Bacon Cheeseburger Casseroles (from {Healthy} Make-Ahead Meals & Snacks eBook) to serve to guests on Sunday.

bacon_cheeseburger_casserole

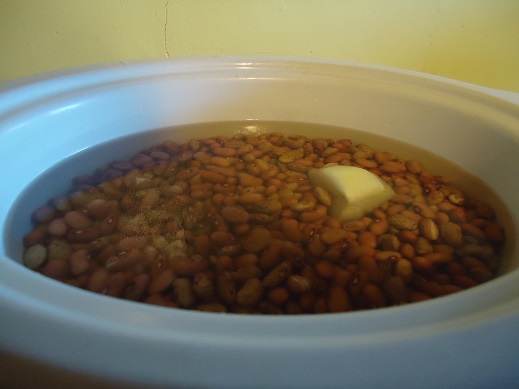
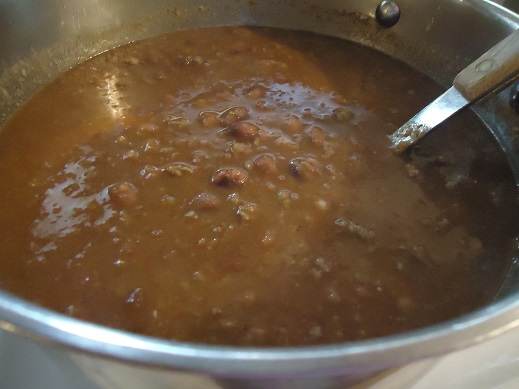
2. A few days later, I soaked enough beans for two big meals (plus a few leftovers). I cooked all the beans the next morning. That night we had Calico Beans. While that dish was cooking, I put the remaining beans in a large pot and made a huge batch of Chili.

multitasking 5

multitasking3

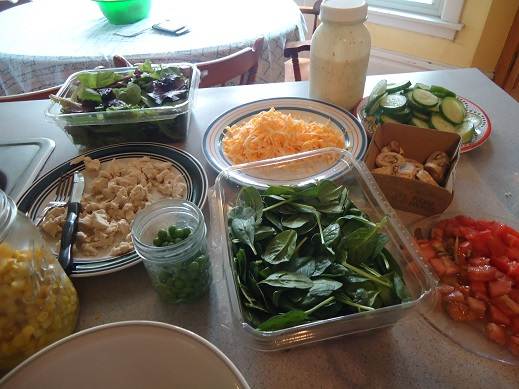
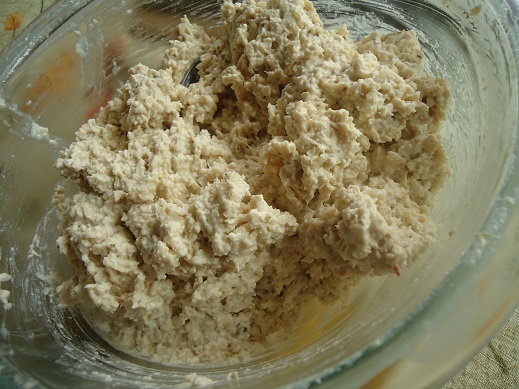
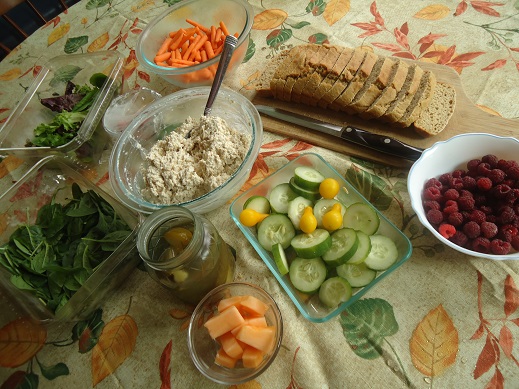
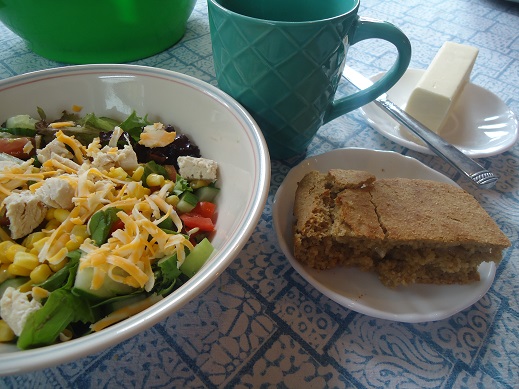
3. For lunch that day, I cooked several plain, boring chicken breasts. I chopped a couple of them up for a chef salad bar to eat immediately. Then I chopped up the rest and made a big bowl of Chicken Salad for the following day’s lunch. 

multitasking 2

Boring.

multitasking 1

But perfect for a chef salad.

multitasking4

And Chicken Salad.

multitasking6

4. I made a batch of Whole Wheat Stir-and-Pour Bread on the night I served Calico Beans. While we could have eaten both loaves in that one meal, I intentionally set one aside to use for the following day’s Chicken Salad lunch.

The thing about bread is that if I let us go crazy with it, we will go crazy with it (I feel a cross-stitch coming on). I want us eating more fruits and veggies than bread, so I’ve found that putting out a limited amount is best for us.

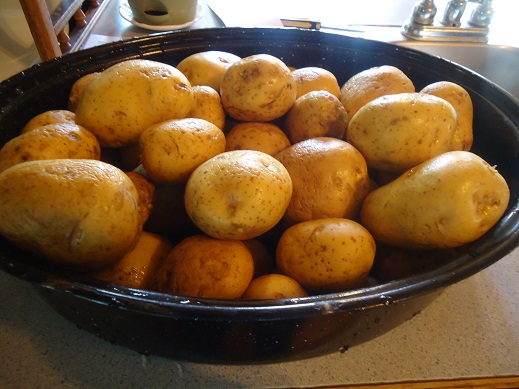
5. Friday morning we scrubbed and baked about 15 pounds of potatoes. We ate some for lunch that day (see #6 below), then put the rest in the fridge to eat in a variety of ways during the next week. This will save so much time and offer so many meal options!

multitasking10
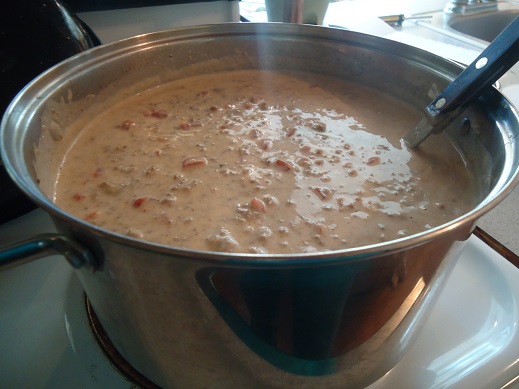
6. On Friday, I also I made a triple batch of Real Food “Velveeta” and Rotel Dip. We ate one round of it on our baked potatoes for lunch that day (see #5 above). I set aside the second round for an easy nacho meal. Then I’ll use the third round for Spicy Mac and Cheese. I love how versatile this dip is…and how delicious.

multitasking11

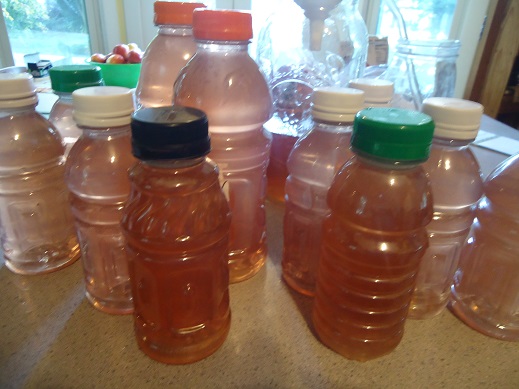
7. Last but not least, I made three rounds of Gatorade. We had quite a few weekend soccer games and plenty of bottles to fill. I’ve started making at least two if not three or four batches of Gatorade at once just to get on top of our needs. Plus, just like everything else, if I’m already getting out the ingredients and I’m already dirtying a few dishes, I might as well save myself time and energy later by tripling up now!

multitasking 12

If you have any athletes in your house, I very much recommend you make this Gatorade. We have gone through many gallons already and have saved sooo much money since I learned to make it. This recipe incredible. (We also learned that it’s very nice to have this on hand if you have a stomach bug going around your house. It’s so much better to replenish electrolytes with than the sugary variety!)

Are you a “Cook Once, Eat Twice” kind of cook? What are your favorite ways to get ahead in the kitchen? Which of the above proverbs is your fav?

Heavenly Homemaker's Club Members: Access your homepage and all your fantastic resources here! Not a member yet? Please join us!

Whole Wheat Stir-and-Pour Bread ~ It is So Easy!

October 8, 2015 by Laura 85 Comments

This post may contain affiliate links. For more information, please see our disclosure policy.

Whole Wheat No-Knead Bread

Yum

My life has forever been changed by a new bread recipe. You might think I’m exaggerating, but as soon as you try this, your life will also forever be changed and you’ll be like, “She was actually not even exaggerating. My life, too, has forever been changed by this bread recipe.”

As we all know, I have been avoiding the act of kneading bread lately. My No-Knead Cinnamon Rolls proves this. (You also need that recipe so click over to get it.)

This new Whole Wheat Bread recipe not only skips the kneading, it also skips many other normal bread-making steps. It’s basically like stirring together ingredients for a quick bread, only easier if you can possibly imagine.

This bread is so easy, even a three year old can make it. Whether you have time or not, gather your entire family and all of your neighborhood to watch this video. This kid is three and he shows us all how to make this bread – for real. I can’t get over how brilliant this is. (Click here to view if it isn’t showing up for you.)

Cooking Guy is a friend of ours (along with his sister, his mom, and his dad). This is my new favorite cooking show. I hope Cooking Guy will remember our house with its very fun legos and train set after he has become famous.

When his mom first gave me this recipe last week, I tried it by pouring the ingredients into a cake pan as directed by her (and now Cooking Guy). We cut it like cornbread and devoured it (with butter, obvs).

no knead bread 2

no-knead bread 2

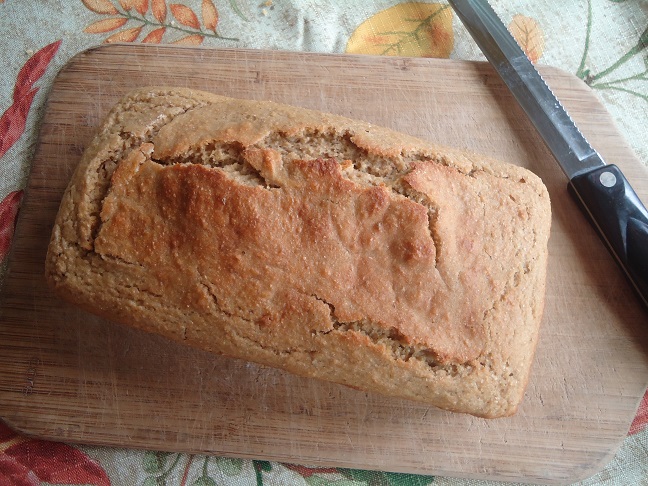
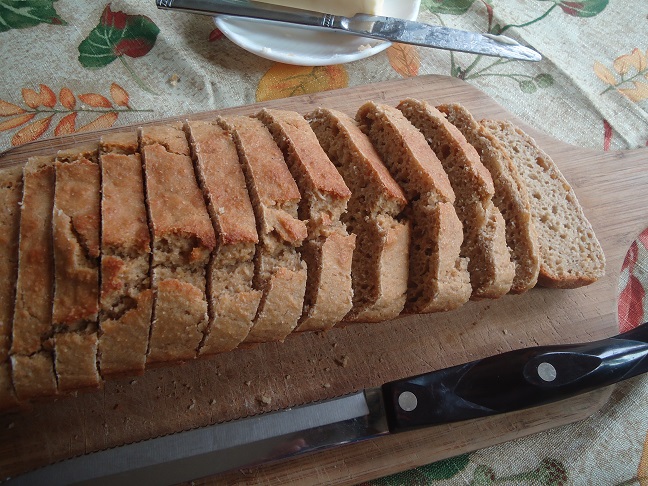
Later I wondered how it would work in regular loaf pans. I buttered a 9-inch loaf pan, poured in the batter, and hoped for the best.

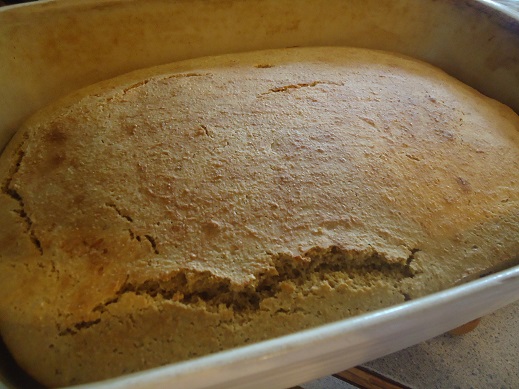
I’m so happy to report that the best is what I got!! When I pulled this out of the oven, this is when I knew my life was changed forever (see first paragraph).

no-knead bread 3

no knead bread 4

Make this for breakfast, make this to go with soup, make this to go with salad, just make this. We ate one loaf fresh out of the oven, then I hid the other one, which we ate for lunch the next day with Chicken Salad. So good.

4.9 from 12 reviews
Whole Wheat Stir-and-Pour Bread ~ It is So Easy!
 
Save Print
Prep time
5 mins
Cook time
45 mins
Total time
50 mins
 
Author: Laura
Serves: 1 loaf
Ingredients
  • 4 cups whole wheat flour (I use freshly ground hard white wheat)
  • 2 teaspoons active rise yeast
  • 2 Tablespoons sucanat or sugar or honey
  • 1 teaspoon sea salt
  • 1 egg (optional)
  • ¼ cup heavy cream (optional)
  • 2 cups warm water
Instructions
  1. Stir all ingredients together.
  2. Cover and allow it to sit for 30 minutes.
  3. Pour contents into a well-buttered cake pan or 1 well-buttered 9" loaf pan.
  4. Bake in a 425° oven for 20-25 minutes (cake pan) or in a 350° oven for 45-60 minutes (loaf pan) or until evenly browned.
Notes
If you have egg or dairy allergies, skip the egg and cream and you'll still turn out a great bread.
3.4.3177

Whole Wheat Stir-and-Pour Bread

I calculated that this bread costs about $1.00 per batch. That’s pretty impressive, seeing as it makes a lovely loaf of whole grain bread.

Thank you, Cooking Guy! You have now changed the lives of thousands of women. Not too shabby for a 3-year old.

Heavenly Homemaker's Club Members: Access your homepage and all your fantastic resources here! Not a member yet? Please join us!

Win a Free Flexi-Clip ~ Earn Free Flexis ~ Support Above Rubies Women’s Ministry

October 8, 2015 by Laura 82 Comments

This post may contain affiliate links. For more information, please see our disclosure policy.

How long have I been wearing Flexi-Clips? Since I tried and reviewed my very first one back in 2010ish I think? I keep talking about them because it’s one of the products I still love and still use almost daily!

I have loved working with Paula from Lilla Rose for all these years. She’s not just a site sponsor. She’s now my friend. I love how she continues to expand what she’s doing with her Lilla Rose business to bless others. Here’s what she’s up to this time:

Let’s make a difference! All proceeds from purchases made through Paula’s website through this promotional period will be donated to Above Rubies, a ministry to encourage women in their high calling as wives, mothers, and homemakers.

Click HERE to see the full updated list of causes that your purchases have previously helped support.

Paula also just started Refer-a-Friend program!

International customers: ask Paula about her new “Refer-a-Friend” program to find out how you can earn credit by sharing Lilla Rose with your friends!
U.S. customers:
ask Paula how you can earn free and half-priced product by hosting an online or catalog party!

international refer friend

So now let’s talk about some freebies she’s offering. 

This week, Paula is giving away three surprise flexi clips (one to each of three winners) here. Leave a comment on this post for a chance to win one. Flexi-Clips come in all different varieties and sizes – for thin and thick hair. I love how they hold my hair up and never pull or break my hair!

For additional entries, follow Paula or her Lilla Rose board on Pinterest, subscribe to her personal monthly newsletter, and/or join her exclusive Facebook group, Paula’s Super-Awesome Lilla Rose Fan Club! Get hairstyle ideas, see newly-released products, and get members-only special deals and giveaways!

win surprise flexi

And if all of that isn’t already wonderful, Paula is offering this fantastic deal!

Never tried a Lilla Rose flexi before? Paula has a Special offer just for you! Get a FREE FLEXI-CLIP of your choice, valued up to $16 retail, when you place an order of $40 or more!

*To redeem your free flexi, you must message Paula after placing your qualifying order of $40 or more, excluding tax and shipping, through Paula’s website. Say that Heavenly Homemakers sent you, and that you are a new customer. Offer valid for NEW U.S. and international customers and expires October 23rd, 2015.

I’ll draw three random winners on Wednesday, October 14. Be watching for a post stating the winner as you will be responsible for contacting me if your name is chosen!

Heavenly Homemaker's Club Members: Access your homepage and all your fantastic resources here! Not a member yet? Please join us!

How to Cook Beans in the Crock Pot

October 7, 2015 by Laura 24 Comments

This post may contain affiliate links. For more information, please see our disclosure policy.

Cooking beans is crazy easy. It’s remembering to soak them the night before that is the hard part.

My morning brain and my night brain are two completely different beasts. My morning brain is like, “Wooooo yeah! We gonna cook all day and do school work with the kids (let’s do art today!) and organize ourselves completely and make all the phone calls and make 20 quarts of applesauce and finish the laundry and write two blog posts! Let’s do this!”

As the days wears on, I knock out about three of my twenty lofty goals (because my time and energy always run out before my to-do list ends –  and also because I hate making phone calls). After a full day of thinking hard and working hard and loving hard, my night brain is like, “I’m not speaking to you right now.”

This is why it is hard to soak beans.

The irony is that I never forget to grind coffee beans at night to put into my coffee pot for easy coffee making the next morning. Obviously, I have my priorities. Perhaps my two bean worlds could collide and I could let my coffee beans trigger a reminder about my pintos? It only makes sense.

On the rare occasion I do remember to soak beans, I feel so accomplished when I get into bed at night. Forget all the other stuff I did for 15 hours all day long. I totally put my beans in a pot with water! I am so very amazing!

Once the beans have been soaked, we can put them into a crock pot to cook all day for our dinner that night.

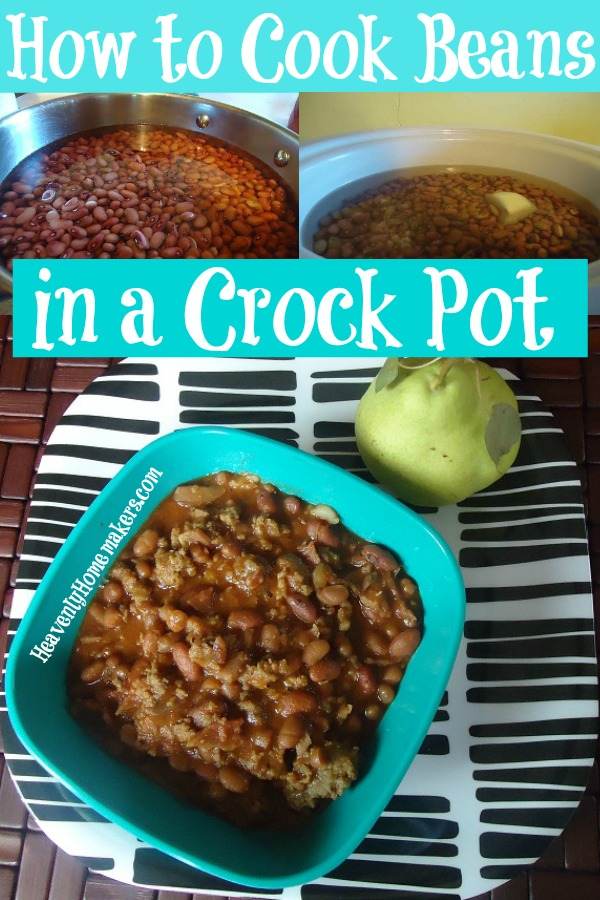
How to Cook Beans in a Crock Pot

How to Cook Beans in a Crock PotYum

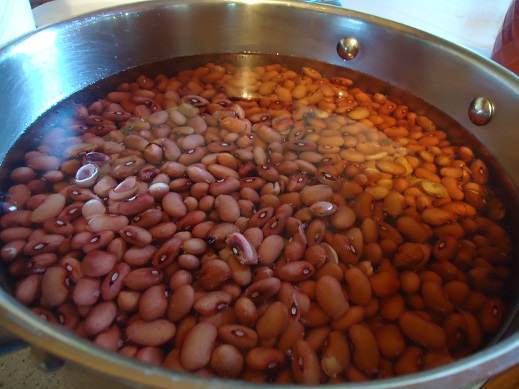
1. At night before bed, put about 4 cups of any variety of beans into a pot with 6-8 cups of water.

2. Splash in a little vinegar. It’s supposed to help with the toots. I offer no guarantees.

making beans1

3. Let the beans soak overnight.

4. Strain and rinse them in the morning. Put them into a crock pot and cover them with fresh water.

5. Add a couple of chopped onions to the post for flavor. This is optional but yummy and recommended.

6. Cover and cook the beans on low for 8-10 hours or until they are tender.

multitasking 5

At this point, you can enjoy your beans in any way you enjoy beans. Our favorites are:

  • Chili
  • Chili Mac
  • Easy Cheesy Bean Dip
  • Black Bean Chicken Nachos
  • Black Bean Salsa
  • Bean and Cheese Burritos
  • Calico Beans

What are your favorite ways to eat beans? Please tell me about your morning brain vs. your night brain. Which works better for you?

Heavenly Homemaker's Club Members: Access your homepage and all your fantastic resources here! Not a member yet? Please join us!

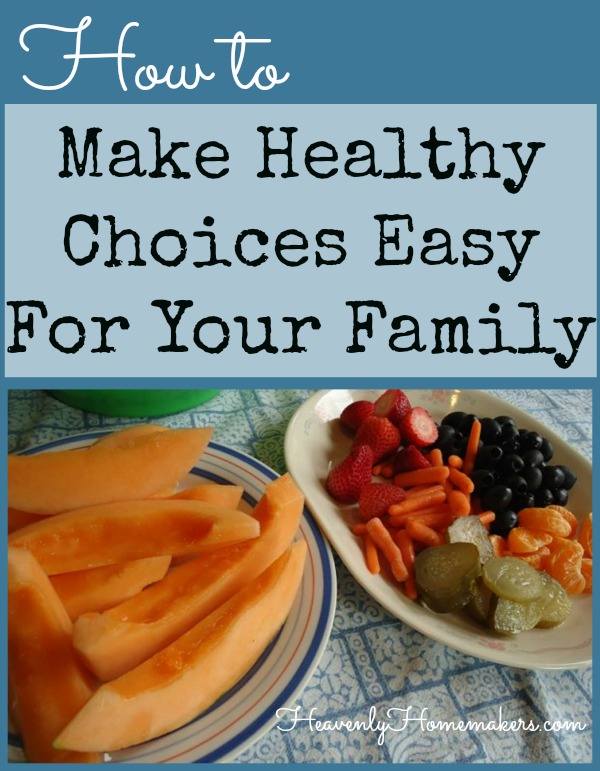
Make Healthy Choices Easy For Your Family

October 6, 2015 by Laura 5 Comments

This post may contain affiliate links. For more information, please see our disclosure policy.

I’ve told you how much my kids love corndogs. And how I still love Dortitos. And how, if given the choice, my kids would choose the candy over the good stuff.

Oh look. My family is normal! (Normal is relative. Thank you for your support.)

This is why I have to be strategic when putting food on the table for meals and snacks. Yep, sometimes I offer chips. So be it. But in an effort to fill us all with as much nourishment as possible – as easily as possible – these are the tricks I’ve discovered through the years.

How To Make Healthy Choices Easy For Your Family

Healthy Choices Are Easier When There Are Several Choices

I’m not about to become a short-order chef. But when I know I’ll be serving a fruit or veggie one of my kids doesn’t love, I’ll always serve another one or two he does love. Then I don’t have to fight a battle that doesn’t even make sense. After all, even I don’t love every single veggie on the planet (sorry jicima, I tried). 

Serve the Healthy Choices on a Plate

This one may sound silly, but the truth is that the easier I make the food to grab and eat, the more my family will eat. Last week I got out jars and bowls filled with little bits of fruit and raw veggie leftovers from the past couple days’ meals. Had I put them on the table as-is – which would have meant that my kids would have had to reach farther across the table and down into jars to access the food – I know without a doubt that they wouldn’t have eaten as many fruits and veggies. Instead, I dumped everything out of the jars and made a big platter of the fruits and veggies for the table. The munching started even before I was ready to call everyone in for the Potato Soup meal. Bingo. My plan worked.

Assign a Number

Often when there is a plate of healthy grab-and-eat foods, I’ll tell my kids, “You each need to eat at least 8 foods from the plate.” Then Malachi says, “What if we eat 10, is that okay?” Smarty pants. Again, some of the foods on the plate aren’t my kids’ favorites, so they don’t even have to touch those and it doesn’t matter as long as they eat at least 8 (or sure, 10).

Healthy and Delicious Should Happen At the Same Time

What I love about healthy food is that it is so yummy and flavorful – naturally. But if a fruit is not in season, it’s not going to taste as good – so choose accordingly for the best chance at your family loving the food choices. Also, be sure your family doesn’t equate the word “healthy” with “dry, boring, and flavorless.” As for me and my household, we will avoid rice cakes at all cost and instead make delicious and flavorful dishes and snacks with herbs and spices, milk, cheese, meats, fruits, veggies, real butter, sea salt, and coconut oil. Real food is what deliciousness is made of.

Serve the Favorites – the Healthier Way

We all love pizza, tacos, hamburgers, fries, and did I mention corndogs? Sometimes we splurge on the not-so-good-for-you variety. Mostly though, it is less expensive and tastier to make all of these favorites with our own wholesome ingredients. Have you ever made homemade fries? On my stars. And corndogs? We can make those too.

I’d love to hear the tricks you use to make healthy choices easy for your family!

Heavenly Homemaker's Club Members: Access your homepage and all your fantastic resources here! Not a member yet? Please join us!
« Previous Page
Next Page »

Join Our Community!

 Facebook Twitter E-mail Instagram Pinterest

Popular Posts

~ Will All of the Real Moms Please Stand Up?
~ Easy! Stir-and-Pour Whole Wheat Bread
~ How to Make Gatorade
~ 31 Real Food Breakfast Ideas
~ Dear Teenage Girls...
~ When Mom Takes a Step Back
~ The Inexpensive Health Insurance We Love!
~ Let's Talk Real Food Grocery Budgets

Check out our latest posts!

  • Big Family Food and Fun: September 13-19, 2026
  • Big Family Food and Fun: September 6-12, 2026
  • Big Family Food and Fun: August 30-September 5, 2026
  • Big Family Food and Fun: August 23-29, 2026
  • Big Family Food and Fun: August 16-22, 2026
Home  ~  Simple Meals  ~  Club Membership  ~  Shop  ~  Privacy Policy  ~  Disclosure  ~ Contact

Copyright © 2026 · Beautiful Pro Theme on Genesis Framework · WordPress · Log in