I believe we should label this summer “The Summer of Never Being Home.” Never is perhaps too strong a word, since in fact, we have been home for a few days here and there in between all the travel and camps. But we have certainly been away from home more than we’ve been at home. After a big trip to Nashville, a smaller trip to Oklahoma, two weeks at church camp – I am home for four days before taking off again.
Where am I going this time? Oooooh, yay me! I am blessed to go spend three days with my friend who had a baby a few weeks ago. I get to love on Mama and Daddy, love on baby, love on baby, love on baby…and maybe do a few dishes and some freezer cooking. Whatever Mama needs. I’m very excited.
After I get home, I’ll have two days, then head off again for another quick trip. Then, our family will all be home together just in time to begin our school year the first full week of August. Phew! This has been (and continues to be) one very full summer!
So let’s catch up a little here. I’ve been online very little in the past two weeks since internet access out at church camp was quite difficult to come by. I’ve missed you! Week One at camp found our family in these roles: Justus and Elias were both campers, Asa was a counselor, and Matt, Malachi, I were helping in the kitchen. Cooking for 140 campers and staff? So fun – and completely exhausting. Wow, and wow some more.
Week two of camp for us was quite different. It was Senior High session, which meant that Asa was/is now a camper; Justus, Elias, and Malachi were kitchen staff, and Matt and I were Bible class teachers. The week allowed for much more down-time for Matt and me. We studied, taught, studied some more, spent time with campers…and took naps and went to bed early every night. Really, I couldn’t believe how much sleep my body kept asking for. Apparently, this summer has worn me out more than I realized. :) By Thursday, I believe we finally caught up on rest. It was a great week of refreshment for us. Matt and I loved team-teaching the youth. They blessed us so much, and working together in that role was wonderful.
As the week came to an end, Justus and Elias asked if they could please stay for one more week to help in the kitchen. They loved their role working together with three other middle school boys to keep up with running the dishwasher, wiping tables, filling drink jugs, and doing whatever else the head cook needed them to do. It’s always fun when you’re working with your friends, right? (And when you’re having adventures with catching mice in your cabin late at night. Oh boys.)
Because the head cook said he could certainly still use our boys’ help for the final week of Senior Session, we let them stay. So three boys are still at camp, and here we are at home with only our youngest, Malachi. It’s quiet, for sure.
So what to eat, what to eat? Well, for starters, we came home to find this in our garden:
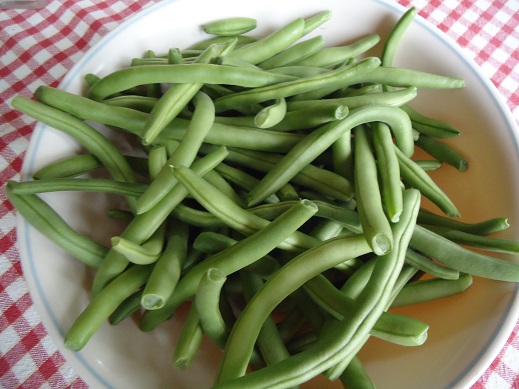
Right after Matt brought in the first bunch, we snapped and steamed them – then absolutely pigged out on them. We could not get enough. I mean, we did not even take the time to use a fork. We picked them up and ate them like they were French fries. No shame. Wow, they are unbelievably delicious.
For these next few days at home with just the three of us, here is what we’ll be eating. (You’ll notice there’s no real plan here. What can I say? I’m not feeding an army this week, plus I’m planning to leave again in a few days. Meals will be light and simple.)
Breakfasts:
- Blueberry Streusel Muffins (One batch will actually last us more than one day. Amazing.)
- Dark Chocolate Almond Granola
- Scrambled Cheesy Eggs
- Fresh Fruit like crazy
Lunches and Dinners:
- Spaghetti
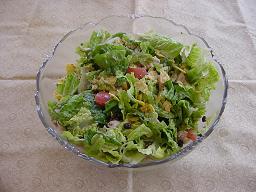
- Chef Salads
- Tuna Salad
- Cold Sandwiches
- Healthier Cheese Dip
- Creamy Mac and Cheese
- Fruits, Veggies, Salads, and Smoothies
Here’s to a great week of continued refreshment, playing catch-up, and eating amazing summer produce!
Tell me what you’ve been up to the past few weeks! What has your summer been like? Full and busy, or restful and relaxing?