Heavenly Homemakers

Encouraging women in homemaking, healthy eating and parenting

  • Home
    • About
    • FAQs
  • Recipes
    • Bread and Breakfast
    • Condiments
    • Dairy
    • Main Dishes
    • Side Dishes and Snacks
    • Desserts
    • Gluten Free
    • Instant Pot
    • Crock Pot
    • Heavenly Homemaker’s Weekly Menus
  • Homemaking
    • Real Food Sources
  • Store
  • Contact
    • Advertise
    • Disclosure
    • Privacy Policy
  • Simple Meals
  • Club Members!

The Day I Had a Little Too Much Fun with Frosting

July 15, 2009 by Laura 23 Comments

This post may contain affiliate links. For more information, please see our disclosure policy.

Last week our local library invited a lady in to show us some cake decorating basics. The kids wanted to go because there were cookies and frosting involved.  I wanted to go because I wanted to learn a few things about cake decorating.

I had way too much fun playing with the frosting tips and patterns. In fact…I sort of forgot that really and truly I was supposed to be there to help the kids. 

“Mom…can I have a turn with the squeezy thing?”

Oh yeah.

Anyway…I was enjoying myself so much that after it was all over, the lady offered to let me take the leftover frosting home so that I could keep playing.  I decided to ignore the fact that the frosting was loaded with shortening, sugar and food coloring and I said yes please.  Hey, it was about decorating…not eating…right?

I quickly baked some cupcakes when I got home then played with my Pampered Chef Accent Decorator to make these flowers:

decoratedcupcakessm

I thought they turned out kind of cute. I decided that if I was using shortening and food coloring….I might as well throw in a few M&Ms too. Shucks why not? We had a little girl house guest this weekend and she gave me a big smile for these. Yay…someone to appreciate purple flowers with me.

I don’t think I’ll quit my day job…but squeezing frosting out of a tube and making patterns is really cool. I’m thinking that I’m going to redeem a couple of Swagbuck earned Amazon cards so that I can get one of these because it will work much better than the one I have for what I’d like to learn.

 Now (because this is what I do) I will experiment with different kinds of frostings so that I can create a yummy one that works for decorating that doesn’t require shortening. And I will play with different ideas for adding coloring that doesn’t require food coloring. (I hear beet juice works well for pink.)

As soon as I have some fun things learned and figured out (and if the result isn’t embarassing to share in picture form)…I’ll let you know.

In the meantime today, check out the carnival going on over at Life as Mom and enjoy all kinds of cake decorating ideas!

Heavenly Homemaker's Club Members: Access your homepage and all your fantastic resources here! Not a member yet? Please join us!

Let’s Discuss…Punctuation (Periods and Question Marks)

July 14, 2009 by Laura 100 Comments

This post may contain affiliate links. For more information, please see our disclosure policy.

First let me warn any male readers that may be visting here today. You really probably want to stop reading now and go – I don’t know – hit a few golf balls or something. This discussion is sort of “for girls only, boys not allowed.”

Okay, ladies…have they all left? Would someone in the back please close the door? Alright now, everyone come closer.

I’ve been wanting to have this discussion for a while. About  punctuation. Periods to be exact.

I kind of thought I was the crazy one. The only one. Until I had a discussion with some girlfriends of mine several months ago about…punctuation. They were experiencing the SAME things I was.

I never really thought that the brand of “punctuation products” I used mattered very much so I would just use coupons and get regular ol’ Kotex at the store for a pretty good deal.

Then I started developing a minor irritation which month after month turned into an incredibly horrible itchy miserable rash. And it wasn’t on my elbow if you know what I mean.

Not only that, but my punctuation was lasting forever. A long time. Seemed to be longer each month.

I thought it was just me. Not so, according to some of the people I talked to.

According to one of my friends (and I’m really sorry that I can’t find the research to back this up) some companies are actually putting chemicals on their products to make your punctuation last longer and be heavier so that you will go through lots more of their products and buy more.  Are you kidding me?  (Again, I have no official research to back this up.)

BUT, I immediately ordered the Natracare brand to test it out for myself. They are chemical and additive free. They are biodegradable and contain organic materials.

I noticed a difference right away.

First, the miserable rash went away. Hallelujah!

Second, the very first month I switched over, my punctuation was several days shorter and quite a bit lighter. The second month…same thing. Third month…same thing.

Uh-huh. Amazing. If at all possible I will NEVER use regular punctuation products from the store again. The Natracare products have made a huge difference for me each month and I love it. (Well, as much as you can love monthy puctuation that is.)

I don’t even care that they cost a little bit more. Actually…I bought a whole case at once and considering that I go through less of them each month…I’m actually not spending more. Hah!

Here’s what I got:

Natracare Natural Ultra Pads with Wings, Long, 12-Count Boxes (Pack Of 12)

Natracare Pads Ultra With Wings 14 ct ( Six Pack)

Natracare Natural Pads, Slender, Case of 12- 20 Count Boxes (240 Pads)

There are tons of other varieties…those just happen to be the ones that work best for me. (Wow, do you know way too much about me or what?)

Now, eventually I’d like to look into cloth cotton pads (Sckoon Organic Plus Cloth Menstrual Pads with Leak Resitant Sheet Mini Daisey) in order to save money in the long run and prevent waste. Anyone have any experience with these that they can share?

I realize this sounds like an infomercial. Really it’s not. Natracare is not paying me to tell you these things. It’s just that they made a big difference for me and well…I like all of you an awful lot and wanted to tell you about it just in case they can help you too.

Because it is not fun to have question marks about your periods.

Heavenly Homemaker's Club Members: Access your homepage and all your fantastic resources here! Not a member yet? Please join us!

Gratituesday: The Garden

July 13, 2009 by Laura 18 Comments

This post may contain affiliate links. For more information, please see our disclosure policy.

gratituesdayspring

I know I’ve already shared how much I love my garden…but everytime I go out to water the plants or pick veggies…I am again reminded of God’s goodness and of how He provides.

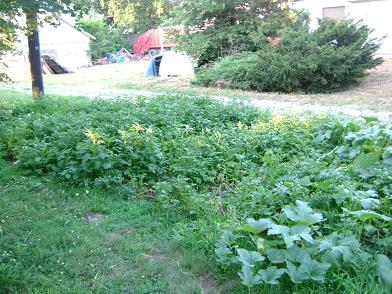
Here are a few current pictures of my garden areas. I love to see how much it has changed in just a few short weeks.

DSC01236sm
Our potatoes are big and full. AND a random pumpkin plant decided to grow right in the middle of our potatoes. What a fun treat for the kids to find several big pumpkins growing!

DSC01237sm
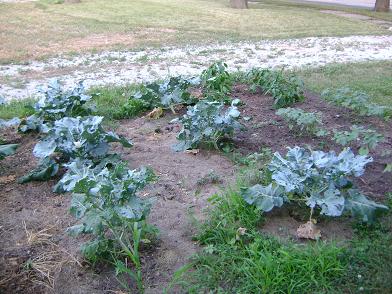
Our broccoli plants are pretty well finished for the year. It doesn’t get much better than fresh broccoli. Just beyond the broccoli, our hot peppers are starting to form. And…the okra plants have teeny tiny okra growing.

DSC01240sm
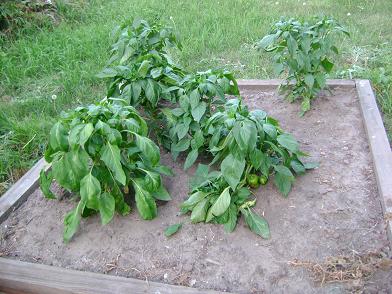
Here are our sweet pepper plants!

DSC01241sm
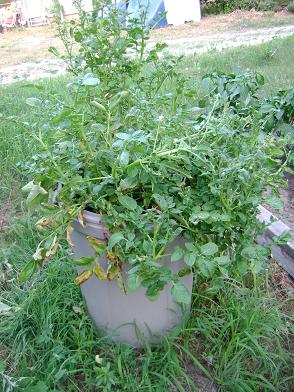
Check out how crazy my potato container looks now! The plants grew up huge over the top and now they are toppling over the sides! I can not wait to dump it out in the fall and see all the potatoes!

DSC01242sm
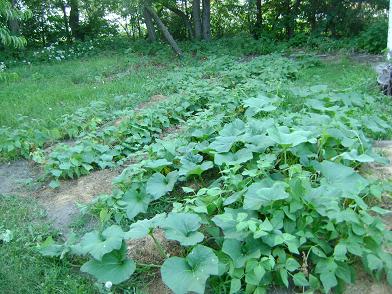
We are just now starting to pick green beans. A few butternut squash are growing on the plant there beside the beans. Can you believe that squash plant is from ONE tiny seed?
 

DSC01244sm
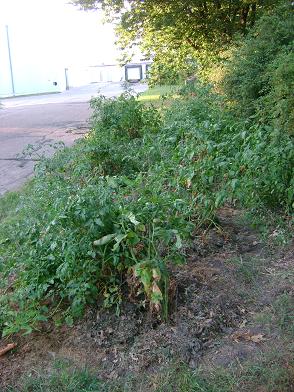
I’m not sure why I saved the ugliest picture for last. Yikes. Here are our tomato plants which have grown huge and gangly all over the place. We have lots of little green tomatoes which will soon be lots of big colorful tomatoes. I can not wait! Just pretend that you can tell that those are tomato plants in the picture!

Seeing God’s goodness and power as He makes awesome food grow from a tiny seed just brings me such joy!
———————————————-

What are you grateful for this Gratituesday? Write about it on your blog, then link up with us here. If you don’t have a blog, be sure to leave a comment letting us know what you’re grateful for!

Heavenly Homemaker's Club Members: Access your homepage and all your fantastic resources here! Not a member yet? Please join us!

Making Homemade Chocolate Chips…In Detail

July 13, 2009 by Laura 357 Comments

This post may contain affiliate links. For more information, please see our disclosure policy.

I posted about making homemade chocolate chips a long time ago. Since that time, I’ve received several emails asking for more help and detail about how this works. It seems that many of you who tried the recipe are having trouble getting everything to melt and dissolve and mix like it should.

In light of your chocolate chip frustration…I decided to do a more thorough tutorial about how I make chocolate chips. The words Chocolate and frustration should never be in the same sentence together. Ever.

You can use coconut oil or butter to make your chips. I used butter this time because I’m almost out of coconut oil. Butter doesn’t quite work as well as coconut oil. They tend to be softer with butter…but still oh so good. Especially when you put them in these Chocolate Chip Brownies.

Here again is the recipe:

Homemade Chocolate ChipsYum

1/2 cup cocoa powder
1/2 cup rapadura or sucanat (you can use white sugar if you want)
1 cup coconut oil or butter
1 teaspoon vanilla extract  (homemade vanilla extract if you have it!)

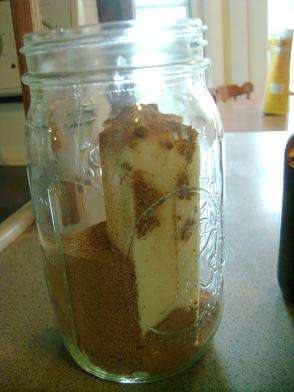
Begin by placing the cocoa, sucanat and butter (or coconut oil) into a quart sized jar. 

chocolatechiptutorial1sm

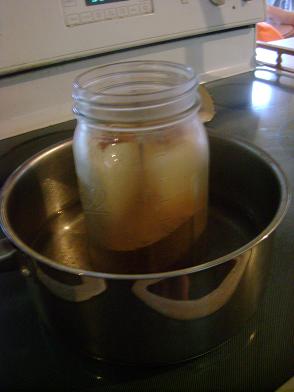
Fill a small saucepan with two or three inches of water. Place the jar into the saucepan/water. Turn the heat on medium/high to begin melting the butter.

chocolatechiptutorial2sm

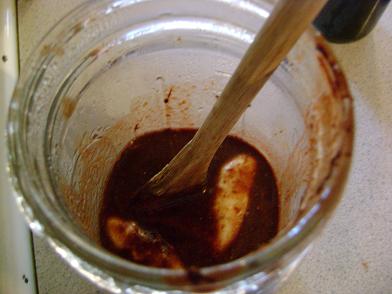
Stir often. After five minutes, my mixture looked like this:

chocolatechiptutorial3sm

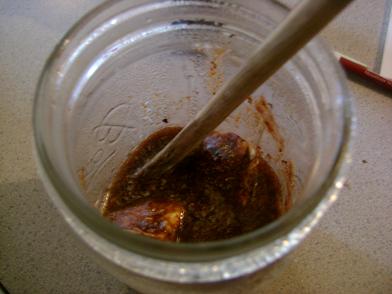
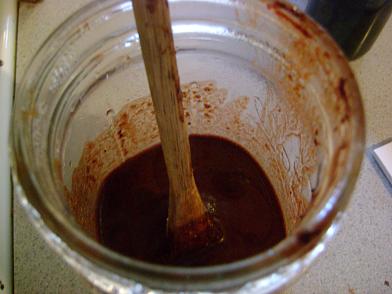
After ten minutes, my mixture looked like this:

chocolatechiptutorial4sm

It took a total of thirteen minutes for the butter to completely melt. I then pulled it out of the water, added the vanilla and stirred well.

The mixture in my jar looked and smelled SO GOOD that I wanted to drink it. But I didn’t.  That would have made quite a mustache. 

chocolatechiptutorial5sm

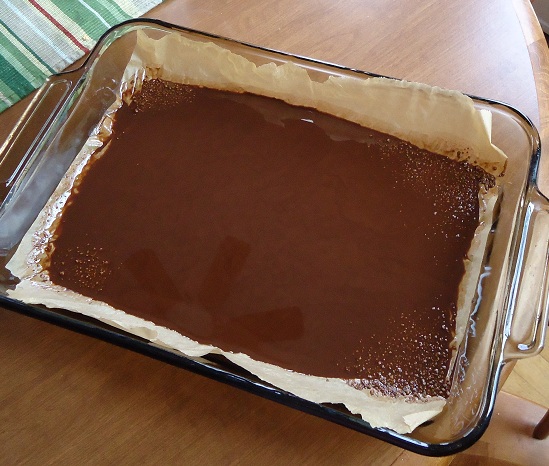
Pour the mixture into a 9×13 inch pan covered with parchment paper. Spread it as evenly as you can. 

As you can hopefully tell from the following picture, I still have a little sucanat that refused to completely dissove. Can you see the bits of chunkyness? That’s been one of the questions I’ve received from several of you. But…the little bits of chunkyness don’t hurt anything. My chocolate chips tasted just fine!

You like how the ceiling fan is reflecting in the chocolate? 
I’m just trying to show off my terrible photography skills.

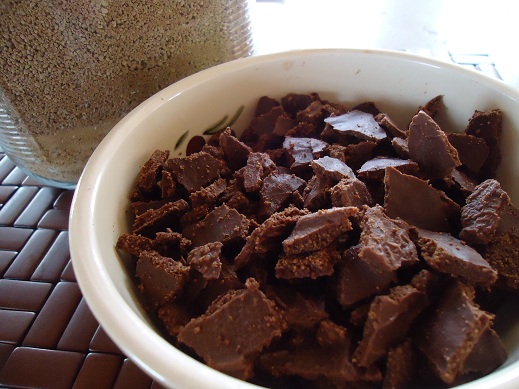
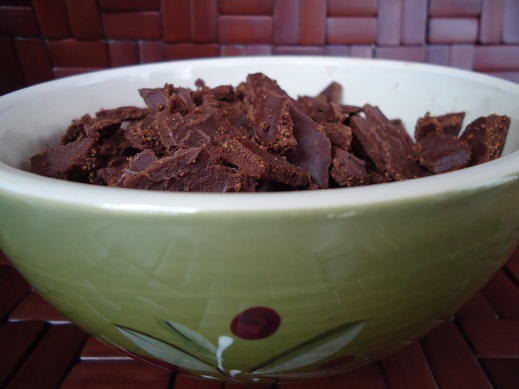
Place your pan into the refrigerator for 1-2 hours so that the chocolate can harden. Remove it from the parchment paper and break it into chunks. Store in refrigerator in an airtight container (unless you and your family eat them all first).

Just a note:  These chocolate chips taste wonderful in Homemade Chocolate Chip Cookies, but keep in mind that they are very pure and therefore tend to melt and get runny while baking. Chocolate Chip Cookies with homemade chocolate chips taste wonderful, but might look a little bit funny. No matter, ugly cookies taste good too. :)  I recommend eating these chocolate chips plain, mixed with peanuts or in trail mix, in Chocolate Chip Brownies or in Chocolate Chocolate Chip Muffins.

And now, I do believe I need to use my freshly made chocolate chips to bake brownies. After I eat some green beans and broccoli of course…

Heavenly Homemaker's Club Members: Access your homepage and all your fantastic resources here! Not a member yet? Please join us!

Menu Plan for the Week

July 12, 2009 by Laura 10 Comments

This post may contain affiliate links. For more information, please see our disclosure policy.

In case I ever really wondered how much I really rely on my menu plan…going without one last week proved it to me! Thanks for all your meal suggestions…they were super inspiring!

Here’s what we’ll be having this week:

Sunday, July 12
Oatmeal, fruit
Italian roast wraps, green beans
Quesadillas, watermelon

Monday, July 13
Whole wheat waffles, strawberries
Salmon patties, avocado dip with chips, strawberry peach slushies
Chicken fried steak, mashed potatoes, gravy, peas

Tuesday, July 14
Scrambled egg sandwiches, oranges
Corn dog muffins, watermelon
Roasted chicken, potatoes, carrots

Wednesday, July 15
Fruit-kefir smoothies, homemade honey-oat cereal
Sloppy joes, creamy cole slaw, grapes
Easy chicken alfredo, steamed broccoli and carrots

Thursday, July 16
Strawberry bread, bananas
Chicken tostadas, watermelon
Hearty bean casserole, tossed salad

Friday, July 17
Peanut butter honey toast, bananas
Spanish rice with chicken, zucchini
Grilled steak, ranch potato wedges, corn on the cob

Saturday, July 18
Homemade donuts
BLTs, angeled eggs, fruit salad
Hamburgers, homemade fries, watermelon

I have some fun posts lined up for this week…including a little more information on making homemade chocolate chips!

Start thinking about what you’re thankful for so you can join us for Gratituesday!

Be sure to head over to Organizing Junkie for more menu planning ideas!

Heavenly Homemaker's Club Members: Access your homepage and all your fantastic resources here! Not a member yet? Please join us!

What to Look for At Garage Sales if You’re Planning to Preserve Food!

July 9, 2009 by Laura 20 Comments

This post may contain affiliate links. For more information, please see our disclosure policy.

Freezing and canning your fruits and vegetables for the winter saves a LOT of money…but getting started can COST a lot of money too. There are some supplies that you just have to have. Almost all of the supplies you need are “one time only” purchases, so if you have to pay full price, you will get your money back on it eventually if you continue to preserve food through the years.

But…if you plan on going to garage sales or auctions this summer…here are a few things to keep your eye out for so that you can try to get a better deal:

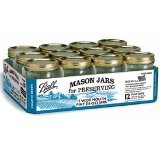
Jars. Jars…jars…and more jars.

31gAKlWjRBL._SL160_
Ball® 16oz. Wide Mouth Jars with Lids

Jars are a must if you plan on doing any canning. Not a lot of people do much canning anymore, so they are ready to get rid of their jars. I’ve seen big boxes of them for super cheap at garage sales. I buy all I can get my hands on anytime I see them for a good price. I don’t even need anymore jars (I have over 300!), but I have friends who need them so I still grab them when I see them at a sale!

My favorites are the “wide mouth” jars, which tend to cost more at the store. I consider it to be a big score if I find wide mouth jars at a garage sale.

And…here’s a little tip I learned from a friend of mine (who likes jars almost as much as I do):  If you see a box of jars at a garage sale…ask the owner if they have any more jars anywhere they’d like to get rid of. When my friend did this…the lady hosting the sale went down to her basement and brought up bunches of boxes of jars she was happy to part with! It NEVER hurts to ask!!!

Hot Water Bath Pot

51-kKM45zjL._SL160_
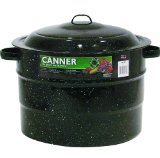
Granite Ware 21-Quart Covered Preserving Canner with Rack

If you’re just going to be canning in small pint sized jars, you can use a big soup pot. (The water has to be high enough to cover your jars as you process them.)  But, if you’re canning in quart sized jars you’ll need a Hot Water Bath Pot. It’s just the right size to hold seven quart sized jars.

My dad found two of them for me at an auction once for about a dollar. At that time, I hadn’t even learned to can yet…but that was motivation for me to learn!!

Cherry Pitter

31P5T3D6SPL._SL160_

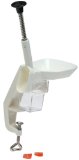
Norpro Deluxe Cherry Stoner/Pitter

If you have a cherry tree or know someone who does…it saves a lot of time (and broken teeth) if you take out the pits with a cherry pitter. Mine is probably an antique, but it works great and saves me a lot of time!

Food Mill

41o4fVdzuEL._SL160_
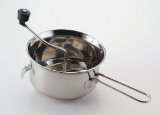
Mirro 50024 2-quart FOLEY Food Mill, Stainless Steel

I usually make my applesauce in a blender, but if you prefer to leave your peelings on your apples…cook them down, then run them through a food mill like this one. I have one and while it takes quite a bit of muscle to get a big batch of applesauce made, it’s yummy!

Funnel

41H8B03T3PL._SL160_
Norpro Stainless Steel Wide-Mouth Funnel

In my opinion, a wide mouth funnel is a must-have for canning. I use mine ALL THE TIME. I paid full price for mine through Azure Standard and it was well worth it. But, I wouldn’t mind a second (or third) one, so I’m keeping my eye out for them at garage sales.

Ziplock bags

21psqXknDfL._SL160_
Ziploc® Double Zipper Plastic Freezer Bags, Gallon (94604ZIP) Category: Plastic Ziplock Bags

Okay, you probably won’t find these at garage sales, but while we’re on the subject of saving money while you preserve food, I recommend stocking up on quart and gallon sized freezer bags when they’re on sale and when you have coupons. Two tips:  Only use freezer bags for freezing produce. Regular storage bags won’t cut it. And…stick with name brand Ziplock bags for produce. I won’t tell you about the time I made real apple cider and froze it in generic freezer bags. Let’s just say everything in my freezer was sticky for six months and I lost a lot of my apple cider. :(

Have you found any great deals at garage sales and auctions for canning jars and etcetera? What else am I forgetting to mention that we should be looking out for at garage sales?
————————————————–

This post is linked to Frugal Fridays.

Heavenly Homemaker's Club Members: Access your homepage and all your fantastic resources here! Not a member yet? Please join us!

Learn Your Letters, Learn to Serve Complete Curriculum Kit

July 9, 2009 by Laura 93 Comments

This post may contain affiliate links. For more information, please see our disclosure policy.

LYLLTSfrontpage2b_sm

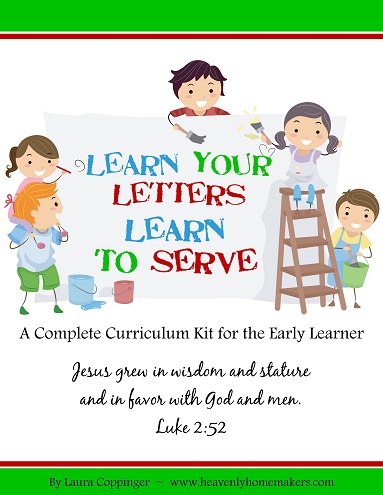
Teach your child to serve…one letter at a time! This 183 page downloadable kit includes thorough lesson plans, games, crafts, recipes, memory verses, Bible story suggestions, vocabulary stimulation and discussion, play, books to read and so much more…all while encouraging service to God!

Each letter you study includes suggestions for service, such as “Take a new Bible to B__________” on Bb week, “Make soup for someone who is sick on Ss week, and “Deliver flowers to F_______________” on Ff week. Your child will make gifts or food, offer help and learn to think of others. As a family you can delight in praying together about who you would like to serve and what form of service you would like to offer!

This curriculum kit can be used as a supplement to what you are currently doing to teach your child preschool basics…or it can be used all on its own as a complete early learners curriculum tool.  It is absolutely not just for home schoolers.  Learn Your Letters, Learn to Serve is for any family who would enjoy learning and serving together with little ones.  In addition, Learn Your Letters, Learn to Serve Curriculum Kit may be purchased for use in a Sunday School Classroom or Preschool Classroom.

To get a feel for what this kit is like, help yourself to free Curriculum Sample Pages, including the lesson for LetterBb!

What Learn Your Letters, Learn to Serve includes:

  • 101 Page Learn Your Letters, Learn to Serve Book of ideas, instructions, recipes, tutorials and service planners  (the majority of this book can be left paperless, unless you choose to print it and bind it)
  • Alphabet Practice Packet (26 pages of printable letter writing practice)
  • Alphabet Project Packet (printable projects that go along with various lessons)
  • Memory Verse Packet** (26 printable memory verses to decorate and place on the wall or in a binder)
  • Parent Planning Packet (planning pages, teaching suggestions, scheduling ideas)

Feel free to email me with questions! This kit is available in download form (have it in your hands today!).

 I pray that you will be as blessed as our family has been as you learn and serve together!

Our Heavenly Homemaker’s Club Members have access to this amazing resource plus ALL of our eBooks, eCurriculum, printables, and so much more – for one very low price! Join us here!

Or purchase separately below:

[wp_eStore_fancy1 id=3]

Add this Learn Your Numbers, Learn to Serve too!

Our Heavenly Homemaker’s Club Members have access to this amazing resource plus ALL of our eBooks, eCurriculum, printables, and so much more – for one very low price! Join us here!

Or purchase separately below:

[wp_eStore_fancy1 id=4]

Don’t forget Learn Your Colors, Learn to Serve!

Our Heavenly Homemaker’s Club Members have access to this amazing resource plus ALL of our eBooks, eCurriculum, printables, and so much more – for one very low price! Join us here!

Or purchase separately below:

[wp_eStore_fancy1 id=47]

Want the entire Learn and Serve 3-Pack?

Our Heavenly Homemaker’s Club Members have access to this amazing resource plus ALL of our eBooks, eCurriculum, printables, and so much more – for one very low price! Join us here!

Or purchase separately below:

Get a major discount when you buy all three books together!

[wp_eStore_fancy1 id=48]

**Memory verses are in NIV, but are available in KJV by request!

Heavenly Homemaker's Club Members: Access your homepage and all your fantastic resources here! Not a member yet? Please join us!

Do the Funky Kitchen Ebook

July 8, 2009 by Laura 30 Comments

This post may contain affiliate links. For more information, please see our disclosure policy.

Having a hard time finding your kitchen? Don’t know what to do with it once you find it? This e-book can help! Get your kitchen organized and functional (get it? funky…functional) once and for all! Let this e-book inspire you to clean off your countertops, clean out your fridge, pantry and cabinets so that you can be more efficient with your time and energy in your kitchen. Full of practical ideas so that you too can “Do the Funky Kitchen.” A fun read!

[wp_eStore_fancy1 id=11]

Want the Kindle Edition?  Grab it on Amazon!

funky_kitchen_amazon


Visit the Heavenly Homemakers Shop for more great eBooks!

Heavenly Homemaker's Club Members: Access your homepage and all your fantastic resources here! Not a member yet? Please join us!

Whoever Calls Summer Days Lazy…Please Come Help Yourself to a Paint Brush

July 8, 2009 by Laura 13 Comments

This post may contain affiliate links. For more information, please see our disclosure policy.

We finally started painting our porch. Boy has it needed it for a long, long time. The whole house needs painting. When we’ll ever get around to all of it is beyond me. But…at least we started on the porch this week.

Here are a few things I’ve learned:

  1. We have a HUGE porch. I recognized that fact after we’d been painting it for several hours and only had a tiny bit of it covered with primer. And also, when I stopped by my friend’s house yesterday I noticed what a cute little porch they had. And it was cement. With a metal railing. No paint needed. I sighed deeply and had a few moments of jealousy (which I quickly repented of because truly I do love my big old house).
  2. Twelve year olds are a great help when it comes to painting. Everyone should get themselves a twelve year old.
  3. Four year olds really want to help too, but really don’t have what it takes to actually make the paint go from the bucket to the brush to the porch without ruining their church shoes, their sweat pants, their hair and their mother’s sanity. (Don’t ask me how he got out there with his church shoes on in the first place.)
  4. Seven year olds do pretty well with a paint brush just long enough to get the paint brush painty. Then they get tired and want to go do something else. Then you have another paint brush to clean at the end of the day.
  5. Nine year olds can be good help except for when they really just want to hurry through the job and go play. Eventually it’s best to assign the nine year old to babysitting the four year old in an area far, far away (see #3 above).
  6. When you work on painting the porch, everything else in the house sort of falls apart. This was not a good week for me to not have a menu plan.

Having said all of that…I’ve decided that I’m not going to paint anymore for a few days. (Did I mention that I’m trying to get ready for company?)  I figure that any amount of painting that I got done is less for Matt to have to do. Yay…I helped.

And also, based on the fact that having all four boys out there at once helping me paint looked a little like a Three Stooges episode (like where I would reach over to help one kid not drip paint from the bucket to the place he was painting…and simultaneously, another kid would drag their paint brush right across my back side…) I think it’s best for me to put away the brushes for a while so that I continue to love my children the way a mother should (the way that doesn’t involve yelling).

I now have white highlights in my hair. I’m not sure if it’s paint or from the stress of painting with the stooges. Or both.

Today, I am going to catch up on green bean picking and cleaning and cooking and kid snuggling. There may still be some Three Stooges episodes  going on…but at least no church shoes will be ruined in the process. 

Well, we can hope anyway.

Heavenly Homemaker's Club Members: Access your homepage and all your fantastic resources here! Not a member yet? Please join us!

What to Do With the Kids in Your Kitchen Ebook

July 8, 2009 by Laura Leave a Comment

This post may contain affiliate links. For more information, please see our disclosure policy.

kidscover1

This ebook will give you many ideas of yummy things to create in the kitchen with and for your kids. Because of the simple format in which it is written, older kids will be able to use this book on their own. Spending time with your kids in the kitchen can be a blessed experience. This ebook can help!

Includes recipes such as:

  • Tuna Topped Tomatoes
  • Alphabet Pancakes
  • Homemade Graham Crackers
  • Chocolate Chip Muffins
  • Scrambled Eggs with Cheese
  • Fried Eggs on Toast
  • Crepes with Jelly
  • Strawberry Banana Yogurt Smoothies
  • French Toast
  • Ham and Cheese Melts
  • Homemade Personal Pizzas
  • Tuna Casserole
  • Nachos
  • Fruit Kabobs
  • Fruit Dip
  • Apple Strawberry Salad
  • Potato Wedges

5.95

Add to Cart

Heavenly Homemaker's Club Members: Access your homepage and all your fantastic resources here! Not a member yet? Please join us!
« Previous Page
Next Page »

Join Our Community!

 Facebook Twitter E-mail Instagram Pinterest

Popular Posts

~ Will All of the Real Moms Please Stand Up?
~ Easy! Stir-and-Pour Whole Wheat Bread
~ How to Make Gatorade
~ 31 Real Food Breakfast Ideas
~ Dear Teenage Girls...
~ When Mom Takes a Step Back
~ The Inexpensive Health Insurance We Love!
~ Let's Talk Real Food Grocery Budgets

Check out our latest posts!

  • Big Family Food and Fun: September 20-26, 2026
  • Big Family Food and Fun: September 13-19, 2026
  • Big Family Food and Fun: September 6-12, 2026
  • Big Family Food and Fun: August 30-September 5, 2026
  • Big Family Food and Fun: August 23-29, 2026
Home  ~  Simple Meals  ~  Club Membership  ~  Shop  ~  Privacy Policy  ~  Disclosure  ~ Contact

Copyright © 2026 · Beautiful Pro Theme on Genesis Framework · WordPress · Log in