Heavenly Homemakers

Encouraging women in homemaking, healthy eating and parenting

  • Home
    • About
    • FAQs
  • Recipes
    • Bread and Breakfast
    • Condiments
    • Dairy
    • Main Dishes
    • Side Dishes and Snacks
    • Desserts
    • Gluten Free
    • Instant Pot
    • Crock Pot
    • Heavenly Homemaker’s Weekly Menus
  • Homemaking
    • Real Food Sources
  • Store
  • Contact
    • Advertise
    • Disclosure
    • Privacy Policy
  • Simple Meals
  • Club Members!

Gratituesday: Got My Baby Fix!

September 15, 2008 by Laura 8 Comments

This post may contain affiliate links. For more information, please see our disclosure policy.

gratituesday22.jpg

I finally got to meet my new nephew last weekend! It was so wonderful to be able to hold him…and kiss him to pieces! (And, while little Austin was sort of the highlight of our trip…I also enjoyed seeing my other nephew and nieces and my brother and sister-in-law and my dad and his wife Tacy and her kids and two of my aunts and an uncle.)  (Oh, and I received a great hug from Jayme via her MIL…and I sent one back for you! And one for you too Sally! Make sure you go get them!)

Of course now I miss everyone more than I did before…and I’m so glad we were able to make the trip!

Here are a few pictures of Austin with his (favorite) Aunt Laura. Would you believe this little sweetheart is barely a month old and he’s starting to give big smiles and coos already? I’m pretty sure it is all because he was so happy to see me that he gave some of the biggest smiles he’s ever given before…

austin3sm.JPG
Hehehe…look at ‘im! Isn’t he just yummy!

austin2sm.JPG
Oh look, Aunt Laura got this big smile out of him!! 
Look at that sweet face. (His, not mine.)

It wasn’t until we were on our way home Saturday night, when I was going on and on about Austin, that Matt pointed out that he hadn’t had a turn to hold the baby. Ooops. I guess I was being a baby hog. Hey.  We were only there for a total of seven hours okay? There was no time for sharing. You would have done the same thing, right?

This Gratituesday, I’m just so thankful for the chance to be with our family over the weekend, even if it was a crazy quick trip. And I’m grateful that Austin shared some of his very first sweet smiles with his favorite aunt. (Okay, okay, his favorite Nebraska aunt.) (Yes…all the other aunts live in Kansas, but still.)  :)
———————————————–
Join us this Gratituesday and share what you’re thankful for! Read the Gratituesday details here, then come link up! Don’t have a blog? Leave a comment letting us know what you’re grateful for!
———————————————–
[blenza_autolink code]

Heavenly Homemaker's Club Members: Access your homepage and all your fantastic resources here! Not a member yet? Please join us!

Awesome Easy Tomato Soup

September 15, 2008 by Laura 112 Comments

This post may contain affiliate links. For more information, please see our disclosure policy.

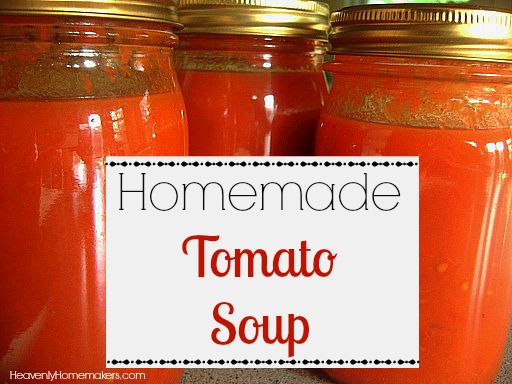
Homemade Tomato Soup

It’s almost that time of year again… The time when we can warm up at lunch with a grilled cheese sandwich and a bowl of tomato soup!

I LOVE this recipe that was given to me by my friend Anne…who got it from her friend Anne. (Yeah, like that’s not ever confusing.)  Along with canning lots of tomato sauce and tomato juice and salsa, I love canning several jars of Anne’s tomato soup for the winter! (Wait, which Anne is that?)

Most of the tomato soup you’ll find at the store will have high fructose corn syrup or sugar in it…

This recipe has no sugar…which is amazing because it tastes so yummy and sweet! Once when Matt was eating some, he asked at least three times, “This really doesn’t have any sugar in it?” :)

Homemade Tomato SoupYum

5 pounds chopped tomatoes
1 cup chopped onion
3 Tablespoon butter
1 1/2 teaspoon sea salt

Put everything in a big pot and cook it for about 3 hours. Then, put it into your blender and blend until smooth. Freeze it, or can it following these canning methods (25 minutes in the water bath).

I love having recipes like this that are so simple to make and healthy for my family!

Heavenly Homemaker's Club Members: Access your homepage and all your fantastic resources here! Not a member yet? Please join us!

Menu For the Week

September 14, 2008 by Laura 5 Comments

This post may contain affiliate links. For more information, please see our disclosure policy.

We had a great, though short, trip to Kansas this weekend to attend a wedding reception. That was the real reason we went…but the really real reason we went is to meet my new baby nephew!! Mmmm-mmm! What a sweetie!

We arrived back late Saturday night (uh, early Sunday morning)…just in time to begin a new week which is absolutely FULL of soccer! Between Matt’s coaching schedule and the three older boys’ game schedules…we will be running to games Sunday afternoon, Monday night, Tuesday night, Thursday night and Saturday morning. Plus Asa has a practice right before church Wednesday night. 

This kind of soccer craziness only really lasts a few weeks…so I find that I have to be very prepared with meals and snacks for all these soccer players! It’s all super fun though. I love soccer season! It’s so much fun to watch Matt’s team play, and to watch our boys play! (Except for when it’s raining.) (And windy.)  (And cold.)  (But other than that…it’s really fun to watch all the soccer.)

Last week when we were out at the soccer field in the evening, another mom asked me, “So, do you feed your family before the games, or after the games?”

And I said, “Yes, definitely.” ;)

Apparently during soccer season, we must eat dinner twice. (And do dishes all day…)

Oh, how thankful I am for Menu Plan Monday!

Sunday, Sept. 14
Oatmeal with raisins
Whatever we can find in the fridge (Choices: 2 heels from a loaf of bread, a bottle of ketchup and an okra stuck to the bottom of the crisper drawer…scary.)
Black bean salsa dip with chips

Monday, Sept. 15
Whole wheat waffles
Cheese quesadillas, pears
Chicken noodle soup, carrots

Tuesday, Sept. 16
Scrambled eggs, oranges
Taco potatoes, strawberry peach slushies
Take to the soccer game – sandwiches, carrots, apples

Wednesday, Sept. 17
Zucchini muffins, bananas
Homemade mac and cheese, peas
Roast, carrots, potatoes, gravy

Thursday, Sept. 18
French toast
Sloppy joes, baked beans, grapes
Cheesy beef and rice, green beans

Friday, Sept. 19
Mini breakfast pizzas
BLTs, pineapple-orange slushies
Homemade chicken nuggets and french fries

Saturday, Sept. 20
Giant breakfast cookies
Homemade pizza pockets, apples
Whole wheat pancakes, turkey sausage, scrambled eggs

I’m sure you all wish you were here for our Sunday lunch…. ;)

This week I’ll share my easy tomato soup recipe with you, and write more about Getting Real with Food! I’m also going to try to share a little bit of my schedule with you…if I can fit it into my schedule…

———————————————–
***Be sure to come get your free downloadable menu planners for fall!!***
———————————————–

Heavenly Homemaker's Club Members: Access your homepage and all your fantastic resources here! Not a member yet? Please join us!

Canning Tomato Juice and Tomato Sauce

September 11, 2008 by Laura 165 Comments

This post may contain affiliate links. For more information, please see our disclosure policy.

Okay, we’ve covered the basics of canning…freezing corn…freezing green beans…canning and freezing peaches…making and canning applesauce…

Now lets talk about tomatoes!

Last year, I planted 40…yes FORTY tomato plants. On purpose. Because I’m crazy.

I ended up having SO MANY tomatoes, that by the end of the summer, I had canned almost two years worth of tomato sauce, tomato juice and tomato soup. And, I still had tomatoes! I was begging people to please come pick my tomatoes and take them far, far away from my house. 

While canning that many tomatoes was a wonderful thing…I still hadn’t fully recovered from it when it came time to plant tomatoes this year. Therefore, I only planted 20 tomato plants this spring. *cough*

The good thing is…I never have to buy any tomato juice, sauce or soup. Ever. And the home-canned stuff is SO GOOD!!!

Here’s the way I make tomato juice and tomato sauce…

tomatosauce1sm.JPG
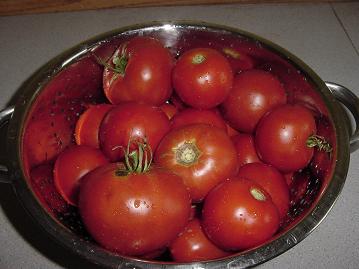
First, you start with bunches and bunches of pretty tomatoes, like these. You can take the skins off and the seeds out if you want to…I pretty much just WASH them. I leave the skin on and and the seeds in…mostly because I’m just too lazy to do otherwise. My family doesn’t know the difference, and you can’t really even tell that the seeds and skin are still there. At all. 

tomatosauce3sm.JPG
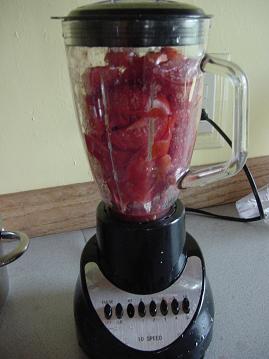
Next, I cut the tomatoes into fourths and put them into my blender.

tomatosauce2sm.JPG
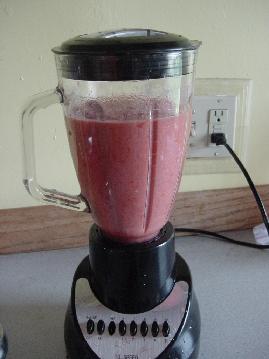
The tomatoes are then blended up until they are liquid. 
(Mmm, tomato smoothie anyone?)

tomatosauce4sm.JPG
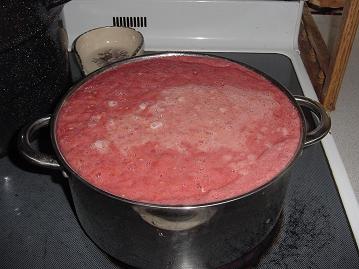
After I blend up my tomatoes, they go into a big pot. Obviously this pot was not quite big enough! Filling your pot this full will just about guarantee that your pot will boil over and spill all over your stovetop creating a cooked on tomato mess. (Picture of the boiled over mess not available…because I scooped some out before it boiled over, thank you very much.)

tomatosauce5sm.JPG
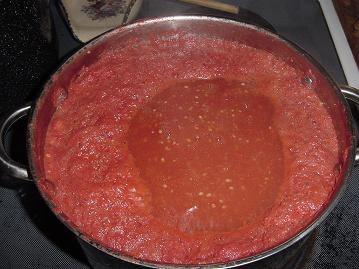
Next, I boil my tomatoes, uncovered, stirring occasionally. After a while it begins to look like this. Once that bubbly froth is just about all gone from the top (about an hour and a half or so after beginning the boiling process), you have made tomato juice, and you’re able to go ahead with the hot water bath process of canning tomato juice. 

tomatosauce6sm.JPG
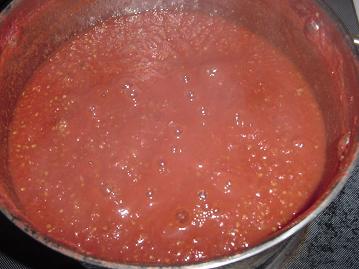
But, if you want tomato sauce, continue to let it boil for another hour or so. You’ll know your tomato sauce is done “saucing” when most of the watery liquid has evaporated. If you continue to cook it at this point, you will have tomato paste…which is fine…if you want tomato paste.

Can your tomato sauce for 25-30 minutes following the hot water bath instructions here.

Then, you will have tomato juice for yummy veggie soups and such…and tomato sauce for sloppy joes, pizza sauce, spaghetti sauce, enchilada sauce…and whatever else you use tomato sauce for. (If you want to, you can add your herbs and spices into the sauce while your making it so that you’ve got your spaghetti and pizza sauce already put together in your jars!)

I have a wonderful recipe for tomato soup that I’ll be sure to share soon! 
Yumm-eeee!

Heavenly Homemaker's Club Members: Access your homepage and all your fantastic resources here! Not a member yet? Please join us!

Helloooo! Is ANYBODY Listening?!

September 11, 2008 by Laura 23 Comments

This post may contain affiliate links. For more information, please see our disclosure policy.

Do any of the rest of you sometimes feel like you can just talk and talk…and nobody in your house even hears you?

Of course, I know it’s best to keep the orders short and sweet…like, “Come. Sit. Eat.” Parenting does seem to work better that way. But I guess I like to talk more than that or something. I’m better at pulling out…

“Okay, Big Guys…Mama made you some yummy food…so everyone come into the kitchen…no…go into the bathroom to wash your hands…oh…put your shoes away first…then go wash your hands…be sure to use soap….Asa, take Malachi potty while you’re in there…then help him wash his hands…then Justus, you come into the kitchen and get forks out for everyone…Elias then you please….

“Wait, guys…are you listening to me? Hey…guys! Yoohoo, over here! HEY! BOYS! YO, BOYS!!!!”

At this point I usually get a response like,

“Oh, did you need us to do somethin’?” (And of course only one of the four even says that much. The other three are likely to still be focussed in the land of imaginary super heroes.)

Sigh.

So, yes, I’ve learned to get their eyes on me first, then keep the command as short as possible (if I can possibly contain myself and reject the urge I normally have to launch into a lengthy string of wonderful detailed information about how I’d like them to carry out the task at hand.)

The usual exception to this problem is when we’re talking about DESSERT. At that time, the boys’ listening skills appear to be somewhat improved. Enough improved that I actually have hope for their wives someday.

But yesterday, I decided to let each of them have one last ice cream sandwich from our last Azure Standard order. We’ve been rationing them through the month since they are such a special treat. Which means…you’d think that when I say the magic words, “Ice Cream Sandwich” they’d…you know…HEAR me. 

So I’m in the kitchen and I say, “Hey, you guys can each have one last ice cream sandwich today.”

Nothin’.

I try again, “If you want an ice cream sandwich, I put them in the door of the freezer.”

One responder, “Oh, can I have an ice cream sandwich?”

Me, “Yes, I put them in the door of the freezer.”

Boy (who shall remain nameless…yet you can make a guess and have a one in four chance of being right), “Where are they?”

Me, “In the door of the freezer.”

Boy, “Ooh, I’m gonna go have an ice cream sandwich!” 

Me, knowing he might not remember where they are, “Great. They’re in the door of the freezer.”

Boy, standing at the freezer, “MOM!! I can’t find the ice cream sandwiches!”

Me, “They’re in the door of the freezer!”

Boy, “I can’t find my ice cream sandwich!”

Me, “THEY’RE IN THE DOOR OF THE FREEZER!!!!” (For Pete’s…sake.) 

Boy, “Oh, in the door of the freezer? Got it.”

At that point, the other boys perk up and say, “Hey, how come he gets an ice cream sandwich? I want one!” 

Me (gritting my teeth) “They’re in the door of the freezer… Eat it in the kitchen… Hey guys, I do not want a mess…take it to the kitchen and stay there…. Boys – KITCHEN!…”

Oh, to my dear future daughters-in-law…I’m trying, I really am….

Heavenly Homemaker's Club Members: Access your homepage and all your fantastic resources here! Not a member yet? Please join us!

Homeschool Hubbub at our House: Ooh, I’m Just So Excited About this Book!!

September 9, 2008 by Laura 20 Comments

This post may contain affiliate links. For more information, please see our disclosure policy.

First, can I just tell you how much I am learning during school time? Yes, me, the mom. The one who is the teacher. I’m pretty sure the kids are learning too, and that is…you know…the real point of home education. But I just love how much I’m learning too. Wow.

So now, let’s take a poll… When did you learn World History in school? And how much did you learn? 

Me? I had one semester of World History in high school and that was it. And I don’t remember anything about it. 

Just the thought of learning World History has always sounded very dry and boring and overwhelming to me. And it also sounded very dry and boring.

AND, I’ve always had such a hard time connecting Bible Times with World History. In my head (limited brain space that it is)…I’ve separated the two. Like there were Bible Times…and there were also Ancient Egyptian times…but I never could put them together.

THAT, my friends, is the reason I love this awesome set of books my boys and I are reading about World History!! They are written by Susan Wise Bauer and are called The Story of the World.

storyoftheworld.jpg
Check it out here.


We are a little over half way through the first book in this four set series. They are so well written that my six year old is understanding it…my eight year old…my eleven year old…and yes this 35 year old mama. We’re all getting it! It all makes sense! The information is captivating and incredibly interesting! (Of course, it’s highly likely that the reason the boys are enjoying the book so much is because ancient times were so filled with fighting and wars and violence and swords…but whatever.)

The best part of these books? The author combines Bible Times and World History for me!! She writes about how Jacob and his sons came down to Egypt and made their home along the Nile and how the nation grew! And then about how things changed years later in Egypt and the Israelites became slaves and how Moses delivered the people. It all makes so much sense!! With dates and everything!

I just love this set of books, and my boys do too! So, I had to share that with you. If you’re a history buff then you know all this stuff already and you’re laughing at me…but I’m okay with that. I finally found a book that makes World History make sense to me! 

I just may be able to be on Jeopardy yet. 

(Yeah, that was a joke. But you didn’t have to laugh that hard.)  ;)

Heavenly Homemaker's Club Members: Access your homepage and all your fantastic resources here! Not a member yet? Please join us!

Gratituesday: Great Christian Role Model

September 8, 2008 by Laura 12 Comments

This post may contain affiliate links. For more information, please see our disclosure policy.

gratituesday2.jpg

Last Gratituesday I told you about our chance to go to Kansas City to watch our good friend Brad Ziegler pitch for the Oakland A’s. We were almost to KC when we got the phone call that the game we had tickets for was rained out. (We’d been driving through a lot of rain, so we had been dreading the thought of having to sit out in it for three hours.)

So, instead of going to a game, we were able to meet Brad and all of his family at McDonalds, which was super fun and a great chance to visit with everyone. 

Then, Thursday we were able to watch a double header since the Wednesday game was re-scheduled for Thursday afternoon, and there was already a Thursday game scheduled for that night…so we got to watch both. (Did that just make any sense?)

Oh, it was SO MUCH FUN!! The boys had a blast, and so did we! 

However…Brad is the “closer” for his team (which means that if his team is ahead…he goes in for the last 2-3 innings and pitches to “seal the deal” because he’s such an awesome pitcher) (and I know you knew what a “closer” was already…but just in case you didn’t…). The Royals were ahead in both games, which meant that Brad didn’t pitch either game. Talk about disappointing. We watched him warm up once just in case…but they ended up not needing him, and the A’s lost both games. 

Sigh.

Oh, but it was so much fun anyway being at a major league baseball game with so many people that we loved. Even my brother met us there because he happened to be in KC for business that week!

While I am typing this post…all four boys are outside with baseball caps on playing a baseball game in the yard. Before they went outside, I got to listen to them (kindly) argue about which one of them got to be the “closer”. How sweet is that? I’m so very grateful that my boys have such a great Christian role model in Brad Ziegler. You can bet they think he’s great! He even signed baseballs for each of them! (Balls they had been using for warm up even!!)

boyswithbradsm.JPG
I was disappointed that this picture turned out so dark…
but here are the boys with their signed baseballs with Brad.

oaklandgame3sm.JPG
And here is a picture of the back of several people’s heads…
and a picture of the teams on the field.

oaklandgame1sm.JPG
I quickly grabbed my camera for this shot when the Royal’s mascot came and sat down by Justus and started to steal his blanket from him. Justus didn’t quite know what to do! :)

We sure did make some great memories! God is good!
——————————————-

What are you grateful for? Read the Gratituesday guidelines here, then come link up with us!
——————————————-

[blenza_autolink code]

Heavenly Homemaker's Club Members: Access your homepage and all your fantastic resources here! Not a member yet? Please join us!

Soaking Those Grains…What is THAT about?

September 8, 2008 by Laura 62 Comments

This post may contain affiliate links. For more information, please see our disclosure policy.

I’ve had tons of emails lately asking if I soak my grains and how I do it and why I do it!

Most of the recipes on my site have not shown that I soak my grains. Mostly I did that because I know that many of my readers are just beginning to look into making changes toward healthy eating. I decided…if you are just starting out trying to switch over from fruit roll-ups to real fruit…from white flour to whole wheat…from boxed foods to foods made from scratch…it would be very discouraging to hear that you also should “prepare your grains 12-24 hours ahead of time by soaking them in something that is lacto-fermented in order to break down the phytic acid…”

It’s overwhelming enough sometimes just to try to get your kids to eat a green bean…and to wrap your brain around the fact that almost every food on the shelves that we might be used to eating has a no-no ingredient in it.

So, if you’re just starting out on the healthy eating trail…read over the information in this post and tuck it away for whenever or if ever you’re ready. Continue to take baby steps and make small changes. Read the Getting Real with Food series here to give you some basic ideas of where to start and what to do.

But, if you’re eating a lot of whole grains already and are used to baking from scratch anyway, and you want to take this nutrition thing one step farther…here’s some information for you about soaking grains that I am paraphrasing from Sally Fallon’s book “Nourishing Traditions”:

Eating whole grains is important because they provide vitamin E, B vitamins, many important minerals and fiber. But the phytic acid in the grain combines with the iron, calcium, magnesium, copper and zinc in the intestinal tract, blocking their absorption. They also contain enzyme inhibitors that can interfere with digestion.

So, Nourishing Traditions recommends that we soak our grains in either whey, cultured yogurt, kefir, cultured buttermilk…or in lemon juice or vinegar if you can’t tolerate milk products. Soaking them for at least seven hours allows the enzymes to break down and neutralize the phytic acid. Then, more of the good nutrients in the grain are released and all the good stuff is more readily absorbed in our systems and the grain is digested much more easily.

Okay…so quick re-cap. Eating whole grains is so, so much better for you than processed grains that have almost all of their nutrients stripped from them. Eating whole grains that have been soaked is even better.

How do I do this?

It’s really not hard…I just have to plan ahead a little more. And I don’t always soak everything even though I know I should. I try to just do the best I can. (That’s the goal right?)

So, here’s a quick run down of the basics of how I soak my grains when preparing recipes:

Pancakes and Waffles…I stir the whole wheat flour and the buttermilk together, cover it with a cloth and let it sit overnight. The next day, I add the remaining ingredients and cook the pancakes or waffles. They are SO YUMMY made like this!

Quick Breads and Muffins…I mix the flour with the butter (melted and cooled) or oil that the recipe calls for and add enough buttermilk to make it “soakable”. I let it sit overnight, then mix in the remaining ingredients.

Giant Breakfast Cookies and Breakfast Bars…I mix the melted butter, flour and oats with enough buttermilk to soak then let it sit overnight. I have found these to be VERY HARD to stir the next morning, so putting the soaked mixture into my food processor with the other ingredients so that it doesn’t take me 45 minutes (or until lunchtime) just to stir the silly things. Yea for food processors.

Tortillas…I mix up the tortillas as the recipes says, only I put in 1/4 cup less water and add 1/4 cup yogurt, kefir or buttermilk as I’m making the recipe. Then, I let them sit for the day, and roll them and cook them that night for dinner. They roll out so nicely after they’ve been soaked.

Breads, Rolls and Pretzels…These belong in the “I don’t soak these but I should” category. When I’m really on the ball, I make sourdough bread…but my sourdough starter isn’t starting anymore, so I need to get a new one going. In the meantime, I’m compromising and making Honey Whole Wheat Bread, and that’s okay with me. After I get my sourdough going again, I’ll post about it. Sourdough bread is so tasty!

Cookies and Brownies…I rarely soak these either, mostly because I’m lazy about it. When I do soak them, I mix the butter and flour called for in the recipe with a few tablespoons of buttermilk, kefir or yogurt…allow them to sit for a few hours, then add the remaining ingredients and bake.

I hope that helps. I’ll cover soaking other grains like rice and oats in the future. And, as I slowly but surely get around to it…I’ll go back through each of my site recipes and blog recipes and add a brief explanation of how to soak the grains if you choose to do so. That way, you have the option if you’d like!

And now, I think I’ll go grind me some flour and soak something. Because looking at all these recipes put me in the mood to bake.

(Like I’m ever not in the mood to bake?!)  :)

Heavenly Homemaker's Club Members: Access your homepage and all your fantastic resources here! Not a member yet? Please join us!

Menu Plan for the Week

September 7, 2008 by Laura 17 Comments

This post may contain affiliate links. For more information, please see our disclosure policy.

I survived the weekend without my family. It was very nice having all the quiet time to get things done (and boy did I get things done!)…but I like it much better when there’s loudness and craziness and….boys. 

Now they’re back…my boys (Daddy included)…along with the loudness and craziness. Ah, life is good.

Because of our trip last week and the Dads-n-Lads retreat over the weekend, we’re all excited and ready for home cookin’ again! Bring on the vegetables! (Because McDonalds french fries do NOT count.)

Sunday, Sept. 7
The guy’s arrived home in time for lunch!
Veggie soup, cornbread
Hearty bean casserole, peaches

Monday, Sept. 8
Whole wheat pancakes
Pizza casserole, corn on the cob
Grilled chicken, stir fried rice and veggies

Tuesday, Sept. 9
Scrambled eggs, oranges
Leftover roast beef, green bean casserole
Beef enchiladas, salad

Wednesday, Sept. 10
Blueberry coffeecake
Homemade chicken nuggets and fries
Potato soup, bread and butter, carrot sticks

Thursday, Sept. 11
Fruit and yogurt delight, granola
Grilled cheese sandwiches, tomato soup
Turkey ham, scalloped potatoes and carrots, peas

Friday, Sept. 12
Peanut butter honey toast, kefir-fruit smoothies
Homemade pizza
Tacos

Saturday, Sept. 13
We’re headed off to Kansas! It’ll be a super quick trip for a wedding reception…and to see my new baby nephew!!! I’ve already warned my sister-in-law that the only time she’ll be able to hold her son is to nurse him…other than that – he’s MINE! 

So that’s the menu! You’ll find many more menu ideas at Organizing Junkie!

Can you tell we’re having fall weather around here? Bring on the soup!! And with fall in the air…I created a few new free downloadable menu planners JUST FOR FALL!! 

fallmenuplanner3sm.JPG
Here’s a peak at one of them! 
There are five more new ones! 
Go help yourself!

Heavenly Homemaker's Club Members: Access your homepage and all your fantastic resources here! Not a member yet? Please join us!

How to Make and Can Applesauce

September 5, 2008 by Laura 75 Comments

This post may contain affiliate links. For more information, please see our disclosure policy.

***UPDATE***

I no longer peel my apples, nor do I slice them. I simply wash them, core them, cook them as described below, then run them through my Blendtec Blender. It is much healthier and saves so much time to do it this way! And the applesauce is delicious. That’s always nice. :)

~~~~~~~~~~~~~~~~~~~~~~~~~~~~~

One of the best “fall smells” I can think of is applesauce cooking on the stove. It is SO YUMMY!!!

Here’s a step by step of the easiest way I’ve found to make applesauce. (But be sure to read Canning 101 first if you’re unfamiliar with the basic steps of canning safely!)

applesauce1sm.JPG
I slice my apples like this, then peel each slice.
I find this to be much easier than peeling the whole apple first and then slicing it.

applesauce2sm.JPG
As I slice and peel, I put my apples into a big pot. At the bottom of my pot is 5 cups of water and 3 teaspoons of ascorbic acid (powdered vitamin C).

applesauce3sm.JPG
As I continue to add apples, I stir them into the water/ascorbic acid frequently so that the apples are all coated with the mixture and are much less likely to turn brown.

applesauce4sm.JPG
Once I have my pot 3/4 full of apples, I put it on the stove…

applesauce5sm.JPG
and bring it to a boil, then simmer it (uncovered)
for about 30 minutes or until the apples are tender.

applesauce8sm.JPG
Then, I spoon the tender apples with some of the liquid into my blender (I highly recommend the Blendtec now)
and blend it all up until it is smooth.

applesauce9sm.JPG
Isn’t it pretty!!! Next, I pour the applesauce
into sterilized jars with a wide mouth funnel.

applesauce13sm.JPG
I hot water bath my jars for about 25 minutes.

applesauce11sm.JPG

And like always, after I pull them out of the hot water, I set them on my counter for several hours (or days) so that I can admire them and feel happy about my applesauce. Ahh…..beautiful!

This post contains affiliate links.

Heavenly Homemaker's Club Members: Access your homepage and all your fantastic resources here! Not a member yet? Please join us!
« Previous Page
Next Page »

Join Our Community!

 Facebook Twitter E-mail Instagram Pinterest

Popular Posts

~ Will All of the Real Moms Please Stand Up?
~ Easy! Stir-and-Pour Whole Wheat Bread
~ How to Make Gatorade
~ 31 Real Food Breakfast Ideas
~ Dear Teenage Girls...
~ When Mom Takes a Step Back
~ The Inexpensive Health Insurance We Love!
~ Let's Talk Real Food Grocery Budgets

Check out our latest posts!

  • Big Family Food and Fun: September 20-26, 2026
  • Big Family Food and Fun: September 13-19, 2026
  • Big Family Food and Fun: September 6-12, 2026
  • Big Family Food and Fun: August 30-September 5, 2026
  • Big Family Food and Fun: August 23-29, 2026
Home  ~  Simple Meals  ~  Club Membership  ~  Shop  ~  Privacy Policy  ~  Disclosure  ~ Contact

Copyright © 2026 · Beautiful Pro Theme on Genesis Framework · WordPress · Log in