Heavenly Homemakers

Encouraging women in homemaking, healthy eating and parenting

  • Home
    • About
    • FAQs
  • Recipes
    • Bread and Breakfast
    • Condiments
    • Dairy
    • Main Dishes
    • Side Dishes and Snacks
    • Desserts
    • Gluten Free
    • Instant Pot
    • Crock Pot
    • Heavenly Homemaker’s Weekly Menus
  • Homemaking
    • Real Food Sources
  • Store
  • Contact
    • Advertise
    • Disclosure
    • Privacy Policy
  • Simple Meals
  • Club Members!

7 Healthy Ingredient Holiday Drinks You’ll Love

December 20, 2014 by Laura 30 Comments

This post may contain affiliate links. For more information, please see our disclosure policy.

7 Healthy Ingredient Holiday Drinks You'll Love

Yum

There is something about special drinks at Christmas time that I just love! Below, you’ll find 7 tried and true holiday beverages that you’ll love too…

Homemade Hot Cocoa

Homemade Hot Cocoa

Warm Vanilla Soother
warmvanillasoother2sm

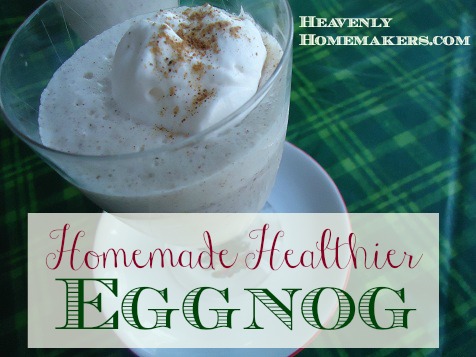
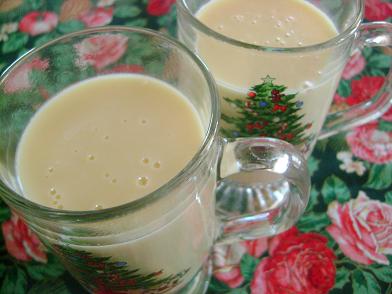
Homemade Healthier Eggnog

Homemade Healthier Eggnog

100% Juice  Punch

Christmas Brunch Punch {with 100 juice!}

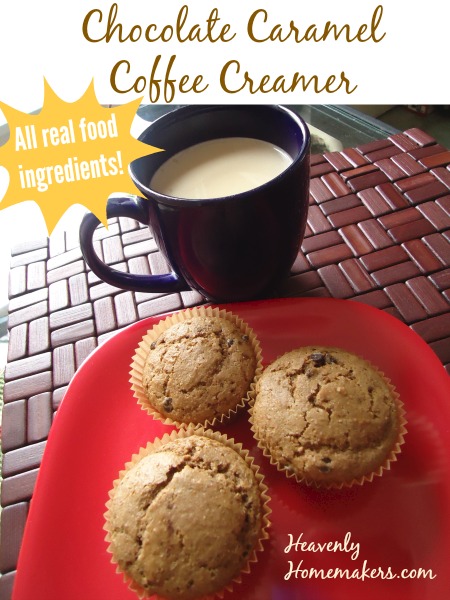
Chocolate Caramel Coffee Creamer

Chocolate Caramel Coffee Creamer

Chocolate Whipped Cream for Coffee

Chocolate Whipped Cream - Perfect For Your Coffee

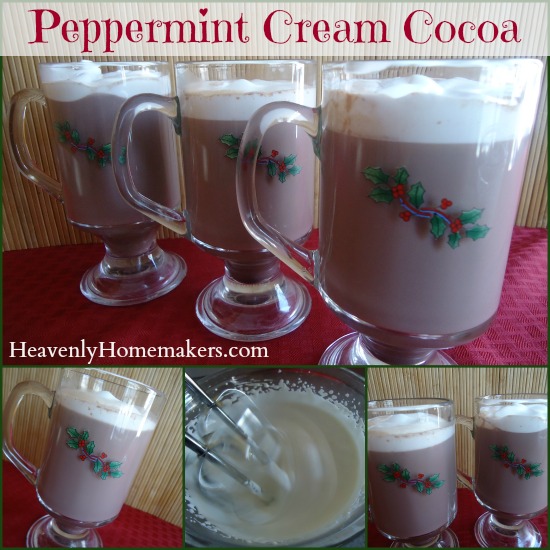
Peppermint Cream Cocoa
Peppermint Cream Cocoa

Heavenly Homemaker's Club Members: Access your homepage and all your fantastic resources here! Not a member yet? Please join us!

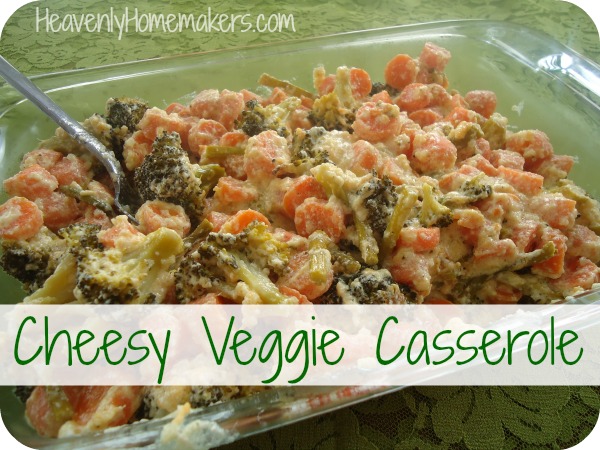
Cheesy Vegetable Casserole

December 20, 2014 by Laura 45 Comments

This post may contain affiliate links. For more information, please see our disclosure policy.

This Cheesy Vegetable Casserole makes it possible to help your entire family enjoy veggies!

XmasBrunch2011

This recipe is versatile so you can add your family’s favorite veggies – or be creative so you can learn to eat new ones. The mixture of all these ingredients makes any vegetable taste great!

Cheesy Vegetable CasseroleYum

Cheesy Vegetable Casserole
 
Save Print
Author: Laura
Ingredients
  • 2 pounds fresh variety of vegetables of your choice (broccoli, cauliflower, carrots, green beans, zucchini, or asparagus all work well)
  • ¼ cup chopped onion
  • ¼ cup melted butter
  • ½ cup mayonnaise (I use Hain Safflower)
  • 1 cup sour cream
  • 1  ½ cups shredded cheese (cheddar or Colby jack work well)
  • ½ teaspoon sea salt
  • ¼ teaspoon ground pepper
  • ¼ teaspoon garlic powder
Instructions
  1. Chop vegetables into bite-sized pieces.
  2. Stir all ingredients together in a large bowl.
  3. Pour into a 2-quart baking dish.
  4. Bake, uncovered, for 45-60 minutes in a 350° oven.
3.4.3177

Cheesy Veggie Casserole

This recipe is perfect to add to your holiday brunch table. Here are some dishes I recommend serving with your Cheesy Vegetable Casserole for brunch:

  • Angeled Eggs
  • Bacon Tomato Dip with Baked Tortilla Chips
  • Fruit Salad
  • Honey Peanut Bars
  • Hot Spinach and Artichoke Dip
  • Nectarine Cream Cups
  • No-Bake Chocolate Fudge Bites
  • No-Bake Peanut Butter Cookie Bites
  • No-Bake Snickerdoodle Bites
  • Pineapple Fluff Salad
  • Ranch Cheese Ball
  • Beef Summer Sausage
  • Barbecue Brisket
  • Crock Pot Barbecue Chicken Breasts
  • Turkey Ranch Pinwheels

The thing about brunches is that you’re wide open to serving just about anything – from main dish to side dish to breakfast dish to dessert. That’s what makes them fun. Putting this Cheesy Vegetable Casserole on the table – even with other breakfast type foods like muffins and sausage – really adds something special. And let’s not forget that it means your putting veggies on the table. With cheese. Veggies with cheese are always a hit!

What are your favorite dishes to add to a brunch table?

Check out DHGate for their fun kitchen gadgets!

Heavenly Homemaker's Club Members: Access your homepage and all your fantastic resources here! Not a member yet? Please join us!

Cranberry Almond Bread with Orange Glaze

December 18, 2014 by Laura 51 Comments

This post may contain affiliate links. For more information, please see our disclosure policy.

XmasBrunch2011

Welcome to our first brunch recipe of 2014! You’re going to love this one. It’s great with a cup of coffee. <— You know, this time last year I was just beginning to realize how awesome coffee is. Oh how far I’ve come in a year. Mmmmm, coffee with cream during my Bible time each morning. How I love it.

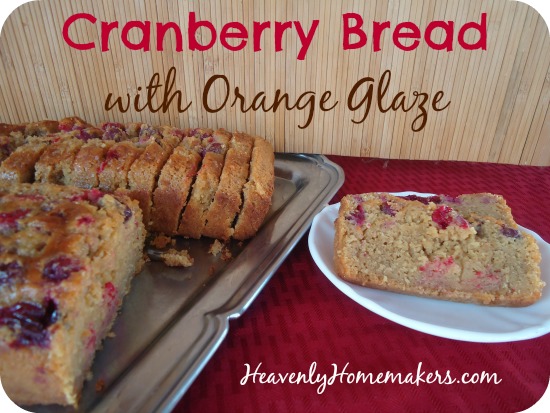
This bread is also great with a cup of hot tea, hot chocolate, Warm Vanilla Soother, or a cold glass of milk. Pretty much it’s great with anything you like to drink. It’s also very easy to make, and can be baked ahead of time if you’d like to wake up on Christmas morning to a delicious ready-made breakfast.

cranberry bread 3

Cranberry Almond Bread with Orange GlazeYum

3 cups whole wheat pastry flour (regular whole wheat works okay, but pastry flour is perfection in this!)
¾ cups sucanat
1 ½ teaspoons baking powder
1 ½ teaspoons sea salt
1 ½ cups milk
1 ½ teaspoons vanilla extract
1 ½ teaspoons almond extract
3 eggs
1 cup melted butter or coconut oil
1 cup fresh or dried cranberries

Mix flour, sucanat, baking powder, and salt. Add eggs, milk, extracts, and oil. Mix well. Fold in cranberries. Pour batter into 2 well-buttered loaf pans (or six small loaf pans). Bake 45-60 minutes at 350°. Makes two loaves.

Orange Glaze

¼ cup orange juice
¼ cup honey
½ teaspoon vanilla extract
1 teaspoon almond extract

Heat orange juice and honey in a small saucepan. Remove from heat. Stir in vanilla and almond extracts. Pour mixture over loaves of cranberry bread about 3 minutes after they have been removed from the oven, but before removing the loaves from the baking pans.

Cranberry Bread with Orange Glaze

 Be sure to leave a comment on this post for a chance to win one of five $10 gift certificates to our Heavenly Homemakers Shop!

Heavenly Homemaker's Club Members: Access your homepage and all your fantastic resources here! Not a member yet? Please join us!

Easy Peppermint Milkshakes

December 11, 2014 by Laura 4 Comments

This post may contain affiliate links. For more information, please see our disclosure policy.

It’s easy, filling, healthy, and delicious – a perfect treat anytime, but especially during the Christmas season. Serve a Peppermint Milkshake for a perfect side dish or snack!

Easy Peppermint MilkshakesYum

2 cups milk
1 Tablespoon real maple syrup
¼ teaspoon peppermint extract

Blend and serve!

We always add organic, farm-fresh raw eggs to our milkshakes for added nutrition. I believe this simple recipe would work great with coconut milk as well. :)

Easy Peppermint Milkshake

Heavenly Homemaker's Club Members: Access your homepage and all your fantastic resources here! Not a member yet? Please join us!

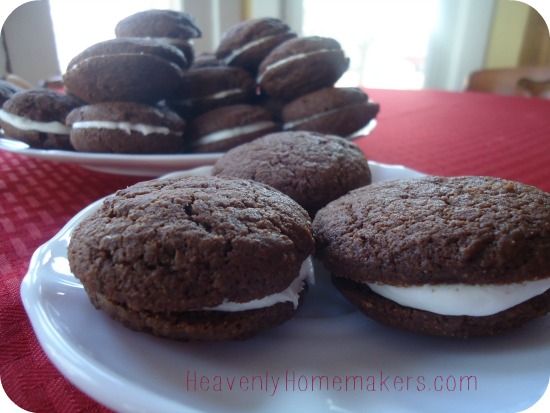
Homemade (Real Food) Mint Oreos

December 7, 2014 by Laura 11 Comments

This post may contain affiliate links. For more information, please see our disclosure policy.

This recipe needs no introduction. It’s a homemade mint oreo.  What more do I need to say? It’s happy, happy, delicious, happiness – perfect for a holiday gathering.

Besides the fact that these are made with whole food ingredients, perhaps the most exciting bragging point of these cookies is this:  After you eat one of these, you can smile at your friends without fear of having “oreo teeth.” You know what I’m talking about, right? Oh my goodness.

oreos 1

Allow me to introduce you to your new friend:

Homemade Oreo CookiesYum

1 cup melted butter
3/4 cup cocoa powder
1 cup sucanat or brown sugar
2 eggs
1/2 teaspoon baking soda
1/2 teaspoon sea salt
1 teaspoon vanilla extract
2 1/4 cups whole wheat flour (less or more as needed)

Stir together melted butter, cocoa powder, and sucanat. Add eggs, baking soda, salt, and vanilla until well combined. Stir in flour. Use a cookie scoop to place cookie dough two inches apart on a cookie sheet. Bake for 8-10 minutes in a 350° oven. Once the cookies have cooled, use the following filling recipe to create cookie sandwiches.

Filling

3 cups unbleached powdered sugar (more or less as needed)
2 Tablespoons melted butter
4 Tablespoons milk (more or less as needed)
Sprinkle of sea salt
1/2 teaspoon peppermint extract

Mix all ingredients together with a hand mixer until smooth and it has reached desired consistency. Spread filling onto cookies to form sandwiches like oreos.

Makes about 25 Mint Oreo Cookie Sandwiches. Want just a “plain” oreo? Simply leave out the peppermint extract in the filling recipe.

Homemade Mint Oreos

As you can see, some of mine are “regular” and some are “double stuffed.” This is because I care so much about perfection and consistency while I slap on the filling. Eh, life is entirely too short to spend time frosting cookies evenly. I especially feel this way because no one – I repeat no one –  cares about perfect cookies when they are eating a Homemade Mint Oreo. They are simply happy to be eating this treat.

Here is the part where I tell you to eat these in moderation, and to be sure to eat vegetables in great abundance before, after, and during your homemade oreo eating event. (You knew this was coming.)  After all, eating these may not leave you with oreo teeth, but you could end up with other issues, including but not limited to a suppressed immune system and cavities.

Wow, do I know how to ruin a great cookie recipe post or what? Never mind all the vegetable talk. You just make this recipe and enjoy your homemade oreo cookies!!! After you’ve eaten a large tossed green salad.

It has become clear that I cannot talk about sugar without encouraging vegetables. Hey, at least I didn’t tell you to add spinach to the cookie dough or frosting. Although now that I think about it…..
Heavenly Homemaker's Club Members: Access your homepage and all your fantastic resources here! Not a member yet? Please join us!

Easy Veggie Dip (With Homemade Seasoned Salt)

December 4, 2014 by Laura 1 Comment

This post may contain affiliate links. For more information, please see our disclosure policy.

It’s been exactly 21 hours and 4 minutes since I posted the Homemade Seasoned Salt recipe, so I’m assuming all of you have some mixed up and ready by now? Perfect. You’ll be needing it for this Veggie Dip recipe. You have cucumbers and carrots on hand, right? Perfect.

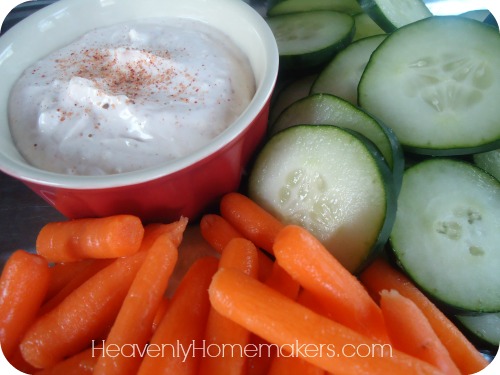
Easy Veggie Dip 1

One of the recipe cards that we made to go with your Seasoned Salt gift package shares this Easy Veggie Dip idea. Right after mixing up my first batch of seasoned salt, I made some Perfect Potato Wedges (a recipe also found on the free recipe card printable) and some of this Easy Veggie Dip. It was so….well, easy. The only way I can get my family (including the mother – that’s me) to eat cucumbers is if I supply dip. Typically, I go for ranch. But cucumbers with this Easy Veggie Dip is delicious. Even my hubby, who doesn’t really dig cucumbers, was enjoying the combo. Yay – another great way to eat veggies!

Easy Veggie DipYum

Easy Veggie Dip (With Homemade Seasoned Salt)
 
Save Print
Author: Laura
Ingredients
  • 1 Tablespoon dried minced onion
  • 2 cups sour cream
  • 2 Tablespoons real mayonnaise (I use Hain safflower mayo)
  • Seasoned Salt to taste
Instructions
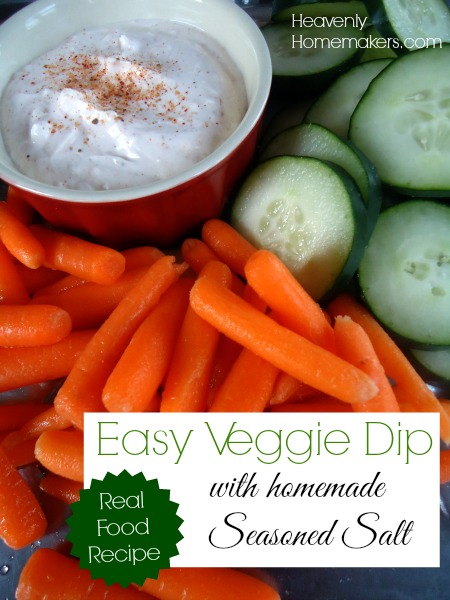
  1. In a bowl, mix together minced onion, sour cream, and mayonnaise. Add Seasoned Salt until mixture changes color (it should become a light peach color), tasting as you go for desired flavor. Chill for at least one hour before serving. Serve as a dip with assorted raw vegetables.
3.4.3177

You’ll find our Seasoned Salt recipe here, along with this recipe (and 3 others) on cute printable recipe cards. This makes a great gift! This dip is great for holiday parties, or simply as a way to get your family to eat vegetables (like cucumbers!) any day of the week. <—- I’m looking at you Coppinger Clan.

Can’t wait to hear how you like this Seasoned Salt and the recipes to go with it!

Easy Veggie Dip with homemade Seasoned Salt

Heavenly Homemaker's Club Members: Access your homepage and all your fantastic resources here! Not a member yet? Please join us!

Easy Pumpkin Pie Bars

November 28, 2014 by Laura 7 Comments

This post may contain affiliate links. For more information, please see our disclosure policy.

Wow, Laura. Another pumpkin recipe? Really?

Actually, I used butternut squash puree in this recipe, so there. But yes, it’s another pumpkin (aka butternut squash) recipe. I told you I was on a roll with pumpkin recipe experiements. I’m here to provide you with easy recipes – and also to force you to eat vegetables. What better way than in a dessert? (And in a salad, of course.)

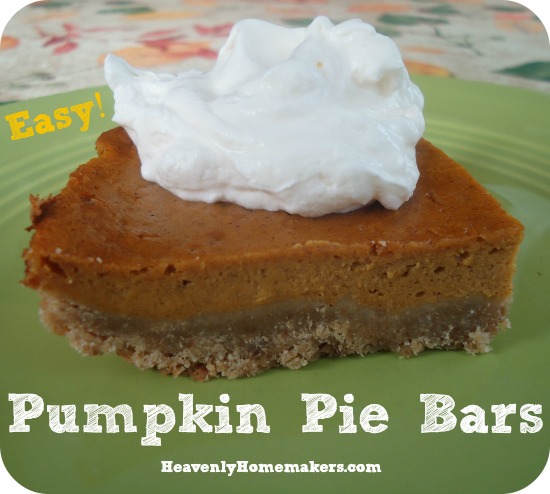
You’ll notice that I loved the Shortbread Crust idea so much in the Pumpkin Cheesecake recipe that I stole the idea for this crust too. This is basically Shortbread with Pumpkin Pie baked on top – all in a 9×13 inch pan. No rolling of a pie crust necessary. Easy, buttery, delicious – what more could we want?

Easy Pumpkin Pie Bars

Easy Pumpkin Pie BarsYum

Shortbread Crust

3 cups whole wheat flour (I use freshly ground hard white wheat for this)
1/2 cup sucanat (or brown sugar if you prefer)
1 1/2 cups melted butter

Stir flour and sucanat together in a bowl. Add melted butter, combining well. Press mixture into a 9×13 inch baking pan. Bake in a 350° oven for 7 minutes. (It will only be partially cooked at this point.)  In the meantime, prepare the filling:

Pumpkin Pie Filling

3 cups pumpkin or butternut squash puree
2/3 sucanat
1 teaspoon cinnamon
½ teaspoon ginger
½ teaspoon nutmeg
4 eggs
1 1/2 cup heavy cream

Whip ingredients together until smooth. Pour over crust. Bake in a 350° oven for 45-55 minutes or until a knife inserted into the bars comes out clean.

Have you had your fill of pumpkin this holiday season?

Heavenly Homemaker's Club Members: Access your homepage and all your fantastic resources here! Not a member yet? Please join us!

Beef Summer Sausage Recipe

November 25, 2014 by Laura 22 Comments

This post may contain affiliate links. For more information, please see our disclosure policy.

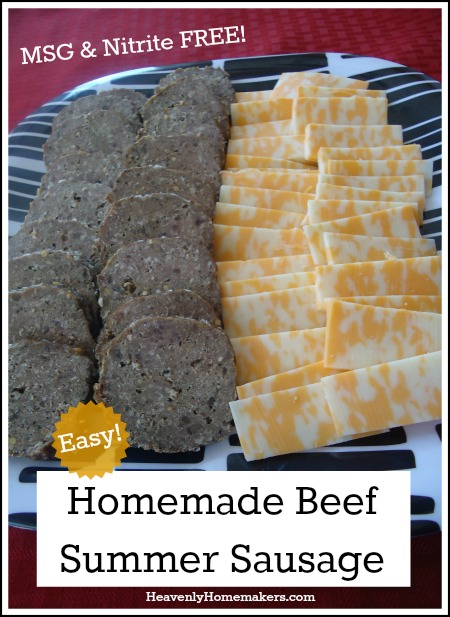
Summer Sausage has always been a favorite finger food of mine during the holiday season. I’ve tinkered with recipes before, but haven’t felt like I’ve nailed them – until now.

Folks, we can now eat Summer Sausage – worry free. High fives all around!  No MSG, no nitrites, no preservatives. Actually, salt is a natural preservative, so I guess I can’t say “no preservatives.” But the least of my worries is sea salt, especially when I use Redmond. That means that “summer sausage” and “good for you” can be used in the same sentence. Yay!!!

I think you’ll be as excited about this recipe as I am. It’s homemade beef summer sausage!! You will not believe how crazy easy this is to make.

Homemade Beef Summer Sausage - Easy and Healthy!

Homemade Beef Summer SausageYum

5.0 from 1 reviews
Beef Summer Sausage Recipe
 
Save Print
Author: Laura
Serves: 2 sausages
Ingredients
  • 2½ pounds hamburger meat
  • 2½ Tablespoons liquid smoke (I prefer Wright's Brand)
  • 1 Tablespoon sea salt (I prefer Redmond brand)
  • 1 teaspoon sucanat
  • 1 Tablespoon ground pepper
  • 1 Tablespoon minced garlic
  • 1 Tablespoon mustard seeds
Instructions
  1. Mix all ingredients together in a bowl, squishing with your hands until everything is well combined. Cover and refrigerate for 24 hours.
  2. Knead meat mixture, then shape into 2 logs, about 13x2 inches each. (I found that rolling them in parchment paper helped form a nice, round shape.)
  3. Place logs in baking dishes such as Pyrex 9x13 inch pans (so fat drippings will not spill over into the oven).
  4. Bake in a 300° oven for 2½ - 3 hours.
3.4.3177

To freeze Summer Sausage:  Allow baked summer sausage to cool completely. Wrap in parchment paper, then with plastic wrap. Place in a freezer bag, storing in freezer for up to 2 months.

As if it wasn’t already wonderful news that we can enjoy healthy summer sausage – it’s even better news that this will be perfect for your Make-Ahead Lunch Box. I’ll be packing this for road trips, for sure.

Share with us! What’s your favorite holiday finger food?

Heavenly Homemaker's Club Members: Access your homepage and all your fantastic resources here! Not a member yet? Please join us!

Simple Pumpkin Pancakes

November 21, 2014 by Laura 7 Comments

This post may contain affiliate links. For more information, please see our disclosure policy.

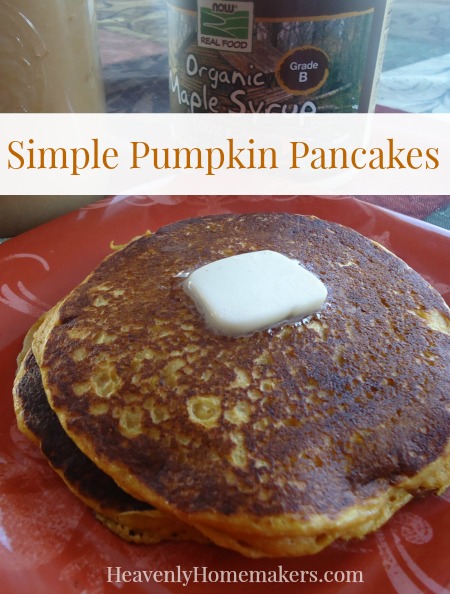
It might be apparent to you at this point that I am on a big pumpkin kick right now. First Pumpkin Breakfast Cake, then Pumpkin Cheesecake, now Simple Pumpkin Pancakes. It’s just one more way to add vegetables to our table, plus it’s delicious – so why not? That, and I have oodles of pumpkin puree at my house right now, so I’m making everything I can think of. My family rejoices.

It is important to note that I often use butternut squash in many of the pumpkin recipes I am making. Pumpkin and butternut squash are interchangeable in recipes. Many a pumpkin pie at my house is actually butternut squash pie, but don’t tell.

Want to know how to easily cook a pumpkin (or butternut squash)? Cooking them whole is the easiest way I’ve found to cook them to make puree. Once pureed, I use it right away or freeze it until I need it. Awesome, nutritious goodness!

These Pumpkin Pancakes stir together in just a few minutes and taste fantastic. Veggies for breakfast…woot!

Simple Pumpkin PancakesYum

1 1/2 cups whole wheat flour (I use freshly ground hard white wheat)
1 teaspoon baking powder
1/4 teaspoon sea salt
1 teaspoon ground cinnamon
2 eggs
1 cup pumpkin puree
1 1/4 cups milk
1/4 cup melted butter

Whisk ingredients together until smooth. Cook on a hot, buttered griddle, flipping once the pancake becomes bubbly on the first side. Serve with applesauce or real maple syrup. Makes about ten 3-inch pancakes.

Simple Pumpkin Pancakes

Other pumpkin (or butternut squash) recipes you’ll find here:

  • Pumpkin Chocolate Chip Bread
  • Pumpkin Chocolate Chip Muffins
  • Pumpkin Donuts
  • Warm Pumpkin Custard
  • Multi-Grain Pumpkin Waffles and Pancakes
  • Pumpkin Chocolate Chip Cake
  • Pumpkin Pecan Pie Squares
  • Pumpkin Pie
  • Pumpkin Breakfast Cake
  • Pumpkin Cheesecake

What’s your favorite way to use pumpkin (or butternut squash)?

Heavenly Homemaker's Club Members: Access your homepage and all your fantastic resources here! Not a member yet? Please join us!

Low Sugar No-Bake Pumpkin Cheesecake

November 18, 2014 by Laura 30 Comments

This post may contain affiliate links. For more information, please see our disclosure policy.

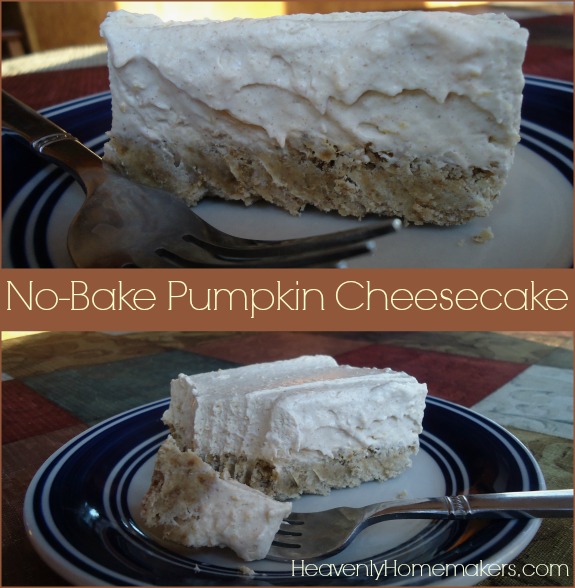
One day when I was nibbling on a little piece of lightly sweetened and buttery Shortbread, it occurred to me: This would make a fantastic cheesecake crust. Then one day when I was baking a pumpkin, it occurred to me:  I should use that pumpkin to make pumpkin cheesecake. These were both very, very good ideas, if I do say so myself.

Why a shortbread crust? I’m not sure why, but making a graham cracker crust for cheesecakes always seems like too much work to me. Probably because that was always my job when I was growing up, so now I have deep-seated graham cracker crust baggage from my past. That, and I never have graham crackers on hand and I don’t want to make a batch of homemade Graham Crackers only to crush them for a crust. Seriously, who knew a graham cracker crust could be such cause for discussion that it would take up an entire paragraph when I could just be sharing this great recipe with you?

So Shortbread Crust. I highly recommend it. Stir the three ingredients together, press them onto the bottom of a dish, and bake. You can’t go wrong, especially because this recipe includes lots of butter. That, of course, makes it amazing.

No-Bake Pumpkin CheesecakeYum

Shortbread Crust:

3 cups whole wheat flour (I use freshly ground hard white wheat for this)
1/2 cup sucanat (or brown sugar if you prefer)
1 1/2 cups melted butter

Stir flour and sucanat together in a bowl. Add melted butter, combining well. Press mixture into a 9×13 inch baking pan. Bake in a 350° oven for 12-15 minutes or until golden brown.

Pumpkin Cheesecake Filling:

2 8-ounce packages softened cream cheese
1 1/2 cups heavy whipping cream
2 cups pureed pumpkin
1 1/2 teaspoons ground cinnamon
1/2 teaspoon ground nutmeg
1/2 teaspoon ground cloves
Real maple syrup or liquid stevia to taste (I used 4 droppers full of stevia)

Blend all ingredients together until smooth. Pour over prepared shortbread crust. Spread until smooth. Chill in refrigerator for at least two hours before serving.

No-Bake Pumpkin Cheesecake

My system doesn’t handle much sugar any more (which seriously limits my cheesecake eating opportunities, woe is me). Making this simple cheesecake with stevia (a natural sweetener, not a sugar or an artificial sweetener) is a fantastic option. This treat is not super sweet, although you can make it as sweet as you like by simply adding more stevia, maple syrup, or even sugar if you like. Now that I know that stevia makes a cheesecake and shortbread makes a great crust, my cheesecake lovin’ self is happy and my graham cracker crust anxt is minimized.

What is your relationship with the graham cracker crust? You should join me in loving a shortbread crust. Easy, delicious, and full o’ buttah!

Heavenly Homemaker's Club Members: Access your homepage and all your fantastic resources here! Not a member yet? Please join us!
« Previous Page
Next Page »

Join Our Community!

 Facebook Twitter E-mail Instagram Pinterest

Popular Posts

~ Will All of the Real Moms Please Stand Up?
~ Easy! Stir-and-Pour Whole Wheat Bread
~ How to Make Gatorade
~ 31 Real Food Breakfast Ideas
~ Dear Teenage Girls...
~ When Mom Takes a Step Back
~ The Inexpensive Health Insurance We Love!
~ Let's Talk Real Food Grocery Budgets

Check out our latest posts!

  • Big Family Food and Fun: September 6-12, 2026
  • Big Family Food and Fun: August 30-September 5, 2026
  • Big Family Food and Fun: August 23-29, 2026
  • Big Family Food and Fun: August 16-22, 2026
  • Big Family Food and Fun: August 9-15, 2026
Home  ~  Simple Meals  ~  Club Membership  ~  Shop  ~  Privacy Policy  ~  Disclosure  ~ Contact

Copyright © 2026 · Beautiful Pro Theme on Genesis Framework · WordPress · Log in