Heavenly Homemakers

Encouraging women in homemaking, healthy eating and parenting

  • Home
    • About
    • FAQs
  • Recipes
    • Bread and Breakfast
    • Condiments
    • Dairy
    • Main Dishes
    • Side Dishes and Snacks
    • Desserts
    • Gluten Free
    • Instant Pot
    • Crock Pot
    • Heavenly Homemaker’s Weekly Menus
  • Homemaking
    • Real Food Sources
  • Store
  • Contact
    • Advertise
    • Disclosure
    • Privacy Policy
  • Simple Meals
  • Club Members!

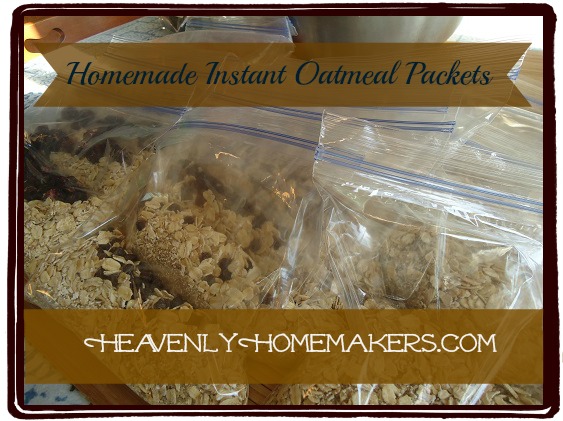
Homemade Instant Oatmeal Packets (without the microwave)

September 13, 2013 by Laura 48 Comments

This post may contain affiliate links. For more information, please see our disclosure policy.

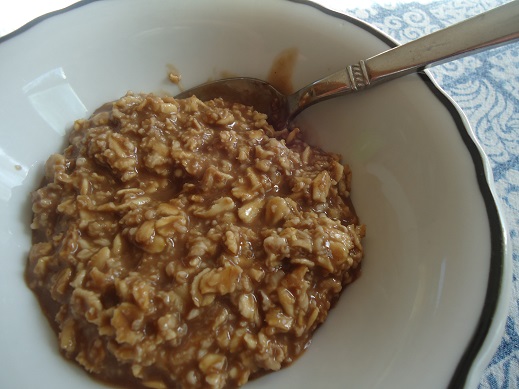
A breakfast of oatmeal is fast, easy, nourishing, and filling. Making a pot of it on the stovetop is not hard. So why make Homemade Instant Oatmeal Packets? Are they really that much of a time saver?
oatmeal_packet_10

For my family – yes. I’m working to get my boys more independent in the kitchen. Having a variety of homemade instant oatmeal packets around for them to grab and fix themselves is a great time saver for me. Plus, it’s nice to have a variety of choices for them so that they can make whichever kind sounds good to them. These are great afternoon snacks too!

Inspired by MoneySavingMom to make Homemade Instant Oatmeal packets, I did a little research to discover the easiest and healthiest way to do this. Here are the tricks I learned through my experimenting:

  • Sucanat works just fine in place of sugar
  • Combining a big batch of the instant oatmeal mixture in a big bowl, then scooping out individual sized portions makes this process very easy
  • Blending a portion of the oats in a blender first to create a powder will help the instant oatmeal packets cook faster
  • A microwave is not necessary to cook this – simply boil water, stir in packet, walk away, then come back and eat
  • The add-in options are endless

Instant_Oatmeal_Packets

It took about 20 minutes to mix this and prepare the packets. Not bad for 24 quick breakfasts or snacks!

Homemade Instant Oatmeal PacketsYum

Homemade Instant Oatmeal Packets (without the microwave)
 
Save Print
Author: Laura
Ingredients
  • 10 cups rolled oats (divided)
  • 2 cups sucanat
  • 2 teaspoons sea salt
Instructions
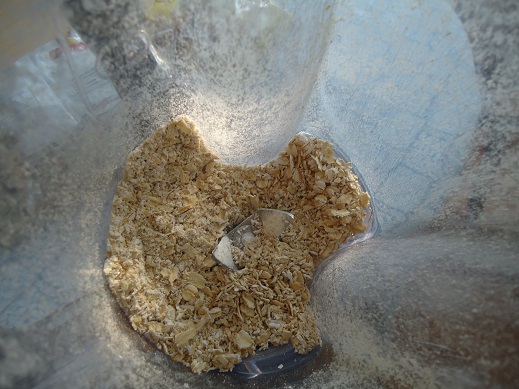
  1. Measure 7 cups of oats into a large mixing bowl. Blend the remaining 3 cups (1/2 cup at a time) until powdery and stir into the mixing bowl. Add sucanat and sea salt. Mix well.
  2. Measure ½ cup of mix into a small zip baggie, making about 24 Instant Oatmeal Packets.
  3. Be sure to scoop the mix from the bottom of the bowl as the sucanat tries to separate and settle there.
  4. Store in a dry, cool place.
  5. If you'd prefer not to scoop the mix into individual baggies, simply place the entire mix in a large, airtight container, scooping out ½ cup of mix for each serving.
  6. When ready to serve the oatmeal, empty contents of baggie into a cereal-sized bowl.
  7. Add ¾ cup boiling water.
  8. Stir.
  9. Allow the oatmeal and water to sit for about 5 minutes.
  10. Stir and eat.
3.4.3177

Skip the Packets!

Want to make this even easier? Since originally coming up with this idea, I switched to simply making the Instant Oatmeal and keeping it in big jars. My kids scoop out 1/2 cup of mix, add 3/4 hot water, and they are good to go!
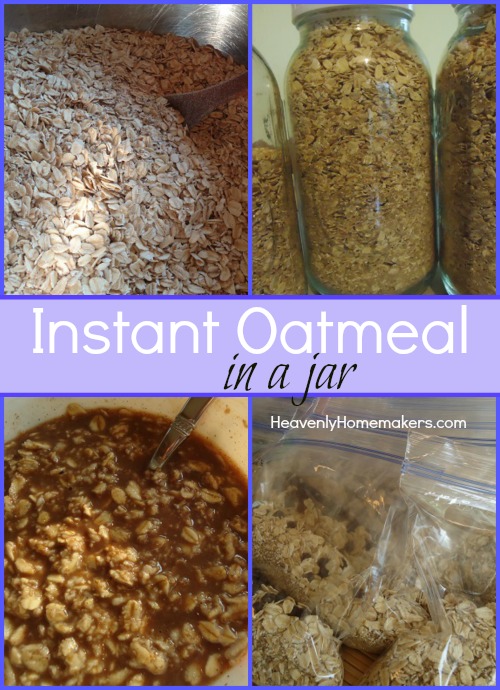
Instant Oatmeal in a Jar

Instant Oatmeal Varieties

By sprinkling in various fruits, spices, chocolate chips, or nuts – you can create many different types of instant oatmeal packets! I fill my bags with the basic mix, then sprinkle in various add-ins so as to have a variety of packages available for my family to pick from. Here are a few ideas:

Chocolate Swirl

Add a few mini chocolate chips

Blueberries and Cream

Add freeze dried blueberries, then cook oatmeal with milk instead of water

Strawberries and Cream

Add freeze dried strawberries, then cook oatmeal with milk instead of water

Cinnamon Raisin

Add 1/4 teaspoon cinnamon and a few raisins

Apples and Cinnamon

Add 1/4 teaspoon cinnamon and a few dehydrated apple chunks

Banana Nut

Add a few crushed walnuts and some freeze dried bananas

The blender does a great job chopping up the whole oats.
Remember, just do about 1/2 cup at a time to make the process work better.
oameal_packets (1)

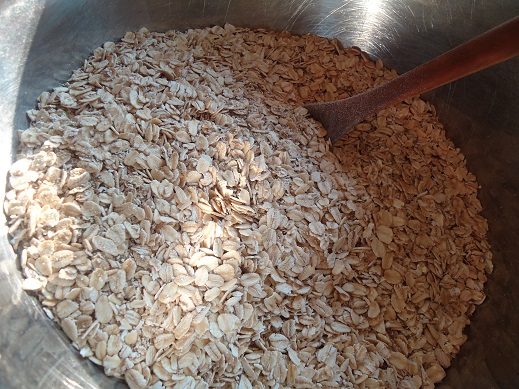
Mix the blended oats (3 cups) with the remaining oats (7 cups),
then stir in the sucanat and sea salt. See how easy this is?
oameal_packets (3)

Scoop 1/2 cup of mix into small zip baggies. Add any add-ins you wish. Seal and store.
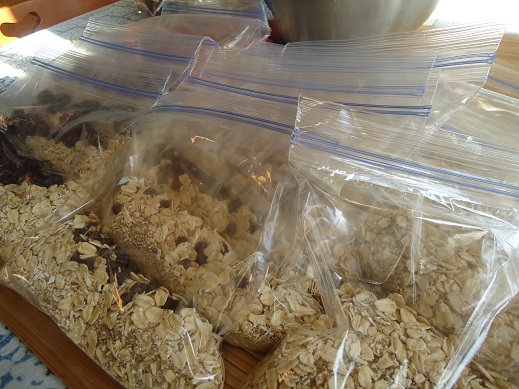
oameal_packets (9)

To Prepare:  Pour contents of baggie into a cereal bowl.
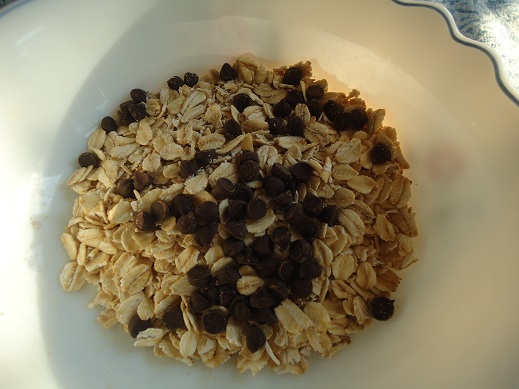
oameal_packets (4)

Add 3/4 cup boiling water. Stir. Let it sit for 5 minutes.
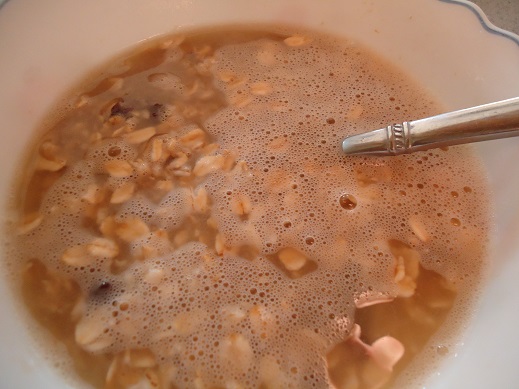
oameal_packets (5)

After 5 minutes, stir again, then eat!

oatmeal_packet_10

Having these homemade instant oatmeal packets has been so helpful. They are much cheaper than buying pre-made oatmeal packets – plus I can be sure we are only including the ingredients we feel good about eating.

Haven’t decided what to make for our Getting Ahead for Breakfast Challenge? This Instant Oatmeal Packets idea is a great choice. Learn more about this challenge here.

How About Giving the Gift of Instant Oatmeal?

Consider sharing this Instant Oatmeal with new moms, someone who has been sick, or anyone you know would appreciate this thoughtful and practical gift? Get all the directions here for making this happen, and even some cute free printable labels!
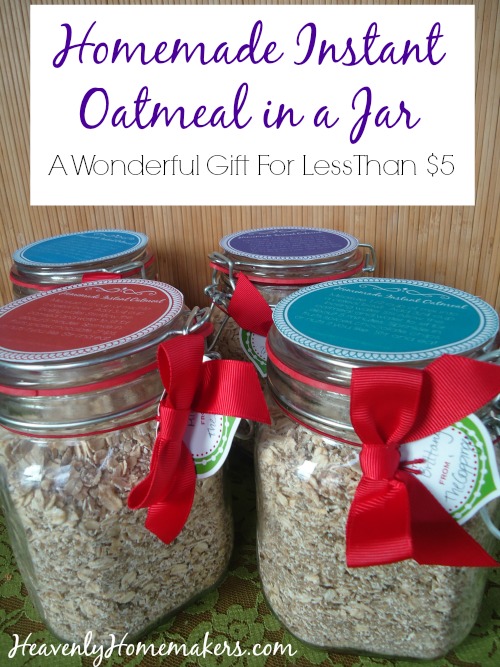
Homemade Instant Oatmeal in a Jar Gift Idea

Ever tried making homemade oatmeal packets? What are your favorite ingredients to stir into oatmeal?

Heavenly Homemaker's Club Members: Access your homepage and all your fantastic resources here! Not a member yet? Please join us!

Starting Our Mornings with Healthy, Quick Breakfasts

September 6, 2013 by Laura 7 Comments

This post may contain affiliate links. For more information, please see our disclosure policy.

Yum

Whether you send your kids off to school early each morning, homeschool your kids, don’t have kids, have kids too little for school, have adult children living with you, have kids who are grown and living on their own (did I catch everybody?) – we all need a good breakfast. Most of us need a breakfast that is fast and easy. We’d also like it to be nourishing. And filling. And tasty.

So how can we get mornings off to a great start?

Have a plan!  It doesn’t need to be elaborate, it doesn’t need to take much time. Simply think ahead toward what will be filling and nourishing for your family. Make a list of some favorites. Here are some of ours:

  • Applesauce Bread, served with eggs and fruit
  • Scrambled Egg Sandwiches, served with fruit smoothies
  • Baked Oatmeal Cups, served with berries
  • Easy Breakfast Casserole, made ahead of time, served with fresh fruit

Pull it out of the freezer! So many great (and inexpensive) breakfast foods can be made ahead of time and frozen for healthy convenience. Some of our favorite breakfast freezer foods are:

  • Breakfast Burritos, served with grapes or oranges
  • Whole Wheat Waffles, topped with berries
  • Pancake Sausage Muffins, served with applesauce
  • Giant Breakfast Cookies, served with fruit and yogurt

If you haven’t tried freezing muffin batter so that you can quickly bake muffins without any effort, you’ve got to try it. It’s my favorite time saving, freezer cooking method yet!

Make it the night before! I have found that while I’m making dinner for my family in the evening, I often have a few extra minutes while I wait for water to boil, meat to brown, or vegetables to steam. During those few minutes, I try to do some prep work toward our breakfast for the next morning. Read more about this idea here.

No time to make breakfast in the evening? How about after you get the dinner dishes cleaned up, you set out bowls, spoons, and Homemade Grape Nuts Cereal or Easy Homemade Granola?

What do you do to make healthy breakfasts simple at your house?

350x350_button_coming

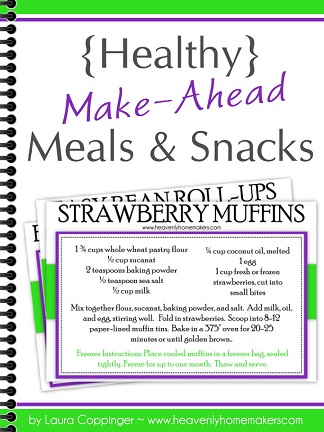
MakeAheadCover5_sm

I can’t wait to reveal our new Let’s Do This! Getting Ahead in Your Real Food Kitchen eCourse and the {Healthy} Make-Ahead Meals and Snacks eBook on Monday! With these resources, you’ll be equipped with loads of recipes that will help you get ahead, save money, and save time – all while feeding your family healthy food. From breakfast to dinner to snacks – you’ll have all kinds of new recipes, ideas, and guidance to help you get ahead in your real food kitchen!

Heavenly Homemaker's Club Members: Access your homepage and all your fantastic resources here! Not a member yet? Please join us!

Chocolate Chocolate Chip Muffins Become…Chocolate Chocolate Chip Bread

August 20, 2013 by Laura 13 Comments

This post may contain affiliate links. For more information, please see our disclosure policy.

It happened last week as I was mixing up a triple batch of Chocolate Chocolate Chip Muffin batter for the freezer. You’ve tried that by now right? Putting muffin batter into the freezer to help save time and so that you can have easy, fresh muffins? (Nope, I just can’t let it rest.)

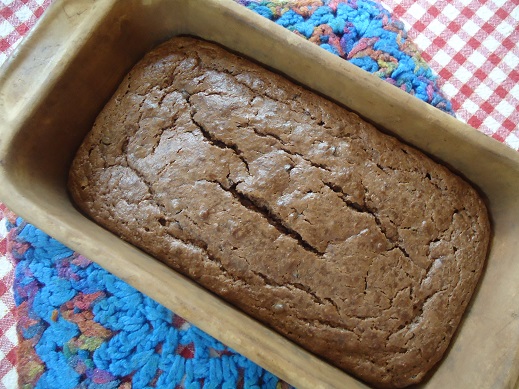
Making a triple batch of the muffins was a great idea, as we eat at least 18 muffins at one time. However, a triple batch requires 3 muffin pans that hold 12 muffins each. I only have 2 muffin pans. Therefore, I filled my two muffin pans and put them into the freezer. I then poured the remaining batter into a bread pan, baked it for 50 minutes at 350°, and we ate it for breakfast the following morning. Update: I’ve since purchased these little gems, but still, this bread idea is a great one.

chocolate_bread_1

Yum

Find the Chocolate Chocolate Chip Muffin recipe here.

It was a tasty experiment. I figured – banana bread makes good muffins. Apple bread makes good muffins. Surely chocolate chocolate chip muffins would make good bread. And so it did.

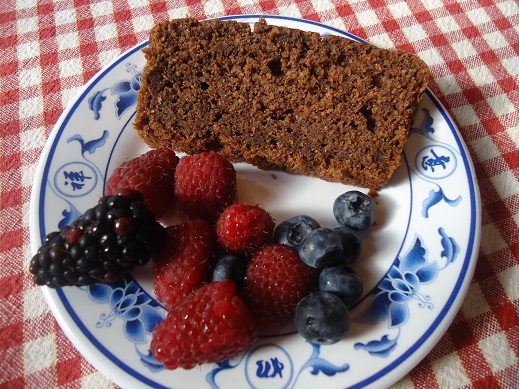
I used sour cream instead of milk, which if you recall, is a great substitution to make muffins and breads more moist. So very good. And even better when eaten with fresh berries.

Chocolate Chocolate Chip Bread
 
Save Print
Prep time
10 mins
Cook time
45 mins
Total time
55 mins
 
Author: Laura
Serves: 1 loaf
Ingredients
  • 1½ cups whole wheat flour
  • ⅓ cup sucanat
  • ¼ cup cocoa powder
  • ½ teaspoon sea salt
  • ½ teaspoon baking powder
  • ¼ cup melted coconut oil or butter
  • ⅔ cup milk or sour cream
  • 1 egg
  • ¼ cup chocolate chips
Instructions
  1. Stir together dry ingredients.
  2. Mix in coconut oil, milk and egg.
  3. Fold in chocolate chips.
  4. Pour into well-buttered loaf pan.
  5. Bake at 350° for 45 minutes.
3.4.3177


chocolate_bread_2

Which do you prefer – muffins or quick bread loaves? Do you find that most recipes work for either/or?

Heavenly Homemaker's Club Members: Access your homepage and all your fantastic resources here! Not a member yet? Please join us!

Flourless Fudge Cookies

August 15, 2013 by Laura 30 Comments

This post may contain affiliate links. For more information, please see our disclosure policy.

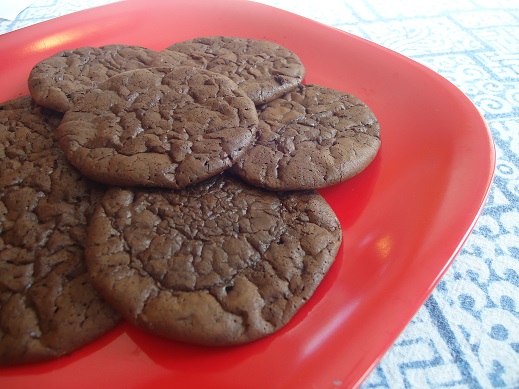
flourless_fudge_cookies_3

You can’t go wrong with a recipe that has the word “fudge” in its name. These cookies are very easy to make and live up to their name. Mmm, fudgy cookies. Yes please.

Flourless Fudge CookiesYum

2 1/4 cups sucanat powdered sugar
1/4 teaspoon sea salt
1 cup cocoa powder
2 eggs
1 teaspoon vanilla extract

Put 2 1/4 cups of sucanat into a blender. Process until sugar has become powdered. (Here is a post with picture tutorial showing you how easy this is!)  In a bowl, mix sucanat powdered sugar with the remaining ingredients. Scoop teaspoon sized balls of batter onto a parchment paper lined cookie sheet (very important). Bake in a 350° oven for 8-10 minutes.  Allow the cookies to cool completely while on the cookie sheet.

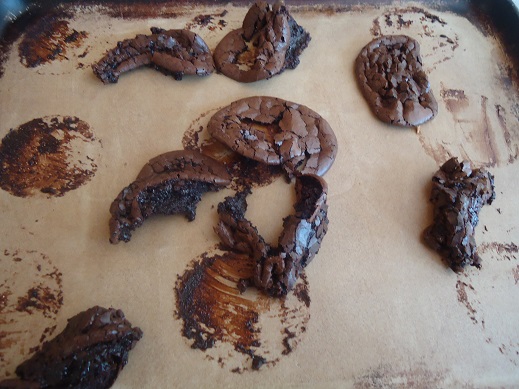
If you bake them on a baking stone or try to remove them before they are completely cooled, you’ll end up with this:

flourless_fudge_cookies_2

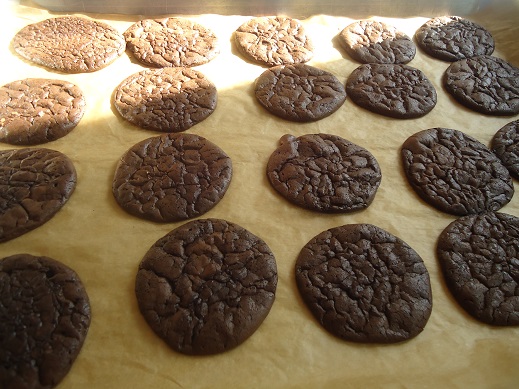
See below, how the cookies sit patiently and cool on their parchment paper so that they will come off the pan nicely?

flourless_fudge_cookies_1
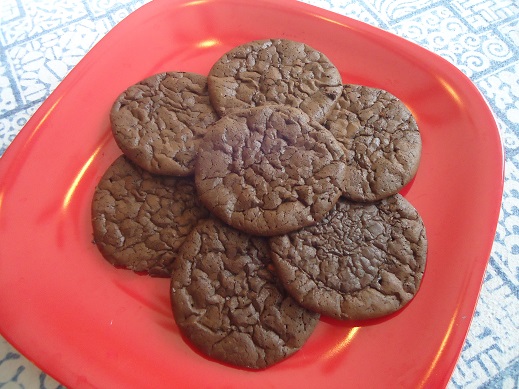
Ah yes, that is the way to do it. These cookies are worth the wait!

flourless_fudge_cookies_4
Have you ever made your own powdered sugar with sucanat?  It’s very easy – and these cookies are a great way to experiment with that idea!

Heavenly Homemaker's Club Members: Access your homepage and all your fantastic resources here! Not a member yet? Please join us!

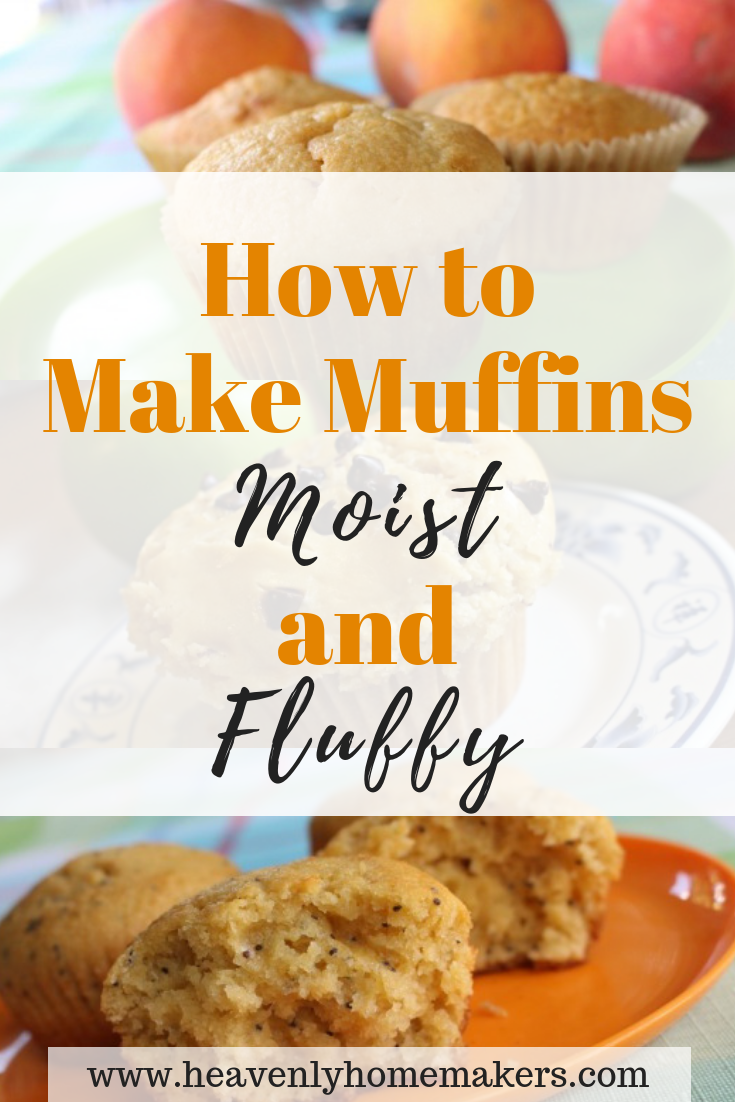
How To Make Muffins Moist and Fluffy

August 7, 2013 by Laura 43 Comments

This post may contain affiliate links. For more information, please see our disclosure policy.

Now that we know we can freeze muffin batter to make muffin baking even easier, let’s talk about how we can make them even more tasty! Today I am going to teach you how to make muffins moist and fluffy!

How to Make Muffins Moist and Fluffy


I love baking with whole wheat flour, but sometimes find that my muffins are a little heavier than those made with white flour. They also seem to get dry quickly (which isn’t usually a problem at my house because we eat them all right out of the pan, but still).

How to Make Muffins Moist and Fluffy

Recently I discovered that if I use sour cream in place of milk in a muffin recipe, I get a super moist, fluffy muffin! The switch is very easy. If a recipe calls for 3/4 cup of milk, I simply use 3/4 cup of sour cream instead. Occasionally, I need to add a bit more sour cream to moisten the muffin batter.

The first time I tried this idea (on Chocolate Chocolate Chip Muffins), I didn’t tell anyone in the family that I’d made a change. (And for the record, these were made from frozen batter that I’d set in the fridge the night before, yay!)  I served the muffins on a Sunday morning, which means that each of us were in and out of the kitchen at different times, grabbing breakfast as we had time. One by one, the boys found me getting ready for church and would ask, “Did you do something different with the muffins? They were better than ever!”

Aha! So they noticed. And they liked the change. Score!

I will be adding sour cream to muffins more often. And of course, I will forever and always be making the batter and freezing it ahead of time. Now I have moist, fluffy, tasty, healthy, and convenient muffins.

Confession time:  Who read the post about making muffin batter for the freezer and promptly went and mixed some up? Ever tried subbing sour cream for the milk in a muffin recipe?

Need More Muffins Recipes?

  • Easy Chocolate Cheesecake Muffins
  • Easy Banana Cheesecake Muffins
  • Easy Pumpkin Cheesecake Muffins
  • Easy Chocolate Chip Cheesecake Muffins
  • Chocolate Chocolate Chip Muffins
  • Peanut Butter Chocolate Chip Muffins
  • Pumpkin Chocolate Chip Muffins
  • Flourless Brownie Muffins (my very favorite!)
  • Super Moist Flourless Peanut Butter Brownies
  • Super Moist Flourless Brownies
  • Easy Chocolate Cheesecake Muffins
  • Easy Banana Cheesecake Muffins
  • Easy Pumpkin Cheesecake Muffins
  • Easy Chocolate Chip Cheesecake Muffins
  • Easy Peanut Butter Chocolate Chip Cheesecake Muffins

What is your favorite muffin recipe?Yum

Heavenly Homemaker's Club Members: Access your homepage and all your fantastic resources here! Not a member yet? Please join us!

Crustless Cheesecake Cups

July 30, 2013 by Laura 13 Comments

This post may contain affiliate links. For more information, please see our disclosure policy.

High Five Recipes 2

Cheesecake is one of my favorite desserts. In fact, I believe I will have my boys make these for my birthday on Saturday. Since I’m turning 40, perhaps I could have them double this recipe so we can have 40 little cheesecake cups. (Why, so I can gain 40 pounds as I celebrate?)  Yeah, we’ll just stick with a single batch.

cheesecake_cups_3

Crustless Cheesecake CupsYum

2 – 8 ounce packages cream cheese, softened
1 1/2 cups heavy whipping cream
1 teaspoon vanilla extract
3/4 cup real maple syrup or 1 1/2 cups unbleached powdered sugar

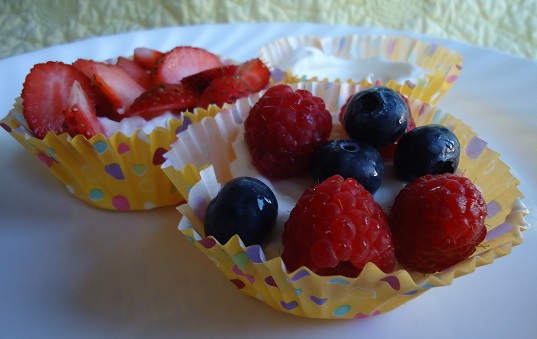
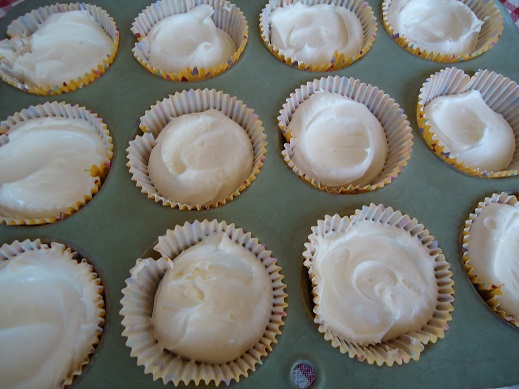
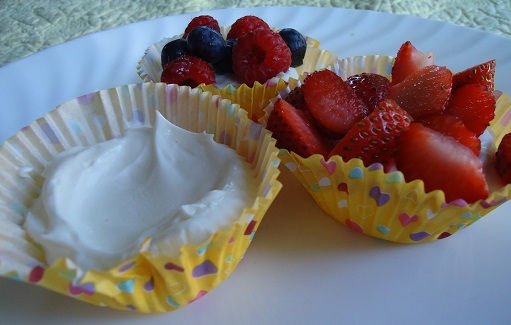
In a medium sized bowl, whip the cream until soft peaks form. In a separate bowl, beat together cream cheese, maple syrup, and vanilla. Fold whipped cream into cream cheese mixture. Scoop cheesecake mix into about 20 paper-lined muffin cups. Refrigerate or freeze until ready to serve. Top with fresh fruit.

cheesecake_cups_1

These Crustless Cheesecake Cups are so easy to make and since they freeze well, they can be made ahead of time. You can even serve them frozen. Delish!

cheesecake_cups_2

Heavenly Homemaker's Club Members: Access your homepage and all your fantastic resources here! Not a member yet? Please join us!

Blueberry Pancake and Waffle Syrup

July 25, 2013 by Laura 19 Comments

This post may contain affiliate links. For more information, please see our disclosure policy.

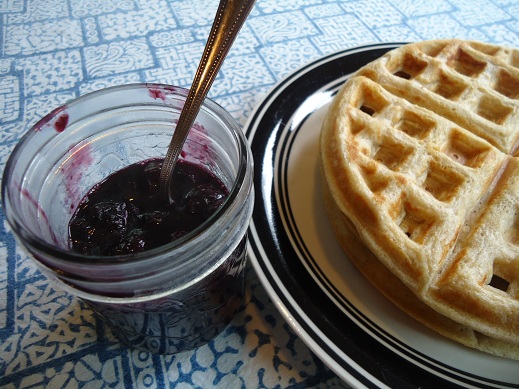
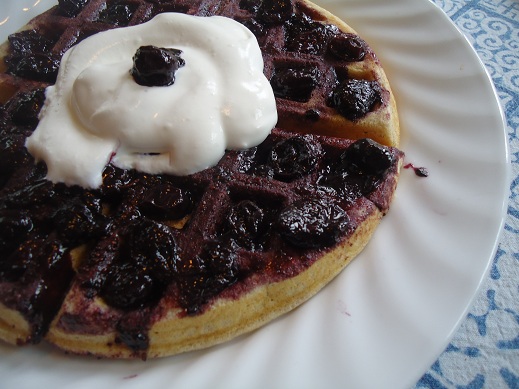
This little gem of a recipe has been tucked away on my Whole Wheat Waffle page for years. But I decided it needed to be brought out of hiding. Everyone must know about this. And you should also whip some cream and plop it onto your waffles with this Blueberry Syrup because then, you will experience bliss.

blueberry_waffle_2

Wondering how to make Whipped Cream? You’ll want to click over here to learn the easiest way I’ve found to make it. You can even make it ahead of time to pull out just before serving! Now anytime I serve waffles with fruit topping and whipped cream, my boys call them “Super Mama Waffles!”

Blueberry SyrupYum

Blueberry Pancake and Waffle Syrup
 
Save Print
Author: Laura
Ingredients
  • 2 cups fresh or frozen blueberries
  • ¼ sucanat (dehydrated cane sugar juice)
Instructions
  1. Stir blueberries and sucanat together in a saucepan over medium heat for about 10 minutes until syrupy.
  2. Serve as is, or blend to make the syrup smooth.
3.4.3177

blueberry_waffle

Trying to get ahead? Make this syrup ahead of time, refrigerate or freeze, then rewarm when ready to serve.

Other fruity recipes you’ll love:

  • Apple Butter
  • Peach Syrup
  • Easy Raspberry Pancake and Waffle Syrup

Of course I can’t provide you with syrups and toppings without also providing you with pancake and waffle recipes:

  • Whole Wheat Waffles
  • Quick Mix Pancakes
  • Peanut Butter Pancakes
  • Pumpkin Pancakes

And we can’t talk about toppings without also mentioning that Peach Syrup, Raspberry Syrup, and Blueberry Syrup are wonderful on ice cream. Check out this post detailing how to set up a Brownie Sundae Bar. Wouldn’t it be nice to offer any of these fruit syrups as an option?

As you can see, once you know how to make a Fruit Syrup, your options for serving it are many. Such a tasty way to enjoy fruit!

Blueberry Pancake and Waffle Syrup

What’s your favorite way to top a waffle?

Heavenly Homemaker's Club Members: Access your homepage and all your fantastic resources here! Not a member yet? Please join us!

Caramel Oatmeal Bars {High Five Recipe}

July 24, 2013 by Laura 37 Comments

This post may contain affiliate links. For more information, please see our disclosure policy.

celebrating_40

I wanted to include a recipe or two in my Celebrating 40 festivities. But how was I supposed to do that when everything about the celebration has to do with the number 40? I don’t have any recipes with 40 ingredients (you’re welcome).

I decided that the exact opposite of a recipe with 40 ingredients is a recipe with only 5 ingredients. Sort of. So I am including this High Five Recipe in my celebration. It’s one of the easiest and quickest you’ll ever make.

Caramel Oatmeal BarsYum

1 cup butter, melted
1 1/3 cups sucanat
1/2 teaspoon sea salt
1 teaspoon baking powder
3 1/2 cups rolled oats

Stir all five ingredients together. Press mixture into a 9×13 inch baking dish. Bake at 350° for 10 minutes until ingredients have melted together and become lightly brown. Cut into bars while hot.

caramel_oatmeal_bars

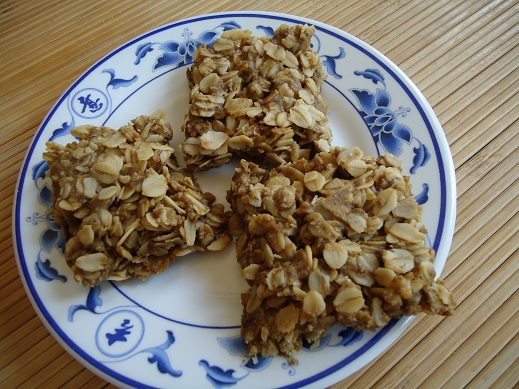
Beyond eating these bars as is, we have also discovered that crumbling one onto a bowl of vanilla ice cream is incredibly delicious.

Need more High Five Recipes? (high quality recipes, five ingredients or less)  Find lots and lots of them here!

Heavenly Homemaker's Club Members: Access your homepage and all your fantastic resources here! Not a member yet? Please join us!

Homemade Chocolate Caramel Cups

July 11, 2013 by Laura 8 Comments

This post may contain affiliate links. For more information, please see our disclosure policy.

Chocolate Caramel Cups

Can I interest you in a Chocolate Caramel Cup recipe to go along with the Chocolate Peanut Butter Cup recipe I shared earlier this week?

Upon typing that sentence, I am suddenly reminded of Mrs. Hendricks, my really, really old 2nd grade teacher. Seriously, she had to have been at least 33. She taught us how to carry the 1 when adding double digits and she would never let any of us say the word can.

We would frequently forget this rule, saying in our best whiny 7 year old voices, “Mrs. Hendricks? Can I get a drink of water?” And she would say, “I don’t know. Can you?” We would then roll our eyes without her seeing us because we were really sneaky and cunning and besides at her age, surely her failing eyesight wouldn’t allow her to see our facial expressions clearly. Obligingly we would come back with, “I mean, may I get a drink of water?” I believe those of us who shall remain nameless who were really sweet and running for teacher’s pet of the year award also added a please in there too.

To this day, I am not able to say can I without switching to may I and I think I might also roll my eyes a little bit while I’m saying it. Old habits die hard.

So, can I interest you in this wonderful recipe to go along with the Chocolate Peanut Butter Cup recipe? And together, with all of the second graders and Mrs. Hendricks we say, “I don’t know.  Can you?”

Chocolate Caramel Cups Yum

1 cup chocolate chips
2 Tablespoons butter
1/4 cup homemade caramel sauce

First, whisk together a batch of Homemade Caramel Sauce. You won’t need it all for this recipe, but get yourself some vanilla ice cream and you’ll be serving the best caramel sundaes with the leftovers.

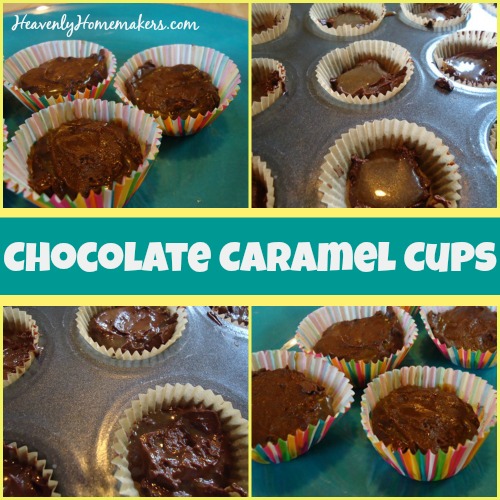
Prepare 6 regular sized or 16 mini-sized muffin cups with paper liners. In a small saucepan, heat chocolate chips and butter, stirring until melted. Spoon half of the melted chocolate mixture into the prepared paper-lined muffin cups.

caramel_cups_1

Place a spoonful of caramel sauce (hot or cold) into each cup, dividing the mixture evenly among the cups. Top each with the remaining chocolate, smoothing it the best you can to cover the caramel.

caramel_cups_2
Refrigerate for two hours until solid. (Or place in the freezer for about thirty minutes to speed the process.)  Store in the refrigerator until ready to serve.

caramel_cups_4

Can I challenge you to refrain from eating these all in one sitting? {I don’t know. Can you?}

Heavenly Homemaker's Club Members: Access your homepage and all your fantastic resources here! Not a member yet? Please join us!

Homemade Chocolate Peanut Butter Cups {Real Food Recipe Makeover}

July 9, 2013 by Laura 21 Comments

This post may contain affiliate links. For more information, please see our disclosure policy.

This recipe was inspired by Laura S., someone I met at the Colorado Springs Meet and Greet. Not only was her idea brilliant, I think her name is absolutely beautiful. ;)

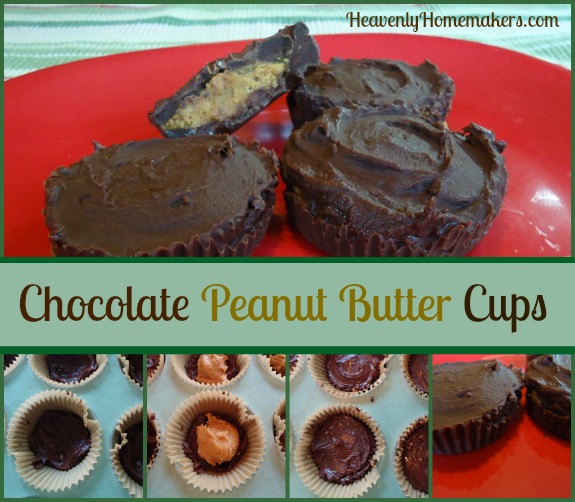
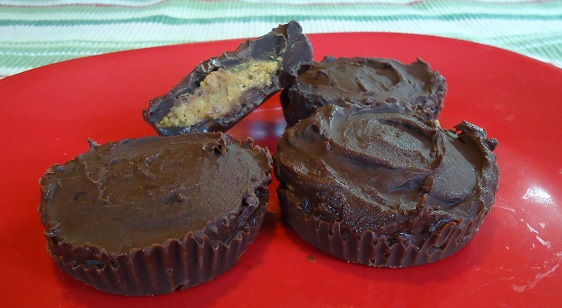
I wasn’t able to make these Chocolate Peanut Butter Cups look perfect and beautiful like one you’d pull out of a Reese’s wrapper. But I did make them taste better, so we’ll go with “taste before beauty” on this one. And of course, with these, you avoid the hydrogenated oils and turn out an even more delicious treat than one that comes from a factory.

Chocolate Peanut Butter Cups
Warning:  These are super rich and slightly messy. Children and adults alike may end up with chocolaty fingers and faces, not to mention a sugar high. You’re welcome and I’m sorry.

Chocolate Peanut Butter CupsYum

1/4 cup natural peanut butter
2 teaspoons honey
1 cup chocolate chips
2 Tablespoons Butter

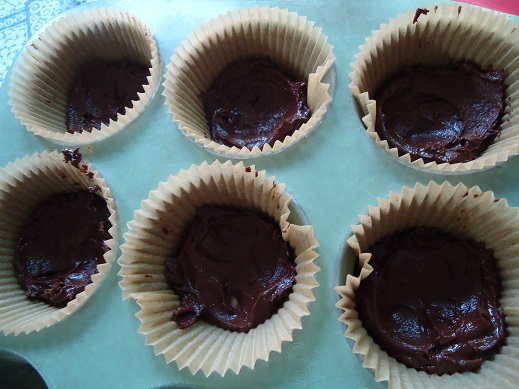
Stir together peanut butter and honey in a small bowl. Set aside. Prepare six regular sized or 15 mini-sized muffin cups with paper liners.

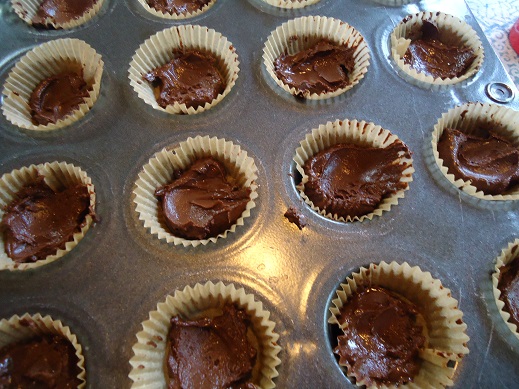
In a small saucepan, melt chocolate chips and butter, stirring until melted. Spoon half of the melted chocolate mixture into the prepared paper-lined muffin cups.

pb_cups_4

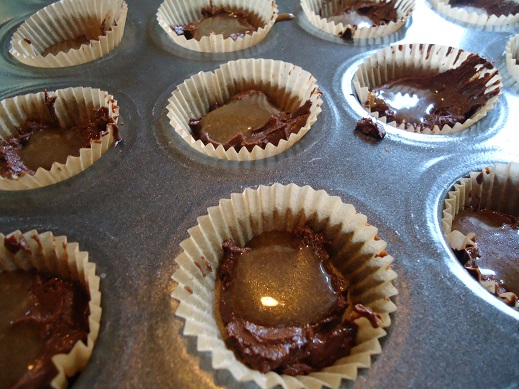
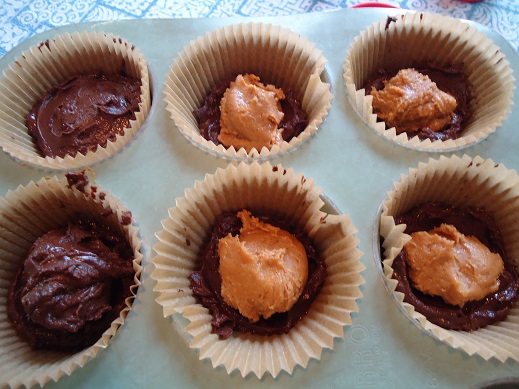
Place a spoonful of peanut butter mixture into each cup, dividing the mixture evenly among the cups. Top each with the remaining chocolate, smoothing it the best you can to cover the peanut butter.

pb_cups_5

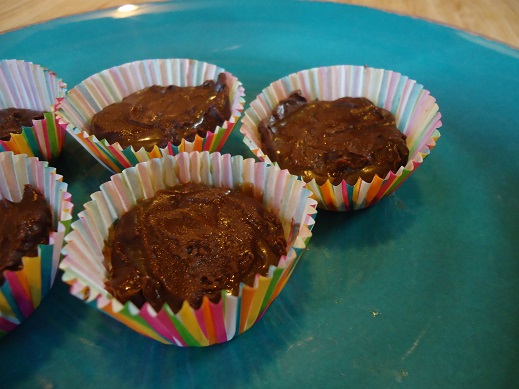
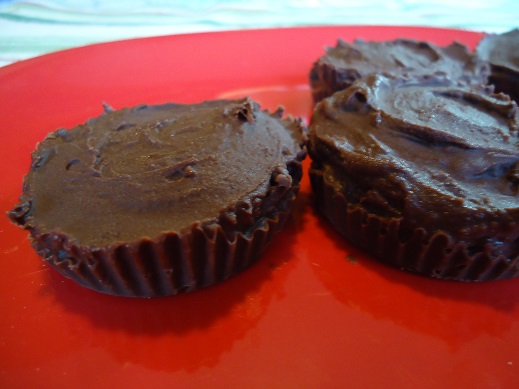
Refrigerate for two hours until solid. (Or place in the freezer for about thirty minutes to speed the process.)  Store in the refrigerator until ready to serve.

pb_cups_2
pb_cups_3
You’ll be happy to know that while playing with this idea, I also came up with a Chocolate Caramel Cup. Recipe coming soon…

Heavenly Homemaker's Club Members: Access your homepage and all your fantastic resources here! Not a member yet? Please join us!
« Previous Page
Next Page »

Join Our Community!

 Facebook Twitter E-mail Instagram Pinterest

Popular Posts

~ Will All of the Real Moms Please Stand Up?
~ Easy! Stir-and-Pour Whole Wheat Bread
~ How to Make Gatorade
~ 31 Real Food Breakfast Ideas
~ Dear Teenage Girls...
~ When Mom Takes a Step Back
~ The Inexpensive Health Insurance We Love!
~ Let's Talk Real Food Grocery Budgets

Check out our latest posts!

  • Big Family Food and Fun: September 6-12, 2026
  • Big Family Food and Fun: August 30-September 5, 2026
  • Big Family Food and Fun: August 23-29, 2026
  • Big Family Food and Fun: August 16-22, 2026
  • Big Family Food and Fun: August 9-15, 2026
Home  ~  Simple Meals  ~  Club Membership  ~  Shop  ~  Privacy Policy  ~  Disclosure  ~ Contact

Copyright © 2026 · Beautiful Pro Theme on Genesis Framework · WordPress · Log in