Heavenly Homemakers

Encouraging women in homemaking, healthy eating and parenting

  • Home
    • About
    • FAQs
  • Recipes
    • Bread and Breakfast
    • Condiments
    • Dairy
    • Main Dishes
    • Side Dishes and Snacks
    • Desserts
    • Gluten Free
    • Instant Pot
    • Crock Pot
    • Heavenly Homemaker’s Weekly Menus
  • Homemaking
    • Real Food Sources
  • Store
  • Contact
    • Advertise
    • Disclosure
    • Privacy Policy
  • Simple Meals
  • Club Members!

Easiest, Tastiest, Healthy Pizza Crust (Freezable!)

October 16, 2012 by Laura 77 Comments

This post may contain affiliate links. For more information, please see our disclosure policy.

I have officially worked myself out of a job. Elias, our 10 year old, has now been declared our Chief Pizza Maker.

Why? Because I’ve figured out how to make quick and easy pizza crust – and I’ve figured out that this pizza crust freezes really, really well. Therefore, I make a double batch of pizza dough, shape it, and bake it into personal sized crusts – and then I freeze them. On “pizza day”, Elias gets out the crusts and toppings, and puts together “made to order” pizzas for everyone. He then bakes them in our toaster oven, all while I am sitting with my feet up in an easy chair, sipping lemonade, and flipping through a magazine.

Just kidding. I’m typically working right beside him on another kitchen chore. But it sure is nice to have a my big guys around who help so much. And it’s so very nice to have such an easy recipe to work with so that making pizzas is crazy easy.

Whole Wheat Pizza Dough (originally posted when I shared my Whole Wheat Calzone recipe)

Easiest, Tastiest, Healthy Pizza Crust (Freezable!)
 
Save Print
Author: Laura
Ingredients
  • 5 cups whole wheat flour (I use freshly ground flour from hard white wheat)
  • 1 teaspoon sea salt
  • 4½ teaspoons active dry yeast (or 2 pouches)
  • 2 cups warm water (The water should feel warm, but not hot.)
Instructions
  1. Mix all ingredients together, knead for 3-4 minutes, then allow the dough to “rest” for about 10 minutes (give or take).
  2. This dough makes 2 large pizzas, or 18 mini pizzas.
  3. Shape dough into desired pizza sizes and place on baking sheets.
  4. Bake in a 375° oven for 5-7 minutes.
  5. Remove crusts from oven, allow them to cool, then freeze in freezer bags.
  6. Or, top hot pizza crusts with desired pizza toppings.
  7. When you're ready, bake the pizzas at 375° for 10 minutes or until cheese is bubbly and beginning to brown.
3.4.3177

FYI – I find that 2 cups (16 ounces) of pizza sauce is typically needed to go with this pizza crust recipe.

Whole Wheat Pizza Crust

Yum

I found little mini turkey pepperonis at the store. Our boys love them.  :)

I love how easy this dough is to work with. I simply pinch off a little dough, and quickly roll out crusts and bake them.

Once they have baked and cooled, I put them into freezer bags. I don’t even get them out in time to thaw before we top them and bake them. So convenient!
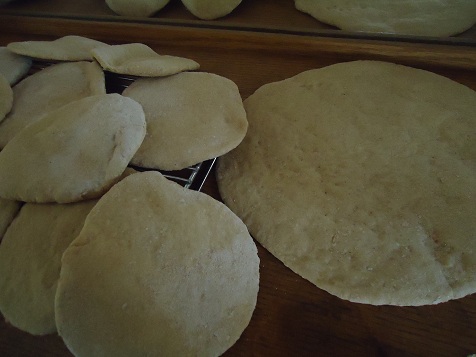
If you’d like to borrow my ten year old sometime, I’m sure he’d be happy to come build you some pizzas. Then, you too can put your feet up in an easy chair, sip lemonade, and flip through a magazine. :)

Ever tried freezing pizza crusts?  If not, I highly recommend it. It makes homemade pizza so very easy!

Heavenly Homemaker's Club Members: Access your homepage and all your fantastic resources here! Not a member yet? Please join us!

Easy Homemade Chicken Salad

October 2, 2012 by Laura 28 Comments

This post may contain affiliate links. For more information, please see our disclosure policy.

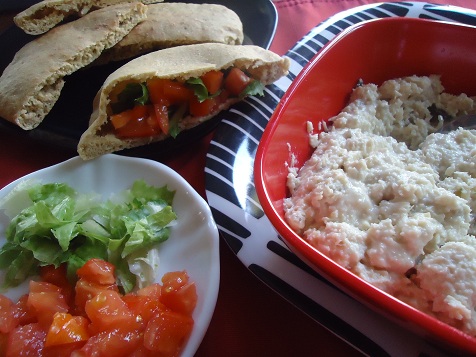
I couldn’t very well make homemade pita bread last week without making Chicken Salad, now could I?

Matt happened to be out of town for two days last week on a soccer trip. The poor guy. All I talked about when he came home was how good the new pita bread recipe ended up and how I’d made chicken salad to go in it and served it all with fresh tomatoes from our garden. And how all four boys scarfed it up and came back for more.

And then I had to tell him that all of it was gone – that we’d saved none at all for him.

Yeah. Welcome home, Dad. ;)

Not to worry. I’ll make him more soon. Have you tried the Whole Wheat Pita Bread recipe yet?

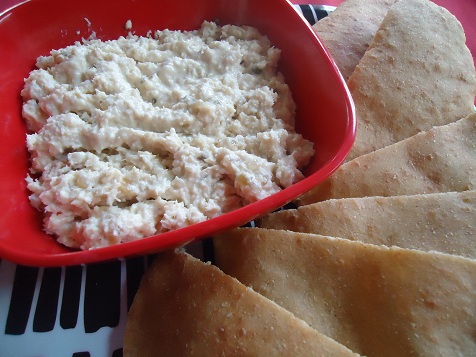
Easy Homemade Chicken Salad

Easy Chicken SaladYum

Easy Homemade Chicken Salad
 
Save Print
Author: Laura
Ingredients
  • 2 cups cooked, shredded chicken
  • ½ cup mayonnaise (I use Hain Safflower)
  • 2 Tablespoons pickle relish (I use either homemade pickle relish or an organic variety from Amazon or Vitacost)
  • ¼ teaspoon onion salt
  • 2 hard boiled eggs, chopped (optional)
Instructions
  1. Mix all ingredients together and serve on crackers, on bread, or in pita pockets.
3.4.3177

Shucks, get out a fork and eat it plain if you want. It’s good stuff. :)

Recipes and links you might need for your Chicken Salad:

  • Hain Safflower Mayo
  • Homemade Pickle Relish Recipe
  • Pre-made pickle relish from Amazon or Vitacost

I’m not a fan of hard boiled eggs in my meat salads. You? And you know, if you all leave a comment answering that question, this will make for one of the most exciting blog conversations – ever.  :)

You can also use this recipe to make Turkey Salad with turkey leftovers after a holiday meal. This is one of my favorite ways to use up chicken or turkey leftovers! Chicken or turkey salad makes a wonderful convenience food!

Heavenly Homemaker's Club Members: Access your homepage and all your fantastic resources here! Not a member yet? Please join us!

Homemade Whole Wheat Pita Bread

September 27, 2012 by Laura 196 Comments

This post may contain affiliate links. For more information, please see our disclosure policy.

Before you try to make this Whole Wheat Pita Bread recipe, here is what you need to know:  Pita Bread is EASY to make!

That’s it. That’s all you need to know.

Know why I’m telling you that? Because as I was researching different recipes and trying to figure out the best way to make pita bread – every recipe seemed sooo difficult. I felt like ducking out on my Funky Fresh Challenge committment this week because, really? Did I have time and energy to make such a complicated recipe? And did I really want to share a complicated recipe with you? Why no, I did not.

So, because I just couldn’t help myself – I took short cuts and figured out how to make this recipe easy. And guess what? It worked. There is no reason to make cooking so complicated. Goodness. As if trying to keep my desk cleaned off isn’t difficult enough.

I should also note that these pita pockets tasted so good that we couldn’t get over it. I will definitely be making these again and again. Especially since they are so easy! And I know that they will freeze well, and will be a wonderful item to have in the freezer to pull out for quick meals!

Whole Wheat Pita BreadYum

Homemade Whole Wheat Pita Bread
 
Save Print
Author: Laura
Serves: 8
Ingredients
  • 3 cups whole wheat flour (I use freshly ground whole wheat from hard white wheat)
  • 1½ teaspoons yeast
  • 1 teaspoon sea salt
  • 2 Tablespoons honey
  • 1 Tablespoon olive oil
  • 1 cup warm water
Instructions
  1. Stir together flour, yeast, and sea salt.
  2. Add honey, oil, and water, stirring until a nice dough forms.
  3. Knead the dough on a well floured surface for 4-5 minutes. (In other words: Mix dry ingredients. Add liquid ingredients. Stir well. Knead.) See? Easy.
  4. Place dough back into the bowl, cover, and allow dough to rest and rise for about an hour.
  5. Pull dough out of the bowl.
  6. Knead for about 30 seconds.
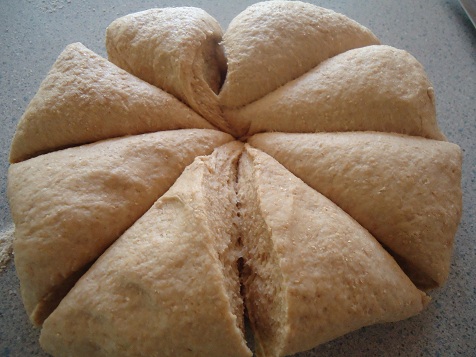
  7. Cut dough into eight equal parts.
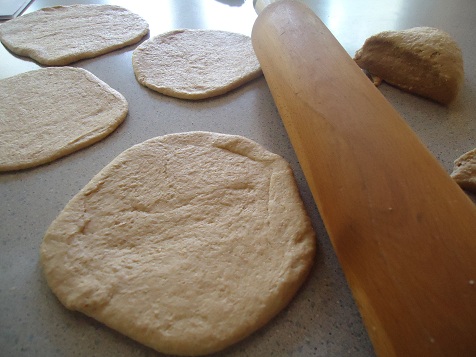
  8. Roll each into a circle, about six or seven inches in diameter.
  9. Place circles directly onto a baking sheet after rolling.
  10. I baked mine on a well seasoned baking stone, so didn't find that I needed to grease my pan, but feel free to grease yours if you need to.
  11. Allow the dough circles to rest/rise on the baking sheet while you heat your oven to 500°.
  12. Place baking sheet of pita circles into hot oven.
  13. Bake for 5-8 minutes - just long enough for them to puff up and brown slightly.
  14. Allow pitas to cool, slice in half, and serve as desired.
3.4.3177

I made Chicken Salad for ours. So delicious!

Don’t ever let anyone tell you making pita bread is hard. And how much do these cost in the store, anyway? I’m pretty sure making these is huge money saver (not to mention they are surely much healthier).

Whole Wheat Pita Bread

Heavenly Homemaker's Club Members: Access your homepage and all your fantastic resources here! Not a member yet? Please join us!

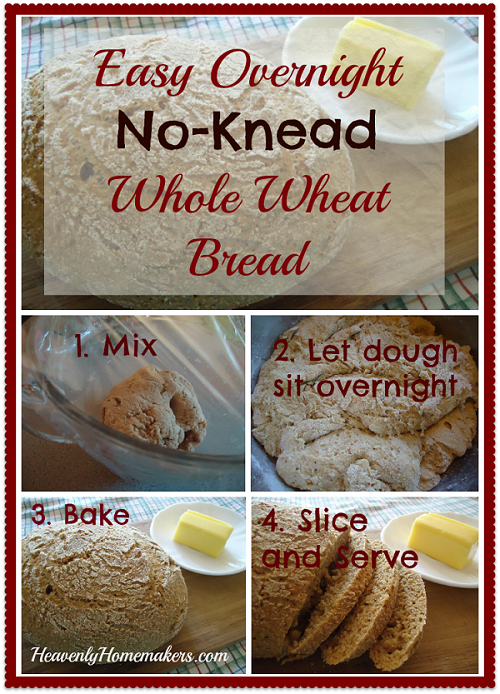
EASY! Overnight, No Knead Yeast Bread

September 19, 2012 by Laura 263 Comments

This post may contain affiliate links. For more information, please see our disclosure policy.

No Knead Bread. Let’s make life easier, shall we?

No-Knead Bread

I love having smart friends.

Smart friends who give me great, easy, healthy recipes are my favorite kind of friends. As are my friends who give me chocolate. Or jars. Or hugs. Or the friends who listen to my constant and sometimes nonsensical chatter. And the ones who put up with my unreasonable freak-out moments of stress. And the ones who pray with me. And the ones who deal with me during soccer season when I can’t finish sentences.

Let me just pause and wipe a tear. I really have the best friends ever…

Well now. (stops to loudly blow nose and gain composure)  I really brought all that up to say that one of my great friends, Nikki, shared this recipe with me. She’s one of my smart friends who I believe has done all of the above and then some (God bless her).

Once when I was at her house, she let me try some of the bread she had made that morning. It was great! And then she started telling me how she made it. How you don’t have to knead it. How you start it the night before and how it takes about three minutes to mix up. I think I grabbed her neck, hugged her fiercely, and knocked her over when she handed me the recipe. Not really. I truly can control myself. Usually. But hey, there was a great recipe involved, so no guarantees. See, I told you my friends are great to put up with me.

And now, the easiest bread recipe in the world…

No Knead Yeast BreadYum

5.0 from 1 reviews
EASY! Overnight, No Knead Yeast Bread
 
Save Print
Author: Laura
Ingredients
  • 3 cups flour (This recipe works a little better with unbleached white flour, but I prefer to use freshly ground hard white wheat so that it is healthier.)
  • 1 ¾ teaspoon sea salt
  • ½ teaspoon active rise yeast
  • 1 ½ cups water
Instructions
  1. Stir ingredients together in the evening. (No need to proof the yeast.)
  2. Cover and allow dough to sit over-night on the counter-top.
  3. In the morning, dump the dough onto a well floured surface.
  4. Shape it into a ball.
  5. Let it sit for 30 minutes.
  6. Preheat the oven to 450°, heating the baking dish in the oven at the same time.
  7. Place the dough in the hot baking dish.
  8. Cover and bake for 30-40 minutes.
3.4.3177

Note:  You need a covered dish to bake this bread.  I found a deep-dish casserole dish with a lid that worked for me, similar to this one. But if I can save up and splurge on this one, would that not be the coolest?

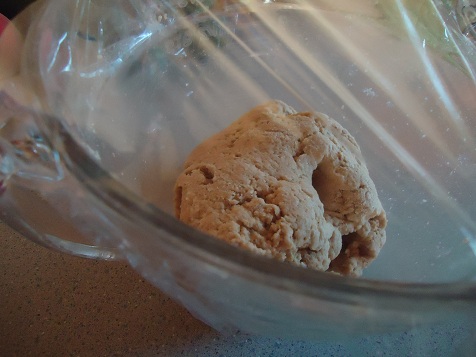
When you mix it and cover it in the evening, it starts out looking like this:

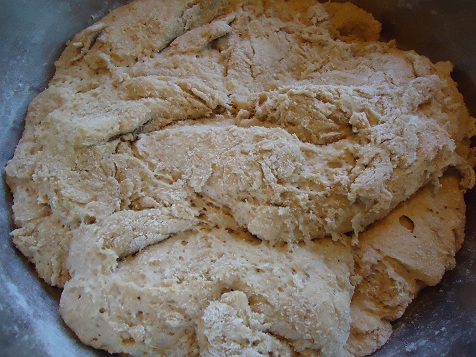
In the morning it will look like this:

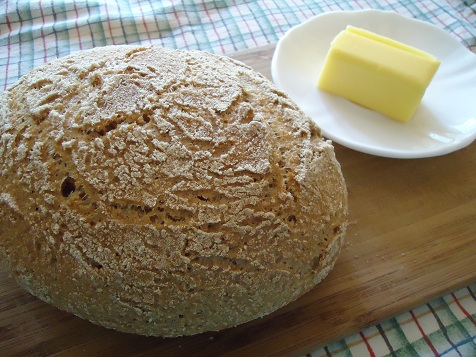
After you bake it, it will look like this:

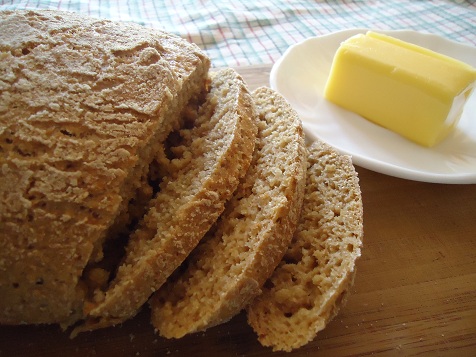
And when you slice it it will look like this:

Once you serve it, it will look like this:

(There’s no picture. The bread is gone. Obviously.)

I highly recommend that you give this recipe a try, and that you consider serving it with this wonderful Calico Beans dish. It’s a wonderful combo!

Heavenly Homemaker's Club Members: Access your homepage and all your fantastic resources here! Not a member yet? Please join us!

Healthy Crock Pot Recipes: Calico Beans

September 12, 2012 by Laura 128 Comments

This post may contain affiliate links. For more information, please see our disclosure policy.

This Calico Beans recipe packs a punch when it comes to protein. In my household of men, this is much appreciated. Oh, who am I kidding? I may be the only girl in my household, but give me a bowl of beans, beef, and bacon, and I’m a happy camper. I love me a high protein meal! If all the boys in the house enjoy it too, well now, that’s just a huge perk. :)

Add some chopped sweet green peppers, or even a few chunks of spicy peppers to this recipe if your family enjoys a little “kick”.

Calico BeansYum

Healthy Crock Pot Recipes: Calico Beans
 
Save Print
Author: Laura
Serves: 6-8
Ingredients
  • 8 ounces turkey bacon, cut into one-inch pieces
  • 1 pound ground beef
  • ½ cup chopped onion (or 4 Tablespoons minced onion)
  • 1 Tablespoon yellow mustard
  • 2 - 15 ounce cans baked beans (I use Eden Organics, full of healthy ingredients)
  • 1 - 15 ounce can kidney beans
  • ¾ cup ketchup (I recommend homemade ketchup or an organic variety that does not contain high fructose corn syrup)
  • 1 teaspoon sea salt
  • 1 Tablespoon vinegar (I use either red wine or balsamic)
Instructions
  1. In a skillet, brown bacon, ground beef, and onions together.
  2. Drain and dump into a crock pot.
  3. Add remaining ingredients, stirring until mixed.
  4. Cover and cook on low for six hours or on high for three hours.
  5. Or, skip the crock pot and bake this in a covered casserole dish at 350° for an hour.
3.4.3177

Of course, you’ll save even more money if you soak and cook your own beans. Read more about this process here.

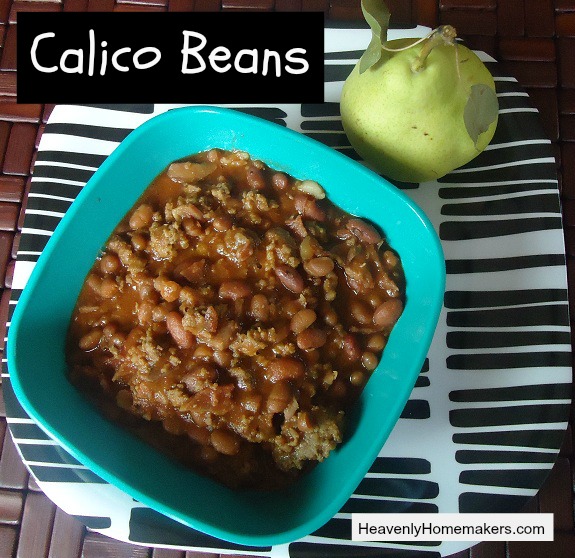
Calico Beans

I know everyone is different when it comes to craving meat and high protein meals.  Are you like me and feel like you could eat a half a cow sometimes? Or are you content with a small bowl of beans and the occasional peanut? 

Interested in more Crock Pot recipes? You’ll find several to look through here!

Heavenly Homemaker's Club Members: Access your homepage and all your fantastic resources here! Not a member yet? Please join us!

Healthy Crock Pot Recipes: Hot Spinach and Artichoke Dip

September 4, 2012 by Laura 192 Comments

This post may contain affiliate links. For more information, please see our disclosure policy.

I couldn’t decide. Should I tell my kids what was in this Spinach and Artichoke dip…or should I not?

Turns out, I didn’t have much choice, because they came into the kitchen and asked what I was making and what was in it. I wasn’t going to lie, obviously, but shucks, I was just sure that once Elias, our 10 year old, heard that there were artichokes and spinach in the dip, he’d suddenly be, “not very hungry right now.”

Thankfully, there were chips involved. ;)  Chips are always a good motivator for eating artichokes, right?

All of the boys decided to “give it a try”, which in Elias’ case, means putting a teeny bit of dip onto his chip. Much to my surprise, all of the boys loved the dip. And Elias was the one who raved about it the most.

The moral of this story? I give up on ever being able to predict which of my kids will like which foods, because about the time I think for sure my pickiest child will rebel against artichokes, I will be wrong.

Just a note:  When picking out Marinated Artichoke Hearts at the store, watch out! Many of them contain partially hydrogenated oils. Ick.  I was happy to find a healthier version at Vitacost which contains only artichoke hearts, water, salt and citric acid. Sweet!

As for chips, I recommend an organic variety of corn chips so you will be avoiding bad fats and GMO corn. Or, this dip also tastes great with carrot sticks and other veggies.

Hot Spinach and Artichoke DipYum

Healthy Crock Pot Recipes: Hot Spinach and Artichoke Dip
 
Save Print
Author: Laura
Ingredients
  • 1 - 14 ounce can marinated artichoke hearts, drained
  • 1 cup sour cream
  • 1 cup grated parmesan cheese
  • 1 cup fresh, torn spinach leaves
  • 1 - 4 ounce can diced green chiles
Instructions
  1. Mix all ingredients and place in a crock pot.
  2. Cook on low for 2-3 hours.
  3. Serve with tortilla chips.
  4. Alternate Cooking Method:
  5. Mix ingredients and spread in a pie dish or 8x8 inch baking pan.
  6. Bake in a 400° for 30 minutes and serve.
3.4.3177

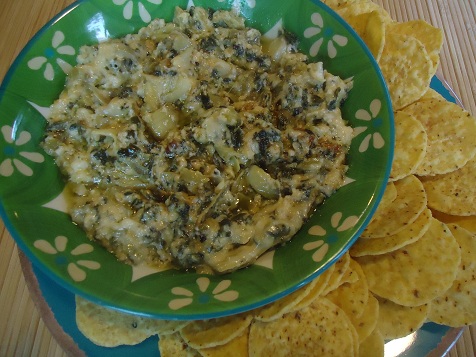
Crock Pot or Oven Friendly Spinach and Artichoke Dip

Share with us: Are you a fan of artichokes? I dare you to try this dip whether you are or not. If Elias likes it, I’m pretty sure you will too. :)

Heavenly Homemaker's Club Members: Access your homepage and all your fantastic resources here! Not a member yet? Please join us!

How To Make Pizza on the Grill

July 10, 2012 by Laura 15 Comments

This post may contain affiliate links. For more information, please see our disclosure policy.

Yum

I’ve always left the grilling up to Matt. He would head outside and cook the meat, I would be in the kitchen making the side dishes, and all was well.

But one day several weeks ago, I felt like cooking something on the grill for lunch. It just sounded good, you know? But Matt wasn’t home. It was then that I realized that I had no earthly idea how to even turn on the grill. Duh. But it’s true.

Why, yes I do feel ridiculous admitting that to you. And hey, if you want, I could list off all kinds of things I have no clue about.  Nah, how about we save that list for another day?

Well anyway, when he got home later that day, I asked my loving husband to teach me the fine arts of turning on a grill, which involved, as most of you probably already know, the push of a button and the turn of a knob. Wow, do I ever feel so much smarter than I did before.

With my newly found knowledge, I have become a little bit addicted to the grill. It is as if a whole new world has opened up to me. And this is why, after mastering burgers, hot dogs, bbq chicken legs, Italian chicken breasts, and several other varieties of meat,  I decided to try making pizza on the grill. I had heard it was great, so why not?

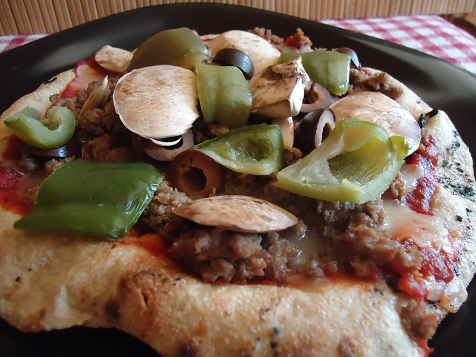
The good news:  Pizza on the grill tastes incredible and my whole family loves it. The bad news:  Pizza on the grill takes more time and effort than a hot dog or even chicken on the grill. Shucks. But hey, it sure beats heating up the house by baking it in the oven. And well, it tastes so good that I think it is worth the effort. 

How To Make Pizza on the Grill:

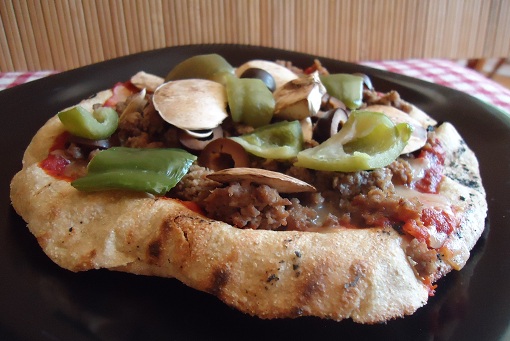
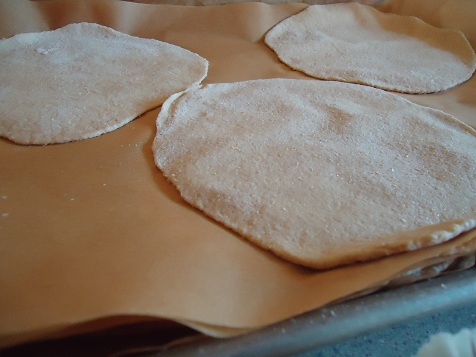
1. Make pizza crust – I used my favorite Whole Wheat Pizza Dough recipe. Roll it thin, and keep it small.  Individual sized pizzas are best for the grill.

2. Freeze the unbaked pizza crusts on a cookie sheet lined with parchment paper. This will make your crusts much easier to work with on the grill. 

3. Prepare all pizza toppings. It is important to have this done before you begin cooking your pizzas. Really, really important.

4. Get your grill hot and ready. (If you need my husband to come show you how to turn on your grill, he is very nice and I’m sure he would be happy to walk you through this step.)

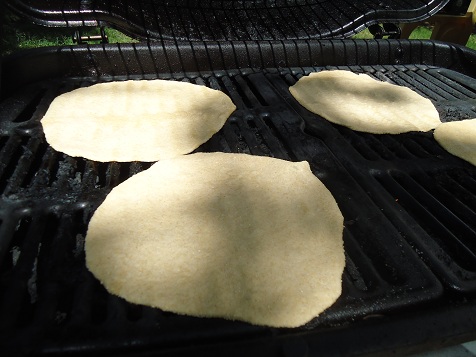
5. Place crusts on the grill on low heat, as many as your grill will hold. Close the lid and allow the crusts to cook on one side for about three minutes.

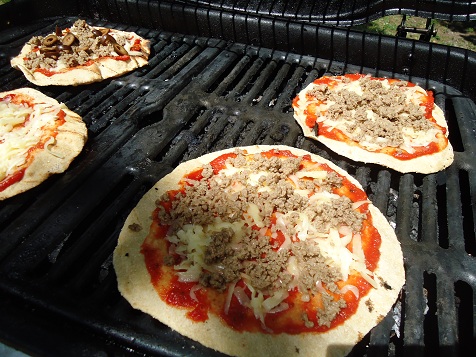
6. Remove the crusts from the grill. Turn them cooked side up and fill with sauce and toppings of your choosing. Go easy on the sauce, unless you want soggy pizza. 

7. Place the topped pizzas back on the grill, close the lid, and cook for another 3-5 minutes or until cheese is melted.

Not that I personally experienced any moments of absolute insanity my first time making these, but be aware that you may be forced to deal with a bit of craziness while feeling like everything needs to be done at once and everyone needs to get out of your way and not ask you any questions while you are trying to grill the crust, top the crust, grill the pizza, and not burn anything along the way. Just so you know. (It does get easier after you’ve done it once.)

And that is why it is very important that your pizza toppings are prepared and ready ahead of time. I am so not kidding. ;)

Heavenly Homemaker's Club Members: Access your homepage and all your fantastic resources here! Not a member yet? Please join us!

Chocolate Peanut Butter Pie

June 22, 2012 by Laura 24 Comments

This post may contain affiliate links. For more information, please see our disclosure policy.

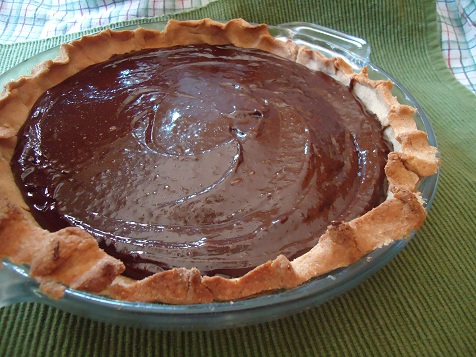
Chocolate Peanut Butter Pie
This recipe was given to me many years ago by my dear friend Jill. I typically make this pie once a year, on Father’s Day, as it is one of Matt’s favorites. I would make it more often, but it is a dangerous item to have in our refrigerator. It is rich, incredibly tasty, and I have a hard time controlling myself when it is around.

And here Matt thought I made this pie for him on his special day…

Chocolate Peanut Butter PieYum
1/2 cup butter
1/2 cup natural peanut butter (I used homemade creamy peanut butter.)
4 squares of unsweetened chocolate
1 1/4 cup sucanat (or sugar)
1 teaspoon vanilla extract
4 eggs (I trust free range, organic eggs for this pie.)
1 baked pie crust (Here’s my whole wheat pie crust recipe.)

Bake a pie crust. I recommend this recipe. Allow crust to cool.

In a small saucepan, melt butter, peanut butter, unsweetened chocolate, and sucanat together, stirring frequently. Pour melted mixture into a mixing bowl. Beat in vanilla and eggs – ONE LITTLE EGG AT A TIME.

It is very important that you add eggs one at a time, allowing time for each egg to thicken the mixture and to help the mixture to become creamy. I got lazy once and just threw all the eggs in at one time and I can assure you, my laziness did not pay off. Take the extra few minutes to follow directions. We make our kids do it, right? Set an example to your children and for Pete’s sake, follow directions. Your chocolate peanut butter happiness depends on it. ;)

Once the mixture is thick and creamy, pour it into the pie shell. Chill for at least two hours before serving. Lick the bowl before anyone comes into the kitchen to fight you for the beaters.

Oops, did I just say that out loud? ;)


FYI – If you whip some fresh cream and plop it on top of your piece of pie, this amazing dessert, if it is actually possible, becomes even more amazing.

I feel as though I should now give some sort of disclaimer about eating raw eggs, so here is my smallish attempt at it. Because of the research I’ve done, I completely and totally trust the organic, free range, farm fresh eggs that we are able to obtain, and I do not hesitate to eat them raw in our smoothies, milk shakes and this pie. Not only do I not fear that they will harm us, I love them for their wonderful health benefits. I do not feel the same way about conventional, store-bought eggs, but that’s just me. I’m not a risk taker, but neither do I have one little hesitation about eating this pie when I make it with our good eggs. (Trust me, you should have seen me eating this pie, without hesitation, on Father’s Day, with a big chocolaty grin on my face.)  Feel free to make your own decisions about this, and we can all still be great friends. :)

So, how long would this pie stay in your fridge before it got eaten?

Heavenly Homemaker's Club Members: Access your homepage and all your fantastic resources here! Not a member yet? Please join us!

Grilled Barbeque Chicken

June 19, 2012 by Laura 18 Comments

This post may contain affiliate links. For more information, please see our disclosure policy.


Grilled BBQ Chicken
This meal could not get any easier. (Especially if you hand it over to your husband to cook it on the grill…you know…while you sit down, put your feet up, and read a book – ha!)  ;)

We made this for Father’s Day, for the first time – go figure. Why in the world we haven’t made this before I will never know. It’s not like it’s any kind of mysterious, hard to come by recipe. You marinate your chicken in barbeque sauce and then you grill it. The end. Make a salad and cook up some veggies and you’ve got the easiest, healthy meal ever.

Our boys, who are typically pretty good eaters anyway (except for when they’re not, of course), devoured this chicken and declared it to be the best they’d ever eaten.

We had exactly one drumstick left at the end of the meal. Then, on “leftover night” a few days later, everyone was left on their own to warm up whatever they wanted from the fridge. When Matt found out the meal plan for the evening, he said, “You guys can have whatever you want, but I call dibs on that last piece of Father’s Day chicken.”

Oops, too late. Elias, our ten year old, looked up with a guilty grin, with bbq sauce on his face as he finished off the coveted chicken leg. :)  I guess we’ll need to make this again very soon so Daddy can have more.

Grilled Barbeque ChickenYum

10-12 chicken legs (or other chicken pieces that you may prefer)
1 batch of homemade barbeque sauce (or your bbq sauce of choice)

Place thawed chicken in a glass dish. Spread barbeque sauce over all sides of each piece of chicken. Cover and refrigerate for 1-24 hours – depending on what works best for your schedule. Grill slowly and on very low heat for 45 minutes to one hour, or until chicken is cooked thoroughly. Spread additional barbeque sauce over the chicken as it cooks if you like.

Grilled BBQ Chicken

I do recommend making homemade barbeque sauce so that you can avoid MSG and/or high fructose corn syrup that many bottled sauces contain. And I also recommend making sure the ten year old offers the chicken leg to his dad before inhaling it on leftover night. ;)

Heavenly Homemaker's Club Members: Access your homepage and all your fantastic resources here! Not a member yet? Please join us!

Whole Wheat Calzones

June 13, 2012 by Laura 49 Comments

This post may contain affiliate links. For more information, please see our disclosure policy.

We have some lovely friends in town that make delicious homemade pizza. Their last name is “Tandy”, and because they have made their awesome pizza for so many, most people around here who know and enjoy their pizza lovingly call it “Tandy Pizza”. If you say, “We’re going to have Tandy’s Pizza for lunch,” everyone will get excited. This family has turned their pizza into a ministry, feeding loads of teenagers each week, making their pizza for large groups, baking it for kids at church camp, and the list goes on. Everyone loves the Tandys and their pizza ministry.

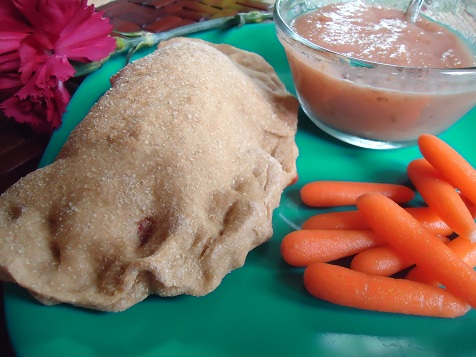
Well, a few weeks ago, I finally perfected my own homemade whole wheat pizza crust, and then adapted it to make calzones for a quick, grab and go meal. Malachi, our seven year old, took one bite of his and excitedly declared it to be “as good as Tandy Pizza!”. Now that is quite an honor. Ever since, Malachi has been calling these calzones “Tandy Pockets”. It seems as though the Tandys are getting the credit for allllll my hard work, but hey, I’m okay with that. (And P.S. it doesn’t really take a lot of hard work to make these. I just wanted to sound momentarily pitiful.)  ;)

How to Make Whole Wheat Calzones

Whole Wheat Pizza DoughYum

5 cups whole wheat flour (I use freshly ground flour from hard white wheat)
1 teaspoon sea salt
4 1/2 teaspoons active dry yeast (or 2 pouches)
2 cups warm water (The water should feel warm to the touch, but  not burn your finger. How’s that for a specific temperature. This is how thorough I am…)

Mix all ingredients together, knead for 3-4 minutes, then allow the dough to “rest” for about 10 minutes (give or take). Use the dough to make two pizzas, baking for about 25 minutes each. (More specific pizza instructions coming eventually). :)

To make Calzones:

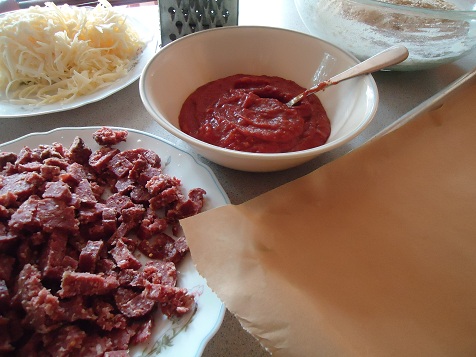
Prepare filling ingredients your family enjoys (sauce, shredded cheese, meat, peppers, olives, veggies, etc.).

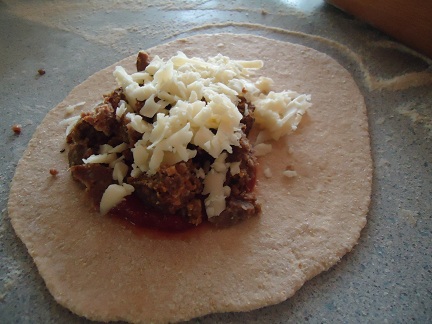
Divide prepared dough into 18 balls. Roll each on a well floured surface. Top with pizza filling of choice.

Fold pocket in half and pinch ends together. Place each calzone on a baking sheet until pan is full.

Bake the pan of calzones at 375° for about 25 minutes or until calzones are golden brown. Makes about 18 calzones. Serve immediately. Or, allow the calzones to cool completely, then refrigerate or freeze them to serve another time. To reheat, place cold or frozen calzones in an oven or toaster oven for 8-15 minutes or until they are heated through.

You can also freeze these before baking if you prefer. Simply place the raw, shaped calzones on a baking sheet and freeze immediately after forming. Transfer frozen calzones into a freezer bag. Bake directly from frozen state in a 375° oven for 25-35 minutes or until golden brown.

Making these Tandy Pockets Whole Wheat Calzones is super easy, and a perfectly wonderful “Make Ahead Meal“. What are your family’s favorite pizza pocket fillers? And oh yes, these would be perfect for meat and cheese pockets, breakfast pockets, and what else can you think of?


Heavenly Homemaker's Club Members: Access your homepage and all your fantastic resources here! Not a member yet? Please join us!
« Previous Page
Next Page »

Join Our Community!

 Facebook Twitter E-mail Instagram Pinterest

Popular Posts

~ Will All of the Real Moms Please Stand Up?
~ Easy! Stir-and-Pour Whole Wheat Bread
~ How to Make Gatorade
~ 31 Real Food Breakfast Ideas
~ Dear Teenage Girls...
~ When Mom Takes a Step Back
~ The Inexpensive Health Insurance We Love!
~ Let's Talk Real Food Grocery Budgets

Check out our latest posts!

  • Big Family Food and Fun: September 6-12, 2026
  • Big Family Food and Fun: August 30-September 5, 2026
  • Big Family Food and Fun: August 23-29, 2026
  • Big Family Food and Fun: August 16-22, 2026
  • Big Family Food and Fun: August 9-15, 2026
Home  ~  Simple Meals  ~  Club Membership  ~  Shop  ~  Privacy Policy  ~  Disclosure  ~ Contact

Copyright © 2026 · Beautiful Pro Theme on Genesis Framework · WordPress · Log in