Heavenly Homemakers

Encouraging women in homemaking, healthy eating and parenting

  • Home
    • About
    • FAQs
  • Recipes
    • Bread and Breakfast
    • Condiments
    • Dairy
    • Main Dishes
    • Side Dishes and Snacks
    • Desserts
    • Gluten Free
    • Instant Pot
    • Crock Pot
    • Heavenly Homemaker’s Weekly Menus
  • Homemaking
    • Real Food Sources
  • Store
  • Contact
    • Advertise
    • Disclosure
    • Privacy Policy
  • Simple Meals
  • Club Members!

High Five Recipes: Italian Roast Wraps

June 9, 2009 by Laura 28 Comments

This post may contain affiliate links. For more information, please see our disclosure policy.

I continue to be amazed at the great dishes you can make using only five ingredients. Or three. And so many of the recipes only take five minutes to prepare. Italian Roast Wraps are so flavorful and juicy! Now – if you were looking forward to seeing a recipe that only takes five minutes to prepare….you may be disappointed with this one. THIS one only takes two minutes. Sorry about that. :)

High Five Recipes 2


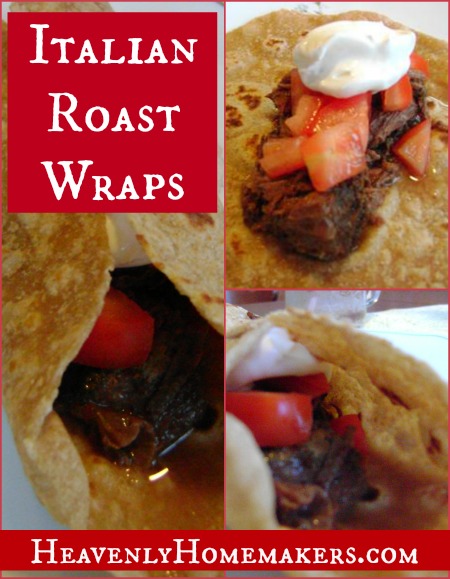
Italian Roast Wraps

Italian Roast WrapsYum

High Five Recipes: Italian Roast Wraps
 
Save Print
Author: Laura
Ingredients
  • 2 - 3 pound frozen roast (beef or deer)
  • 2 Tablespoons Italian dressing mix
  • Whole wheat tortillas
  • Sour cream or kreme fresh
  • Chopped fresh tomatoes
Instructions
  1. Place FROZEN roast in a crock pot.
  2. Sprinkle ½ pouch Italian dressing mix onto roast.
  3. Cook on low for 5 hours.
  4. Shred meat or slice thinly.
  5. Spoon meat onto a warm tortilla and top with tomatoes and sour cream.
  6. Wrap and eat!
3.4.3177

Recipes I recommend you using for this dish:

Italian dressing mix 
Whole wheat tortillas
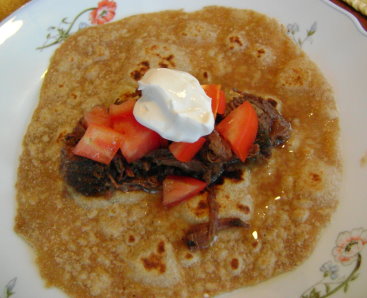
italianroastwrap4sm.jpg

Served with a fresh fruit salad, these Italian Roast Wraps are a great lunch or dinner!
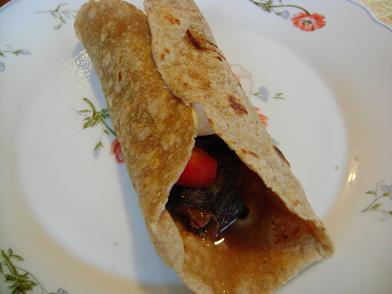
italianroastwrap3sm.JPG

Be sure to check out all of the High Five Recipes I’ve posted so far. Here are a few to tease you:

  • Easy Breakfast Casserole

    This is such a great recipe because you can make the casserole however you like it. I especially love it because there’s no bread in it. (I am not a fan of soggy bread!) This casserole freezes well – also a perk!

  • Roasted Italian Potatoes

    Hey, another recipe you can use with your homemade Italian dressing mix !
  • Layered Cheesy Salsa Enchiladas

    Only make this if you like easy recipes. And ones that taste amazing.

  • Chicken Fried Steak Strips

    I especially love to make several pounds of these at once, then freeze them to pull out for a quick meal!

  • Cheddar Ranch Burgers

    These are amazing on the grill or on the stovetop. You’ll use ranch dressing mix for this one.

Enjoy these High Five Recipes!

Heavenly Homemaker's Club Members: Access your homepage and all your fantastic resources here! Not a member yet? Please join us!

How To Make Sunbutter

June 8, 2009 by Laura 26 Comments

This post may contain affiliate links. For more information, please see our disclosure policy.

I just wanted to share some quick tips about making sunbutter. I mentioned that I would experiment with it after learning to make peanut butter. I’ve been experimenting with it…and have come to a conclusion:

It is not as easy to make as the peanut butter is. :)

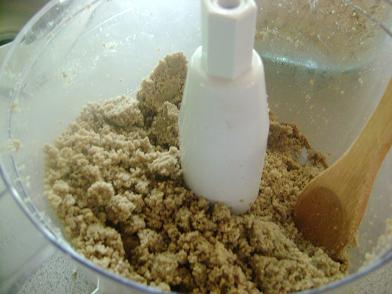
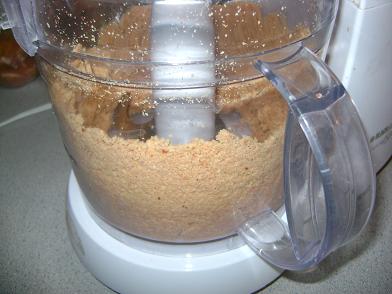
Using raw sunflower seeds I tried to make sunbutter  just like I had made the peanut butter. Except that I processed it and processed it, and it never turned creamy. It became kind of mealy…and stayed that way. 

sunbutter6sm.JPG

Yum

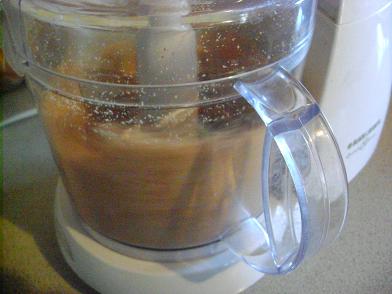
I added a few drops of olive oil and processed some more. No change.

I finally gave up. Sort of. I mean…I was determined to figure this thing out because Malachi won’t eat peanut butter (long story). And sunbutter is pricey.

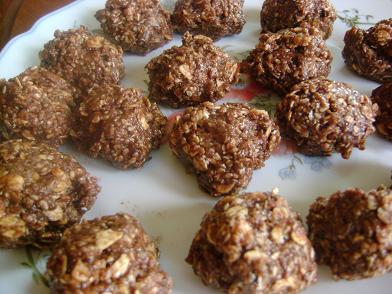
So…I took the mealy sunbutter…and made it into mudballs because that’s one of Malachi’s favorite snacks. I just substitute the peanut butter for sunbutter. Ah-hah! Even though the sunbutter started out mealy…the mudballs came out perfectly! Score!

sunbutter7sm.JPG

At least I know that the mealy sunbutter works when you mix it into other recipes!

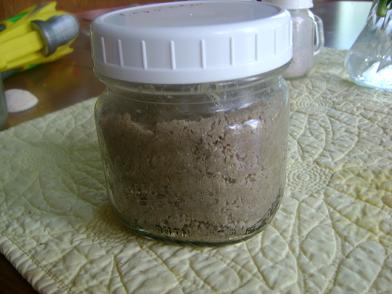
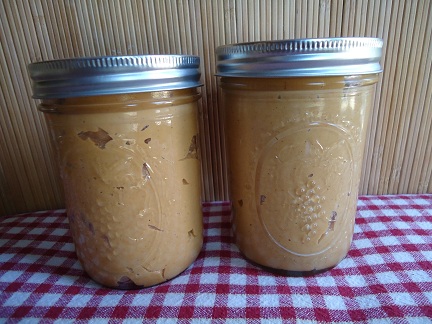
Then…I added a bit of honey to the rest of the mealy sunbutter and put it into a jar and then into the fridge. The honey didn’t make it smooth and creamy, but it did make it less dry. I think it will work great to spread on toast or a tortilla.

sunbutter8sm.JPG

By the way, I did a Swagbuck search and discovered that 1) There aren’t many ideas out there for making sunbutter and 2) Anyone else who tried to make sunbutter ended up with mealy sunbutter. It’s good to know that I’m normal. (At least in the area of making sunbutter.)

Do any of you have any experience making sunbutter or other nut butters? 
————————————

This post is linked to Kitchen Tip Tuesdays.

Heavenly Homemaker's Club Members: Access your homepage and all your fantastic resources here! Not a member yet? Please join us!

Homemade Corn Dogs and Corn Dog Muffins

May 26, 2009 by Laura 135 Comments

This post may contain affiliate links. For more information, please see our disclosure policy.

A few weeks ago, Josette asked if anyone had a healthier, homemade corn dog recipe. Yippee! A recipe challenge. I love me a recipe challenge.

And – all my healthy eating talk aside – I love me a good hot dog. Oh, how I wish I didn’t. The icky ones that are made from 14 different kinds of animal leftovers? I don’t love me that kind of hot dog. A big juicy beef hot dog? I could eat three. (Not that I do of course…)

I’ve found some hot dogs from Azure Standard made by Shelton that are pretty good. They are made with chicken, don’t have any preservatives, etc. If you have access to those, give them a try. We like them just fine.

And – hot dog on a stick with yummy cornbread fried all around it? Hello. I am my kids’ favorite mom on days I make these.

Homemade Healthier Corn DogsYum

Homemade Corn Dogs and Corn Dog Muffins
 
Save Print
Author: Laura
Serves: 10
Ingredients
  • 10 hot dogs
  • 1 cup whole wheat flour
  • ⅔ cup cornmeal
  • 2 T. honey
  • 1½ t. baking powder
  • ½ t. dry mustard
  • 1 egg
  • ¾ cup milk
  • 2 T. oil
  • Oil for frying (I use Palm Shortening)
  • 10 lollipop sticks
Instructions
  1. Whisk together all ingredients (okay, except for the hot dogs of course...and the oil for frying...and the lollipop sticks).
  2. Place one hot dog on each stick. (I find lollipop sticks in the cake decorating section at Walmart.)
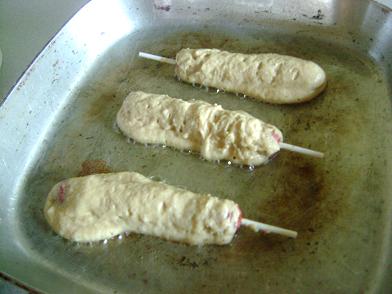
  3. For frying the corn dogs...you can immerse them in hot oil if you have a Fry Daddy or something similar. I don't have one, plus I'd rather not use that much oil. Here's what I do:
  4. Heat a small amount of oil in your electric skillet.
  5. Holding onto the stick "roll" the hot dog around in the cornmeal batter to coat.
  6. Place the corn dog down onto the hot oil.
  7. Allow the corn dog to cook quite well on one side before attempting to turn it so that the batter won't pull off.
  8. Turn as necessary to cook on all sides.
3.4.3177

corndogs2sm.JPG

corndogs1sm.JPG

corndogs3sm.JPG

My corndogs don’t turn out very lovely. They’re sort of triangular in shape. Ah, but they taste delicious!

corndogs5sm.JPG

NOW.

Wait until you hear THIS idea. When Jennifer heard that I was going to conduct a corn dog experiment…she gave me this idea!!! Thanks Jennifer!

These Corn Dog Muffins are a perfect way to avoid the mess of frying your corn dogs and finding lollipop sticks, etc. I LOVE this!

Easy Corndog Muffins

Corn Dog Muffins

This recipe for cornbread, doubled
8 hot dogs
24 muffin papers to line muffin pans.

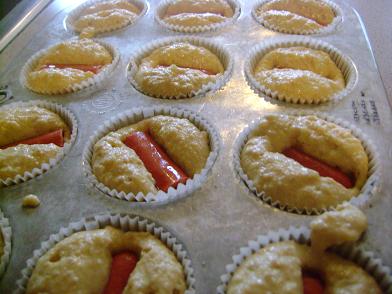
Mix up the cornbread. Cut hot dogs into thirds. Scoop cornbread batter into the paper lined muffin cups. Place 1/3 hot dog into each muffin.

corndogmuffinssm.JPG

Bake at 400 ° until golden brown. Serve right away.

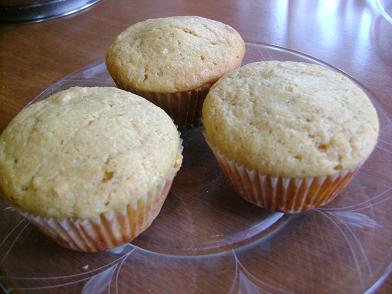
corndogmuffins2sm.JPG

Look! You can’t even tell there’s a hot dog in those muffins! You could surprise your kids with these! They’ll think they are only having a cornbread muffin for lunch. Then tada! There’s a hot dog inside!

The best thing about these Corn Dog Muffins is that they freeze well!!! Just thaw and reheat in the oven for a few minutes before serving!

How’s that for an easy lunch idea that you can make ahead of time?!

(Click on our Make Ahead Meals link for more fun ideas of kid friendly, healthy recipes that you can make ahead of time.)

Heavenly Homemaker's Club Members: Access your homepage and all your fantastic resources here! Not a member yet? Please join us!

High Five Recipes: Justus’ Shaved Ice

May 14, 2009 by Laura 15 Comments

This post may contain affiliate links. For more information, please see our disclosure policy.


High Five Recipes 2

Yum

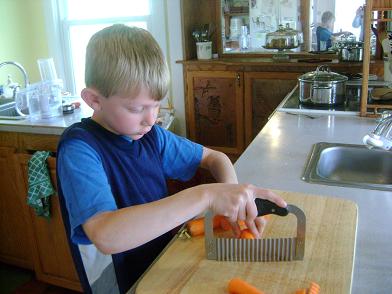
I’m not sure how often I’ve emphasized to you how much Justus (my nine year old) LOVES cooking. He wants to be a “restaurant worker” someday…he calls himself a chef (I am sometimes privileged to be his assistant)…and he really just can’t get enough of the kitchen. He LOVES it.

justuscookingmay09sm.JPG

Of course I love it too. While the other boys mostly love to cook so that they can lick a beater, Justus truly loves everything there is about cooking.

He got a new cookbook for Christmas and has been waiting for a warm day to make the shaved ice recipe he found in it. We adapted it to make it healthier (ah yes, I’m teaching him how to change a recipe already!) and here’s what he came up with:

Justus’ Shaved Ice

1 cup fresh or frozen peach slices
1 cup fresh or frozen raspberries
1 1/2 cups warm water
1/4 cup orange juice
1/4 cup honey

If your fruit is frozen, place it in a bowl with warm water (not the water mentioned in the above list of ingredients) for about fifteen minutes to thaw. Drain.

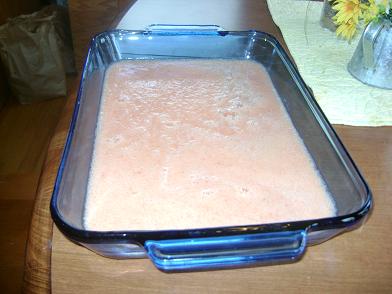
Put fruit, water, orange juice and honey into a blender or food processor. Blend until smooth. Poor mixture into a 9×13 inch baking dish. Cover with plastic wrap and freeze for about 6 hours.

justusshavedice2sm.JPG

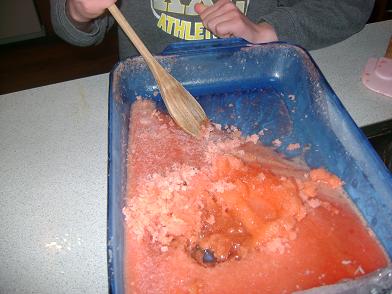
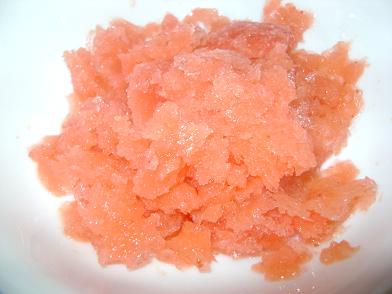
Remove from freezer and allow it to sit on the counter about ten minutes. Use a large wooden spoon to “shave” icy mixture into serving bowls.

justusshavedice3sm.JPG

justusshavedicesm.JPG

The “bummer” about this recipe is that we had to wait for SIX whole hours before we could eat it. Not much instant gratification there! However, it was worth the wait!

All the boys (and the parents) loved this treat! It was super refreshing on a hot afternoon.

And, of course, it’s a wonderful recipe to help you get another great serving of fruit. (Are you taking the challenge?!)

Any other recipes you’d like Justus to come up with for us?!

Heavenly Homemaker's Club Members: Access your homepage and all your fantastic resources here! Not a member yet? Please join us!

High Five Recipe: Creamy Mac and Cheese

April 27, 2009 by Laura 251 Comments

This post may contain affiliate links. For more information, please see our disclosure policy.

High Five Recipes 2

I’ve been searching my whole life (give or take) for a good homemade mac and cheese recipe. The recipes I’ve come up with in the past are decent….but not great.

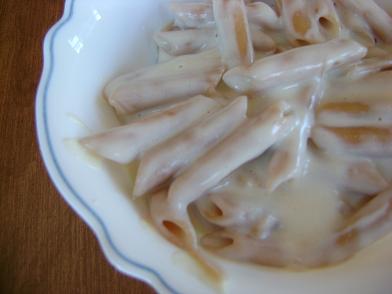
A couple of months ago, a friend told me how she makes it. I adapted it a bit and now we can’t seem to get enough! It is THE creamiest mac and cheese ever.

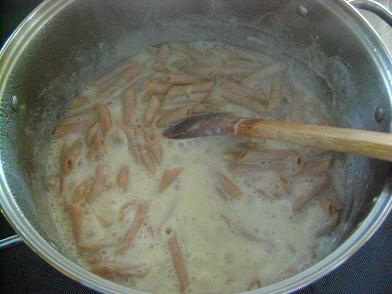
Here’s the secret:  Cook your pasta in MILK instead of water. The milk makes it super creamy. The starch from the pasta thickens the milk into a sauce. Add your cheese after the pasta is finished cooking.

macandcheese3sm.JPG

Uh-huh…comfort food at it’s best.

Creamy Mac and CheeseYum

5.0 from 1 reviews
High Five Recipe: Creamy Mac and Cheese
 
Save Print
Author: Laura
Ingredients
  • 2½ cups whole wheat pasta
  • 3 cups whole milk
  • ½ t. sea salt
  • 1 cup shredded cheese (I use white cheddar)
Instructions
  1. Mix pasta, milk and salt in a large sauce pan.
  2. Cook over medium-high heat STIRRING ALMOST CONSTANTLY until the pasta is tender (10-15 minutes).
  3. Remove from heat. (IMPORTANT!)
  4. Add cheese and stir until melted.
  5. Serve immediately.
3.4.3177

Be very sure to remove this from the heat before you stir in the cheese. Otherwise you’ll have a gritty mess. :)

macandcheesesm.JPG

You can use any shape of pasta you want. I have found that elbow noodles cook quite a bit faster so I use those when I need a quick lunch.

Every time I make this, we can not believe how creamy and delicious it is. My lifelong search for awesome homemade macaroni and cheese has come to an end. We should have some sort of mac and cheese ceremony.

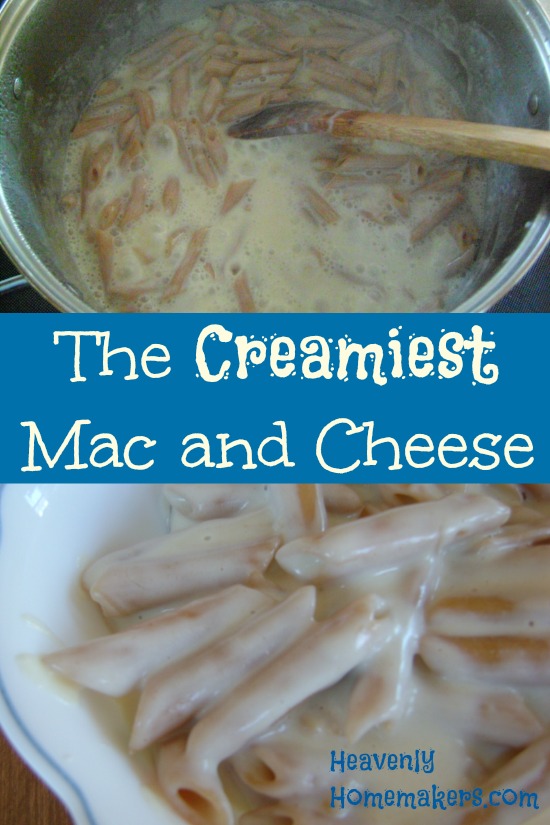
The Creamiest Mac and Cheese


If you haven’t ever tried cooking your pasta in your milk, you must do this! You can enjoy it for an easy meal as is. Or you can use this base recipe to make:

  • Easy Tuna Casserole
  • Cheeseburger Macaroni
  • Three Cheese Garlic Chicken Pasta
  • Baked Three Cheese Chicken Pasta

Life as you know it just got better. Serve any of these with a salad and some steamed veggies. It’s amazing!

Heavenly Homemaker's Club Members: Access your homepage and all your fantastic resources here! Not a member yet? Please join us!

High Five Recipes: Crispy Cheese Crackers

April 13, 2009 by Laura 90 Comments

This post may contain affiliate links. For more information, please see our disclosure policy.

High Five Recipes 2

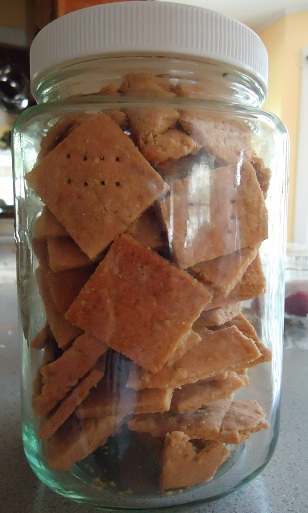
Move over little gold fish. There’s a new cheese in town.

Heidi emailed me a couple of months ago asking if I had a good cheese cracker recipe. Well no, I said, but I sure do love me a recipe challenge! It took a bit of trial and error, but I finally figured out a recipe that not only tastes good, but is SO easy.

Who knew a cheese cracker recipe that would qualify as a High Five Recipe!! (Oh, but psst…we’re not counting the tablespoon of water in this recipe as an ingredient…because that would mean there are technically six ingredients in this cracker. I really wanted to make this a High Five Recipe and it just would not work without a bit of water. Just sprinkle it in and look the other way.)

Crispy Cheese CrackersYum

¼  cup butter, softened
¼ t. sea salt
1 cup shredded cheddar cheese, room temperature
1 cup whole wheat flour
¼ t. baking powder
1 T. cold water

Use beaters or food processor to mix butter and salt until creamy. Add cheese. Mix well. Gradually add flour, baking powder and water, mixing until dough begins to form a ball. Form dough into a ball with hands.

Roll the dough into 1/8 inch thickness onto a cookie sheet. (I find that placing the dough between two pieces of parchment paper helps me to roll them out more easily.)  Cut the rolled out dough into 1 ½ inch squares. Bake 15 minutes at 350° or until lightly browned. Turn off the oven and leave the crackers inside to crisp up. Store tightly covered.

That’s all there is to it! I’m not exaggerating when I tell you that my kids will eat the entire pan of these (before Matt and I get some) in one ten minute time frame. They LOVE these! So much for trying to make a snack to “have on hand”. Guess I oughta double the recipe, huh?

Heavenly Homemaker's Club Members: Access your homepage and all your fantastic resources here! Not a member yet? Please join us!

Honey Whole Wheat Bagels

April 9, 2009 by Laura 243 Comments

This post may contain affiliate links. For more information, please see our disclosure policy.

honey_whole_wheat_bagels

I used to make these bagels all the time…then I guess I forgot about them. Recently the boys asked, “WHEN are you going to make those yummy bagels again?!” (I think they ended the sentence with “oh our Beautiful Mother Dearest” or something like that.)

Funny how you can completely forget about a particular recipe for a while. I made the requested bagels again last weekend and I think I made quite a few little men (and one tall one) very happy. Wow, is that all it takes?

Making bagels takes a few different steps…but they aren’t hard steps. You mix, rest, shape, broil, boil, and bake. I kinda think it’s fun to say “broil your bagels”, but then again, I don’t get out much.

Honey Whole Wheat BagelsYum

4  to 4 1/2  cups whole wheat flour (I use freshly ground flour from hard white wheat)
1 pkg yeast (2 1/4 teaspoons)
1 1/2 cups warm water (if you put your finger in and it hurts, it’s too hot and will kill your yeast)
3 Tablespoons honey + 1 Tablespoon honey
1 teaspoon sea salt

Stir together 2 cups of the flour, the salt and the yeast. Add in the warm water and 3 Tablespoons honey. Gradually add in the remaining flour.

bagels1sm.JPG
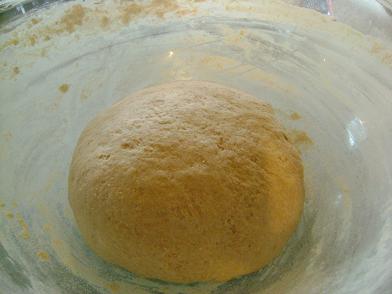
Dump it out and knead the flour in until the dough is smooth and elastic.
Cover the dough and let it take a nap for about 10 minutes. (zzzz)

bagels2sm.JPG
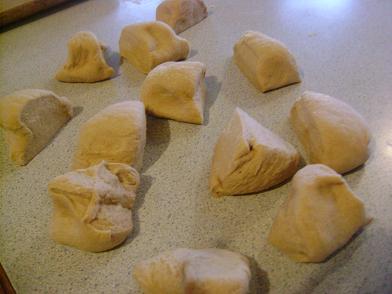
Divide the dough into twelve equal parts.

bagels3sm.JPG
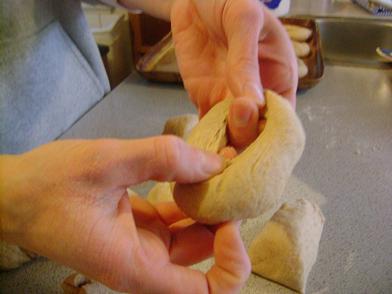
Set a timer for 20 minutes. Begin shaping each piece of dough into a nice ball. Stick your finger in the middle of the ball and pull it apart to create about a 2 inch hole.

bagels6sm.JPG
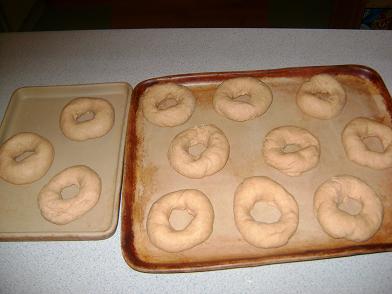
Lay it onto a buttered cookie sheet or baking stone.
Continue until all the bagels are formed. Let them sit until your timer goes off.

bagels7sm.JPG
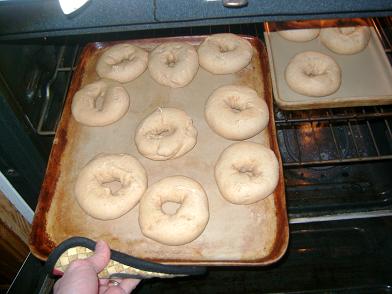
After your 20 minute timer goes off, turn the broiler on in your oven.
Broil your bagels for 2 minutes on each side.

Meanwhile…bring a big pot of water to a boil. Stir in the remaining 1 T. honey.

bagels8sm.JPG
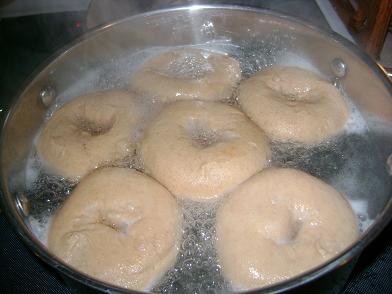
Put 4-6 bagels into the water, turn down the heat and
simmer for seven minutes, turning the bagels over once during that time.

bagels9sm.JPG
Continue to boil your bagels until they are all done.
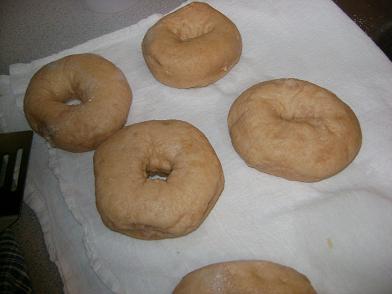
Let them drain on a towel for 1-2 minutes.

bagels11sm.JPG
Bake at 375 ° for 25-30 minutes or until the tops are golden brown.

Slice these, toast them, then slather them with butter or cream cheese for breakfast….oh my goodness.

Now I want to experiment with cinnamon raisin or blueberry bagels…and what other flavors can you think of?

Okay, answer me this….is it fun to say “broil your bagels” or is it just me? Yeah, you know you love it.
———————————————-

This post is linked to Frugal Fridays.

Heavenly Homemaker's Club Members: Access your homepage and all your fantastic resources here! Not a member yet? Please join us!

How to Make Peanut Butter

April 2, 2009 by Laura 147 Comments

This post may contain affiliate links. For more information, please see our disclosure policy.

I just learned last week how to make peanut butter.

peanut_butter

Here is what I must now ask myself…

WHY HAVE I NEVER MADE PEANUT BUTTER BEFORE?

I make almost everything else from scratch. But somehow making peanut butter sounded hard to me. I guess I thought I’d have to crush each individual peanut for three hours with my fingernails until it turned soft and creamy. I’d just never looked into it before. Finally I watched a tutorial here.

Um, hello Laura! It takes about a minute and a half! And you don’t even break a sweat (or a fingernail). Now, I’m totally addicted to making peanut butter. It’s one of the coolest things I’ve ever made.

After I made it, we ate it on pancakes and it was one of the best meals I’ve ever eaten. I loved it!!! All of us loved it! (Except Malachi who doesn’t love peanut butter at all.)

Here’s how to make Peanut Butter:

peanutbutter1sm.JPG

Yum
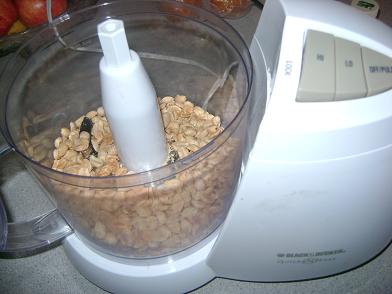
Pour about 2 cups of dry roasted peanuts into your food processor and begin to chop.

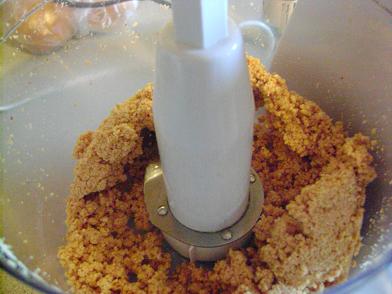
peanutbutter2sm.JPG
After about thirty seconds the nuts will all be crumbled up like this.

peanutbutter3sm.JPG
Keep going with the food processor…

peanutbutter4sm.JPG
Here’s what it looks like after about one minute.

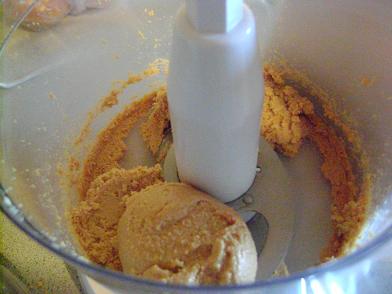
peanutbutter5sm.JPG
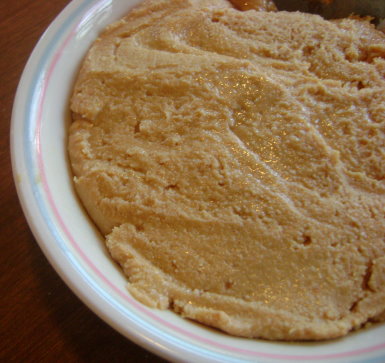
And after about a minute and a half, it starts to become butter-like and rolls itself into a ball. Continue processing until your peanut butter reaches desired consistency.

peanutbutter6sm.jpg
Tada…peanut butter!

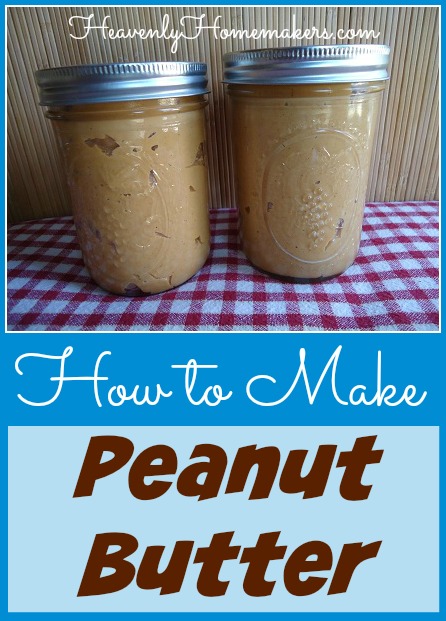
How to Make Peanut Butter

Stir some honey into your peanut butter if you think your family would like it better that way. Even better, if you prefer a more spreadable peanut butter (like Jif or Skippy but without all the icky ingredients) – check out this recipe for Super Creamy Peanut Butter.

NOW, I’m going to experiment making other nut butters and sunbutter (which is butter made from sunflower seeds if you aren’t familiar with that one). *Update* You’ll find my Almond Butter tutorial here.

The math: The way I figured it, making my own peanut butter did save me money, but not oodles of it like I was hoping for. However, because of the fresh taste of this peanut butter…and the fact that making it was as easy as using my thumb to push a button – I’m hooked!

Grab the family and try this! Then pour yourself a glass of milk and enjoy your hard work. (I love hard work that isn’t hard…)

Heavenly Homemaker's Club Members: Access your homepage and all your fantastic resources here! Not a member yet? Please join us!

High Five Recipes: “Angeled” Eggs

March 30, 2009 by Laura 44 Comments

This post may contain affiliate links. For more information, please see our disclosure policy.

I call ’em Angeled Eggs. I can’t help it.

High Five Recipes 2

I mentioned before that I have a pretty hard time calling these pretty little eggs…deviled. I’m pretty sure eggs don’t really care. I just think that “angeled” sounds nicer.

Have you ever taken Angeled Eggs to a potluck? It seems that they are one of the most popular items. They’re GONE before Great Aunt Edith’s chocolate pie – and that’s saying something! Plus, they are very inexpensive to make!

Here’s my simple four ingredient recipe:

Angeled EggsYum

High Five Recipes: "Angeled" Eggs
 
Save Print
Author: Laura
Ingredients
  • 6 eggs
  • ½ cup mayonnaise (I use Hain safflower brand)
  • 1 teaspoon mustard
  • ¼ teaspoon onion salt
Instructions
  1. Put the eggs in a saucepan with enough water to cover them.
  2. Boil for 10 minutes.
  3. Remove the eggs from hot water immediately and place them into a bowl of cold water.
  4. Refrigerate until cool.
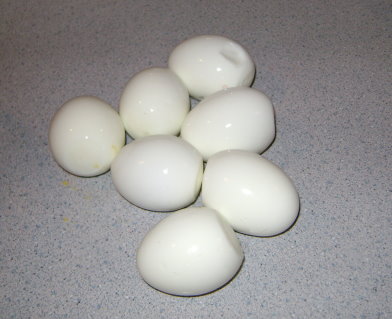
  5. Peel the shell off the egg.
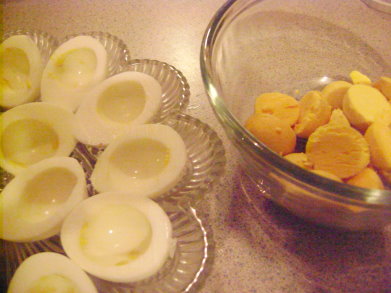
  6. Cut each egg in half and place the yolks into a bowl.
  7. Mash the yolks with a fork, then stir in the mayonnaise, mustard and onion salt until smooth.
  8. Fill the whites of the eggs with yolk mixture using a spoon or a fancy cake decorating tool.
3.4.3177

devilledeggs2sm.jpg
Peel the shell off the egg. (I usually start this process by banging it onto the counter, then rolling it around a bit. Cracks those eggs up. I guess it must tickle.)

devilledeggs3sm.jpg
Cut each egg in half and place the yolks into a bowl.
Mash the yolks with a fork, then stir in the mayonnaise,
mustard and onion salt until smooth.

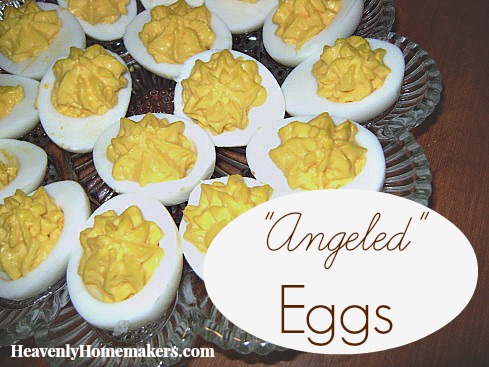
Angeled Eggs
Fill the whites of the eggs with yolk mixture. I used my handy Pampered Chef cake decorator which makes these eggs SO pretty. Plus, the chickens must be really excited about spring because they are laying eggs with SUCH yellow yolks! Lovely!

I love how angeled eggs are a perfect picnic or potluck food – and how they compliment so many spring and summer time meals! And they’re so easy to make!

Heavenly Homemaker's Club Members: Access your homepage and all your fantastic resources here! Not a member yet? Please join us!

High Five Recipe: Popcorn Chicken

March 23, 2009 by Laura 70 Comments

This post may contain affiliate links. For more information, please see our disclosure policy.

Popcorn Chicken – One of our most popular High Five Recipes!

High Five Recipes 2

Here’s what I always wondered as a little girl:

Why DID the chicken cross the road?  And how did he manage not to get hit en route? And if he just wanted to get to the other side, WHAT exactly was on the other side that he was so excited to get to? And why wasn’t he just at home where he was supposed to be? Where was his owner?  

Silly little chicken.

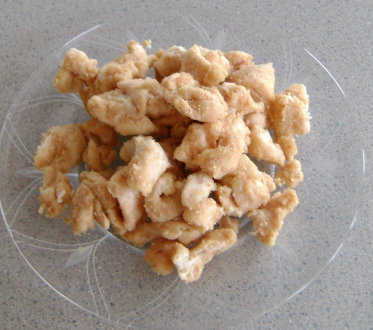
popcornchickensm.jpg

Yes, I will be happy to continue to give you these little morsels of deep thoughts to ponder while you do your dishes.

Here’s the promised recipe for Popcorn Chicken. I don’t suppose the chicken ever suspected he’d be turned into delicious edible items such as this…

Popcorn ChickenYum

5.0 from 1 reviews
High Five Recipe: Popcorn Chicken
 
Save Print
Author: Laura
Ingredients
  • 3 large boneless, skinless chicken breasts
  • ¾ cup whole wheat flour
  • ½ teaspoon sea salt
  • ½ teaspoon garlic powder
  • butter
Instructions
  1. In a medium sized bowl, stir together flour, salt and garlic powder.
  2. Using kitchen shears, cut chicken breasts into tiny bite sized pieces.
  3. Toss chicken in flour mixture to coat well.
  4. Smear a thick layer of butter on the bottom of a 9x13 inch baking dish.
  5. Pour coated chicken into dish, spreading so that they are in a single layer.
  6. Bake at 350° for 10 minutes. Stir chicken and bake another 10 minutes.
3.4.3177

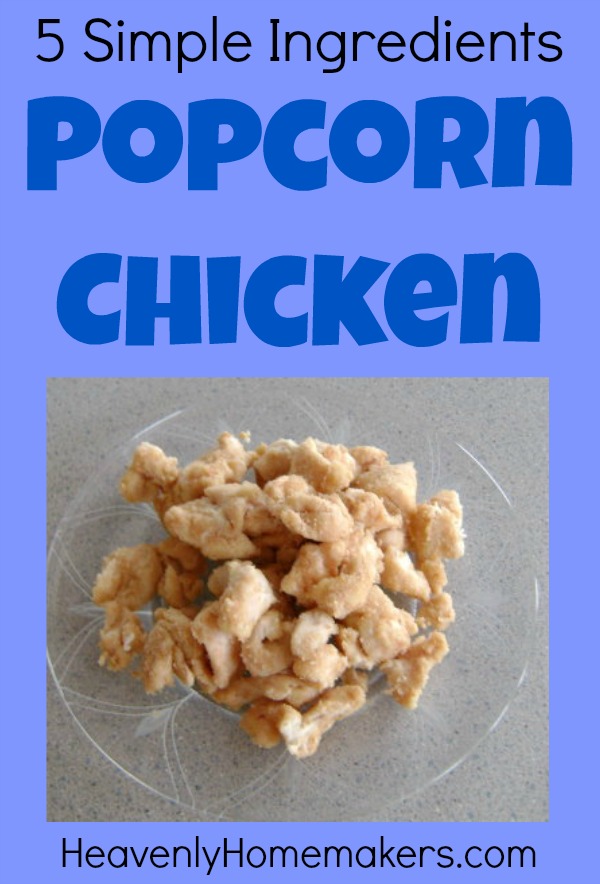
5 Simple Ingredients - Popcorn Chicken

This recipe really is as simple as it sounds. Make the chicken pieces as big or small as you like. Want more High Five Recipes like this one? You’ll find all of our real food, 5 ingredient recipes here!

You might be interested to know that when Matt and I visited west Africa in ’95, there were all kinds of animals crossing roads at all times of the day…and some of them were chickens. Indeed, it did look as if all they wanted to do was get to the other side. How ’bout that?

Heavenly Homemaker's Club Members: Access your homepage and all your fantastic resources here! Not a member yet? Please join us!
« Previous Page
Next Page »

Join Our Community!
 Facebook Twitter E-mail Instagram Pinterest

Popular Posts

~ Will All of the Real Moms Please Stand Up?
~ Easy! Stir-and-Pour Whole Wheat Bread
~ How to Make Gatorade
~ 31 Real Food Breakfast Ideas
~ Dear Teenage Girls...
~ When Mom Takes a Step Back
~ The Inexpensive Health Insurance We Love!
~ Let's Talk Real Food Grocery Budgets

Check out our latest posts!

  • Big Family Food and Fun: September 6-12, 2026
  • Big Family Food and Fun: August 30-September 5, 2026
  • Big Family Food and Fun: August 23-29, 2026
  • Big Family Food and Fun: August 16-22, 2026
  • Big Family Food and Fun: August 9-15, 2026
Home  ~  Simple Meals  ~  Club Membership  ~  Shop  ~  Privacy Policy  ~  Disclosure  ~ Contact

Copyright © 2026 · Beautiful Pro Theme on Genesis Framework · WordPress · Log in