Heavenly Homemakers

Encouraging women in homemaking, healthy eating and parenting

  • Home
    • About
    • FAQs
  • Recipes
    • Bread and Breakfast
    • Condiments
    • Dairy
    • Main Dishes
    • Side Dishes and Snacks
    • Desserts
    • Gluten Free
    • Instant Pot
    • Crock Pot
    • Heavenly Homemaker’s Weekly Menus
  • Homemaking
    • Real Food Sources
  • Store
  • Contact
    • Advertise
    • Disclosure
    • Privacy Policy
  • Simple Meals
  • Club Members!

The Easiest Sweet Vanilla Coffee Creamer Recipe

April 10, 2016 by Laura 25 Comments

This post may contain affiliate links. For more information, please see our disclosure policy.

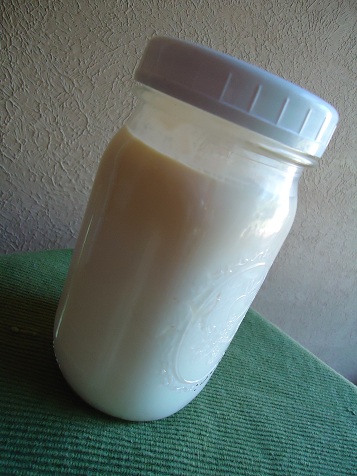
Before I say anything else about this Sweet Vanilla Coffee Creamer, I should tell you that this tastes 100-times more amazing if you use Homemade Vanilla Extract. Not that I’ve tested it on anything else. This is just an obvious conclusion since homemade vanilla makes everything 100-times better.

Homemade Vanilla Creamer

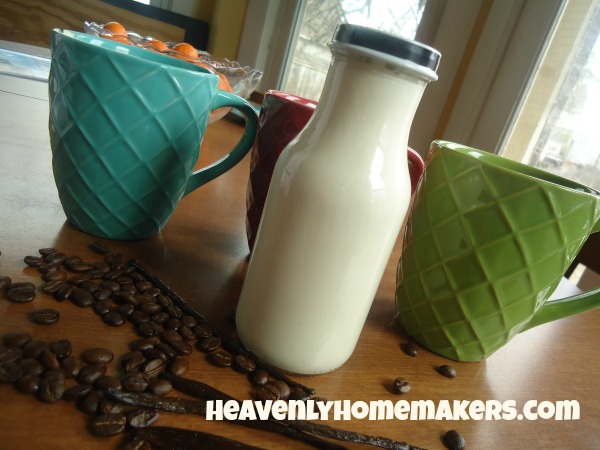
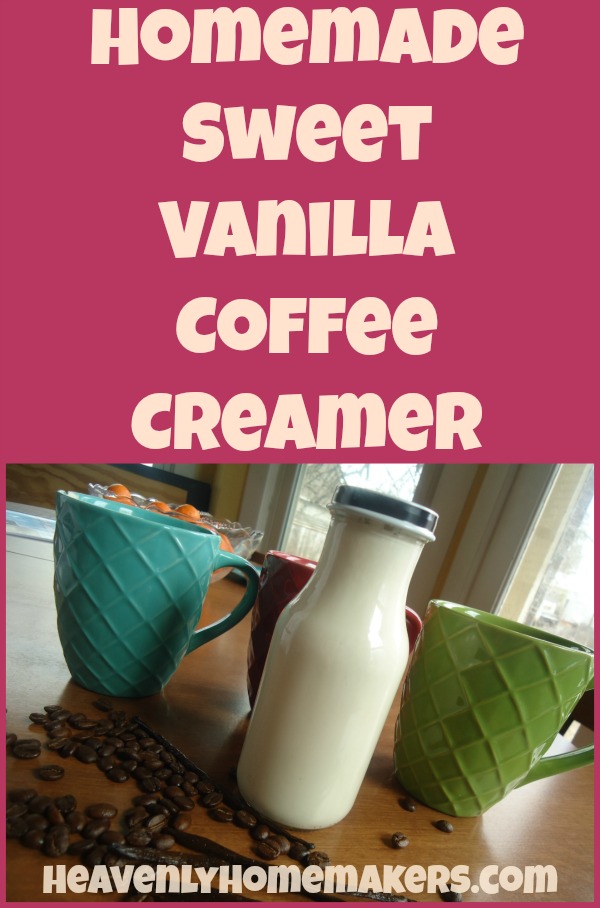
You like how my fruit bowl is in the picture behind my coffee mugs and bottle of coffee creamer? It is there to show that photography is not my gift. Also, using precious energy to walk all the way around the table and move it out of the picture would have been just too much. What am I? A teenager? Plus I hadn’t had my coffee yet. Thanks for understanding.

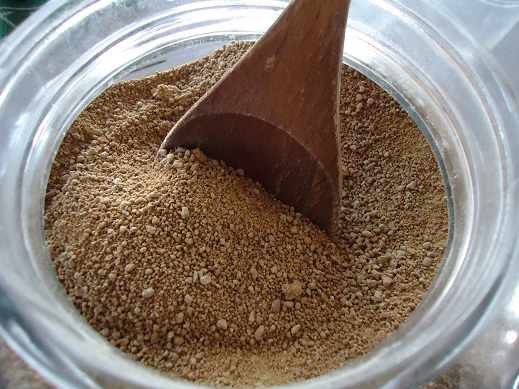
I did take the time to scatter coffee beans and vanilla beans on the table for effect. Mostly they just smelled really good. Try to imagine.

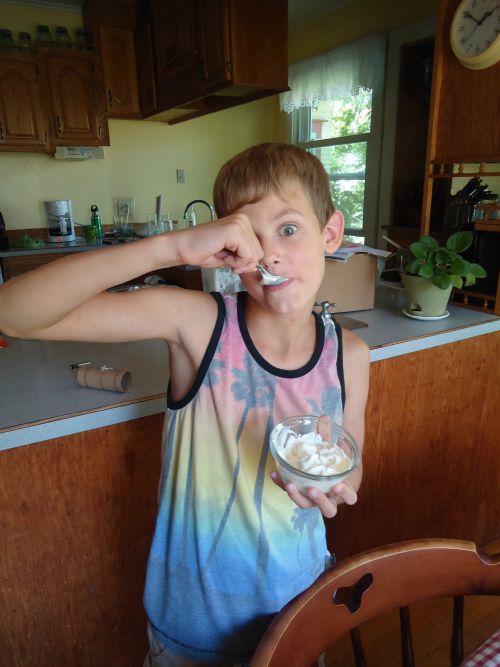
So why did I make a Sweet Vanilla Coffee Creamer recipe to share with you? After all, I drink my coffee with no sweetener – just some cream (which is perfectly sweet if you ask me). I did it for the kids. MY kids. Yup. Justus and Elias enjoy a cup of coffee with me now a few mornings each week. It’s pretty special that we can share this simple pleasure together. There’s just something cool about sharing a cup of coffee with someone. (Though to be clear – I do not share my own personal cup of coffee. It’s mine and everyone else can back away and get their own cup. I guess I should have said that I share my pot of coffee. I’m sorry to give you the impression that I was actually nice enough to share even a drop of what is in my mug each morning.)

For the past several months, the boys have been making their coffee with a splash of cream and a squeeze of NuNaturals Chocolate Syrup. I love that this makes such an amazing cup of coffee that they love – particularly because it contains no sugar. If you haven’t tried this concoction, you really want to. You won’t believe how good it is.

A couple of weeks ago, Elias asked what else he could do with his coffee – you know – for a little variety? He played with different NuNatural Flavored Stevia options, but nothing hit a home-run for him.

So we experimented with ingredients to come up with this Sweet Vanilla Coffee Creamer. Unfortunately it’s not stevia-sweetened like the chocolate syrup – so he has this one less frequently. Still though – he thinks it’s pretty tasty and worth sharing with you. Remember – Homemade Vanilla makes all the difference. Why just put in one teaspoon when you can put in two?

Sweet Vanilla Coffee CreamerYum

5.0 from 2 reviews
The Easiest Vanilla Coffee Creamer Recipe
 
Save Print
Author: Laura
Ingredients
  • 1 cup half-and-half
  • 3-4 Tablespoons real maple syrup
  • 2 teaspoons vanilla extract
Instructions
  1. Place all ingredients in a jar or bottle.
  2. Shake well.
  3. Refrigerate for up to two weeks.
  4. Shake well before each use.
  5. Pour desired amount into a hot cup of coffee and stir.
3.4.3177

Homemade Sweet Vanilla Coffee Creamer Recipe

Feel free to sweeten it more or less to reach your desired flavor preference. This recipe is a no-brainer so even if you don’t measure exactly, you can’t mess it up.

Would you be so kind as to leave a comment sharing how you like your coffee? I know my boys would have fun playing with different combinations and flavors – and maybe we can come up with more recipes to share!

This post contains affiliate links.

Heavenly Homemaker's Club Members: Access your homepage and all your fantastic resources here! Not a member yet? Please join us!

Low Sugar Dairy Free Chocolate Sauce (3 Ingredients!)

April 5, 2016 by Laura 6 Comments

This post may contain affiliate links. For more information, please see our disclosure policy.

Dairy free chocolate sauce….the new way to top a waffle.

Dairy Free Chocolate Sauce

We sure do eat a lot of cream cheese around our house.

This has nothing to do with the recipe I’m about to share with you – except that it is my way of saying, “We definitely aren’t a dairy-free family.”

Why a Dairy Free Chocolate Sauce then?

  • Because coconut milk is nourishing and I like to use it in addition to cow milk as a way to give my family a variety of nutrients.
  • Because I love having recipes on hand that I can use to bless our friends who can’t eat dairy.
  • Because this Chocolate Sauce is rockin’ and I can actually eat it because it is low in sugar.

You pretty much can’t mess up this recipe. Go ahead. Try. Not that you would. (I mean, I can sometimes mess up a recipe without even trying, say…when I’m trying to talk and cook at the same time??)

But this recipe is really fool-proof and adaptable. You can make it a little sweeter if you like. You can keep the sugar low and enjoy this as a “dark chocolate” sauce. You can add a splash of vanilla extract or mint extract.

Oh my goodness, you could stir in some peanut butter! I just thought of that, will try it, and get back to you. You’ve gotta love it when a delicious brainstorm comes in the middle of writing a sentence.

How to use your Low Sugar Dairy Free Chocolate Sauce

  • We love it on fresh strawberries, bananas, blueberries, or raspberries.
  • Often we use it as an apple dip.
  • Try stirring it into a cup of hot coffee. Yup.
  • Instead of maple syrup, spread this sauce over your pancakes or waffles.
  • Hello. Just eat it on a spoon.
  • You can drizzle this on ice cream, but if you do have to eat dairy free, you’d also have to make or find dairy free ice cream (this was obvious but still worth mentioning)

Low Sugar Dairy Free Chocolate SauceYum

Low Sugar Dairy Free Chocolate Sauce
 
Save Print
Author: Laura
Ingredients
  • 13.5 ounce can of full fat, unsweetened coconut milk
  • ⅓ cup unsweetened cocoa powder
  • ¼ - ½ cup sweetener (honey, sucanat, or brown sugar)
Instructions
  1. Mix ingredients in a small saucepan, cooking and stirring on medium heat until well combined.
  2. Serve warm or cold.
  3. Store this sauce in a covered container in the refrigerator, rewarming on the stove-top as needed. It will keep for up to a month in the fridge.
3.4.3177

Low Sugar Dairy Free Chocolate Sauce

This sauce just takes a few minutes to whip up and it seriously tastes like a gourmet treat.

Need Coconut Milk?

I typically purchase cans of coconut milk in bulk online. Some of my favorite resources are:

  • Vitacost
  • Amazon

Want the Dairy-Full version? You’ll find one here. Be warned: it’s super full of sugar. I should play with that and see how we can reduce it!

Can you think of other great ways to eat this sauce? 

Heavenly Homemaker's Club Members: Access your homepage and all your fantastic resources here! Not a member yet? Please join us!

Easy Low Sugar Key Lime Melt-Away Cookies

March 8, 2016 by Laura 10 Comments

This post may contain affiliate links. For more information, please see our disclosure policy.

I actually have no idea what makes something key lime rather than simply lime. I’d look it up, but there are fresh lime cookies to eat and also there is a lot of laundry to do since we have been gone all weekend. I would have just called these lime cookies, but key lime sounds more exciting.

Key Lime Cookies

Oh wait. I just looked it up. Did you know there are actually Key Limes? You probably did, so before you tease you have to remember that I am from Nebraska where there are no lime trees. Nebraska limes grow on trucks and in grocery stores.

Key limes are apparently great for cooking and baking because they are extra juicy and full of aroma and flavor. I will admit that I don’t know what kind of limes I used in these cookies. Therefore, maybe we should call these Easy Low Sugar On-Sale Lime Melt Away Cookies?

Either way, add these cookies to the collection of Low Sugar Cookies we’ve been enjoying here. These cookies are so much fun since all we have to do is use the base recipe, then add different flavors! Lime is just as amazing as the others.

Want to try the other varieties of these cookies?

  • Easy {Low} Sugar Cookies
  • Low Sugar Lemon Melt-Away Cookies
  • Low Sugar Almond Melt-Away Cookies
  • Low Sugar Orange Melt-Away Cookies

Easy Low Sugar Key Lime Melt-Away CookiesYum

4.0 from 1 reviews
Easy Low Sugar Key Lime Melt-Away Cookies
 
Save Print
Author: Laura
Serves: 24
Ingredients
  • 1 cup melted butter
  • ½ cup sucanat or raw sugar
  • 2 eggs
  • 1 teaspoon vanilla extract
  • The juice of two limes
  • grated lime rind
  • 1 teaspoon baking powder
  • 3 cups of whole wheat pastry flour (give or take)
Instructions
  1. Stir together melted butter and sugar.
  2. Add eggs, vanilla, lime juice, and baking powder.
  3. Grate lime rind into the mix for extra flavor.
  4. Stir in flour until a solid ball of dough forms.
  5. Drop teaspoon-sized balls of dough onto a cookie sheet, about an inch apart.
  6. Bake in a 350° oven for 10-12 minutes or until cookies are lightly browned.
3.4.3177

Easy Low Sugar Key Lime Melt-Away Cookies

If you’d like to learn a cool trick to make your lime squeezing easier, grab your limes and some tongs and read this handy information.

Do you live in an area where limes grow in your backyard? If so, I’m happy for you and not even jealous. After all, I live in a state where the wind blows so hard we don’t have to bother fixing our hair. Now who’s jealous?

Heavenly Homemaker's Club Members: Access your homepage and all your fantastic resources here! Not a member yet? Please join us!

Easy Crustless Pizza Pie

March 2, 2016 by Laura 6 Comments

This post may contain affiliate links. For more information, please see our disclosure policy.

Without a doubt, this crustless pizza pie tastes as good as it looks. Better actually.

Malachi's Pizza Pie

This recipe is simple enough for my 11-year old to make by himself, and tasty enough that we all decided to add it to the menu frequently.

______________________________________________________________

Pssst:

Said 11-year old learned most of his cooking skills because we “made him” take this Kids Cook Real Food eCourse. He was hooked after the first 5-minutes of starting this class. It is fantastic!!

______________________________________________________________

The best part is: You can make this with any pizza toppings you like. Make it full of veggies, full of meat, or a combination of both.

I will say that we made one with hamburger and one with pepperoni and all of us enjoyed the hamburger pizza pie best. The day we made these for pictures, I had no peppers or mushrooms in the house. Boo. We made them with sauce, meat, and cheese and served olives and tossed salad on the side.

See how Malachi is using one of our DIY Recipe Card Holders to hold up his recipe? Here he is, measuring the ingredients for the Cream Cheese Layer of the Pizza Pie.

malachi pizza pie1

I promise he owns other shirts. Somehow, every time we took
pictures of him cooking, he was wearing the same thing! #ipromiseitsclean

Once the Cream Cheese Layer was in the oven, Malachi browned the hamburger meat – while standing on the AlienBoard. Is there any other way to do it? I promise you will not catch me multi-tasking in this way. But yay for the 11-year old!

malachi pizza pie2

Here is the easy-to-make, very tasty recipe for your family to enjoy. MAKE THIS WITH YOUR KIDS. But that was a given, right?

Easy Crustless Pizza PieYum

5.0 from 2 reviews
Easy Crustless Pizza Pie
 
Save Print
Author: Laura
Serves: 1 pie
Ingredients
  • 8 ounces cream cheese, softened
  • 2 eggs
  • ¼ teaspoon ground black pepper
  • ½ teaspoon garlic powder
  • ¼ cup grated parmesan cheese
  • 1 cup pizza sauce
  • 1½ cups shredded mozzarella, cheddar, or colby jack cheese
  • Any meat or veggie toppings you like
Instructions
  1. In a medium-sized bowl mix cream cheese, eggs, pepper, garlic powder, and parmesan cheese until creamy.
  2. Spread mixture into a pie dish.
  3. Bake in a 350° oven for 15 minutes.
  4. In the meantime, prepare pizza toppings.
  5. Spread pizza sauce over hot cream cheese layer.
  6. Top with any meat, veggies, and cheese you like.
  7. Bake in a 350° oven for 10 minutes or until cheese has melted.
3.4.3177

Easy Crustless Pizza Pie

Kids Cook Real Food shout out!

I can’t recommend the Kids Cook Real Food eCourse highly enough. It is well worth your investment. Learn about it here. Malachi loved this class!

Heavenly Homemaker's Club Members: Access your homepage and all your fantastic resources here! Not a member yet? Please join us!

Homemade Real Food Tootsie Roll Candy – Perfect for Kids to Make!

February 29, 2016 by Laura 6 Comments

This post may contain affiliate links. For more information, please see our disclosure policy.

You don’t have to make this real food tootsie roll recipe into the shape of Legos, but for real. They do taste better this way.

Malachi's Lego Fudge

When I decided to be intentional about helping Malachi learn to cook, I knew I’d need to start him with something simple, sweet, and fun. Hey, Malachi! Want to put your soccer ball away and come make a boring meat and vegetable casserole all by yourself?!! You don’t?!?

My Peanut Butter Honey Fudge recipe seemed like a fun and perfect choice…except for the fact that Malachi hates peanut butter. “Hey, Malachi! Want to come make something that will make you totally gag? You don’t?!?

So I decided to go ahead and use the fudge recipe but adapt it in two ways:

  1. Use almond butter instead of peanut butter.
  2. Cut down the honey to make it less sugary.

He was on board to “try making fudge,” then he remembered his Lego Shape Molds. “Can I make this into Legos, Mom?” Well, yeah!! What a great way to make this project even more perfect for him!

malachi fudge 1

Be sure to admire the messy counter-top behind my kid. Whoever was supposed to load the dishwasher that morning hadn’t done it yet. I figure you’ve seen a messy counter-top before, but if not, I’m thrilled to offer you your first experience with this. #embracethemess #constantdishesandlaundry

malachi fudge 2

malachi fudge 3

malachi fudge 4

malachi fudge 5

malachi fudge 6

Malachi made some of the mixture into Lego Bricks, some into Lego Mini-Figures, then patted the rest into a small container which we cut into squares later. When all was said and done, we decided that these actually don’t taste like fudge at all. But they do taste like an amazing homemade tootsie roll!!!! To eat a tootsie roll made with real food and shaped like a Lego – that Malachi had made by himself?! Well, it was a kids-cooking success!

Homemade Real Food Tootsie Roll Recipe

5.0 from 1 reviews
Homemade Real Food Tootsie Roll Candy - Perfect for Kids to Make!
 
Save Print
Author: Laura
Serves: 24-30 pieces
Ingredients
  • 1 cup almond butter
  • ¼ cup honey
  • ½ cup chocolate chips
Instructions
  1. Measure all ingredients into a small pan.
  2. Melt and stir them over low heat until the chocolate chips have melted and the ingredients are well combined.
  3. Spread mixture into an 8x8 inch dish or press small amounts of the mixture into fun silicone molds.
  4. Place in the refrigerator to chill for about an hour before serving.
3.4.3177

Homemade Real Food Tootsie Roll Candy

Use my recipe and instructions for making Homemade Almond Butter if you like. You can switch out the almond butter for Peanut Butter if you prefer.

This Tootsie Roll recipe is what launched Malachi into his new world of discovering that cooking isn’t so bad!

If you’re wanting to pull your kids into the kitchen to launch them into their own journey to learning cooking skills, I recommend that you:

  • Begin with a very easy recipe – like these Homemade Tootsie Rolls!
  • Pick something fun – like these Homemade Tootsie Rolls!
  • Choose something you know your child will like to eat.
  • Be relaxed. (You can do it!)
  • Get out (or have your child help you get out) the ingredients your child will need before you start the cooking process.
  • Be open to your child’s suggestions.
  • Don’t back down. Your kids NEED to learn how to cook.

I’m excited to show you the fun Recipe Card Holder craft! Plus more kid-friendly recipes throughout the rest of this week! As you can tell, teaching my kids to cook has been so boring and sad we can’t even stand it. Eating Homemade Tootsie Rolls is so difficult and turning over a big part of my kitchen workload to my kids has been such a challenge. Somehow I’ll make it through. #yeahright #lovingthis #teachyourkidstocookalready

Psst!

Teach your kids some great cooking skills through the Kids Cook Real Food video series. Learn about it here. The knife skills series is free, but we loved it so much we went through the entire course. Malachi learned a ton and is now so much more confident with his cooking skills!

This recipe contains affiliate links.

Heavenly Homemaker's Club Members: Access your homepage and all your fantastic resources here! Not a member yet? Please join us!

Get Your Kids Into The Kitchen This Week! (What Malachi is Learning)

February 29, 2016 by Laura 11 Comments

This post may contain affiliate links. For more information, please see our disclosure policy.

I tell you, when my older boys were little I had them in the kitchen learning with me all the time. It’s amazing, though, what Malachi has missed out on by being the youngest of four. Poor kid. I read to him less, took fewer pictures of him – basically he has all the “baby of the family” issues. You can see how sad and miserable he is as a result:

pineapple fluff malachi

There. We can’t say I never took his picture.

One thing that has been nice the past few months is that while the older boys have been at basketball practice on Tuesday/Thursday nights – Malachi has had quite a bit of one-on-one time with the parents. We’ve used these nights to work on special projects – one in particular has been in the area of cooking. (He’s also been dreaming of and planning a state-wide Lego Convention with Matt, because when Malachi has an idea it’s go big or go home.)

I’ve been pulling him down onto my lap (because yay, he still fits!) and together we’ll watch a cooking video from the Kids Cook Real Food eCourse that came out in January. We talk about what we watched. We make plans for what to cook, based on the skills he just learned. We practice the skills together. This kid has made huge strides in just a few weeks!

In fact, he and I got so excited about what he’s learning that we spent part of the month of February writing a little cookbook together! I’m not even kidding. (More about his book later!)

Malachi's Favorite Cookbook small

Score one (or one-thousand) for being intentional. That’s really all it takes: Deciding you’re going to teach your kid something – then actually following through with it. (That is profound parenting advice, right there.)

malachi cutting

Free 3-Part Kids Cook Real Food Videos

This all started for Malachi and me back in January when we took advantage of Katie’s FREE Knife Skills Training Lessons. He learned loads in those lessons alone. Now Malachi confidently cuts everything from apples to strawberries to carrots – and I confidently hand him the sharp knives. (I am totally working myself out of a job.)

malachi cutting berries

I’m so happy to share that Katie opened up access to these FREE video lessons again just for Heavenly Homemaker readers. They are completely free – so grab the videos, grab your kids, then grab some knives. ( <—For your fruits and vegetables. Oh, you know what I mean.)

What You Can Expect This Week

All this week we’ll be focused on getting our kids into the kitchen. Why?

  • Our kids need to know how to cook.
  • Our kids need to know about cooking nutritious foods (not just about putting a frozen pizza in the oven).

Even if you don’t have kids at home, I think you’ll still enjoy the posts during the next several days (because recipes and a craft!!!). Here’s the line-up for this week:

  • Kid (and everyone else) Friendly Recipe: Crustless Pizza Pie
  • Kid (and everyone else) Friendly 3-Ingredient Recipe: Homemade {Real Food} Tootsie Rolls – I am not kidding!
  • Easy 5-Minute Recipe Card Holder Craft Tutorial for Kids and Adults Alike (If I can make it, you can make it. Wait until you see how cute!)
  • Lists of easy recipes (with links) your kids can learn to make on their own
  • And don’t forget that this week only, you have access to the FREE Knife Skills Videos and Lessons.

kids in the kitchen week

A Word About the Kids Cook Real Food eCourse

Registration for Katie’s Kids Cook Real Food eCourse closed right after Malachi and I signed up in January. Since that time, it has benefited our family more than I ever imagined it would. Malachi wasn’t super thrilled to watch the first video with me and get started in the kitchen (because it’s easier to let someone else do the work, right?). But in just a few weeks, he has gone from knowing very little about cooking to being able to do dozens of kitchen tasks. Now each week when a new lesson hits our inbox, Malachi actually gets excited!

“Did we get a new cooking video? I really like those, Mom. You should tell Katie that I really like the videos and the lessons. What’s this new one about?”

That is why I emailed Katie recently – to let her know that her eCourse has been a huge blessing to our family, and to ask her if she would pretty please open up her cart for a few days in Feb/March so more of you can jump aboard this amazingness with Malachi and me. She said “sure!” You need to know that we scored big to be given this privilege, because the cart doesn’t open back up for the general public until May!

What Surprises Me Most About The Kids Cook Real Food eCourse

I’ve been cooking since I was about 8-years old. I’ve been researching nutrition and real-food eating for over 10 years. I consider myself to be pretty good in the kitchen and pretty knowledgeable about food in general.

But I have learned oodles of facts I did not know while working through this eCourse with Malachi.

I didn’t know the thing about the garlic! I didn’t even know the thing about the rice. (I can’t tell you which things because that’s not fair to Katie.) If your kids are taking the course and you read/hear the things about the garlic and the rice, please email me to tell me if you knew. Did you know??

I Have a Bunch of Free Stuff for You To Go With This eCourse

You might remember me saying that I’ve been wanting to put together a Kids Cooking eCourse for years. I was even a little bit disappointed when I heard Katie was making one because I wanted to make one! (<— best read in a whiny voice.) Then I saw what Katie had put together, and I was like, “Well, wow. This is a million times better than I would have/could have done. This is incredible.”

But if I would have made one (which I didn’t), I would have geared it around my Teaching Your Kids to Cook and Learn to Cook ebooks. They would have gone hand-in-hand because those books have a lot of basic cooking information and of course – many easy-to-make real food recipes.

Katie’s class is perfectly set up to teach your kids to cook the real foods you regularly make in your kitchen. This means that if your family has allergies, your child learns to make allergy friendly food your family can eat. It means that if your family has favorite recipes, your child learns to make your family’s favorite recipes. This means that no matter what cookbook your child has, he/she can read it and cook from it.

That’s why it’s fun to be able to give you all 212 pages worth of my Teaching Your Kids to Cook and Learn to Cook ebooks FOR FREE when you buy the Kids Cook Real Food eCourse this week. Then you and your kids will have even more great real food recipes to work with!

Free Teaching Your Kids to Cook eBooks

Additional Freebies!

I’ve been creating some simple activities for Malachi to complete as he has been working his way through the Kids Cook Real Food eCourse. They are fun and effective – reinforcing the skills and nutrition tips he’s been learning. So I packaged them up for you to enjoy with your kids too! Get the Kids Cook Real Food Activities Packet for FREE when you buy Katie’s eCourse this week.

Kids Cook Real Food Activities Packet - Free with Purchase

A Special FREE Copy of Malachi’s Favorite Cookbook

Malachi and I had so much fun working together to write a cookbook. Wait until you read, “Malachi’s Best Cooking Tips!” on page 2 of his book. (He actually used the word, “duh!” which I edited out then put back in because he is eleven and adorable and I couldn’t not include it.)

I’m guessing Malachi’s favorite recipes will soon be your child’s favorite recipes. The book includes 16 of his favorites. Of course, now that we’ve completed it and we keep cooking together, he keeps thinking of more. “We should have added that recipe to my cookbook!” Good thing we included extra pages at the back of the book for your child (and mine) to add new favorites as he/she discovers tasty recipes he/she enjoys!

Malachi agreed that we could give this book away for free this week to anyone who buys the eCourse. “People should get these classes, Mom. They’re really good. Tell them it’s really good.” <— Malachi has spoken.

Malachi's Favorite Cookbook Samples2

So Let’s Review

  1. Everyone can sign up this week to enjoy the FREE Knife Skills Training Videos with your kids. Do this now! You’ll love it!
  2. I have some really great recipes and a craft tutorial ready to share with you this week. Homemade tootsie rolls? Absolutely, yes!
  3. The Kids Cook Real Food eCourse is open just for Heavenly Homemaker readers, just through Monday, March 7. It is well worth your money and time investment.
  4. To sweeten the pot, I’m giving everyone who purchases the eCourse a free Learn to Cook eBook (102 pages), a free Teaching Your Kids to Cook eBook (111 pages), a free copy of Malachi’s Favorite Cookbook (15 pages), and a free KCRF Activity Packet (10 pages)!

To get your freebies and to be entered into our drawing, you’ll just need to email me to let me know that you made the purchase. I’ll have your name in a ledger, but I won’t have your email address. So I can check the ledger, then email you back with the goods!

It’s going to be a great week! At home we’ll be starting with Malachi cutting broccoli, carrots, and zucchini for stir-fry. See? Told you I was working myself out of a job. :)

Look forward to fun kid-friendly recipes coming right up!

Learn More About the Kids Cook Real Food eCourse Here.

This post contains my referral links.

Heavenly Homemaker's Club Members: Access your homepage and all your fantastic resources here! Not a member yet? Please join us!

My Adventures in Making Homemade Nutella

February 24, 2016 by Laura 5 Comments

This post may contain affiliate links. For more information, please see our disclosure policy.

Homemade Nutella, anyone?

Nutella

It all began at Asa’s graduation party with two other graduates last May. The moms and I planned it together and they decided to go all out. One of the items on our menu was “crusty bread with different topping options” like meats, cheeses, and nutella (though probably not all at the same time). My friends and I set out a lovely buffet. I was the one in charge of purchasing the condiments, sauces, and Nutella.

grad party 4

Not knowing how many hundreds of people might show up and how many of those hundreds would want to spread Nutella on their bread – I bought four enormous containers of it. We went through exactly 1.5 of those huge tubs, so guess what we’ve been eating since May?

My boys have been so sad about this.

We finally finished them off, and now the boys are having Nutella withdrawals. I can’t stand to buy more, so I determined to figure out a healthier option that I can feel better about. Some of you might remember that I attempted Homemade Nutella a few years ago. That was tasty, though still had quite a bit of sugar. I had a terrible time actually finding Hazelnuts this go around – but part of my problem was that the price was throwing me off.

The good news is (now that I’ve attempted this recipe and learned a few tricks) – it takes only a few hazelnuts to make a batch of nutella. So my purchase will go a long way to providing a healthier nutella option for the fam.

nutella2

Malachi’s been my chef-in-training the past few weeks and was very excited to enjoy Nutella again. He joined me in putting together this recipe. Here he is pushing a button. (Cooking is so hard.)

I’m excited that this version of Homemade Nutella is lower in sugar than most. If you prefer, use expeller pressed coconut oil since it is flavorless and won’t effect the taste.

Make Your Own Nutella

My Adventures in Making Homemade Nutella
 
Save Print
Author: Laura
Serves: half pint
Ingredients
  • ⅔ cup hazelnuts
  • ¼ teaspoon sea salt
  • ½ cup cocoa powder
  • ½ cup melted coconut oil
  • ½-2/3 cup real maple syrup
Instructions
  1. Lay the hazelnuts on a cookie sheet and toast them in a 350° oven for about 10 minutes.
  2. Remove skins if necessary.
  3. Whirl toasted hazelnuts in a food processor until smooth.
  4. Add remaining ingredients and blend until creamy.
  5. Store in a half-pint jar for up to three weeks.
3.4.3177

Make Your Own Nutella

Have you tried making Nutella before?

It’s fun, easy, and yummy – and unlike Homemade Peanut Butter Captain Crunch – this one is worth the small time investment. :)

Heavenly Homemaker's Club Members: Access your homepage and all your fantastic resources here! Not a member yet? Please join us!

My Real Food Purchase Priorities In Order From One to Eight

February 16, 2016 by Laura 17 Comments

This post may contain affiliate links. For more information, please see our disclosure policy.

If I had to sum up the past 11 years of my personal real food journey, I’d say I have gone from poptarts to psycho to chill. No one liked the psycho phase – not even me. I coped by drinking Pepsi. Do not ask me to make sense of this. Read the details here, if you dare.

Now, I’d like to spend a few minutes answering a much requested question as of late:

“What are your current real food priorities?”

Now that I’ve been doing the real food thing for 11 years – if I had to make a list of the foods I feel are most important to buy and put them in order of highest priority down to lowest, what would that look like? Also, where does organic fall in this list? What about raw? How about grass fed? What about hormones? How about margarine? Oh, c’mon. Everyone knows how I feel about margarine.

(Just in case: DON’T EAT MARGARINE EVER, EVER IN YOUR LIFE, EVER.)

The past few weeks, I have spent quite a bit of time pondering my current food priorities, which no doubt, may look different than yours. If you’ve been reading here for years, you’ve watched my priorities change along with the seasons in my life (psycho to chill ~ little boys to teenage boys ~ small budget to huge budget). I look forward to hearing about your priorities too! For now, here are mine:

1. Fruits and Vegetables

You know I can’t say enough about eating many, many fruits and vegetables every day. I do buy some of them organic if they are available and within my budget – but mostly – I just buy them. Organic is best, absolutely. But I found that I was not buying and eating enough when I was focused on only buying organic produce. I live in too small a town to have enough organic options, plus the cost is prohibitive for my family. We go through pounds and pounds of produce every week. I spend at least $100-$150 on fruits and vegetables alone – every week. I would triple that number if I bought exclusively organic. I can’t, so I don’t.

Organic or not, a big variety of fresh and frozen fruits and vegetables is definitely my highest grocery priority.

feb 5 groceries

2. Healthy Fats

I considered making this my #1 priority, simply because switching to real-food fats is what I always advise as one of the easiest healthy changes a person can make. But seeing as I eat more veggies than butter every day (shocking, I know) – I went ahead with fats as number 2.

I see fats as super important in our diet – and I believe eating the good kind is crucial. Our bodies struggle to digest and utilize hydrogenated oils and chemically created oils. It’s best to avoid them altogether.

On the other hand, coconut oil is a health food rock-star. Real butter is recognized by our bodies and can be very nourishing. Palm shortening is easily digested and a wonderful alternative to crisco. Olive oil is wonderful (but best at low temps) – great for salad dressings.

If you change nothing else about how you eat and feed your family – add more fruits and vegetables and switch bad fats for good ones. I can’t say enough about these two priorities. Our bodies need nourishment and in my opinion (based on research and real life) – fruits, vegetables, and healthy fats are some of the best foods that pack a nourishing punch.

coconut_oil

3. Good Meat and Eggs

I make this a high priority mainly because we go through quite a bit of meat and eggs at our house. Our sons are athletic and active – they need a lot of good protein beyond beans and nuts!

We are blessed to have access to wonderful farm-fresh meats and eggs (at reasonable prices) where I live. I love that my chicken, beef, lamb, and eggs come from animals who are fed well and allowed to roam free. This is important enough to me that if we ever moved to another location, I would search out good meat and egg sources. Buying regular ol’ meat and eggs from the store would be tough for me now that we’ve been so spoiled with the good stuff. I can taste a huge difference! (But I still say that if store-bought is your only option, you never need to fret. God is bigger than a free-range chicken. Amen?)

chicken week 1

4. Whole Grains

Number 4-5-6 could probably be interchanged with one another, but here is where they ultimately landed.

We’ve cut way back on grains – making fruits, veggies, and meat the main focus of our meals. But I still make whole grains a priority because they help stretch our food budget. They also help keep my life in the kitchen simpler. It’s easy for me to whip up (or have the boys whip up) a triple batch of pancakes or a big bunch of muffins or a few loaves of Stir-and-Pour Bread to go with our meals.

It is important to me that our grains be whole and nourishing, not just filling and empty. If at all possible, I do like our wheat, oats, rice, corn, and other grains to be organic and non-GMO. I’m blessed to have a Nutrimill to grind our own flour – which makes our baked goods incredibly delicious.

wheat

5. Healthy Sweeteners

I’ve recently shared that I rarely buy sucanat anymore because of the expense. In addition, I can no longer tolerate much sugar. Seeing as none of us need sugary treats, and our boys get plenty from all their outside activities – I am making fewer dessert-y foods overall.

But I love our raw, local honey. We use real maple syrup on our waffles and pancakes. Sucanat or brown sugar are used in my baked goods. And liquid stevia has become a staple. I keep all of these on hand at all times, usually buying them online.

sucanat

6. Dairy Products

I hesitated putting this one way down here, but when I look at the quality of most of our dairy products – they are usually just straight from the grocery store, which shows that I no longer make this a huge priority. We do buy a gallon of raw, organic milk from local farmers each week. Funny, isn’t it, and my family of big eaters only uses one gallon of milk each week? That’s because we just use it for cooking. None of my boys likes drinking milk, and our natural doctor has recommended that it isn’t a big need. So I don’t make milk a big priority. I love that I can get the good stuff, though!

As for cheese and cream – right now I have chosen to save money by skipping the organic/raw varieties. We buy these items on sale at a regular grocery store.

I should also mention that I do still make our buttermilk from our raw, farm-fresh milk. I only make yogurt and kefir occasionally – mostly in the summer when we’re making more smoothies! (I’ve also been using coconut milk more often for this type of drink – mainly to give our bodies variety of nutrients.)

buttermilk

7. Nuts and Beans

We love making our own Peanut Butter and Almond Butter. I like buying organic nuts if I can, either from Azure Standard or Braga Farms. I buy organic beans in bulk from Azure – though we really don’t go through them very quickly. They aren’t a favorite around here.

peanut butter

8. The Other Stuff

There are many other food items – from spices to baking powder – that I haven’t mentioned here. Just like all the rest – if I find a good organic source for these foods, I go for it. If not, I don’t sweat it as long as it still qualifies as “real food.” We also sometimes buy a convenience food item (like chips!) balancing those with plenty of nourishing options. I feel like I’ve probably forgotten some major food group in this list of priorities – so fire away with your questions!

real_salt

How about you?

I’d love to hear what you consider to be your top priorities when purchasing food for your family!

Heavenly Homemaker's Club Members: Access your homepage and all your fantastic resources here! Not a member yet? Please join us!

Simple Taco Soup

February 9, 2016 by Laura 1 Comment

This post may contain affiliate links. For more information, please see our disclosure policy.

taco soup 1

I can’t get a good picture of this soup. This is so easy to make and it’s amazing to eat and the picture looks like eh, whatever. So just glance over the picture and know that you need to make this soup.

Here’s my happy little soup secret: This Taco Soup is made with none other than this Real Food “Velveeta” and Rotel Recipe. See, you make that recipe and you double or triple it because it just makes sense because it is so delicious. You eat it with chips, or you boil some pasta and make it into Spicy Mac and Cheese. Or if you’re feeling soupy, you stir in some chicken or beef broth and top it with crunched chips. It becomes Taco Soup and you love it so much you can’t even stand it. Or maybe it’s just me.

Simple Taco Soup

Simple Taco Soup
 
Save Print
Author: Laura
Serves: 6-8
Ingredients
  • 1 pound hamburger meat
  • 2-4 Tablespoons butter
  • 2 heaping Tablespoons corn starch
  • 1 cup water
  • 1 teaspoon chili powder
  • sea salt to taste
  • 2 cups heavy cream
  • 10-ounce can diced tomatoes with green chilies (Rotel)
  • 1-2 cups shredded cheddar or colby jack cheese
  • 2-3 cups chicken or beef broth
Instructions
  1. Brown the hamburger meat in a large pot.
  2. Add butter to the meat, melting it throughout the pot.
  3. Sprinkle in corn starch, coating the meat.
  4. Pour in water, chili powder, and salt.
  5. Turn heat up and stir until the mixture thickens.
  6. Add cream, continuing to stir as the mixture thickens. (This all happens quickly in my experience.)
  7. Stir in Rotel and broth, heating for about 5 more minutes.
  8. Remove from heat.
  9. Add shredded cheese, stirring until the cheese has melted and the dip is smooth.
  10. Serve with tortilla chips.
3.4.3177

I know I’ve said it before, but I really, really love making triple batches of Real Food “Velveeta” and Rotel. It’s super easy and it is so versatile! Every few weeks I make it and store it in my fridge to pull out for easy meals. Now we use it to make soup too!

Here are some pictures of your options to entice you:

Real Food “Velveeta” and Rotel, served as a dip:

Real Food Velveeta and Rotel Dip

The very same dip, stirred into boiled pasta and served as Spicy Mac and Cheese: 

Spicy Mac and Cheese

Same dip again, with broth stirred in, served as Taco Soup:

Simple Taco Soup

Do you see why I make big batches of this?? 

If you’d like to take a look at my favorite way to make nourishing broth for soups like this, check out this post:

How I Make Veggie-Packed Chicken Broth and Beef Broth

Have you made the Real Food “Velveeta” and Rotel recipe? What’s your favorite way to eat it?

Heavenly Homemaker's Club Members: Access your homepage and all your fantastic resources here! Not a member yet? Please join us!

29 Fun Treat Recipes for Valentine’s Day – With NO Red Food Dye

February 8, 2016 by Laura 3 Comments

This post may contain affiliate links. For more information, please see our disclosure policy.

Low Sugar Strawberry Cheesecake Parfait 1

Traditionally we think of red or pink food dye squirted into white frosting to make festive Valentine’s Day cookies and cupcakes. Want to put some fun Valentine meals and treats on the table this year – but want to keep the food real and avoid food coloring?

It is a true fact that food exists that is red without any help from outside sources. There’s also this lovely thing we like to call chocolate. It’s not red, but it certainly says, “I love you,” don’t you think?

Here are 29 great recipes for you that can be turned into Valentine’s Day goodies for your family. You might be able to tell that I am desperately hoping for fresh strawberries to be in season and on sale THIS WEEK.

29 Fun Treat Recipes for Valentine's Day with NO Red Food Dye

Red and Pink Treats (No Food Dye!)

  • Cranberry White Chocolate Chip Breakfast Cookies
  • Homemade Poptarts, cut into hearts, of course
  • Strawberry Cream Muffins
  • Raspberry Oatmeal Bars
  • Chocolate Whipped Cream on Strawberries
  • Strawberry-Peach Slushies
  • Strawberry-Kefir Smoothies
  • Strawberry Yogurt
  • Strawberry-Yogurt Fruit Dip
  • Strawberry Christmas Salad (which obviously becomes Strawberry Valentine Salad on Feb. 14)
  • Low Sugar Strawberry Cheesecake Parfait
  • 7-Minute Strawberry Ice Cream
  • Strawberry Creamsicles
  • Strawberry Shortcake
  • Strawberry Milkshakes
  • Easy Raspberry Syrup (for your heart shaped pancakes)
  • Raspberry Lemon Cream Cups

Don’t forget obvious foods that are red – like tomatoes, sweet peppers, strawberries, grapes, cherries, raspberries, and oranges. Ha. Just seeing if you were paying attention.

Chocolate Treats

  • Warm Chocolate Soother
  • Chocolate Whipped Cream on Strawberries (which I realize I mentioned above, but it is both red and chocolate, so it deserves to be in both categories)
  • No-Bake Chocolate Fudge Bites
  • Chocolate Chocolate Chip Muffins
  • Peanut Butter or Caramel Chocolate Truffles
  • Low Sugar Chocolate Cake
  • Low Sugar Chocolate Cheesecake
  • Dark Chocolate Peppermint Mousse
  • No-Bake Chocolate Peanut Butter Cheesecake
  • Homemade Chocolate Frappe
  • Chocolate Cheesecake Pie
  • Homemade Chocolate Peanut Butter Cups

Do you have foods you traditionally make and serve on Valentine’s Day?

Heavenly Homemaker's Club Members: Access your homepage and all your fantastic resources here! Not a member yet? Please join us!
« Previous Page
Next Page »

Join Our Community!

 Facebook Twitter E-mail Instagram Pinterest

Popular Posts

~ Will All of the Real Moms Please Stand Up?
~ Easy! Stir-and-Pour Whole Wheat Bread
~ How to Make Gatorade
~ 31 Real Food Breakfast Ideas
~ Dear Teenage Girls...
~ When Mom Takes a Step Back
~ The Inexpensive Health Insurance We Love!
~ Let's Talk Real Food Grocery Budgets

Check out our latest posts!

  • Big Family Food and Fun: May 31-June 6, 2026
  • Big Family Food and Fun: May 24-30, 2026
  • Free 7-Day Summer Menu Plan
  • Big Family Food and Fun: May 17-23, 2026
  • Easy Side Dishes for Summer
Home  ~  Simple Meals  ~  Club Membership  ~  Shop  ~  Privacy Policy  ~  Disclosure  ~ Contact

Copyright © 2026 · Beautiful Pro Theme on Genesis Framework · WordPress · Log in