Heavenly Homemakers

Encouraging women in homemaking, healthy eating and parenting

  • Home
    • About
    • FAQs
  • Recipes
    • Bread and Breakfast
    • Condiments
    • Dairy
    • Main Dishes
    • Side Dishes and Snacks
    • Desserts
    • Gluten Free
    • Instant Pot
    • Crock Pot
    • Heavenly Homemaker’s Weekly Menus
  • Homemaking
    • Real Food Sources
  • Store
  • Contact
    • Advertise
    • Disclosure
    • Privacy Policy
  • Simple Meals
  • Club Members!

Simple Cheesy Baked Chicken

October 20, 2016 by Laura 8 Comments

This post may contain affiliate links. For more information, please see our disclosure policy.

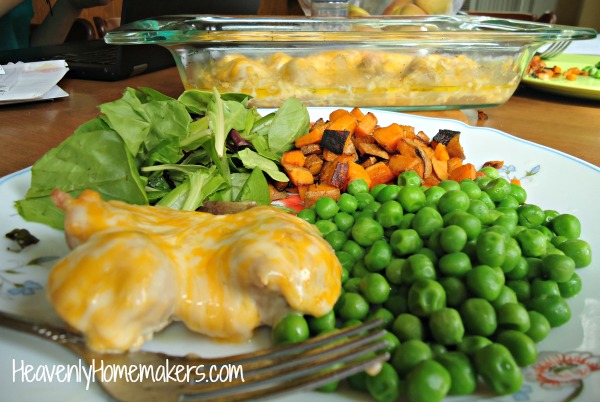
This Cheesy Baked Chicken recipe is unbelievably simple!

I was skeptical at first. I thought it might turn out boring or dull, dry or flavorless. Turns out, the flavor is perfect, the chicken is juicy, and then there’s the cheese. Cheese makes everything better.
easy-cheesy-chicken


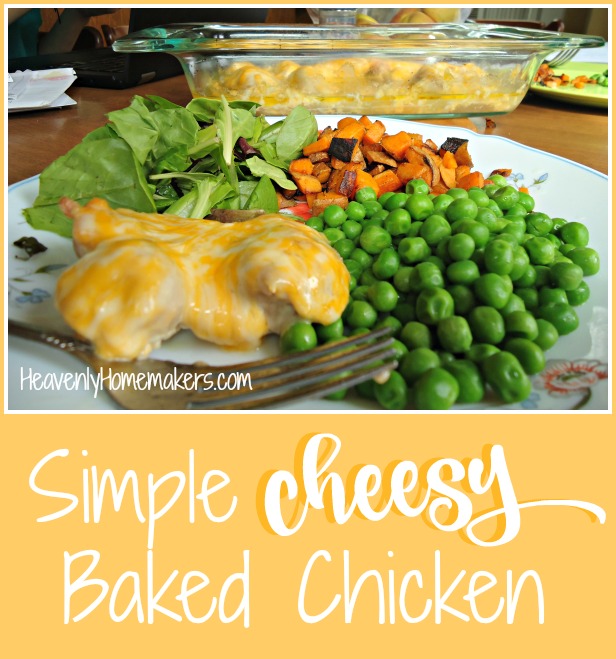
In keeping with the Simple Recipes theme we have going on here, this recipe can be made with about five minutes of effort. While the chicken is baking, you can quickly make some veggie side dishes. We first enjoyed this chicken with fried sweet potatoes, tossed salad, and buttered peas. It was crazy easy and so, so delicous.

Simple Cheesy Baked ChickenYum

4.5 from 2 reviews
Simple Cheesy Baked Chicken
 
Save Print
Author: Laura
Serves: 4-6
Ingredients
  • 2 pounds boneless chicken thighs or breasts
  • 2 Tablespoons olive oil
  • 1 teaspoon garlic powder
  • 1 teaspoon sea salt
  • 1 cup shredded cheese (cheddar or Colby jack recommended)
Instructions
  1. Place chicken in a baking dish.
  2. Drizzle olive oil over the chicken and sprinkle with garlic powder and salt.
  3. Bake, uncovered, in a 350 degree oven for 20 minutes.
  4. Sprinkle cheese over the chicken and bake for 10 minutes more or until cheese has melted.
3.4.3177

simple-cheesy-baked-chicken

Allow me to put in a word again for using boneless chicken thighs instead of boneless chicken breasts. The thighs have more fat in them, so they are always juicier and more flavorful. I’ve found the price for thighs to be about the same, if not better than what I’ve found for breasts. I’m also enjoying the fact that I continue to find a natural brand of chicken marked down for quick sale at the store. I know it’s not the best of the best when it comes to chicken, but it is at least better than the worst. (You like my logic, there?) I grab all the marked down packages I find, often getting 2-pound packages for about $3.00, and freeze them for when I need them. What a huge money saver!

Have you been enjoying all the new Simple Recipes I’ve shared here lately? They’ll keep coming, because I’m on a roll and this is fun! Here’s the list of what I’ve shared so far:

  • Simple Baked Salmon and Asparagus
  • Simple Crock Pot Chicken Soup with a Kick
  • Simple Skillet Taco Pasta
  • Simple Sweet and Sour Baked Chicken Legs
  • 20-Minute Taco Soup

It’s here! Check out our amazing Simple Meals program!

728x90

Heavenly Homemaker's Club Members: Access your homepage and all your fantastic resources here! Not a member yet? Please join us!

20-Minute Taco Soup Your Family Will Love

October 16, 2016 by Laura 6 Comments

This post may contain affiliate links. For more information, please see our disclosure policy.

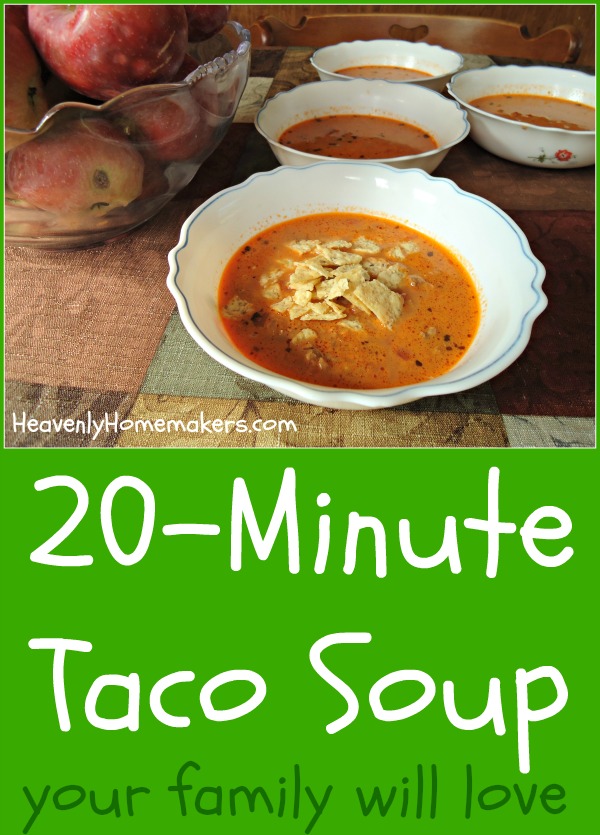
I’m going to start this post off by saying that this soup can be made from start to finish in about 20 minutes, but it actually only takes about 5 minutes of effort on your part, so you can be even happier about this Taco Soup than you were when you first saw the title.

quick-taco-soup

The Simple Crock Pot Chicken Soup with a Kick recipe I shared a couple weeks ago has been such a hit that I decided to try the same idea, subbing hamburger meat for the chicken. You know me. I love me some beef.

You guys, adding beef to this soup was a very, very good idea. The soup came together very quickly and my family loved it like crazy. I served it with homemade applesauce (because applesauce is what October is made of) and carrot sticks (because I needed to quickly throw out a veggie to compliment this meal before we left for a soccer game).

The very next day, I made this soup again because at the last minute it was decided that our oldest son, Asa, and a couple of his college buddies were going to come have dinner with us. I quickly thawed some hamburger in hot water like this (best trick ever!), made the soup, sliced some peaches and strawberries, cut up some sweet peppers, and set out a buffet.

Everyone who has tried this Taco Soup loves it, and seeing as it only takes a few minutes to make, I see myself falling back on this recipe often this winter!

Why shouldn’t you make this soup in the crock pot like the chicken version? Because it’s not necessary and will not save you time. The chicken soup does best in a crock pot because you can dump the chicken in while frozen and the crock pot will thaw and cook it and after a few hours you’ll have soup. For this hamburger version, you simply need to brown the meat, stir in the other ingredients, let the cheese melt, and serve it right away.

This soup and the Chicken Version are about to become your frequent dinner guests.

20-Minute Taco SoupYum

5.0 from 3 reviews
20-Minute Taco Soup Your Family Will Love
 
Save Print
Author: Laura
Serves: 4-6
Ingredients
  • 1 pound ground beef
  • 16-ounces salsa (more or less is fine; mild to hot is fine - your preference)
  • 32-ounces (1 quart) chicken or beef broth
  • 8-ounces cheese (Colby jack or cheddar)
Instructions
  1. In a medium to large sized pot, brown the hamburger meat until no longer pink.
  2. Stir in salsa and broth and heat with the meat.
  3. Cut cheese into small chunks and stir into the soup, whisking until melted.
3.4.3177

What to serve with this 20-Minute Taco Soup:

  • Tossed salad
  • Fresh fruit
  • Applesauce
  • Raw veggies

Consider adding to your bowl of 20-Minute Taco Soup:

  • Crushed tortilla chips
  • Sour Cream
  • Sliced Olives
  • Black Beans
  • Corn

20-minute-taco-soup-your-family-will-love

Don’t miss our other Simple Recipe ideas shared here so far:

  • Simple Baked Salmon and Asparagus
  • Simple Crock Pot Chicken Soup with a Kick
  • Simple Skillet Taco Pasta
  • Simple Sweet and Sour Baked Chicken Legs

This series has been so much fun so far and I’m excited about more new simple recipes I’ve been playing with to share. More to come!

It’s here! Check out our amazing Simple Meals program!

728x90

Heavenly Homemaker's Club Members: Access your homepage and all your fantastic resources here! Not a member yet? Please join us!

Want to Eat Healthy? Then Stay Away From This…

October 2, 2016 by Laura 8 Comments

This post may contain affiliate links. For more information, please see our disclosure policy.

Let me guess. You assume I’m going to say something about margarine. Maybe high fructose corn syrup. Crisco, perhaps?

Aww, you know me well. You know I yell about avoiding those harmful ingredients. But that’s not actually what I want to talk about today.

want-to-eat-healthy-stay-away-from-this

Today I’m not going to give you a list of do’s and don’ts about eating. Today’s advice is much simpler. It’s this:

If you want to consistently eat healthy meals and snacks, stay away from complicated recipes.

I can’t emphasize this enough. Every once in a while I meet someone who truly thrives on challenging recipes with multiple steps. But mostly I find that complicated recipes make people frustrated and overwhelmed, then they quickly give up on healthy eating and fall back into patterns of eating out and grabbing cheap, empty, convenience food.

I don’t even blame them. When I see a recipe with a long list of ingredients and a bunch of detailed instructions, my brain explodes. This, from someone who loves to cook.

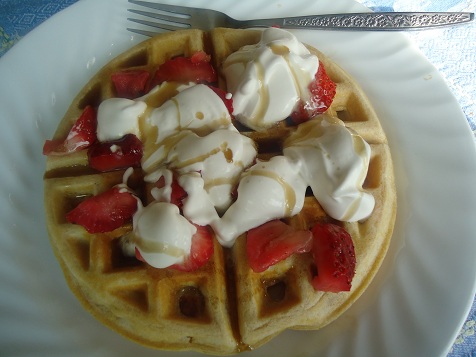
Here’s a little example of what I’m talking about: Do not tell me to separate my egg whites from their yolks, whip them until they are frothy, then gently fold them into my waffle batter. No. I will not. The people need their waffles! There is life waiting for us just on the other side of breakfast and taking time to froth my egg whites is something I only do at Thanksgiving when there is meringue for a cream pie involved. Instead, I always quickly whisk my waffle ingredients together all at once – whites and yolks and all – and would you believe it? The mixture still turns out amazing waffles.

belgiun_waffles

If the kitchen is intimidating to you, if you have a busy schedule, and if you want to eat consistently healthy, day after day…

Relax and make your meals as simple as possible.

If I hadn’t figured out how to make healthy meals simple, I would have given up long ago. There really is too much to do outside the kitchen. Through the years, I’ve pared down and reshaped my cooking style so that most often our healthy meal is on the table within just 15-20 minutes. But it’s amazing how much variety we get and how nourishing our meals are.

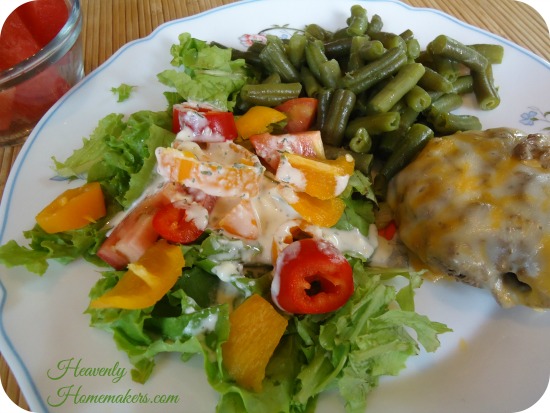
Oven Free Summertime Meal

I credit this to the fact that I’ve restructured most of our meals to look like this:

  1. Simple main dish (often made ahead of time; sometimes quickly thrown into the crock pot earlier in the day)
  2. Tossed salad, straight from the container
  3. A steamed veggie, which at most, took five minutes of  prep work
  4. Fresh fruit, washed and if necessary, sliced

enchilada meal

See how pretty? See how simple? Not to mention all I’ve done is set out the food (still in their pans) and salad fixin’s and everyone fills their own plate. We work together to cook it, we work together to clean it up.

This is what Simple Meals are made of. They are delicious and stress-free. They are balanced. They aren’t messy. They do not require you to froth your egg whites.

If you’re into healthy eating and want to do this consistently, stick with me here. I’m constantly working to simplify my recipes and menus to save all of us time (and money, which is a lovely bonus). Find all of the hundreds of recipes I’ve shared so far here. And…

Introducing Simple Meals!

simple-meals


Get all the details about Simple Meals here. You’ll be amazed at how these meal plans with simplify your kitchen life, help you be efficient, and take away stress over what to feed your family each night.

Each week your Simple Meals Planning Packet contains recipes and a grocery list for these categories of Simple Meals:

  • No-Thaw Night Forgot to thaw meat? No problem, this is the meal you can fall back on!
  • No-Trouble Night Limited on time? This one will come together quickly!
  • Crock Pot Night Start this one earlier in the day, then sit down and eat, simple as that!
  • Made-Ahead Night This recipe was simple to make ahead of time, so all you have to do is heat and eat!
  • Build-It-Yourself Night This weekly suggestion will give you a fun idea of how you can put together a quick “buffet” for each person to build a plate or bowl to their liking!
  • Savor-It Night This recipe is for the night you have a little extra time to cook, but don’t worry. The recipe is still as simple as can be!

The seventh night you can plan your family’s favorite, leftovers, or a night off from cooking.

Want to see a sample Simple Meal Plan to be amazed at all it includes each week? Grab a fully week’s sample here!

Breathe New Life into Your Meals!

728x90

Since we launched Simple Meals last October, we’ve loved hearing your feedback about how it’s been helping your families breathe easier.

Allison “I can’t thank you enough for your meal plans! They have literally breathed new life into our meal time!”

Anne “What a brilliant idea. We are so impressed!”

Kim “We love getting your Simple Meals plan every week!”

Knowing that Simple Meals truly is helping people win back family time, spend less time planning and cooking, all while still putting great real food meals on the table is so very encouraging to us!

Family time comes first, and I’m excited to make it even easier for all of us to make this a reality!

facebook_cover_photo

Subscribe to Simple Meals here —>

Heavenly Homemaker's Club Members: Access your homepage and all your fantastic resources here! Not a member yet? Please join us!

How to Make Homemade Chicken Patties for Sandwiches (Freezable!)

September 6, 2016 by Laura 14 Comments

This post may contain affiliate links. For more information, please see our disclosure policy.

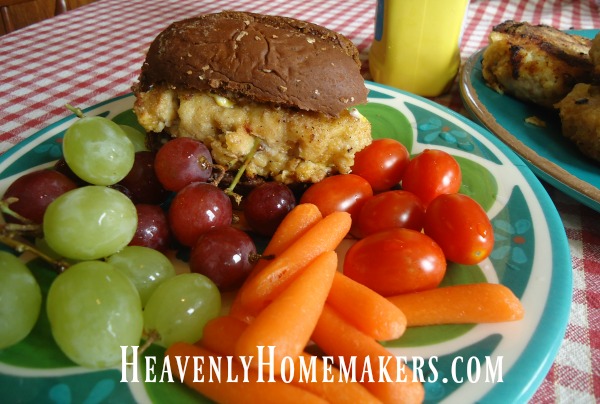
You want to know one of my favorite convenience foods I miss the most since switching to real food? Processed chicken patties for chicken sandwiches. (Bet you never would have guessed that, since that’s what this post is about.)

chicken patties9

I grew up microwaving Schwan’s chicken patties and slapping them on white buns for a quick meal or snack after a sports practice. They were yummy and easy and while I couldn’t care less about many other processed convenience items (I gave up boxed pizza rolls several years ago and never looked back) – I do miss the taste and handiness of chicken patties.

So why it’s taken me this long to figure out a recipe that resembles the beloved frozen chicken patties, I do not know. But here I am, finally learning a way to make breaded chicken patties for sandwiches. The best news is that you can make these in bulk and freeze them for a fast, convenient, ready-made meal on a busy day.

Homemade Chicken Patties for SandwichesYum

How to Make Homemade Chicken Patties for Sandwiches (Freezable!)
 
Save Print
Author: Laura
Serves: 15-20 patties
Ingredients
  • 3 pounds ground chicken
  • 4 teaspoons onion powder, divided
  • 3 teaspoons garlic powder, divided
  • 1 teaspoon sea salt, divided
  • 3 eggs
  • 1 cup milk
  • 3 cups whole grain flour (I used whole wheat, but if you need these to be gluten free, use your favorite flour choice)
  • Palm shortening or oil of choice
Instructions
  1. In a large bowl mix ground chicken, 2 teaspoons onion powder, 2 teaspoons garlic powder, and ½ teaspoon sea salt.
  2. Shape meat mixture into 15-20 patties (make them larger or smaller depending on your family's portion size needs)
  3. Beat eggs into a bowl.
  4. Pour milk into a separate bowl.
  5. In a third bowl, mix flour, 2 teaspoons onion powder, 1 teaspoon garlic powder, and ½ teaspoon sea salt.
  6. Heat palm shortening or oil on a griddle.
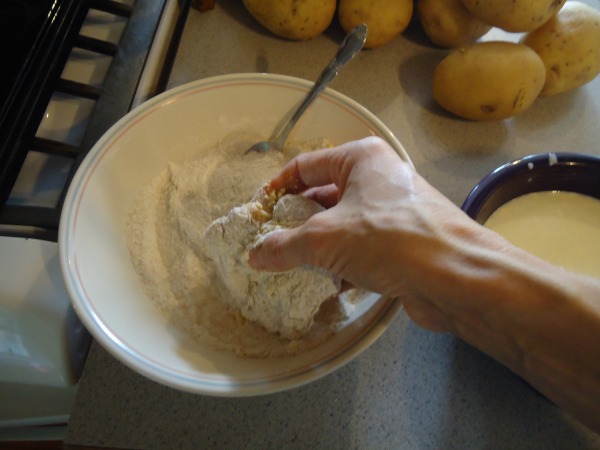
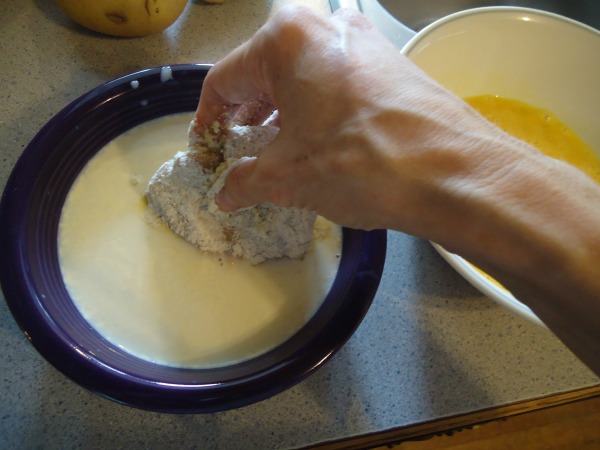
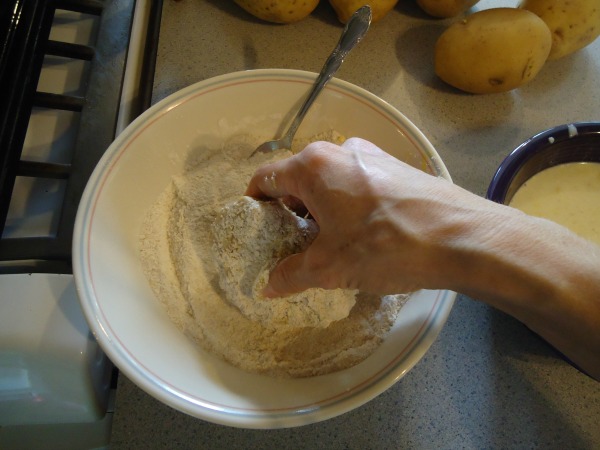
  7. Dip prepared meat patties in egg, then flour mixture, then milk, then flour mixture again.
  8. Place battered chicken patty into oil on the griddle.
  9. Repeat process with each chicken patty.
  10. Cook for 7-10 minutes on each side, mashing down lightly as needed.
  11. Serve right away, or cool and freeze for future use, then rewarm in a 350 degree oven until heated through.
3.4.3177

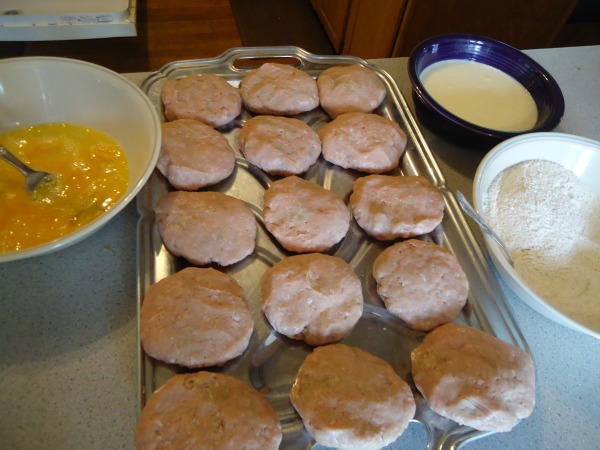
Are you ready to see some ugly chicken patty pictures? This isn’t pretty, friends. Raw meat pressed into patties – well there’s a reason we call stuff like this “processed food.” But take great comfort in the fact that this is all made from real food and wholesome ingredients and ignore the fact that naked ground chicken pressed into a patty really just ain’t purty.

chicken patties2

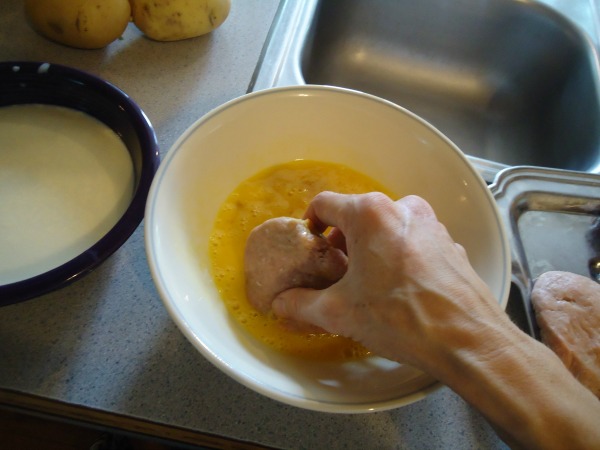
See the patty breading process? First the egg.

chicken patties3

Then the flour.

chicken patties4

Then the milk.

chicken patties5

Then the flour again.

chicken patties6

Then comes the part where we fry the patties in oil.

chicken patties7

We watch in amazement as they turn into beautiful chicken patties we can’t wait to put on a bun or between two big leaves of lettuce.

chicken patties8
Sure, it’s thicker than the patties we grew up eating. We like it that way. That means there’s double the meat.

Homemade Chicken Patties for Sandwiches - Freezable

One of the biggest perks is that you can form your chicken patties into any size you need for your family. Have small children? Make small patties. Have teenage boys? Make the patties nice and big. Have some big eaters and small eaters? Make a variety.

The biggest win is that if you make a bunch, you’ll have yummy chicken patties ready to warm up for sandwiches on a day you don’t have time to cook!

Did you grow up eating and loving processed chicken sandwiches? 

Heavenly Homemaker's Club Members: Access your homepage and all your fantastic resources here! Not a member yet? Please join us!

Menu Plan for the Week (We survived the first week of school!)

August 28, 2016 by Laura 1 Comment

This post may contain affiliate links. For more information, please see our disclosure policy.

The first week of school is always known at our house as the week that “works out the kinks.” This is good because of all weeks for one of our computers to die, one died last week. So much for Math and Spanish lessons on “the back room computer.”

Now that we’re ready for “Week 2” I think we’ve got all the software set up (again) and schedules mostly situated into what actually works. If I’ve learned anything during my life 15 years of homeschooling it’s to be open and flexible. Expect life to happen. Don’t get tied down to the ideal schedule because as ideal as the ideal is, it is rarely pulled off ideally. <— Profound, eh?

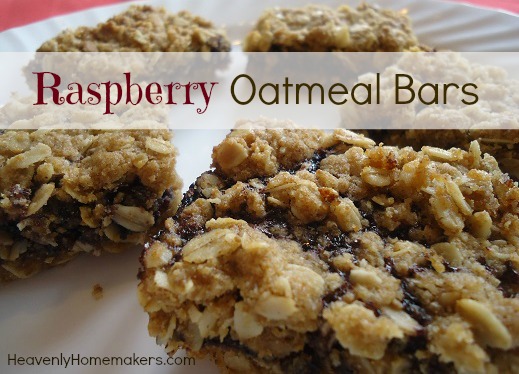
Raspberry Oatmeal Bars 12

I kept last week’s menu plan simple and am doing the same this week. Is there any other way?

This Week’s Menu Plan

Breakfasts

Always served with some sort of protein and 1-2 choices of fruit.

  • Easy Breakfast Casserole
  • Raspberry Oatmeal Bars
  • Pancake Muffins
  • Stir-n-Pour Bread (toasted and served with peanut butter and honey)
  • Poppyseed Bread (from our Make-Ahead Meals and Snacks eBook)

Lunches

Always served with 2-4 choices of fruits and veggies. This week I have apples, grapes, avocados, bananas, nectarines, applesauce, cantaloupe, carrots, spinach, mixed greens, and zucchini to work with.

  • Chicken Salad
  • Lazy Dogs (prepped in the freezer)
  • Pizza Boats
  • Bacon, Egg, and Avocado Salad
  • Easy Cheesy Bean Dip

Dinners

I’m using my crock pot almost every night this week to save time after a busy day of work and school. Dinners are always served with 2-4 choices of fruits and veggies. I’ll work with all of the fruit/veggies options mentioned in the lunch section, plus sweet potatoes, frozen green beans, and frozen peas.

  • Baked Potatoes in the Crock Pot (served with ham, cheese, butter, and sour cream)
  • Italian Cream Cheese Chicken
  • Calico Beans
  • Apricot Chicken (one of our favorite recipes in the Eat Right Away Collection)
  • Grilled Italian Chicken

Anything yummy on your menu this week?

Final eBook Discount Day

Low Sugar Treats cover5

If you haven’t already picked up our new Low Sugar Treats eBook, you’ll want to do it today so you can get it at the introductory price! Get all the details about this book (with its 41 low sugar recipes!) here. Sale price ends at midnight Monday, August 29!

[wp_eStore_fancy1 id=18]

Heavenly Homemaker's Club Members: Access your homepage and all your fantastic resources here! Not a member yet? Please join us!

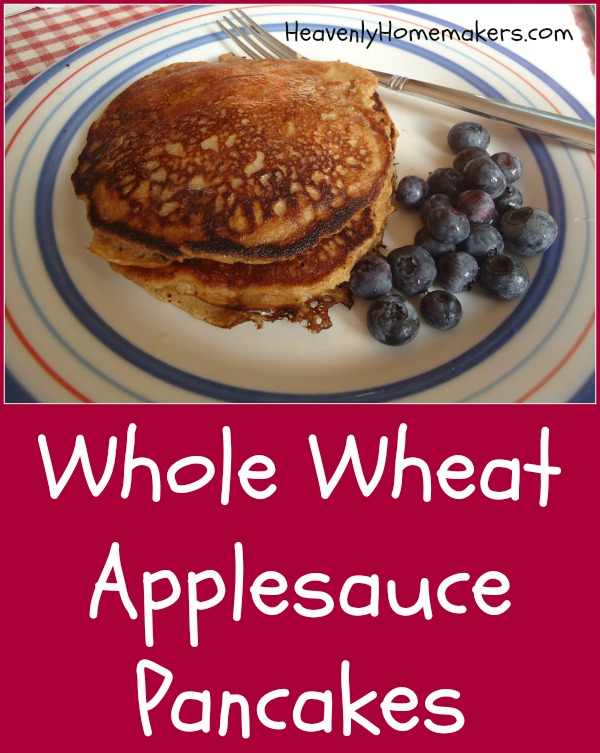
Whole Wheat Applesauce Pancakes

August 24, 2016 by Laura 4 Comments

This post may contain affiliate links. For more information, please see our disclosure policy.

Funny thing about this Whole Wheat Applesauce Pancakes recipe: It’s low in fat. Crazy, right? Laura never shares “low fat” recipes. (Though she does sometimes talk about herself in third person.)

Trust me, I did not do this on purpose. I didn’t substitute the butter for applesauce in order to cut down on fat consumption. I did it to create a yummy fall recipe. I did it because applesauce makes a recipe quite moist and flavorful. I did it because as it turns out, this recipe works better without any butter or coconut oil. Who knew?

applesauce pancakes

I tell you what, though. Make these pancakes, then slather them with real butter or natural peanut butter. Those are good, real fats our bodies recognizes and uses to nourish our brains and bodies. Go easy on the maple syrup though, because sugar is where many of our health problems lie. Poor fat. It gets all the blame for what sugar is doing to us. (Don’t get me started.)

Whole Wheat Applesauce PancakesYum

Whole Wheat Applesauce Pancakes
 
Save Print
Author: Laura
Serves: 8-12
Ingredients
  • 2 cups whole wheat flour (I used freshly ground hard or soft whole wheat)
  • 1 teaspoon baking powder
  • ¼ teaspoon sea salt
  • 1 teaspoon ground cinnamon
  • 1½ cups unsweetened applesauce
  • 1 egg
  • Milk or water to reach preferred batter consistency
Instructions
  1. Whisk all ingredients together until smooth.
  2. Add milk or water to make a thinner or thicker batter - however you like it.
  3. Cook pancakes on a buttered griddle, flipping once they become bubbly.
  4. These take a bit longer to cook compared to regular pancakes, so turn the heat down so the outside doesn't burn while the inside cooks fully!
3.4.3177

Whole Wheat Applesauce Pancakes

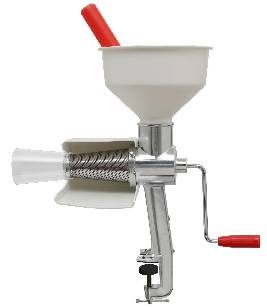
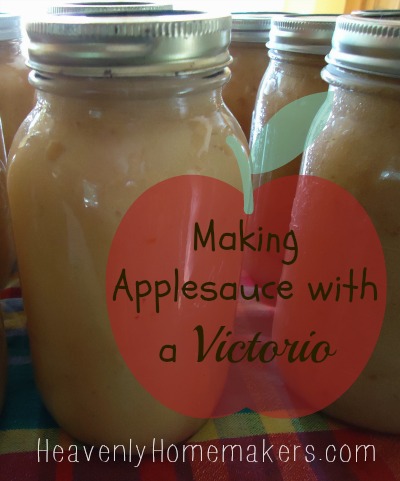
In order to make these Whole Wheat Applesauce Pancakes as wonderful as possible, you’ll want to learn to make Homemade Applesauce. My favorite way is to make applesauce using the very wonderful Victorio. Read more about that here.

victorio

applesauce_victorio

Other great apple recipes

  • Applesauce Bread
  • Mini Apple Pies
  • Crock Pot Apple Cider
  • Apple Crisp
  • Apple Pie Filling
  • Cinnamon Apple Toast
  • Baked Apple Pancake
  • Salted Caramel Apple Crisp
  • Cream Cheese Fruit Dip (to go with your apples)
  • Apple Fruit Leather
  • Build a Fruit Salad Bar
  • Apple Butter
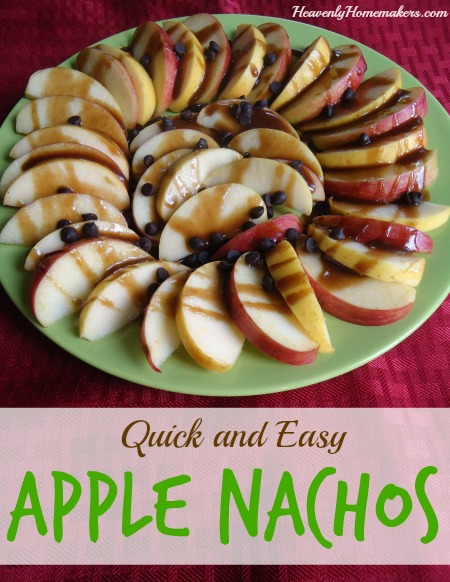
  • Apple Nachos

Just in case you wanted to see what the amazing Apple Nachos look like:

apple nachos

Mmmmm, apple season!

P.S. These Applesauce Pancakes freeze well. :)

Heavenly Homemaker's Club Members: Access your homepage and all your fantastic resources here! Not a member yet? Please join us!

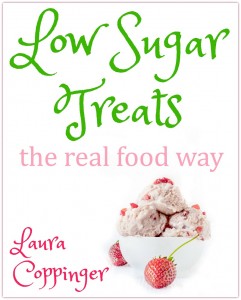
Low Sugar Treats the Real Food Way

August 23, 2016 by Laura 4 Comments

This post may contain affiliate links. For more information, please see our disclosure policy.

Gimme one good reason any of us should eat sugar.

Fine. It tastes good. 

But we all know that too much sugar causes big, big problems for all of us. Our bodies can’t utilize much of it for nourishment, but it does have to do something with it. Turn it to fat, perhaps? Tuck it away in our hips? Make us sluggish, achy, and depressed? Well that all sounds like fun.

What are our options here? Avoid all the sugar? Switch to fake sugars like aspertame and splenda?

No, no, NO! Never think that fake sugar is better than real sugar. But maybe we don’t have to give up on treats either. I’m not a big fan of sugar, but I sure do love me a good treat.

That’s why, about a year ago, I started creating low sugar recipes from real food ingredients. I’ve learned that most treats are unnecessarily over-sweetened. In fact, I once cut the sugar in a cake recipe from 6 cups down to 1/2 cup. The result? Amazing. Moist. Flavorful. Delicious.

41 wonderfully yummy recipes later, we can definitely conclude that we don’t have to add oodles of sugar to a recipe to make it taste good. Those 41 recipes turned into this:

Low Sugar Treats

Yum

Why I’d love for you to have the Low Sugar Treats eBook

These recipes are perfect for everyone who wants to:

  • create yummy treats without overloading on sugar
  • stick with real food options
  • prepare nourishing treats for lunchboxes and snacks

From cookies to cakes to cheesecakes to ice cream – it’s amazing how cutting the sugar in recipes doesn’t effect their deliciousness!! Can you believe all of these can be made with very little sugar?

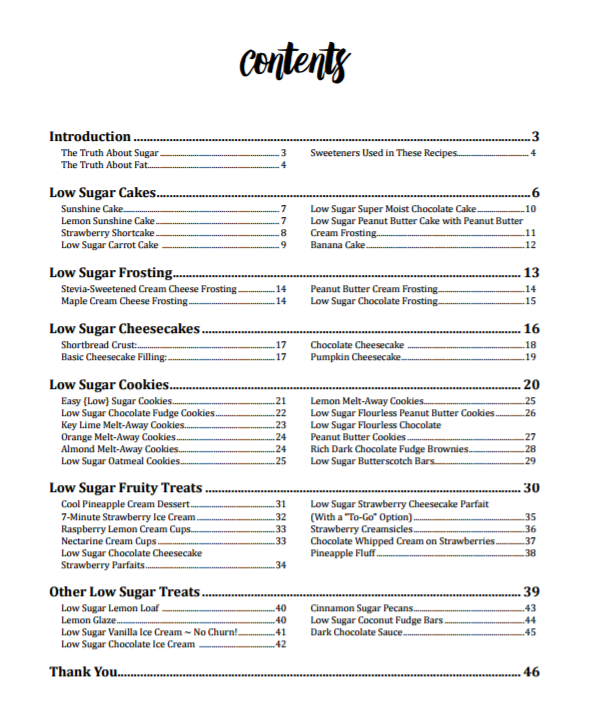
low sugar treats contents

You’ve likely tried several of these that I’ve shared here during the past year. I love that all of these recipes are now in one convenient download. I’m printing mine and keeping it in a binder in the kitchen for easy access. My family is set now when it comes to birthdays, snacks, and well, even the occasional breakfast. (Hey, there’s less sugar in these goodies than a typical breakfast muffin or serving of cereal.)

These recipes use whole grains (or no grains, depending on the recipe), healthy fats like coconut oil and butter, and sweeteners like:

  • Stevia
  • Sucanat
  • Real Maple Syrup
  • Honey
  • Raw Sugar (in small amounts)

You can use the sweeteners of your choice, making the recipes to meet your family’s taste preferences.

So many treats, so little sugar. It’s a win-win!

Our Heavenly Homemaker’s Club Members have access to this amazing resource plus ALL of our eBooks, eCurriculum, printables, and so much more – for one very low price! Join us here!

Or purchase separately below:

Maximum quantity exceeded
Minimum purchase amount of 0 is required
Maximum purchase amount of 0 is allowed
7.000

Let me know which recipe becomes your favorite!

Want more? See the other fun products in our Heavenly Homemakers Shop.

Heavenly Homemaker's Club Members: Access your homepage and all your fantastic resources here! Not a member yet? Please join us!

Our First Week of School Menu Plan + an Update on my Grain Free Journey

August 21, 2016 by Laura 7 Comments

This post may contain affiliate links. For more information, please see our disclosure policy.

What a wonderful, refreshing summer.

First, our 16-year old went to Ecuador.

This is him (gray shirt, black pants) playing soccer with some Ecuadorian children.

ecuador

In June we went to Arkansas for a family reunion to celebrate our darling Nana’s 90th birthday. Here’s a picture of me with several of my 1st cousins and Nana. (I’m second from the right in the back row.)

reunion2016

The boys spent several weeks out at our church camp – either as campers or counselors depending on the session. Yay for time to grow spiritually as leaders!

nyc5

I grabbed some pictures of one of the boys’ favorite evening camp activities – Lip Sync Night.

Justus (16) is on the far right:

nyc1

Here’s Elias (14)

nyc2

Asa (19) is on the far right:

nyc3
Oh look. There’s me. I went to camp too. (Matt and I love team-teaching Bible classes out there.)

nyc4

Malachi (11) got to go to camp for the first time as a camper this year. He’s there in the middle between one of his buddies and his counselor:

nyc6

Back at home, Malachi also spend hours and hours building with Legos (and taking pictures of his creations):

legos

It’s all been fantastic. It’s been so fantastic, in fact, that I’ve not been at all ready to start up again with ACT prep, Algebra, history lessons, intense schedules, ball games, practices, music lessons, running, running, running….

Ooooh! But Justus got his driver’s license! So that right there has been very freeing (after the first breath-catching experience of letting him head out on his own without a parent). He can get himself to his college class, soccer reffing games, music lessons – AND HE CAN DRIVE HIS BROTHERS AROUND TOO. This is all very happy.

God always provides. He’s actually made me excited again about a new school year. I might be mostly excited about the routine the school year brings. But even the actual school part. That is starting to make me excited too!

We begin school this week. The books are organized; the software has been installed; the assignment lists are on the fridge.

I’ve been freezer cooking a little bit each week in an effort to make the transition smooth. I’m also writing down this week’s menu in an effort to save my brain from having all the organization swim around and try to keep itself in order. I may begin sharing my menus here again if you and I both find it to be helpful.

This Week’s Back to School Menu Plan

Breakfasts

We usually make some form of meat and/or eggs with our breakfasts because our teens really crave protein. Also, we always serve a fruit or two with our breakfast. So to go with our protein and fruit, we’ll serve:

  • Giant Breakfast Cookies (freezer)
  • Poptarts (freezer)
  • Chocolate Zucchini Muffins
  • Quick Mix Pancakes
  • Ham and Egg Breakfast Bowls (with spinach)

Lunches

I’ve got watermelon, blueberries, strawberries, nectarines, apples, applesauce, pickles, sweet peppers, mixed greens, and carrots to serve with our lunches. I usually put out 2-4 fruits and veggies for everyone to pick from during our meals.

  • Beef and Cheese Burritos (freezer)
  • Chicken Sandwiches (in the freezer/recipe coming soon)
  • Homemade Corndogs (freezer)
  • Chef Salads (with leftover grilled chicken)
  • Homemade Pizza (crusts in the freezer)

Dinners

I try to serve 2-4 fruits/veggies with our evening meal, varying them with what we ate for breakfast and lunch. I’ve got broccoli, peas, green beans, zucchini, spinach, sweet potatoes, and mixed greens to work with, plus all the fruit mentioned above.

  • Grilled Lamb Chops
  • Taco Salad
  • Grilled Burgers
  • Easy Noodle Stir Fry
  • BLTs (if our tomatoes would ever ripen)

How’s my grain-free journey going?

If you recall, my natural doctor took me off all grains in early July. Why? Well, she’s been working with me for four (long) years to cleanse and detox my body to get all systems functioning well again. Trust me when I say that there’s been a lot of junk to cleanse out of me (from heavy metals to bad bacteria). This process has been way less than fun as there have been many days during the past four years I have not felt well.

And then there are the days I feel amazing. So I know we’re onto something here.

My health has improved in incredible ways. Probably more importantly, my emotional health has experienced a huge overhaul along with the physical detox. I didn’t see that coming. It’s amazing how our mental and physical are connected. I invite you to read more about that journey here. God is incredible, gentle, and faithful.

So the grain-free thing?

As really old bacteria and metals have been pulling out from all their hiding places from decades ago and finding their way into my blood stream where the remedies I’ve been given are helping my body get rid of them forever  – sugar and carbs have not been playing nice. So cutting out sugar and grains has been a must for me.

But praise the Lord it is not a must for me forever!!!

In fact, this phase of detox is happening quite rapidly (part of why I haven’t felt great some days). My digestive organs are healthy now, so my body can actually handle grains in small amounts. (I’ll continue to avoid refined sugar and only eat honey and maple syrup in small amounts.)

If none of this makes sense, trust me when I say that I barely understand it either. But I trust my doctor who focuses on getting to the root of our problems. It all makes sense when she explains it (except for the parts that don’t, but since she knows what she’s talking about…).

So. Grains.

I’ve learned that I do need a few whole grains and I feel fine when I eat them now.

But I’ve also learned that my 43-year old, non-athletic self does not need many. Going grain free for several weeks really taught me how to sub grains for even more veggies in my diet. I’m eating tons of leafy greens instead of bread. Sweet potatoes are amazing. It’s such a win to eat this way! Also, you must try fried zucchini with this Real Food “Velveeta” and Rotel Dip.

I eat a little bit of whole grain a couple times each day. I enjoy every bite!! Otherwise I eat veggies, meat, fruit, and dairy – and as much good fat as I can incorporate into my meals and snacks.

So that’s the update. I’m eating a little whole grain again. I’m eating more veggies than ever. I’m on the last phases of healing detox (please, Lord).

When you see grainy food in my recipes and menus, you can assume I’m likely not eating many of them. I’m feeding my family whole grains as normal – because they are active and can handle it. I typically eat what they eat, just a grain free version. (Like my BLT will be in a big bowl of greens instead of between two slices of bread. Don’t feel sorry for me. I’ll eat all the bacon I want with garden fresh tomatoes. There’s nothing sad about this.)

Here’s to a great new school year and all the delicious food that goes with it!

Has your family started school yet? What’s on your menu this week?

You’ll find more great menu plans at OrgJunkie. :)

Heavenly Homemaker's Club Members: Access your homepage and all your fantastic resources here! Not a member yet? Please join us!

Whole Wheat Chocolate Zucchini Muffins

August 14, 2016 by Laura 25 Comments

This post may contain affiliate links. For more information, please see our disclosure policy.

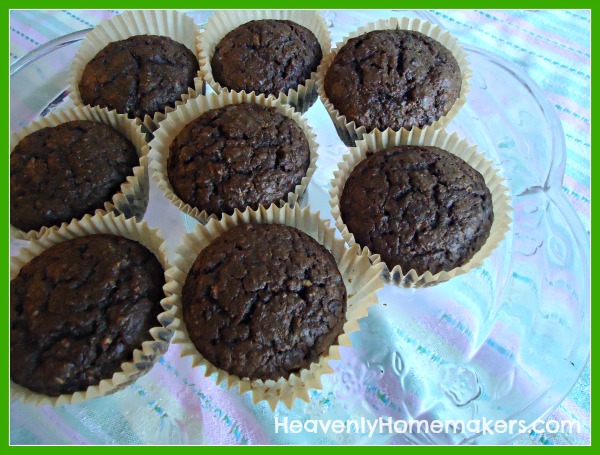
You know you’ve got a fabulous recipe when your 14-year old son takes a bite of a fresh Chocolate Zucchini Muffin and says, “Hmm. Great texture.” Or maybe I’ve just got a fabulous 14-year old son. This is a given.

zucchini muffins

Here’s a pic of this amazing kid at church camp this summer. Yes, the girls have noticed him. Every single girl has noticed. Let’s go back to talking about the muffins.

Elias at camp 2016

These muffins are “moist like a cupcake.” Again – the description of my 14-year old.

The original recipe I had for these muffins called for one full cup of sugar and (brace yourself) an entire bag of chocolate chips. An entire bag. Not only am I not interested in adding that amount of sugar to the healthy and necessary meal I like to call “breakfast” – I’m also way too cheap. Would you like a little muffin with those chocolate chips?

With proportions like that, you might think that cutting the sugar so drastically as I did might turn out a boring and inedible muffin. But allow me to remind you of the teenager’s comment from above, that these muffins are “like a cupcake.” This from someone who would never have argued with me if I had chosen to dump an entire bag of chocolate chips into my muffin mix. He didn’t even know what he was missing.

He also didn’t know he was eating zucchini.

When writing this recipe for you, I shared a range of measurements for the sugary ingredients. Your family might prefer these muffins to be a bit sweeter, in which case you’ll want to go with the 1/2 cup portion of sugar and chocolate chips. Either way, the muffins will turn out amazing. You know – moist like a cupcake.

Whole Wheat Chocolate Zucchini MuffinsYum

4.7 from 3 reviews
Whole Wheat Chocolate Zucchini Muffins
 
Save Print
Author: Laura
Serves: 12
Ingredients
  • 1½ cups whole wheat flour
  • ¼ cup sucanat or brown sugar
  • ½ cup unsweetened cocoa powder
  • 1 teaspoon baking powder
  • ½ teaspoon sea salt
  • 1½ cups shredded zucchini
  • 2 eggs
  • ½ cup coconut oil
  • ¼ - ½ cup mini chocolate chips
Instructions
  1. Mix together flour, sugar, cocoa, baking powder, and salt.
  2. Stir in shredded zucchini, eggs, and oil until well combined.
  3. Fold in chocolate chips.
  4. Scoop into 12 prepared muffin tins.
  5. Bake in a 350 degree oven for 20-25 minutes.
3.4.3177

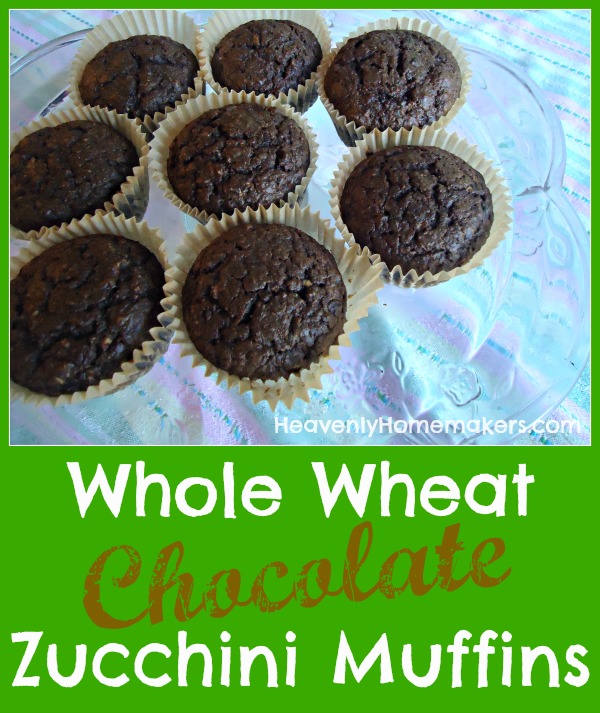
Whole Wheat Chocolate Zucchini Muffins

I like to use Enjoy Life Soy Free Chocolate Chips when possible. :)

Enjoy these muffins for a Back-to-School breakfast or as an after school snack. Need more breakfast ideas? Find 60 Make Ahead Breakfast ideas in this post.

Here’s your final reminder to sign up to win a copy of our new Low Sugar Treats eBook!!

Heavenly Homemaker's Club Members: Access your homepage and all your fantastic resources here! Not a member yet? Please join us!

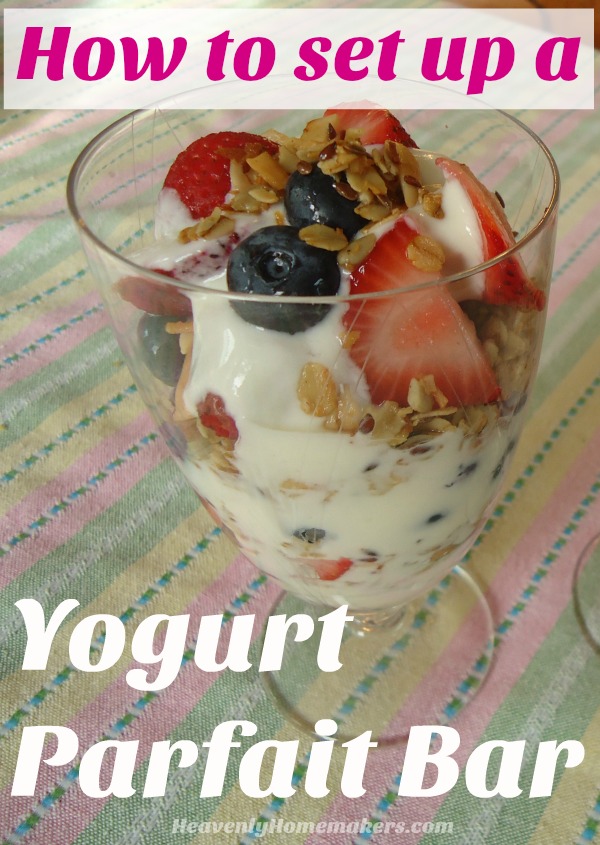
Back to School Breakfast: How to Set Up a Yogurt Parfait Bar

August 10, 2016 by Laura Leave a Comment

This post may contain affiliate links. For more information, please see our disclosure policy.

You know I like setting up different varieties of “Build Your Own” bars. This cuts down on my work and let’s everyone build their dish to their liking. Other ideas I’ve shared here:

  • Build a Brownie Sundae Bar
  • Build a Fruit Salad Bar
  • Build a Pasta Salad Bar
  • Build a Breakfast Burrito Bar
  • Build an Iced Coffee Bar
  • Build a Burrito Bar

Today’s idea is quite simple, and great for a busy school morning. In fact, this would even work as a “breakfast on the go” option by simply building your yogurt parfait in a plastic cup or glass jar and eating it on the way out the door.

How to Set Up a Yogurt Parfait Bar

Yum

Great options to set out for a Build Your Own Yogurt Parfait Bar

  • Containers of your family’s favorite yogurt
  • Stevia, maple syrup, or honey if you haven’t already sweetened the yogurt
  • A variety of fresh berries or peaches (make the process faster in the morning by cutting the fruit ahead of time)
  • Dried fruit options
  • Coconut Flakes
  • Cinnamon Sugar Pecans or other nuts or seeds your family enjoys
  • Dark Chocolate Almond Granola, Regular Granola, or Grape Nuts Cereal

Want to save even more time? Make this 5-Minute Stop-Top Granola!

Your options are only limited by your imagination. And the ways to save money are great. For instance:

  • Typically it is less expensive to purchase larger tubs of yogurt instead of individual cups.
  • If you buy whole milk plain yogurt, you can add any sweetener you like and make it for your sweetness preference.
  • You can make Homemade Yogurt.
  • Offer berries and other fruit that is in season and thus less expensive.
  • Make your own granola as a stir-in option using one of the recipes above. (Pre-made, boxed granola can be very expensive!)

Did you see all 60 of these great Make-Ahead Breakfast ideas? We will survive busy school mornings, we will!

Heavenly Homemaker's Club Members: Access your homepage and all your fantastic resources here! Not a member yet? Please join us!
« Previous Page
Next Page »

Join Our Community!

 Facebook Twitter E-mail Instagram Pinterest

Popular Posts

~ Will All of the Real Moms Please Stand Up?
~ Easy! Stir-and-Pour Whole Wheat Bread
~ How to Make Gatorade
~ 31 Real Food Breakfast Ideas
~ Dear Teenage Girls...
~ When Mom Takes a Step Back
~ The Inexpensive Health Insurance We Love!
~ Let's Talk Real Food Grocery Budgets

Check out our latest posts!

  • Big Family Food and Fun: September 27-October 3, 2026
  • Big Family Food and Fun: September 20-26, 2026
  • Big Family Food and Fun: September 13-19, 2026
  • Big Family Food and Fun: September 6-12, 2026
  • Big Family Food and Fun: August 30-September 5, 2026
Home  ~  Simple Meals  ~  Club Membership  ~  Shop  ~  Privacy Policy  ~  Disclosure  ~ Contact

Copyright © 2026 · Beautiful Pro Theme on Genesis Framework · WordPress · Log in