Heavenly Homemakers

Encouraging women in homemaking, healthy eating and parenting

  • Home
    • About
    • FAQs
  • Recipes
    • Bread and Breakfast
    • Condiments
    • Dairy
    • Main Dishes
    • Side Dishes and Snacks
    • Desserts
    • Gluten Free
    • Instant Pot
    • Crock Pot
    • Heavenly Homemaker’s Weekly Menus
  • Homemaking
    • Real Food Sources
  • Store
  • Contact
    • Advertise
    • Disclosure
    • Privacy Policy
  • Simple Meals
  • Club Members!

Why Are There So Many People Now Who Can’t Tolerate Wheat?

February 20, 2015 by Laura 47 Comments

This post may contain affiliate links which won’t change your price but will share some commission.

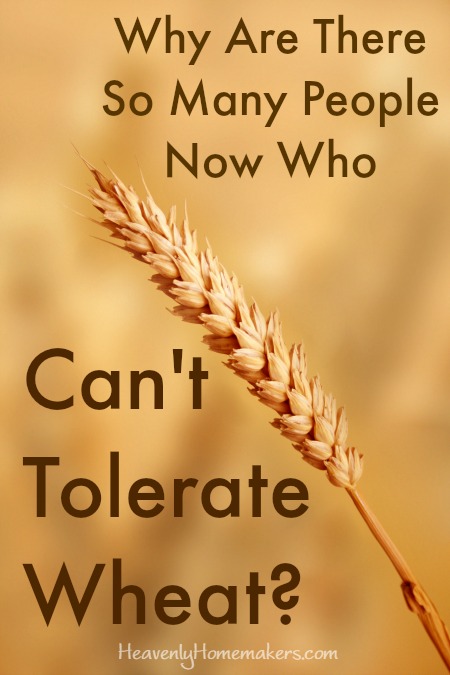
After reading my Do We Need to Be Eating So Much Bread post, a friend of mine sent me a link to this article called The Real Reason Wheat is Toxic. I found it to be a great read, especially because this is a question I’ve asked many times the past few years as more and more people are having to cut wheat out of their diets. Why?  Why is wheat, which has been consumed forever, suddenly giving so many people digestive trouble?

Read this and come back here to share your thoughts.

Wheat

If you can eat wheat and reading that article made you want to avoid conventionally grown grain forever and always, here are links to my favorite sources for chemical-free grain:

  • Azure Standard (If you have access to this co-op, you will love the savings and quality products.)
  • Amazon – I was glad to find this 37 pound box of chemical free hard white wheat (my fav).
  • If you live in a city, check stores specialty stores like Whole Foods or Natural Grocers.
  • If you live in a rural community, check with farmers around you to see if they grow chemical free wheat for you to purchase.

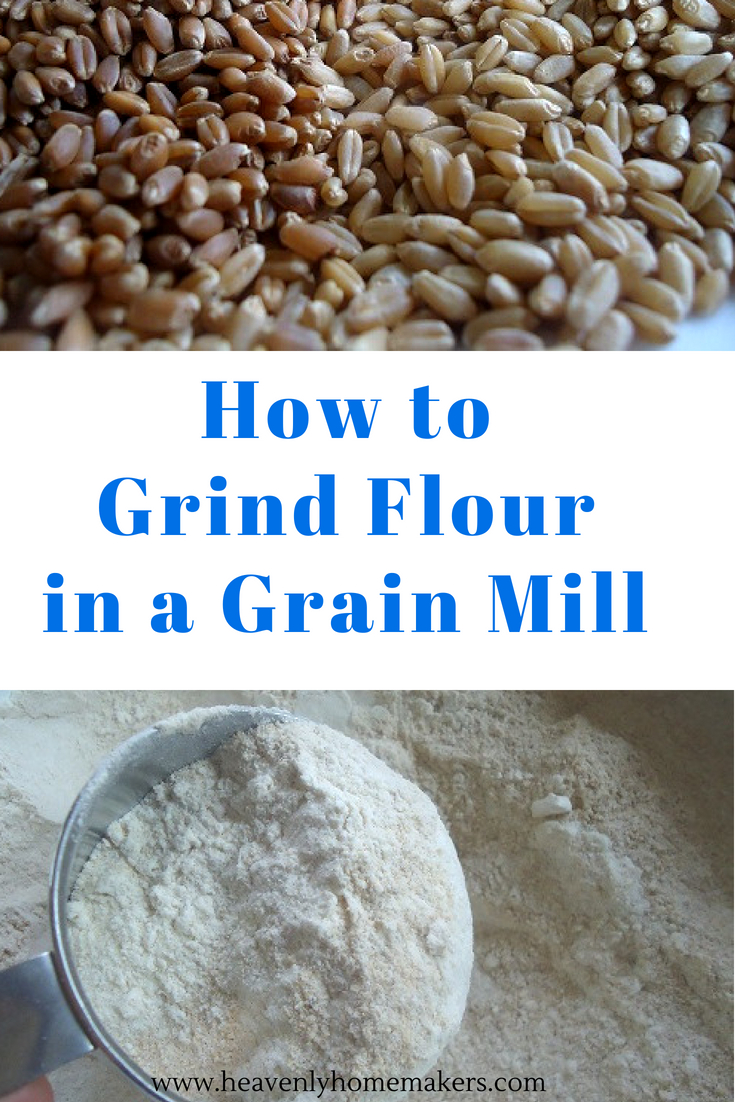
Grinding chemical-free wheat is easier than you think and incredibly tasty! Ever since we got a Nutrimill and began grinding our own wheat (and corn) – our whole grain breads and other baked goods are more delicious than ever. Here are all my posts on wheat and grain mills for your reading pleasure. :)

~~~~~~~~~~~~~~~~~~~~~~~~~~~~~~

I also wanted to be sure you saw that it’s a free shipping weekend at Tropical Traditions! Use the code 15223 at check-out. You might check out their Einkorn Grain as it is fantastic quality. Also worth noting is their Natural Soaps and their Coconut Creams are buy-one-get-one-free, which is great since you can also get free shipping. (These links are my referral links.)

Heavenly Homemaker's Club Members: Access your homepage and all your fantastic resources here! Not a member yet? Please join us!

How to Grind Flour in a Grain Mill

July 6, 2014 by Laura 56 Comments

This post may contain affiliate links which won’t change your price but will share some commission.

Wanna see how easy it is to
grind wheat into flour in a Nutrimill?
——————————————-

I’ve talked about how I love freshly ground flour and about how I love my nutrimill. You’ve all helped me share about great sources for organic or chemical free grains. I’ve even written a letter to your husbands trying to convince them that getting you a grain mill is a fabulous idea.

But I’ve never taken the time to show you how a grain mill works. Is it hard to run? Does it take a lot of time? Do you work up a sweat using it?

The answer to all three questions is a definite no!

So many people have mentioned to me things like “I don’t know how you have time to grind your own flour. I barely have time to cook, much less make the flour for my baked goods.”

You’re welcome to continue to think that because I grind my own flour, I am a modern day wonder woman. Or, you can watch this video clip and learn the truth…

Did you see that? I put in the wheat, turned on the machine…and then I walked away and made lunch and did some dishes. Then I came back and had freshly ground flour. It doesn’t get any easier than that. And wow, this flour tastes more delicious than any you’ve ever had (in my opinion)!

How to Grind Flour in a Grain Mill! #grainmill #grindflour #wholewheatflour

Check out the wonderful Nutrimill here!

This post was originally published June 1, 2010.

Heavenly Homemaker's Club Members: Access your homepage and all your fantastic resources here! Not a member yet? Please join us!

Oh Beautiful Jars!! Stocked and Ready For Gawking

August 1, 2012 by Laura 28 Comments

This post may contain affiliate links which won’t change your price but will share some commission.

One of the jobs on my “To Do” List was to refill all of the jars in my pantry so that I’d have easy access to all of the staple ingredients I reach for so often. Since I typically purchase these ingredients in 25-50 pound quantities, I store them big buckets, and pour a smaller portion into easy-access jars in my kitchen, refilling as needed. (Read more here about where I purchase most of my food, and scroll through these posts to learn more about my bulk shopping and storage.)

My favorite part of this system, besides the fact, of course, that this just makes my life easier and saves us money while we strive to eat a whole foods diet is this:  I love staring at my jars full of pretty food.

It’s a slight obsession. A major obsession? Yeah, probably something like that.

Well, after just a few minutes of going back and forth from storage room to kitchen, lugging buckets and bags of dry goods (a great upper arm work-out!), all of my jars are re-stocked and ready to go. Pasta, sucanat, wheat, salt, beans, corn, and rice. Oh so beautiful.

 This is the part of my pantry I stare at when I most need a fix:

Hey, it’s much healthier than my former Pepsi addiction, right? :)

Heavenly Homemaker's Club Members: Access your homepage and all your fantastic resources here! Not a member yet? Please join us!

How I Store Bulk Food

March 20, 2011 by Laura 57 Comments

This post may contain affiliate links which won’t change your price but will share some commission.


I received my Azure Standard food co-op order last week…one of my favorite days of the month! It’s slightly ridiculous how much I get a thrill out of boxes and bags of food. I know not everyone  has the storage space to purchase food in bulk…but this method works very well for me and I am so thankful to have this option.

As I mentioned several months ago in this post about why I buy bulk food, I don’t just buy in bulk to save money. Saving money is a wonderful perk, but I also find that buying in bulk makes cooking so much simpler for me. I don’t have to think so hard or shop so often. I buy large quantities of food items, enough to last much longer than a week. This way, I save on gas, time, energy and brain power.

I am often asked how I store my bulk purchases. Here is a little bit of explanation for what works well for me for bulk food storage:

I could just leave the food right in their bags, but I don’t feel comfortable with that for sevaral reasons. We’ve had trouble with mice in the past. Yowza, there’s not much that makes me more frustrated in the kitchen that seeing that those little rodents have gotten into and pooped in my oats. What a waste! Beyond mice, we find that if we don’t transfer food out of their bags and into something more properly sealed, it is easier for bugs to get in and ruin food.

In addition…I just feel like buckets and containers are easier to stack and store than bags. I know I’m a nerd…but I LIKE the way food looks when it’s poured into nice jars and jugs. Crumpled up bags don’t look nearly as cute in my pantry.

When my bulk purchases arrive, out come my jars, buckets and containers. I’ve accumulate quite a nice collection through the years, purchased from garage sales, Walmart or the dollar store. You know how I LOVE jars.  And in general, I avoid plastics. However, for dry food that isn’t as likely to absorb chemicals from the plastic, I’m okay with using plastic containers for bulk storage.

I take a few minutes to scoop out the sea salt or sucanat or wheat or oats or whatever dry bulk item I’ve purchased into large storage containers.

From those, I will funnel smaller amounts into smaller jars for simple cooking use. I  keep these smaller jars in the cupboard right above my stove so I can easily grab them while I’m cooking. As they get low, I refill them from their larger storage container.

Once I have everything divided into the appropriate jars and containers (I stare at it in happiness for a while and then) I put them all away in either my storage room, or in my pantry if there is space.

I especially like to keep my nicest jars full of dry bulk items like beans, rice, popcorn and pasta in my pantry door where it looks pretty everytime I open it!

You may also want to read about how I store bulk grain. And, if you’d like to see a more thorough view of my whole kitchen, I invite you to join me on my kitchen tour!

Do you buy in bulk? What have you found that works best for you to store your bulk food?

Join us on Facebook

If you’re interested in learning more about my favorite health food co-op Azure Standard, join the Azure Standard facebook page!

Heavenly Homemaker's Club Members: Access your homepage and all your fantastic resources here! Not a member yet? Please join us!

What it Means to “Soak Grains”

March 1, 2011 by Laura 70 Comments

This post may contain affiliate links which won’t change your price but will share some commission.

It’s a funny term isn’t it? “Soak your grains.” It sounds like you need to dump a bunch of water into your bucket of hard white wheat kernels and give ’em a good soaking. But don’t do that.  You don’t want soggy wheat berries.

For those of you who are new to “soaking grains” and have emailed me with questions of confusion as to what this means exactly…I thought I would take the time to explain it a little bit better, and to show some pictures of what a bowl of “soaking grains” looks like!

First, let’s talk a tiny bit about why soaking grains is important. Because I’m not good at remembering big words and how to use them, here is a quote from the Nourishing Traditions cookbook about soaking grains:

Phosphorus in the bran of whole grains is tied up in a substance called phytic acid. Phytic acid combines with iron, calcium, magnesium, copper and zinc in the intestinal tract, blocking their absorption. Whole grains also contain enzyme inhibitors that can interfere with digestion. Traditional societies usually soak or ferment their grains before eating them, processes that neutralize phytates and enzyme inhibitors and, in effect, predigest grains so that all their nutrients are more available.

In Laura’s terms:  When you soak your grain, your tummy will feel better and the nutrients in the grain will be better used by your body.

If you’ve been reading here long, you know that I’m a little bit on the fence when it comes to soaking grains. Sometimes I’m a soaker…sometimes I’m not. It depends on the day and what recipe I’m using, but I do try to soak my grains if I can. There are different schools of thought behind soaking grains and you can read my thoughts about it (and other people’s ideas and comments) here. Matt and I have come to the conclusion that we don’t need to go into panic mode if I don’t get around to soaking our grains. Right or wrong…that’s where we’ve landed. I really like the pressure this has taken off of my brain.

Now, having said all of that…I would like to share what “soaking grains” really means. Ultimately, it means that you are soaking the whole grain that has already been ground into flour . (You can/should also soak oats or cornmeal. Oats are soaked the same as flour. Cornmeal requires a different variety of soaking, which I’ll discuss in a separate post.)

The soaking of said flour or oats needs to be done in an “acid medium liquid” for 12-24 hours, or at least overnight. This means, you can soak your flour or oats in:

  • Any cultured dairy product such as buttermilk, yogurt or kefir. You can read about how I easily and inexpensively make these products here. Or…
  • If you are not able to use dairy products in your family, you can instead use water with 2 Tablespoons of lemon juice or vinegar in place of the buttermilk, yogurt or kefir.

The flour doesn’t need to “go swimming” in the liquid. It simply needs to be wet. In any of my recipes that give soaking instructions, I will share the exact measurements of flour and/or oats and liquids needed for soaking. On my site, I have instructions for soaking:  Whole Wheat Waffles, Simple Soaked Pancakes, Breakfast Cookies, Breakfast Cake, Poptarts, Pizza Pocket dough, and others that I’m likely forgetting at the moment. :)  I also describe how to soak my Whole Wheat Tortillas in my Totally Tortillas ebook.

Here is what my Simple Soaked Pancakes look like in the morning after I’ve stirred together the flour and buttermilk the night before. See the little bubbles that formed? That means we’ve accomplished kind of a “sourdough” effect. Perfect! Next, I mix in the remaining ingredients and make the pancakes. (And then the fam will eat the entire triple batch before I have a chance to grab one if I’m not on top of my game.) 

This is what my Whole Wheat Tortillas look like once I’ve mixed them up and left them to “soak”. This recipe with soaking instructions is so simple because I put them all together, they soak, then they are ready right away for me to roll them out and cook them!

Soaking grains isn’t difficult at all…it just requires a little bit of planning ahead!

Some other frequently asked questions about soaking grains include:

Do I need to soak my flour even if it isn’t freshly ground in a grain mill?

Yes, even if it is store bought whole wheat flour, it is best to soak it if you can.

Do I need to soak my white flour?

Nope. The reason it’s white flour is because the bran and the germ have been taken out. The bran is what needs to be soaked in the first place. Since that’s not there…no reason to soak!

What other questions do you have about soaking grains? Are you a soaker?

Heavenly Homemaker's Club Members: Access your homepage and all your fantastic resources here! Not a member yet? Please join us!

Switching “from White to Brown”

September 26, 2010 by Laura 40 Comments

This post may contain affiliate links which won’t change your price but will share some commission.

simplesteps

In last week’s podcast I mentioned that another great step to make in your journey toward healthy eating is to make the switch “from white to brown”.

And what, you ask, does it mean to switch “from white to brown”? In three major areas, I would suggest starting to move away from refined, highly processed, nutrient void ingredients…and instead choose unrefined, unprocessed, nutrient filled ingredients. These three major areas would be:  Rice, Sugar and Grain. 

Yeah, because guess what?! White flour, white sugar and white rice have pretty much NO nutritional value. When we eat them, they fill our bellies…and that’s about it. Our body really can’t do anything with them since the nutrients have been stripped out of them…which is why they are called “empty calories”. In fact, because our bodies crave nutrients in order to function properly, these “white ingredients” can also be “negative calories” – as in the nutrients stored as reserves in our bodies are then sucked out to help our body function, leaving our reserves depleted. And then what often happens with the white stuff? It turns to fat.  Well, no wonder. It’s bored and has nothing else to do.

In addition, once our bodies are depleted of nutrients, we are much more likely to get sick. Did I mention that eating these nutrient void ingredients can even cause depression? OUR BODIES NEED NUTRIENTS!!!

Now that I’ve made this suggestion…I am also going to reassure you that it really is okay to take one step at a time as you start replacing white ingredients with brown ingredients in your kitchen. This switch “from white to brown” takes a little effort. It may take a while to adjust your family’s taste buds. You also may find that it adds a little more expense. (Remember though that you are investing in REAL whole food – an investment in your health and the health of your family that is well worth the cost and effort!)

But I believe in the end, you will LOVE making this switch. 

Want to know a little secret? Brown ingredients actually have flavor!! It’s amazing what nutrients will do to food – it makes them taste good!! Go figure. :)

Here are some tips to help you transition “from white to brown”:

  • Make the switch gradually. You can make a mixture of white rice and brown rice to help get your family used to it. You can do the same with white flour and whole wheat…white sugar and sucanat. Mix it up a bit…literally.
  • Read through the suggestions about the sugars I recommend here.  There are several different “healthy sugars” that make fantastic treats!
  • Try to find whole wheat flour made from hard (or soft) WHITE wheat. White wheat is a variety of grain that has the same nutrition as red wheat…but white wheat makes a lighter, fluffier flour that is not as hard to get accustomed to. We love hard white wheat at our house. And…I know I’m telling you to switch from white to brown and white wheat is white…but really…white wheat makes brown flour. Really it does. :)
  • Cook your brown rice in chicken broth to make it taste awesome – yum! (I’ll try to post a tutorial on how to easily cook brown rice sometime soon.)
  • Whole wheat pasta really is tasty! Our favorite whole wheat spaghetti is bionaturae. This brand works great for my Creamy Mac and Cheese recipe!

 I’d love for all of you to pipe in and share your tricks for making the switch from white to brown! What works for you and your family? What have been some of your biggest challenges in making the switch?


Heavenly Homemaker's Club Members: Access your homepage and all your fantastic resources here! Not a member yet? Please join us!

How to Store Bulk Grain

May 13, 2010 by Laura 76 Comments

This post may contain affiliate links which won’t change your price but will share some commission.

Remember that 500 pound order of hard white wheat I ordered and brought home a few weeks ago? (Yeah, like you could forget.)

bagsofwheatsm

You may be happy to know that I’m down to only 447 (give or take) pounds of wheat now. And you were worried that I wouldn’t use it all up quickly…

Anyway, many of you asked how I would store all my bags of grain…and several of you suggested that I “critter proof” it. Yes. Very, very good advice. If it’s one thing I can count on having at my house…it’s critters. {shudder}  Although I don’t think snakes or birds should care too much about my wheat…we do see our fair share of bugs and the occasional mouse. Eeeww.  I do NOT want mice getting into my big stash of wheat. That would just be maddening.

And so, ever since I brought home all the wheat in February…I’ve been on a quest for big huge buckets for my grain storage. I needed some with lids that seal very well (obviously). The fabulous buckets with gamma seal lids I found online are pricey! Great quality, no doubt…but I needed around 20 buckets. I could have spent at least $80 for what I needed, and that was JUST the lid…not the bucket! Ouch.

Instead, I began asking around at my local grocery stores. Did you know that the frosting used in a bakery often comes in big five gallon buckets?! Yes indeed. That’s a lot of frosting! Did you know that most bakeries go through several of these big five gallon buckets in a month? Yes indeed. That’s a lot of frosting! And did you know that bakeries generally don’t want to keep their empty buckets after they’ve used the frosting out of them? Yes indeed. That’s a lot of empty, unwanted buckets.

One store asked me to “fork over” an entire dollar per bucket with lid that I took from them. Big buckets with lids for a dollar each? Okeedokee!

The other store practically threw their buckets with lids into my cart and wouldn’t let me pay one penny for them. They were almost giddy about the fact that I was so happy to take the buckets off of their hands. For free. Yes indeed.

And so…long story longer…I came away from my grocery store bakery departments with 20 buckets with lids for a total of $6.00. Yes, that was SIX dollars. Total. 

wheat_bucket_sm

I washed and dried the buckets thoroughly, then got busy scooping all of the wheat into them. I found that it took two – five gallon buckets for each 50 pound bag of wheat. 

I now have a big stash of white frosting buckets full of hard white wheat just waiting to be turned into bread, tortillas, muffins, pancakes, cakes, pies, cookies, pretzels, donuts, buns, bagels…the possibilities are endless!

And the critters? They can go pick on someone their own size. 

Huh. I’m suddenly remembering another time I bravely and fearlessly used big buckets to defend myself from attack. Wow. Who knew buckets such as these would be such a helpful aid for a wimpy woman such as I. Between big buckets and cottage cheese containers…I’d say I am well protected. What do you think?

Heavenly Homemaker's Club Members: Access your homepage and all your fantastic resources here! Not a member yet? Please join us!

Join Our Community!

 Facebook Twitter RSS E-mail Instagram Pinterest

Popular Posts

~ Will All of the Real Moms Please Stand Up?
~ Easy! Stir-and-Pour Whole Wheat Bread
~ How to Make Gatorade
~ 31 Real Food Breakfast Ideas
~ Dear Teenage Girls...
~ When Mom Takes a Step Back
~ The Inexpensive Health Insurance We Love!
~ Let's Talk Real Food Grocery Budgets

Check out our latest posts!

  • Easy Meatballs with Sweet Sauce (Freezer Friendly)
  • How to Make Uncrustables
  • The Easiest No-Bake Cheescake
  • Do I Still Buy Organic Food?
  • How I Shop and Budget for Our Large Family
Home  ~  Simple Meals  ~  Club Membership  ~  Shop  ~  Privacy Policy  ~  Disclosure  ~ Contact

Copyright © 2023 · Beautiful Pro Theme on Genesis Framework · WordPress · Log in