Did I ever tell you about the time I almost forgot to put the bananas into my banana bread?
I have these finer moments in my kitchen from time to time. They mostly happen while I’m trying to cook and talk simultaneously. If I’m talking on the phone while mixing up a recipe, I tend to leave out key ingredients. Or add the same ingredient twice. It’s ridiculous. I think it’s crazy that I can usually multi-task quite well…but I can barely have a conversation with someone while I cook. Duh. Just be glad I type these posts after I’m finished cooking. Otherwise, these recipes would just be plain scary.
And so, because I care too much not to share, here’s a handy baking tip: When making Banana Bread or Muffins, be sure to add the bananas. The final product tastes much better this way. I’m nothing if not helpful.
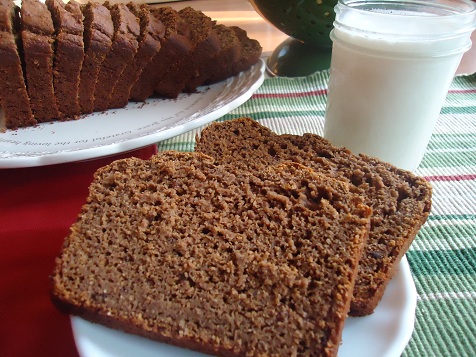
Whole Wheat Banana Bread and Muffins
1 3/4 cups whole wheat flour (I use freshly ground flour from hard white wheat)
1 teaspoon baking powder
1/2 teaspoon baking soda
1/4 teaspoon sea salt
1 cup mashed over-ripe bananas (about 2-3 bananas)
1/3 cup honey
1/4 cup melted butter
2 eggs
Stir together flour, baking powder, baking soda and salt. In a separate bowl, mash bananas, or puree them in a blender. Mix mashed bananas, honey, melted butter and eggs into flour mixture.
For Bread: Spread batter into a well buttered bread pan. Bake in a 350° oven for 50-60 minutes or until a toothpick inserted into the middle comes out clean.
For Muffins: Spoon batter into 12 buttered or paper lined muffin tins. Bake in a 400° oven for 20 minutes.
Speaking of finer moments in my kitchen…did I ever tell you about the time I made a lovely lasagna ahead of time so that I would be all ready for my company that night? Because, you see, it’s great to be prepared when you’re having company. Oh, and it also helps to get the lasagna out of the fridge and BAKE IT at dinner time. Being prepared doesn’t help at all if you don’t actually bake your lasagna. Yeah, dinner was a little late that night.