Heavenly Homemakers

Encouraging women in homemaking, healthy eating and parenting

  • Home
    • About
    • FAQs
  • Recipes
    • Bread and Breakfast
    • Condiments
    • Dairy
    • Main Dishes
    • Side Dishes and Snacks
    • Desserts
    • Gluten Free
    • Instant Pot
    • Crock Pot
    • Heavenly Homemaker’s Weekly Menus
  • Homemaking
    • Real Food Sources
  • Store
  • Contact
    • Advertise
    • Disclosure
    • Privacy Policy
  • Simple Meals
  • Club Members!

Whole Wheat Quick Mix Biscuits

March 7, 2013 by Laura 25 Comments

This post may contain affiliate links. For more information, please see our disclosure policy.

Here’s another promised Whole Wheat Quick Mix recipe! When you have the Quick Mix put together and ready to go, it is so easy to throw these biscuits into the oven. And if you want, you can make Sausage Gravy to go with them. My family cheers when I make gravy for our biscuits!

Whole Wheat Quick Mix BiscuitsYum

2 cups Whole Wheat Quick Mix
2/3 cup milk

Mix ingredients together, adding additional whole wheat flour if necessary to form a nice bisuit dough that will roll out well.

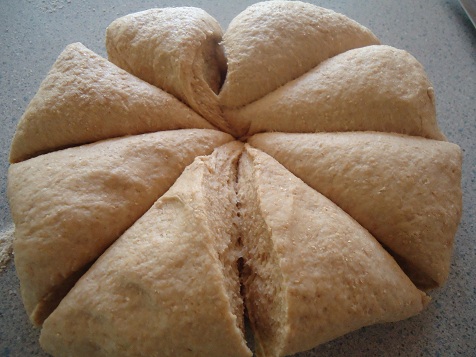
Press or roll dough onto a well-floured surface. Cut with a biscuit cutter or round glass to shape biscuits. Place biscuits onto a baking stone or a well-buttered baking pan. Bake in a 450° oven for 10-12 minutes or until biscuits are golden brown.

Makes 10 small biscuits.

quick_mix_biscuits

Here are other recipes you can make with Whole Wheat Quick Mix:

  • Quick Mix Very Vanilla Cookies
  • Quick Mix Pancakes
  • Quick Mix Fruit Pizza
  • Quick Mix Honey Cinnamon Muffins

More Quick Mix Recipes found in the Oh For Real book:

  • Chocolate Peanut Butter Cookies
  • Chocolate Chip Cookies
  • Easy Fruit Cobbler
  • Garlic Cheese Drop Biscuits (like those you get at Red Lobster!)
  • More!

Have you ordered a copy of Oh, For Real: Real Food, Real Family, Real Easy yet? You’ll find all these recipes in the book – plus many more recipes and tips that will make your life easier as you work to feed your family a diet of real, whole foods!

I’m curious:  What’s your favorite way to eat a biscuit? Dripping with butter and honey? With gravy poured all over them? Slathered with jelly? Can you guess my favorite way to eat a biscuit?!  :)

Heavenly Homemaker's Club Members: Access your homepage and all your fantastic resources here! Not a member yet? Please join us!

Whole Wheat Quick Mix Honey Cinnamon Muffins

March 1, 2013 by Laura 26 Comments

This post may contain affiliate links. For more information, please see our disclosure policy.

Simple. Tasty. Fast. Isn’t that what we want in all of our recipes? This muffin recipe is all of that and healthy too!

See? I told you this Whole Wheat Quick Mix has been a life saver!

Quick Mix Honey Cinnamon MuffinsYum

2 cups Quick Mix
1 teaspoon ground cinnamon
½ cup honey
½ cup milk
1 egg

Mix all ingredients until just combined. (Do not over-stir.)  Scoop batter into 9 paper lined muffin cups. Bake at 400° for 15-20 minutes or until muffins are golden brown.

Honey_Cinnamon_Muffins_2

Heavenly Homemaker's Club Members: Access your homepage and all your fantastic resources here! Not a member yet? Please join us!

Whole Wheat Quick Mix Pancakes {Sneak peek into our new Oh, For Real! book}

February 23, 2013 by Laura 19 Comments

This post may contain affiliate links. For more information, please see our disclosure policy.

Now that I always keep a large batch (often a double batch) of the Whole Wheat Quick Mix on hand, I have been so grateful for the time it saves me in meal preparation. And let’s be real (since, after all, the upcoming book this recipe is featured in is called Oh, For Real):  I really like that having this mix on hand saves my brain energy. Who really wants to think about the process of making pancakes when there are so many other things to think about?

These pancakes require three little ingredients. I can make these in my sleep…which, without a doubt, is something that I have done.

Whole Wheat Quick Mix PancakesYum

2 cups Whole Wheat Quick Mix
1 cup milk
2 eggs

Whisk ingredients together thoroughly. Cook them in a well greased skillet, turning after they are bubbly. Makes about 12 three inch pancakes.

quick_mix_pancakes

Ever made pancakes in your sleep?  :)

P.S. These pancakes taste best when made on a cast iron griddle. I have this Lodge 20-Inch Cast Iron Griddle and love it so much! I can make pancakes three times as fast because it covers two burners. Check it out here (affiliate link).

cast iron griddle

Heavenly Homemaker's Club Members: Access your homepage and all your fantastic resources here! Not a member yet? Please join us!

Hashbrown Sausage Casserole {Christmas Brunch}

December 19, 2012 by Laura 147 Comments

This post may contain affiliate links. For more information, please see our disclosure policy.

There’s nothing fancy about this casserole – but it is very tasty. It’s perfect for our Christmas Brunch!

I especially love putting this together if I have Homemade Frozen Hashbrowns and Premade Turkey Sausage crumbles. Then all I have to do is throw everything into a dish and bake it. If you prefer, you could substitute browned hamburger meat for the turkey sausage. Just shake in some chili powder and/or garlic powder to spice it up a little. It’s a great, versatile recipe!

Hashbrown Sausage CasseroleYum

6 cups frozen hashbrowns  (partially thawed)
1 pound browned turkey sausage
6 eggs
1/2 cup cream (or milk)
2 cups shredded cheddar cheese
salt and pepper to taste

Stir hashbrowns and cooked sausage together in a 9×13 inch baking dish. In a bowl, whip eggs and cream together. Pour mixture over the hashbrowns and sausage. Sprinkle with shredded cheese, salt, and pepper. Bake in a 350° oven for 45-50 minutes or until eggs are no longer runny and cheese is melted and beginning to brown.

Hashbrown Sausage Casserole

Heavenly Homemaker's Club Members: Access your homepage and all your fantastic resources here! Not a member yet? Please join us!

Whole Wheat Butterhorns ~ Real Food Makeover

December 12, 2012 by Laura 52 Comments

This post may contain affiliate links. For more information, please see our disclosure policy.

Have a recipe you’d like me to try and make over?
Submit your recipes on this Real Food Recipe Makeover Submission Page.

Did you know that I really, really love butter?

Let’s see – which do I love more? Butter…or jars? That’s a toss up. Hey, did you know you can make butter IN a jar? That tidbit of information is irrelevant to this post, but still worth mentioning…just because it involves two of my favorite things.

It is a fact that Matt’s eyes got really big as I was buttering my biscuit last week – even though he obviously knows how much I love butter. I mean – it was enough to stop our conversation at the time.

“What?” I said,  “You’ve never seen me butter my biscuit before?”

“Yes,” he said, “I’ve seen you. But there is almost more butter than biscuit this time.” (At which point I grinned – and got just a tiny bit more butter because there was a spot on my biscuit not yet covered…)

Alrighty. So I like a little biscuit with my butter. And I like it to be all melty down the sides. Then I like to sop the buttery drippings off of my plate as I eat my biscuit. It’s just best that way if you ask me.

Which is why I was excited to make over this recipe. I mean, they are called Butterhorns! I didn’t have to make many changes in this recipe – just a few minor tweaks. And wow is it delicious!

With Christmas coming, many of you are looking for a yummy, whole grain roll to make with your holiday meal. This would be perfect if you ask me. :)

Whole Wheat Butterhorns

Whole Wheat ButterhornsYum

2 Tablespoons dry yeast
1/3 cup warm water
9 cups whole wheat flour, divided (I use freshly ground hard white wheat)
2 cups warm milk
1 cup butter, melted
1 cup sucanat or 3/4 cup honey
6 eggs
2 teaspoons salt
3-4 Tablespoons butter, melted

In a large mixing bowl, dissolve yeast in water. (Water should be warm, but not so warm that you can’t comfortably put your finger in it to test the temp.)  Add 4 cups flour, milk, butter, sucanat, eggs, and salt. Beat with an electric mixer until contents are smooth.

Add enough remaining flour to form a soft dough. I found it easiest to do this by hand. Although if you have a Kitchen Aid type mixer, I’m sure that would work well too! Turn mixture onto floured surface and knead for 3-4 minutes.

Place dough in a bowl, cover, and let rise in a warm place until doubled (1-3 hours).

Punch dough down and divide into four equal parts. Roll each part into a 12-inch circle and brush with melted butter.

Cut each circle into 8 pie-shaped wedges.

Roll up each wedge from wide edge to tip of dough and pinch to seal. Place rolls, top down, on baking sheets.


Allow rolls to rise again for about 30 minutes or until they have doubled in size. Bake at 375° for 10-20 minutes (every oven is different!) or until they are lightly browned. Brush with melted butter as soon as they come out of the oven. Remove and serve immediately or cool on wire racks.

This recipe makes about 30 rolls. These freeze very well! I found that having a batch of these in the freezer is wonderful when I need something additional to help stretch a meal! I simply take out the amount we  need, warm them in our toaster oven, and serve them with…you guessed it…butter.

Who loves butter as much as I do?  Do tell.

Heavenly Homemaker's Club Members: Access your homepage and all your fantastic resources here! Not a member yet? Please join us!

Homemade Whole Wheat Pita Bread

September 27, 2012 by Laura 196 Comments

This post may contain affiliate links. For more information, please see our disclosure policy.

Before you try to make this Whole Wheat Pita Bread recipe, here is what you need to know:  Pita Bread is EASY to make!

That’s it. That’s all you need to know.

Know why I’m telling you that? Because as I was researching different recipes and trying to figure out the best way to make pita bread – every recipe seemed sooo difficult. I felt like ducking out on my Funky Fresh Challenge committment this week because, really? Did I have time and energy to make such a complicated recipe? And did I really want to share a complicated recipe with you? Why no, I did not.

So, because I just couldn’t help myself – I took short cuts and figured out how to make this recipe easy. And guess what? It worked. There is no reason to make cooking so complicated. Goodness. As if trying to keep my desk cleaned off isn’t difficult enough.

I should also note that these pita pockets tasted so good that we couldn’t get over it. I will definitely be making these again and again. Especially since they are so easy! And I know that they will freeze well, and will be a wonderful item to have in the freezer to pull out for quick meals!

Whole Wheat Pita BreadYum

Homemade Whole Wheat Pita Bread
 
Save Print
Author: Laura
Serves: 8
Ingredients
  • 3 cups whole wheat flour (I use freshly ground whole wheat from hard white wheat)
  • 1½ teaspoons yeast
  • 1 teaspoon sea salt
  • 2 Tablespoons honey
  • 1 Tablespoon olive oil
  • 1 cup warm water
Instructions
  1. Stir together flour, yeast, and sea salt.
  2. Add honey, oil, and water, stirring until a nice dough forms.
  3. Knead the dough on a well floured surface for 4-5 minutes. (In other words: Mix dry ingredients. Add liquid ingredients. Stir well. Knead.) See? Easy.
  4. Place dough back into the bowl, cover, and allow dough to rest and rise for about an hour.
  5. Pull dough out of the bowl.
  6. Knead for about 30 seconds.
  7. Cut dough into eight equal parts.
  8. Roll each into a circle, about six or seven inches in diameter.
  9. Place circles directly onto a baking sheet after rolling.
  10. I baked mine on a well seasoned baking stone, so didn't find that I needed to grease my pan, but feel free to grease yours if you need to.
  11. Allow the dough circles to rest/rise on the baking sheet while you heat your oven to 500°.
  12. Place baking sheet of pita circles into hot oven.
  13. Bake for 5-8 minutes - just long enough for them to puff up and brown slightly.
  14. Allow pitas to cool, slice in half, and serve as desired.
3.4.3177

I made Chicken Salad for ours. So delicious!

Don’t ever let anyone tell you making pita bread is hard. And how much do these cost in the store, anyway? I’m pretty sure making these is huge money saver (not to mention they are surely much healthier).

Whole Wheat Pita Bread

Heavenly Homemaker's Club Members: Access your homepage and all your fantastic resources here! Not a member yet? Please join us!

EASY! Overnight, No Knead Yeast Bread

September 19, 2012 by Laura 263 Comments

This post may contain affiliate links. For more information, please see our disclosure policy.

No Knead Bread. Let’s make life easier, shall we?

No-Knead Bread

I love having smart friends.

Smart friends who give me great, easy, healthy recipes are my favorite kind of friends. As are my friends who give me chocolate. Or jars. Or hugs. Or the friends who listen to my constant and sometimes nonsensical chatter. And the ones who put up with my unreasonable freak-out moments of stress. And the ones who pray with me. And the ones who deal with me during soccer season when I can’t finish sentences.

Let me just pause and wipe a tear. I really have the best friends ever…

Well now. (stops to loudly blow nose and gain composure)  I really brought all that up to say that one of my great friends, Nikki, shared this recipe with me. She’s one of my smart friends who I believe has done all of the above and then some (God bless her).

Once when I was at her house, she let me try some of the bread she had made that morning. It was great! And then she started telling me how she made it. How you don’t have to knead it. How you start it the night before and how it takes about three minutes to mix up. I think I grabbed her neck, hugged her fiercely, and knocked her over when she handed me the recipe. Not really. I truly can control myself. Usually. But hey, there was a great recipe involved, so no guarantees. See, I told you my friends are great to put up with me.

And now, the easiest bread recipe in the world…

No Knead Yeast BreadYum

5.0 from 1 reviews
EASY! Overnight, No Knead Yeast Bread
 
Save Print
Author: Laura
Ingredients
  • 3 cups flour (This recipe works a little better with unbleached white flour, but I prefer to use freshly ground hard white wheat so that it is healthier.)
  • 1 ¾ teaspoon sea salt
  • ½ teaspoon active rise yeast
  • 1 ½ cups water
Instructions
  1. Stir ingredients together in the evening. (No need to proof the yeast.)
  2. Cover and allow dough to sit over-night on the counter-top.
  3. In the morning, dump the dough onto a well floured surface.
  4. Shape it into a ball.
  5. Let it sit for 30 minutes.
  6. Preheat the oven to 450°, heating the baking dish in the oven at the same time.
  7. Place the dough in the hot baking dish.
  8. Cover and bake for 30-40 minutes.
3.4.3177

Note:  You need a covered dish to bake this bread.  I found a deep-dish casserole dish with a lid that worked for me, similar to this one. But if I can save up and splurge on this one, would that not be the coolest?

When you mix it and cover it in the evening, it starts out looking like this:

In the morning it will look like this:

After you bake it, it will look like this:

And when you slice it it will look like this:

Once you serve it, it will look like this:

(There’s no picture. The bread is gone. Obviously.)

I highly recommend that you give this recipe a try, and that you consider serving it with this wonderful Calico Beans dish. It’s a wonderful combo!

Heavenly Homemaker's Club Members: Access your homepage and all your fantastic resources here! Not a member yet? Please join us!

Whole Wheat Peanut Butter Pancakes (and My Peanut Butter Addiction Confession)

May 29, 2012 by Laura 77 Comments

This post may contain affiliate links. For more information, please see our disclosure policy.

Peanut Butter Pancakes? Oh yes.

I have no idea what my deal is lately, but during the past few weeks, I have become completely addicted to peanut butter. I can not seem to get enough. I want peanut butter in and on everything. Well, maybe not everything. I suppose spooning a dollop of peanut butter onto my taco salad or chicken fried steak would not be as tasty. But bread and pancakes and cookies – bring it on. I am, of course, okay with you giving me a little chocolate with my peanut butter. But you probably already figured that one out.

Over Memorial Day weekend, my dad’s wife made a delicious Peanut Butter Cake with Peanut Butter Frosting, which may have been one of the best desserts I’ve ever eaten. And I may have topped it with Homemade Butterfinger Ice Cream. Twice. (And yes I am a little sheepish to admit that.)  Remind me to get that cake recipe, because I think I need to adapt it and share it with you, don’t you think so?

Because I can’t come up with a better reason, I have decided that my peanut butter addiction is most likely because of all of the workouts I’ve been doing. Yes, walking and weight lifting make a person very hungry for peanut butter. I believe there is even some extensive research and scientific data to back up that statement. As a matter of fact, I even found and read an article recently which stated:  Be sure to drink plenty of water…and eat lots and oodles and gobs of peanut butter after exercise!!!

Okay, not really. Or if I did, I would surely have been the one writing it.

In all seriousness (if I can, in fact, write something in all seriousness), I truly do believe that the real reason I am loving peanut butter so much right now is because my body needs the extra protein to help me along in my fitness goals. Jen, my trainer friend, agrees with me, and tells me that in fact, I do definitely need extra protein now. She’s the expert, which makes me feel better about my peanut butter consumption so that I know that I am not completely nuts. Get it – nuts? (Oh brother.)  Anyway, I am definitely eating plenty of protein in the form of good meat, eggs, and yes…peanut butter.

(Now, what excuse can I come up with to justify eating chocolate do you suppose? Jen, do you have anything for me on that one?? Please?)

I went into all of that simply to let you know why I created a Peanut Butter Pancake recipe. It sounded like a great way to add protein to our breakfast, so I gave it a try. And, it made it possible for me to feed my addiction first thing in the morning. Yay for me. :)

Whole Wheat Peanut Butter PancakesYum

Whole Wheat Peanut Butter Pancakes (and My Peanut Butter Addiction Confession)
 
Save Print
Author: Laura
Ingredients
  • 2 cups whole wheat flour (I use freshly ground)
  • 1 teaspoon baking powder
  • ½ teaspoon sea salt
  • 5 Tablespoons butter
  • ½ cup natural peanut butter (I use homemade creamy peanut butter)
  • 2 cups milk
  • 2 eggs
Instructions
  1. Mix flour, baking powder, and sea salt. In a small sauce pan, melt butter and peanut butter together, stirring so that it won't scorch.
  2. Pour melted butter and peanut butter, along with the milk and eggs into the flour mixture.
  3. Whisk until well mixed.
  4. Cook the pancakes on a buttered griddle or skillet, flipping halfway through cooking.
  5. Serve with real maple syrup or your favorite pancake topping.
  6. Makes about 20 three inch pancakes.
3.4.3177

Peanut Butter Pancakes

Incredible with a glass of milk…

My apologies to all of you who have a peanut allergy and had an allergic reaction simply by reading this post that was so full of nutty information.

Are you a fan of peanut butter? Which do you like best, creamy or crunchy? Ever tried making homemade peanut butter? It is the best stuff ever!!!

Heavenly Homemaker's Club Members: Access your homepage and all your fantastic resources here! Not a member yet? Please join us!

Baked Oatmeal Cups (Bird’s Nests)

April 10, 2012 by Laura 111 Comments

This post may contain affiliate links. For more information, please see our disclosure policy.

Baked Oatmeal Cups are perfect for a spring breakfast.

Baked_Oatmeal_Cups

My four boys are just about getting too old to appreciate anything cutesy I try to make with food.

When they get up in the morning, they bound into the kitchen, excited to see a big pile of bacon on a tray with a dozen scrambled eggs and mountain of pancakes. Does it really matter to them if I tried to arrange the food in such a way as to make the platter look pretty? Do they even care that I woke up extra early, and lovingly mustered all of my artistic ability to form the pancakes into the shape of the country of India? After all, we’ve all been enjoying our studies about William Carey and his missionary efforts there. Who wouldn’t have fun smearing butter all over Calcutta? I figured they’d be thrilled!

But no. They don’t care at all. They just want me to hurry up and pass them the maple syrup and while I’m at it, another slice of bacon.

I’m telling you, I am sooooo unappreciated around here. From now on, I think I’ll just flip some boring ol’ round pancakes straight off the griddle and onto their plates ten feet away. I’ll skip the serving platter. I won’t mess with a lovely presentation of fruit arranged on a plate in the shape of a clown face. They can just stuff their faces with “normal” food for all I care.

Hmmph.

Now that I’ve thrown a fit that is so becoming of a grown-up, I suppose I should now confess that my intentions and my artistic abilities are not even close to being able to pull off much of the above. I’ve never really attempted to make pancakes into the shape of India – or any other country for that matter. Incidentally, I did turn out the state of Texas once, but that was totally an accident and as usually happens when I have not gone out of my way one little bit, my boys were actually quite impressed.

“Whoa Mom! You made a Texas pancake! Can you make me a Maryland and an Idaho next?”

I obviously got right on that, but ended up instead with a lopsided gourd and another pancake that resembled the fuzz under my couch. I gave up at that point and figured they could chew the pancakes into the shapes of their requested states, because really, have you ever tried to pour Florida onto a griddle with a spoon?

This leads me to the special breakfast I made recently in an effort to be cute. It is spring after all. Doesn’t the idea of eating a bird’s nest for breakfast sound simply delightful?

Okay fine. We can just call these Baked Oatmeal Cups. Either way, these are easy to throw together and are versatile enough to add variety and meet your family’s taste preferences.

Baked Oatmeal Cups (or Bird’s Nests if you’re feeling cute)Yum

5.0 from 1 reviews
Baked Oatmeal Cups (Bird's Nests)
 
Save Print
Author: Laura
Serves: 12
Ingredients
  • 2 cups rolled oats
  • ½ cup sucanat or honey
  • ½ teaspoon sea salt
  • 1 teaspoon baking powder
  • 2 eggs
  • ¾ cup milk
  • ⅓ cup melted butter
  • Topping choices: mini chocolate chips, raisins, other dried fruit, coconut flakes, apple chunks
Instructions
  1. Mix together oats, sucanat, salt and baking powder.
  2. Stir in eggs, milk, and melted butter.
  3. Scoop batter into 12 paper lined muffin cups.
  4. Sprinkle toppings of choice into the center of each cup.
  5. Bake in a 350° for about 30 minutes, or until the oats are golden brown.
3.4.3177

These are easier to eat with a fork, unless you like cleaning partial bird’s nests up off of your table and floor.

If you prefer, simply spread the mixture into a 9×9 inch baking pan. Bake in a 350° oven for 25-30 minutes.

Do you try to be cute when you cook and bake at your house? And how do those efforts go over for you? Ever tried to make India out of pancake batter?

Heavenly Homemaker's Club Members: Access your homepage and all your fantastic resources here! Not a member yet? Please join us!

Flaky Cream Cheese Pastry – The Healthy Way

March 15, 2012 by Laura 94 Comments

This post may contain affiliate links. For more information, please see our disclosure policy.

Back in my former life – the one in which I innocently and cheerfully ate Chillsbury* dough from a can – I loved making a cream cheese pastry dish that always got rave reviews. It was simple. You spread a can of Whillsbury* crescent dough on the bottom of a pan, throw in some cream cheese filling, top it with another round of Gnillsbury* crescent dough, bake it, and eat. I loved that stuff, as did everyone else who ate it with me.

Gone are my days of eating biscuits or crescents from a can. Oh, and can I just pause to say this:  I do not miss that vulnerable and insecure feeling that always came from never knowing when the can would pop open and dough would ooze out. Maybe it is just me, but waiting for the biscuit can pop always put me slightly on edge. Yeah, it was probably just me. I have can-popping-biscuit-bursting-forth issues, I think.

Anyway, I had forgotten all about this delicious dish, which is crazy, because hello? It does have cream cheese in it. It occurred to me recently that the perfect replacement for Billsbury* crescent dough would surely be my go-to whole wheat yogurt dough. Why I hadn’t thought of using it to figure out a new Cream Cheese Pastry dish, I have no idea. But I finally thought of it, tried it, and here it is. My family devoured it for breakfast this morning, which means that next time, I have to double it for sure!

*name changed to protect the innocent guilty

cream_cheese_pastry

Flaky Cream Cheese PastryYum

Dough:

1 3/4 cups whole wheat flour
1/2 teaspoon sea salt
1/2 cup melted butter
1/2 cup plain yogurt

Filling:

1 – 8 ounce package of cream cheese, softened
1 egg
1/2 cup real maple syrup (sugar, sucanat, or honey would work too)
1 teaspoon vanilla extract
1-2 Tablespoons lemon juice (optional)

Mix together all four dough ingredients and knead lightly to form a nice ball. Divide in half. Press one half of the dough into an 8×8 inch baking dish.

Whip together the cream cheese filling ingredients. Pour filling over the bottom crust.

Roll the second half of the dough into a square and place it on top of the cream cheese filling.

Bake in a 350° oven for 30-40  minutes, or until crust is golden brown.

Allow pastry to cool slightly before slicing and serving.


Tell me – am I the only one here with can-popping-biscuit-bursting-forth issues? I’ll admit it right now, it makes me jumpy just thinking about it. ;)

Heavenly Homemaker's Club Members: Access your homepage and all your fantastic resources here! Not a member yet? Please join us!
« Previous Page
Next Page »

Join Our Community!

 Facebook Twitter E-mail Instagram Pinterest

Popular Posts

~ Will All of the Real Moms Please Stand Up?
~ Easy! Stir-and-Pour Whole Wheat Bread
~ How to Make Gatorade
~ 31 Real Food Breakfast Ideas
~ Dear Teenage Girls...
~ When Mom Takes a Step Back
~ The Inexpensive Health Insurance We Love!
~ Let's Talk Real Food Grocery Budgets

Check out our latest posts!

  • Big Family Food and Fun: May 24-30, 2026
  • Free 7-Day Summer Menu Plan
  • Big Family Food and Fun: May 17-23, 2026
  • Easy Side Dishes for Summer
  • Big Family Food and Fun: May 10-16, 2026
Home  ~  Simple Meals  ~  Club Membership  ~  Shop  ~  Privacy Policy  ~  Disclosure  ~ Contact

Copyright © 2026 · Beautiful Pro Theme on Genesis Framework · WordPress · Log in