It would appear that there is a theme this week in the Stir-and-Pour Bread category. First, a Stir-and-Pour Pizza Crust, now a Stir and Pour Cinnamon Swirl Bread. Hey, I’m just trying to make your lives easier, one recipe at a time.
Or in this case I guess I would have to say that it’s the same recipe over and over made with a few variations. This in and of itself keeps life easy because after a while, you’ll have the basic recipe memorized and the variations will come naturally.
So let’s review.
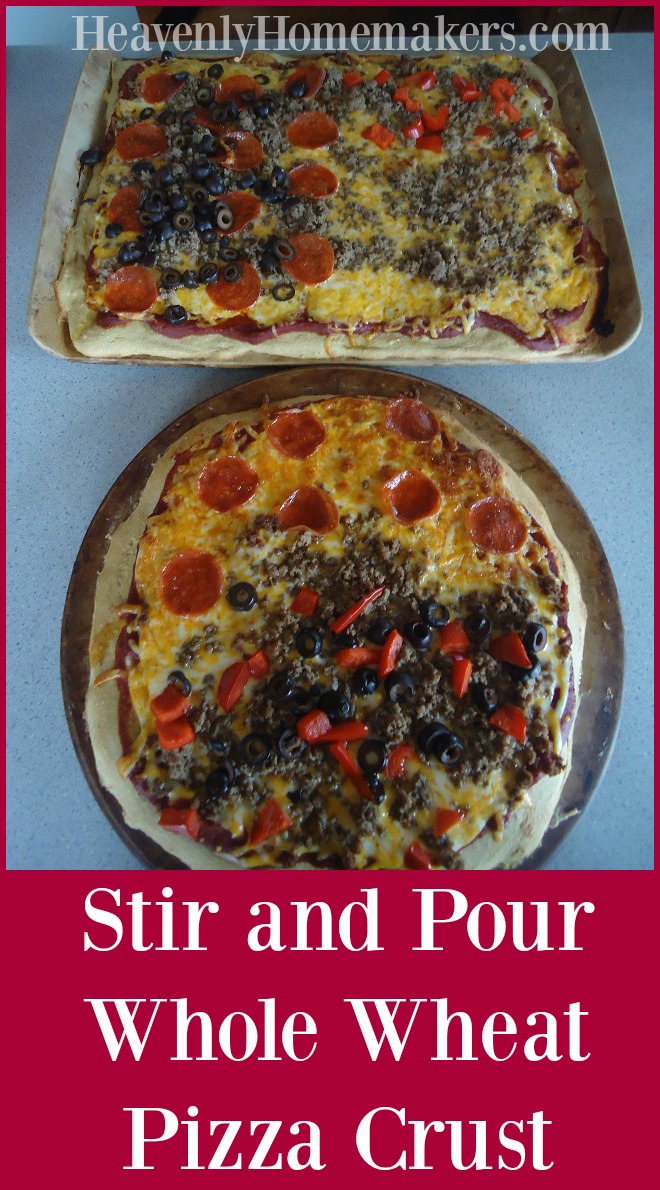
Get to know this basic and incredibly easy Stir-and-Pour Sandwich Bread recipe. That recipe has forever changed my bread-making life and I will never (probably) knead bread again. Why would I when I can just stir and pour – then take a nap?
With this basic recipe, we’ve learned that we can make Stir-and-Pour Rolls and Stir-and-Pour Pizza Crust. Today we learn that we can make Stir-and-Pour Cinnamon Swirl Bread. If you want, you can add raisins to make Cinnamon Raisin Bread. Or you can add dried cranberries to make Cinnamon Cranberry Bread. Or you can add dried apples to make Cinnamon Apple Bread. Or you can add nuts to make Cinnamon Nut Bread.
Or you can add all of the above to make Cinnamon Apple Raisin Cranberry Nut Bread.
How happy are all of us right now that this recipe offers so many wonderful possibilities? We are all so, so happy.
You might notice that since originally posting the basic recipe, I have ditched the optional cream and egg. They are optional, after all. I’ve found after making the recipe so many times that the egg and cream didn’t make much difference so I skip those steps which cuts out a good 32 seconds in bread making time. Every 32 seconds counts.
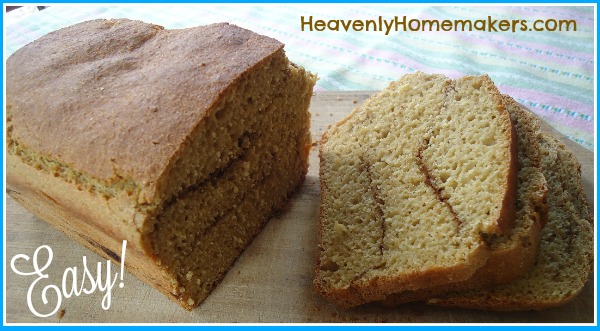
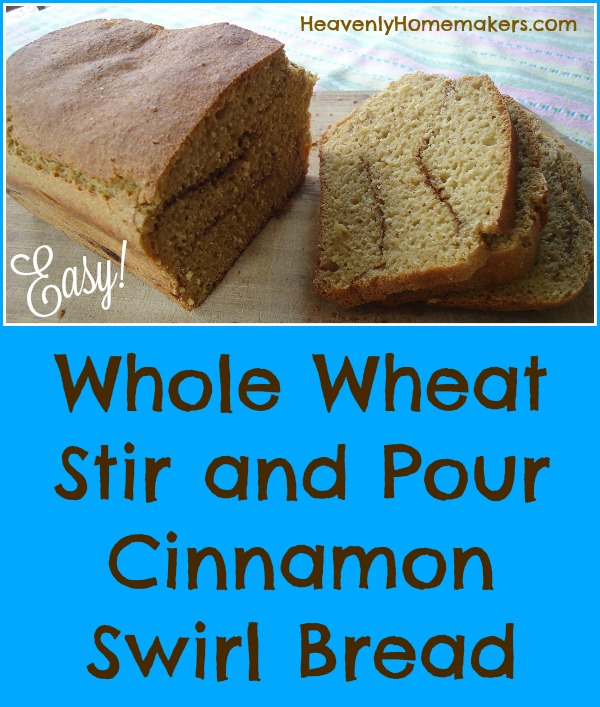
Whole Wheat Stir-and-Pour Cinnamon Swirl Bread
- 4 cups whole wheat flour (I use freshly ground hard white wheat)
- 2 teaspoons active rise yeast
- 2 Tablespoons sucanat or sugar or honey
- 1 teaspoon sea salt
- 2 cups warm water
- 3 Tablespoons sucanat or brown sugar mixed with 1 Tablespoon ground cinnamon
- Stir together flour, yeast, sucanat, salt, and water.
- Cover and allow it to sit for 30 minutes.
- Pour ⅓ of the mixture into a well-buttered loaf pan.
- Sprinkle ½ of the cinnamon/sugar mixture over the dough.
- Spread another ⅓ of the dough over the cinnamon/sugar layer.
- Sprinkle remaining ½ of the cinnamon/sugar mixture over the dough.
- Spread remaining dough over the top.
- Bake in a 350° for 50-60 minutes or until evenly browned.
- Allow it to sit in the pan for 15 minutes.
- Remove the loaf to let it cool completely before slicing.
As you can see, instead of actually swirling the cinnamon-sugar, we’re actually layering it. This method works great!
I am super excited about all these great Stir and Pour options! Have you tried any other variations you can let us know about?