Heavenly Homemakers

Encouraging women in homemaking, healthy eating and parenting

  • Home
    • About
    • FAQs
  • Recipes
    • Bread and Breakfast
    • Condiments
    • Dairy
    • Main Dishes
    • Side Dishes and Snacks
    • Desserts
    • Gluten Free
    • Instant Pot
    • Crock Pot
    • Heavenly Homemaker’s Weekly Menus
  • Homemaking
    • Real Food Sources
  • Store
  • Contact
    • Advertise
    • Disclosure
    • Privacy Policy
  • Simple Meals
  • Club Members!

Real Food “Velveeta” and Rotel Recipe

June 28, 2015 by Laura 46 Comments

This post may contain affiliate links. For more information, please see our disclosure policy.

To be clear, this recipe does not include Velveeta as one can not use the words “real food” and “velveeta” in the same recipe and be telling the truth. In addition, this is not a recipe for Velveeta. I refuse to experiment to come up with a way to make a cheese product that has a shelf life.

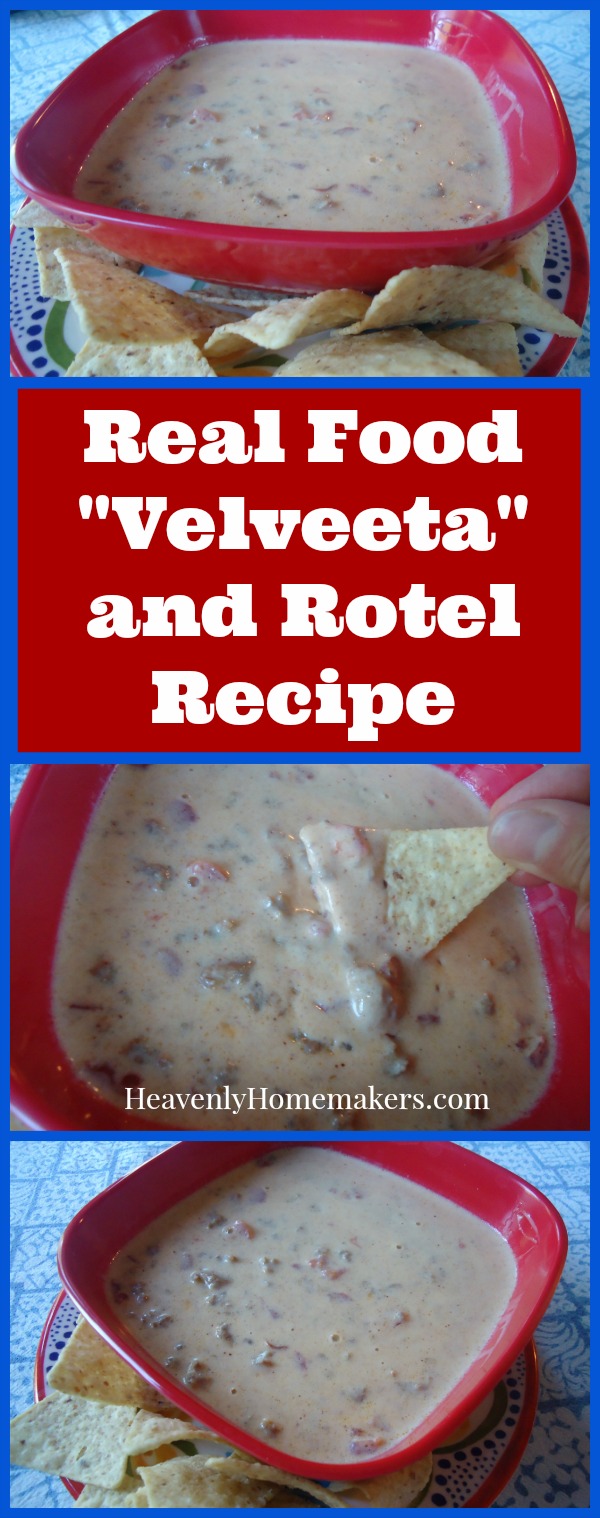
Real Food Velveeta and Rotel Dip

But. As many of you know, I have a ridiculous love for the completely nasty and absolutely delicious Velveeta Rotel Dip that I grew up on as a kid. You may remember that I wrote a love letter to Velveeta a few years ago and bid her farewell as I created a tasty dip to replace her. Sure enough, we make that dip frequently at our house as it is super easy, all real food, and absolutely yummy.

But. That recipe, as good as it is, is still not the same as the Velveeta Rotel Dip I crave. That is why (and I’m not proud of this) sometimes I put a $6 log of boxed cheese product (otherwise known as Velveeta) into my cart along with 2 cans of Rotel and I bring it home and I melt it together and I eat it even though it is terribly terrible and truthfully it doesn’t even taste as good to me as it used to because of that whole real food thing I’m into now which has made all bad foods taste like chemicals on a tortilla chip.

So what is my problem?

Problem? I don’t have a problem.

Okay fine. Whatever. I have a problem.

And also? When did fake cheese become so expensive? You’d think that would deter me from buying it. But as I said, I have a problem.

It was either time to begin a Velveeta support group or get back in the kitchen to try my hand at another dip recipe since I’ve only tried like seventeen other times and posted like five other cheese dip recipes through the years and may have to rename this website to cheesediprecipesforaddicts.com with the tag line “All Cheese Dip Recipes, All the Time.”

A support group was out of the question because it is my understanding that they don’t serve chip dip at those meetings. So here we are again, back in the kitchen for another attempt at a real food version of my beloved dip.

You guys. I think I nailed it this time. And I mean that with all the humility and sweetness possible, but hey guess what? I just made the best chip dip ever!!! 

So here’s how this dip becomes amazing. Two things:

  1. We must make a cheese sauce for this to work. This requires butter and corn starch and actual cheese. Relax. It’s not as hard as it sounds.
  2. We must use actual Rotel or an off brand of “diced tomatoes and green chilies. Salsa isn’t the same. Thankfully, Rotel is still a real food – read the ingredient label and rejoice.

Note: My wonderful grass-fed beef produces the perfect amount of fat so I never have to drain off grease. In order to make a sauce, one must have fat or grease to work with. That’s why my recipe includes butter. Depending on what meat you have, I recommend either skipping the butter (if your meat has some grease to work with) or draining the grease and adding the butter or using your grease with some butter. Just so you have about 4 Tablespoons of fat to work with, you’re golden.

Real Food “Velveeta” and Rotel Dip RecipeYum

5.0 from 2 reviews
Real Food "Velveeta" and Rotel Recipe
 
Save Print
Author: Laura
Serves: 6-8
Ingredients
  • 1 pound hamburger meat
  • 2-4 Tablespoons butter
  • 2 heaping Tablespoons corn starch
  • 1 cup water
  • 1 teaspoon chili powder
  • sea salt to taste
  • 2 cups heavy cream
  • 10-ounce can diced tomatoes with green chilies (Rotel)
  • 1-2 cups shredded cheddar or colby jack cheese
Instructions
  1. Brown the hamburger meat in a large pot.
  2. Add butter to the meat, melting it throughout the pot.
  3. Sprinkle in corn starch, coating the meat.
  4. Pour in water, chili powder, and salt.
  5. Turn heat up and stir until the mixture thickens.
  6. Add cream, continuing to stir as the mixture thickens. (This all happens quickly in my experience.) Stir in Rotel, heating for about 2 more minutes.
  7. Remove from heat.
  8. Add shredded cheese, stirring until the cheese has melted and the dip is smooth.
3.4.3177

If you don’t remove your sauce before adding cheese, your cheese will end up funky and not smooth and creamy. You’ve been warned, so don’t add your cheese while your pot is still on the stove, then email me and ask why your cheese got funky. Not that anyone would ever do that.
Real Food Velveeta and Rotel Recipe

If you need me, I’ll be in the kitchen eating another bowl of my homemade not velveeta but way better than velveeta because it’s real food Chip Dip.

Who wants to come join me? I need to know who loves this dip as much as me. Admit it. Join my support group – the one where there IS CHIP DIP AT THE MEETINGS because my support group meetings rock and we support one another by eating dip.

~~~~~~~~~~~~~~~~~~~~~~~~~~~~~~~~~~~~~~~~~~~~~~~~~~~~

It’s recipes like this Real Food Velveeta and Rotel that makes Simple Meals what it is. It offers you huge money and time savings. Not to mention you don’t have to think as hard every week about what to cook and what to buy.

Join the fun! Check out our amazing Simple Meals program!

You will love this!

728x90

Heavenly Homemaker's Club Members: Access your homepage and all your fantastic resources here! Not a member yet? Please join us!

We Can Bake Quick Breads in a Slow Cooker!

June 25, 2015 by Laura 13 Comments

This post may contain affiliate links. For more information, please see our disclosure policy.

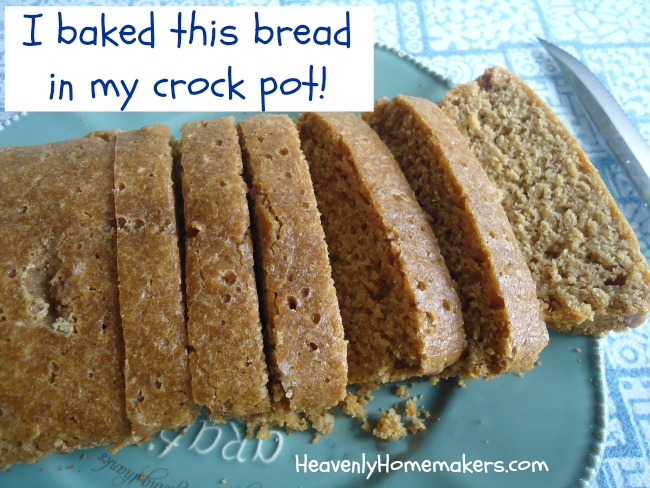
It’s a new way to bake quick breads!

You Can Bake Bread in a Crock Pot!

Yum

I had no idea that this was an actual thing. Did you?? I came across this idea here and am ever so grateful.

I’ve been baking potatoes in a crock pot for several years, but I did not know a person could bake quick bread this way too. (And also yeast bread, but I’m trying to perfect that idea before posting about it. You can look forward to that…as will I if I can ever figure out how to do it right.)

This is going to change how we eat this summer. No more avoiding bread on hot days since I never want to turn on the oven. However, since I only have one crock pot, I can obviously only do one loaf of bread at a time. This is a little bit limiting for my family of huge eaters. But all I’ll have to do to remedy this is scramble up a bunch of eggs and make a blender (or two) full of smoothies to go with our loaf, and we’ve got a meal.

I’ve tried this idea with two different types of quick breads – Chocolate Chip Bread and Snickerdoodle (it was a recipe experiment). Both worked great! This leads me to believe that any quick bread recipe will work. (Actually, I’m not sure about gluten free breads. Anyone have experience with this?)

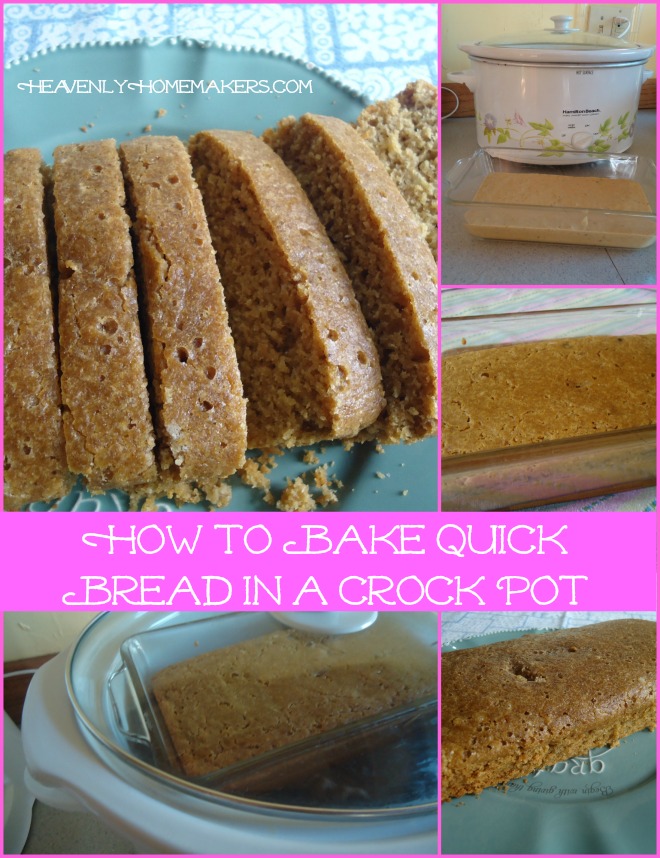
How to Bake Quick Bread in a Crock Pot

How to Bake Quick Breads in a Crock Pot

1. Turn your crock pot onto “hi” to preheat.

2. Mix your quick bread as usual and put it into a buttered loaf pan. (I used glass as I’m not sure about using a stone in my crock pot. Any have experience with this?)

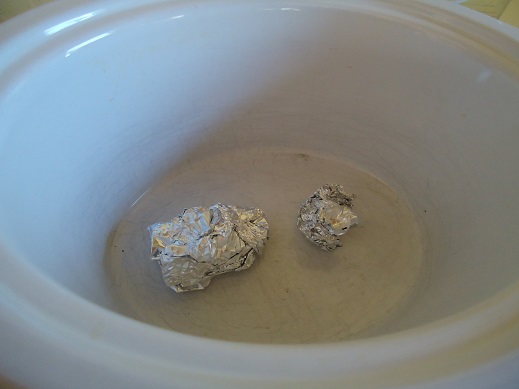
3. Wad up two pieces of tin foil and place them at the bottom of your crock pot. This will offer some space under your bread pan which will help your bread bake better.

bread in crock pot 2
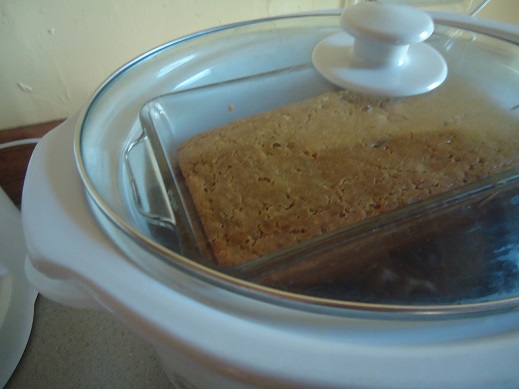
4. Set your loaf pan into your crock pot. (Mine is actually barely the right size, so it didn’t fit all the way in thus negating the need for wads of foil. As you can see in the pictures above, my pan sat on the edge of the top of the crock. It worked perfectly.)

5. Place the lid on your crock pot slightly off centered so as to allow a little bit of steam to escape during baking.

6. Leave the bread to bake in the crock pot for about 2 hours. You’ll be able to watch it baking from the outside into the middle, making it quite easy to see when it has finished baking.

bread in crock pot 3

How excited are you to learn this fun trick?! What quick bread are you going to try baking in your crock pot first? I’m asking because I know you are going to try this right away, this minute, today, as soon as you stand up.

P.S. Look through our quick bread/muffin recipes here.

Heavenly Homemaker's Club Members: Access your homepage and all your fantastic resources here! Not a member yet? Please join us!

No-Bake Snickerdoodle Bites – A Quick and Easy Low Sugar Treat

June 24, 2015 by Laura 14 Comments

This post may contain affiliate links. For more information, please see our disclosure policy.

I’ve been making a treat similar to this recipe for several years (found over at TheNourishingHome.com). I’ve tweaked it here and there…then sort of forgotten all about this great treat. Last week I decided I needed a lightly sweetened snack. Not salty. Not desserty. Not meaty. Just something filling and lightly sweetened. These Snickerdoodle Bites are perfect.

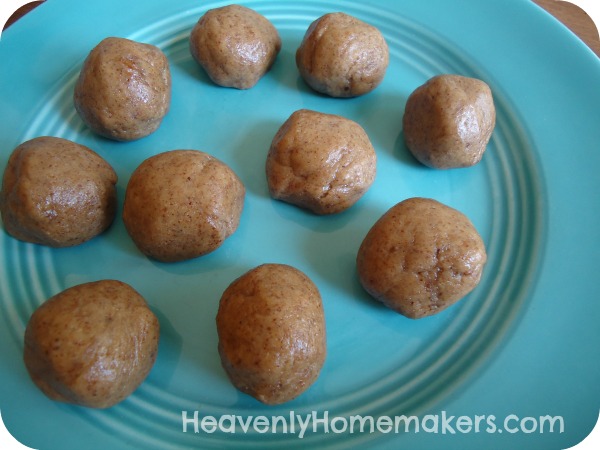
snickerdoodle bites2

I’ve kept these Snickerdoodle Bites in my fridge, grabbing one in the afternoon when I need a little something to get me through until dinner. Because these are made with coconut flour, they are filling and nourishing. And did I mention that they are lightly sweetened to perfection? Like, if they were produced in mass and put into a box, the box would definitely say, “Lightly sweetened…to perfection.” Yep, that’s what it would say.

No-Bake Snickerdoodle BitesYum

No-Bake Snickerdoodle Bites - A Quick and Easy Low Sugar Treat
 
Save Print
Author: Laura
Ingredients
  • 1 cup creamy almond butter or peanut butter (almond butter is my fav for these)
  • ¼ cup honey
  • 1 teaspoon vanilla extract
  • 1 teaspoon ground cinnamon
  • ½ cup coconut flour
Instructions
  1. Mix the ingredients together in a bowl until well combined.
  2. Roll the mixture into teaspoon-sized (or whatever sized) balls.
  3. Refrigerate before serving - or just start eating because who can wait?
3.4.3177

Do feel free to add more honey if you prefer – although then these might be slightly more than lightly sweetened, thus ruining my description. But I’ll never know, so it won’t matter, and truly – we want these to be perfectly sweetened for your family’s delight.

No-Bake Snickerdoodle Bites - a quick and easy low sugar treat

Coconut flour is naturally gluten free – a great option for those of you who must avoid gluten. Our family doesn’t not need to avoid gluten – however we like coconut flour because it is so rich in nutrients! “Coconut flour is the fiber from coconut meat after most of the oil has been extracted to make coconut oil.” (source: Tropical Traditions) Adding protein and fiber to our (lightly sweetened) snacks? Yes please!

Where do I get coconut flour? I either order it from Tropical Traditions or Amazon. (Right now, this coconut flour at Amazon is a wonderful price!) Here are some of my other coconut flour recipes:

  • Coconut Flour Cheddar Drop Biscuits
  • Coconut Flour Muffins
  • Coconut Flour Banana Muffins
  • Coconut Flour Brownies

But right now, these lightly sweetened No-Bake Snickerdoodle Bites are my favorite coconut flour recipe. It’s probably because they only take 5 minutes to prepare and don’t require baking. And also because they are lightly sweetened to perfection.

Are you a fan of coconut flour? How do you use it at your house? 

This post includes affiliate links

Heavenly Homemaker's Club Members: Access your homepage and all your fantastic resources here! Not a member yet? Please join us!

Make Orange Creamsicle Ice Cream – No Ice Cream Freezer Required

June 18, 2015 by Laura 2 Comments

This post may contain affiliate links. For more information, please see our disclosure policy.

Orange Ice Cream

Knock, knock.

Who’s there?

Orange.

Orange who?

Orange you glad I didn’t bore you with the ridiculous banana knock-knock joke your three year old thinks is funny every time he tells it over and over? Between my four boys, I heard that joke 45,000 times. It was so hilarious every single time, of course. If you don’t know which joke I’m talking about, I am very, very jealous and and also very happy for you. Look it up if you must, but I’m warning you: do not tell your three year old.

All jokes aside, orange you excited to try this recipe? You should be! It’s very refreshing – and super easy. No need to dig out the ice cream maker and rock salt. You do need a high power blender, however. I invested in a BlendTec about a year ago, and I’m not sure how Ma Ingalls and I ever lived without it. That thing is a power horse and makes my kitchen life so much easier. I probably use it three times every day – no exaggeration.

But speaking of exaggeration, check out this orange:

orange ice cream 1

I got two of these giants in my Bountiful Basket order last week. As you can see, this one was so huge, I could barely hold it in my hand. This recipe calls for two medium-sized oranges. The above orange does not qualify as “medium-sized.” He is an over-achiever and we are so proud. I used about 1 1/2 of this size orange for this recipe. And really, this recipe isn’t rocket science because I don’t know what rocket science is and also because this recipe is flexible in its ingredient quantities. Just freeze some orange wedges and throw them in a blender with the other stuff and it makes a really great treat.

Knock, knock.

Just kidding.

Alrighty, here is the very easy recipe, which I found here and tweaked only slightly. Thank you for the great idea, SuperHealthyKids.com!

Low Sugar Orange Ice CreamYum

2 cups whole milk or coconut milk
2 medium-sized oranges
3 Tablespoons maple syrup or 20 drops liquid stevia
1 teaspoon vanilla extract

Peel oranges and divide them into sections. Lay them flat on a cookie sheet. Place them in the freezer for about two hours or until they are frozen solid.

Put half the frozen orange segments into a high power blender. Add milk and blend until smooth. Add remaining oranges, maple syrup or stevia, and vanilla. Continue blending until smooth.

Pour mixture into a 9×13 inch dish. Place in the freezer for 1-2 hours before serving. (If it is in the freezer longer than 1-2 hours, remove from freezer a few minutes before serving to make scooping easier.

Orange Ice Cream with dairy free option!

Do you have a BlendTec or other high power blender (like Vitamix)? What all do you do with it? Isn’t it great?!

 Some of the links in this post are affiliate links.
Heavenly Homemaker's Club Members: Access your homepage and all your fantastic resources here! Not a member yet? Please join us!

Build a Breakfast Burrito Bar

June 16, 2015 by Laura 12 Comments

This post may contain affiliate links. For more information, please see our disclosure policy.

My family ranks the Breakfast Burrito Bar as one of the best ways to feed a crowd in the morning!

It seems that I’ve been on a bit of a Build a _________ Bar kick during the past few months. I believe it just makes sense now that my kids are older. They definitely have specific tastes and preferences. Laying out ingredients and letting individuals put together what they like just makes sense.

That, and it’s much less work for me. I like this part best of all.

Beyond the family, the Build a __________ Bar idea is wonderful for company. Guests can fill their bowl or plate just the way they like. This is a great way to accommodate people with food allergies or differing tastes.

So let’s see. Shall we review the Build a ______ Bar ideas I’ve shared up to this point?

  • Build a Brownie Sundae Bar
  • Build a Fruit Salad Bar
  • Build a Pasta Salad Bar

I thought surely I had posted about Build a Chef Salad Bar, but I guess I never have. That’s one of the easiest meal ideas, so I highly recommend it.

And now, consider a Breakfast Burrito Bar. This worked wonderfully for company a few weeks ago.

Build a Breakfast Burrito Buffet

Simply lay out breakfast burrito items and let everyone fill their plate according to their tastes. Here are some suggestions for the buffet:

Build a Breakfast Burrito BuffetYum

  • Warm tortillas
  • Scrambled eggs
  • Cooked meat like ham, sausage, or bacon
  • Shredded cheese
  • Salsa
  • Chopped veggies like peppers, onions, and mushrooms
  • Spinach

Of course, it’s great to offer a variety of fresh fruit for a side dish.

Do you have any other Build a __________ Bar ideas to share? I love how simple this is!

Heavenly Homemaker's Club Members: Access your homepage and all your fantastic resources here! Not a member yet? Please join us!

Low Sugar Chocolate Peanut Butter Cake

June 10, 2015 by Laura 13 Comments

This post may contain affiliate links. For more information, please see our disclosure policy.

chocolate peanut butter cake 2

Happiness is taking part of one recipe and part of another recipe and putting them together to make Chocolate Peanut Butter Cake recipe. Happiness is having your cake and eating it too because of the low sugar content. Happiness is a cup of coffee with this cake. Really, this whole post and all that is included is really very happy.

Unless you can’t have dairy or gluten or nuts. Then this post really just stinks.

But for the wheaty, milky, nutty (you know who you are) people out there, we shall enjoy this cake on behalf of our dairy free, gluten free, and nut free friends. We’ll feel just a little bit bad that you can’t eat this with us, but we trust that you can take this idea and run with it. You’re good at adapting, right?

So Chocolate Peanut Butter Cake. This is amazing, and it only has 1/2 cup of sugar in it so if you want to eat it for breakfast, by all means, do it.

Here’s what I did:

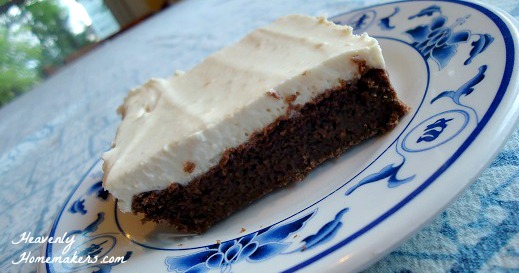
I made this Chocolate Cake. When it cooled, I topped it with this Peanut Butter Cream Frosting. Everyone at our house loved this cake! (except for Malachi, who hates peanut butter – what is the matter with this child?)

Now, you can also bake this Peanut Butter Cake and top it with this Honey Sweetened, Low Sugar Chocolate Frosting for a variation of Chocolate Peanut Butter Cake. Again, happiness is taking part of one recipe and putting it with part of another recipe. (This concept does not apply to everything. Do not mix and match my Alfredo Sauce with Pasta recipe with Apple Butter or Barbeque Sauce. I should not have to explain this.)

Low Sugar Chocolate CakeYum

1 cup melted coconut oil
1 cup water
4 Tablespoons unsweetened cocoa powder
2 cups whole wheat pastry flour
1/2 cup sucanat
dash of sea salt
1 teaspoon baking soda
1/2 cup sour cream
2 eggs

In a large mixing bowl, stir together flour, sucanat, salt, and baking soda. Set aside. In a saucepan, bring oil, water, and cocoa to a boil. Pour liquid mixture into the bowl with the dry ingredient mixture. Stir well. Add sour cream and eggs, mixing well. Pour batter into a 9×13 inch baking pan. Bake in a 350° oven for 20-25 minutes or until a toothpick inserted in the middle comes out clean. Allow cake to cool completely before frosting.

Peanut Butter Cream Frosting

1/4 cup butter, softened
1/2 cup natural peanut butter, softened
8 ounces cream cheese, softened
1/2 cup heavy whipping cream
1 teaspoon vanilla extract
Liquid stevia

Whip together all ingredients until thick and smooth, sweetening with stevia to taste. Spread over cooled cake.

Low Sugar Chocolate Peanut Butter Cake

Mixing and matching rocks. Who’s a fan of chocolate and peanut butter? What’s the weirdest food combination you like to eat? I have no idea why I’m asking that.

Heavenly Homemaker's Club Members: Access your homepage and all your fantastic resources here! Not a member yet? Please join us!

How to Make Mint Extract

June 4, 2015 by Laura 27 Comments

This post may contain affiliate links. For more information, please see our disclosure policy.

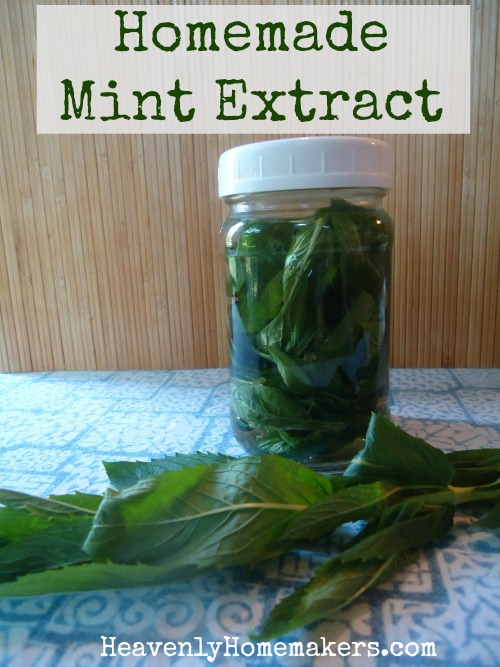
Homemade Mint Extract!

Homemade Mint Extract 2

It is a fact that I went to the store last week with one purpose: To buy liquor. Not fruit, not vegetables, not butter…but rum. And also vodka.

I grabbed one bottle of each and walked to check-out. I certainly would have taken a selfie to show you all, but obviously that would have been impossible since I only have but two hands and they were both clearly full…of liquor bottles.

I should be used to this by now, but even after so many years of making Homemade Vanilla Extract, I still feel awkward about buying large quantities of liquor. Since I typically make so much extract at once, my cart full of liquor makes it look like I’m hosting a party for half the city.

Whatever. It’s just weird. But the worst (and I do mean worst) part is this:

The past three times I’ve purchased liquor for extracts – I have not even been carded. What?? Do I look like I’m over 21? Sheesh. (says the woman who has an almost 18 year-old son.)

Well, anyway. It seems that I just need to get used to it and deal. Why? Because it occurred to me as of late: Since it’s so easy and so cost effective to make Homemade Vanilla Extract – why have I not tried making other extracts?

Why indeed. Therefore, I bought rum and made Cinnamon Extract – which took a grand total of about two minutes (not counting the time it took to not get carded at the store). Last week I stole some fresh mint from a friend’s yard (and by stole, I definitely mean that she cut some for me, put it in a bag, and handed it to me with the promise that there was more where that came from and to feel free to help myself at any time) – and started a batch of Mint Extract.

This stuff is too easy. Why do we think homemade goodies are difficult? Do we know how to open a bottle of liquor and pour? Well then.

Be watching for instructions for making Orange Extract and Almond Extract. Click on the following to learn to make Vanilla Extract and Cinnamon Extract. And now…

How to Make Mint ExtractYum

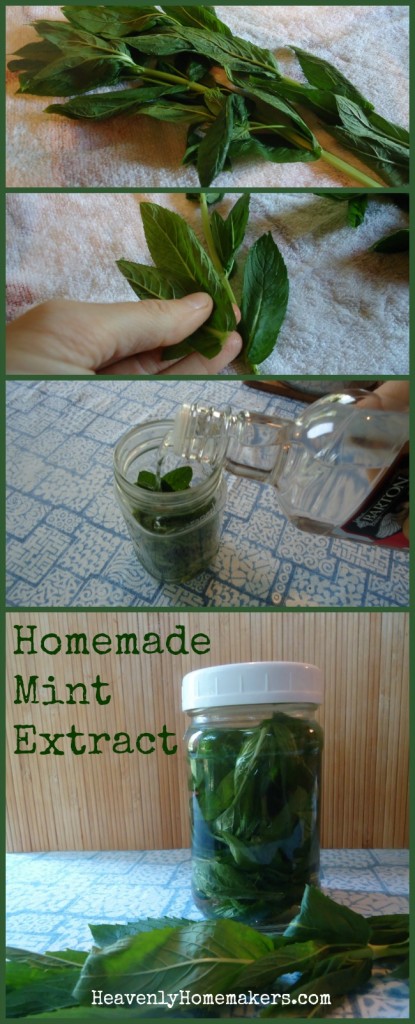
1. Cut fresh mint leaves (or buy them at the grocery store), rinse, and pat dry.

2. Pull leaves off the stem.

3. Place about 1 cup worth of mint leaves into a pint-sized jar.

4. Pour in about 2 cups of vodka (the cheap kind is fine).

5. Cover and place in a dark cabinet for 1-2 months, shaking occasionally.

Homemade Mint Extract

Make enough for your family to use, and enough to offer as gifts. Wow your family and friends. They’ll be so impressed, and inside you’ll be thinking, “Well all I had to do is rip leaves and pour vodka. But yeah, I’m awesome.”

Have you tried making extracts? Which homemade extract recipes would you be interested in learning to make next?

Heavenly Homemaker's Club Members: Access your homepage and all your fantastic resources here! Not a member yet? Please join us!

Low Sugar Almond Fudge Bars

May 31, 2015 by Laura 15 Comments

This post may contain affiliate links. For more information, please see our disclosure policy.

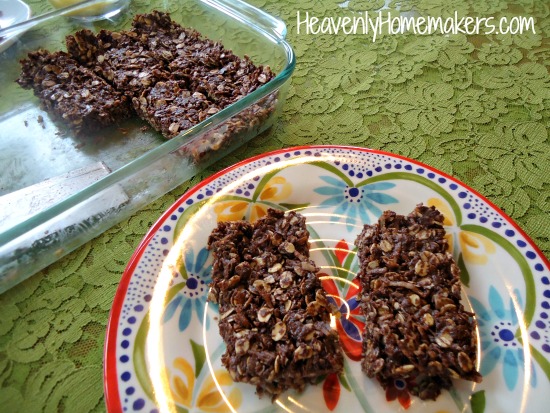
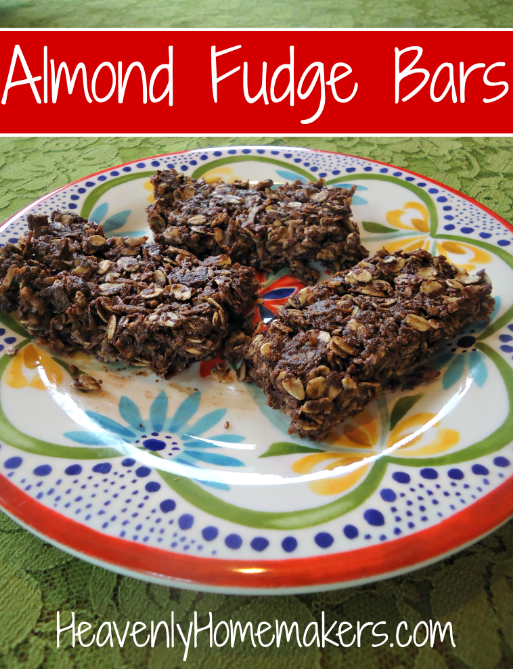
Low Sugar Almond Fudge Bars

almond butter fudge bars 1

I hadn’t spoken to my friend Emily in weeks. This is not because we aren’t getting along (because, grown adults, hello?). This is because I was in the thick of finishing a tough semester with my kids and preparing for graduation for our oldest, not to mention we had to finish our bathroom remodel before all the grad company came (and try to squeeze in this thing called blogging). Emily, as well as many of my dear friends, recognized that if I happened to have any spare time on my hands I should use it to take a shower or scrub the crusted bits of leafy greens off the bottom of my crisper drawer – not answer emails, talk on the phone, or answer questions in the church foyer.

But here and there, I would get a meaningful email or card from Emily. She would start it by saying something like “don’t answer this right now” or “I’m praying for you” because she knew. She knew. (Oh, look at me, tearing up just a little.)

Well one such email – actually – I think it was a quick holler across the church foyer conversation went something like this:

Emily: You know your Coconut Fudge Bars? I really like them but it would also be fun to figure out how to make them a little less peanutty. I wonder if almond butter would work?

Laura: {blank stare}

Emily: Carry on. Maybe I’ll play with it and get back to you.

It’s actually amazing that I remember that conversation at all. God bless all my friends who put up with me during this school year. I am not even kidding. (And all of them nodded in unison as if to say, “Really. She is not even kidding.”)

Not many days after that conversation, I got this email from Emily with the subject line, “Stop the presses!” Here’s what she said,

Okay, you really don’t have to stop anything but I was really excited about this. I felt like it was my DUTY to test out the coconut fudge bar recipe using almond butter instead of peanut butter. Technically I’ve only licked the spoon so far but oh my goodness, it is so good! It really does taste a little like a crunchy almond joy, but more grown up since it’s not too overly sweet. Can’t wait to have one after lunch!

How great is it that she did my recipe experimenting for me? Our family tried the almond butter fudge bar idea on a morning I hadn’t made anything for breakfast and we needed to eat quickly. I mixed these up and found that Emily was very right. These are awesome!

Almond Fudge BarsYum

Low Sugar Almond Fudge Bars
 
Save Print
Author: Laura
Ingredients
  • ½ cup almond butter
  • ¼ cup honey
  • ¼ cup coconut oil (or another oil of your choice)
  • ½ cup cocoa powder
  • 1½ cup rolled oats
  • 1 cup unsweetened coconut flakes
Instructions
  1. In a medium sized saucepan, melt together almond butter, honey, coconut oil, and cocoa.
  2. Remove from heat and stir in oats and coconut flakes.
  3. Spread mixture into a 9×9 inch pan.
  4. Chill for 2 hours before serving.
  5. Makes 8-16 bars, depending on how big/small you cut them.
3.4.3177

Honey Sweetened Almond Fudge Bars

Hooray for great friends, hooray for a snack/breakfast/treat that can be made in about five minutes, and hooray…just hooray.

How excited are you over this almond butter version of Coconut Fudge Bars? Leave a comment to tell Emily “thank you,” because I can take no credit for this (except for the fact that she’s my friend, which is, of course really because of God, so be sure to tell Him “thank you” as well.)

Heavenly Homemaker's Club Members: Access your homepage and all your fantastic resources here! Not a member yet? Please join us!

Low Sugar Strawberry Cheesecake Parfait (With a “To-Go” Option)

May 29, 2015 by Laura 25 Comments

This post may contain affiliate links. For more information, please see our disclosure policy.

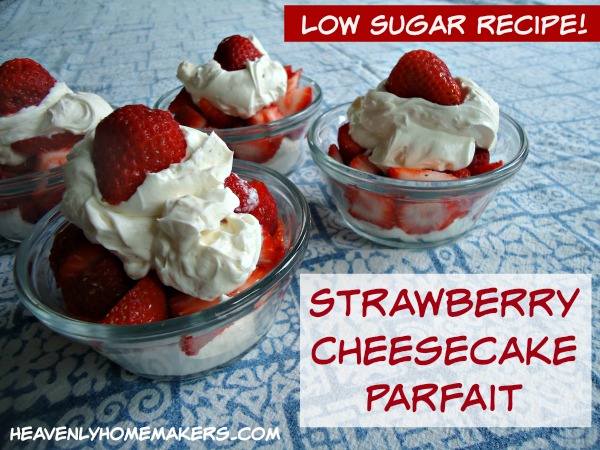
Low Sugar Strawberry Cheesecake Parfait

Low Sugar Strawberry Cheesecake Parfait 1

There is only one requirement for making this recipe: All parties – including the makers and the recipients – must lick the bowl, dish, cup, spoon, and spatula when preparing, serving, and partaking in each Strawberry Cheesecake Parfait. Lickage (oh, it’s totally a word) is not an option. Failure to lick said bowl, dish, cup, spoon, and spatula will result in…you know, the missing out of the enjoyment of every last taste of goodness. It would be devastating, and friends don’t let friends not lick delicious creaminess out of the bowl. This is how you know how much I love you. I insist on the lickage (pronounced lick-uj). You can thank me later.

You know what is so amazing to me about recipe creation? It is that with just a couple of little tiny tweaks, one recipe becomes another – with very little thought or effort. Case in point: I basically took my Low Sugar Cheesecake filling, tweaked the measurements just a little bit, and spooned it into bowls with layers of sliced strawberries. Really. I’m not as smart as you didn’t think I was. It’s simply a matter of changing things up, of taking one idea and forming another, and also of being way too lazy to bake a cheesecake crust.

It’s also a matter of…fresh strawberries are amazing.

If that’s not motivation enough for you to go to the kitchen immediately to make these, then I should let you know that these little parfaits can be put together in a very short amount of time, they have very little sugar, and they are seriously bowl/dish/cup/spoon/spatula lickin’ good.

Low Sugar Strawberry Cheesecake Parfait (serves 6-8)Yum

5.0 from 2 reviews
Low Sugar Strawberry Cheesecake Parfait (With a "To-Go" Option)
 
Save Print
Author: Laura
Ingredients
  • 2½ cups heavy whipping cream
  • 8 ounces softened cream cheese
  • 1 teaspoon vanilla extract
  • 1 Tablespoon real maple syrup
  • Liquid stevia to taste (I use about 20 drops) (Use a few Tablespoons of sugar if you prefer.)
  • 1 -2 pounds fresh, sliced strawberries
Instructions
  1. Place all ingredients (minus the strawberries) into a blender.
  2. Whip until smooth and creamy.
  3. Spoon mixture into bowls or cups - layering them with sliced strawberries.
3.4.3177

Lick the blender. Lick the spoons. Lick the spatula that you will use to get every last little bit of goodness out of the blender.

Lick your lips, lick your chin, lick your fingers. That oughta do it.

Low Sugar Strawberry Cheesecake Parfait

And guess what else? I learned that these Strawberry Cheesecake Parfaits are perfect for a treat-to-go! Simply layer the parfait in 8-ounce jars, cover with a lid, and take them with you. (Pack a spoon though, because while licking is good, it is rather difficult to be that good of a licker.)

Low Sugar Strawberry Cheesecake Parfait - To Go!

Feeling more like a blueberry, a blackberry, a raspberry, or a peach? By all means, switch out the strawberries with any or all of the above. See, the choice of fruit is optional. It’s the lickage that is a requirement.

Go therefore and begin fighting over which family member gets to lick the spatula.

Heavenly Homemaker's Club Members: Access your homepage and all your fantastic resources here! Not a member yet? Please join us!

The Most Amazing Cinnamon Smoothie (with a Dairy Free Option)

May 26, 2015 by Laura 13 Comments

This post may contain affiliate links. For more information, please see our disclosure policy.

Be sure to check out these ten great ideas for how to use fresh cinnamon sticks. And now, idea number 11 for how to use fresh cinnamon sticks. Trust me that when I say Amazing Cinnamon Smoothie – I really do mean amazing. Wowza.

Amazing Cinnamon Smoothie 2

When I came across a recipe similar to this, it claimed that the smoothie tasted just like a fresh cinnamon roll. Hmmm, really? Because have you ever had a fresh cinnamon roll?? I mean, nothing is quite the same as a fresh, warm cinnamon roll straight from the oven dripping with gooey… STOP! That’s just not nice to tease people with talk about freshly baked rolls of cinnomony-ness. Not nice at all.

Let’s very quickly focus on the negatives of freshly baked cinnamon rolls so that we can all stop craving them.

  1. They take forever to make. Hours and hours. A very long time.
  2. Making homemade cinnamon rolls creates many, many dirty dishes – not to mention a crusty counter-top.
  3. Cinnamon rolls can be addicting.
  4. Cinnamon rolls are full of empty calories and sugar. Just think of the stomach ache to follow the indulgence. Misery, it is.

Bleh. Ick. Nothankyou. We absolutely do not want a freshly baked cinnamon roll not even a little bit, no way, nuh-uh.

Clearly, I should have gone into psychology because this tactic is working very, very well to make us believe that fresh, hot cinnamon rolls are disgusting.

(Just now I had to look up how to spell psychology so I guess I’ll stick with writing and recipe creations.)

Now how about this Amazing Cinnamon Smoothie? Here are all the positives and the wonderful reasons we should make these instead of cinnamon rolls:

  1. This smoothie can be made in about two short minutes.
  2. Making this smoothie only dirties a blender and a glass. Fine – and a straw if you’re feeling fancy.
  3. Instead of making you say “okay, but I’ll just eat one more” (three times) like fresh hot cinnamon rolls can do – this smoothie is quite satisfying with one delicious glassful.
  4. Every part of this smoothie offers nourishment.

I’m sure none of us want a fresh hot cinnamon roll anymore. I’ve talked us all out of it. Cravings be gone! Right? Right. Absolutely.

Either way, just go make this simple – no sugar added, by the way – Cinnamon Smoothie. It’s super delicious and you really can make it in about two minutes.

Amazing Cinnamon SmoothieYum

The Most Amazing Cinnamon Smoothie (with a Dairy Free Option)
 
Save Print
Author: Laura
Serves: 2
Ingredients
  • 2 cups whole milk or coconut milk
  • 2 ripe, frozen bananas
  • 1 teaspoon vanilla extract
  • ½ teaspoon ground cinnamon
Instructions
  1. Blend ingredients until smooth.
  2. Serve right away.
3.4.3177

(I’m pretty sure homemade cinnamon roll instructions are just a tad more lengthy. Just sayin’.)

Amazing Cinnamon Smoothie

If you’re still wanting a homemade cinnamon roll (a real one, like the kind that comes out of a pan in the oven) – I recommend this Whole Wheat Cinnamon Roll recipe. Not that you are. After all, you’re about to get up and make this smoothie.

Click over to this post to learn more about picking up some free cinnamon sticks to use in this recipe and others. You’ll also learn how to make Cinnamon Extract, Cinnamon Infused Sugar, Cinnamon Pancake and Waffle Syrup and much more. :)

Now, raise your hand if you definitely do not want a cinnamon roll. 

Heavenly Homemaker's Club Members: Access your homepage and all your fantastic resources here! Not a member yet? Please join us!
« Previous Page
Next Page »

Join Our Community!

 Facebook Twitter E-mail Instagram Pinterest

Popular Posts

~ Will All of the Real Moms Please Stand Up?
~ Easy! Stir-and-Pour Whole Wheat Bread
~ How to Make Gatorade
~ 31 Real Food Breakfast Ideas
~ Dear Teenage Girls...
~ When Mom Takes a Step Back
~ The Inexpensive Health Insurance We Love!
~ Let's Talk Real Food Grocery Budgets

Check out our latest posts!

  • Big Family Food and Fun: August 9-15, 2026
  • Big Family Food and Fun: August 2-8, 2026
  • Big Family Food and Fun: July 26-August 1, 2026
  • Big Family Food and Fun: July 19-25, 2026
  • Easy Baked Spanish Rice Recipe
Home  ~  Simple Meals  ~  Club Membership  ~  Shop  ~  Privacy Policy  ~  Disclosure  ~ Contact

Copyright © 2026 · Beautiful Pro Theme on Genesis Framework · WordPress · Log in