Heavenly Homemakers

Encouraging women in homemaking, healthy eating and parenting

  • Home
    • About
    • FAQs
  • Recipes
    • Bread and Breakfast
    • Condiments
    • Dairy
    • Main Dishes
    • Side Dishes and Snacks
    • Desserts
    • Gluten Free
    • Instant Pot
    • Crock Pot
    • Heavenly Homemaker’s Weekly Menus
  • Homemaking
    • Real Food Sources
  • Store
  • Contact
    • Advertise
    • Disclosure
    • Privacy Policy
  • Simple Meals
  • Club Members!

Homemade Turkey Sausage Seasoning Packs {Gifts in a Jar}

November 6, 2011 by Laura 23 Comments

This post may contain affiliate links. For more information, please see our disclosure policy.

I’ve been making homemade turkey sausage for several years, which is especially nice to have on hand for Pancake Sausage Muffins, Easy Breakfast Casseroles and Cheesy Turkey Sausage Stromboli. Everytime I make the sausage though, I have to empty out half of my spice cabinet. It’s not difficult, but I knew it would save time to prep the seasonings for this sausage ahead of time, just like I prep Taco Seasoning, Ranch Dressing Mix, Italian Dressing Mix and Onion Soup Mix.

I just hadn’t found the time to figure it all out.

But guess what? One of my readers, Karen, figured it out for me. So excited was I to see her email, I high-fived everyone in the house and together, we sang a song of celebration in four part harmony. (Just kidding, but I did send Karen a virtual hug.)  She has saved me a lot of time and thought – and she took a picture too. This will for sure be going into our upcoming free Gifts in a Jar eBook, and I’m posting it here as well, because this is one time-saving idea I’d like everyone to have!

Homemade Turkey Sausage Spice Mix

2 cups dried minced onions
2 teaspoons cumin
2 teaspoons marjoram
2 teaspoons black pepper
2 teaspoons oregano
2 teaspoons nutmeg
1 teaspoon cayenne pepper
2 teaspoons ground ginger
4 teaspoons basil
4 teaspoons thyme
4 teaspoons sage
4 teaspoons sea salt

Mix altogether and store in pint-sized jar. Shake to mix.

To Make Homemade Turkey Sausage

1 pound ground turkey
¼ cup turkey sausage spice mix
1 egg

Mix all together. Chill for at least one hour to blend flavors. Form into patties. Saute. These freeze well for later use. OR  sauté mixture into a crumbled mixture for Pancake Sausage Muffins or other recipes which include cooked sausage.

What ideas are you working on for our Gifts in a Jar eBook? Remember, I’ll need your ideas, thorough directions and pictures by Thursday, November 10. Read all the details here and get busy on those ideas!!!

Heavenly Homemaker's Club Members: Access your homepage and all your fantastic resources here! Not a member yet? Please join us!

Menu Plan for the Week

February 13, 2011 by Laura 11 Comments

This post may contain affiliate links. For more information, please see our disclosure policy.

With the “You’re the Bomb” Valentine craft idea I shared, several of you mentioned that your schools have a zero tolerance policy for kids who bring anything to school that is even remotely related to a weapon. Yeah, bomb suckers sort of resemble weapons. Just a word of caution for you to check into that before you send your son to school with these valentines.

Instead, you could easily make these…

valentineglasses2sm.jpg

Because you just may want the loved ones in your life to look as ridiculous as this.

Valentine’s Day Specs

 Here’s our menu for this week:

Sunday, February 13
Strawberry bread, apples
Pizza, bananas
Leftovers

Monday, February 14
Heart shaped pancakes, blueberries
Heart shaped grilled cheese sandwiches, tomato soup
Veggie soup, heart shaped pretzels, sweetheart fruit salad

Tuesday, February 15  (Justus’ birthday choices)
Biscuits and turkey sausage gravy, hashbrowns
Cheeseburgers, homemade fries
Tilapia, rice and veggie stir fry

Wednesday, February 16
Vanilla muffins with cinnamon crumb topping, applesauce
Black bean taco salad, raw veggies
Beef stroganoff, steamed broccoli

Thursday, February 17
Warm vanilla soother, peanut butter honey toast
Italian roast wraps, smoothies
Easy breakfast casserole, zucchini bread

Friday, February 18
Creamy orange cooler, scrambled egg sandwiches
Bean and cheese burritos, pears
Lasagna casserole, tossed salad

Saturday, February 19
Cheesy omelets, oranges
Leftovers
Chicken fried steak strips, mashed potatoes, gravy, peas

What’s on your menu for this week?

Be sure to check out Say Mmm, a free menu planning resource!

Heavenly Homemaker's Club Members: Access your homepage and all your fantastic resources here! Not a member yet? Please join us!

“You’re the Bomb” Valentines – a Great Valentine Project for Boys

February 11, 2011 by Laura 22 Comments

This post may contain affiliate links. For more information, please see our disclosure policy.

Pink hearts and sparkly flowers don’t quite cut it at our house when it comes to making Valentines to take to our Home school Valentine Party. I’d be making them all by myself and my boys would not be impressed.

But, tell the boys they get to make little bombs for their Valentines this year? I had all kinds of help!

I originally saw this idea at Skip to my Lou…my go to site for all things crafty. That gal is FULL of great ideas! She had actually made these bombs into “bath bombs”…but in the interest of keeping things a little more simple…we used suckers. (I just didn’t read the label on the suckers. I didn’t want to know.)

To make “You’re the Bomb” Valentines, you need:

Round suckers, like tootsie roll pops
Black tissue paper cut into 5″x5″ squares (you’ll need two pieces for each bomb)
Glittery pipe cleaners
“You’re the Bomb” gift tags (we just printed them on our computer)

Begin by placing the sucker in the middle of a TWO pieces of black tissue paper. One piece is too thin and the sucker will show through.

Wrap the tissue paper around the round sucker.

Fasten the black tissue paper by beginning to wrap a glittery pipe cleaner around the paper at the base of the sucker.

Continue to wrap the pipe cleaner all the way to the bottom of the sucker stick.

Gently bend the sucker stick so that it looks more like a “fuse”.

Print or create “You’re the Bomb” tags for your Valentines. I forgot this step until the end, but just simply pulled up the top part of the pipe cleaner and put it through the hole in the tag, then refastened the pipe cleaner.

And now we have a basket full of bombs to deliver to our friends at our home school party. I’m not sure the girls will be very impressed.

Admittedly, the “bombs” over at Skip to my Lou are more nicely done than these. But, our boys had a blast (pun intended) and I was thrilled that these were so simple to make!!

Are you making homemade Valentines this year?

Heavenly Homemaker's Club Members: Access your homepage and all your fantastic resources here! Not a member yet? Please join us!

Valentine’s Day Crafts With Kids – a guest post

February 10, 2011 by Laura 4 Comments

This post may contain affiliate links. For more information, please see our disclosure policy.

Enjoy this fun guest post from Maria!

Valentine’s Day isn’t just for lovers—it’s for the whole family. Spend an afternoon with your kids this February 14th with these two simple crafts. Make a few extra to spread the love around to friends and family.


Lollipop Bouquet

This sweet craft costs considerably less than a store-bought set of flowers and is easy enough for kids to give to Mom or Dad as they please.

Materials Needed

Colored paper in green and pink, red, or other flower-like colors
Flat (not ball) lollipops
Scissors and glue stick

Directions

Fold the colored paper in half. Keeping part of the shape along the folded edge (so that the heart is a folded card), cut out heart shapes just bigger than the lollipop candy. Write a short message in the heart (“Be mine,” for example) and then glue it to the lollipop wrapper. For the leaves, fold the green paper in half. Cut out leaf shapes, keeping the stem part of the shape on the folded edge. Unfold the leaves and coat them with the glue stick. Fold it back over the lollipop stem.

Candy Cane Leftovers Chocolate Cookies


Image Credit

Still have candy canes lying around since Christmas? Recycle them in this simple chocolate cookie recipe. Bringing kids into the kitchen (with supervision, of course) is always good practice.

Ingredients

2 ½ cups bittersweet chocolate chips (but don’t go over 61% cacao or it will be more bitter than sweet!)
1 ½ cups all purpose flour
¼ cup natural unsweetened fair trade cocoa powder
1 tsp baking powder
½ tsp salt
1 stick (or ½ cup) unsalted butter at room temp
1 cup sugar
1 tsp vanilla extract
1 tsp peppermint extract
2 eggs
4 candy canes, coarsely crushed (an easy and safe way to do this is to take them out of their original wrappers and freeze them in a paper bag. Once frozen, take it out of the freezer, cover with a thick dish towel, and give them a good whack with a hammer or rolling pin.)

Directions

Preheat the oven to 375 F. Line 2 baking sheets with parchment paper. Stir 2 cups of chocolate chips in a metal bowl over a saucepan of simmering water so they melt. Measure out 2/3 cup and put into a separate bowl. Take them off the heat. You’re going to use the 2/3 measurement to drizzle over the cookies later.

Meanwhile, whisk flour, cocoa powder, baking powder, and salt in a bowl. Beat butter in another bowl until creamy with an electric mixer. Add sugar and vanilla and peppermint extracts. Add eggs and beat. Add what’s left in the original chocolate bowl to the mixture and beat. Finally, add the dry ingredients and beat just to blend. Stir in the remaining ½ cup chocolate chips.

Take the dough 1 level tablespoon at a time and roll between palms into a ball before placing on the baking sheet. Space the cookies about 1 ½ inches apart. Bake for about 8 minutes or until cracked all over and a tester comes out with moist crumbs. Cool the cookies for a few minutes before transferring them to a cooling rack (still on the parchment paper).

Remember that 2/3 cup of melted chocolate? Warm them over simmering water again and, once melted, drizzle over the cookies using a fork. Sprinkle the crushed candy canes. Make sure that some of the red show on the cookie to give it a Valentine’s Day feel. Chill the cookies for about 20 minutes so the chocolate sets. Then, enjoy!

Heavenly Homemaker's Club Members: Access your homepage and all your fantastic resources here! Not a member yet? Please join us!

Make Your Own Valentines (For Cheap!)

February 1, 2010 by Laura 4 Comments

This post may contain affiliate links. For more information, please see our disclosure policy.

Looking to create some fun valentines this year? Check out these fun free or inexpensive ideas!

elephantpuzDownload your free Love You to Pieces Elephant Puzzle Valentine here! 
(Once you “buy” the free puzzle, scroll down to find the link to download.)

valentinepuzzles
Purchase this entire set of Love You to Pieces Valentine Puzzles here for only $1, 
download, then print off as many as you want! Hurry while sale lasts!

valentinemint8sm.jpg
Learn to make this valentine in mint condition here. 
So easy, so cute…so inexpensive to make!

valentineglassessm.jpg
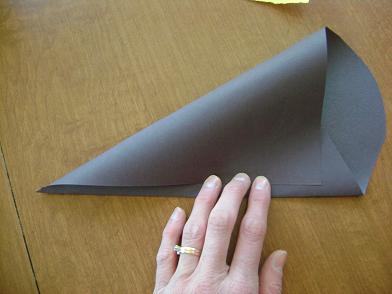
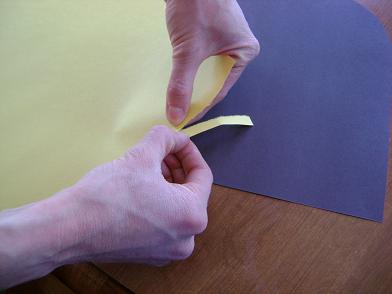
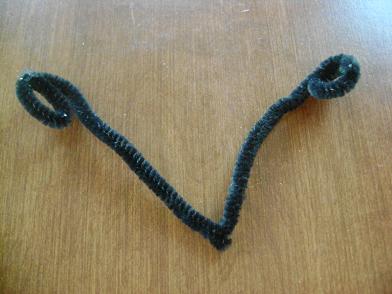
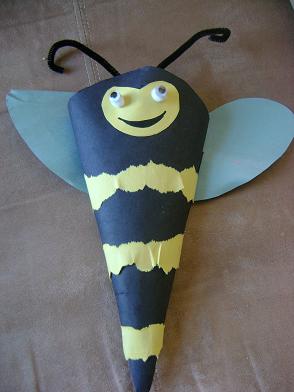
You’ll find a pattern and instructions for these great Valentine spectacles here. 
If you click over, you’ll be rewarded with a picture of yours truly
wearing the beautiful heart shaped glasses. 
Go ahead…you know you want to see it.

This post is linked to Frugal Friday.

Heavenly Homemaker's Club Members: Access your homepage and all your fantastic resources here! Not a member yet? Please join us!

Frugal Gift Idea: Make a Sweet-n-Spicy Brown Sugar Scrub

December 17, 2009 by Laura 11 Comments

This post may contain affiliate links. For more information, please see our disclosure policy.

Not all food gifts have to be edible, right? (Well, you could eat this one if you want to…wouldn’t hurt anything…although it might give you quite a sugar rush.)

When I saw the idea for this Sweet-n-Spicy Brown Sugar Scrub on the Domino Sugar website, I loved how simple it was and thought it would be fun to make some up. What a unique homemade gift idea!

I used coconut oil instead of the almond oil it called for (apparently my small town doesn’t carry almond oil anywhere…or maybe I just don’t know the right places to look?)

brownsugarscrubsm

After putting it in a jar and tying on some cinnamon sticks (which have nothing to do with the scrub…but look oh so cute)…I rubbed some of the scrub on my hands just to test it out.

Ooh, nice! 

Do I have to give this away? 

Okay, maybe I should just mix up another batch. Or maybe try making another variety of the sugar scrubs.

I had a blast looking through the gift ideas on the Domino Sugar website. But as you know…looking at pictures of food always makes me happy. :)

Okay, I think after typing this…my hands are in need of another scrub treatment.

Do you think the recipient of this gift will mind if the jar is almost empty when she receives it?

Yeah…I better go mix up another batch.
—————————————————-

Special thanks to the folks at Domino Sugar for providing me with a $20 gift card to purchase ingredients to create their wonderful gift ideas! I think I’m going to mix up some Holiday Cookie Rolls next. Aren’t they cute?!
—————————————————-

This post is linked to Frugal Friday.

Heavenly Homemaker's Club Members: Access your homepage and all your fantastic resources here! Not a member yet? Please join us!

Make a Simple Homemade Christmas Angel Ornament

December 9, 2009 by Laura 29 Comments

This post may contain affiliate links. For more information, please see our disclosure policy.

Simple Angel Ornament Craft

The boys and I saw this fun idea hanging on a Christmas tree at the library last week. I couldn’t believe how simple…yet how sweet these ornaments are. Check it out…they’re angels made from a funky paper clip.

angel5sm

Standing at the library Christmas tree examining the ornaments, I kept going on and on about how sweet the angels were. My boys were interested for about two seconds, then they just stood there nodding politely with a look in their eyes that told me that they’d rather make a pea shooter from a paper clip than an angel.

Fine, fine…but I like the angel. And so I made some. All by myself because my manly boys weren’t interested.

I thought they were interested at one point because they came into the kitchen while I was making them and said, “Ooh, what are ya makin’?”

“Those sweet little angels we saw at the library,” I told them eagerly, handing them a piece of ribbon and a bead.

Nah, it would seem that they really were just hoping I was making some kind of food.

Oh well…maybe for those of you with girl children…or kids littler than mine…you can enjoy the wonderful activity of making these ornaments together with your family. If not, bring over your beads, ribbon and funky paper clips so you and I can ooh and aah over our pretty little creations! (To their credit, my boys did think my finished results were nice.)   (And then they asked for food again.)

Because I already had ribbon and beads hanging around…my only purchase was the paper clips (which I found at Wal-mart). I was then able to make these Angel Ornaments for just a few cents each!

You will need:   Thin ribbon, beads, funky paper clips, needle and thread

angel1sm

As you take a look at the following tutorial, pay no attention to the fact that some of the pictures show green ribbon with clear beads and some show red ribbon with green beads. I had to take the pictures in stages…in between feeding snacks to boys.

angel6sm
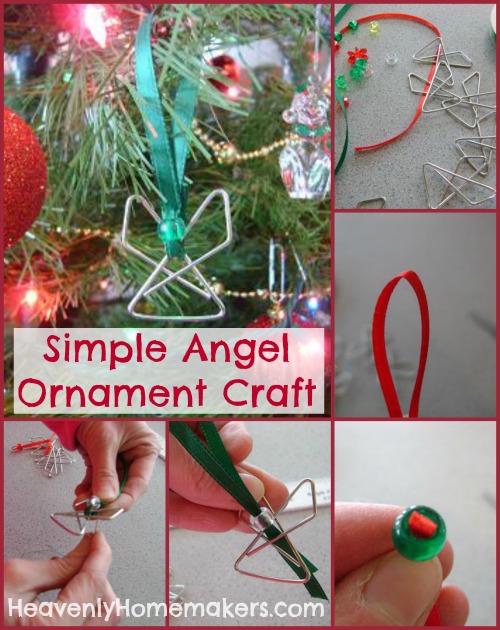
Cut a piece of ribbon about 10 inches long.

angel2smFold the ribbon in half.

angel3smPush the folded part of the ribbon through a bead.

angel7smPull ribbon through…

angel8sm…then fold it around the “neck” of the paper clip.

angel9smWith your needle and thread, stitch the ribbon together.
(This was the best way I found to hide the excess ribbon behind the angel’s head.)
To see exactly where you stitch the ribbon, scroll back up to the picture right above this one. See where my thumb is? Stitch there…removing your thumb first.

angel4smOoh. Aah. So pretty. So simple.

Much cuter than a pea shooter…don’t you think so?

Heavenly Homemaker's Club Members: Access your homepage and all your fantastic resources here! Not a member yet? Please join us!

Fun Father’s Day Idea: How to Make a Mystery Message Card

June 16, 2009 by Laura 19 Comments

This post may contain affiliate links. For more information, please see our disclosure policy.

You have to try this great idea for making a mystery message card! I think they’d be super fun for the kids to make for Dad (or Grandpa) (or that ornery uncle) for Father’s Day. They’re very simple to make, yet kind of tricky for the recipient! How fun for the kids to try to stump the grown up!

Instead of trying to explain how to make the card with a picture tutorial, I had Asa video me making one. I think he did a pretty good job taking his first video!

Oh and to answer the questions you’ll all want to know…yes, I’m wearing my old basketball uniform top from high school. I found it when I went to KS last month, and thought it was fun. And no, I wasn’t any good at the sport, but it’s fun to have the uniform. My boys think it’s oh so cool.


**Edited**  Never mind about the gluing step. It doesn’t work. I don’t know what I was thinking!! :)

Be creative thinking of something fun to write for your mystery message! Hope you give these a try!
————————————–

This post is linked to Works for me Wednesday, Frugal Father’s Days and Frugal Friday.

Heavenly Homemaker's Club Members: Access your homepage and all your fantastic resources here! Not a member yet? Please join us!

Make a May Day Basket…bzzzt!

April 23, 2009 by Laura 13 Comments

This post may contain affiliate links. For more information, please see our disclosure policy.

Last year, some friends of ours dropped off these fun May Baskets at our door. I declared them the cutest May Baskets I’d ever seen! The boys loved them!

beemaybasketssm.JPG

May Day (May 1) is only a week away…so I just had to share these with you! Beecause these baskets are really beeautiful. (Sorry…you know I couldn’t write an entire post without some sort of silliness.)

Here’s what you need to make them:

  • black, yellow and light blue construction paper
  • glue stick
  • elmer’s glue
  • googly eyes
  • white pom-poms
  • black pipe cleaners
  • pencil
  • stapler

What to do:

Use elmers glue to fasten googly eyes to pom-poms. Allow glue to dry.

beemaybasket11sm.JPG

Cut black paper into a 9×9 inch square. 

beemaybasket6.jpg

Cut off one corner into a curve.

beemaybasket7sm.JPG

Fold paper into a cone and staple ends in place.

beemaybasket10sm.JPG

Tear yellow paper into strips. Glue them as stripes onto the black construction paper cone.

beemaybasket8sm.JPG

Curve ends of pipecleaner around a pencil, fold pipecleaner in half, then fasten with stapler as antennae onto “bee”.

beemaybaskets14m.JPG

Cut a “heart” out of yellow paper for face, and a smile out of black paper for smile. Glue eyes and mouth onto face. Glue face to the rounded corner of the black paper, covering the staple used to attach the antennae.

beemaybaskets13sm.JPG

You’ll find the pattern for the wings here. Trace it onto blue paper, then cut it out and staple it onto the back of the bee.

beemaybasket3sm.JPG

Fill “bee basket” with popcorn and other fun goodies.

Deliver them to your friends on May Day!

Aren’t these the most beecoming May Baskets you’ve ever seen?

Do you usually make and deliver May Baskets?  Or, have you been the recipient of May Baskets before?

I really and truly think that it is one of my boys’ favorite “holidays”! 
—————————————————–

For more Frugal Fun…visit Life as Mom!

Heavenly Homemaker's Club Members: Access your homepage and all your fantastic resources here! Not a member yet? Please join us!

Filling Those Easter Baskets

April 6, 2009 by Laura 31 Comments

This post may contain affiliate links. For more information, please see our disclosure policy.

Looking to fill your kids’ Easter Baskets this weekend? Do it simply with these Six Easy Steps:

  1. Purchase the biggest basket you can find.
  2. Dump in a good portion of the money you earned this week.
  3. Pour in five pounds of sugar.
  4. Drizzle on three cups of High Fructose Corn Syrup.
  5. Add a wide variety of artificial colors. (Go ahead, don’t hold back.)
  6. Toss in several cheap plastic toys (the kind that like to re-locate themselves under your van seats and couch cushions after one short use).

What? You don’t like my Six Easy Steps? Neither do I.

But that’s often what many of us do when we put together Easter baskets for our kids. We spend more money than we mean to. We can’t decide between the jelly beans, the chocolate bunnies or the malted milk balls…so we get all three (plus several of those foil covered cream filled eggs). The little yo-yos with little yellow chicks printed on them are too cute to pass up, so we throw those into the cart too.

Before we know it, we have completed the Six Easy Steps in twelve expensive minutes.

How about taking a look at some new ideas this year? There are so many fun ways to create gifts for your kids that cost just a few cents and a small amount of your time. Here are a few that our kids have enjoyed.

Fill the Easter Baskets

Homemade Flubber

flubbersm.JPG


Homemade Tootsie Rolls

Malachi's Lego Fudge


Homemade Vanilla Wafers

tinycookiebitessm.JPG

Homemade Bubble Bath

eliasbubblebathsm.JPG

Homemade Fruit Leather

fruitleather6sm.JPG

Honestly, my kids enjoy the Easter Egg hunt so much, they really don’t think too hard about what’s in the eggs!

AND…what’s really important about Easter anyway?! :)

What kinds of things do you like to put into your kids’ Easter Baskets? Have any fun ideas or neat family traditions to share?

Heavenly Homemaker's Club Members: Access your homepage and all your fantastic resources here! Not a member yet? Please join us!
« Previous Page
Next Page »

Join Our Community!

 Facebook Twitter E-mail Instagram Pinterest

Popular Posts

~ Will All of the Real Moms Please Stand Up?
~ Easy! Stir-and-Pour Whole Wheat Bread
~ How to Make Gatorade
~ 31 Real Food Breakfast Ideas
~ Dear Teenage Girls...
~ When Mom Takes a Step Back
~ The Inexpensive Health Insurance We Love!
~ Let's Talk Real Food Grocery Budgets

Check out our latest posts!

  • Easy Side Dishes for Summer
  • Big Family Food and Fun: May 10-16, 2026
  • Big Family Food and Fun: May 3-9, 2026
  • Help Your Kids Become Independent in the Kitchen!
  • Big Family Food and Fun: April 26-May 2, 2026
Home  ~  Simple Meals  ~  Club Membership  ~  Shop  ~  Privacy Policy  ~  Disclosure  ~ Contact

Copyright © 2026 · Beautiful Pro Theme on Genesis Framework · WordPress · Log in