Heavenly Homemakers

Encouraging women in homemaking, healthy eating and parenting

  • Home
    • About
    • FAQs
  • Recipes
    • Bread and Breakfast
    • Condiments
    • Dairy
    • Main Dishes
    • Side Dishes and Snacks
    • Desserts
    • Gluten Free
    • Instant Pot
    • Crock Pot
    • Heavenly Homemaker’s Weekly Menus
  • Homemaking
    • Real Food Sources
  • Store
  • Contact
    • Advertise
    • Disclosure
    • Privacy Policy
  • Simple Meals
  • Club Members!

Bacon Tomato Dip With Baked Tortilla Chips

August 26, 2015 by Laura 11 Comments

This post may contain affiliate links. For more information, please see our disclosure policy.

Bacon Tomato Dip. It is so yum.

Bacon Tomato Dip

When I first came upon a recipe like this one, it was called BLT Dip. This sounds delicious, but with one problem. The recipe included no L. There was only B and T.

(Translation: There was only bacon and tomato – no lettuce.)

I considered adding lettuce to the recipe to make it a true BLT dip, but I am quite sure the L would have gotten soggy. Nobody likes soggy L, am I right? Of course I’m right. There are books written about this. People know to run far, far away from soggy L and even limp L will raise eyebrows. So far be it for me to stir crispy L into this recipe and turn out a recipe with soggy or limp L. I love you all too much to put you through that. {wipes tear from eye}

So I played with the recipe and landed on a perfect BT Dip, but decided that BT Dip was a ridiculous name. Come everyone! Try this BT Dip! You will love it! “What a weirdo,” the people will say, “She forgets her vowels.” Then people will try to figure out which vowels and then if they didn’t want to already, they will really not want to try the dip.

Bat Dip, Bit Dip, But Dip (have mercy), Bot Dip… The people would be so busy trying to figure out what the name of the dip is really supposed to be that they would never actually look at the recipe and try the dip. This would be tragic (because this dip is terribly delicious).

I hope this gives you just a glimpse into how hard my life is. This situation has been crippling. Landing on a title kept me up night after painfully long night – so much so that I again considered adding soggy L to the dip just so I could move on with my life and effectively parent my children.

Then I just decided to turn the B and the T back into words. B=Bacon. T=Tomato. Bacon Tomato Dip. How clever.

There is nothing more to say except that you really must make this dip. And also the chips as detailed below because those make the dip many percentages better.

Bacon Tomato Dip (adapted from this recipe) Yum

5.0 from 1 reviews
Bacon Tomato Dip With Baked Tortilla Chips
 
Save Print
Author: Laura
Ingredients
  • 1 pound bacon
  • 1 cup mayonnaise (I prefer Hain Safflower Mayo)
  • 1 cup sour cream
  • 2 chopped tomatoes
Instructions
  1. Cut bacon into bit-sized pieces, cook, and drain.
  2. Stir cooked bacon into mayo and sour cream.
  3. Stir in chopped tomatoes just before serving.
3.4.3177

Serve with corn chips or homemade tortilla chips (details below).

Bacon Tomato Dip with Baked Tortilla Chips

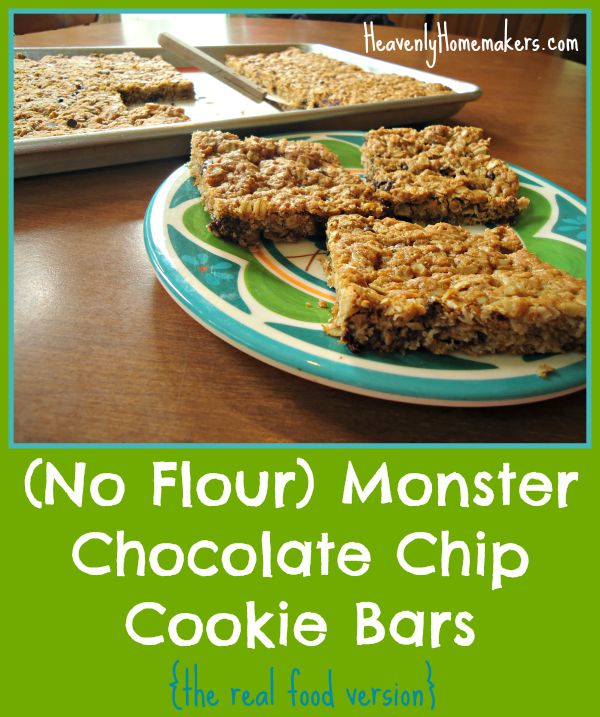
Now let’s talk about making Baked Tortilla Chips. I did not even consider calling these BT Chips because I’d already been through so much trauma. But as you can see, B and T would have also worked for these chips. (B=Baked. T=Tortilla) Try to keep up.

How to Make Baked Tortilla Chips

1. Cut your favorite tortillas into strips or triangles or shapeless objects of any sort. Do not name the objects. It makes for sleepless nights. (I usually make homemade tortillas, but Bountiful Baskets offered a nice variety pack and I grabbed it. This worked very well as it is very sad for me to go to the trouble of making tortillas only to cut them after I’ve rolled them. Naming recipes is hard enough. Do not make me also destroy my hand-rolled creations.)

baked chips4

Lay the cut tortillas in a single layer on a baking sheet. Place them in a 350° oven for about 10-15 minutes or until the tortillas have become crispy.

baked chips3

Notice that they puff up a bit as they get crispy. Delicious perfection.

baked chips2

Throw them all on a platter and serve them with Bacon Tomato Dip. You will love how delicious this combination is.

baked chips1

I can’t wait to hear how much you love this dip with your homemade chips!

Aren’t you proud of me for actually coming up with a dip that did not involve ground beef or cheese? And also for coming up with such a brilliant name for this new dip? May we all stand (neh, just sit) in amazement.

Heavenly Homemaker's Club Members: Access your homepage and all your fantastic resources here! Not a member yet? Please join us!

(No Flour) Monster Chocolate Chip Cookie Bars – The Heathier Way

August 25, 2015 by Laura 14 Comments

This post may contain affiliate links. For more information, please see our disclosure policy.

Monster Chocolate Chip Cookie Bars – come and get ’em!

Real Food Monster Cookie Bars

When I saw the original recipe for these bars here, what really jumped out at me was the “no flour” thing. Avoiding flour is always a nice option in recipes. I also noticed the “mini m&m” thing but decided that while those are fun and tasty, they are on the naughty list and not required to make these cookie bars good. Then I wondered if I could cut back on the 2 cups of sugar and the amount of chocolate chips.

Do I know how to ruin a good recipe, or what? 

Hey. I didn’t ruin a thing. I simply cut back on the sugar and cut out the corn syrup and 10 different food dyes. The cookie bars are still delicious, so says my family and several other people I have served these to who didn’t even know I’d healthified this recipe. It probably helps that these bars still have plenty of sugar in them.

The oats and lack of flour create a really fun, chewy bar. I say, make these then wrap them individually and freeze them to grab out for lunch boxes or on-the-go snacks. This makes 24 good sized bars.

(No Flour) Monster Chocolate Chip Cookie BarsYum

(No Flour) Monster Chocolate Chip Cookie Bars - The Heathier Way
 
Save Print
Author: Laura
Serves: 24-36
Ingredients
  • 1 cup sucanat or brown sugar
  • ½ cup melted butter
  • 1½ cups creamy natural peanut butter (here's how to make it yourself)
  • 3 eggs
  • 1 teaspoon vanilla extract
  • 1 teaspoon baking soda
  • 1½ cups quick oats
  • 2½ cups rolled oats
  • ¾ cup mini chocolate chips
Instructions
  1. Cream sugar, butter, and peanut butter together until smooth.
  2. Add eggs, vanilla, and baking soda and mix well.
  3. Stir in oats until well combined.
  4. Fold in chocolate chips.
  5. Spread mixture into a cookie sheet lined by parchment paper.
  6. Bake in a 350° oven for 18-20 minutes or until lightly browned.
  7. Makes 24-36 cookie bars, depending on how large you cut them.
3.4.3177

No Flour Monster Chocolate Chip Cookies (the real food version)

Make these gluten free by using GF oats. Learn to make your own Quick Oats here.

Enjoy this very easy treat!

Heavenly Homemaker's Club Members: Access your homepage and all your fantastic resources here! Not a member yet? Please join us!

How to Make Quick Oats and Oat Flour

August 24, 2015 by Laura 6 Comments

This post may contain affiliate links. For more information, please see our disclosure policy.

There’s nothing magical about these instructions and many of you probably know how to do this already. I’m not even entirely convinced that this will save much money, as there isn’t much price difference in whole oats, quick oats, and oat flour.

However, here’s why I find these tips to be beneficial:

They save my brain. And also storage space in my pantry, but my brain is obviously a much bigger issue now. Anything that saves my brain makes me so, so happy. (Hello, 40’s. I love you truly. But why do you make it harder to think straight? I think it must be because my children are coming and going more than they used to and also, I have more profound, wise thoughts floating through so I have less space for silly little unimportant things like remembering where I put my phone.)

So see? If I order Whole Rolled Oats, then I can make my own Quick Oats and Oat Flour as needed. My brain is thus saved from ordering three different items and making sure I have them on hand. It takes turning 42 to come up with stuff like this. Be amazed.

How to Make Quick Oats and Oat Flour

Why do I need Quick Oats? Well, I rarely do, except for when I make Homemade Instant Oatmeal – which is da bomb. And Oat Flour? Well, that’s just nice to add to muffins or pancakes sometimes when I want to include a variety of grains. I guess that’s another nice reason to not buy each of them individually. I mostly use whole rolled oats. The rare occasion I need quick oats or oat flour, I can just make it quickly with my whole oats.

So, how to make these delightful oat products? It’s as easy as putting Whole Oats into your blender and turning it on. Whirl for a few seconds until quick oats are formed. Whirl for a few more seconds until oat flour appears. It’s almost the easiest thing in the world.

How to Make Quick Oats

Making Quick Oats and Oat Flour

Below you will see, from left to right: Whole Rolled Oats, Quick Oats, Oat Flour. Beautiful, right?

oats 3

With that, I will tell you that if you’ve never needed this information before today, you will need it tomorrow because I have a Monster Cookie Bar recipe to share that includes no flour but it does include both whole oats and quick oats. Get out your oats and your blender. You’re going to want to make these bars.

monster bars1

What do you prefer to use at your house? Whole oats or quick oats? Do you use oat flour much?

Heavenly Homemaker's Club Members: Access your homepage and all your fantastic resources here! Not a member yet? Please join us!

The Post Where I Tell You How Much I Spend On Groceries Every Month

August 23, 2015 by Laura 29 Comments

This post may contain affiliate links. For more information, please see our disclosure policy.

Ever curious how much I spend on groceries?

I don’t usually like to share the specifics of numbers any more when it comes to budgets, especially with groceries. Why? Because grocery prices are not apples to apples (see what I did there?) from one part of the nation to another. Plus I have international readers. Plus I have readers with young children, readers with many children, readers with no children, readers with adult children…just all sorts of readers. We all live in different places with different food sources and different situations.

So talking about grocery budgets and comparing numbers is not always beneficial.

Still, people are often very curious about how much I spend on groceries to feed my growing family full of teenage boys. I don’t blame them. Whether it makes sense or not, it is kind of fun to talk about grocery spending and compare notes about what works for people. Especially if any of us can gain insights on more ways to save money on healthy food purchases.

So here’s the big fat truth about my real food grocery budget as I feed a houseful of growing teenage boys. There is a comma in this monthly line item. I used to feed the six of us for less than $500/month. Then our boys doubled in size and so did the amount of money it takes to keep them fed.

The truth about how much I spend on groceries

Our current monthly grocery spending ranges from $900-$1,200.

Ouch. But not.

I mean, that’s a lot of money every month on food. But it’s food. The really good kind. My family is eating it heartily and staying relatively healthy. Because we homeschool and work from home, we typically eat all three meals at home each day, every day of the week. When I average it out, I see that we are spending between $5-$8 per person per day to eat very well.

Could I cut back on our grocery spending? Yes, but not by much. I’m not just throwing food into my cart at random. I’m carefully price-matching each week, strategically buying in bulk, cooking from scratch – doing everything I can to spend wisely and frugally. We just eat…a lot. Plus, we love to have people into our home for meals. Our grocery money is money well spent, and I’m thankful.

groceries819
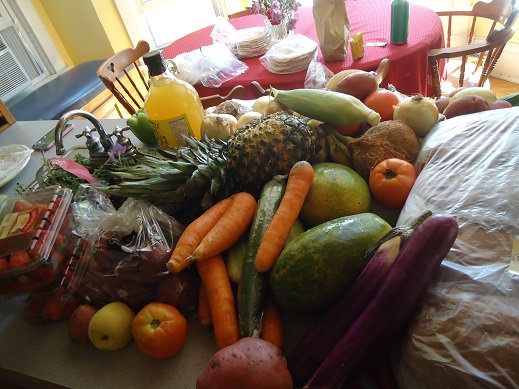
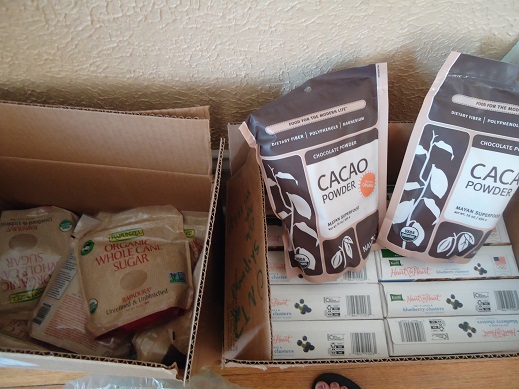
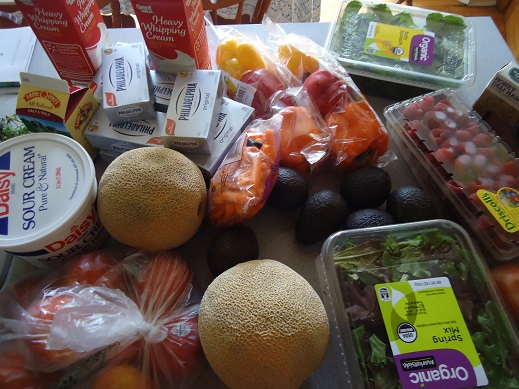
Last week’s grocery run cost $78. Most of this food was price-matched. Not bad, eh?
Yeah well, the week before that I spent about $500 between Bountiful Baskets, Azure Standard, and Amazon.
Cha-ching.

Now let’s not even talk about car insurance for teenage boy drivers. That is a whole ‘nother conversation and it isn’t pretty, nor is it fun like strawberries and beef roasts. Boo, hiss, car insurance. I curl up into a ball at this subject. Please, let’s go back to talking about happy things like green beans.

So speaking of green beans, and gardens, and other ways of saving money on groceries – which we were so obviously talking about…

The verdict is still out on whether or not our budget will see a big difference with our oldest son moving out and eating most of his meals in the college cafeteria. So far there’s not been much change – but I do predict that our spending average will go down a little bit. I mean, just last week I only had to double our pancake recipe instead of triple it, so that right there was a $1 saved. I think I’ll start saving for a cruise. Or just apply that dollar to his college tuition.

Below is a list I posted about a year and a half ago about ways I save on real food groceries. I can’t imagine what our budget would be if I didn’t continually work to save money in these ways. There would definitely be a 2 in front of the comma. Have mercy.

Ways I Save on Real Food Groceries

  • Make as much food from scratch as possible
  • Price-Match at Wal-Mart – mostly on produce
  • Buy ingredients in bulk to cut cost
  • Avoid eating out unless we are traveling – and then I try to pack as much food as possible
  • Do freezer cooking
  • Find great deals online
  • Shop through our co-op
  • Take advantage of Amazon Prime/Subscribe and Save
  • Eat less expensive real foods like rice, potatoes, beans, and pasta
  • Grind our own grain to make whole grain flour for our baked goods
  • Drink mostly water instead of purchased drinks
  • Avoid wasting food (as if there are ever any leftovers to waste)
  • Watch for sales on items we buy at local stores, then stock up
  • Grow what we can in our garden (and then get a cat, which is was a whole thing you should read about, and shucks if we haven’t found that the bunnies are actually disappearing and the green beans are growing back, thank you, Wiggams)

I’m working on some posts which highlight some of our lower cost, real food meals. But while my goal is to save money where I can and to be wise with my spending- my bigger goal is to nourish my family with good food. So bring on the wholesome goodness! In large quantities. Frequently. (said the mother of many teenage boys)

Want to share your grocery budget numbers? Have you seen your grocery spending increase as your kids got older? For those of you on the other end, have you found it difficult to adjust to buying less once your kid leave home? I will not even know how to cook in small quantities a few years from now. An 8×8 inch dish? Yes, I think I have one of those in the back of my cupboard.

~~~~~~~~~~~~~~~~~~~~~~~~~~~~~~~~~~~

2016 update!

I still spend a significant amount on groceries every month because of all the very starving teenage boys at our house. But to my surprise, I’ve noticed significant grocery savings while following our Simple Meals plans. I love this so much. I mean, I knew it would save money, but this much?

facebook_cover_photo

Heavenly Homemaker's Club Members: Access your homepage and all your fantastic resources here! Not a member yet? Please join us!

No-Bake Peanut Butter Cookie Bites

August 20, 2015 by Laura 8 Comments

This post may contain affiliate links. For more information, please see our disclosure policy.

Cookie bites? Eh. We like ’em okay. ;)

Because we all like healthy snacks and we absolutely love easy recipes – let us take a moment to review the previous no-bake cookie bite recipes shared here:

  • No-Bake Chocolate Fudge Cookie Bites
  • No-Bake Snickerdoodle Bites

One idea turned into another, and now we have No-Bake Peanut Butter Cookie Bites to add to the list!

No-Bake Cookie Bites - Easy Recipes!

With a few ingredient tweaks, a Peanut Butter Cookie Bite came about. Of course, a peanut butter cookie bite must be gently pressed with a fork like the real deal, don’t you think? These taste so much like Peanut Butter Cookies, we couldn’t believe it. But instead of being an actual cookie full of sugar – they are a high protein, high fiber, low sugar snack. But hey, call it a cookie since it still tastes like one. Healthy treats are so exciting!

Peanut Butter Cookie Bites - No Bake!

No-Bake Peanut Butter Cookie Bites Yum

No-Bake Peanut Butter Cookie Bites
 
Save Print
Author: Laura
Ingredients
  • 1 cup natural creamy peanut butter
  • ¼ cup honey
  • 1 teaspoon vanilla extract
  • ½ cup coconut flour
Instructions
  1. Mix the ingredients together in a bowl until well combined.
  2. Roll the mixture into teaspoon-sized (or whatever sized) balls.
  3. Press down gently, criss-cross, with a fork.
  4. Refrigerate before serving.
3.4.3177

It really is that easy.

(Here are my homemade peanut butter instructions.)

No-Bake Peanut Butter Cookie Bites

Where to get Coconut Flour:

Many have asked about Coconut Flour. I order it from Tropical Traditions or Amazon. A little bit goes a long way, so don’t let the price-tag scare you. Coconut flour is naturally gluten free, high in fiber, and high in protein. I love it for its nutritional value!

Ways to enjoy these No-Bake Cookie Bites:

  • Packed in a lunch
  • As a snack/pick-me-up
  • Before or after a work-out
  • On the road during a trip
  • In a box, on a train, with a fox, in a tree (thank you, Sam I Am) – Do you really need any more reasons to love these? Eat them any where for any reason!

Lovin’ these No-Bake Cookie Bites!

Give me more cookie flavor ideas to play with!! What would you like to see here?

Heavenly Homemaker's Club Members: Access your homepage and all your fantastic resources here! Not a member yet? Please join us!

Pineapple Fluff Salad (All Real Food Ingredients!)

August 19, 2015 by Laura 16 Comments

This post may contain affiliate links. For more information, please see our disclosure policy.

We can actually make Pineapple Fluff with real food!

Pineapple Fluff

While we were out at church camp this summer, one of the cooks made a huge bowl of “Green Fluff Salad.” Malachi, our 10 year old, helped himself to seconds and thirds – absolutely loving this salad.

Now I personally think that calling this a salad is kind of like calling margarine butter which no one should ever, ever do in my hearing because I will gag and then I will do the ugly cry on the spot. (Do not picture this.) A dish which contains green jello, cool whip, cream cheese, pineapple (yay fruit!), and mini-marshmallows is…I’m going to say…a dessert? Now if you like that variety of “salad,” more power to you. I understand these types of cravings because I still want an occasional Dorito even though I know better. But I just question the use of the word “salad” here and now back to the story.

Malachi loved the Green Fluff Salad. This is why, when I asked him a week later at home for a side dish suggestion to go with grilled steaks we’d be making, he perked up and said, “Oh Mom! We should make that Green Fluff stuff we had at camp!”

Before I go on, you need to know this: It was my birthday. We were talking about side dishes for my birthday dinner. Mine. Does my child not know me the way I thought my child knew me? Was he also going to buy me some margarine as a gift? I felt an ugly cry coming on.

Catching myself before an outburst because I am always so graceful in my parenting, I gently said, “Buddy, I don’t use those kind of ingredients. I’d rather make something with food we have on hand already.”

To which Malachi said calmly, “I know. I mean we can try to figure out how to make that salad the healthy way. Like you always do.”

Squeeze him. Now that’s a boy who knows how his mama thinks. I mean, I knew all along that’s what he meant. I never doubted for a minute. I knew he didn’t mean for me to go buy cool whip and marshmallows. C’mon now.

Pineapple Fluff Salad (I guess I’m still calling this a salad. I don’t know why.)Yum

Pineapple Fluff Salad (All Real Food Ingredients!)
 
Save Print
Author: Laura
Ingredients
  • 8 ounces softened cream cheese
  • 1 cup heavy whipping cream
  • 1 teaspoon vanilla extract
  • 2 Tablespoons lime juice
  • ¼ cup sugar or 3 Tablespoons real maple syrup or liquid stevia to taste
  • 14-ounce can of pineapple, drained (chunks, tidbits, or crushed works fine)
Instructions
  1. Open pineapple, drain, and save juice for drinking another time.
  2. Set pineapple aside.
  3. In a high-power blender mix cream cheese, whipping cream, vanilla, lime juice, and sweetener of choice until well combined and smooth.
  4. In a bowl, fold pineapple into the whipped mixture.
  5. Chill for at least one hour before serving.
3.4.3177

If you want this salad to be green, I’m sorry. Real food is only green if it comes out of the ground that way. Jello doesn’t grow in a garden. It’s okay though. I put this salad in a clear dish on top of a green plate and that kind of gives it the greenish look. I do what I can.

Pineapple Fluff Salad with Real Food Ingredients

Did Malachi like the results? Yes. He absolutely loved it. No jello needed. Lime juice did the trick, as did a tiny bit of sugar. I didn’t take the time to figure out a marshmallow substitute for this because I am not crazy, and whipping cream was an obvious real food substitute for cool whip. This kid received the “favorite kid in my kitchen” award (because none of my other kids were home) and I received the “nailed it” award on this recipe challenge. Fist bump, high five, happy dance.

pineapple fluff malachi
One might wonder, “Why is there a toilet paper tube behind Malachi?” What? Don’t you keep those on your countertop beside your fruit bowls? It’s soooo Heavenly Homemakerish. But for real, we are working on some projects for a great big new book coming out soon for you and your kids. It’s super exciting and on this very Pineapple Fluff making day, the project involved an empty tp tube. Nothing should surprise you about me anymore. (Update: Here’s the book!)

Are you familiar with Green Fluff Salad? Or other colors of fluff salad? Drop-kick those (but not literally because, eww) and make this amazing real food version.

Heavenly Homemaker's Club Members: Access your homepage and all your fantastic resources here! Not a member yet? Please join us!

How To Make Almond Butter

August 18, 2015 by Laura 44 Comments

This post may contain affiliate links. For more information, please see our disclosure policy.

Almond Butter recipe? Yeah, I’ve got an Almond Butter recipe. I think.

Confessions of a scatter-brained homemaker:

On Monday, I decided to try making a new variety of No-Bake Cookie Bites. I was out of Almond Butter, so I considered that it was probably as easy to make as Peanut Butter, which I make all the time. Heading to my computer to search for how to do it, I realized: I think I have done this before and maybe even already have a post written about it. So I searched my own website. Sure enough. I told us all how to make Almond Butter back in 2012.

This makes me wonder what else I’ve already taught us how to do that I don’t even remember. Maybe I’ve told us all how to save thousands of dollars or how to save hours of time. What else have I forgotten?!?

Well anyway. I am loving the No-Bake Cookie Bites so much that I will be actually using homemade Almond Butter more often, which will likely help me remember that I know how to make it. In case you also forgot that I have already taught us how to make this easy spread, I am re-posting the tutorial for us all here today. May we all remember and use these instructions often. May our brains be for us instead of against us. May we never forget when we walk into a room, what in the world we walked in to get.

Homemade Almond Butter

Yum

So here we go, loud and clear so that we don’t forget:

Here’s How to Make Almond Butter!

Step One: Pour 2 cups of almonds into a food processor. I have found that 2 cups of almonds creates one full cup of almond butter. I don’t recommend putting more than 2 cups of almonds into your food processor at one time. The process takes a while, and the more almonds you have, the longer it will take.

Step Two: Place lid on food processor and turn it on. Plugging it in is always a plus as well. This will be very loud at first, so warn your household.

Step Three: After processing almonds for two to three minutes, use a spoon to scrape down the sides of your food processor and shift around the almonds.

Step 4: Continue to process, but stop and scrape and stir almonds around from time to time to aid in the butter making process.

Step 5: You’re getting closer! Process, scrape, stir, and process some more. Continue until the almonds have become the almond butter you’ve always dreamed of. Because yes, we all do spend much of our time dreaming of perfect almond butter, do we not? (Not me, apparently, because I forgot the stuff existed.)

And there you go – lovely, smooth and creamy almond butter.

What other nut butters have you made? Did you remember that I’ve already told us all how to make this three years ago? I sure hope your brain works better than mine.

P.S. I order organic almonds from Braga Farms. They are a wonderful company to work with and offer high quality nuts. Almond Butter will stay fresh in the refrigerator for several weeks.

Heavenly Homemaker's Club Members: Access your homepage and all your fantastic resources here! Not a member yet? Please join us!

Gratituesday: The Beginning of the Next Chapter

August 17, 2015 by Laura 9 Comments

This post may contain affiliate links. For more information, please see our disclosure policy.

gratituesday[2]

So it’s for real. Our oldest son has moved out and is living in a dorm. I learned that one can prepare for it and know it’s coming, but when it really does – well now that is something else.

asa dorm 1

asa dorm 2

Some of the mothers (okay fine, only me) were crying like babies in the registration line. Well c’mon. If all the people would have stopped being so nice and just looked at me with emotionless, cold eyes saying, “here is a pen. sign this form.” it would have been much better. Instead, they were all, “Oh here you are! Big changes for your family, huh? How are you doing with this, Mama?” Seriously. All the nice people were so mean. They made me cry. They are so heartless. (Love them.)

It wasn’t so much the fact that I knew I would miss him (even though I already do). I mean, he has been gone most of the summer so I’m used to being away from him. And good grief, he now lives a grand total of five minutes from our house and we’ve already seen him at church. My tears came from a place of joy mingled with sadness as I look back on the last 18 years.

This is the kid who made me a mother. Our family grew to include four brothers – all of whom have shared a room, shared the love of sports, shared hobbies, shared books, shared inside jokes, shared games, shared music, shared their school hours, shared so much over the years. This isn’t the end of the world – but it is the end of the lovely, beautiful, delightful chapter of life that has been The Coppinger6 for so many precious years.

The next chapter is sure to hold even more amazingness. I know it’s true. But I always cry at the end of a good chapter of a book. The same goes for this.

Remember our “back to school” tradition? For the past 10 years, we’ve made school supply lists and headed to the store together, then splurged on lunch out afterward. I’ve taken a picture of them with their baskets in the aisle since 2008. Would you just look at these sweet little boys? (More yearly pictures here if you want to take a walk down memory lane.)

shoppinglunch3sm.JPG

Silly as it was, I asked if we could do it one more time before Asa moved out. None of the boys even really needed any school supplies. Sweeties that they are, they posed by the crayons for their sappy mom.

boys school shopping 2015

I told them afterward that I’d decided that this wasn’t our final year of doing this. We’re going to keep doing this, year after year, until the entire aisle is filled with my daughers-in-law and all my grandbabies. Yep. This is written in stone. The tradition must continue. This means, of course, that they must all settle with their families right here in York. All of them. Their wives will love this. None of this is unrealistic.

So the next chapter has begun. Asa is all settled in and consumed this week with three soccer practices and work-outs every day. Classes begin next week. He’s doing great.

asa soccer 2015

There he is, at one of his first soccer practices. This picture was courtesy of my friend, the coach’s wife. Receiving this picture via text sure was a fun gift the night after he moved in!

We look forward to watching God at work in our kids as we begin this new chapter. And now I’d love to hear what you’re grateful for this Gratituesday. :)

Heavenly Homemaker's Club Members: Access your homepage and all your fantastic resources here! Not a member yet? Please join us!

How Does Prepping 5 Meals in 20 Minutes Sound?

August 17, 2015 by Laura 3 Comments

This post may contain affiliate links. For more information, please see our disclosure policy.

You might remember how a couple of weeks ago I made 7 Chicken Slow Cooker Meals in 30 Minutes. Well, the next day I made 5 Beef Slow Cooker Meals in just 20 minutes. It is too fun.

This is the easiest, fastest, most fun freezer cooking I’ve ever done. Plus, these freezer meals keep saving my neck on busy days. I just pull a bag out of the freezer and throw the contents into the crock pot. I add some veggies to the table in the evening, and we are set.

Here are a few pictures of my 5 beef meals in 20 minutes prep. They aren’t pretty, but at least it’s better than looking at pictures of mannequins in my office. (Ain’t that the truth.)

5 Meals in 20 Minutes

First I took my printed copy of Eat Right Away: Slow Cooker Beef Edition and put the ingredients for the Hawaiian Beef and Rice directly into the crock pot. That would be for dinner that day – you know, since I was so busy spending another 17 minutes making 4 more meals. Obviously, I was exhausted after that and couldn’t possibly think about cooking our evening meal.

slow cooker beef 1

Next, I labeled freezer bags and started filling them with ingredients for the other four packet recipes.

slow cooker beef 2

This process is so fascinating to witness. Lookie at the meat with Onion Soup Mix and other ingredients splashed into a bag. Ooh. Aah.

slow cooker beef 3

A grand total of 20 minutes later, dinner was in the crock pot and four other meals were ready for the freezer.

slow cooker beef 4

Read about our Eat Right Away Packets here.

We’ve got four packets (a total of 20 recipes!) all organized and ready for you to work with! I cannot tell you how great these are to work with. Actually, I guess I did just tell you. Go get your packets. They’ll save you time and money!

Heavenly Homemaker's Club Members: Access your homepage and all your fantastic resources here! Not a member yet? Please join us!

Our Groceries, Our Menu, Our First Week of School…and Our Mannequins?

August 16, 2015 by Laura 12 Comments

This post may contain affiliate links. For more information, please see our disclosure policy.

Well, here we are at the beginning of our first week of school for 2015-2016. I’ve made a few meals and convenience foods ahead of time. I’ve ordered and purchased a lot of groceries. I’ve organized our books and classes for the year. I’ve made a 30-Day Real Food Menu to help make meal time easier. I’ve moved the mannequins out of my office. Hold on. Did I forget to tell you about Sheila and Robert?

Creepy Alert…

mannequins

Why, oh why?

Asa was working on a new video project for a friend last week, and they needed mannequins. What does a person do when he needs mannequins? Well, his mom puts a request out on Facebook, and hopes a friend has some to lend. I truly almost wet myself watching our friend haul two necked mannequins across the street to our porch. I would love to know what the neighbors were thinking.

Ever dressed a mannequin? It’s harder than one would think. Sheila lost two fingers in the process, for which we are truly sorry. I gave up on pants and simply wrapped her legs in a blanket. Then we stored her (as well as a little boy mannequin – see him back there?) on the bed in my office. I jumped every time I walked in – because obviously – and I felt as though Sheila was watching my every move while I tried to work. It is very hard to write sentences while being watched by someone who doesn’t blink. So we moved them to our other guest room. In the process, her legs came off. As did her arms. And her blanket. Then Asa and his friend ended up not needing them for the video after all.
mannequins 4

See sometimes you just don’t want to know all the goings on in other people’s homes. Please still love us.

Want to talk about food now? Yes, let’s move on to the more normal (and I use that term lightly) life of the Coppinger household, shall we? Truly, looking at my bottle of vinegar will be a blessed relief after the previous pictures.

Saturday I picked up an enormous Bountiful Basket order. Along with lots of fruits and veggies we got tortillas, bread, and pizza crusts for the freezer. Ah yes, and a bottle of vinegar. As I was saying earlier, life is so normal, simple, and boring around here.

bountiful basket 815

My August Subscribe and Save order is beginning to trickle in. I should have the rest by Monday, but so far we’ve received Organic Cacao Powder, a case of Kashi cereal, and a case of Rapunzel sucanat.

amazon 815

Our garden tomatoes are producing well! Soon it will be time to make a batch of tomato sauce.

garden tomatoes 2

And guess what? Our green bean plants are reviving themselves and we already got to pick a few beans. Take that, bunnies! (Yes, we’re still keeping the cat.)

garden beans

I ordered 50 pounds of potatoes and 50 pounds of wheat (not pictured) from Azure Standard. Soooo, we are all set on food for a while!

potatoes

Along with school, some of our boys’ soccer practices also begin this week. I took the 30-Day Real Food Menu list and my Menu Planning Notebook, and I jotted down meals from the list I have food on hand to make. This is so much better than having all the info and thoughts floating around in my head. Yay for a list on my fridge (and for the iced coffee I drank while making it)!

meal planning before school

First Week of School Food

  • Homemade Pizza
  • BLT Chopped Salad
  • Meat and Cheese Burritos
  • Easy Noodle Stir Fry
  • Tuna Casserole
  • Italian Cream Cheese Chicken
  • Bacon Cheeseburger Casserole (from Make-Ahead Meals and Snacks)
  • Hawaiian Beef and Rice (from Eat Right Away: Slow Cooker Beef Edition)
  • Taco Potatoes
  • Real Food Meat and Velveeta Dip with chips
  • Crepes

Last but not least, here are some boring pictures of a few of the books our three younger boys will be using this year. (Justus – 10th grade, Elias – 8th grade, Malachi – 5th grade)

school books 2015

This isn’t all of them, but these are some of the piles I was working through for a few hours over the weekend. I got the boys’ assignment lists printed, so we’ll begin bright and early (yeah right) Monday morning.

school books 20152


Hopefully, the mannequins will not be terribly distracting while the boys work on their math and Spanish on Matt’s office computer. We’re running out of options for places to move them. Our porch, perhaps? That could be fun.

Here’s to a great first week of school! How about you? What are you up to this week? Care to share anything about your normal (or not so normal) goings on? Have any mannequin creepers?

Heavenly Homemaker's Club Members: Access your homepage and all your fantastic resources here! Not a member yet? Please join us!
« Previous Page
Next Page »

Join Our Community!

 Facebook Twitter E-mail Instagram Pinterest

Popular Posts

~ Will All of the Real Moms Please Stand Up?
~ Easy! Stir-and-Pour Whole Wheat Bread
~ How to Make Gatorade
~ 31 Real Food Breakfast Ideas
~ Dear Teenage Girls...
~ When Mom Takes a Step Back
~ The Inexpensive Health Insurance We Love!
~ Let's Talk Real Food Grocery Budgets

Check out our latest posts!

  • Big Family Food and Fun: June 14-20, 2026
  • Big Family Food and Fun: June 7-13, 2026
  • Big Family Food and Fun: May 31-June 6, 2026
  • Big Family Food and Fun: May 24-30, 2026
  • Free 7-Day Summer Menu Plan
Home  ~  Simple Meals  ~  Club Membership  ~  Shop  ~  Privacy Policy  ~  Disclosure  ~ Contact

Copyright © 2026 · Beautiful Pro Theme on Genesis Framework · WordPress · Log in