Heavenly Homemakers

Encouraging women in homemaking, healthy eating and parenting

  • Home
    • About
    • FAQs
  • Recipes
    • Bread and Breakfast
    • Condiments
    • Dairy
    • Main Dishes
    • Side Dishes and Snacks
    • Desserts
    • Gluten Free
    • Instant Pot
    • Crock Pot
    • Heavenly Homemaker’s Weekly Menus
  • Homemaking
    • Real Food Sources
  • Store
  • Contact
    • Advertise
    • Disclosure
    • Privacy Policy
  • Simple Meals
  • Club Members!

Flour Made From White Wheat and Red Wheat – Is It All Whole Wheat?

June 6, 2012 by Laura 37 Comments

This post may contain affiliate links. For more information, please see our disclosure policy.

Remember the post I wrote talking about which kind of wheat flour is best? In that post, I told how both hard red wheat and hard white wheat are good for you. Both make whole wheat flour. They are simply different varieties of wheat.

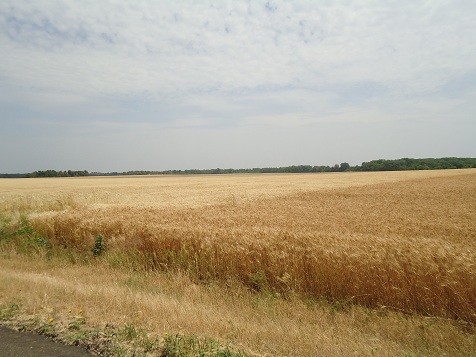
Well, a few weeks ago, when we were visiting family in Kansas, wheat fields were ready for harvest – and so, so beautiful. I grew up in Kansas, and since I don’t live there anymore, I have really learned to appreciate the beauty of a wheat field. I tend to gush about it over and over when I see what used to just be a “boring ol’ wheat field”. That was a side note, but I thought you’d like to hear what Matt has to hear each time we go “home” for a visit. Wheat fields are so pretty!! (For the record, my California born and raised husband agrees with me.)

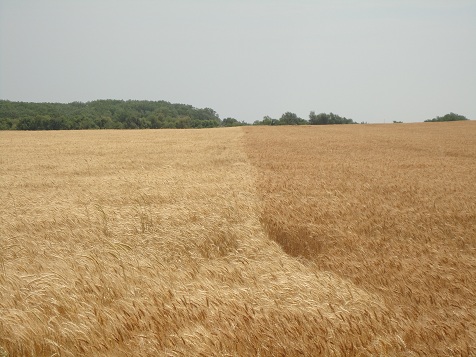
Anyway, we were driving back to my dad’s after church and I nearly came out of my seat belt as we drove past these wheat fields. Why had I never seen fields like this before? Had I simply not been paying attention? Check out the difference in these two fields:

My darling husband, seeing what I was pointing out, kindly slammed on the brakes (not really, but sort of), put the car in reverse, and pulled over so I could get some pictures. (Don’t worry. We were on a country road in the middle of nowhere. There wasn’t another vehicle around for miles.)  There, side by side, was a field of hard red wheat, and a field of hard white wheat. Gorgeous!

The main reason we wanted pictures is to show you that indeed, red wheat and white wheat both make whole wheat flour – they are just different varieties of wheat. (Read through all of my grain and grain mill posts if you’d like to learn more.)  And the other reason we wanted pictures is because wheat fields are beautiful and I wanted to gush about them to you.

If I could have recorded the sound they made in the breeze, I would have done that too. Okay, I’m done gushing now. 

But tell me – is that not beautiful??! :)

Heavenly Homemaker's Club Members: Access your homepage and all your fantastic resources here! Not a member yet? Please join us!

Making Kefir with Powdered Starter

June 5, 2012 by Laura 89 Comments

This post may contain affiliate links. For more information, please see our disclosure policy.

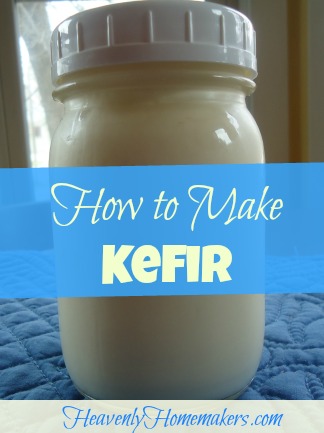
How to Make Kefir

I had never heard of Kefir until about six years ago. (It’s pronounced “kEE-fur”, by the way.)  And then, while learning about kefir, I heard that there were these things called “kefir grains”, which of course made me immediately picture a wheat field.

FYI – kefir and wheat fields have nothing in common – except for maybe the fact that both can be used to create consumable products. Therefore, if you are having a conversation with friends and the subject of kefir comes up – (and you know it will, because a lengthy kefir conversation is what friendship is made of) – smile, look smart, and for the love of probiotics, don’t ask something silly about what a kefir field looks like.

Not that I ever asked anything like that or made myself sound silly in front of friends during a kefir conversation. Nor did I ever pronounce the word like “keh-fur” which rhymes with heifer, which makes me think of a cow, which sort of relates because at least kefir is a dairy product. But anyway…

I finally learned what kefir is, and I also learned to love it. Kefir is a probiotic beverage, similar to yogurt, only not quite as thick. This cultured dairy product is excellent for your digestion as it is full of healthy bacteria that can heal the gut. You can drink it plain, and will find that it is rich and tangy. We prefer to drink it in smoothies, blended with lots of frozen fruit to sweeten it up.

Kefir grains are reusable, allowing you make batches and batches of kefir for years and years. But with my busy schedule, I find that keeping up with making sure my kefir grains are alive and healthy is very overwhelming. That’s probably silly, but that’s where I’ve landed.

By the way, kefir grains are not a grain at all, so I don’t know why they are called grains. They are simply little grain sized live bacteria that, when placed in milk, culture the milk so that it becomes kefir. (I am so incredibly unscientific in my explanations.)

Instead of using these grains to make kefir for my family, I have found that using a Powdered Kefir Starter Culture is a much easier way to go. Then I use my homemade kefir to make more kefir. It’s awesome. Here’s how I do it:

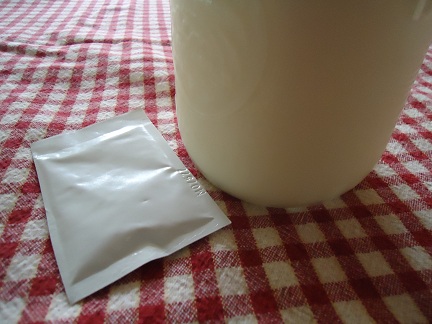
Begin with a quart of milk and a packet of Powdered Kefir Starter Culture. I use raw, organic milk, but this it not necessary if you don’t have access to raw milk.

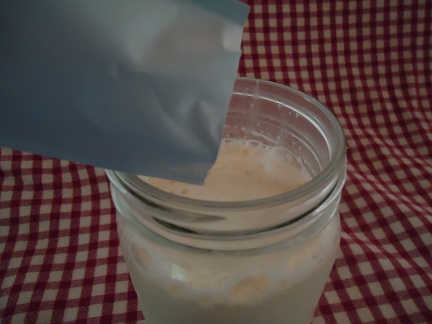
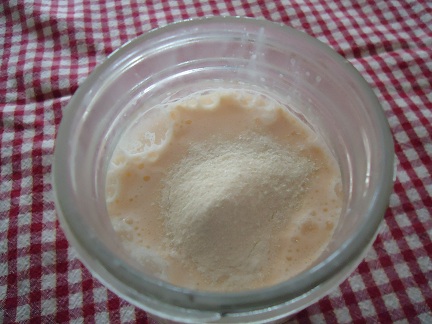
Pour contents of the packet into the milk. This step is so very difficult that I took a picture of it to show you how to do it. ;)

After you have poured the contents of the packet into the milk, it will look like this. Aren’t you glad I took a picture of this for you too?

Okay, that’s all of the obvious pictures I took, even though I’m sure you would have loved pictures of me digging through my drawer for a lid, putting the lid on, and shaking it up furiously.

Oh shucks, I guess I gave away the next steps in your kefir making process. Indeed, you need to put a lid on the jar, shake it up, and leave it on your countertop for about 24 hours – more or less – depending on how long it takes for this to “kefir-fy”. You will know that your kefir has formed once the contents in your jar have thickened. At this point, you can put your kefir in the fridge to chill.

Just a note:  The instructions in the packet are likely to tell you to heat your milk and do a few extra steps beyond what I have told mentioned here. You can do that if you wish. I skip the other steps because I prefer to keep my milk raw, plus I have found that cold milk works just as well as warm milk.

VERY IMPORTANT!!! When using your kefir, keep about one cup at the bottom of your jar. Pour this cup of kefir into a quart or half gallon of milk, leave it on the counter for 24 (give or take) hours, and allow the milk to thicken into cultured kefir.

Isn’t that cool? You use your kefir to make more kefir. Therefore, your kefir starter packet will make eight or more batches of kefir! So easy!!

P.S. I just did a little internet research and see that another way to pronounce kefir is {keh-FEER}. I think that sounds a little funny, but what do I know? I’m the one who thought kefir grains grew in fields. ;)

Ever made kefir? How do you pronounce it?

Heavenly Homemaker's Club Members: Access your homepage and all your fantastic resources here! Not a member yet? Please join us!

Gratituesday: Yard Sale

June 4, 2012 by Laura 18 Comments

This post may contain affiliate links. For more information, please see our disclosure policy.

I typically do not enjoy having yard sales. They are a lot of work and take a lot of time. However, for a few years now, we have been accumulating items in our basement we wanted to get rid of. Last weekend, we finally decided to just get it done.

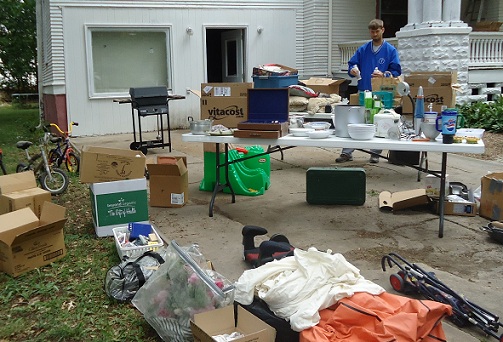
The boys hauled it all out, then we set to organizing it on tables.

This unrecognizable kid showed up sometime while we were getting things out of boxes and setting up. We were pretty sure it was Malachi, but we may never know for sure…

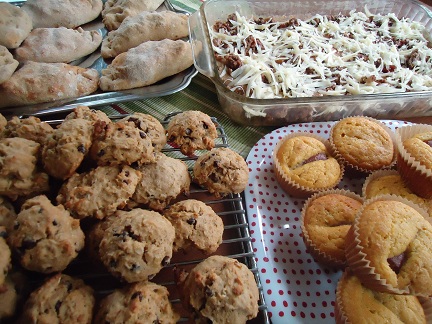
Just for fun, I took a picture of some cooking I did last Thursday in an effort to get ahead for the weekend. I knew Friday and Saturday would be full, so having easy to warm up foods was a real life saver! 


I made Calzones, Corn Dog Muffins, Cheesy Salsa Enchiladas, and Giant Breakfast Cookies. What?  The giant cookies don’t look very big? Well, that’s what happens when you’re making too many recipes at once and you forget to add eggs to the cookies. Ah well, at least they still tasted good. ;)

But back to the yard sale. Ultimately, we just wanted to get rid of the “junk” and de-clutter our home. Therefore, in the hopes of seeing the stuff walk away, our yard sale prices were crazy low. In fact, we didn’t put a price tag on much of anything. When people asked what we wanted for an item, we just threw out a low number, in hopes they would just take it!

More than once, when asked how much we wanted for a toy or a plate, we’d shrug and say, “How about a quarter?” And would you believe that people would say, “Oh, that doesn’t sound like enough! I’ll give you 50¢. How does that sound?” Ha! It was the opposite of anything I’d experienced at any yard sale. People were requesting to give us MORE money than we were asking for.

By Saturday, we’d sold everything of value to us, so we just told people to take whatever they wanted for free. We found that it was a fun way to bless people and get our house cleaned out at the same time.

It ended up being a great weekend and yay for me, my house is cleaned out!

Share how God is working in your life on your blog, then come link up with us here. If you don’t have a blog, be sure to leave a comment letting us know what you’re grateful for! Please read through the Gratituesday Guidelines so that you understand what kinds of posts you can link up to share here. Posts that are linked but do not fit our Gratituesday theme will be deleted.

If you are linking up a blog post for Gratituesday,
please copy and paste the following sentence into your post! Thanks!

Join us for Gratituesday at Heavenly Homemakers!

Heavenly Homemaker's Club Members: Access your homepage and all your fantastic resources here! Not a member yet? Please join us!

Menu Plan for the Week

June 3, 2012 by Laura 6 Comments

This post may contain affiliate links. For more information, please see our disclosure policy.

Our oldest is turning 15 this week. (As my lovely sister-in-law assures me each year on Asa’s birthday – I am much too young to have a 15 year old. I’m hanging on to that!)

Turning 15 means that he is getting his learner’s permit and will soon be driving me to the store. I think every time I look at him he is taller. Wow. Love my teenager!

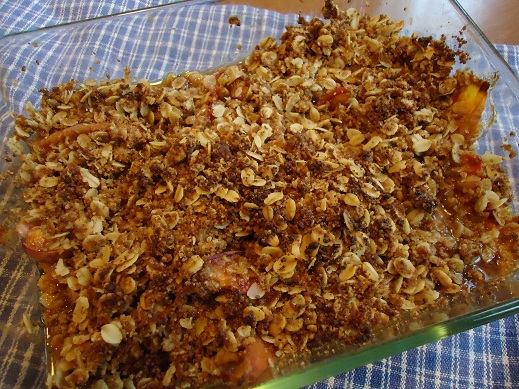
He’s working to figure out what meals he wants to eat for his birthday, and has almost landed on Peach Crisp or Cobbler for breakfast. No one around here is arguing.

Here is our menu for this week:

Sunday, June 3
Oatmeal, fruit
Italian roast with carrots and green beans
Nachos

Monday, June 4
Peanut butter pancakes, bananas
Cheddar ranch burgers, creamy cole slaw, baked beans
Easy noodle stir fry, tossed salad

Tuesday, June 5
Scrambled egg sandwiches, oranges
Black bean salsa, organic corn chips, fruit
Taco salad

Wednesday, June 6
Hashbrowns, turkey sausage, creamy orange coolers
Tuna salad on tomatoes, smoothies
Cheesy salsa enchiladas, tossed salad

Thursday,  June 7
Mini breakfast pizzas, apples
Creamy mac and cheese, peas
Bean and cheese burritos, watermelon

Friday, June 8
Asa’s bday choices! – waiting to hear…

Saturday, June 9
Giant breakfast cookies, fruit
Sloppy joes, raw veggies
Leftovers

What will you be eating this week?

Heavenly Homemaker's Club Members: Access your homepage and all your fantastic resources here! Not a member yet? Please join us!

Make Fun Pancake Designs

May 31, 2012 by Laura 9 Comments

This post may contain affiliate links. For more information, please see our disclosure policy.

Remember how I said that we’d feature a Homemaking Hints link-up on the first Friday of each month? Yes, well…I completely forgot about it in May. So sorry. Now that it’s June 1, I am remembering and very much looking forward to hearing your fun tips!

The tip I’m sharing comes from my lovely friend and mentor, Avon. After I shared my “Bird’s Nests” idea, this is what she emailed me:

I like to pour my pancake batter into a squeeze bottle… then it is amazing all the things you can design.

When the grandchildren are here I make a second squeeze bottle of batter and mix in some syrup. Then I make a design on the griddle (like a smiley face or their initials or in your case the state of idaho) then cover the whole thing with the regular batter. When you flip it over the design cooked darker so it looks really cool.

This was our traditional finale at all our sleepover parties when my kids were growing up.

Well, isn’t that just a super fun idea? I need to give it a try – I know my boys would love it! Now, if I could only find just a little bit of artistic ability so that my boys can actually recognize the designs I’m going for in my pancakes!

Feel free to share kitchen tips, cleaning solutions, recipe ideas, cooking short-cuts, household money-saving suggestions, decorating ideas, gardening tips, or anything else you feel fits this category. (No product reviews or giveaways – thanks!)  As always, when linking your blog post, please post a link back to this blog so that your readers will know where to find more Homemaking Hints.

Heavenly Homemaker's Club Members: Access your homepage and all your fantastic resources here! Not a member yet? Please join us!

Make Your Own Kefir – a Giveaway!

May 31, 2012 by Laura 54 Comments

This post may contain affiliate links. For more information, please see our disclosure policy.

Kefir is a wonderful, delicious, and incredibly healthy probiotic drink. It only takes a few minutes of work to prepare. In fact, I made some this morning and was finished within about a minute and a half. In a few hours, we’ll have super healthy kefir to use in smoothies!

There are different ways to make kefir, all of which are easy. If you use “kefir grains”, you will save money in the long run. However, I have found that my busy schedule limits my ability to keep up with my kefir grains. This may be a bit of a cop-out, but this is where I’ve landed at this point.

Instead, I use powdered kefir mix to make jars of kefir. It is still very economical to make kefir this way, and wow is it tasty! I will be sharing a tutorial on how I do this next week. In the meantime, would you like to win a Kefir Starter Culture from Cultures for Health?

I’ve been a customer and affiliate with Cultures for Health for several years, and I completely trust their products and knowledge. Their prices and shipping costs are extremely reasonable. And the buttermilk and kefir I make with their starters are delicious!

Make Kefir at HomeToday, Cultures for Health is giving away three Body Ecology Kefir Starter Cultures. To enter this giveaway, you must click here and sign up on the Cultures for Health site. In doing so, not only will you be entered in this giveaway, you’ll also be able to download a free Kefir Recipe eBook!

I am very excited about the thought of many of you making kefir at home to offer your family a wonderful, pro-biotic beverage. (Don’t worry, you don’t have to drink it straight if you don’t want to. Add some fruit to it and make smoothies – your family will think you gave them ice cream.)  ;)

We’ll draw three random winners on Monday, June 4. Please watch for a post stating the winners as you will be responsible for contacting me if your name is chosen.

And stay tuned for a tutorial on making kefir – it’s much easier than you think!

Heavenly Homemaker's Club Members: Access your homepage and all your fantastic resources here! Not a member yet? Please join us!

Why Exercise Gives You More Energy

May 30, 2012 by Laura 13 Comments

This post may contain affiliate links. For more information, please see our disclosure policy.

Last week, I had a chance to visit with my friend Nicole about exercise. She’s been reading about my new fitness goals and workouts, and was encouraging me to keep it up. Who is this “friend Nicole” that I speak of? Oh, just my friend who just trained for and ran a half marathon a few weeks ago – something that completely and totally impresses my socks off. I’ll take her encouragement any time!

One of the things Nicole and I talked about was our increased energy. Both of us (are pushing 40 and) sat there pretty much gushing over the fact that the more we exercise, the more energy we have. Amazing, isn’t it? You have to use energy to work out, but the energy you gain in return is amazing!! Our conversation quickly turned toward the idea of, “oh how we wish more women understood this and would join us in getting fit!”

And now, since I have your ear, here I am writing this post to try and help more women understand this!! I wish I would have understood it earlier. Seriously, I have so much energy now, I am amazed! I keep telling people that I am feeling better than I ever have before, and that is the truth. I’m not sure I can ever run an actual half marathon like Nicole, but sometimes I feel like I’ve run one around my house, knocking out all kinds of tasks that need to be done. It is invigorating! It feels so good to feel this good!

I asked Jen, of Getting Fit With Jen, why this is true? Why does using energy to exercise give us more energy? Here’s what she told me:

When we exercise, we increase blood flow. This helps deliver more oxygen throughout our bodies. We need that oxygen to create energy. As more oxygen is being delivered throughout our bodies, more energy is created. Therefore, after a workout, you are likely to find that you feel much more energetic.

Also, exercise releases endorphins in our bodies. You don’t want me to go into the chemistry mumbo-jumbo to explain that, so I’ll just say that endorphins released in our bodies will give us a “feel good” sensation. In addition, working out gets us in better shape which in the long run means that we don’t get as tired as quickly, which is much like having extra energy.

Ah, I love how Jen always helps me understand the “whys” behind what I’m experiencing when I workout. (Oh, and she’s always really nice about not frequently mentioning the fact that I’m pushing 40. Love that girl.)  ;)

Have you experienced the “feel good” sensation of exercising giving you more energy?

Heavenly Homemaker's Club Members: Access your homepage and all your fantastic resources here! Not a member yet? Please join us!

Whole Wheat Peanut Butter Pancakes (and My Peanut Butter Addiction Confession)

May 29, 2012 by Laura 77 Comments

This post may contain affiliate links. For more information, please see our disclosure policy.

Peanut Butter Pancakes? Oh yes.

I have no idea what my deal is lately, but during the past few weeks, I have become completely addicted to peanut butter. I can not seem to get enough. I want peanut butter in and on everything. Well, maybe not everything. I suppose spooning a dollop of peanut butter onto my taco salad or chicken fried steak would not be as tasty. But bread and pancakes and cookies – bring it on. I am, of course, okay with you giving me a little chocolate with my peanut butter. But you probably already figured that one out.

Over Memorial Day weekend, my dad’s wife made a delicious Peanut Butter Cake with Peanut Butter Frosting, which may have been one of the best desserts I’ve ever eaten. And I may have topped it with Homemade Butterfinger Ice Cream. Twice. (And yes I am a little sheepish to admit that.)  Remind me to get that cake recipe, because I think I need to adapt it and share it with you, don’t you think so?

Because I can’t come up with a better reason, I have decided that my peanut butter addiction is most likely because of all of the workouts I’ve been doing. Yes, walking and weight lifting make a person very hungry for peanut butter. I believe there is even some extensive research and scientific data to back up that statement. As a matter of fact, I even found and read an article recently which stated:  Be sure to drink plenty of water…and eat lots and oodles and gobs of peanut butter after exercise!!!

Okay, not really. Or if I did, I would surely have been the one writing it.

In all seriousness (if I can, in fact, write something in all seriousness), I truly do believe that the real reason I am loving peanut butter so much right now is because my body needs the extra protein to help me along in my fitness goals. Jen, my trainer friend, agrees with me, and tells me that in fact, I do definitely need extra protein now. She’s the expert, which makes me feel better about my peanut butter consumption so that I know that I am not completely nuts. Get it – nuts? (Oh brother.)  Anyway, I am definitely eating plenty of protein in the form of good meat, eggs, and yes…peanut butter.

(Now, what excuse can I come up with to justify eating chocolate do you suppose? Jen, do you have anything for me on that one?? Please?)

I went into all of that simply to let you know why I created a Peanut Butter Pancake recipe. It sounded like a great way to add protein to our breakfast, so I gave it a try. And, it made it possible for me to feed my addiction first thing in the morning. Yay for me. :)

Whole Wheat Peanut Butter PancakesYum

Whole Wheat Peanut Butter Pancakes (and My Peanut Butter Addiction Confession)
 
Save Print
Author: Laura
Ingredients
  • 2 cups whole wheat flour (I use freshly ground)
  • 1 teaspoon baking powder
  • ½ teaspoon sea salt
  • 5 Tablespoons butter
  • ½ cup natural peanut butter (I use homemade creamy peanut butter)
  • 2 cups milk
  • 2 eggs
Instructions
  1. Mix flour, baking powder, and sea salt. In a small sauce pan, melt butter and peanut butter together, stirring so that it won't scorch.
  2. Pour melted butter and peanut butter, along with the milk and eggs into the flour mixture.
  3. Whisk until well mixed.
  4. Cook the pancakes on a buttered griddle or skillet, flipping halfway through cooking.
  5. Serve with real maple syrup or your favorite pancake topping.
  6. Makes about 20 three inch pancakes.
3.4.3177

Peanut Butter Pancakes

Incredible with a glass of milk…

My apologies to all of you who have a peanut allergy and had an allergic reaction simply by reading this post that was so full of nutty information.

Are you a fan of peanut butter? Which do you like best, creamy or crunchy? Ever tried making homemade peanut butter? It is the best stuff ever!!!

Heavenly Homemaker's Club Members: Access your homepage and all your fantastic resources here! Not a member yet? Please join us!

Gratituesday: The Cousins

May 28, 2012 by Laura 22 Comments

This post may contain affiliate links. For more information, please see our disclosure policy.

We have had a great big cousin filled weekend. The boys are dirty, tired, and basking in the memory of the past few days.

We were blessed to go to Kansas for an extended weekend where we had two different reunions. I come from a very large extended family. My grandfather was the youngest of twelve children, and my dad was the youngest of nine children. So when I say large extended family, I mean large extended family.

And oh the cousins!

I’m thankful for the blessing of family. I’m thankful for the blessing of a Christian heritage. And I’m thankful that I was able to celebrate both of those this weekend.

Share how God is working in your life on your blog, then come link up with us here. If you don’t have a blog, be sure to leave a comment letting us know what you’re grateful for! Please read through the Gratituesday Guidelines so that you understand what kinds of posts you can link up to share here. Posts that are linked but do not fit our Gratituesday theme will be deleted.

If you are linking up a blog post for Gratituesday,
please copy and paste the following sentence into your post! Thanks!

Join us for Gratituesday at Heavenly Homemakers!


Heavenly Homemaker's Club Members: Access your homepage and all your fantastic resources here! Not a member yet? Please join us!

Menu Plan for the Week

May 27, 2012 by Laura 3 Comments

This post may contain affiliate links. For more information, please see our disclosure policy.

We’ve been blessed to be able to spend time with many of our extended family this weekend and are looking forward to more time tomorrow. I hope you are enjoying your Memorial Day weekend!

Here’s our menu plan for the week:

Sunday, May 27
Oatmeal, fruit
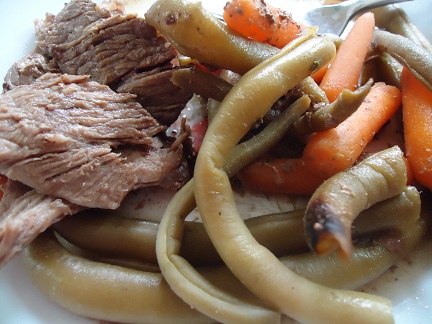
Roast, carrots, potatoes, gravy, green beans
Pizza

Monday, May 28
Pancakes, cantaloupe
Family get together – Cook-out with homemade ice cream
Leftovers

Tuesday, May 29
Chocolate chocolate chip muffins, applesauce
Homemade calzones, tossed salad, smoothies
Chicken pasta alfredo, steamed broccoli and carrots

Wednesday, May 30
Honey whole wheat bagels, fruit salad
Bean and cheese burritos, peaches
Bbq brisket, baked potatoes, asparagus

Thursday, May 31
Creamy orange cooler, toast
Cheeseburger macaroni, peas
Italian cream cheese pasta, tossed salad

Friday, June 1
Easy breakfast casserole, oranges
Corn dog muffins, mock frozen yogurt
Hamburgers, homemade fries, carrot sticks

Saturday, June 2
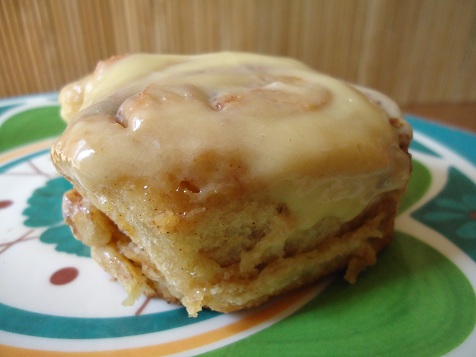
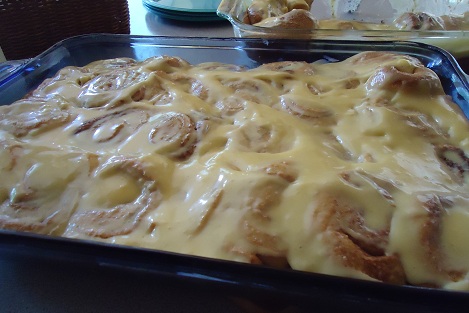
Whole wheat cinnamon rolls, fruit
Leftovers
Beefy enchilada bake, tossed salad

Heavenly Homemaker's Club Members: Access your homepage and all your fantastic resources here! Not a member yet? Please join us!
« Previous Page
Next Page »

Join Our Community!

 Facebook Twitter E-mail Instagram Pinterest

Popular Posts

~ Will All of the Real Moms Please Stand Up?
~ Easy! Stir-and-Pour Whole Wheat Bread
~ How to Make Gatorade
~ 31 Real Food Breakfast Ideas
~ Dear Teenage Girls...
~ When Mom Takes a Step Back
~ The Inexpensive Health Insurance We Love!
~ Let's Talk Real Food Grocery Budgets

Check out our latest posts!

  • Big Family Food and Fun: September 13-19, 2026
  • Big Family Food and Fun: September 6-12, 2026
  • Big Family Food and Fun: August 30-September 5, 2026
  • Big Family Food and Fun: August 23-29, 2026
  • Big Family Food and Fun: August 16-22, 2026
Home  ~  Simple Meals  ~  Club Membership  ~  Shop  ~  Privacy Policy  ~  Disclosure  ~ Contact

Copyright © 2026 · Beautiful Pro Theme on Genesis Framework · WordPress · Log in