Heavenly Homemakers

Encouraging women in homemaking, healthy eating and parenting

  • Home
    • About
    • FAQs
  • Recipes
    • Bread and Breakfast
    • Condiments
    • Dairy
    • Main Dishes
    • Side Dishes and Snacks
    • Desserts
    • Gluten Free
    • Instant Pot
    • Crock Pot
    • Heavenly Homemaker’s Weekly Menus
  • Homemaking
    • Real Food Sources
  • Store
  • Contact
    • Advertise
    • Disclosure
    • Privacy Policy
  • Simple Meals
  • Club Members!

Homemade Beef Bologna

September 14, 2011 by Laura 77 Comments

This post may contain affiliate links. For more information, please see our disclosure policy.

I did it. I made bologna. Mine didn’t turn out nearly as pretty as Tammy’s. Maybe that’s because I adapted the recipe? Or maybe it’s simply because Tammy has a magic touch I don’t seem to have. (Tammy is super talented!)  Either way, we have a healthy, easy-to-make lunch meat that I will feel no guilt about feeding to my family.

A couple of notes about this recipe:

In order to avoid artificial flavorings, you’ll want to use a liquid smoke which does not have any additional ingredients beyond “liquid smoke”. Some liquid smoke varieties have caramel coloring and I don’t know what else. I have found that Lazy Kettle Brand contains only liquid smoke. I’m sure there are other “all natural” brands of liquid smoke – this is the one I found first.

In addition, Tammy’s recipe includes Morton’s Tender Quick Salt, which is a great salt for preserving. However, I hesitate to use this salt now that I’ve learned that it contains nitrates. Therefore, I tried simply using my trusty Redmond’s Real Sea Salt. I figure, I’m keeping the bologna in the fridge or freezer anyway so I don’t need to worry about “preserving” the meat, right?

Overall, I’m pleased with how the bologna turned out. Well, aside from the fact that mine didn’t turn out pretty like Tammy’s. Tammy, how do you do it? :)

Homemade Beef Bologna (adapted from Tammy’s Recipes)Yum

3 pounds ground beef (I used grass-fed beef)
2 Tablespoons sea salt
1 cup water
1/4 teaspoon garlic powder
1/2 teaspoon onion powder
1 1/2 teaspoons “all natural” liquid smoke

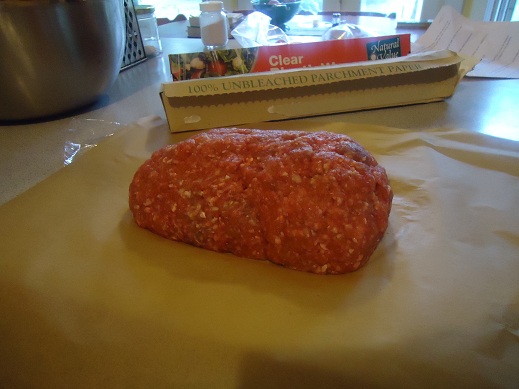
Mix all ingredients together, sticking your hands into the bowl to squish it all together in order to mix the ingredients well. Mmmhmm, that’s the fun part.

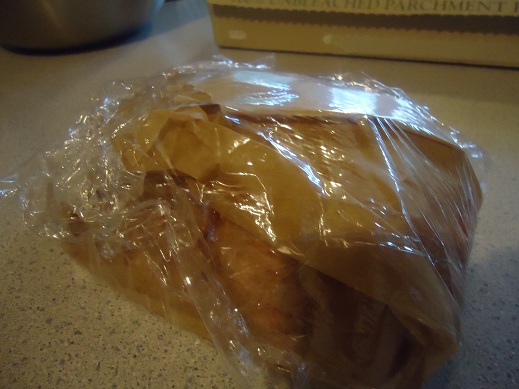
Divide the mixture into two parts and shape two “logs” of meat. I don’t like having plastic touch my raw meat if at all possible, so I placed parchment  paper on top of plastic wrap to help form the log and to wrap it for the fridge. (Yes, this may seem obsessive, but I’m weird – what can I say?)

Wrap the bologna logs well and place them into the refrigerator for 24 hours.

Unwrap the meat and place both logs into a buttered baking dish. I used a 9×13 inch Pyrex dish. Bake in a 300° oven for 30 minutes, then in a 200° for another 2 1/2 hours.

Cool and store in the freezer or fridge.

Homemade Beef Bologna

A big thanks again for Tammy’s Recipes for inspiring this recipe! Now, on to her Spicy Beef Pepperoni!

I’m super thrilled with this recipe because I totally love bologna. I know that’s a silly thing to love, but love it I do. Kinda like how I love beef hot dogs.

Do you like hot dogs and bologna, or do you think I’m a little bit nuts for thinking they taste good? Hey, at least now I can eat bologna again without feeling like my stomach is turning inside out!

Heavenly Homemaker's Club Members: Access your homepage and all your fantastic resources here! Not a member yet? Please join us!

Easy Chicken Burritos (Perfect for the Freezer!)

September 13, 2011 by Laura 103 Comments

This post may contain affiliate links. For more information, please see our disclosure policy.

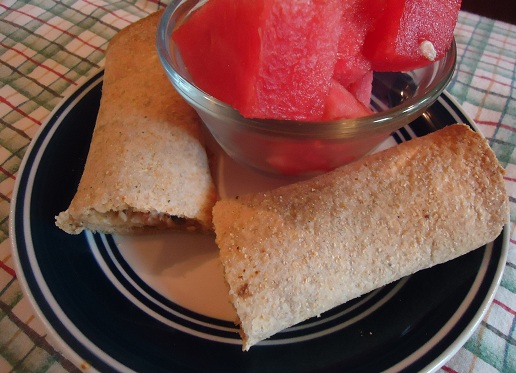
As I sat down to write this post, I could think of nothing exciting to say about these Easy Chicken Burritos. Therefore, I have decided to see if I can win “The Most Boring Blog Post Ever Award”. Most of this post has nothing to do with burritos, but really, there’s only so much a person can say about burritos. See look – there they sit:

Here is my very boring post:

Today I cleaned my ceiling fans and dust bunnies fell down onto the math books below. It was gross. When I got the mail this morning, most of it was junk mail so I put it directly into the recycling. We can’t find Malachi’s left tennis shoe. Today I’m wearing a brown shirt. I have a lot of brown shirts. I like brown.

I gouged my thumb on a kitchen cabinet yesterday. It hurts. Today I bonked it again. That hurt worse. The weather today is nice. Tomorrow it might get cooler. I need to pick green beans. And tomatoes.

I picked up our Azure Standard order today. We got a box of strawberries. They are good. Somehow we got strawberry juice on our kitchen floor tonight. I wiped it up.

I did four loads of laundry yesterday. They aren’t folded yet. Asa’s jeans are all too short. So are Elias’. So are Justus’. Kids grow fast.

We have crickets in our house. They are loud.

Here is a burrito recipe. These taste good. They are pretty much exactly like the Bean and Cheese Burritos and Beef and Cheese Burritos I’ve already written about, except that instead of using beans or beef, you use chicken.

(Told ya it was boring. Although that part about the weather was really pretty exciting. Except for not really.)

Easy Chicken BurritosYum

10 whole wheat tortillas (one batch homemade)
2 cups cooked chicken
1 cup shredded cheese (I use white cheddar)
1 cup salsa
Sea salt and/or chili powder to taste

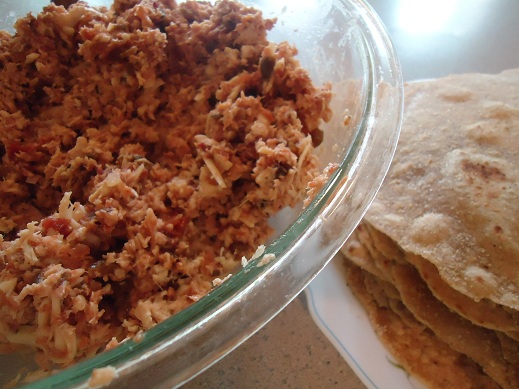
Chop cooked chicken into tiny pieces or run it through a food processor. Stir together shredded chicken, cheese, salsa and spices. Spoon mixture into a warm, soft tortilla. Wrap and serve.


We like freezing these burritos, then rewarming them for quick lunches. To rewarm:  Place desired number of burritos on a baking stone or cookie sheet. Heat in a 350° oven for about 15 minutes or until slightly brown, crispy and hot.

What’s the most boring thing you can think of to tell me right now? Or maybe the most exciting? (If your laundry is folded and put away, I don’t want to hear about it. Over-achievers.)

Heavenly Homemaker's Club Members: Access your homepage and all your fantastic resources here! Not a member yet? Please join us!

Gratituesday: Burden Lifted

September 12, 2011 by Laura 43 Comments

This post may contain affiliate links. For more information, please see our disclosure policy.

I was carrying a burden and I didn’t even recognize it. Well, maybe I did recognize it but it seemed like such a petty matter in life’s big picture, so I was choosing to carry the burden alone. To talk to anyone about it seemed like I’d either be whining or gossiping – and I certainly didn’t want to do either one. Therefore, I just trudged along, carrying the burden – because I’m strong, right? I can deal with it, right? Right.

Until last Sunday. That was the day a good friend of mine showed up on my doorstep unannounced. I’m always glad to see my friends, but I could tell that she had come with something on her mind. I thought maybe something was troubling her and that she’d come to unload a burden of her own. Yes, because apparently I think I’m the one that can carry my own burdens alone, and then help others carry their burdens too. (Who do I think I am, for goodness sake?)

Instead, she lovingly told me that she had no idea why, but that God had put me on her heart. She had come to ask if there was anything troubling me and she had come to pray with me.

For about one half of a second, my stubborn heart began to blurt that I was absolutely fine. And then the Spirit revealed the truth to me, making me realize that God had sent my friend here for a reason. She was fulfilling His purpose.

So I shared, and we prayed. I wasn’t gossiping, I wasn’t whining. I had a burden and my friend met my need and helped me let God take over the burden.

I’m not sure I’ve ever experienced anything so immediately transforming. Since that day, I’ve been a new woman. The issue causing my struggle is still there, but it is no longer a burden weighing me down. I am no longer carrying it alone and the difference is amazing.

Thank God for friends who listen to the Spirit and who can help meet our needs. I am so grateful.

What are you thankful for this Gratituesday? Write about it on your blog, then come link up with us here.
If you don’t have a blog, be sure to leave a comment letting us know what you’re grateful for!

If you are linking up a blog post for Gratituesday,please copy and paste the following sentence into your post! Thanks!

Join us for Gratituesday at Heavenly Homemakers!


Heavenly Homemaker's Club Members: Access your homepage and all your fantastic resources here! Not a member yet? Please join us!

Working Ahead for Healthy Food Convenience

September 11, 2011 by Laura 52 Comments

This post may contain affiliate links. For more information, please see our disclosure policy.

For the past two weeks during our Funky Fresh Kitchen series, we’ve talked all about getting your kitchen cleaned out and organized, getting rid of unhealthy foods and working toward making your own healthy foods from scratch. One thing I didn’t cover during the series which has become a very imporant way for me to keep my kitchen organized and healthy is making healthy foods ahead of time and freezing them for quick meals.

Whole Wheat Waffles are great to make ahead and
put into the freezer for a quick, healthy breakfast!

Having foods like healthy burritos, whole wheat waffles and homemade pizza pockets in the freezer to pull out for quick meals has been a life saver for me many times. This week, I plan to work on putting a few more healthy foods into my freezer for quick, convenience items. Here’s what’s on my list to try making this week:

  • Turkey Sausage
  • Homemade Beef Bologna (I’ll be adapting the recipe)
  • Homemade Spicy Beef Pepperoni (I’ll be adapting the recipe)
  • Hashbrowns
  • Giant Breakfast Cookies

At the end of the week, I’ll be back with an update on how my extra cooking times went. I can’t wait to try those new bologna and pepperoni ideas!!

Care to join me in trying to get ahead just a little bit? Think you might have time to make just one extra dish or item for your freezer for some healthy convenience? Leave a comment letting us know what you’re up to in the kitchen. I love hearing new ideas!!

P.S. I’ve got a new “Make Ahead Meals” recipe to share with you later this week!

Heavenly Homemaker's Club Members: Access your homepage and all your fantastic resources here! Not a member yet? Please join us!

Menu Plan for the Week

September 11, 2011 by Laura 13 Comments

This post may contain affiliate links. For more information, please see our disclosure policy.

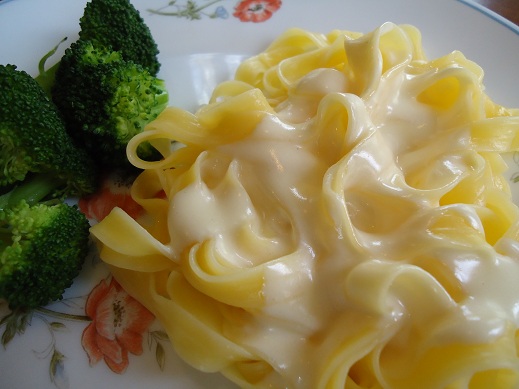
Pasta Alfredo

Here’s our menu plan for this week!

Sunday, September 11
Oatmeal, pears
Cheesy beef and rice, green beans
Leftovers

Monday, September 12
Whole wheat waffles, blueberries
Taco Corn Fritters, cantaloupe
Cheeseburger macaroni, peas, tossed salad

Tuesday, September 13
Scrambled egg sandwiches, creamy orange cooler
Chicken salad, apples, homemade ranch and carrot sticks
Taco potatoes, watermelon

Wednesday, September 14
Pancake sausage muffins, pears
Popcorn chicken, strawberry-peach slushies, peas
Lasagna casserole, tossed salad, sweet corn

Thursday, September 15
Breakfast burritos, peaches
Salmon patties, toast, strawberry milkshakes
Lamb chops, mashed potatoes, gravy, zucchini

Friday, September 16
Giant breakfast cookies, pears
Chicken burritos, fresh pineapple
Hamburgers on homemade buns, ranch potato wedges, carrot sticks

Saturday, September 17
Fried eggs on toast, oranges
Leftovers
Chicken pasta alfredo, steamed broccoli and carrots

Heavenly Homemaker's Club Members: Access your homepage and all your fantastic resources here! Not a member yet? Please join us!

How To Leave a Comment on this Blog (and How to Enter Giveaways)

September 10, 2011 by Laura 18 Comments

This post may contain affiliate links. For more information, please see our disclosure policy.

I often receive emails from people asking me how to leave a comment on my blog. Most feel silly about asking – but don’t! If you’re new to the world of blogging, these things take a little bit of time to figure out. Plus, every blog is a little different!

I decided that instead of continuing to email each person individually, I’d save a little effort and type it here so that I can simply refer people to this post! Here is how to leave a comment on a post here at Heavenly Homemakers:

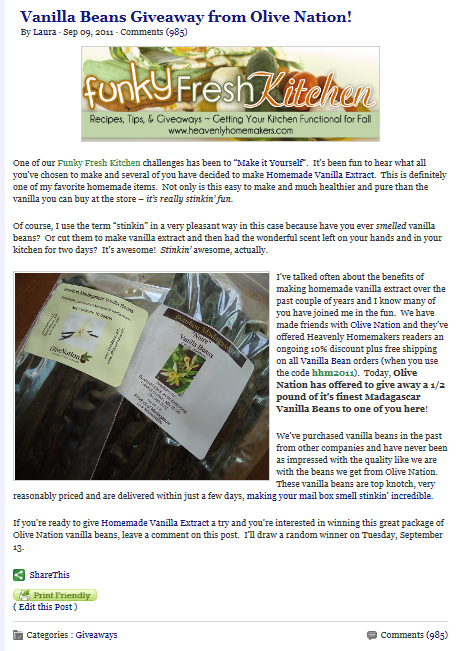
  1. Look at the top and the bottom of each post and you will see the word Comments with a blue number in parentheses beside it. Here’s a screen shot of what this looks like:
  2. In the case of our example above, you see that the number is (985). Click on that blue number (whatever it happens to be for that post) and a form will pop up for you.
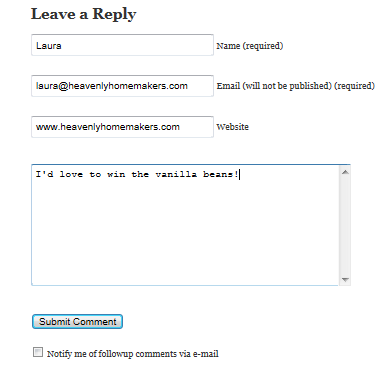
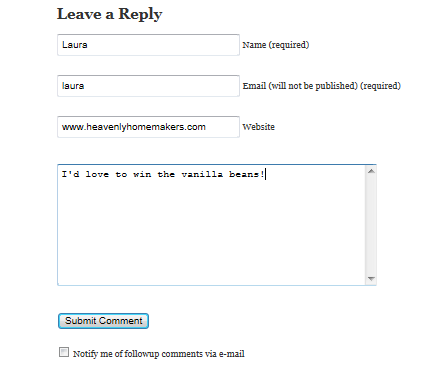
  3. Fill in the form by putting your name (or a user name like “MomofFour” if you’d rather be anonymous), and then your email address. If you have your own blog, you can put the URL to your blog in the space that calls for “Website” – otherwise you can just leave that spot blank. Type your desired comment into the big space provided, then click on “Submit Comment”. If you are a first time commenter, I will have to “approve” your comment before it will appear on my blog. Once approved, your comments should automatically show up once you type and submit them!

Here’s what my completed form might look like just before I hit submit:

Take note: You can click on “Notify me of followup comments via e-mail” ONLY if you want to receive an automatic email every time someone leaves a comment on this particular post. This is a helpful feature if you are enjoying the discussion on the topic of this blog post. But if you click that on a giveaway post, you’re likely to get hundreds of emails full of comments saying “I’d love to win vanilla beans” and it may get annoying after a while. (If you run into this problem, no worries. You can email me and I can fix it!)

So there you go – that’s how to leave a comment here at Heavenly Homemakers.

I also wanted to take a moment to clear up any confusion on How to Enter a Giveaway here at Heavenly Homemakers. Often I have subscribers who simply click “reply” on the daily email newsletter that comes to their inbox and tell me via that email that they’d like to win. Unfortunately, I am unable to count those responses because they get lost in my full inbox.  To enter a giveaway, you MUST click over from the email newsletter to the actual post on this website and enter a comment as directed above.

Any questions? Leave a comment (it’ll be good practice!) here and I’ll try to give you an answer!!! :)


Heavenly Homemaker's Club Members: Access your homepage and all your fantastic resources here! Not a member yet? Please join us!

Listen

September 9, 2011 by Laura 6 Comments

This post may contain affiliate links. For more information, please see our disclosure policy.

~Appreciate Your Spouse~Buoyancy in Marriage~Consult Your Partner~
~Dream Together Part One ~Dream Together Part Two~Empower Your Spouse~
~Have Fun With Your Spouse~Give to One Another~Honor Each Other~
~Be Intentional~Jubilee~Kingdom Focused~

Listen

Synchronized Staring – Matt’s Thoughts

When the moon hits your eye like a big pizza pie…that’s absurdity. When you look into your spouse’s eyes and truly listen…that’s amore.

Here’s a question for self-evaluation: Is my beloved’s voice mixing with all the other noise in my life? If so, something needs to change.

Healthy marriages consist of two people listening to each other. My best listening is achieved when my eyes are on my prized one. So, I say, if at all possible, look at your spouse in the eyes when he/she is communicating to you. Okay, when you are changing a diaper, your focus needs to be there, but pause or turn off the media and give your full attention to the most important person in your life; the game or show – or gameshow – really isn’t important.

Remember when you first looked into each other’s eyes and your hearts raced with adrenaline? Maybe your story didn’t quite happen that way, but think about other instances when you would have competed for gold in the Olympic Event of Synchronized Staring. Practice that again right now. If your “Romantic” is not with you now, then at your next opportunity look lovingly into his/her eyes and listen. We can’t help but smile when we do this. We smile because we know we are being heard. We smile because we know we are loved.

I’m Sorry, Did You Say Something? – Laura’s Thoughts

It is a fact that if I’m working at the computer, Matt has learned that he has to say, “Are you in writing mode or are you able to listen for a minute?” Yes, when I write, I go into a zone. (See like right now – I’m typing and I can’t hear a thing you’re saying.)

Sometimes that’s okay – we all have to learn to be selective about when we share something important with our spouse. If he/she is in the middle of balancing the checkbook, that may not be the best time to share a deep, heart-felt need or request. Just as important as listening is being thoughtful about when we’d like to truly be heard.

Do you know what I love about the way Matt listens to me? He just listens. He doesn’t talk, he doesn’t interrupt, he doesn’t jump in with ideas of how to fix my situation. Usually, I just need to share and to be heard and cared for. When he’s sharing something with me, he also appreciates if I just let him talk. Sometimes I like to try to finish his sentences for him. That’s not nice and I’m working on not doing that. He can finish his own sentences quite well without my help.

If you’re a good listener, your ears and heart are open – your mouth is not. And yes, like Matt said, it’s best to look into your spouse’s eyes when he or she shares. You can really hear better that way.

And that’s why, at the end of the day after I’ve taken out my contacts, I have to say to Matt, “Will you hand me my glasses? I can’t hear you very well.” Either I’m a weirdo or eye contact is just that important in order to be a good listener.

Or maybe it’s a little bit of both. ;)

Ladies, we know you’re reading here more often than the guys. ;)  We’d love husbands to read this article as well. If you feel so inclined please send the link to your husbands, or if it’s easier, we’ve created a downloadable article for you to quickly print off and share. Healthy Marriage Tips A to Z – Listen

Heavenly Homemaker's Club Members: Access your homepage and all your fantastic resources here! Not a member yet? Please join us!

Homemade Beef Summer Sausage

September 8, 2011 by Laura 111 Comments

This post may contain affiliate links. For more information, please see our disclosure policy.

My personal Funky Fresh Kitchen “Make it Yourself” Challenge was to make Homemade Beef Pepperoni, using a recipe I found at Tammy’s Recipes. I read through all of her reviews before trying the recipe and many of them suggested that this tastes more like Summer Sausage than Pepperoni. I completely agree – it does taste much more like Summer Sausage. But no matter what you call it, we all really loved the flavor.

I kept having to remind myself while we were eating (one entire log of sausage in one sitting) that we didn’t need to feel guilt or hold back on eating this. We have, on occasion, purchased beef summer sausage from the store to eat on the run. The boys love it, but I’ve always been hesitant because the store-bought sausage is so full of MSG and who knows what. To now have this recipe in my hip pocket to make as a healthy, convenience food for my family is super exciting!

And did I mention that it is crazy easy to make? Yes, practically effortless. I used our healthy Grass Fed Beef and made five pounds of this wonderful meat, which tastes good with cheese and crackers or on sandwiches. I put our leftover meat in the freezer to use later. This is going to be a perfect grab and go snack to take to soccer games this fall!

Making this summer sausage was a three day process (although not time consuming or difficult). On the third day, after we got to smell it cooking on low heat all day, we were thrilled to eat it with cheese and fruits and veggies for dinner. Awesome!

Next, I’d like to try Tammy’s Spicy Pepperoni, which sounds like it has more of a pepperoni flavor. Score! Now we can have healthy summer sausage and healthy pepperoni too!

Does your family like summer sausage and pepperoni? You’ve got to try Tammy’s recipes!

Heavenly Homemaker's Club Members: Access your homepage and all your fantastic resources here! Not a member yet? Please join us!

Healthy Homemade Pigs in a Blanket

September 6, 2011 by Laura 158 Comments

This post may contain affiliate links. For more information, please see our disclosure policy.

Pigs in a Blanket

Have I ever told you about the trophy I won back when I was in high school? I’m not very athletic, so I hope you aren’t imagining some sport trophy. If so, you’re going to be rather disappointed, although amused, I’m sure.

My trophy proudly displayed a golden pig. Don’t laugh. It had a wooden base and stood about 15 inches tall and there at the top was a golden hog that was probably around 3 inches long. Oh how I wish I still had it so that I could take a picture to show you. Wait – what did I just say? Do I really wish I still had my pig trophy? Why? So that I could use it to decorate my living room? (Precious Moments figurines, family pictures, pig trophy…)  Yes, I think I’m glad my golden swine got misplaced.

In case winning pig trophies aren’t common where you’re from, let me explain my prize. I was a farm girl and we were involved in 4-H. Each year, we raised pigs to take to the fair. One year, my pig won Reserve Grand Champion. It was a proud moment – and also a little embarrassing because well, what teenage girl do you know that can truly appreciate being awarded with a trophy of a pig? The only one at the fair more excited/embarrassed than me was my brother. His pig took the Grand Champion prize, so his pig trophy was even bigger than mine. Yep, those were some pigs.

Kind of makes you want to read Charlotte’s Web again, doesn’t it?

I say all of that to say: “I had a pig trophy and you didn’t, neener-neener-neeeeeener.”

Just kidding. (Even though it’s probably true – neener-neener.)

But really, I just wanted to share a new idea I’ve come up with for making a healthy variety of Pigs in a Blanket. I don’t want to get all “farm animal technical” here on you, but even though these are called “Pigs in a Blanket”, there’s actually no pork in these. I prefer my hot dogs to be all beef, no nitrate, no nitrite, no nootrote (I made that one up) and otherwise as healthy as a processed meat can possibly be. But to call these “Cows in a Blanket” – well, that just does nothing for me. It doesn’t sound nearly as cute. And really, these treats do look like little pigs wrapped up taking a nap. As we all know, pigs are always willing to be swaddled. I know my 4-H pigs always went directly where I told them to go. (bah)

Healthier “Pigs in a Blanket”Yum

3 1/2 cups whole wheat flour
1 teaspoon sea salt
1 cup melted butter
1 cup plain yogurt
16 beef hotdogs, cut in half (I buy Applegate Farm Beef Hotdogs from Azure Standard)
32 small pieces of cheddar cheese (optional)

That dough recipe may sound a bit familiar. It’s my go-to recipe for Homemade Pizza Pockets, Homemade Poptarts and a variety of other goodies that require a flaky, buttery crust.

Mix flour, salt, butter and yogurt together. Knead ingredients together on a floured countertop until the dough is ready to be rolled out. Use a floured rolling pen to roll the dough to a 1/8 inch thickness. Use a knife to cut the dough into 32 rectangles.

Place one piece of cheese (if desired) and one hotdog half on each rectangle.

Roll it up and place it on a well buttered baking dish. Bake at 350° for 30 minutes or until the crust is lightly browned.

My kids especially like the Pigs in a Blanket made with cheese. These warm up great as leftovers and can be frozen. (I’d bake them first before freezing, then pull them out and rewarm them in the oven for a few minutes.)

I’m posting this recipe as a part of our Funky Fresh Kitchen series to remind us all that you can make all kinds of great dishes that are kid friendly and fun AND healthy!

Tell me all about your trophies, pigs, brothers, athleticism (or lack thereof), carrot sticks, or anything else remotely relating to this post. Your comment is your entry for a chance to win one of five $10 gift certificates to the Heavenly Homemakers Shop.

Heavenly Homemaker's Club Members: Access your homepage and all your fantastic resources here! Not a member yet? Please join us!

Funky Fresh Kitchen – The “Do You Really Need It?” Challenge

September 6, 2011 by Laura 140 Comments

This post may contain affiliate links. For more information, please see our disclosure policy.

What is all that stuffed crammed in the back of your utensil drawer? When’s the last time you used that fancy Blitzamachoppit that promised to make your life easier? And how many used twist-ties and drinking straws does it take to change a light bulb?

Oh wait. I think I just mixed two unrelated questions.

But still – I do believe it is time for some of us to take control of what is lurking in our kitchen drawers and cabinets. If you took advantage of the Do the Funky Kitchen ebook sale, you may have already started plucking unused items out of your kitchen and worked at finding them a better home (like in someone else’s kitchen – mwoohaha!!). If not, let me suggest to you that your kitchen will be a lot more fun and a lot more functional (funky!) if you get rid of items you are not using.

Here is a check-list of questions to ask yourself as you clean out cabinets and drawers in your kitchen (taken from the Do the Funky Kitchen ebook):

  1. Do I use it often?
  2. How many do I have?
  3. How many do I need?
  4. Did someone special give it to me?
  5. Does it work?

If you don’t use it, get rid of it. If you have too many, the extras need to go. If it doesn’t work, what is it still doing there anyway? And if you don’t even know what it is, you won’t miss it after you say goodbye. Keep only items that you use or items that are special to you.

If you are having a hard time deciding if you should get rid of something, do this:  Put the item in a potential “Garage Sale” box for a few weeks, but don’t get rid of it yet. Next Tuesday, if you’re preparing some food and suddenly remember the reason you had the Ultimate Onion Slicer (with built in tissues for inevitable tears, batteries not included) then by all means, go get it out of your box and put it back into your kitchen for future onion slicing and tear wiping needs. But if in fact you see that gadget in your “Garage Sale” box three months later and have to stand on your head while holding a flashlight so that you can try and figure out what in the world it is, I’m pretty sure you never needed it anyway and you can feel free to give it away or try to sell it.

Your Funky Fresh Kitchen Challenge today is to clean out at least ONE cabinet or drawer. Get rid of all items that are not useful to you. You’ll feel so much better, I promise!!

Leave a comment on this post letting us know one thing you can throw out or give away that will lessen any kitchen clutter you may have. Your comment will serve as your entry in the giveaway for one of five $10 gift certificates to our Heavenly Homemakers Shop.


Heavenly Homemaker's Club Members: Access your homepage and all your fantastic resources here! Not a member yet? Please join us!
« Previous Page
Next Page »

Join Our Community!

 Facebook Twitter E-mail Instagram Pinterest

Popular Posts

~ Will All of the Real Moms Please Stand Up?
~ Easy! Stir-and-Pour Whole Wheat Bread
~ How to Make Gatorade
~ 31 Real Food Breakfast Ideas
~ Dear Teenage Girls...
~ When Mom Takes a Step Back
~ The Inexpensive Health Insurance We Love!
~ Let's Talk Real Food Grocery Budgets

Check out our latest posts!

  • Big Family Food and Fun: September 20-26, 2026
  • Big Family Food and Fun: September 13-19, 2026
  • Big Family Food and Fun: September 6-12, 2026
  • Big Family Food and Fun: August 30-September 5, 2026
  • Big Family Food and Fun: August 23-29, 2026
Home  ~  Simple Meals  ~  Club Membership  ~  Shop  ~  Privacy Policy  ~  Disclosure  ~ Contact

Copyright © 2026 · Beautiful Pro Theme on Genesis Framework · WordPress · Log in