Heavenly Homemakers

Encouraging women in homemaking, healthy eating and parenting

  • Home
    • About
    • FAQs
  • Recipes
    • Bread and Breakfast
    • Condiments
    • Dairy
    • Main Dishes
    • Side Dishes and Snacks
    • Desserts
    • Gluten Free
    • Instant Pot
    • Crock Pot
    • Heavenly Homemaker’s Weekly Menus
  • Homemaking
    • Real Food Sources
  • Store
  • Contact
    • Advertise
    • Disclosure
    • Privacy Policy
  • Simple Meals
  • Club Members!

Low Sugar Flourless Peanut Butter Cookie Recipe

May 11, 2016 by Laura 14 Comments

This post may contain affiliate links. For more information, please see our disclosure policy.

Low Sugar Flourless Peanut Butter Cookies and my Mother’s Day flowers!
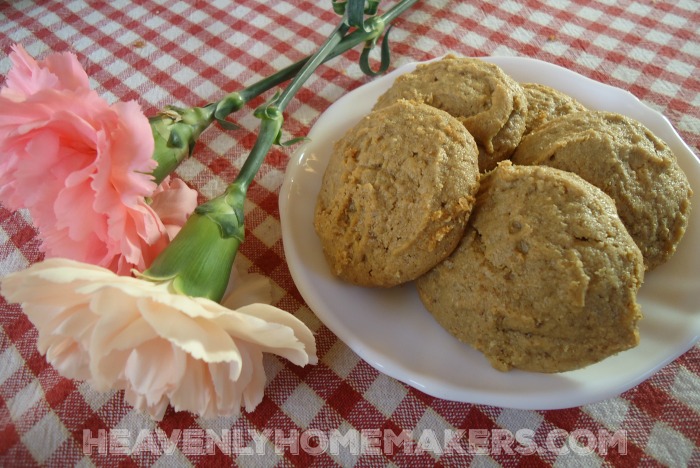
Low Sugar Peanut Butter Cookies

About the time I think I’ve cut the sugar in every recipe that would possibly work, I find another that works just as well.

Do you remember my Flourless Peanut Butter Cookies? One cup peanut butter, one cup sugar, one egg. They’re delicious. They’re naturally gluten free so I can make them for my GF friends. They’re incredibly easy. And they have a very high sugar content.

I thought surely cutting the sugar in that recipe would mess up the consistency and turn out weird cookies – if they even turned out cookies at all. I am so happy to say, “I was wrong.”

The only thing that didn’t work when I cut the sugar in this recipe is that the dough didn’t allow me to do the cute little criss-cross fork squish thing. The dough was too sticky. Thankfully, life goes on and we’re all grown up enough to eat our peanut butter cookies without fork-squishing them, right? Thank goodness.

Low Sugar Flourless Peanut Butter CookiesYum

5.0 from 1 reviews
Low Sugar Flourless Peanut Butter Cookie Recipe
 
Save Print
Author: Laura
Serves: 20ish
Ingredients
  • 2 cups natural peanut butter
  • ⅓ cup sucanat or brown sugar
  • 1 egg
Instructions
  1. Mix the ingredients together until smooth.
  2. Use a small or medium scoop to place dough balls on a cookie sheet, about two inches apart.
  3. Bake in a 350° oven for 10-12 minutes or until cookies are lightly browned.
  4. Allow them to sit on the cookie sheet for a few minutes before removing them to cool on a rack.
3.4.3177

Get my Homemade Natural Peanut Butter Recipe here.
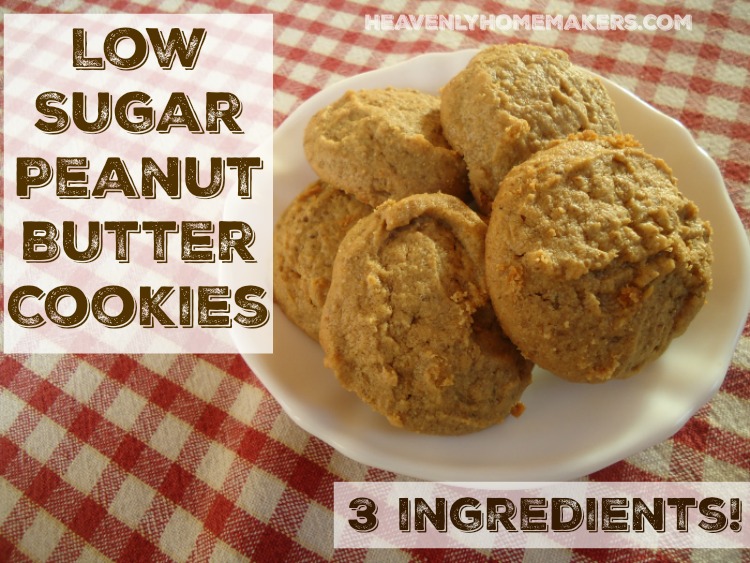
Low Sugar Peanut Butter Cookie Recipe

Matt and I are totally good with barely sweet treats. But the boys? Well, they’re a little more particular. Therefore, my kids are always the true testers for whether or not one of my Low Sugar Treats actually tastes good to other people.

I always hesitate to say these are low sugar, come try them because sometimes that makes the boys unsure from the get-go. But there I was, standing in the kitchen eating a peanut butter cookie. This made the boys suspicious. If Mom is eating it, it must be low sugar.

All that to say: These cookies smelled really good, which made my boys want some. Then they saw me eating them, which made them not so sure. I insisted they try a bite because I thought they were so good I could hardly stand it, and I knew they would like them once they tried.

What did they think?

Well, let’s just say that I had to stop them from finishing the entire batch in one sitting, and we all started shaking our heads once again at Betty Crocker for making us all think we needed eighty cups of sugar in cookie recipes just to make them taste good. C’mon, Betty.

You’ll want to look through all of our tried and true Low Sugar Recipes here. It is amazing how much sugar you can cut out of treats and still make them taste delicious! These Peanut Butter Cookies went from 2 cups down to 1/3 cup of sugar – and they are amazing.

Need more Low Sugar Cookie Recipes?

  • Easy {Low} Sugar Cookies
  • Low Sugar Lemon Melt-Away Cookies
  • Low Sugar Almond Melt-Away Cookies
  • Low Sugar Orange Melt-Away Cookies
  • Low Sugar Lime Melt-Away Cookies
  • Low Sugar Chocolate Fudge Cookies
Heavenly Homemaker's Club Members: Access your homepage and all your fantastic resources here! Not a member yet? Please join us!

The Best and Easiest Homemade Guacamole

May 5, 2016 by Laura 8 Comments

This post may contain affiliate links. For more information, please see our disclosure policy.

I posted this recipe several years ago, but last month when I was cleaning out some old, irrelevant posts – I think I somehow deleted this one for Homemade Guacamole! Yikes. One should never delete their guacamole.

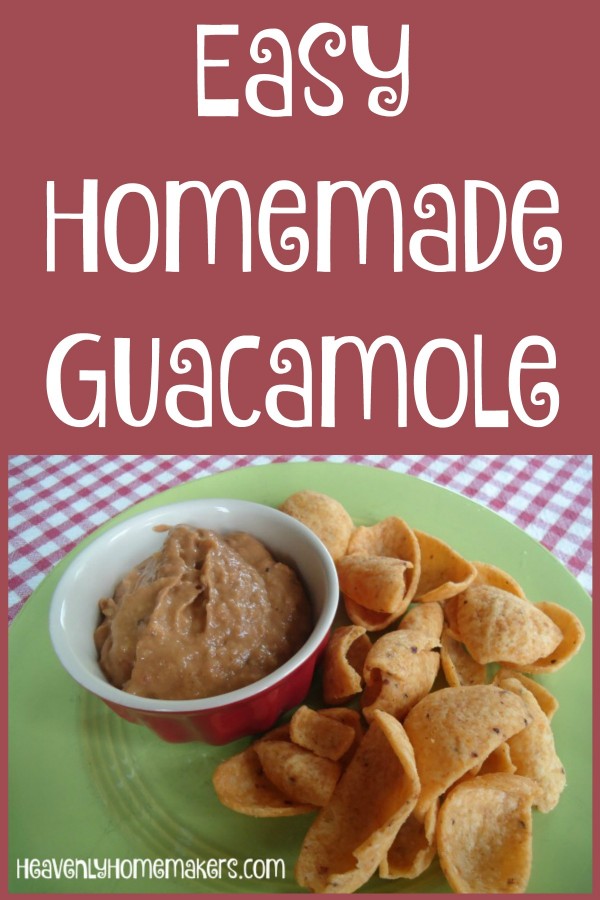
Homemade Guacamole

What I love about guacamole is that it is a super easy way for our family to add nourishment to the table. Everyone in our family loves this guac. They just think they’re eating chips with dip, and I’m like, “Yay, they’re eating another veggie!” Actually, avocados are a fruit aren’t they? Well, whatever. They are super nutritious.

Before I (re)share this recipe, I need to have a slightly weird conversation with you. Avocados are green and guacamole is usually green, but what happens when you mix green (avocados) and red (salsa) together? Wellllll….

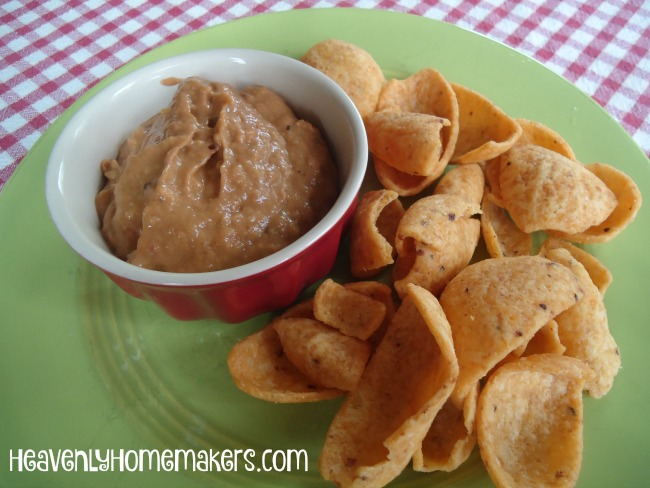
Let’s just say my guac ends up looking a little bit like…um, well, it’s brownish. Red and green make brown, and that’s what color your guac will be when you follow this recipe. There is no other way. So the end result of blending these fine ingredients together makes an ugly mixture in a bowl.

We are used to it and don’t even care. But when we serve it to company we have to have a “sorry this guacamole looks like baby poop, please try it anyway” conversation. Then we all enjoy snacking together. Hospitality is always fun at the Coppinger house.

Well now that we got that out of the way…

Easy Homemade GuacamoleYum

The Best and Easiest Homemade Guacamole
 
Save Print
Author: Laura
Ingredients
  • 4 ripe avocados
  • 16-ounce jar of your favorite salsa
  • 3-4 Tablespoons of lime juice
Instructions
  1. Cut open the avocados, pull out the pit, and scoop the "meat" into a blender.
  2. Dump salsa and lime juice into the blender.
  3. Blend until smooth.
  4. So what if it's brown?
3.4.3177

Do you see how easy this is? Dump in the ingredients, blend it up, scoop it out, eat it because you just can’t stop. After one bite, you will no longer care what color it is because the flavors are just so wonderful together.

Easy Homemade Guacamole

Don’t sweat the exact measurements on this “recipe.” Add or subtract ingredients to taste. Use hot salsa, medium, or mild – your choice. It pretty much tastes great no matter how you blend it. It just looks ugly. Bless its heart.

Heavenly Homemaker's Club Members: Access your homepage and all your fantastic resources here! Not a member yet? Please join us!

How to Make Iced Coffee for a Crowd

May 3, 2016 by Laura 14 Comments

This post may contain affiliate links. For more information, please see our disclosure policy.

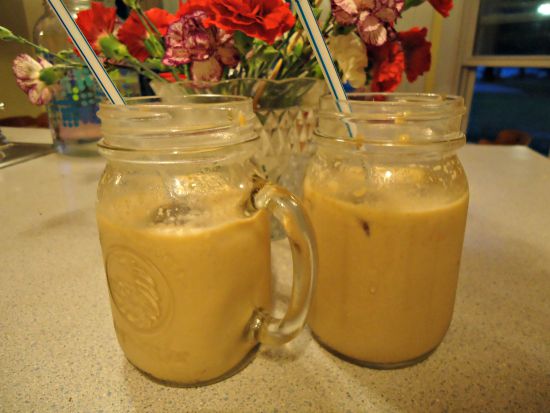
iced coffee

In three years I went from not liking coffee, to loving coffee, to becoming a coffee snob. I mean this in the sweetest way. I’ve learned that there’s coffee, and then there’s coffee. Can I help it if I prefer the coffee that makes me feel the actual love of Jesus flow over me? Well of course I can’t help this.

I blame my oldest son for my particular coffee preferences, because any time I can blame one of my children for something, I do. (I hate it when I spill something and none of my kids is around to blame. It’s very frustrating.)

Why are my coffee snob issues Asa’s fault? Because I was in my early years of drinking coffee about the time he took a mission trip to Ecuador two years ago. While he was there, I happily sipped my “coffee from a red canister that shall remain nameless” like I had done since I started my coffee drinking ways. When he came back home, he brought me a cute little Ecuador bracelet as a souvenir and a package of Ecuadorian coffee. How nice, I thought. Coffee from Ecuador. I’ll pray for the ministry there while I drink it. It will be so lovely.

Lovely didn’t even begin to describe this experience. I took my first sip and exclaimed, “Oh my goodness!! This coffee!! I’ve never had anything like it. I think this must be the most amazing thing I’ve ever tasted. I might even like this more than butter.”

From that moment on, no other cup of coffee measured up. Once you have the best, it’s hard to go back.

(Our second son, Justus, will have the delightful opportunity to go to Ecuador this summer for his first overseas mission trip. I am so excited for him to bring me back a suitcase full of coffee share the love of Jesus with people there.)

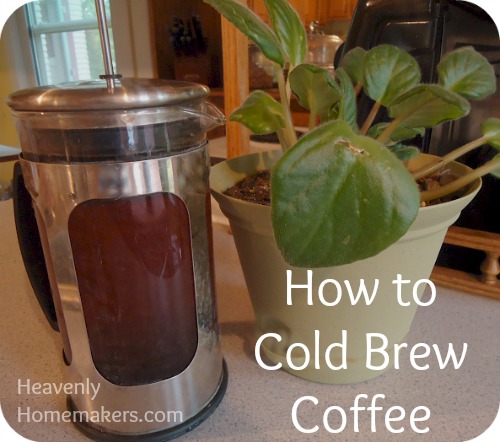
How to Cold Brew Coffee

Needless to say, I hoarded my little bag of Ecuador coffee and rationed it – saving it for the mornings I could truly savor it. I might not have shared even a drop with anyone, but I can’t remember all the details. I’ve since started buying (and yes, even sharing) these Guatemalan coffee beans online. I find the flavor to be very similar to the Ecuador beans. This coffee is so delicious!

I questioned myself. “Should I really be spending extra money on high quality coffee?” So I did the math.

I discovered that it costs between $0.50-$0.60 per pot of coffee when I use the good stuff. This is more than a pot of the cheaper coffee. But worth it? Well, is it worth it to spend more on butter instead of settling for margarine? Obviously! (I know. That’s not an apples to apples comparison because the butter/margarine thing is more about eating real food for good health, but still. I think it’s worth it to pay a little extra for good quality and taste.)

Iced Coffee for a Crowd

Well, all that to say – get yourself some good coffee and treat people to this delicious Iced Coffee I’m going to tell you about. Or just use the cheap stuff for this recipe since you’re adding sugar anyway. :)

Last week I was asked to provide drinks for a get-together. I made a gallon of Homemade Lemonade (with sugar instead of maple syrup to cut the cost). Then I decided to make a big jar of iced coffee just for fun. It was a hit, so I thought I’d better share the idea with you!

My rough calculations tell me that a half-gallon of this Homemade Iced Mocha Coffee costs about $1.00. (I priced it at the store a few days later. The cheapest one cost $2.66. Boom.)

How to Make Iced Coffee for a CrowdYum

How to Make Iced Coffee for a Crowd
 
Save Print
Author: Laura
Ingredients
  • 1 quart coffee
  • 1 tray coffee ice cubes
  • ½ cup heavy cream
  • ½ cup homemade chocolate fudge sauce (more or less to taste)
Instructions
  1. Cold brew coffee, or hot brew as normal, then chill.
  2. Stir cold coffee, coffee ice cubes, cream, and chocolate sauce into a half-gallon jar.
  3. Shake well before serving.
3.4.3177

Some helpful links for you:

  • How to make coffee ice cubes so you won’t water down your cold coffee
  • How to cold brew coffee (but you can just make a normal hot pot of coffee, then chill it)
  • How to make chocolate fudge sauce (not a low sugar recipe) :)

You might also enjoy this idea:

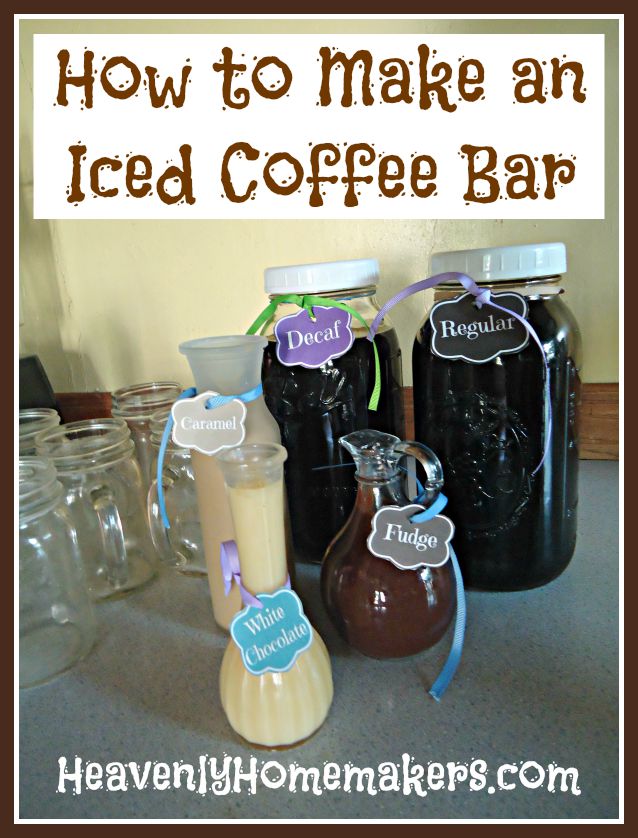
How to set up an Iced Coffee Bar

How to Make an Iced Coffee Bar

We set up that Iced Coffee Bar for my birthday guests last year and it was so much fun! See? I’m nice and share my good coffee now. I’ve grown so much.

Are you particular about what kind of coffee you drink?

Heavenly Homemaker's Club Members: Access your homepage and all your fantastic resources here! Not a member yet? Please join us!

Easy Salsa Chicken Salad Recipe (Less Than 5-Minutes of Work)

April 28, 2016 by Laura 2 Comments

This post may contain affiliate links. For more information, please see our disclosure policy.

Hi! It’s me. The girl without an oven.

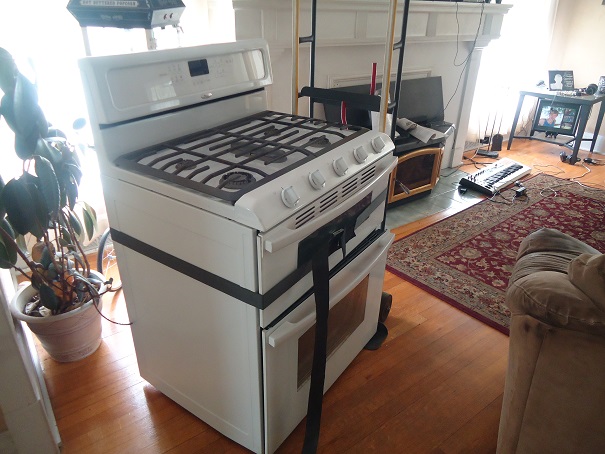
Actually, I have an oven. It’s sitting in my living room by my couch. See? There it is:

gas oven

Oh man. If you’re one of my Facebook followers, you might have witnessed my first ever Facebook Live video where I showed off my new stove and made a bad joke about having gas. “Going Live” with you was super fun, so I’ll definitely be doing that more often. Please check it out and join us!

While I type, my favorite guy is going up and down the stairs to complete the transition from electric hook-up to gas. As soon as my pretty new dream oven is hooked up, I will be making a Peach Cobbler to reward Matt for all his hard work getting this set up for me! (To catch you up on the latest, on a whim we checked to see if Craigslist had anything for us. We didn’t have our hopes up. But would you believe, we found exactly one double oven and it is exactly what we want/need – except better?! And we got it for an amazing price!! So thankful!)

During the days I’ve been without an oven I’ve been using my crock pot, my electric skillet, my cast iron griddle, my blender, and my waffle iron quite a bit. As you can see, being oven-less has not been the end of my world.

This Easy Salsa Chicken Salad recipe is actually just a simple variation of my Crock Pot Chicken Tacos. I made this last Sunday when we needed to leave for church in ten minutes but I hadn’t figured out lunch for the day. I got out frozen chicken, ran it under some hot water, plopped it into my crock pot, dumped in some salsa, and left for church.

I said, “Wow, easiest meal ever.” and my boys said, “Mom you say that every day.”

It’s true. I only make food that’s easy. Multi-step recipes are not for me. And yet here we are still eating a healthy, real food diet. Don’t forget how to put the easiest, healthiest side dishes on the table too. Fruits and veggies are the best convenience foods there are!

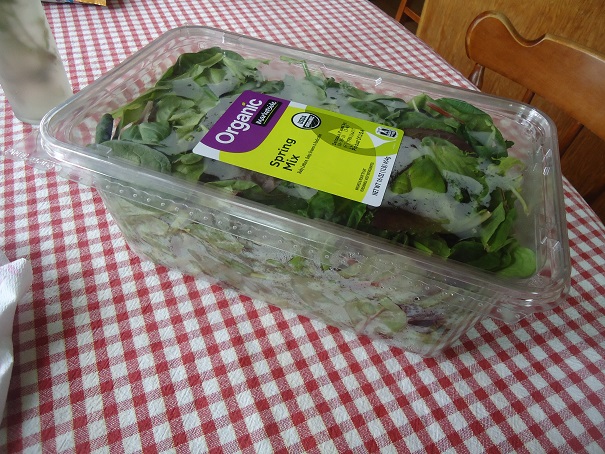
organic spring mix

Speaking of healthy convenience foods – big containers of Organic Mixed Greens are my favorite fast food to get at the grocery store! Instead of making my Salsa Chicken into a taco last Sunday, I dumped a big hand-full of mixed greens into a bowl, added my tasty chicken along with some tomatoes, black beans, and corn – and I had the best salad! I didn’t even need salad dressing. (Though you can take a look at the yummy options I have listed here.)

Easy Salsa Chicken SaladYum

Easy Salsa Chicken Salad Recipe (Less Than 5-Minutes of Work)
 
Save Print
Author: Laura
Ingredients
  • 2 pounds boneless chicken thighs or breasts
  • 2 cups salsa
  • Your choice of greens
  • Your choice of salad fixins (I like tomatoes, corn, and black beans for this salad)
Instructions
  1. Place fresh or frozen chicken in a crock pot.
  2. Dump salsa over the chicken.
  3. Cook on low for about 4 hours.
  4. Shred the chicken and serve with your favorite salad fixins.
3.4.3177

Easy Salsa Chicken Salad

A similar recipe to this Salsa Chicken idea is this Crock Pot Bbq Chicken Recipe. Dump it into the crock pot and go!

What are your favorite healthy convenience foods?


Heavenly Homemaker's Club Members: Access your homepage and all your fantastic resources here! Not a member yet? Please join us!

Stir-and-Pour Chocolate Swirl Bread

April 21, 2016 by Laura 9 Comments

This post may contain affiliate links. For more information, please see our disclosure policy.

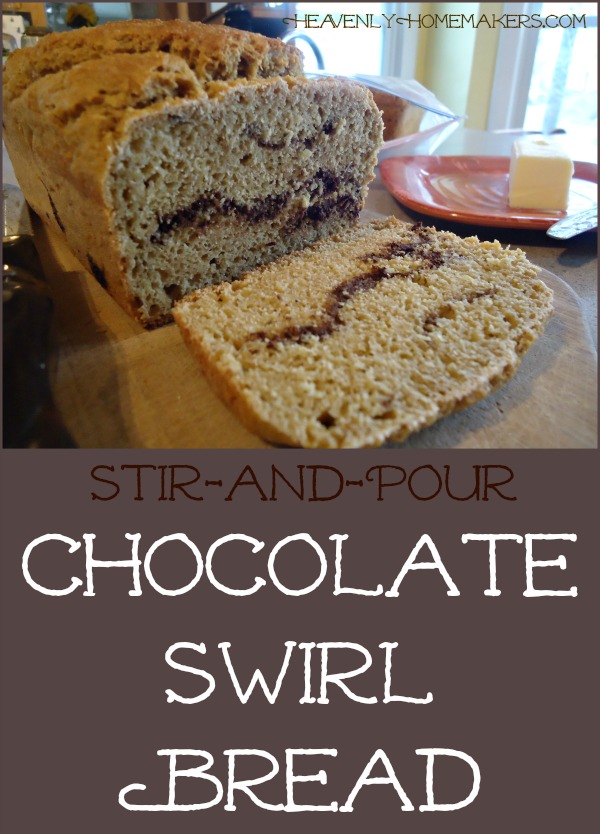
Let us not miss the irony of the timing of this post. As you know, I currently have no oven. As great as this Stir-and-Pour Chocolate Swirl Bread recipe is, I cannot bake any right now. I made this last week before my oven died and I’m just now getting around to posting about it.

Chocolate Swirl Bread

You though. You probably all have ovens. On behalf of my oven-less self, won’t you please bake this bread for your family? It would make me so happy. (My request is not completely selfish. It should also make you happy. Because chocolate. And homemade bread.)

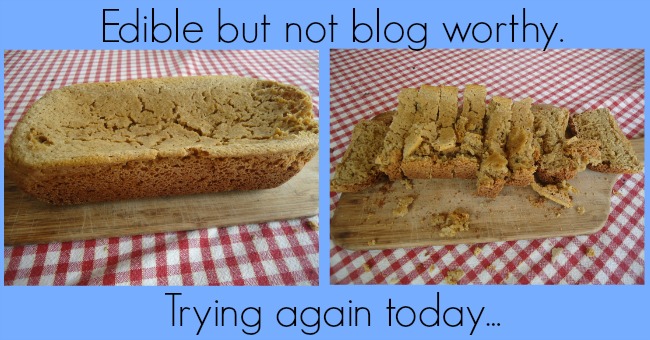
Side note: I made some measurement adjustments and tried the regular Stir-and-Pour Bread recipe in my crock pot yesterday. I figured if it works to bake quick bread in a crock pot, I could try making a yeast bread. It turned out….not great. I’m determined though. I’m gonna keep tweaking and try again. In the meantime, feel free to make fun of this way too crusty on the outside, weirdly chewy in the middle attempt at crock pot bread…

Crock Pot Bread Fail

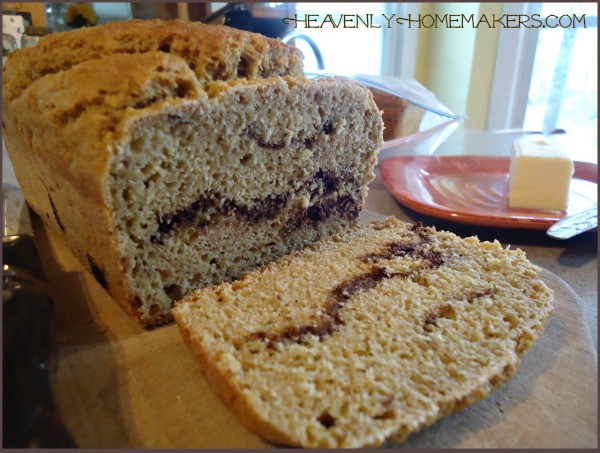
But moving on to share how to bake this Stir-and-Pour Chocolate Swirl Bread in an actual oven. This is made in a similar way to the Stir-and-Pour Cinnamon Swirl Bread. Seeing as we don’t have to knead this bread (hallelujah!) it’s a bit hard to actually roll this out and make lovely swirls. I simply layered this bread. I put one-third of the dough into the pan, then spread on 1/2 of the chocolate layer. Then I spread in another third of the bread dough, and spread on the remaining half of the chocolate. Finish by spreading on the last of the bread dough. Bake. Slice. Eat. Appreciate the fact that you have an oven. Amen.

Stir-and-Pour Chocolate Swirl BreadYum

Stir-and-Pour Chocolate Swirl Bread
 
Save Print
Author: Laura
Ingredients
  • 4 cups whole wheat flour (I use freshly ground hard white wheat)
  • 2 teaspoons active rise yeast
  • 2 Tablespoons sucanat or sugar or honey
  • 1 teaspoon sea salt
  • 2 cups warm water
  • 3 Tablespoons honey
  • 2 Tablespoons unsweetened cocoa powder
  • 2 Tablespoons milk or water
Instructions
  1. Stir together flour, yeast, sucanat, salt, and water.
  2. Cover and allow it to sit for 30 minutes.
  3. In a small saucepan, cook and stir together the honey, cocoa, and water until smooth.
  4. Remove from heat.
  5. Pour ? of the mixture into a well-buttered loaf pan.
  6. Spread ½ of the chocolate mixture over the dough.
  7. Spread another ? of the dough over the chocolate layer.
  8. Sprinkle remaining ½ of the chocolate mixture over the dough.
  9. Spread remaining dough over the top.
  10. Bake in a 350° for 50-60 minutes or until evenly browned.
  11. Allow it to sit in the pan for 15 minutes.
  12. Remove the loaf to let it cool completely before slicing.
3.4.3177

Stir and Pour Chocolate Swirl Bread

Other Stir-and-Pour Bread variations include:

  • Stir-and-Pour Sandwich Bread recipe.
  • Stir-and-Pour Rolls
  • Stir-and-Pour Pizza Crust
  • Stir-and-Pour Cinnamon Swirl Bread

Raise your hand if you love this Stir-and-Pour Bread and all the greatness it offers!!

Heavenly Homemaker's Club Members: Access your homepage and all your fantastic resources here! Not a member yet? Please join us!

Low Sugar Butterscotch Bars

April 19, 2016 by Laura Leave a Comment

This post may contain affiliate links. For more information, please see our disclosure policy.

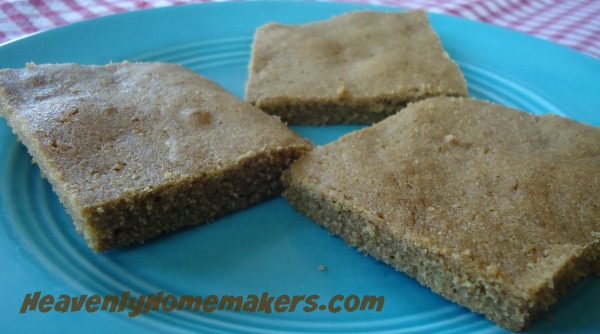
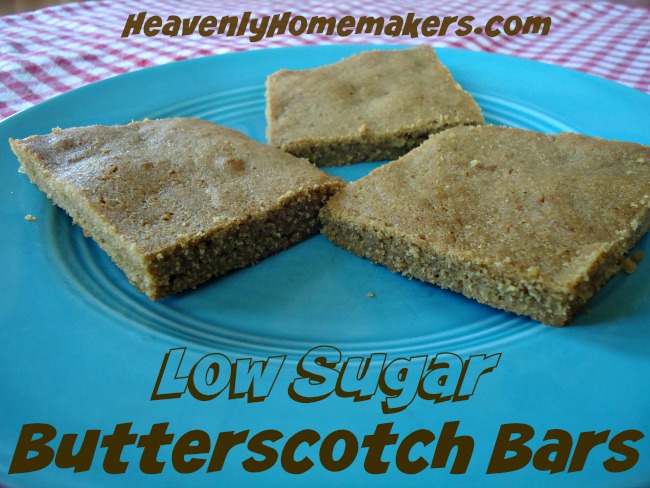
It’s a happy day. Gather ’round, my friends. I’ll share the secret of how we can remake a Heavenly Homemaker’s classic recipe, Butterscotch Bars, into Low Sugar Butterscotch Bars.

butterscotch bars 1

We have Colleen to thank for this. She’s the one who emailed me after I shared my Low Sugar Chocolate Fudge Cookie recipe, asking how I thought my Butterscotch Bars would turn out if we cut the sugar.

I wasn’t confident. While I’ve found that many recipes work amazingly well when we cut the sugar, the two I felt might have to stay sugar-full were the Butterscotch Bars and Chocolate Fudge Brownies.

But you never know until you try, right? Last week I shared that indeed, we can make Low Sugar Chocolate Brownies – proving myself wrong that it just wasn’t possible. Today I’m sharing that sugar in the Butterscotch Bars can be cut too! Boom!

Low Sugar Butterscotch BarsYum

Low Sugar Butterscotch Bars
 
Save Print
Author: Laura
Serves: 15 bars
Ingredients
  • 1 cup melted butter
  • ½ cup sucanat or brown sugar
  • 2 eggs
  • 1 teaspoon vanilla extract
  • 1¼ cups whole wheat pastry flour (regular white whole wheat flour works too)
Instructions
  1. Cream melted butter and sucanat together.
  2. Add eggs and vanilla.
  3. Stir in flour and mix well.
  4. Spread mixture into a 9x13 inch baking dish.
  5. Bake in a 350° oven for 20 minutes.
3.4.3177

Low Sugar Butterscotch Bars

Confession: I love these low sugar bars. I actually find that they are still almost too sweet for me so I can only have a tiny sliver. My family thinks they’re good. But when I made a pan of Butterscotch Bars for a houseful of college kids last week, I made the full sugar version.

If you’re going for a treat that’s rich and gooey – you’ll want to make the regular 2-cups of sugar (gag me) Butterscotch Bars. But if you want a treat that is lightly sweetened and deliciously tasty (just not ooey gooey super sweet) – this Low Sugar Butterscotch Bar recipe is what you want!

Find more Low Sugar Treats here. You guys – the list is getting long!! I’m loving this!

Heavenly Homemaker's Club Members: Access your homepage and all your fantastic resources here! Not a member yet? Please join us!

Rich Dark Chocolate Fudge Brownies (Low Sugar!)

April 14, 2016 by Laura 13 Comments

This post may contain affiliate links. For more information, please see our disclosure policy.

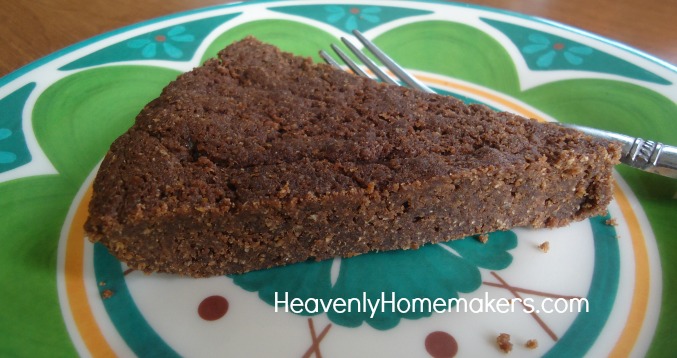
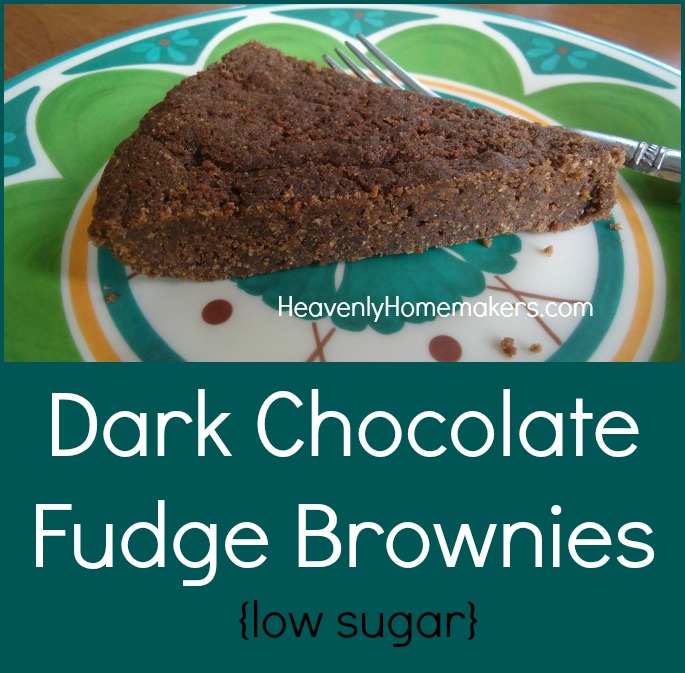
These Dark Chocolate Fudge Brownies are low in sugar. Can you believe it?

Low Sugar Fudge Brownie

Sugar became my enemy about the time I turned 39. I feel absolutely awful – for hours or even days – if I eat sugary treats. Therefore I haven’t been able to eat a regular brownie for about three years.

Avoiding desserts hasn’t been hard for me because a cookie is not even worth a migraine. Sometimes just the smell of sweets turns my stomach, thinking of how terrible I’ll feel if I eat them. So will power? That has nothing to do with my “I’ll pass on the dessert, thanks.” Sweets literally make me sick. I really do not want them.

You know this is saying something since I’m the one who used to eat sugar with my sugar and wash it down with a fizzy glass full of sugar (and then have seconds).

Perhaps I consumed a lifetime quota of sugar by the time I was 39. More likely I think this is a result of some major cleansing and heavy metal detox I’ve been doing with my natural doctor during the past few years. My body is at a point of only wanting the good stuff. Okay then. This is probably the best side effect ever.

Having said all that, I do really appreciate a treat that is lightly sweetened. My body can handle these in moderation, and experimenting with recipes to drastically cut the sugar has been really fun. As you know from reading any of my recent low-sugar recipes – I’m learning that treats and dessert really do taste wonderful even when the sugar content has been cut in a huge way.

This, of course, has been greatly beneficial for our entire family (and now for yours!). I’ve wanted for so long to cut down on our sugar intake. It’s just hard since sugar tastes so doggone good.

Thorough research has taught me that high quality fats like coconut oil, butter, and palm oil are not our enemy when it comes to good health. SUGAR IS THE ENEMY. I should probably write an entire post about this. (Oh wait. I just did.) But go read it later because, my friends, I have a Low Sugar Brownie Recipe and I’m not afraid to eat it. This is my most exciting discovery in all my low-sugar recipe experimentation. We can cut the sugar in brownies!!!!

Someone hold me back. Not from eating too many. Just from SCREAMING TOO LOUDLY. This is just exciting. You’ll be screaming too. I support your decision to scream. (Outside. While we’re inside we use our inside voices.)

Rich Dark Chocolate Fudge BrowniesYum

5.0 from 1 reviews
Rich Dark Chocolate Fudge Brownies (Low Sugar!)
 
Save Print
Author: Laura
Serves: 12-15
Ingredients
  • 1 cup melted butter
  • ⅓ cup unsweetened cocoa powder
  • ½ cup sucanat or brown sugar (I use just under ½ cup, actually)
  • 2 eggs
  • 1 teaspoon vanilla extract
  • 1¼ cups whole wheat pastry flour
Instructions
  1. Mix together melted butter, cocoa, and sugar.
  2. Add eggs and vanilla, stirring well.
  3. Mix in flour until well combined.
  4. Spread into a 9x9 inch baking dish or a 9 inch pie dish.
  5. Bake in a 350° oven for 20 minutes.
  6. Allow brownies to cool before cutting them (good luck).
3.4.3177

Dark Chocolate Fudge Brownies {Low Sugar}

These bake up a little different from “full sugar” brownies. You may notice that the butter sizzles on the top of these while they’re baking. Don’t worry a bit. Take them out of the oven after 20 minutes of baking and let them sit for a few minutes. The butter settles in and turns your brownies fudgy and moist.

Because the sugar is cut down in this recipe, you’ll find that these taste more like dark chocolate. All of my kids ate them without complaint because these are still plenty sweet. (But not so sweet that I can’t have a small piece, so yay!)

Onward we go, testing out more low sugar recipes! How fun is this?!

Heavenly Homemaker's Club Members: Access your homepage and all your fantastic resources here! Not a member yet? Please join us!

Homemade Whole Wheat Graham Crackers

April 13, 2016 by Laura 187 Comments

This post may contain affiliate links. For more information, please see our disclosure policy.

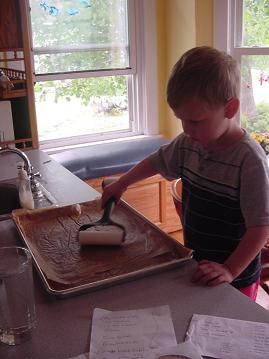
This Whole Wheat Graham Crackers recipe was originally posted in 2008. My current big 11-year old was a tiny 3-year old back then and I can’t stop looking at the pictures in this post.

I updated this post to have an easy-to-print recipe option for you. These crackers are crunchy-crispy…and taste SO GOOD. Oh, I hope you love them like we do.

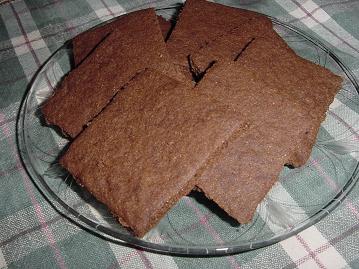
If you like the Honey Graham Cracker recipe, you’ll love the fact that you can also make CHOCOLATE Graham Crackers! Just add 1/3 cup cocoa to the recipe.

Whole Wheat Graham Crackers Yum

5.0 from 1 reviews
Healthy Treat for Today: Homemade Whole Wheat Graham Crackers!
 
Save Print
Author: Laura
Ingredients
  • 2 ¼ cups whole wheat flour
  • ½ cup sucanat (dehydrated cane sugar juice)
  • 1 teaspoon baking powder
  • ½ teaspoon baking soda
  • ½ teaspoon salt
  • ¼ teaspoon cinnamon
  • 4 Tablespoons honey
  • ¼ cup water
  • 1 teaspoon vanilla
  • ½ cup butter, melted
Instructions
  1. Preheat oven to 350°.
  2. Melt stick of butter in a pan on the stove. Set aside.
  3. In a mixing bowl, stir together the flour, sucanat, baking powder, baking soda, salt and cinnamon.
  4. Add the liquids: honey, water, vanilla and melted butter.
  5. Stir well until a nice ball of dough is formed.
  6. Cut two pieces of Parchment paper the size of the cookie sheet.
  7. Lay one piece of parchment paper on the cookie sheet.
  8. Place the ball of dough on the parchment paper.
  9. Lay the other piece of parchment paper on top of the ball of dough. Squish dough down a little with your fist.
  10. Use the rolling pin to roll the dough between the pieces of parchment paper. Roll until the dough covers the whole cookie sheet.
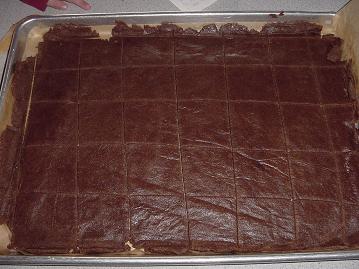
  11. Remove the top piece of parchment paper. Cut rolled dough into 2 inch squares, or cut shapes with cookie cutters, being sure to separate the shapes from the surrounding dough a little.
  12. Bake in oven for 18 minutes.
  13. Turn oven off, but leave crackers in the oven to get crisp.
  14. Remove from oven after 30 minutes to one hour. Break graham crackers apart.
  15. Store in a air tight container.
3.4.3177

grahamcrackers1sm.JPG
Malachi is finishing up the rolling for Mama!

chocgrahamcrackers1sm.JPG
Here’s a shot of the chocolate graham crackers
cut into squares and ready to bake.

grahamcrackers3sm.JPG
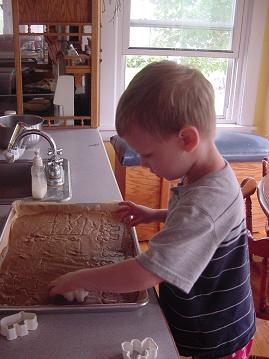
Malachi is using little cookie cutters to make “animal crackers”!

chocgrahamcrackers3sm.JPG
Here’s a plate of the Chocolate Graham Crackers.
(Got milk?)

My kids get so excited when I make these. They are a great snack to have on hand. Try them and see what you think! :)

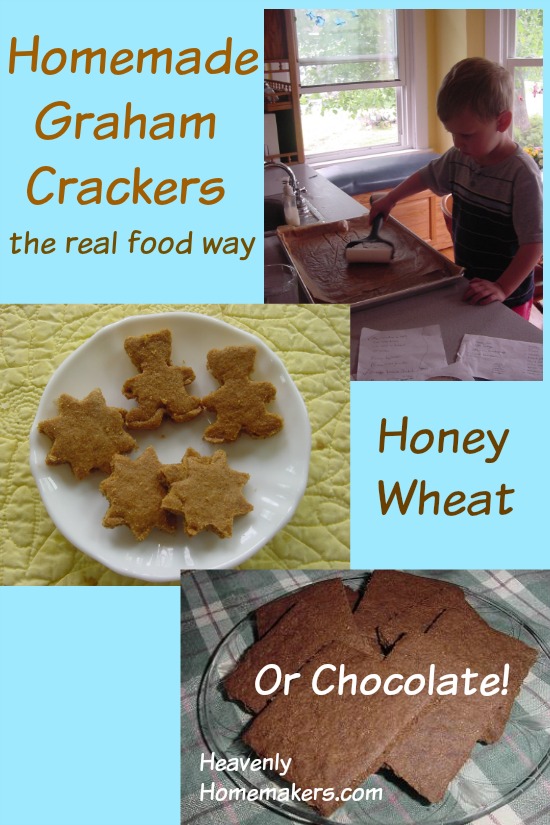
Homemade Graham Crackers

Heavenly Homemaker's Club Members: Access your homepage and all your fantastic resources here! Not a member yet? Please join us!

The Easiest Sweet Vanilla Coffee Creamer Recipe

April 10, 2016 by Laura 25 Comments

This post may contain affiliate links. For more information, please see our disclosure policy.

Before I say anything else about this Sweet Vanilla Coffee Creamer, I should tell you that this tastes 100-times more amazing if you use Homemade Vanilla Extract. Not that I’ve tested it on anything else. This is just an obvious conclusion since homemade vanilla makes everything 100-times better.

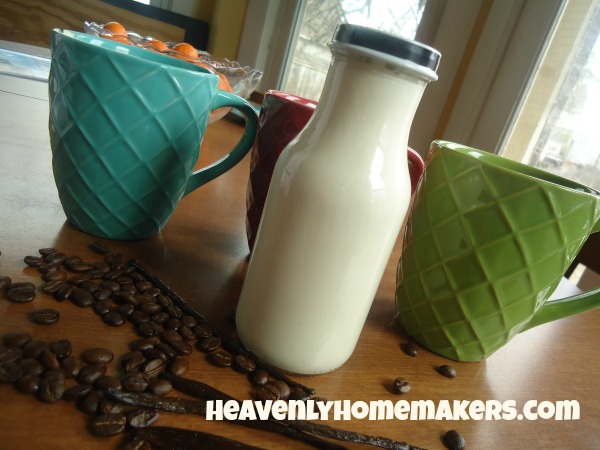
Homemade Vanilla Creamer

You like how my fruit bowl is in the picture behind my coffee mugs and bottle of coffee creamer? It is there to show that photography is not my gift. Also, using precious energy to walk all the way around the table and move it out of the picture would have been just too much. What am I? A teenager? Plus I hadn’t had my coffee yet. Thanks for understanding.

I did take the time to scatter coffee beans and vanilla beans on the table for effect. Mostly they just smelled really good. Try to imagine.

So why did I make a Sweet Vanilla Coffee Creamer recipe to share with you? After all, I drink my coffee with no sweetener – just some cream (which is perfectly sweet if you ask me). I did it for the kids. MY kids. Yup. Justus and Elias enjoy a cup of coffee with me now a few mornings each week. It’s pretty special that we can share this simple pleasure together. There’s just something cool about sharing a cup of coffee with someone. (Though to be clear – I do not share my own personal cup of coffee. It’s mine and everyone else can back away and get their own cup. I guess I should have said that I share my pot of coffee. I’m sorry to give you the impression that I was actually nice enough to share even a drop of what is in my mug each morning.)

For the past several months, the boys have been making their coffee with a splash of cream and a squeeze of NuNaturals Chocolate Syrup. I love that this makes such an amazing cup of coffee that they love – particularly because it contains no sugar. If you haven’t tried this concoction, you really want to. You won’t believe how good it is.

A couple of weeks ago, Elias asked what else he could do with his coffee – you know – for a little variety? He played with different NuNatural Flavored Stevia options, but nothing hit a home-run for him.

So we experimented with ingredients to come up with this Sweet Vanilla Coffee Creamer. Unfortunately it’s not stevia-sweetened like the chocolate syrup – so he has this one less frequently. Still though – he thinks it’s pretty tasty and worth sharing with you. Remember – Homemade Vanilla makes all the difference. Why just put in one teaspoon when you can put in two?

Sweet Vanilla Coffee CreamerYum

5.0 from 2 reviews
The Easiest Vanilla Coffee Creamer Recipe
 
Save Print
Author: Laura
Ingredients
  • 1 cup half-and-half
  • 3-4 Tablespoons real maple syrup
  • 2 teaspoons vanilla extract
Instructions
  1. Place all ingredients in a jar or bottle.
  2. Shake well.
  3. Refrigerate for up to two weeks.
  4. Shake well before each use.
  5. Pour desired amount into a hot cup of coffee and stir.
3.4.3177

Homemade Sweet Vanilla Coffee Creamer Recipe

Feel free to sweeten it more or less to reach your desired flavor preference. This recipe is a no-brainer so even if you don’t measure exactly, you can’t mess it up.

Would you be so kind as to leave a comment sharing how you like your coffee? I know my boys would have fun playing with different combinations and flavors – and maybe we can come up with more recipes to share!

This post contains affiliate links.

Heavenly Homemaker's Club Members: Access your homepage and all your fantastic resources here! Not a member yet? Please join us!

Low Sugar Dairy Free Chocolate Sauce (3 Ingredients!)

April 5, 2016 by Laura 6 Comments

This post may contain affiliate links. For more information, please see our disclosure policy.

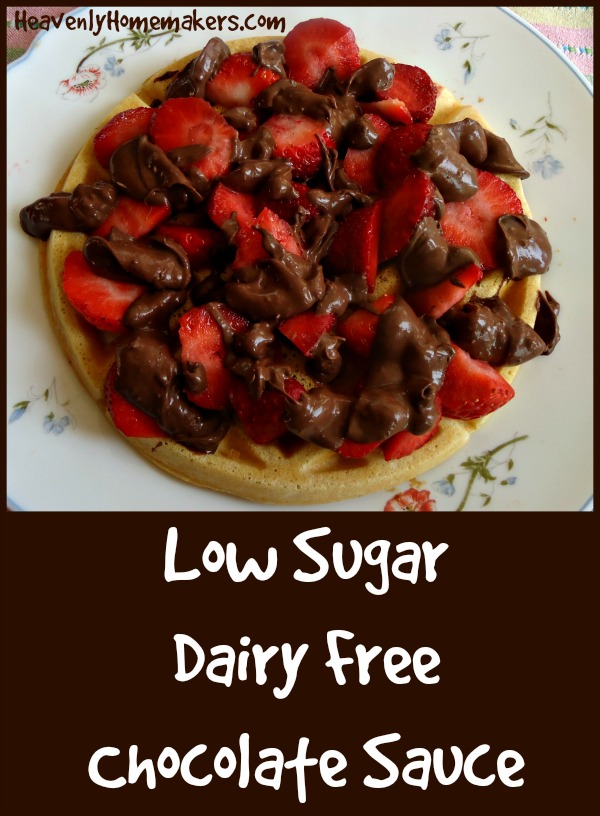
Dairy free chocolate sauce….the new way to top a waffle.

Dairy Free Chocolate Sauce

We sure do eat a lot of cream cheese around our house.

This has nothing to do with the recipe I’m about to share with you – except that it is my way of saying, “We definitely aren’t a dairy-free family.”

Why a Dairy Free Chocolate Sauce then?

  • Because coconut milk is nourishing and I like to use it in addition to cow milk as a way to give my family a variety of nutrients.
  • Because I love having recipes on hand that I can use to bless our friends who can’t eat dairy.
  • Because this Chocolate Sauce is rockin’ and I can actually eat it because it is low in sugar.

You pretty much can’t mess up this recipe. Go ahead. Try. Not that you would. (I mean, I can sometimes mess up a recipe without even trying, say…when I’m trying to talk and cook at the same time??)

But this recipe is really fool-proof and adaptable. You can make it a little sweeter if you like. You can keep the sugar low and enjoy this as a “dark chocolate” sauce. You can add a splash of vanilla extract or mint extract.

Oh my goodness, you could stir in some peanut butter! I just thought of that, will try it, and get back to you. You’ve gotta love it when a delicious brainstorm comes in the middle of writing a sentence.

How to use your Low Sugar Dairy Free Chocolate Sauce

  • We love it on fresh strawberries, bananas, blueberries, or raspberries.
  • Often we use it as an apple dip.
  • Try stirring it into a cup of hot coffee. Yup.
  • Instead of maple syrup, spread this sauce over your pancakes or waffles.
  • Hello. Just eat it on a spoon.
  • You can drizzle this on ice cream, but if you do have to eat dairy free, you’d also have to make or find dairy free ice cream (this was obvious but still worth mentioning)

Low Sugar Dairy Free Chocolate SauceYum

Low Sugar Dairy Free Chocolate Sauce
 
Save Print
Author: Laura
Ingredients
  • 13.5 ounce can of full fat, unsweetened coconut milk
  • ⅓ cup unsweetened cocoa powder
  • ¼ - ½ cup sweetener (honey, sucanat, or brown sugar)
Instructions
  1. Mix ingredients in a small saucepan, cooking and stirring on medium heat until well combined.
  2. Serve warm or cold.
  3. Store this sauce in a covered container in the refrigerator, rewarming on the stove-top as needed. It will keep for up to a month in the fridge.
3.4.3177

Low Sugar Dairy Free Chocolate Sauce

This sauce just takes a few minutes to whip up and it seriously tastes like a gourmet treat.

Need Coconut Milk?

I typically purchase cans of coconut milk in bulk online. Some of my favorite resources are:

  • Vitacost
  • Amazon

Want the Dairy-Full version? You’ll find one here. Be warned: it’s super full of sugar. I should play with that and see how we can reduce it!

Can you think of other great ways to eat this sauce? 

Heavenly Homemaker's Club Members: Access your homepage and all your fantastic resources here! Not a member yet? Please join us!
« Previous Page
Next Page »

Join Our Community!

 Facebook Twitter E-mail Instagram Pinterest

Popular Posts

~ Will All of the Real Moms Please Stand Up?
~ Easy! Stir-and-Pour Whole Wheat Bread
~ How to Make Gatorade
~ 31 Real Food Breakfast Ideas
~ Dear Teenage Girls...
~ When Mom Takes a Step Back
~ The Inexpensive Health Insurance We Love!
~ Let's Talk Real Food Grocery Budgets

Check out our latest posts!

  • Big Family Food and Fun: September 6-12, 2026
  • Big Family Food and Fun: August 30-September 5, 2026
  • Big Family Food and Fun: August 23-29, 2026
  • Big Family Food and Fun: August 16-22, 2026
  • Big Family Food and Fun: August 9-15, 2026
Home  ~  Simple Meals  ~  Club Membership  ~  Shop  ~  Privacy Policy  ~  Disclosure  ~ Contact

Copyright © 2026 · Beautiful Pro Theme on Genesis Framework · WordPress · Log in