Heavenly Homemakers

Encouraging women in homemaking, healthy eating and parenting

  • Home
    • About
    • FAQs
  • Recipes
    • Bread and Breakfast
    • Condiments
    • Dairy
    • Main Dishes
    • Side Dishes and Snacks
    • Desserts
    • Gluten Free
    • Instant Pot
    • Crock Pot
    • Heavenly Homemaker’s Weekly Menus
  • Homemaking
    • Real Food Sources
  • Store
  • Contact
    • Advertise
    • Disclosure
    • Privacy Policy
  • Simple Meals
  • Club Members!

White Chocolate Peppermint Popcorn

December 23, 2013 by Laura 33 Comments

This post may contain affiliate links. For more information, please see our disclosure policy.

I got the wonderful idea for this recipe when I was at a friend’s house recently for a baby shower. It’s so simple, yet turns popcorn into an extra special treat.

White Chocolate Peppermint PopcornYum

16 cups popped popcorn (about 1 cup kernels)
1/2 cup melted coconut oil
sea salt
1 cup white chocolate (this works great)
1 Tablespoon butter
1 teaspoon peppermint extract

Stir melted coconut oil into the popped popcorn and sprinkle with salt according to your taste. Pour prepared popcorn onto two cookie sheets or two 9×13 inch pans. Set aside.

In a small saucepan, melt white chocolate and butter together until smooth. Remove from heat and stir in peppermint extract.

Drizzle melted chocolate over the popcorn and stir immediately to coat. Allow chocolate to harden on the popcorn for 30 minutes to an hour. Or just start eating it right away because it’s too hard to wait.
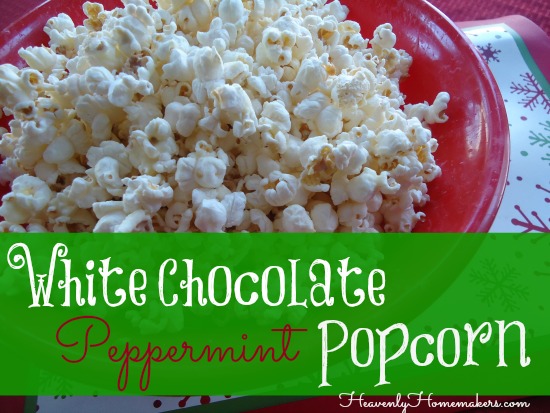
White Chocolate Popcorn

You might think I’m on a bit of a peppermint kick since I’m posting this recipe right after the Peppermint Cream Cocoa recipe. What can I say? I think of peppermint when I think of Christmas.

If peppermint isn’t your thing, you can definitely skip the peppermint extract in this recipe and just enjoy yourself some White Chocolate Popcorn.

What do you think? With peppermint or without?

Be sure to leave a comment on this post for a chance to win one of five $10 gift certificates to the Heavenly Homemakers Shop, good on anything of our eBooks or eCourses!


Heavenly Homemaker's Club Members: Access your homepage and all your fantastic resources here! Not a member yet? Please join us!

Bacon Cheese Muffins

December 18, 2013 by Laura 85 Comments

This post may contain affiliate links. For more information, please see our disclosure policy.

I believe bacon is the language of love when it comes to most males, and I happen to like bacon too. You want to know the best way I’ve found to get all of my men-folk out of bed in the mornings? Make bacon. Hoooah! <—that was me grunting out a manly sound, did you hear it? That’s the sound that typically follows the word bacon in our house. “Mmm, bacon. Hoooah!” Based on this idea, I created Bacon Cheese Muffins.

I usually stick with turkey bacon, but it really is hard to beat the taste of the pork bacon I can get from our local farmer. It’s a wonderful, occasional treat at our house – and yes, it does drive the boys out of bed in the morning.

These Bacon Cheese Muffins are easy and delicious – perfect for a holiday brunch. (You may remember seeing this recipe in our free Healthy Breakfast Made Simple eBook.)

bacon cheese muffins

Bacon Cheese MuffinsYum

Bacon Cheese Muffins
 
Save Print
Author: Laura
Serves: 12
Ingredients
  • 1½ cups whole wheat flour
  • ¼ cup sucanat or brown sugar
  • ½ teaspoon baking powder
  • ½ teaspoon sea salt
  • 1 egg
  • ¾ cup milk
  • ¼ cup melted butter or coconut oil
  • ½ cup bacon
  • ½ cup shredded cheese
Instructions
  1. Using kitchen shears, cut bacon into bite sized pieces.
  2. Brown bacon pieces in a skillet until thoroughly cooked.
  3. In a mixing bowl combine flour, sucanat, baking powder, and sea salt.
  4. Add egg, milk, and butter. Fold in cooked bacon and shredded cheese.
  5. Scoop batter into 12 paper-lined muffin tins.
  6. Bake in a 400° oven for 15-20 minutes or until muffins are golden brown.
3.4.3177

Are you bacon lovers at your house?  Hoooah!

Muffin Info You Need

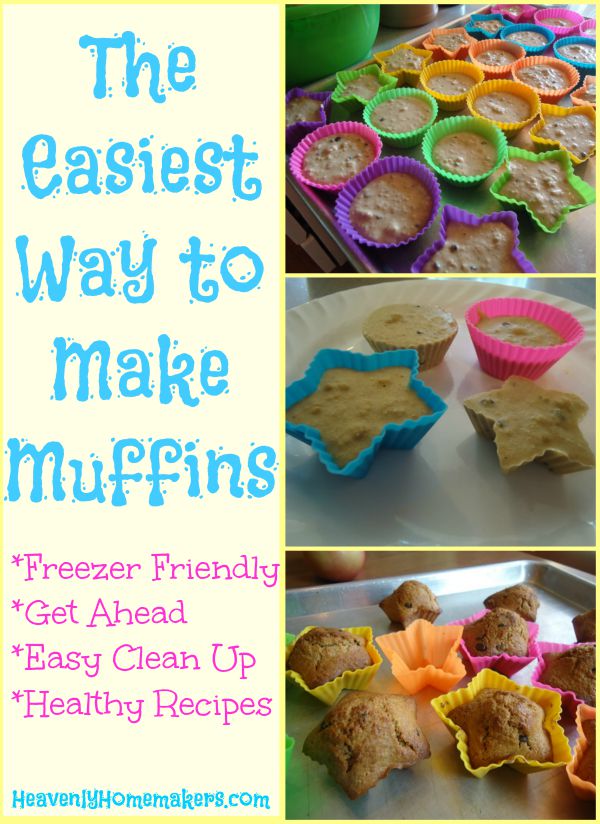
The Easiest Way to Make Muffins

Even though muffins are easy to make, these tips make them even easier. I love real food made easy.

  • The Easiest Way to Make Muffins
  • Freeze Muffin Batter for Easy Breakfasts (my favorite muffin tip of all time)
  • Make Pancake Muffins
  • Use Silicone Muffin Cups to Save Money and for Easy Clean Up

All of these tips work great for these Bacon Cheese Muffins!

Heavenly Homemaker's Club Members: Access your homepage and all your fantastic resources here! Not a member yet? Please join us!

Homemade Hot Chocolate Mix Without Dry Milk or Creamer {With Free Printable Gift Tags and a Dairy Free Option}

December 17, 2013 by Laura 29 Comments

This post may contain affiliate links. For more information, please see our disclosure policy.

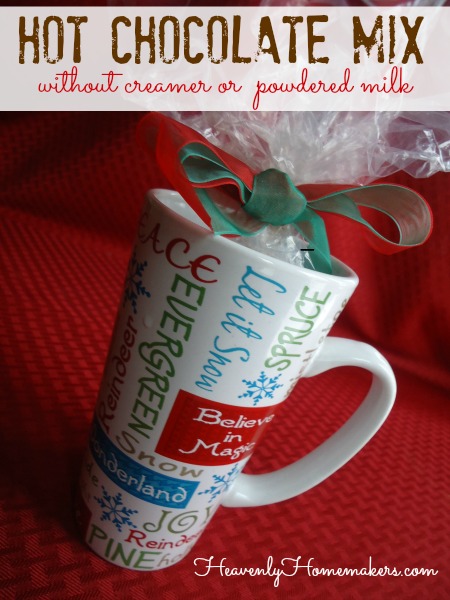
Hot Chocolate Mix

I can’t tell you (because I can’t remember) how many requests I’ve received through the years for a healthier hot chocolate mix. Non-dairy creamer and powdered milk are two ingredients in every homemade hot chocolate mix recipe I’ve ever found – and those are two ingredients I try to avoid if possible. I’ve had to keep telling people through the years that, sorry, I have no idea how to make a hot chocolate mix without those ingredients. I worried, fretted, and lost sleep over the fact that I was failing to provide a healthy hot chocolate mix recipe. (Not really, but shucks if I didn’t want one for myself too.)

Then I realized that I was making this way too hard. After all, what we’re all going for in this real food realm is simple, back to basics, whole food ingredients – right? Then why not mix together the basic, real food ingredients needed to make homemade hot cocoa – and keep the mixture on hand as a quick mix to stir into hot milk? Ladies and gentlemen, boys and girls – we now have a real food, real good, real easy Hot Chocolate Mix! And it’s here just in time for Christmas!

You’ll probably look at the simple recipe below and ask, “Really Laura? It took you six years to come up with this?” And I would have to shrug and say, “Uh-huh.”

Homemade Healthier Hot Chocolate MixYum

3/4 cup cocoa
1 1/2 cups sucanat or brown sugar

Place ingredients in a pint-sized jar and shake well. When you are ready for a cup of hot chocolate, here is what you’ll do:

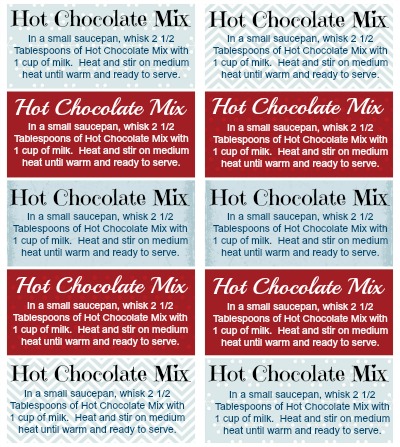
In a small saucepan, whisk 2 1/2 Tablespoons of Hot Chocolate Mix with 1 cup of milk. Heat and stir on medium heat until warm and ready to serve.

This recipe makes about 12-15 one-cup servings, depending on how “heaping” your Tablespoons are when you stir it into the milk.

Want to make this dairy free? Simply add the mixture to a cup of coconut milk. It’s super delicious!

Malachi had a buddy over the day I was playing with this recipe idea. They were sweet enough to be my taste testers, and they both gave it a thumb’s up. Or at least I believe they would have if they weren’t so busy saying “yum” and guzzling it down.

hot chocolate mix 1

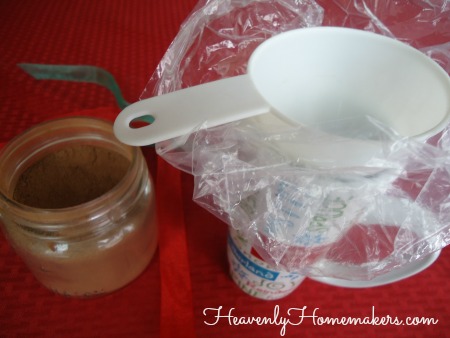
Want to package this Hot Chocolate Mix up for a gift? Simply place a gallon-sized twist tie bag (like this one) down into a mug. Funnel the mix into the bag and tie it up with a bow. Attach a gift tag to the handle of the mug, describing how to make the mix into Hot Chocolate. You’ll find free printable gift tags below!

hot chocolate mix 2

Download and print Hot Chocolate Mix Tags Here

Hot Chocolate Mix Tags sm
Now you tell me – is this exciting or what? How fun to have a real food Hot Chocolate Mix to have on hand and to give as gifts! Sometime within in the next six years, I hope to provide you with another recipe idea as simple as this one.

Hey, check out my friend, Cooking Guy making this hot chocolate!

Heavenly Homemaker's Club Members: Access your homepage and all your fantastic resources here! Not a member yet? Please join us!

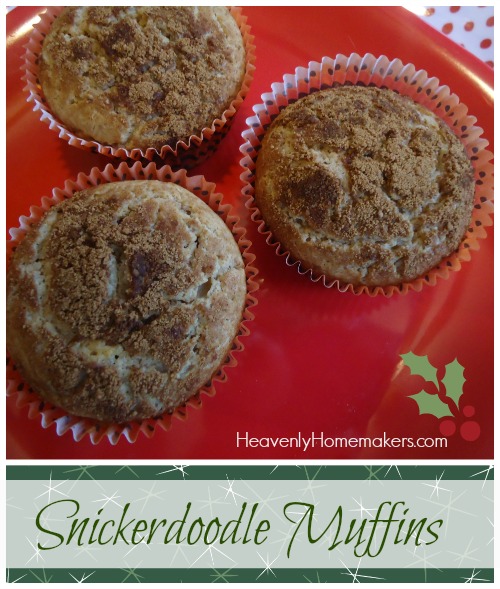
Snickerdoodle Muffins ~ Having Breakfast With the Muppets

December 4, 2013 by Laura 21 Comments

This post may contain affiliate links. For more information, please see our disclosure policy.

As I stated on Facebook yesterday:

I feel a tiny bit silly (but not silly enough to keep it to myself, apparently). Growing up, my mom and I always listened to the Muppets Christmas cassette, which featured John Denver. I loved it SO much. So I just bought the album for myself. I couldn’t hold back. I mean, if you haven’t heard Miss Piggy singing the 12 days of Christmas, you’ve really missed out. (Ah, the memories…)

muppets
I have played the songs over and over within the last 24 hours. All I can think about while I listen to this is hanging out with my mom while we wrapped presents and made Christmas crafts together during the month of December.

I had all but forgotten the album existed until my sister-in-law texted something about it yesterday. Memories flooded back. Now I can’t stop listening to it. And I can’t stop smiling. You would think that after over 9 years of being without her, I would realize that calling to talk to my mom isn’t an option. But as I listen to this music, I have had to stop myself several times from picking up the phone to dial her number. “Mom!” I want to shout, “Remember our winter nights together? Remember Miss Piggy singing ‘ba-dum-pum-pum’ in the 12 Days of Christmas? Remember how much fun we had? I just got the John Denver Muppets album on CD and I’m listening to it now with the boys, and they love it as much as we did!”

So since I can’t tell her, I’m sharing this with you. Of all my Christmas memories, I have to say listening to this music while preparing for Christmas with my mom might be my favorite memory of all. I really can’t stop smiling. And crying. And laughing (“mee-mee-mee-mee-mee-mee” – you have to know Miss Piggy to get that one).

Here’s a little blast from the past for ya that I found on youtube:

This morning, I turned on the Christmas lights, cranked up the Muppets, and tried a new recipe. These muffins are simple, full of cinnamon, delicious, and perfect for Christmas time. My family and I had breakfast with Miss Piggy, Kermit, and John Denver.

Snickerdoodle MuffinsYum

1 1/2 cups whole wheat flour
1/3 cup sucanat or brown sugar
1/2 teaspoon baking powder
1/2 teaspoon cinnamon
1/2 teaspoon sea salt
1 egg
1/4 cup melted butter or coconut oil
1/2 cup sour cream
1/2 cup milk

Snickerdoodle Topping:

2 Tablespoons sucanat or brown sugar
1 teaspoon cinnamon

Stir together flour, sucanat, baking powder, cinnamon, and salt. Add egg, butter, sour cream, and milk – stirring until mixture is well combined. Scoop batter into 10-12 paper lined muffin tins. Stir together the sucanat/cinnamon topping. Sprinkle about a 1/2 teaspoon of the mixture onto each muffin. Bake in a 400° oven for 15-20 minutes or until muffins are golden brown. Snickerdoodle Muffins 8

Here’s to tasty Christmas goodies, relishing wonderful Christmas memories, and creating new memories with our own families now.

Please tell me if you remember this Muppet Christmas album with John Denver so that we can talk about Piggy Pudding together! What are your favorite Christmas music memories?

Heavenly Homemaker's Club Members: Access your homepage and all your fantastic resources here! Not a member yet? Please join us!

Pumpkin Chocolate Chip Bread

November 20, 2013 by Laura 12 Comments

This post may contain affiliate links. For more information, please see our disclosure policy.

It’s kind of a no-brainer, converting muffin recipes into quick bread recipes and vice versa. Still, it’s not something I always think about doing.

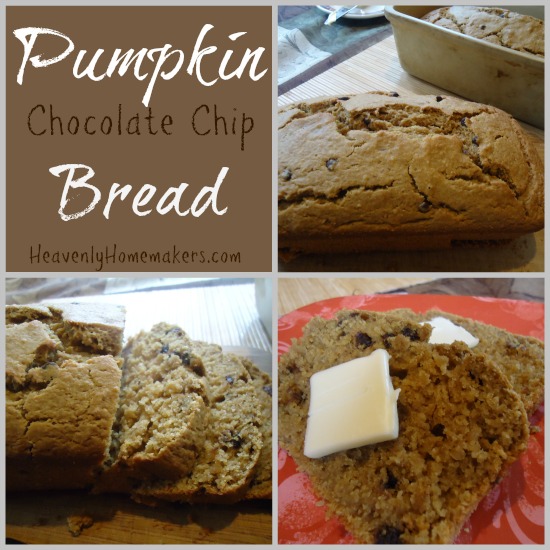
Remember how I turned Chocolate Chocolate Chip Muffins into Chocolate Chocolate Chip Bread? That worked just as well when I decided to turn Pumpkin Chocolate Chip Muffins into Pumpkin Chocolate Chip Bread.

Pumpkin Chocolate Chip Bread

To make it easy, I’ll post the recipe here with revised instructions for making this batter into a delicious quick bread!

Pumpkin Chocolate Chip BreadYum

Pumpkin Chocolate Chip Bread
 
Save Print
Author: Laura
Serves: 1 loaf
Ingredients
  • 3 cups whole wheat flour (I used freshly ground hard white wheat)
  • ½ cup sucanat
  • 1 teaspoon baking soda
  • 2 teaspoons baking powder
  • 1 teaspoon sea salt
  • 1 teaspoon cinnamon
  • 4 eggs
  • 2 cups pureed pumpkin (or one 16 ounce can)
  • 1 cup melted coconut oil (or butter)
  • 1 cup chocolate chips
Instructions
  1. In a large mixing bowl, stir together all dry ingredients. Add eggs, pumpkin and oil. Mix well. Fold in chocolate chips. Pour batter into two buttered loaf pans. Bake in a 350° oven for 45-60 minutes or until a toothpick inserted in the middle comes out clean. Allow bread to cool for about 10 minutes before removing from pan.
3.5.3229


(I prefer either homemade chocolate chips or soy free chocolate chips)

Do you like muffins or quick bread better, or does it depend on the day?

Heavenly Homemaker's Club Members: Access your homepage and all your fantastic resources here! Not a member yet? Please join us!

Easy Homemade Nacho Cheese Pretzel Dip

November 14, 2013 by Laura 31 Comments

This post may contain affiliate links. For more information, please see our disclosure policy.

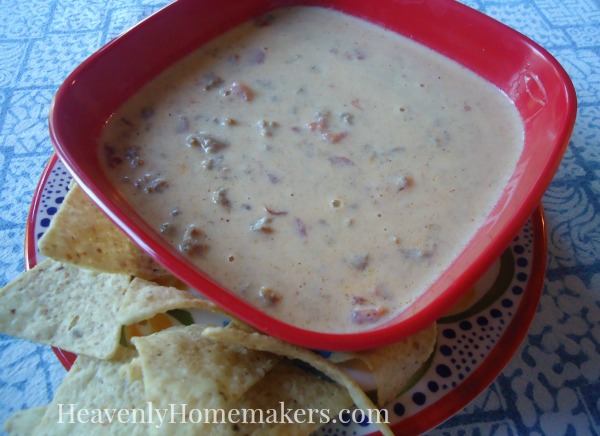
Obviously, this nacho cheese pretzel dip can be eaten with other foods beyond pretzels. I’m thinking tortilla chips, steamed veggies, popcorn chicken…

pretzel_bites_4

But with these Homemade Soft Pretzel Bites? So delicious!

What’s fun about this recipe is that you can make it as spicy or as mild as you like. In fact, our family made individual bowls of the cheese dip, then added as much hot sauce as we each preferred.

Easy Nacho Cheese Pretzel DipYum

Easy Homemade Nacho Cheese Pretzel Dip
 
Save Print
Author: Laura
Ingredients
  • 4 ounces cream cheese
  • 8 ounces cheddar cheese, cut into cubes
  • 1 to 1½ cups milk
  • hot sauce to taste (we like Cholula)
Instructions
  1. In a medium saucepan, slowly melt cream cheese and cheddar cheese cubes on medium low heat, stirring constantly.
  2. Once melted, gradually add milk and whisk together while continuing to heat.
  3. Once the sauce reaches the consistency you desire, remove from heat and serve - adding hot sauce to taste.
3.4.3177

nacho_cheese_pretzel_dip_1

My boys were so impressed that I was able to make something that tasted so much like the canned fake cheese dip. But never fear – because this is made with real ingredients, it tastes much better than what comes out of a can.

Let’s take a vote: Who likes the cheese stuff that pours out of a can?  Love it? Hate it? Don’t feel bad admitting that you like it. We all have our lingering non-food cravings (says the lady who still chooses Nacho Cheese Doritos when given the opportunity).

But speaking of Doritos and Velveeta (which we weren’t actually speaking of but hang with me here). If you want to avoid cheese from a can and cheese from a box – but you really love Nacho Cheese Dip – I have a recipe you are going to love!

After years of trying, I came up with Real Food “Velveeta” and Rotel Dip.

Real Food Velveeta and Rotel Dip

You guys. This recipe changed my life and I now make this dip every couple of weeks because we love it so much. I exaggerate frequently and am sarcastic often – but I am very serious about this dip.

So there you go. You now have two amazing homemade, real food dips to try so that you can forever and always avoid processed cheese. Amen and amen.

Heavenly Homemaker's Club Members: Access your homepage and all your fantastic resources here! Not a member yet? Please join us!

Cranberry Nut Trail Mix

November 7, 2013 by Laura 4 Comments

This post may contain affiliate links. For more information, please see our disclosure policy.

This healthy, make-ahead snack is kind of a no-brainer, and not really a recipe at all. But it’s still worth mentioning as we focus on getting ahead with healthy snacks. Why? Because there’s chocolate in it. Obviously.  And also because it’s easy and good for you and all that other stuff.

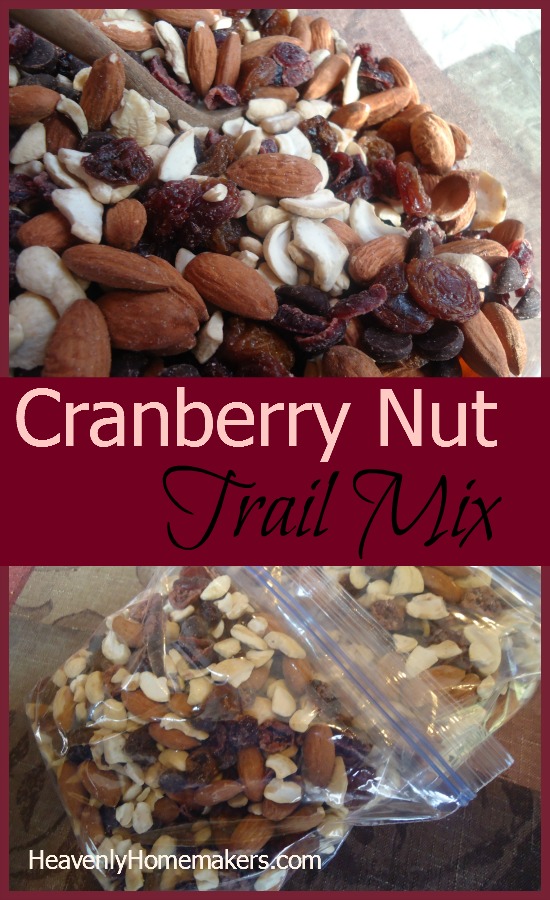
Last week, I mixed up a big bowl of Cranberry Nut Trail Mix with items we had on hand. Then, I scooped it into individual grab-and-go baggies. Don’t like the dried fruit and nut options I mention below? No biggie – just use what you have and what you like. No matter what, you’ll be putting together a healthy snack. (Unless you add candy corns or m&ms, c’mon.)

And have you purchased bagged trail mix? Talk about pricey! They can’t help but be. Ingredients like nuts and dried fruit can be expensive. Therefore, I’ve decided that I don’t need to pay someone to stir my ingredients and put them into a bag for me. I can do that myself thankyouverymuch and save some bucks while I’m at it. (I buy my nuts in bulk at Braga Farms.)

Cranberry Nut Trail Mix

So here you go – Cranberry Nut Trail Mix, the recipe. Which isn’t a recipe. Far be it for me to tell you how nutty you should be on any given day.

Cranberry Nut Trail MixYum

Almonds
Cashews
Dried Cranberries
Golden Raisins
Dark Chocolate Chips

Stir any combination of the ingredients together in a bowl. Store in an airtight container (like a jar!), or scoop mixture into individual baggies for grab-and-go snacks.

What other trail mix combinations do you like?

Heavenly Homemaker's Club Members: Access your homepage and all your fantastic resources here! Not a member yet? Please join us!

Homemade Soft Pretzel Bites Recipe

November 5, 2013 by Laura 31 Comments

This post may contain affiliate links. For more information, please see our disclosure policy.

How’s the Getting Ahead {Snacks} Challenge going for you? I’m having a blast in the kitchen, but I can’t say I’m really getting ahead. We’re eating the food as fast as I make it. And by we, I mean my four boys. Okay fine, except for the Raspberry Oatmeal Bars. I took care of those very well without much help. {grins sheepishly}

You are going to love today’s idea! This one really did help me get ahead. I turned out so many pretzel bites, we ate on them all day, then I was able to stash some in the freezer too. This recipe is more time consuming than the other easy snack recipes I’ve shared. But trust me, these are worth the extra work! I didn’t stop and count how many pretzel bites this recipe makes (for obvious sanity reasons), but I would say this recipe would fill a two gallon ziplock bag and then some. Yep! You’ll get ahead with this recipe for sure!

pretzel_bites

Yum

Homemade Soft Pretzel Bites (Adapted from my Soft Pretzel Recipe)

1 cup water
2 Tablespoons yeast
2 teaspoons honey
2 1/2 cups milk
1 stick butter
1/2 cup honey
4 teaspoons sea salt
8 cups whole wheat flour (more or less as necessary)
butter
salt

In a large bowl, mix 1 cup warm water, yeast, and 2 teaspoons of honey. Stir this together and allow it to sit. Meanwhile, heat butter, milk, 1/2 cup honey, and salt in a medium saucepan on the stove until mixture has reached 120°. Stir contents in saucepan into the yeast mixture. Begin adding flour, two cups at a time until a nice dough has formed. Knead for 3-4 minutes. Place dough in bowl, cover, and allow it to rise for 1-2 hours.

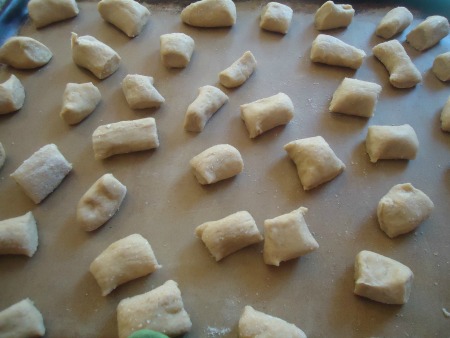
On a well floured surface, roll fistful sized balls of dough into “snakes.” Cut into one inch bites.

pretzel_bites_1

Place on a baking sheet or stone. No need to allow for rising time, but if they sit there a while, that’s okay too. Bake in a 350° oven for 15-20 minutes or until golden brown.

pretzel_bites_3
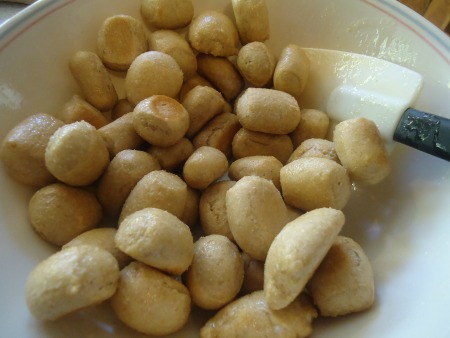
Place baked pretzel bites in a bowl, drizzle on some melted butter, toss until coated, then sprinkle sea salt and toss again. Serve warm, serve cold, or cool and freeze the bites in a freezer bag for up to three months. Thaw and reheat in the oven.
pretzel_bites_2
I experimented with a Nacho Cheese Dip for these pretzel bites. Check it out here!

pretzel_bites_4

 Give me more dipping ideas for these soft pretzel bites!!

Heavenly Homemaker's Club Members: Access your homepage and all your fantastic resources here! Not a member yet? Please join us!

Easy Peanut Butter Snack Bars

November 3, 2013 by Laura 22 Comments

This post may contain affiliate links. For more information, please see our disclosure policy.

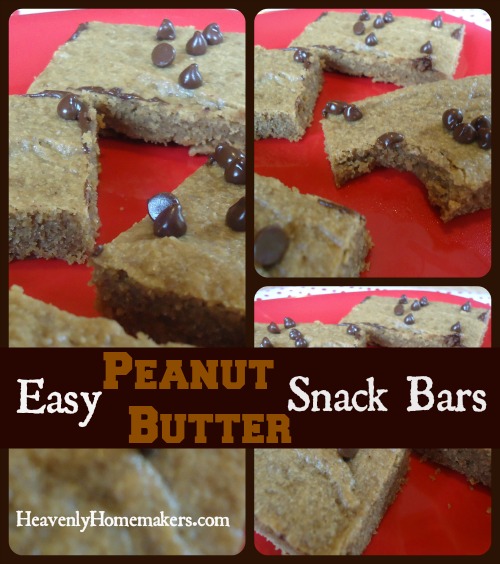
Here’s another super easy snack recipe to help us along in the Getting Ahead {Snacks} Challenge. These were a huge hit at our house – and so easy that I can definitely make these frequently!

peanut butter snack bars

Easy Peanut Butter Snack BarsYum

Easy Peanut Butter Snack Bars
 
Save Print
Author: Laura
Serves: 20
Ingredients
  • 1 cup natural peanut butter (I use homemade creamy peanut butter)
  • ½ cup butter
  • ⅔ cup sucanat or brown sugar
  • 3 eggs
  • 1 teaspoon vanilla extract
  • ½ teaspoon sea salt
  • 1 cup whole grain flour
  • ¼ cup chocolate chips (optional)
Instructions
  1. In a small saucepan, melt together peanut butter and butter.
  2. Pour mixture into a medium-sized bowl and stir in sucanat until creamy.
  3. Add eggs, vanilla, and salt, stirring well.
  4. Mix in flour until well combined.
  5. Spread mixture into a 9x13 inch baking dish.
  6. Bake in a 350° oven for about 25 minutes.
  7. Remove from oven and sprinkle chocolate chips on top if desired.
  8. Cut into about 20 bars.
3.5.3251


To freeze:  Allow bars to cool completely. Wrap them individually to keep the bars moist. Place wrapped bars in a freezer bag and freeze for up to 3 months. Thaw for at least one hour before serving.

These make for great grab-and-go snacks!

Heavenly Homemaker's Club Members: Access your homepage and all your fantastic resources here! Not a member yet? Please join us!

Raspberry Oatmeal Bars

October 31, 2013 by Laura 76 Comments

This post may contain affiliate links. For more information, please see our disclosure policy.

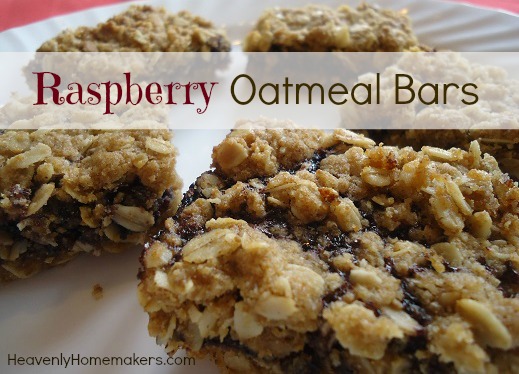
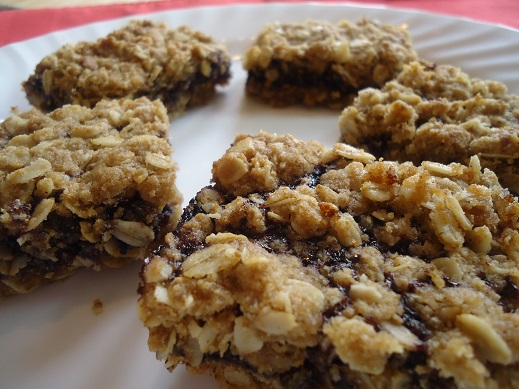
Raspberry Oatmeal Bars are pretty much amazing.

Raspberry Oatmeal Bars 11

Yum

I’m on a mission to create new healthy snack recipes so that my boys will have some great options on hand. But here’s what happened after I made these Raspberry Oatmeal Bars:  I dug into them while I was in the kitchen by myself and loved them so much that I forgot to call in the kids. Then when I realized I was like, “Eh, the kids can have a piece of cheese.” And then I kept eating the bars. Great mom moment, huh? :)

This may be one of the best snack recipes ever, hands down. The kids thought so too, once I remembered to share.

Raspberry Oatmeal Bars

Raspberry Oatmeal Bars
 
Save Print
Author: Laura
Ingredients
  • 1½ cups whole wheat flour
  • 1½ cups rolled oats
  • ½ cup sucanat
  • ½ teaspoon baking powder
  • ¼ teaspoon sea salt
  • 1 cup melted butter
  • ½ cup raspberry jam (100% fruit)
Instructions
  1. Mix together flour, oats, sucanat, baking powder, and salt.
  2. Stir in melted butter until the mixture resembles crumbs.
  3. Press half of the mixture into an 8x8 inch baking pan.
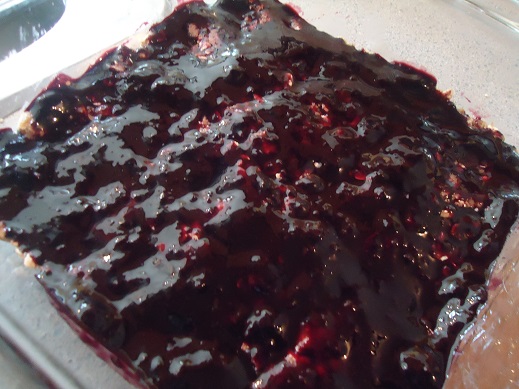
  4. Spread jam over the top.
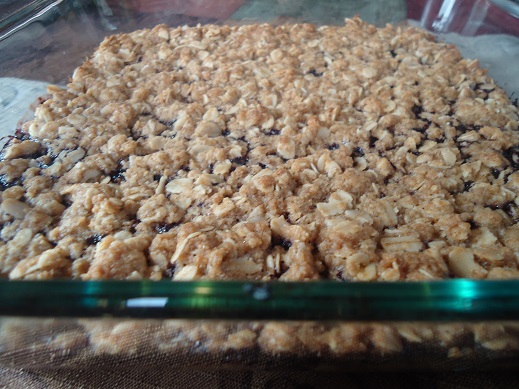
  5. Sprinkle remaining oat mixture on top of the jam layer, pressing down to cover.
  6. Bake in a 350° oven for 30 minutes or until lightly browned.
3.4.3177

Raspberry Oatmeal Bars 12

You can definitely change these up by using a different variety of jelly or jam. I think apricot would be awesome in these, or strawberry, or peach…

If they last long enough, you can freeze them: Allow them to cool completely, then wrap individually for a quick grab and go snack. Place individually wrapped bars in a large freezer bag and store in the freezer for up to two months.

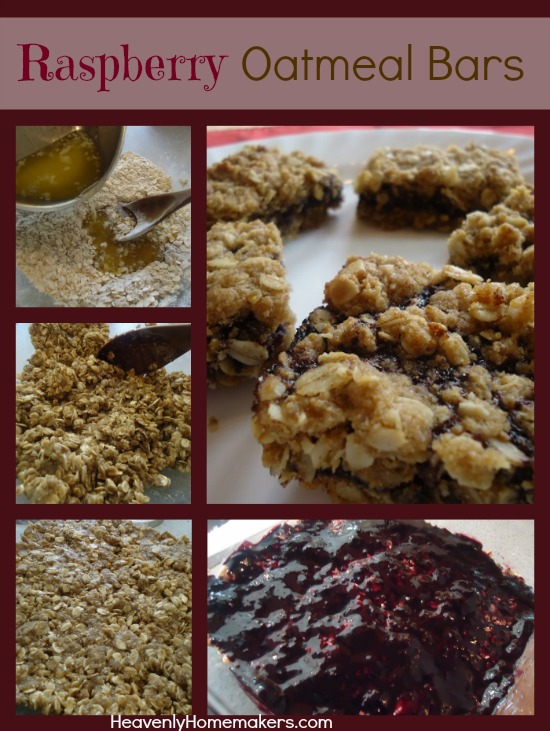
Here are some pictures to show more specifically how to put these bars together. They are really so easy!

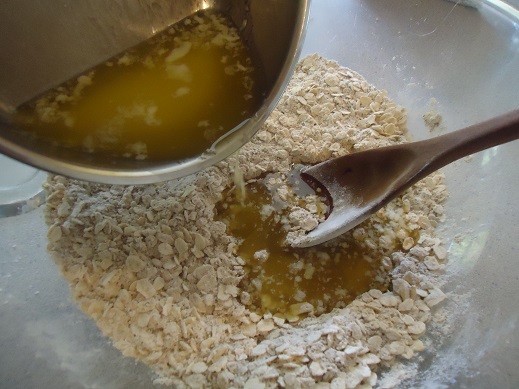
First,  mix together the dry ingredients. Then pour in the melted butter.

raspberry-bars_1

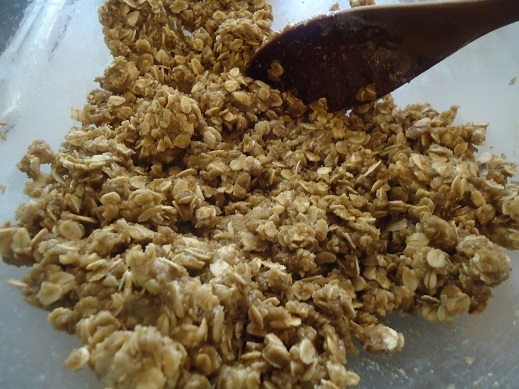
 Stir until the mixture resembles buttery crumbs.
raspberry_bars_2

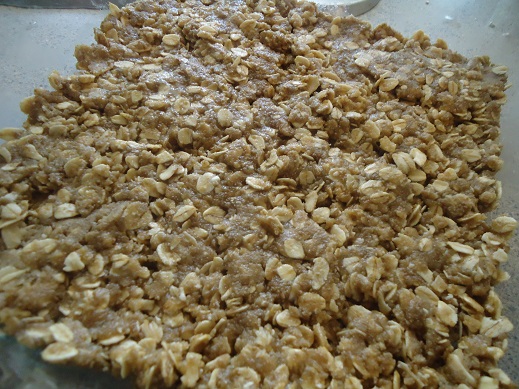
Press half of the crumbs into an 8×8 inch baking dish.

raspberry_bars_3
Spread the jam over the first layer of oat mixture. Spoon the remaining oat mixture over the jam and press down to cover.
raspberry_bars_4

Bake in a 350° oven for about 30 minutes. Cut them while they are warm, or allow them to cool first.

raspberry_bars_7

Try to remember to share them with others.

raspberry_bars_8

Not only will I be making these frequently for snacks in the future, I think they will be wonderful for breakfast. And I’ll even try to remember to serve them to my children. ;)

Heavenly Homemaker's Club Members: Access your homepage and all your fantastic resources here! Not a member yet? Please join us!
« Previous Page
Next Page »

Join Our Community!

 Facebook Twitter E-mail Instagram Pinterest

Popular Posts

~ Will All of the Real Moms Please Stand Up?
~ Easy! Stir-and-Pour Whole Wheat Bread
~ How to Make Gatorade
~ 31 Real Food Breakfast Ideas
~ Dear Teenage Girls...
~ When Mom Takes a Step Back
~ The Inexpensive Health Insurance We Love!
~ Let's Talk Real Food Grocery Budgets

Check out our latest posts!

  • Big Family Food and Fun: September 6-12, 2026
  • Big Family Food and Fun: August 30-September 5, 2026
  • Big Family Food and Fun: August 23-29, 2026
  • Big Family Food and Fun: August 16-22, 2026
  • Big Family Food and Fun: August 9-15, 2026
Home  ~  Simple Meals  ~  Club Membership  ~  Shop  ~  Privacy Policy  ~  Disclosure  ~ Contact

Copyright © 2026 · Beautiful Pro Theme on Genesis Framework · WordPress · Log in