Heavenly Homemakers

Encouraging women in homemaking, healthy eating and parenting

  • Home
    • About
    • FAQs
  • Recipes
    • Bread and Breakfast
    • Condiments
    • Dairy
    • Main Dishes
    • Side Dishes and Snacks
    • Desserts
    • Gluten Free
    • Instant Pot
    • Crock Pot
    • Heavenly Homemaker’s Weekly Menus
  • Homemaking
    • Real Food Sources
  • Store
  • Contact
    • Advertise
    • Disclosure
    • Privacy Policy
  • Simple Meals
  • Club Members!

Cheesy Turkey Sausage Stromboli

July 7, 2008 by Laura 28 Comments

This post may contain affiliate links. For more information, please see our disclosure policy.

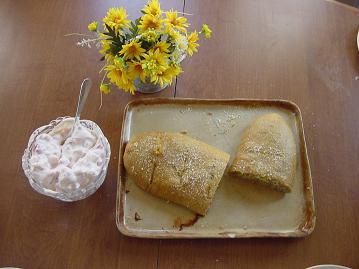
If I ask my husband what special meal he wants for his birthday or for Father’s Day…he usually grins and says, “Can you make me a Stromboli?”

It is SO YUMMY…it’s no wonder he always requests it! 
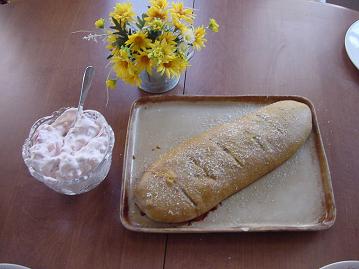
stromboli3sm.JPG

Cheesy Turkey Sausage StromboliYum

2 1/2 cups whole wheat flour
1 T. honey
1 t. sea salt
1 package yeast
3/4 cups warm water
1/4 cup warm milk
1 T. melted butter
1 pound turkey sausage
2 cups white cheddar cheese, shredded
2 eggs
1 t. basil
grated Parmesan cheese

Combine flour, salt and yeast. Add water, milk, honey and butter. Knead until smooth and elastic. Place in a bowl, cover and let rise until doubled, about one hour.

Meanwhile, in a skillet cook sausage. Stir shredded cheese, one egg and basil into the sausage. Set aside.

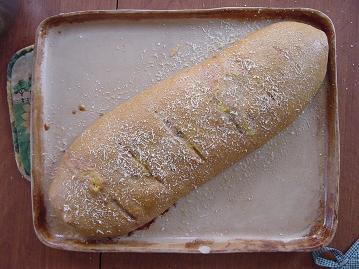
Punch dough down and roll into a 15 x 10 inch rectangle. Spoon sausage mixture down one side of the rectangle to within one inch of the edges. Fold dough over filling and pinch to seal. Place on a cookie sheet. Cut four diagonal slits on top of the stromboli. Beat remaining egg and brush it over the stromboli. Sprinkle with Parmesan cheese. 

Cover and let rise until doubled, about 45 minutes. Bake in a 375 degree oven for 20-25 minutes or until golden brown. Slice and serve warm.
stromboli2sm.JPG

This is definitely a family favorite! Hope you try it and enjoy it!

Print Grocery List

Heavenly Homemaker's Club Members: Access your homepage and all your fantastic resources here! Not a member yet? Please join us!

Spinach? I Don’t See Any Spinach…

July 1, 2008 by Laura 65 Comments

This post may contain affiliate links. For more information, please see our disclosure policy.

Whatever you do…don’t look through the ingredients in this slushy and get all freaked out because there’s spinach in it. Don’t do it. Just relax.

There’s nothing to freak out about. I promise you can’t taste the spinach….and this slushy is so refreshing and delicious you won’t even know what hit you.

The first time I made these, I was just messing around trying to come up with a yummy way to get more raw greens into our diet. I figured they’d turn out some ugly brown color, since I was mixing red, yellow and green together. I just hoped I’d be able to make my family look past it and enjoy the fruity taste.

But instead, they turned out to be a beautiful deep red color…and tasted like fruity heaven. So even though you KNOW there’s spinach in them because you made them and put it there yourself, you will forget all about it while you sit down with a spoon and eat this slushy that tastes better than anything I’ve eaten this entire summer.

Try these!!!

Strawberry Peach SlushiesYum

2 cups frozen strawberries
1 cup frozen peaches
1 cup raw mixed greens or spinach
5-8 drops stevia (more if you like)
1 cup water

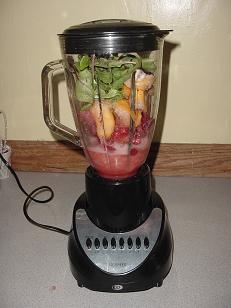
Put all ingredients into blender. Process until everything is mixed and becomes slushy.

strawberrypeachslushy3sm.JPG

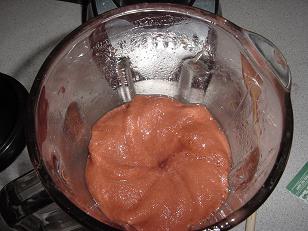
strawberrypeachslushysm1.JPG
And see what my blender did? It made that pretty swirl thingy. My boys beg for me now to show them the pretty swirl thingy everytime I make these.

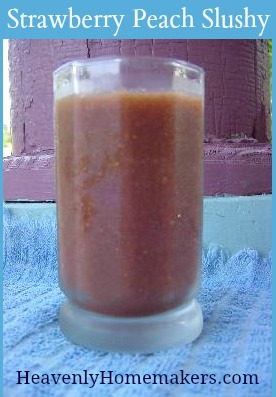
Strawberry Peach Slushy

These have become one of our favorite side dishes….or sometimes they are our breakfast. WE LOVE THESE SLUSHIES!

Please, oh please, try them. :)

Heavenly Homemaker's Club Members: Access your homepage and all your fantastic resources here! Not a member yet? Please join us!

Healthy Treat For Today: Whole Wheat Cinnamon Rolls

June 17, 2008 by Laura 285 Comments

This post may contain affiliate links. For more information, please see our disclosure policy.

I’ve been baking all my life (give or take). I can bake in my sleep. I can bake along with the best of ’em. 

But I have had the hardest time coming up with a good cinnamon roll. 

I’ve tried many different recipes and they always end up being too bready, too heavy, too doughy or too dry.

I just about gave up, figuring I must have the incurable CRBD (Cinnamon Roll Baking Disorder)….

But I tried just one more time.

I don’t know why I didn’t think of this before. Must be because I also suffer from GGDS (Good Grief Duh Syndrome) and sometimes have a hard time seeing the obvious.

It finally occured to me that since my homemade soft pretzels are so, so good…maybe that dough recipe would make a good cinnamon roll. And BOY was I right! Yumm-eee.

It was one proud day when I finally made a good cinnamon roll. And the fact that it was made with whole wheat and honey was an added bonus! Healthy and delicous…what a deal!

So, just in case you also have CRBD (see above to remind yourself what that is if you have GGDS and can’t remember)…here’s the recipe that finally worked for me!

Whole Wheat Cinnamon RollsYum

1 cup water
2 Tablespoons yeast
2 teaspoons honey
2 1/2 cups milk
1/2 cup butter
1/2 cup honey
4 teaspoons sea salt
8 cups whole wheat flour

Ingredients for the “innerds” of your cinnamon rolls:

1/2 cup butter
3/4 cup rapadura or sucanat (dehydrated cane sugar juice) (you can use white sugar if you want)
1/2 Tablespoon ground cinnamon 

Melt your butter and set it aside. Mix together the rapadura and cinnamon in a bowl.

Ooey-Gooey Frosting

1/4 cup butter
3 Tablespoons milk
1/2 teaspoon vanilla
1-2 cups powdered sugar to make the consistency you like

Melt butter. Remove from heat and stir in vanilla, milk and powdered sugar. Whisk together until smooth. 

Okay, here’s how to make the dough…

In a large bowl, mix 1 cup very warm water, 2 T. yeast and 2 t. honey. Stir this together and kind of mush the yeast around. Let this sit for a few minutes while you do the next step.

Melt a stick of butter in a large saucepan. Add 1/2 cup honey, 4 t. salt and 2 1/2 cups of milk. Heat this to 120 degrees.

Pour milk mixture into yeast mixture and stir. Stir in 8 cups of flour, 2 cups at a time. (add more if you need it)

Knead the dough for 5-10 minutes. Plop it into a bowl, cover it and let it rise for 1-1 1/2 hours.

After dough is nice and fat, punch it down and knead out all it’s bubbles. Cut the dough in half, setting one half aside. 

On a well floured surface, roll dough into a nice big rectangle, about 1/4 inch thick.

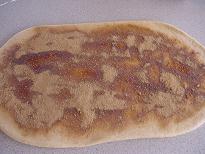
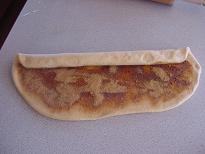
Use a pastry brush to spread 1/2 of the melted butter all over the rectangle. Sprinkle 1/2 of the rapadura/cinnamon mixture all over the butter. 

cinrolls1sm.JPG

Roll up the dough.

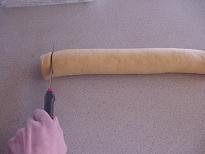
cinrolls2sm.JPG

Cut into thin slices, about 1/2 inch thick. 

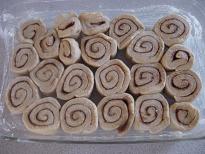
cinrolls3sm.JPG

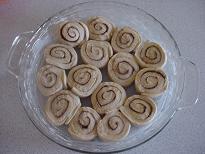
Place rolls side by side on baking pan.
cinrolls4sm.JPG  cinrolls5sm1.JPG

Repeat process with other 1/2 of dough.

Allow dough to rise about 30 minutes. 

Bake for 25 minutes or until golden brown at 350 degrees.

Allow rolls to cool a bit, then drizzle lots and lots of ooey-gooey frosting all over them.

Happy cinnamon roll baking!! Be sure to look through the “Natural Sugar Treats” section of my blog for more great recipes like this one…using great wholesome ingredients to make great treats!
———————————

Heavenly Homemaker's Club Members: Access your homepage and all your fantastic resources here! Not a member yet? Please join us!

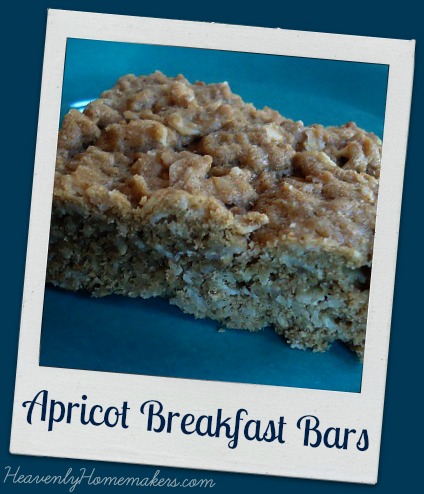
Yummy Apricot Breakfast Bars

June 9, 2008 by Laura 62 Comments

This post may contain affiliate links. For more information, please see our disclosure policy.

One day a few weeks ago, I was getting ready to make my Giant Breakfast Cookie recipe…but decided to play with it a bit and create some kind of breakfast bar instead. (I LOVE playing with recipes!)

I came up with these yummy apricot bars and knew I’d have to share it with you.

And then I forgot. (So sorry.)

Then, last week, Marie emailed and asked if I’d try to come up with a good breakfast bar recipe (I think she said something about “since you’re so brilliant in the kitchen”…yeah, that was it.). And I was reminded that indeed – I had already come up with one. So Marie (and everyone else), here you go! (I hope you like them, but if you don’t, can we still be friends?)  :)

Apricot Breakfast BarsYum

2 sticks butter
3/4 cup honey
1 teaspoon baking soda
1 teaspoon sea salt
1 teaspoon vanilla
1/2 cup buttermilk
2 eggs
2 cups whole wheat flour
1 1/2 cups rolled oats
1/2 cup unsweetened coconut flakes
1/4 cup sesame seeds
3/4 cup dried apricots

Melt butter and honey together. Remove from heat. Pour mixture into a mixing bowl and add baking soda, salt, vanilla and buttermilk and eggs. Stir in flour, oats, coconut and sesame seeds until well combined. Cut dried apricots into small bites (I usually cut mine into fourths). Fold apricot pieces into dough.

Bake in a 9 x 13 baking pan at 350 degrees for 25 minutes.

apricot_bar

You can play with these yourself and add any combination of fruit and nuts – I know I’ll continue to mix and match different ingredients! Enjoy!

Heavenly Homemaker's Club Members: Access your homepage and all your fantastic resources here! Not a member yet? Please join us!

Make Homemade Turkey Sausage!

May 12, 2008 by Laura 163 Comments

This post may contain affiliate links. For more information, please see our disclosure policy.

Make this turkey sausage recipe even easier by creating a jar of seasonings for this sausage. Learn how!

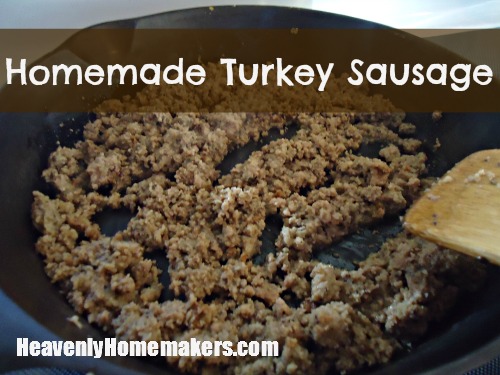
We LOVE ham and sausage at our house, but from what I read, pork is not the best for you. We do eat bacon from time to time, but this Turkey Sausage is a delicious alternative to pork. It’s easy and it tastes great!

See? It looks like sausage and everything?! My family devours this sausage.

Homemade Turkey Sausage

Homemade Turkey SausageYum

Make Homemade Turkey Sausage!
 
Save Print
Author: Laura
Ingredients
  • 1 pound ground turkey
  • 3 Tablespoon minced onion
  • ¼ teaspoon cumin
  • ¼ teaspoon marjoram
  • ¼ teaspoon ground pepper
  • ¼ teaspoon oregano
  • ¼ teaspoon ground nutmeg
  • ⅛ teaspoon cayenne pepper
  • ¼ teaspoon ground ginger
  • ½ teaspoon dried basil
  • ½ teaspoon thyme
  • ½ teaspoon sage
  • ½ teaspoon sea salt
  • 1 egg (optional)
Instructions
  1. Mix all ingredients.
  2. Chill for about an hour. (If you forget to chill this ahead of time...it cooks up okay anyway!)
  3. Form into patties.
  4. Saute in butter.
3.4.3177

You’ll find more recipes like this in my ebook:  Think Breakfast…Outside of the Box or in my “actual book” Oh, For Real: Real Food, Real Family, Real Easy.

What can you do with this Turkey Sausage? Here are our favorite ways to use this:

  • Just eat it. Turkey Sausage Patties are pretty great as a breakfast meat along with eggs, pancakes, or muffins.
  • Homemade Sausage Gravy is amazing. I like to make a huge batch of this sausage, then freeze it browned and crumbled in 1-pound meal-sized portions. Then I just pull it out and quickly make gravy. Of course, we eat this gravy over biscuits. This means that you also need my Quick Mix Biscuits recipe.
  • Turkey Sausage and Red Bean Stew is a wonderful comfort food – made easier if you have this sausage made ahead of time.
  • Sometimes I use this sausage in my Spicy Mac and Cheese recipe.
Heavenly Homemaker's Club Members: Access your homepage and all your fantastic resources here! Not a member yet? Please join us!

Kids in the Kitchen: Making Cheesecake For Mom!

May 8, 2008 by Laura 7 Comments

This post may contain affiliate links. For more information, please see our disclosure policy.

We have two pretty solid Mother’s Day traditions at our house. (Neither of them involves spending much money!) 

One tradition is that we take the pictures of our boys beside the peach tree that we planted a few years ago. Each year, it is super fun to see how much the tree has grown and how much the boys have grown. We then email these pictures to all of the special women in our lives for Mother’s Day. I LOVE looking back at these pictures! 

The second tradition is that I get the day off from cooking. :)

And I get to choose what we’re eating! (okay…I do that EVERY day…)

I absolutely NEVER want to eat out on Mother’s Day. I find the restaurants overflowing and stressful…and that is not a treat for me. 

So Daddy and the boys put on their aprons (not really) and cook for mama. I LOVE it!!

You can read about the Mother’s Day Muffins they’ll be making here. And for lunch…they’ll be making steak on the grill, baked potatoes, veggies and cheesecake.

Here’s the cheesecake they’ll be making for me  (and YES, we’re compromising a bit and by eating processed sugar and graham crackers from a box. I know…you must be absolutely shocked!)  :)

Simple CheesecakeYum

2 pkgs graham crackers
2 sticks butter
¼ cup sugar
2 – 8 oz. pkgs. cream cheese, softened
2 cups powdered sugar
1 cup heavy whipping cream
1 t. vanilla

In a gallon sized Ziploc bag, crush graham crackers with a rolling pin. Melt butter in a small saucepan. Pour crushed graham crackers, melted butter and sugar into a 9 x 13 inch pan. Stir ingredients together and pat it down to create crust. Set aside.

In a medium sized bowl, stir together cream cheese, powdered sugar and vanilla. In a large bowl, whip the cream until soft peaks form. Add cream cheese mixture to whipped cream and fold in gently. Smooth mixture over the crust. Chill for at least two hours.

This cheesecake is super simple to make…which means the boys can do it entirely by themselves!

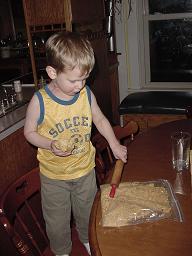
grahamcrackercrustsm.JPG

The boys LOVE crushing up the graham crackers in the baggie. It IS permission to BREAK something after all! (Oh, and don’t you just LOVE Malachi’s outfit in this picture? He chose it himself…)  :)

justusdipsm.JPG

malachidipsm.JPG

Okay, and I always do pour the vanilla myself for them. It’s organic, and it’s pricey, and I’m afraid they’d accidentally pour in the entire bottle. Just the control freak in me coming out while they make MY cheesecake… ;)

eliasdipsm.JPG

I love this Mother’s Day tradition…and so do Daddy and the boys! They look forward to it as much as I do! 

I’d love to hear about any Mother’s Day traditions you have!! What special things are YOU looking forward to this weekend?!

[tags]Mother’s Day, Kids in the Kitchen, Cheesecake[/tags]

Heavenly Homemaker's Club Members: Access your homepage and all your fantastic resources here! Not a member yet? Please join us!

Mother’s Day Breakfast…Chocolate Swirl Muffins

May 5, 2008 by Laura 18 Comments

This post may contain affiliate links. For more information, please see our disclosure policy.

Daddy and the boys always make a great Mother’s Day lunch for me each year. This year, they’ll be making our breakfast too!

These muffins can be made ahead of time, so the kids will make a double batch of these on Saturday so that they’ll be ready to grab on Mother’s Day morning! 

And yes…I chose a Chocolate Swirl Muffin for them to make because it IS Mother’s Day after all…and a mama needs her chocolate…

Chocolate Swirl MuffinsYum

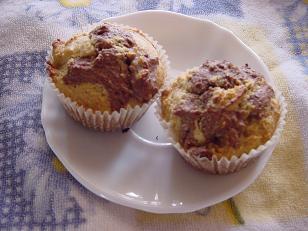
chocolateswirlmuffinssm.JPG

1 1/2 cups whole wheat flour
1 t. baking powder
1/2 t. sea salt
1/2 cup honey
1 egg
2/3 cup milk
1/4 cup melted butter
1/2 t. vanilla
2 t. cocoa powder
3-5 drops stevia

Mix together flour, baking powder and salt. Stir in honey, egg, milk, melted butter and vanilla. Scoop out 1/2 cup of batter into a small bowl. To this small amount of batter, add cocoa and stevia.

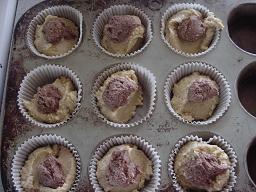
Fill nine paper lined muffin tins about half full with plain batter. Put about 2 t. of chocolate batter on top of each. 
chocolateswirlmuffins3sm.JPG

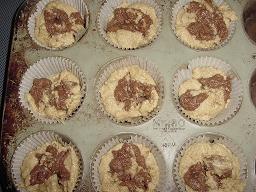
 Use a butter knife to cut the chocolate into the muffin. 
chocolateswirlmuffins2sm.JPG

Bake at 400 degrees for 15-20 minutes.

I hope you’ll continue to join us this week for lots more Mother’s Day encouragement! Read about our Celebrating Women series here!

And be sure to check out Tammy’s Recipes for more kitchen tips!

Heavenly Homemaker's Club Members: Access your homepage and all your fantastic resources here! Not a member yet? Please join us!

Whole Wheat Hamburger Buns

April 21, 2008 by Laura 180 Comments

This post may contain affiliate links. For more information, please see our disclosure policy.

 In the past few years as our family is working to learn more about eating healthier…I’ve tried to come up with a healthy, homemade whole wheat hamburger bun. 

I think I have finally figured out how to make a good bun.

(I must say…blogging about my buns feels a little….strange. But  just in case you’ve had trouble with your buns…I thought this was worth sharing.)  

Many burger bun attempts failed…as usually they were too bready…or too heavy. And we all know that NOBODY wants their buns to be too heavy…

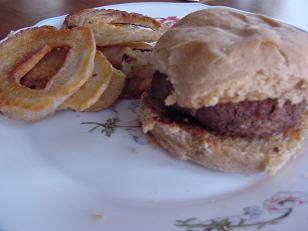
hamburgerandonionringssm.JPG

Yum

So last week…I tried again and tweaked one of my other recipes and turned out a great batch of buns! Here’s how I did it:

Homemade Whole Wheat Hamburger Buns 

5 cups  (+) whole wheat flour
1 1/2 cups warm water
2 pkgs regular or active dry yeast (4 1/2 t.)
2 T. honey
1/4 cup water
1/2 cup milk
2 T. butter
2 t. sea salt

In a large mixing bowl, stir together 3 cups of whole wheat flour and 1 1/2 cups warm water. Set aside to let rest for 30 minutes. In the meantime, mix together 1/4 cup water, yeast and honey. Allow this to sit for at least 10 minutes to activate the yeast.

Melt butter, milk and salt in a small saucepan on the stove. Do not allow the mixture to get above 120 degrees.

Pour yeast mixture and milk mixture into flour mixture. Add remaining two cups of flour (more if needed). 

Knead for about 10 minutes until dough begins to look “shiny”. Put dough back into the bowl, cover and let rise for at least an hour…or until it has doubled.

Pull dough onto a clean countertop and knead for a couple of minutes to get any air bubbles out. Roll dough on a lightly floured surface until about 1/2 inch thick. 

Cut circles from the dough with a large drinking glass or wide mouth jar. Place circles on in a well buttered baking dish about an inch apart. 

Allow to rise for about 30 minutes. Bake for 20-25 minutes in a 350 degree oven. Makes about 18 buns.

Now….I really hope you like these as much as we do!! 

But really…do be careful when you share this recipe and talk with others about them. Because…

“Don’t you just LOVE Laura’s buns?!” might just not sound quite right… ;)

Heavenly Homemaker's Club Members: Access your homepage and all your fantastic resources here! Not a member yet? Please join us!

Blueberry Coffee Cake: Breakfast…or Dessert?!

April 18, 2008 by Laura 21 Comments

This post may contain affiliate links. For more information, please see our disclosure policy.

I have a question.

I don’t like coffee, and I didn’t make coffee to drink with this cake, so can this still be called a coffeecake?

Hm, well anyway…

blueberry_coffeecake

Blueberry Coffee CakeYum

3 cups fresh or frozen blueberries
½ cup water
½ cup sucanat
3 Tablespoon cornstarch or arrowroot powder
3 cups whole wheat flour
1 teaspoon baking powder
½ teaspoon baking soda
1 cup sucanat
¾ cup melted butter
2 eggs
1 cup buttermilk
1 teaspoon vanilla

In a medium saucepan, cook blueberries and water together until boiling. Turn down the heat, cover and simmer for about five minutes. Stir together rapadura and arrowroot powder in a bowl. Slowly pour rapadura mixture into the blueberries, stirring while you pour. It should very quickly become bubbly and thick. Remove from heat. Set aside.

In a mixing bowl, combine flour, baking powder, baking soda and rapadura. Make a “well” in the center and pour in melted butter, eggs, buttermilk and vanilla. Stir well.

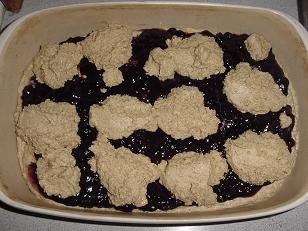
blueberrycoffeecake2sm.JPG

Pour half of the cake batter into a 9 x 13” baking dish. Spread blueberry mixture over the batter. Drop remaining batter by spoonfuls on top of the blueberry mixture.

Bake in a 350° oven for 40-45 minutes.

Heavenly Homemaker's Club Members: Access your homepage and all your fantastic resources here! Not a member yet? Please join us!

Eat More Fruits and Veggies: The Best Way to Eat an Onion

April 16, 2008 by Laura 25 Comments

This post may contain affiliate links. For more information, please see our disclosure policy.

I’ll tell you right now…I’m not a big fan of onions. I like the flavor of them cooked into my meat…and that’s about it. I don’t put them on my burgers and I think they are weird and slimy in my stew.

I’ve never really liked onion rings.

!!!!Until now!!!!

I recently made homemade onion rings….because I knew my husband would love it. (and because I am such a sweet wife)  :)

As I pulled the first few out of the skillet..I decided to try small one.

OH MY WORD!! I shrieked with great excitement over the amazing taste of this onion jewel…which made the kids come running, of course…

They then started eating them as fast as I pull them out of the skillet…

And to make a long story short (or something like that)…I had to slice up another onion and mix up another batch of batter…so that my husband could have some too. (you know…the guy I was making them for in the first place?)

I’m pretty sure the tears running down my face were for the joy of my new found love of the onion…and had nothing at all to do with the fact that I was cutting up the vegetable that makes everyone’s eyes sting like mad.

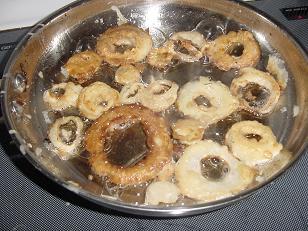
onionringssm.JPG

Amazing Onion RingsYum

3/4 cup whole wheat flour
1/2 t. sea salt
1 egg
2/3 cup milk
2 medium onions
Oil for frying (I use palm shortening)

Whisk together the flour, salt, egg and milk. Slice onions into rings. Heat a few tablespoons of oil in a skillet. Turn heat down to medium. Dip a few onion slices into the batter to thoroughly coat. Fry them in the oil, turning once. Cook on each side for 1-3 minutes each. Remove onion rings and devour immediately and place on a plate for serving. Continue to fry onion rings until batter is gone. You can keep onion rings warm in a 200 degree oven while you continue to cook the remaining rings.

Okay, I’m tellin’ ya… Go get yourself some onions and make these!

You’ll be weeping right along with me!

I feel a little teary just talking about it… (sniff)  They’re just (sniff) so…good…

Heavenly Homemaker's Club Members: Access your homepage and all your fantastic resources here! Not a member yet? Please join us!
« Previous Page
Next Page »

Join Our Community!

 Facebook Twitter E-mail Instagram Pinterest

Popular Posts

~ Will All of the Real Moms Please Stand Up?
~ Easy! Stir-and-Pour Whole Wheat Bread
~ How to Make Gatorade
~ 31 Real Food Breakfast Ideas
~ Dear Teenage Girls...
~ When Mom Takes a Step Back
~ The Inexpensive Health Insurance We Love!
~ Let's Talk Real Food Grocery Budgets

Check out our latest posts!

  • Big Family Food and Fun: September 6-12, 2026
  • Big Family Food and Fun: August 30-September 5, 2026
  • Big Family Food and Fun: August 23-29, 2026
  • Big Family Food and Fun: August 16-22, 2026
  • Big Family Food and Fun: August 9-15, 2026
Home  ~  Simple Meals  ~  Club Membership  ~  Shop  ~  Privacy Policy  ~  Disclosure  ~ Contact

Copyright © 2026 · Beautiful Pro Theme on Genesis Framework · WordPress · Log in