Heavenly Homemakers

Encouraging women in homemaking, healthy eating and parenting

  • Home
    • About
    • FAQs
  • Recipes
    • Bread and Breakfast
    • Condiments
    • Dairy
    • Main Dishes
    • Side Dishes and Snacks
    • Desserts
    • Gluten Free
    • Instant Pot
    • Crock Pot
    • Heavenly Homemaker’s Weekly Menus
  • Homemaking
    • Real Food Sources
  • Store
  • Contact
    • Advertise
    • Disclosure
    • Privacy Policy
  • Simple Meals
  • Club Members!

Getting Ahead for the Holidays – Join Us!

November 1, 2015 by Laura 110 Comments

This post may contain affiliate links. For more information, please see our disclosure policy.

There is oodles of info out there about how to have a simple season and how to relax and enjoy the holidays. I am all for it. Why go overboard and make life complicated? Pinterest can keep its 14-step recipes and perfect looking hand-crafted gifts. I’ve gotta stick with the basics.

But still. Making a holiday special means that I’m going to do extra work on top of all my normal work. There’s no way around it. No matter how simple I keep our holiday festivities, the cookies don’t bake themselves. Packages don’t arrive if I don’t order them. The turkey stays frozen when not baked. I could go on.

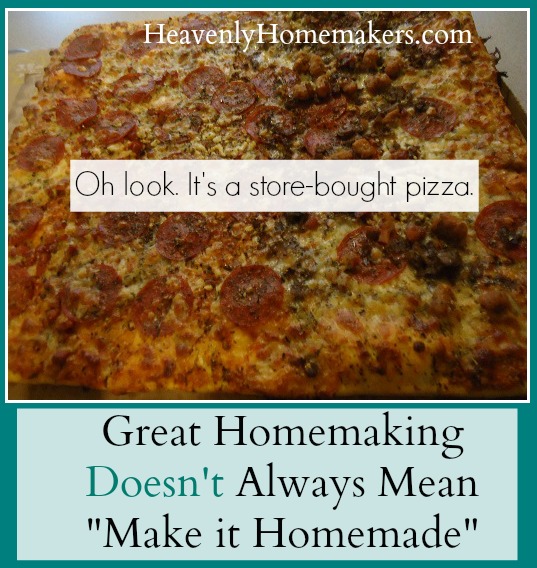
Now, I can keep things simpler if I buy pre-made food and gift packages. Sometimes I do. Sometimes in the name of saving my sanity, I feel that it’s worth the extra money and the gross ingredients (don’t read the label, don’t real the label, what you don’t know can’t hurt you, do not turn that package over!). But overall, I want to save money and put delicious real food on the table. While keeping life simple. Is it even possible?

Thus, we begin a fun two-week series here called:

Getting Ahead for the Holidays

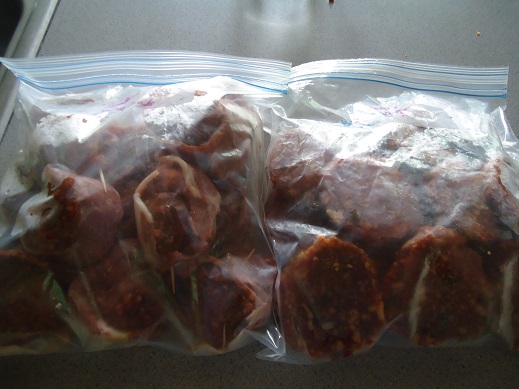
This is the best way I know to keep life simple during the holiday season. If I do everything last minute, I enjoy nothing. But if I do a little each day in advance, prepping food and gifts and decorations – I can actually enjoy myself. What a lovely idea. Food can be put on the table (the good kind) without me standing on my feet for hours at a time. I can save dozens (or maybe even hundreds?) of dollars. Food tastes better. Gifts are more meaningful. I can actually look at the people around me and maybe I can even smile.

Getting ahead saves my holiday. Want to join me?

Getting Ahead for the Holidays Invitation

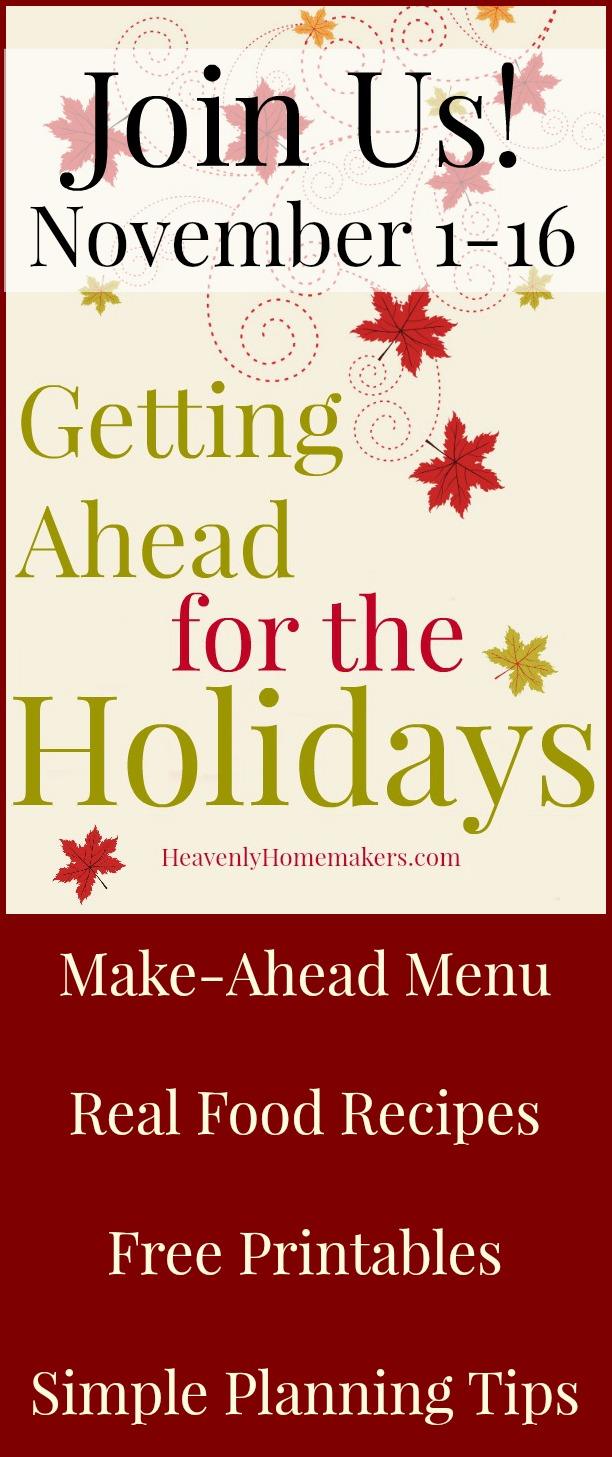
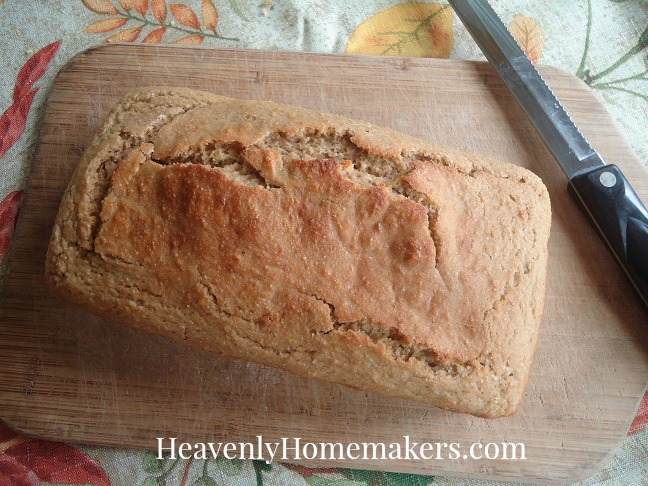
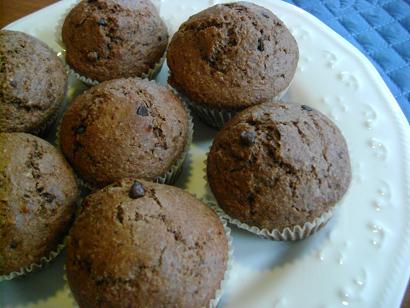
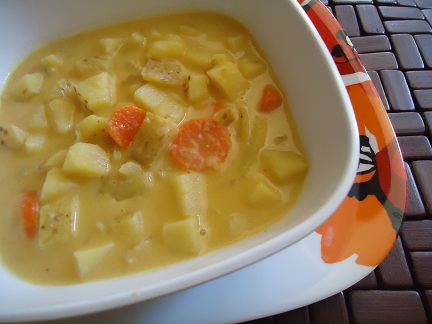
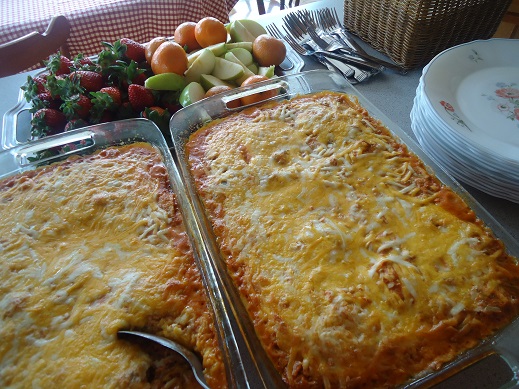
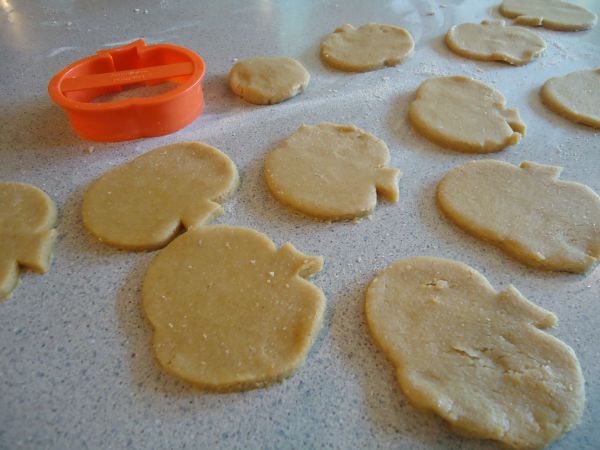
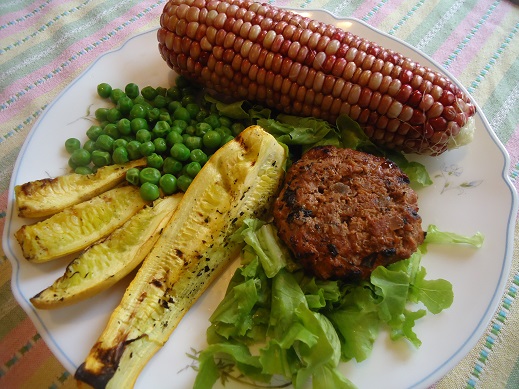
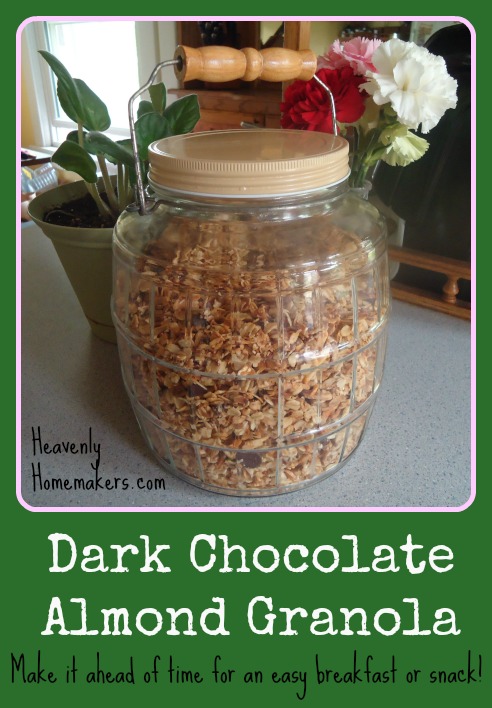
Most of the posts I’ll share will involve food prep suggestions and recipes. This doesn’t surprise you, I’m sure. Decorating is not my gift. Food though? I  love it! Nothing will be fancy; everything will be tasty. It’s all real food.

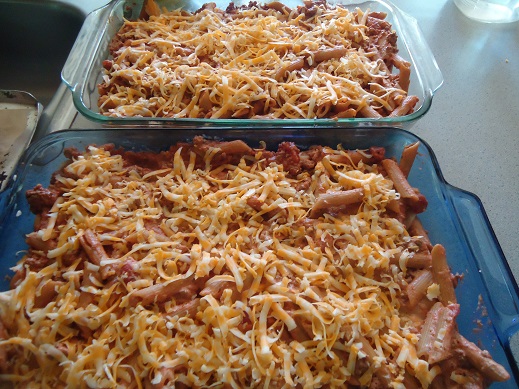
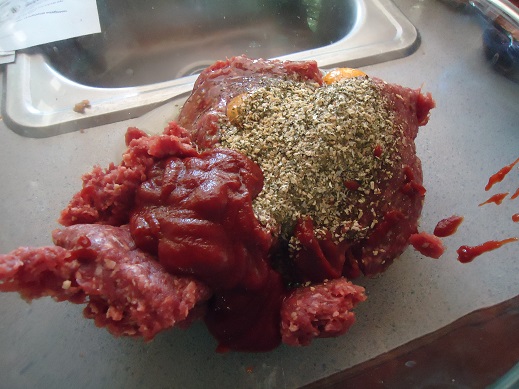
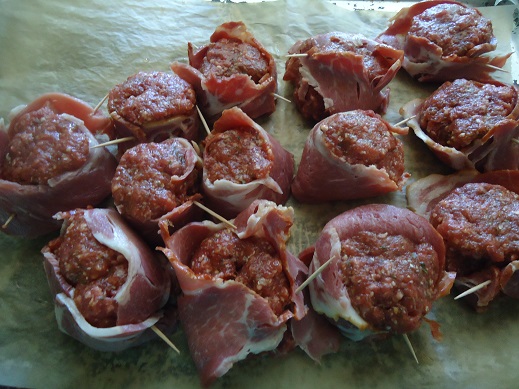
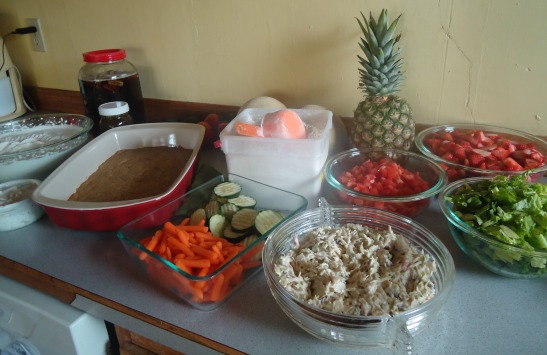
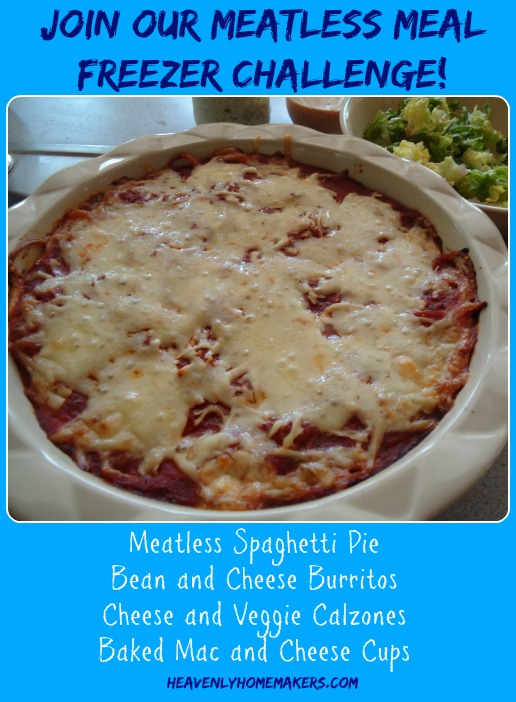
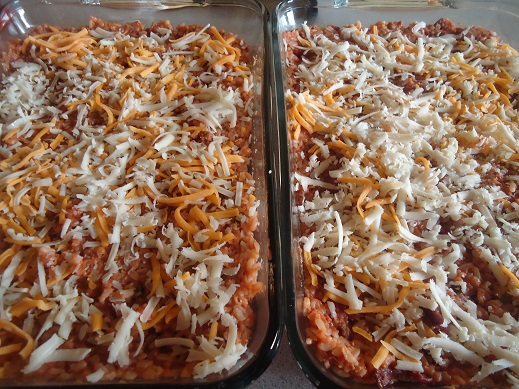
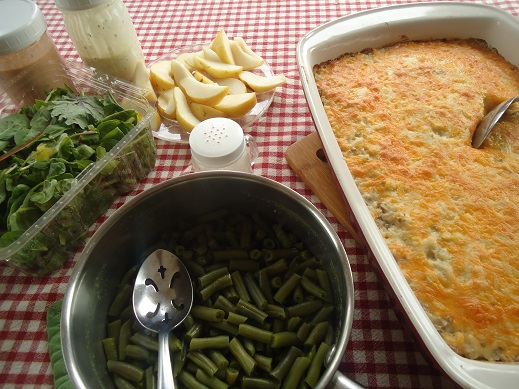
Would you like a peek at the menu we’ll be working through?

holiday menu plan

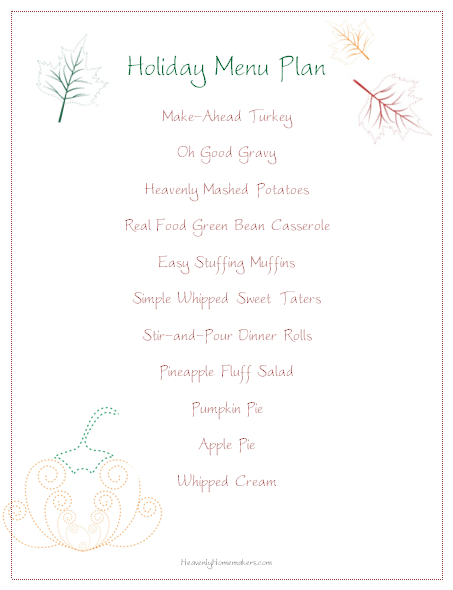
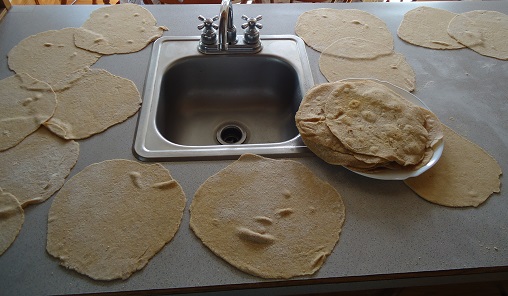
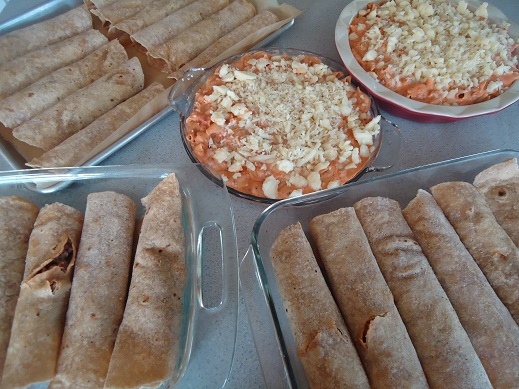
All of this (with the exception of the Stir-and-Pour Dinner Rolls) can be made in advance. Some can be made many days in advance. Some should be made the day before. All of the recipes are simple. I’ll walk you through the entire process of methods I use to make these foods efficiently so I can enjoy time with family and guests!

Make plans to join us here. If you want, subscribe so you won’t miss a post:

Daily Newsletter

Weekly Newsletter

There will be recipes, printables…and I’m thinking there should be prizes. What do you think? Should there be prizes? Yes. Let there be prizes.

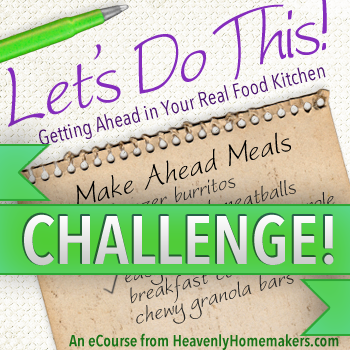
Every time you see this banner on a post:

Getting Ahead for the Holidays

Leave a comment on that post.

There will be many posts in the coming days where you’ll spot that banner. The more you comment, the more chances you have to win! What will you win?

How about we give away three $25 Gift Certificates good toward any of our eCourses or downloadable items in the Heavenly Homemakers Shop? Three! Sound good?

Let’s get the comments rolling with this question:

Which of the recipes in the Holiday Menu above are you most excited to see first?

Heavenly Homemaker's Club Members: Access your homepage and all your fantastic resources here! Not a member yet? Please join us!

Company is Coming This Weekend! Here’s What We’ll be Eating…

October 18, 2015 by Laura 9 Comments

This post may contain affiliate links. For more information, please see our disclosure policy.

I super love when people come to visit us! I love planning the meals and preparing the meals and serving the meals and doing all the food up right in an effort to bless our guests while we visit. And of course, I love to visit with our guests.

In summary: Would one of you please come clean my house for me?

Man, I do not like to clean. I do like my house to be clean, but the act of cleaning is low on my fun list. Actually, it’s not even on my fun list. It’s on my do it because it has to be done so get over it list.

Hiring regular cleaning help is not in the budget right now, but I’m seriously thinking about seeing who might want to trade cooking for cleaning. Some people like to clean but not cook, right? Yes, I hear that this is true.

My boys are very helpful with their assigned cleaning chores, which is another reason I’ve not wanted to outsource this task to hired help. But sometimes my idea of clean differs from my boys’ idea of clean. (I probably don’t need to explain this.)

Well anyway. All this talk about cleaning is starting to make me upset. Let’s talk about food!!!! Aaaaahhh yes. Now I’m happy again. :) :) :) :)

Family is coming to town this weekend for our York College Homecoming festivities. I can’t wait to feed see them! This is always a wonderful weekend with people we don’t get to see often enough.

In order to enjoy my guests and avoid having to talk very much while I cook (this is a serious problem for me) – I’m making most of the food ahead of time or at least planning very simple, no-brainer dishes (like this Stir-and-Pour Bread).

Whole Wheat No-Knead Bread

Here are the meals we’ll be having:

Breakfast Foods

  • Bacon Cheesy Eggs
  • Banana Bread
  • Applesauce Bread
  • Chocolate Chocolate Chip Muffins
  • Lots of Fruit (apples, pears, grapes, raspberries, blueberries, cantaloupe, plums)
  • Donuts (My dad almost always brings a box to share. It’s a Papa thing and we love it.)

chocolatechocolatechipmuffinssm

Lunch Foods

  • Potato Soup
  • Chili (with Fritos – yes really – and shredded cheese)
  • Sub Sandwich Bar
  • Veggie Platter (carrots, cucumbers, sweet peppers, olives, pickles)
  • Fresh Fruit

potato_soup

Dinner Meals

  • Creamy Salsa Enchilada Casserole from Lesson 2 of the Let’s Do This! eCourse, with tossed salad, spicy avocado dip and chips, fruit
  • Crock Pot Roast Beef from Eat Right Away: Slow Cooker Beef Edition, cheesy mashed potatoes, green beans, cantaloupe, stir-and-pour bread

(The Crock Pot Roast Beef recipe was originally written to be used for Roast Beef and Melted Cheese Sandwiches, but we love the flavor of this one so much, and it only takes about 30 seconds to prepare {seriously!!!!}, so we make it frequently to eat as a main dish without the cheese and buns.)

creamy salsa enchiladas

Here’s a picture of Creamy Salsa Enchilada Casseroles I like to serve guests.
So, so, so, so good. And easy.

Snack Foods

  • Easy {Low} Sugar Cookies
  • Applesauce (I’ve made huge bowls of this since apples are abundant right now.)
  • Fresh Fruit
  • Cheese and Crackers
  • Chewy Granola Bars

sugar cookies 4

Any of these meals sound particularly good to you? What do you like feeding guests when they come visit? Who likes cleaning?!?

Heavenly Homemaker's Club Members: Access your homepage and all your fantastic resources here! Not a member yet? Please join us!

How to Freeze Apple Pie Filling – Easy!

September 14, 2015 by Laura 12 Comments

This post may contain affiliate links. For more information, please see our disclosure policy.

When it comes to making and preserving Apple Pie Filling, you have a few choices. You can can it (can can, can you do the can can, can you…). You can freeze it, which I will describe here today. Or (and this is by far the most novel idea of them all) you can put the filling directly into a pie crust and bake it immediately.

apples

It all comes down to how much freezer space you have, how much pantry space you have, if you love canning produce, if you have plenty of jars, or if you really just want to eat an apple pie after dinner on this very day.

But really most of it comes down to apples. You can’t do any of this if you don’t have apples.

So…do you have apples? I have apples. This year I decided that the easiest way for me to preserve Apple Pie Filling is to freeze it.

If you want to can apple pie filling so that you can store it in your pantry, you can learn how to do that here. You should know that I break out in a sweat every single time I type the word p-a-n-t-r-y. I re-read it four hundred and eighty times to make sure I didn’t leave out the “r” because that would bring a whole new unintended meaning to my sentence.

apple_pie_filling_5

Here’s how to freeze apple pie filling:

1. Wash, core, and slice apples into a large bowl. I leave the peeling on. (Once again I sweat and make sure I added the “l” to p-e-e-l-i-n-g.)
2. Stir in 1/4 cup sucanat or brown sugar plus 1 teaspoon cinnamon per every 5-6 apples.
3. Transfer mixture to quart-sized freezer bags, 3-4 cups of apple pie filling per bag.
4. Label the bag and freeze it for up to a year.

How to Freeze Apple Pie Filling

When you’re ready to make an apple pie, simply thaw and dump the contents into an unbaked pie crust, then proceed as you normally would to make an apple pie. Here’s my Whole Wheat Pie Crust recipe. Even easier, use the filling to make an Apple Crisp or a Salted Caramel Apple Crisp.

It’s wonderful having prepared apple pie filling in your freezer, and yes, even in your pantrrrrrrry.

How’s your apple supply? Have you been able to get your hands on plenty of good apples this year? 

Heavenly Homemaker's Club Members: Access your homepage and all your fantastic resources here! Not a member yet? Please join us!

I Just Spent 45 Minutes in the Kitchen and Made 6 Meals! Boom!

June 11, 2015 by Laura 8 Comments

This post may contain affiliate links. For more information, please see our disclosure policy.

I decided to give you an idea of how our Eat Right Away Packets work, so I thawed 6 pounds of hamburger and took some really bad pictures of raw meat. My life is glamorous.

Eat Right Away Beef Edition 50
Knowing that your life is probably glamorous also – meaning you might have interruptions in the form of nursing babies, important phone calls, teenagers needing a ride, siblings who need to learn that nice words go a long way, or any other variety of real life stuff – we all know that 45 minutes can turn into an hour and an hour can turn into are you kidding me. So don’t set a timer on this. My 45 minutes of work began at 12:00 noon and didn’t end until 1:30 pm because someone stopped by to pick something up a few minutes after I started, my husband and 10 year old had some questions, and somewhere in there I realized I needed lunch because what was I thinking starting this project on an empty stomach?

In other words, I did 45 minutes of kitchen work, but those minutes were broken up a bit by life and lunch.

The beauty of the Eat Right Away Packets is that they help you be efficient with your time, they help you make the most of your effort in the kitchen, and they help you turn out some pretty awesome meals with very little effort. But there’s no right or wrong way to go about putting these meals together. Case in point:

Here are the five beef recipes in the Eat Right Away: Beef Edition Packet ~

  • Cheesy Salsa Burgers
  • One Dish Cheesy Beef and Potatoes
  • Bacon-Wrapped Individual Meatloaves
  • Easy Hamburger Soup 
  • Baked Ziti 

But seeing as we’re not into soup this summer, and knowing I was low on time – I decided to skip the Easy Hamburger Soup and the One Dish Cheesy Beef and Potatoes. I went with the crazy easy Cheesy Salsa Burgers, the almost as crazy easy Bacon-Wrapped Individual Meatloaves, and the no-brainer Baked Ziti.

I doubled the Baked Ziti. Why not, right? So when all was said and done, I had spent 45 minutes of work time to make 6 meals. Sweet!

NOTE: If your family is smaller than mine or eats less – these Eat Right Away Packets are going to turn out way more than 5 meals for you. How’s that for a bonus return on your time investment?!

So here’s an ugly picture run-down of my Eat Right Away: Beef Edition meal prep…

I threw 2 pounds of meat into a pot to begin cooking (for the double batch of Baked Ziti).

beef1

While it began cooking, I mushed up another two pounds of meat in a bowl, then stirred in the ingredients for Cheesy Salsa Burgers. Here and there, I stirred the meat cooking on the stove.

beef3

Side Note: My dad and his wife got me this amazing meat squisher
(spoken like a true professional) for Christmas. I super love it.

Before shaping the patties, I put a pot of water on to boil. (Had I not taken the time to snap a picture, you all would surely be left in the dark as to what this step looks like. You are very, very welcome.)

beef4

I shaped 18 Cheesy Salsa Burger patties – in a variety of sizes. See how great this is? You can make different sizes to accommodate different sized appetites. That, and you can just be a total non-perfectionist who really doesn’t care if all her patties are uniform in size. This may not work for you Type A’s. Shape your patties according to your personality type. We can all still be friends.

beef5

Somewhere in there, my water hit boiling point. I poured in the pasta and continued shaping patties.

beef6

The meat was finished cooking on the stove, so I added sauce ingredients.

beef7

If you look at my Baked Ziti recipe in the beef packet, you’ll see that I didn’t follow my own instructions correctly. I blame it on the fact that I hadn’t eaten lunch.

And it was at this point that I stopped my work and ate some tuna salad and cole slaw.

Revived by food, I stirred in other Ziti sauce ingredients, then began to build the casseroles.

beef8

beef9

beef12

Having this done, I went to work on the Bacon-Wrapped Individual Meatloaves. Two pounds of meat in a bowl, other ingredients dumped in (because life is too short to get out measuring spoons).

beef10

Meatloaves were shaped and wrapped in bacon. Husband walked in and said some really nice things about my bacon. ;)

beef11

I put the pans of Meatloaves and Salsa Patties into the freezer. Then, I loaded the dishwasher and hit “start.” While the meat froze and the dishes washed themselves, I took Malachi to meet some friends at the swimming pool because life is hard.

beef13

So much glorious vitamin D later, I came home and put the frozen meat items into freezer bags. I labeled them and put them back in the freezer for a quick meal another day. YAY!!

beef14

That night, I threw some of the Cheesy Salsa Burgers on the grill for our dinner (meal #1). In the freezer I have another meal of burgers (meal #2), two meals worth of bacon meat-loaves (meals #3 and #4) and two zitis (meals #5 and #6).

beef15

You guys – this is not hard!! If you don’t love cooking, I believe you will really love this way of prepping ahead to make your kitchen life easier. These recipes are super simple, and once the work of preparing these foods is done (and cleaned up after, woot!) – all you have to do at meal time is pull something out of the freezer and cook it. You don’t even have to think at that point. (I’m not ashamed to say that the not thinking is my favorite part of this.)

I’ve got many pounds of chicken coming in a Bountiful Basket order Friday, so this weekend I’ll be pulling out my Chicken Edition and taking more bad pictures to show you how that one works.

Get all the details on these Eat Right Away Packets here. Ready to add them to your kitchen collection? Download them right away and get started!

Eat Right Away: Beef Edition
$2.00

Add to Cart

Eat Right Away: Chicken Edition
$2.00

Add to Cart


Some of the links in this post are affiliate links.

Heavenly Homemaker's Club Members: Access your homepage and all your fantastic resources here! Not a member yet? Please join us!

What I’ll Be Doing This Weekend

November 14, 2014 by Laura 9 Comments

This post may contain affiliate links. For more information, please see our disclosure policy.

If I thought I couldn’t keep up before with all that must be done each day, somehow I am finding it even harder now that our lives are so full of teenage activities. Throw in the fact that our oldest is a senior, and all that goes along with making decisions for next year, applying for scholarships, and taking college level classes. I officially surrender. I am beat.

Except that I’m not, because God is in control (not me!), my family is awesome, and if all else fails, I can buy a pizza.

Great Homemaking Doesn't Always Mean Make it Homemade

If you haven’t already, or if you need a reminder about what’s really important,
you should read this post.

This weekend, I find myself with only one kid at home (the rest are enjoying time with Christian friends at a youth rally). No school to teach, barely anyone to feed – I will be using this time to catch up and try to prepare for next week! I’m thankful God is giving me this little window of “down time.” Next weekend, basketball travel begins, then Thanksgiving, then more games, then Christmas…

We have much to be thankful for! Life is never boring, and what would we do without these amazing kids who keep us so busy? (Sleep, maybe? No, no. That was rhetorical.)

I’m writing down my weekend plan here to share with you. On Sunday, I’ll try to share an update on what I’ve accomplished.

Friday after school is (mostly) wrapped up:

  • Grocery shop to stock up on fresh produce for this week, plus to get remaining food needed to feed 30 teens at Sunday Night Huddle
  • Finish the Menu Planning Notebook – and upload it to my Shop – finally!
  • Make Chicken Broth
  • Clean out the fridge (wow, does it ever need to be wiped out!)
  • Enjoy one-on-one time with Malachi, the lone child at home this weekend

Saturday:

  • Make Coconut Fudge Bars to have on hand for snacking
  • Make 2 Creamy Chicken and Rice Casseroles – one to eat next week, and one for the freezer
  • Make a big batch of Chili

Doing those tasks, along with getting some writing done and maybe tackling my email inbox (yikes!) should help me keep my head above water next week.

How about you? What will you be doing this weekend?

Heavenly Homemaker's Club Members: Access your homepage and all your fantastic resources here! Not a member yet? Please join us!

Trying To Get Ahead So I Can Have Rational Conversations With My Guests

May 24, 2014 by Laura 10 Comments

This post may contain affiliate links. For more information, please see our disclosure policy.

My aunt and uncle are visiting for the weekend – something I’ve been looking forward to for a long time! We’ll be having cousins over for a meal or two while they are here. And you know me. For the life of me, I cannot talk and cook at the same time (more info to follow about my poor, pitiful self).

Because of this issue I have, the boys and I spend some time yesterday prepping food to make it possible for me to have coherent conversations with my loved ones. I think it goes without saying that we will all appreciate this – both the food and the completed sentences.

memorial day food 2

What all did we get done? Well, none of this was difficult, and in fact, much of it didn’t even involve cooking. Still, the more kitchen work done ahead of time the better. Here’s what we did:

  • Prepped tomatoes and lettuce for BLT Wraps. The day before that, we cooked the bacon for the cream cheese mixture. Was it torture to make bacon and not eat it. Yes, just a little bit.
  • Sliced strawberries and whipped cream to top Whole Wheat Waffles for breakfast.
  • Made Creamy Coleslaw
  • Sliced cucumbers and opened a bag of petite carrots (that was exhausting, let me tell you)
  • Ground flour to have on hand for waffles and whatever else I may need it for this weekend.
  • Made Ranch Dip for the veggies.
  • Made Italian Dressing to marinate chicken for the grill.
  • Baked a double batch of Shortbread for snacking.

You may remember the following post I wrote last year. I thought it was worth sharing again, just to help you understand why prepping food ahead of time is so important for me. Enjoy!

Having Company? Prepare Food Ahead of Time (and My Hostess Confessions)

Little known fact about Laura:  I can start a load of laundry, brush my teeth, plan dinner, write a grocery list, and instruct four different children on six different chores all at the same time, but for all of my multi-tasking abilities, I cannot talk and cook simultaneously.

I try to fake it. I’ll stir together cookies while chatting with a friend in the kitchen, and attempt to sound intelligent when answering a question. This works not at all. She’ll ask how long we’ve lived in this house, and I’ll look lamely up from my cocoa powder and answer, “blue.” She’ll try again, asking where I got my lovely serving platter. I’ll blink a few times in an effort to pull myself into the conversation, and come up with “last week at a soccer game.” You think I’m kidding. God bless our house guests. 

Occasionally, I will actually answer questions correctly while cooking (and even ask a few brilliant ones) only to realize later that I forgot to stir important ingredients like oil or eggs into our breakfast muffins. We already know I struggle with remembering to put bananas in my banana bread – and that’s when I’m all alone in the kitchen holding only a conversation with myself (don’t ask). It’s rather scary and a wonder friends and loved ones still eat my food and declare it to be good.

Because I love extending hospitality, but I also love not looking and sounding like a dimwit, I work to prepare as much food ahead of time as possible before guests arrive. It is my number one hospitality survival tactic. This also helps insure that I will not be working in the kitchen the entire time my company is here. I love to cook, but when guests are here, I’d much rather play games, watch the kids play, or sit around and visit intelligently. (Eleven. We’ve lived in this house for eleven years. It was a wedding gift. The platter, not the house. Try to keep up.)

In addition, prepping food ahead of time means that the worst of the dirty dishes are cleaned up and put away. I’ve also found that when some of the guests are children who eat as much and as frequently as mine, having snacks and meals prepared is helpful in avoiding melt-downs and grumpiness. As we all know, a grumpy hostess melting down in the kitchen is ugly. (Right. You thought I was talking about the kids.)

One more thing to note:  Beyond preparing food ahead of time, I feel it is important to keep meals simple. Guests don’t need gourmet, they just need food served with love. They don’t need fancy, they just need tasty. A fruit platter is beautiful, nourishing, and delicious. A lettuce salad tosses together quickly. Veggies steam in no time. Put those together with a casserole or another main dish you’ve prepared ahead of time, and you’ve got a perfect, simple meal to serve to guests.

So just in case you find yourself like me, with the inability to cook and talk at the same time, do the best you can to prepare food ahead of time. If all else fails, remember to keep a smile on your face at all times. You might respond to your guest with “in the refrigerator behind the peanut butter” when asked where your bathroom is located, but at least you’ll look cute.

Can you talk and cook at the same time?  (If your answer doesn’t make sense, I’ll assume you’re adding spices to your sauce.)

Heavenly Homemaker's Club Members: Access your homepage and all your fantastic resources here! Not a member yet? Please join us!

Dark Chocolate Almond Granola – Quick! Make this before it gets too hot outside!

May 21, 2014 by Laura 10 Comments

This post may contain affiliate links. For more information, please see our disclosure policy.

First, many of you are thinking, “What do you mean before it gets too hot outside? It’s already too hot outside!” And second, do you want to see my awesome new jar??

Dark Chocolate Almond Granola - A Great Make-Ahead Meal

Yum

I actually got the jar as a Christmas gift and am just now getting around to showing you. Therefore, it’s really not new as I’ve had it for five months. It’s also an antique, which also means it’s not new, but whatever. My dad’s wife found it at an auction and was sweet enough to think of me, snatch it up, wrap it, and put it under the tree. I opened it and gasped with complete delight, while everyone else in the room was like, “oh look it’s an old, used jar…she really gets excited about weird things.”

I washed it up, and have used it to store many treats. The latest? Dark Chocolate Almond Granola. Which leads me back to my original statement:  You really should make this before it gets too hot outside.

See, at my house, it’s finallllllly warming up and staying warm (I hope). This is making me so happy!!! It’s also making me think about foods that require an oven and how I will not want to be using the oven much in the near future. These thoughts are what led me to ask my 14 year old to make a double batch of Dark Chocolate Almond Granola earlier this week. How nice to get this made ahead of time! We baked it on a day it wasn’t too hot, and we can eat it on a day that is too hot.

And it looks so pretty in my new, old jar. Don’t you think?

One thing to consider:  The pieces of chocolate in the granola will get pretty soft if (when) my kitchen gets too hot. I may need to store it in the fridge. On the other hand, melted chocolate all over granola is not a bad thing.

So, Dark Chocolate Almond Granola. Make some before it gets too hot. Enjoy it on a morning you don’t have time to cook breakfast, it’s too hot to cook breakfast, or you just have a hankering for chocolatey almond goodness.

Find the recipe here.  This recipe is also included in our free Healthy Breakfast Made Simple eBook. Head on over and download it for several more easy, healthy breakfast ideas.

Have you made this recipe before? Is it hot at your house yet? Do you love my new, old jar?

Heavenly Homemaker's Club Members: Access your homepage and all your fantastic resources here! Not a member yet? Please join us!

Meatless Freezer Cooking: Bean and Cheese Burritos and Meatless Spaghetti Pie

May 5, 2014 by Laura 13 Comments

This post may contain affiliate links. For more information, please see our disclosure policy.

One big mess, four awesome meals. It was a great morning!

Since we’re finished with our official school year, I got a couple boys involved in today’s freezer cooking. Elias (12) learned to make Meatless Spaghetti Pie (recipe in {Healthy} Make-Ahead Meals and Snacks eBook). He chose to use shell-shaped pasta, because when you’re the cook, you earn the privilege of picking from penne, spiral, shell, elbow….

Am I the only one who thinks picking the pasta shape is a fun activity? Maybe I just don’t get out enough.  Well, anyway, Elias picked shell noodles and did a great job putting together the Meatless Spaghetti Pies.

In the meantime, I made a triple batch of Whole Wheat Tortillas for Bean and Cheese Burritos. I then put together 23 burritos. Because we eat so much at our house, these burritos will only last us two meals. But, I now have 11 burritos in the freezer to pull out sometime in the next few weeks for an easy meal!

meatless freezer 1

I can roll tortillas faster than my skillet can cook tortillas,
so I just start laying them out all over the counter while they wait for their turn to be cooked.

Hey, would you like to hear an obvious discovery I made this morning? When you’re making meatless meals, you don’t have to worry about thawing out meat before you cook. Sometimes my brilliance shocks you, doesn’t it?  Not only is this meatless thing a money saver, it’s also a time saver. But I still love my beef.

After the mess was cleaned up, we ended up with 23 burritos and 2 spaghetti pies. If I add plenty of sides to those pies, I can make it work to serve one tonight and freeze one for another day.

meatless freezer 2

Are you joining our latest Freezer Cooking Challenge?  You’ll find the plans and grocery list here. You’ll love how easy it is to get ahead!

Heavenly Homemaker's Club Members: Access your homepage and all your fantastic resources here! Not a member yet? Please join us!

The Plan ~ Getting Ready for Freezer Cooking, Week Four – Meatless Meals

May 2, 2014 by Laura 6 Comments

This post may contain affiliate links. For more information, please see our disclosure policy.

I love meat.  My body doesn’t function well when I go too long (you know, like an entire day and a half) without eating animal protein. Beyond that, sometimes, fish or chicken just isn’t enough. There are days my body needs beef and ain’t nothin’ else gonna cut it. I think this has something to do with my tendency to become anemic and the iron red meat provides. I truly do not feel well when I’m not eating enough beef, and on the contrary, I feel very, very well and much more energetic when I am eating plenty of cow.

Therefore, when some of you suggested that we do a freezer challenge that consisted entirely of meatless meals, I was like, “What? Why would we do that? Don’t you know that meatless meals don’t have any meat in them?”

Then, I (had a hamburger) and realized that these lovely ladies who made the meatless suggestion were actually brilliant. Meatless meals are a huge money saver, and good gravy – it’s not like I need meat at every meal. I just need it at least once every day. Meatless meals rock.  Let’s make some for the freezer, shall we?

350x350_Challenge

We’ve taken a couple weeks off from freezer cooking challenges, and I don’t know about you, but I’m excited to hit it again. We’ve slowly been working our way through the {beef, chicken, and breakfast} meals I put into the freezer during the March/April challenges. The meatless freezer meal ideas I came up with are going to go together quickly and make for some super easy lunches on busy days during the next few weeks.

Here’s what is so great about the freezer cooking I plan to do:  I’ll be making a double batch of each recipe. That way, I can serve one portion of it to my family the very day I make it. Then, I’ll freeze the other portion to pull out another day. Work once, eat twice – it’s my favorite way to get ahead!

Join me!!! I want you to see how easy it is to get ahead in your real food kitchen. You’ll save money, effort, energy, time, and brain power.

Here’s what I’m planning to make, one at a time, during the next few days:

  • Bean and Cheese Burritos (x2)
  • Meatless Spaghetti Pie (x2) (recipe in {Healthy} Make-Ahead Meals and Snacks eBook)
  • Calzones (with cheese and veggies) (x2)
  • Baked Mac and Cheese Cups (x2) (recipe in {Healthy} Make-Ahead Meals and Snacks eBook)

Join Our Meatless Meal Freezer Challenge!

The Grocery List

  • 32 ounces whole grain spaghetti noodles
  • 5 cups whole grain pasta – any shape
  • 1/2 cup butter
  • 4 eggs
  • 4 cups (32 ounces) ricotta cheese
  • 1 cup (16 ounces) parmesan cheese
  • 8 cups (64 ounces) spaghetti sauce
  • 4 cups shredded mozzarella cheese
  • 6 1/2 cups shredded cheddar cheese
  • 6 cups whole milk
  • 6 cups cooked black or pinto beans (or a combination of both)
  • 2 cups (16 ounces) salsa
  • 16-20 whole wheat tortillas (we like homemade tortillas)
  • 10 cups whole wheat flour
  • 9 teaspoons yeast
  • 3-4 cups pizza sauce (depending on how saucy you want your calzones)
  • veggies, olives, and other fillings for calzones
  • sea salt and pepper

I’ve created a downloadable and printable grocery list for you here:  Freezer Cooking Grocery List Four

 Who’s going to join me?

To help you out if you’re interested in some of the above recipes, the Let’s Do This! eCourse and {Healthy} Make-Ahead Meals and Snacks eBook are discounted to just $5 for the whole package. The recipes included in that package are some that we use all the time at our house to get ahead!

Heavenly Homemaker's Club Members: Access your homepage and all your fantastic resources here! Not a member yet? Please join us!

Cheesy Beef and Rice and Bacon Cheeseburger Casserole ~ Freezer Cooking Week One

March 30, 2014 by Laura 12 Comments

This post may contain affiliate links. For more information, please see our disclosure policy.

Here’s hoping you got all your grocery shopping done for this challenge. If not, you can certainly join this challenge at any time!

Did you brown 8 pounds of hamburger in preparation for the freezer cooking? How long did it take?

Wait.  You didn’t time yourself cooking the hamburger meat? It’s possible that you aren’t as much of a food geek as I am. Be thankful.  I just get a kick out of knowing how much time it saves to double – or octuple, as the case may be in this beefy situation – in order to get ahead.

Today, we’re going to make both Cheesy Beef and Rice and Bacon Cheeseburger Casserole.

  • Cheesy Beef and Rice
  • Bacon Cheeseburger Casserole (recipe in {Healthy} Make-Ahead Meals and Snacks eBook)

Why are we making both recipes in one day? Because they both call for rice. It makes sense, then, to cook up all the rice we need for both recipes, then divide it up and make our four casseroles. Oh the efficiency. Oh the productivity. Oh the smell of bacon…

Yeah, by the way, prepare yourself for the fact that your family will likely get excited about eating bacon once they smell it cooking today. If you weren’t planning to serve the Bacon Cheeseburger Casserole tonight, you may need to change your plan to accommodate all the bacon sniffers and the sad I can’t believe you’re making bacon and we can’t eat it faces in your home.

So let’s get started. 

I’m assuming you’ve already cooked your meat. If not, well – cook your meat. Because we’re making four casseroles today, you’ll need four pounds of cooked hamburger.

Now, begin by getting the rice cooking since that’s what takes the longest. The beauty of this: while your rice cooks, you can do 45 minutes of other work or play. Unless, of course, you want to stand at the stove watching your rice get plump and tender.  snore

We need 5 cups of brown rice for these four casseroles, so measure out 10 cups of water and bring it to a boil. Stir in 5 cups of rice, turn down your burner to simmer, cover the pot, then walk away. Here are more detailed instructions on cooking brown rice.

beef freezer cooking 1

There it is. It can cook all by itself and will actually turn to mush if you stir it.
So put the lid on, set a timer, and walk away. 

In the meantime, you can cut your bacon into bite-sized pieces and get it cooking. You can also get out your casserole dishes, set out your other needed ingredients, and trim your fingernails – though not all at the same time or all in the same place.

beef freezer cooking 2

Once your rice and bacon are finished cooking, divide the rice according to the recipes. Stir in remaining ingredients to create your four casseroles. I found that it was easiest to use two huge bowls – one for each recipe. Then I divided the contents of the bowl into two casserole dishes for each recipe.

beef freezer cooking 4

Cheesy Beef and Rice x2

You might notice that since I was making so many cheesy casseroles this week, I cheated and bought a big bag of pre-shredded Colby jack cheese. I know.  There are healthier options, and I always recommend the healthier options. But it’s still cheese, right? At least I didn’t purchase a pre-shredded Snicker bar (which doesn’t even make sense, but I was trying to divert your attention away from my orange cheese).

beef freezer cooking 5

Bacon Cheeseburger Casserole x2

I actually made these four casseroles over the weekend so that I could get ahead a little bit on putting together these challenge posts. How lovely it was to put a Cheesy Beef and Rice plus a Bacon Cheeseburger Casserole into the freezer. I then put one Cheesy Beef and Rice into the oven too cook and serve for dinner, and put the additional Bacon Cheeseburger Casserole into the fridge to serve another day this week. One big mess, four great meals!

beef freezer cooking 7

See how easy it was to set out delicious and healthy veggie and fruit side dishes with this Cheesy Beef and Rice? I cooked some frozen green beans, set out a package of mixed greens along with some homemade dressings that were already made and in the fridge, sliced a couple of pears, and called in the family. Except for about one serving of greens, this entire spread was gone in about a half hour.

Need more Pyrex? I found a 9×13 dish with lid for just $11.79 with free shipping if you have Amazon Prime. If you order today, it would arrive in two days, which works out great for this challenge!

pyrex 5

Be sure to leave a comment letting us know how you’re coming in this challenge!

Just a reminder, Let’s Do This! eCourse and {Healthy} Make-Ahead Meals and Snacks eBook are discounted to just $5 for the whole package.

Heavenly Homemaker's Club Members: Access your homepage and all your fantastic resources here! Not a member yet? Please join us!
« Previous Page
Next Page »

Join Our Community!

 Facebook Twitter E-mail Instagram Pinterest

Popular Posts

~ Will All of the Real Moms Please Stand Up?
~ Easy! Stir-and-Pour Whole Wheat Bread
~ How to Make Gatorade
~ 31 Real Food Breakfast Ideas
~ Dear Teenage Girls...
~ When Mom Takes a Step Back
~ The Inexpensive Health Insurance We Love!
~ Let's Talk Real Food Grocery Budgets

Check out our latest posts!

  • Big Family Food and Fun: April 19-25, 2026
  • Big Family Food and Fun: April 12-18, 2026
  • Big Family Food and Fun: April 5-11, 2026
  • Big Family Food and Fun: March 29-April 4, 2026
  • My 2026 NON-Grocery Budget Update
Home  ~  Simple Meals  ~  Club Membership  ~  Shop  ~  Privacy Policy  ~  Disclosure  ~ Contact

Copyright © 2026 · Beautiful Pro Theme on Genesis Framework · WordPress · Log in