Heavenly Homemakers

Encouraging women in homemaking, healthy eating and parenting

  • Home
    • About
    • FAQs
  • Recipes
    • Bread and Breakfast
    • Condiments
    • Dairy
    • Main Dishes
    • Side Dishes and Snacks
    • Desserts
    • Gluten Free
    • Instant Pot
    • Crock Pot
    • Heavenly Homemaker’s Weekly Menus
  • Homemaking
    • Real Food Sources
  • Store
  • Contact
    • Advertise
    • Disclosure
    • Privacy Policy
  • Simple Meals
  • Club Members!

Healthy Crockpot Recipes: Apple Butter

October 25, 2011 by Laura 44 Comments

This post may contain affiliate links. For more information, please see our disclosure policy.

Many of you offered suggestions as to how to make Apple Butter – thank you!

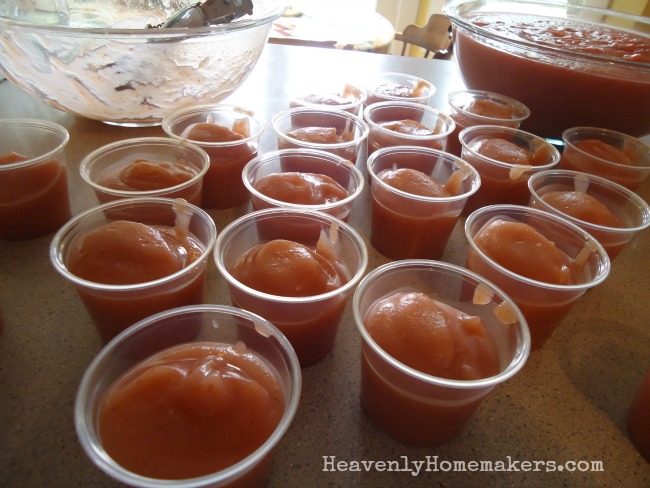
My house smelled wonderful for hours, thanks to all of you! I decided to experiment with my friend Leesa’s apple butter method, and found it to be very simple and delicious. I only made a small amount this time, since I was experimenting – so you’ll want to double or triple this recipe if you want a larger amount. When I started with one quart of applesauce, I ended up with two and a half – half pints of apple butter. However, it is very clear to me that writing half – half just looks weird and confusing. It may make more sense for me to say that one quart of applesauce resulted in 2.5 half-pint jars.

Or we could say that I ended up with one full pint plus a half of a half pint of apple butter. This is, of course, the same as two and a half cups of apple butter, which is otherwise known as five half cup portions of apple butter, better known as ten – 1/4 cup portions, which we all know is precisely 20 – half of a half of a half of a half of a half pints of apple butter. Give or take a half of a half of a pint.

I’m done now.

Homemade Apple ButterYum

Healthy Crockpot Recipes: Apple Butter
 
Save Print
Author: Laura
Ingredients
  • 1 quart homemade apple sauce
  • 2 Tablespoons sucanat
  • 1 teaspoon cinnamon
Instructions
  1. Stir ingredients into a crock pot.
  2. Cook on low for about six hours on low setting, with LID OFF, stirring occasionally.
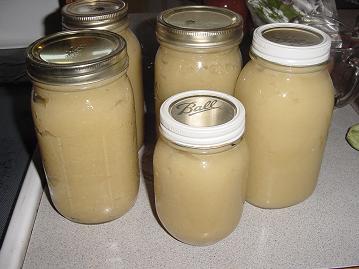
  3. Store the apple butter in the refrigerator - or process in a hot water bath for 10 minutes to seal.
  4. If the jars are sealed properly, you can store your apple butter in the pantry until you're ready to serve.
3.4.3177

Find my Homemade Apple Sauce recipe here. Read information on how to process in a hot water bath for 10 minutes to seal your jars here.

apple_butter

Caution:  Contents cooking in crock pot are hot. Refrain from sticking a finger into the crock pot for a lick, even though the delicious smell will create a major temptation. Dipping in with a teaspoon is obviously a much better option. No double dipping allowed. In addition, be aware that partaking in too many licks from the crock pot will result in a smaller amount of finished product, which will mean that all of the math I labored over above, rounding carefully to the nearest half of a half pint, will be null and void.

Heavenly Homemaker's Club Members: Access your homepage and all your fantastic resources here! Not a member yet? Please join us!

Leaving the Skins on Homemade Applesauce and Apple Pies

October 23, 2011 by Laura 59 Comments

This post may contain affiliate links. For more information, please see our disclosure policy.

Slowly but surely I’m getting a few things figured out with this applesauce-making business. Many of you left comments sharing that you were shocked that with all the canning I do, I don’t have a Victorio. Others were shocked that I take off the apple skins. Yep, I’m just learning along with the rest of us here. I didn’t grow up doing any canning, so I’m learning as I go. I’d never even heard of a Victorio or a Squeezo before last week, so I’ve appreciated your ideas and suggestions!

Since I don’t have a Victorio strainer, nor do I know anyone who has one I can borrow, and since I’ve got apples that need to be put up right now, I went ahead and tried yet another applesauce method. Ladies and Gentlemen, we have a winner! (I think we will probably end up investing in a nice strainer, especially for tomato sauce. But for apples, can you all reassure me that the bad, wormy parts in the apples really do get strained out? I’m still hesitant about that since the apples I work with aren’t always pretty once I cut into them. Really – do I just quarter them and throw them all into the pot, worms and all?)

This time, I followed the advice of leaving the skins on and blending them up along with the apples. I hesitated with this idea at first because I figured there would be little bits of apple peelings in the sauce and that my family would rebel. Well, what’s a mother to do, but to try the idea and not tell her family what she’s done?

Sure enough – I cooked my apples, ran it all through my food processor, served it up, and would you believe – not one boy or husband knew that there were apple peelings in the applesauce!

Not only did this method save lots of time, we’re getting a healthier applesauce. Plus, there was much less waste – so I got several more quarts of applesauce for my efforts!! Ahhh, I’m so happy about this.

Applesauce Instructions:

Quarter and core apples, cutting out bad spots. Cook apples in a large pot, following these directions. When the apples are soft, run them through a food processor until smooth. See, the peelings just get blended up in there! (I don’t have an immersion blender, but according to many of you, sticking the immersion blender directly into the pot saves yet another step. I may ask for one for Christmas.)  :)

Yum

I used some of my “special” jars this time, because this applesauce is so pretty. These jars came from my late friend Lorna Mae. I miss her. :(  I think she’d be thrilled that her jars are being put to good use for my family.

I also made a bunch of mini apple pies, a big apple pie and an apple crisp – all with apple skins left on. I may never peel another apple again.


So there we have it. Leaving the skins on the apples when making applesauce and apple pies saves time and adds nutrients. Now, on to the Apple Butter…

Heavenly Homemaker's Club Members: Access your homepage and all your fantastic resources here! Not a member yet? Please join us!

Menu Plan for the Week

October 23, 2011 by Laura 27 Comments

This post may contain affiliate links. For more information, please see our disclosure policy.

Tonight for High School Huddle, I made three big dishes full of Creamy Chicken and Rice Casserole. I also made a big whole wheat chocolate sheet cake plus 24 cupcakes.

Funny story (or maybe boring story, whichever way you want to look at it):  As I was planning tonight’s huddle meal (for 35 people), I consulted my high schooler to see what he thought I should serve with the chicken and rice. Because he has two hollow legs, he suggested that rolls would be good, but I got overwhelmed with that because I was already making cakes and casseroles. Brilliant child that he is, my son said, “Maybe you could just buy some rolls this time.” Oh duh. I forget these things are an option. Therefore, everything else is homemade, but I bought rolls to feed the group tonight. This afternoon, instead of baking rolls, I’m going to take a nap. I like this plan. ;)

Here’s our menu for this week:

Sunday, October 23
Marriage Class Treat – Apple crisp, coffee
Easy noodle stir fry with broccoli and carrots, grapes
Huddle – Creamy chicken and rice casserole, green beans, homemade dinner rolls, whole wheat chocolate sheet cake and cupcakes with fudge frosting

Monday, October 24
Angie’s pumpkin waffles (can’t wait to try this new recipe!)
Taco corn fritters, applesauce
Three cheese marinera with spaghetti noodles, tossed salad, corn

Tuesday, October 25
Chocolate chocolate chip muffins, bananas
Homemade  beef summer sausage, crispy cheese crackers, carrot sticks with ranch, apples
Roast, carrots, potatoes, green beans, coconut flour muffins

Wednesday, October 26
Scrambled eggs, hashbrowns, creamy orange cooler
Popcorn chicken, steamed broccoli and carrots, cottage cheese
Bbq meatballs, baked potatoes, peas

Thursday, October 27
Breakfast burritos, pears
Pigs in a blanket, apples or bananas
Chicken noodle soup with carrots, fruit salad

Friday, October 28
Peanut butter honey toast, applesauce
Bean and cheese burritos, raw veggies
Homemade pizza, apples

Saturday, October 29
Whole wheat cinnamon rolls, fruit
Chicken alfredo, tossed salad
Attending a baby shower – taking Pumpkin Chocolate Chip Muffins and Apples with Caramel Apple Dip

Heavenly Homemaker's Club Members: Access your homepage and all your fantastic resources here! Not a member yet? Please join us!

Healthy Homemade {Pink} Applesauce

October 19, 2011 by Laura 167 Comments

This post may contain affiliate links. For more information, please see our disclosure policy.

For years, I’ve used this method of making applesauce. The past couple of years, I’ve decided to try something new, in an effort to cut down on preparation time and to make the homemade applesauce a bit healthier. Still, I have to say, this process still takes quite a bit of time and effort. After spending several hours making applesauce yesterday and only yielding five quarts – I felt a little bit discouraged. Several of you have mentioned that a Victorio Food Strainer is a worthwhile investment. After looking into this, I have to say that Matt and I are talking seriously about making the purchase. Check out this pretty tool. Does that not look like a life saver when making applesauce and tomato sauce?

Here is a run-down of yesterday’s applesauce process:

We used a mixture of apples, most of which had very dark red skin (Empire, I think). Cooking the apples with skin on created a lovely pink colored applesauce. To start, we gave the apples a good washing. I looked around for the cutest assistant I could find. Since everyone else was busy with math and vocabulary lessons, Malachi got the job.

Yum

While he was washing apples (about 18 pounds), I prepped my huge stock pot. I stirred 2 heaping tablespoons of Vitamin C Powder (ascorbic acid to keep the apples from turning brown) into 5 cups of water.

Then, I began to quarter and cut out all yucky parts. These apples were mostly organic (he had sprayed a little bit early on before the fruit set on), so there were some wormy parts to cut out. As I added apples, I stirred them around so that they would be coated with the ascorbic acid/water to  keep them from browning.


I continued this process until my pot was full and until my right hand was cramped permanently into a claw-like position.

I then cooked the apples on the stove for about an hour, stirring occasionally, until they became nice and soft.

Next I blended the apples in my Blendtec, careful to dip down to the bottom of the pot to get some of the juices with each scoop. I blend until the peelings are completely pureed along with the flesh of the apples. This makes the applesauce pretty and creamy!

Applesauce Cups

I ended up with smooth, beautiful, delicious applesauce that my family had seconds and thirds of at lunch time.

I then canned four remaining quarts (using this water bath process for 20 minutes) and put them into my pantry.

What do you use to make applesauce? I highly recommend the Blendtec to make this process super easy! (I also love the Blendtec for oodles of other kitchen tasks.)

I have yet to make apple butter or any of the other tasty apple dishes I talked about earlier this week. I do believe that next I will experiment with my crock pot and apple butter. Which means that I really need to make some whole wheat biscuits. Doesn’t apple butter spread on a hot, fresh biscuit sound wonderful?

Heavenly Homemaker's Club Members: Access your homepage and all your fantastic resources here! Not a member yet? Please join us!

Healthy Crock Pot Recipes: Turkey Sausage and Red Bean Stew

October 18, 2011 by Laura 30 Comments

This post may contain affiliate links. For more information, please see our disclosure policy.

This Turkey Sausage and Red Bean Stew is a pretty awesome comfort food!

How nice is it that I put this stew into my crock pot before a soccer game, then came home to dinner all ready and waiting for us to eat? In fact, my crock pot was so nice that as we walked in the door, it scooped the prepared stew into six serving bowls, poured milk for us to drink, set the table and sang us a song while we gathered around. Okay, not really. But still, having a hot meal ready and waiting made me feel like someone else had done all the work.

This stew is especially easy to make if you already have turkey sausage and red beans cooked up ahead of time. I typically make six pounds of the sausage at a time, then freeze it in one pound packages, making it easy to throw into a meal like this one.

Turkey Sausage and Red Bean StewYum

Healthy Crock Pot Recipes: Turkey Sausage and Red Bean Stew
 
Save Print
Author: Laura
Serves: 6-8
Ingredients
  • 1 pound turkey sausage (browned)
  • 2 cups cooked red beans or 1 can (15 ounces) small red beans
  • ½ cup brown rice (uncooked)
  • 1 cup water
  • 1½ cups corn (frozen or canned)
  • 2 cups tomato juice
  • ½ cup chopped sweet green pepper (more if you like)
  • salt and pepper, to taste
Instructions
  1. Combine all ingredients in a slow cooker.
  2. Cook on low setting for 6 hours.
  3. This stew is great served with hot cornbread and a glass of milk.
  4. It is also gluten free - a bonus for those of you with GF needs!
3.4.3177

You need this recipe: Turkey Sausage

Crock Pot Turkey Sausage and Red Bean Stew

With my crock pot cooking our dinner for us, now all I need is an appliance that will clean my kitchen for me. Oh wait – that’s what the kids are for. We make kitchen clean-up a family project – here’s a post explaining more, along with a free downloadable kitchen chore chart.

Is it stew weather where you live? (If it’s still warm and sunny at your house, break it to me gently.) ;)

Heavenly Homemaker's Club Members: Access your homepage and all your fantastic resources here! Not a member yet? Please join us!

A Week of Apples

October 16, 2011 by Laura 50 Comments

This post may contain affiliate links. For more information, please see our disclosure policy.

I have a grand total of 110 pounds of apples in my kitchen right now. You know what this means don’t you? Yes, it means that by the end of this week my fingers are going to look brown and dirty. And they’ll stay that way for about two weeks until the brown wears off. It’ll be really cute and not at all embarrassing (as long as I keep my hands stuffed into my pockets while out in public).

Oh, and if I don’t wear an apron while I’m working with all of these apples, the front of my shirt will also be covered in brown splatter stains, which will never come out. I learned this the hard way a few years ago when I made applesauce all day, while wearing a cute Disney shirt, before going to a soccer game. I completed the task of making applesauce, ran it through the water bath process to can it and put the jars away in my pantry. I didn’t look down at my shirt until I was at the soccer game that night cheering for my boys. It was then that I noticed that Eeyore was completely covered in ugly brown specks. (Of course, it had to be Eeyore.)  I was by far the most pitiful looking mother out at the soccer field that day. Of all days to leave my jacket at home.

So now you know:  While you peel, core, slice and chop apples – the juice will spit and splatter everywhere. If you work on 110 pounds of apples, everything around you, including every crevice on your hands, will turn brown for days. There’s not much you can do about this, so just embrace the fact that you’ll look like you’ve been working under the hood of your car. To avoid answering any difficult-to-answer questions from the powers that be, remove all school papers, bills, library books, and photos before proceeding. And for the love of Eeyore, please wear an apron.

My 110 pounds of apples await, and I guess it goes without saying that my apron is ready for action. Here’s what I’m looking at doing this week:

I’ll start by making and canning as many jars of Applesauce as I can make before I get sick of making applesauce. I will probably be using a slightly different method than the one described here, so I’ll give an update on that sometime during the week.

applesauce11sm.JPG

If, in fact, I still have a few pounds of apples left after making applesauce, I hope to then make a few Mini Apple Pies. These are great to have in the freezer for a quick breakfast or dessert.

miniapplepies7sm

I may also can a few jars of Apple Pie Filling. This is great to have on hand to when throwing together a quick apple crisp or of course, to make a big apple pie. Here’s my Whole Wheat Pie Crust recipe if you’re interested.

Malachi_apple_pie_1

I may also use my Excalibur Food Dehydrator and make Apple Fruit Leather and/or dried apple rings. When you have 110 pounds of apples, you can just keep going with the apple preserving until you’ve got a wide variety of apple goodies, or until you faint onto the floor of your kitchen – whichever comes first. Don’t worry – I plan to get my boys busy helping me with these projects this week. They are great applesauce makers.

We also plan to simply eat a bunch of these apples. I love having so many apples on hand for snacks. If you haven’t tried making Caramel Apple Dip, I highly recommend it. It’s one of my favorite ways to eat apples.

Throughout the week, I’ll be snapping pictures and sharing my apple preserving progress. Prepare to get sticky around here. I might even experiment with Apple Butter like several of you requested last week!

What is your favorite way to eat apples? Ever ruined an Eeyore shirt with apple spatters? This is why aprons were invented.


Heavenly Homemaker's Club Members: Access your homepage and all your fantastic resources here! Not a member yet? Please join us!

Menu Plan for the Week

October 16, 2011 by Laura 17 Comments

This post may contain affiliate links. For more information, please see our disclosure policy.

We had lots of company over the weekend while we celebrated York College Homecoming – one of my favorite weekends of the year! One of the meals I served for our guests was “Huge Hamburgers” with potato wedges, grapes, veggies, olives and cookies. The Huge Hamburger idea came from one of our boys when we were planning the menu for our guests. Ever since I made this big burger to feature in our curriculum (while you’re learning the letter Hh, of course!), my boys beg me to make it. The bun (Kings Hawaiian that I find at our regular grocery store or at Walmart) is not very healthy, but boy is it good. It’s a real treat, and I find that when I have lots of company, I have to make compromises on the food we eat so that I’ll stay sane. I want to enjoy my company – not spend time making huge hamburger buns while everyone else is visiting!

Here’s our menu for this week:

Sunday, October 16
Oatmeal, pears
Sub sandwiches with all the fixings, raw veggies with ranch dip, grapes
High School Huddle:  Italian pasta bake, green beans, honey whole wheat bread, apple crisp

Monday, October 17
Pancake sausage muffins, applesauce
Tuna casserole, peas
Cheesy salsa enchiladas, tossed salad

Tuesday, October 18
Sweet potato streusel muffins, bananas
Easy noodle stir fry, fruit salad
Turkey sausage bean stew, sourdough biscuits

Wednesday, October 19
Mini breakfast pizzas, oranges
Chicken noodle soup, carrots
Shepherds pie, tossed salad

Thursday, October 20
Breakfast burritos, creamy orange coolers
Crock-pot experiment (for the new crock-pot recipe series)
Chicken fried steak strips, mashed potatoes, gravy, green beans

Friday, October 21
Peanut butter honey toast, applesauce
Salmon patties, potato wedges, peas
Homemade pizza, fruit

Saturday, October 22
Homemade donuts
Leftovers
Three cheese garlic chicken pasta, tossed salad

I may be wrong, but I do believe this week may be a little calmer around our house. We will have some company here and there, but if you can believe it, I think we only have one soccer game during the next few days. Whatever shall I do? (Yes, I know – laundry. You weren’t supposed to answer that. It was rhetorical.)

Heavenly Homemaker's Club Members: Access your homepage and all your fantastic resources here! Not a member yet? Please join us!

Getting to the Root Cause of Eczema: What Worked for Malachi

October 12, 2011 by Laura 84 Comments

This post may contain affiliate links. For more information, please see our disclosure policy.

Our six year old has struggled with chronic eczema since he was two months old. If you’ve been reading here long, you know the heartache we’ve had watching our boy suffer from this.

The hardest part of this has been that we’ve felt so helpless. We’ve tried so many different remedies in an effort to give him comfort and ultimately, to try to find healing for him. Time after time, try after try, dollar after dollar, nothing took away his miserable skin condition. We’re thankful that through this journey, our family has learned about eating a whole foods diet and about non-toxic cleaning and using non-toxic products on our skin. We’ve also learned quite a bit about overall body health and that simply “fixing Malachi’s skin” or any medical condition is not just a matter of “take this pill or use this cream” – we must get to the root of the problem.

Once we began seeking alternative and more natural sources of healing, we were taught that eczema is not ultimately a skin issue. It appears to be a skin issue because that is where the pain and itching manifest themselves. But skin is an organ. When other organs are not working properly, the organ of the skin can be effected. This was the case for Malachi. Doctors found that his liver and kidneys were not working properly, thus toxins were not being flushed the way they needed to be. Toxins have to go somewhere and in Malachi’s case, they were coming out through his skin. Therefore, he was covered with eczema. (Obviously, this is just my “mommy version” of the diagnosis – I don’t know all of the technical ins and outs of this. Also, not all cases of eczema are the same. This is just Malachi’s story.)

Steroids and cortisone creams had helped clear his skin somewhat when we tried those in the very beginning, but since those were only meant to treat the symptoms, as soon as he stopped using them, his skin broke out again. Once we had an understanding about the toxins trying to rid themselves from his body, it scared us to use the steroids and cortisone creams. Beyond other long term side effects that can result in him using steroids and cortisone creams, the thought of the toxins being suppressed in his little body gave us cause for many other more serious fears.

Over the past six years, we’ve tried a variety of natural methods to cleanse his system. Some of them were effective for a time, but did not clear him up completely. (You can read here about several things we’ve done that did make a difference – at least it kept the eczema from becoming worse!)

You may remember that we tried a gluten free diet last spring. You can read the details here, but long story short, it didn’t help even a little bit. We considered taking him off dairy, off eggs, off night shade veggies, off whatever it took to help him feel better. Thankfully, in the meantime, we heard about a biochemist in Wisconsin who sounded like a promising option. We’d heard great testimonies about how she’d helped others, not only with eczema but with all sorts of health issues.

We decided to make the investment. It wasn’t cheap (although it was very reasonable for the services offered). It was hard work. We had to carefully watch what Malachi ate and be diligent about giving him supplements. One of the simple but most important things – we had to make sure he was drinking plenty of water to flush out his system while the supplements, digestive enzymes and cleansing products went to work.

It was not an easy fix. It was not without frustration. Malachi did not become better overnight.

But after a long summer of dedicated time spent on this, he is now only taking minimal supplements and is back to eating almost all of the regular healthy, whole foods we feed our family. Now that we are at this point, it is very apparent that when he drinks his needed quota of water each day, he feels much better.

Praise be to God, our boy is making his way toward good health! The relief and gratitude we feel can not be put into words.

Look at that sweet, clear baby skin. I can’t help but kiss him frequently. Even during math lessons.
(And in case you’re wondering, he’s eating a vanilla pudding pop.)

I have to say that I’ve been hesitant to share too much about this on my blog. I WANT all of you to know about this amazing treatment option. There is hope and there is healing for eczema, allergies, behavior issues – many health concerns. A big part of me has wanted to shout this from the roof-tops – CALL THIS LADY! SHE CAN HELP YOU!!!! But there are many of you and I don’t want to overwhelm her with emails and phone calls. She has a heart of gold and a desire to help as many as she can, but she is also a human being with limits. So, I share hesitantly. ;)  Except for WOW I’M SO THANKFUL – that part I’m not hesitant about! You’ve all been so supportive and caring while we’ve walked this journey with Malachi. You deserve to have an update on his progress.

Thank you all so much for cheering for us and for caring about our boy. God is always, always, always faithful.

UPDATE:

We were initially helped by a Biochemist, named Su. I don’t know if Su still practices or not as I haven’t been in touch with her in several years and we’ve since found a local natural doctor that helped us even more! But here’s her contact information: [email protected] . Also, you can check out her new website here: http://www.promiseoutreach.org/

Either way, I encourage you to search for a natural doctor in your area who will help you get to the root of the problem. We sure appreciate our doctor who treated our son’s problem instead of his symptoms!

Heavenly Homemaker's Club Members: Access your homepage and all your fantastic resources here! Not a member yet? Please join us!

Introducing: Healthy Crock Pot Recipes at Heavenly Homemakers!

October 11, 2011 by Laura 157 Comments

This post may contain affiliate links. For more information, please see our disclosure policy.

I’ve decided that up until now, I may have had the most bored crock pot in the world. If all of the crock pots gathered for a convention, my crock pot would win the award for least exciting uses and most reasons to yawn while plugged into a wall. If there was such an award. Or convention. Or if crock pots really had feelings. It may actually be possible that I’ve taken the idea of “becoming one with my kitchen” a bit too far.

So many of the crock pot recipes I’ve seen call for Cream of Blechy Soup or MSG in a Jar. I think this is the main reason I’ve avoided much crock pot usage. But finally, I started doing a little bit of recipe research. While many of the recipes I’ve found do call for ingredients I don’t cook with, I’ve also discovered that I can make a few simple adaptations to make the recipe healthy. My crock pot and I are so excited about this! (If, in fact, crock pots do have feelings.)

And so, over the next few weeks or months or years or until I run out of healthy crock pot ideas, I’ll be occasionally sharing easy, healthy crock pot recipes. They will be recipes that contain real food ingredients and hopefully, they will be recipes that simplify your healthy cooking life.

Yum

I’m not sure how you’re feeling about this announcement, but I’m guessing your crock pot is going to be totally jazzed! (If, in fact, crock pots do have feelings.)

Regarding Lead Poisoning from Crock Pots: I’ve heard that this is a problem and am very frustrated with the lack of information I can find on this subject. Because I was concerned, I called the folks at Hamilton Beach, as I own this crock pot. They informed me that none of their crock pots contain lead. I think I believe them. Not that they would lie, but since the lady I talked to didn’t elaborate, I just had to assume she knew this information to be true. And, I’m going to go on faith and feel comfortable using my crock pot. What have you learned about this subject?

I’ve been working on crock pot ideas for main dishes, side dishes, dips, soups and even a few desserts. Which would you like me to sharing with first?

Heavenly Homemaker's Club Members: Access your homepage and all your fantastic resources here! Not a member yet? Please join us!

Menu Plan for the Week

October 9, 2011 by Laura 9 Comments

This post may contain affiliate links. For more information, please see our disclosure policy.

Sundays have become quite full since we are hosting a marriage class in the mornings and high school huddle in the evenings. What helps most to keep this enjoyable is to make as much food ahead of time as possible. My goal each week has been to get Sunday night’s main dish completed by Friday. That way, all I have to do on Sunday is put the food in the oven, then serve it up. Easy! I’ve also realized the importance of choosing a very easy Sunday noon meal so that when we get home from church, all I have to do is put on the final touches and put the meal on the table.

Therefore, Saturday night while I was cleaning the kitchen after dinner, I put together a big pan of Italian Pasta Bake for our Sunday lunch. If you haven’t tried this dish, I’ve got to say that it is one of the easiest meals ever to make. I cooked it up, cleaned up after myself and put the pan in the fridge so that as soon as we got home from church today all I had to do was heat it in the oven while I made the veggies. Simple, inexpensive, healthy and a crowd pleaser. In fact, I think I’ll be making this dish next week for Huddle! :)

Here’s our menu for this week:

Sunday, October 9
Marriage Class – Breakfast cake, juice, coffee
Italian pasta bake, corn, green beans
Huddle – Chicken enchiladas (x4), tossed salad, chips and salsa, oatmeal butterscotch cookies

Monday, October 10
Whole wheat waffles, blueberries
Grilled cheese sandwiches, tomato soup, carrots
Roasted chicken, potatoes, carrots, gravy

Tuesday, October 11
French toast, peaches
Bean dip with organic corn chips, sweet peppers and tomatoes
Chicken alfredo, steamed broccoli and carrots

Wednesday, October 12
Fried eggs on toast, creamy orange cooler
Tuna salad with crackers, apples
Italian stew, sourdough biscuits

(We’ll be having lots of company this weekend – I can’t wait! Bring on the family and friends!)

Thursday, October 13
Chocolate chocolate chip muffins, pears
Leftovers
Cream cheese chicken and pasta, tossed salad, green beans

Friday, October 14
Easy breakfast casserole, vanilla muffins with cinnamon crumb topping, grapes
Sandwiches, chips, fruit
Hamburgers, ranch potato wedges, veggie tray with homemade ranch dip, fruit salad

Saturday, October 15
Simple soaked pancakes, applesauce
Sloppy joes, angeled eggs, fruit
Tacos

What’s on your menu this week?

Heavenly Homemaker's Club Members: Access your homepage and all your fantastic resources here! Not a member yet? Please join us!
« Previous Page
Next Page »

Join Our Community!

 Facebook Twitter E-mail Instagram Pinterest

Popular Posts

~ Will All of the Real Moms Please Stand Up?
~ Easy! Stir-and-Pour Whole Wheat Bread
~ How to Make Gatorade
~ 31 Real Food Breakfast Ideas
~ Dear Teenage Girls...
~ When Mom Takes a Step Back
~ The Inexpensive Health Insurance We Love!
~ Let's Talk Real Food Grocery Budgets

Check out our latest posts!

  • Big Family Food and Fun: May 3-9, 2026
  • Help Your Kids Become Independent in the Kitchen!
  • Big Family Food and Fun: April 26-May 2, 2026
  • Big Family Food and Fun: April 19-25, 2026
  • Big Family Food and Fun: April 12-18, 2026
Home  ~  Simple Meals  ~  Club Membership  ~  Shop  ~  Privacy Policy  ~  Disclosure  ~ Contact

Copyright © 2026 · Beautiful Pro Theme on Genesis Framework · WordPress · Log in