Heavenly Homemakers

Encouraging women in homemaking, healthy eating and parenting

  • Home
    • About
    • FAQs
  • Recipes
    • Bread and Breakfast
    • Condiments
    • Dairy
    • Main Dishes
    • Side Dishes and Snacks
    • Desserts
    • Gluten Free
    • Instant Pot
    • Crock Pot
    • Heavenly Homemaker’s Weekly Menus
  • Homemaking
    • Real Food Sources
  • Store
  • Contact
    • Advertise
    • Disclosure
    • Privacy Policy
  • Simple Meals
  • Club Members!

How to Use a Cast Iron Skillet like a Pro

January 27, 2021 by Tasha Hackett 1 Comment

This post may contain affiliate links. For more information, please see our disclosure policy.

I’ve loved and recommended using a cast iron skillet for years. Today, Tasha will tell you how to use one like a pro!

How to use a cast iron skillet like a pro

by Tasha Hackett

I didn’t know how to properly cook with a cast iron skillet until very recently. 

Even though I have prepared food almost exclusively on my cast iron skillet, I continually burned food or the food stuck so badly I spent far too long scraping it off the bottom and reseasoning again. 

I burned the pancakes on my cast iron again and I was sad. As I served my family I said, “I know it’s burned. Sorry. It is what it is. This is the last of the flour, I’m not making anything else. Sorry. Just eat it. I know it’s burned. Sorry. Don’t ask me why it keeps burning.” 

I burned the zucchini patties and I was sad. “I don’t know why they’re burning! The bottom is burned before I can even flip them without it falling apart! I turned it down and they’re still burning.” 

The scrambled eggs stuck to the bottom of the pan so badly I felt like I sacrificed two whole eggs to the cast iron gods. 

Please tell me I’m not the only one who struggles with the cast iron skillet? 

Figuring out how to use a cast iron skillet shouldn’t have taken me this long.


With all my struggles, you may be asking, “Why do you even use it if it causes so much trouble?” A few reasons. 

Now that I know how to use a cast iron skillet, I love it even more.

Foremost, I like the simplicity of it. I use this one pan multiple times a day. I clean it after each meal and it lives on my stovetop. The nostalgia that this is the same type of pan the pioneers used hundreds of years ago speaks to my author soul. I don’t wear 1800’s dresses, or travel by horse or train or write letters with an inkwell, but by golly I can cook with the same pan! (In theory, except I was disproportionately burning everything.) Another main reason I like to use it is that I don’t trust modern technology when it comes to our health. Teflon is bad for you–correction, teflon is bad for you when heated. HA! 

I know there are other non-stick pans out there today that claim to be non-toxic, but I haven’t had the time to look into them yet. (I’ve been far too busy wondering why I keep burning the Simple Tuna Patties.)

cast iron eggs

Here are my how-to tips for using your cast iron skillet:

  1. Start with a well-seasoned cast iron skillet. Which I have. Many times. Keeping it well-seasoned was my problem. Seasoning a skillet is simple: Clean. Dry. Rub a teaspoon of vegetable oil or lard all over. Top, bottom, outside, underneath, and the handle. Bake upside down in a 350* oven for an hour. Let it cool in the oven before putting it away.
  2. Be patient. Let the pan preheat at a low temperature for up to five minutes before cooking on it. A drop of water should immediately sizzle and then you may add the oil. If the butter, oil, lard, etc., is smoking, that means your skillet is too hot. Heating a cast iron skillet/pot/pan on high heat right away, especially on an electric stove, causes the iron to expand and heat unevenly and can cause warping. This is one of the only things that will ruin your skillet.
  3. Preheat the oil. Do this after the pan is preheated. Again, if the oil smokes or burns, this is a bad sign. If the butter is burning, the pancakes will soon be burning. (You’d think I could have figured that out sooner.) On my gas stove, I do most of my cooking just above Low or directly between Low and Medium. On my stove, the butter burns at Medium. Once the pan is heated, if you turn the temperature down it will not immediately make a difference. One of the pan’s strengths is the ability to hold heat. Therefore, adjusting the temperature up and down while you’re cooking isn’t going to work well for your food or your taste buds. Or your family’s trust in your cooking abilities. Have patience while preheating, and you will quickly learn where to set the temperature and can leave it there.
  4. Do the sizzle dance.

  5. The food should sizzle as soon as it touches the pan. Food that doesn’t sizzle means your pan wasn’t preheated enough and now your food is going to stick and then probably burn. (Preheat the skillet even if you are baking cornbread in the oven. The sizzle as you pour in the cornbread batter will create a delicious crust and keep the wet cornbread from sticking to the pan.)
  6. A properly seasoned cast iron skillet is easily cleaned with a wipe-down of a paper towel or hot water and plastic scraper. Boiling water in the pan, using soap, or not properly drying will cause your pan to rust and this is bad. If the pan rusts, you get to scrub it off with a steel brush and do the reseasoning thing again.
  7. Whenever dry spots appear on the pan, it’s time to reseason. If you use enough oil while cooking on the pan, you shouldn’t have to do the reseasoning thing more than a few times a year. If that. But… if you were anything like me and frequently burned the food and then had to scour it off with hot water, reseason it as often as necessary until you’ve perfected the patience that is required for preheating your pan. 

And that’s how to use your cast iron!

cast iron onions

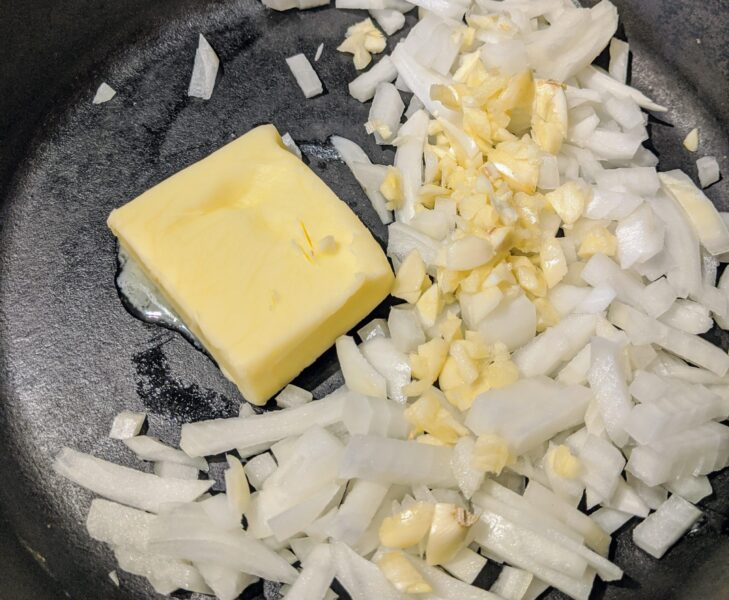
This pan was not preheated. There was no sizzle when the onions were added. The butter wasn’t melted and then it will later burn.

I’m curious, how many of you have skillets passed down from your grandma? Years of history and thousands of meals prepared in a pan that is still in great use today? Amazing!

I love to invest in things that will last. Cast iron is just one of those things. Now that I know how to really use mine, I foresee some delicious pancakes in my family’s future. 


Tasha HackettTasha Hackett, friend of Laura, is fueled by sunshine or chocolate, whichever is more readily available. Recently embarking on a paleo journey to combat some chronic inflammation, she is still finding ways to eat chocolate. Though she proudly sings every word of the Wee Sing Silly Songs albums and often pretends to be a ballerina while unloading the dishwasher, her favorite thing is writing with hope and humor to entertain and encourage women—specifically young moms. Most of her time is spent with four chatty children and an incredibly supportive husband. They give her the kind of love people write books about. Her debut novel, Bluebird on the Prairie, a heartwarming Historical Romance will release spring, 2021. You can connect with her at www.tashahackett.com or on Instagram @HackettAcademy. 

Heavenly Homemaker's Club Members: Access your homepage and all your fantastic resources here! Not a member yet? Please join us!

My Favorite Real Food Cheat Trick to Save Time Chopping Onions

March 18, 2018 by Laura 12 Comments

This post may contain affiliate links. For more information, please see our disclosure policy.

This Real Food Cheat Trick is going to sound fairly lame. I admit it. But this tip saves me oodles of time without costing much, if any, extra money! This is how I save time chopping onions!

minced onion trick

How’s this for a tip? Want to save time chopping onions? Don’t chop them. Hold your applause. Please stay tuned for more brilliant tips like this one.

Now that I’ve fully prepared you to be unimpressed, I will admit that it’s likely that many of you will thoroughly dislike my trick. Why? Because most certainly the smell of freshly chopped onions and minced garlic sauteing in a pan with olive oil or butter is incredible!

You are right and I agree. But I still like my trick and I love the time this saves.

My Favorite Real Food Cheat Trick to Save Time
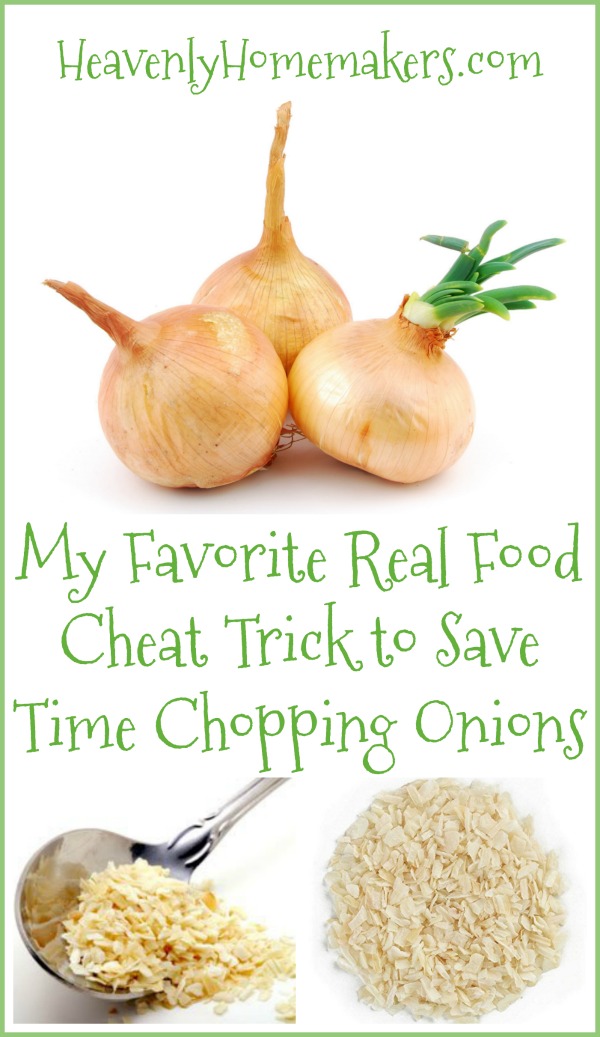
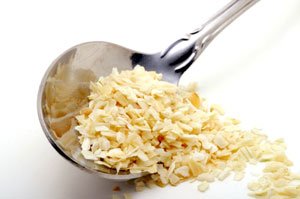
How I Save Time Chopping Onions

I always keep a huge supply of Dried Minced Onion on hand. I almost never go to the trouble of chopping an onion. I simply grab my jar of dried minced onion, dump in the desired amount, and stir it into the meat I’m cooking. It still smells amazing. It flavors the food marvelously. And I save myself the trouble of chopping an onion, crying a river, and cleaning up the mess afterward.

I suppose it goes without saying that this method also keeps me from having to work at getting the onion smell off my fingers. (Yes, I know. Rub your fingers on stainless steel. I do. It works. But still.)

Also, for people who don’t love chunks of onion in their food, but do love the flavor onions give, using Dried Minced Onion is a great solution!

Save Time Chopping Onions

I might as well make a garlic confession while I’m here.

I frequently cheat with that too. True story: I almost never buy fresh garlic, a fact of which has many of you throwing tomatoes.

Fresh garlic is tough to beat, no doubt. But time saved in the kitchen trumps all, in my book. So I either keep a jar of minced garlic in the fridge or I grab my jar of dried garlic powder from my spice cabinet. My food still tastes delicious, but I’ve saved myself some work by using these convenience items.

So there you have it. Now you know. I often cheat and use already-prepared onions and garlic. You can’t talk me out of it. (Though I suppose you can try.)

But doesn’t this cost more?

Minced Onion appears to be more expensive per pound compared to cost per pound of fresh onions. However, Dried Minced Onions have been dehydrated, shrinking them down and changing their weight. You’ll get a lot of dried minced onion per pound compared to fresh onions. One small fresh onion equals 1 Tablespoon Dried Minced Onion.

onion3

Where to purchase Dried Minced Onion

Most grocery stores carry these. They can be found in the aisle with the spices. However, I typically purchase it in bulk either from Azure Standard or Amazon.

Huge Bulk Amount of Dried Minced Onion

Dried Minced Onion options at Azure Standard

Now it’s your turn to tell me if you feel it is worth taking the extra time to chop onions and garlic. If you’re often feeling tight on time in the kitchen, I recommend giving this a try, especially on busy days!

Heavenly Homemaker's Club Members: Access your homepage and all your fantastic resources here! Not a member yet? Please join us!

My Top 10 Kitchen Tips Ever and 10 eBooks for $10 – Through Monday Only!

February 6, 2015 by Laura 5 Comments

This post may contain affiliate links. For more information, please see our disclosure policy.

Top 10 Kitchen Tips

Here is a life-changing  list of my top 10 kitchen tips ever, and the links where you will find the wonderful details on each:

10. Don’t forget to close the dispenser on your blender.
9. Never overfill said blender.
8. Clearly label your freezer food so you won’t have to wait for the food to thaw and bake before you recognize what it is.
7. A fresh tablecloth makes everything better.
6. Be sure to allow room for expansion when you fill jars with food for the freezer so your beloved jars won’t break.
5. If your garden is destroyed by a hail storm, wait and trust. It might just bounce back.
4. Buttering your pineapple is not a good idea.
3. Wearing mis-matched rubber gloves is the best way to clean.
2. Don’t touch your eyeball with your hands after chopping hot peppers.
1. Never, ever forget that God is bigger than a free range chicken.

Just reading that list makes you a better homemaker, does it not? Really. What would you ever do without my insights and advice? (I forgot to mention earlier, you should always be sure to sift the popcorn out of your waffle mix. Keep hanging around. The wisdom never ends around here, my friends.)

And now, I am excited to share with you that through Monday, February 9 at midnight, our very popular Heavenly Homemaker’s eBook Overload Package is marked down to just $10.  That’s 10 eBooks for $10.  Seriously!


eBook Overload sm
This package includes loads of real food recipes that are easy and family friendly. From chicken to beef to fruits and vegetables to chocolate (of course!), here is the wonderful books you will receive:

  • Have Your Fruits…and Veggies Too!
  • Have Your Cookie…and Eat it Too!
  • Have Your Cookie and Eat it TWO!
  • Think Breakfast…Outside the Box
  • Totally Tortillas
  • What to Do With the Kids in Your Kitchen
  • What to Do With the Chicken in Your Kitchen
  • What to Do with the Cocoa in Your Kitchen
  • What to Do With the Cow in Your Kitchen
  • What To Do With the Vanilla In Your Kitchen

Feel free to click on any of the above titles to learn more about these individual books. Once purchased, you’ll recieve an email giving you the download links to each eBook. You’ll have so many healthy, kid friendly recipes you won’t know where to start!

Heavenly Homemakers Ebook Overload!
$51.49
$10.00

Add to Cart

Feel free to add your best kitchen tip in the comments. It’s always great to learn from each other. :)

Heavenly Homemaker's Club Members: Access your homepage and all your fantastic resources here! Not a member yet? Please join us!

Two Simple Ways to Get Ahead in the Kitchen

February 25, 2011 by Laura 41 Comments

This post may contain affiliate links. For more information, please see our disclosure policy.

It may be apparent after you read this post that somebody got a little bit wheat grinder happy this week, thoroughly enjoying a small portion of the 300 pounds of hard white wheat that had been delivered. (You can read all my posts involving grain and grinding grain here, in case you’re interested in reading about my grainy obsession.)

I couldn’t help myself. After being sick myself and taking care of a family of sickies for the past four weeks (that influenza stuff is a BEAR), to have energy again and healthy children with appetites is truly delightful. I’ve been spending extra time in the kitchen, trying to make up for lost time it would seem. I loved every minute of it.

Okay, maybe not the dirty dishes part.

Dirty dishes aside (and really – I shouldn’t complain about the blessing of having so many people to dirty up dishes at my house), I loved being able to bake and cook a little extra this week in order to have healthy convenience foods in my freezer. Two things occurred to me as I was participating in this mad flour grinding, recipe mixing up, dough kneading, cooking ahead extravaganza this week, and I would like to share them with you.

Here are two of the simplest ways I’ve found to get ahead in the kitchen:

1. Cook or bake just one extra thing each day, if at all possible.  This might mean that you brown up several pounds of hamburger to have on hand for an easy casserole, tacos, sloppy joes, etc. Or it might be that you whip up some snacks to have on hand for the kids. Or maybe you could cook up some brown rice to have for simple meal prep the next day. It doesn’t have to be complicated or time consuming. But if you happen to be home and have a few extra moments during the day, utilize it for cooking up a little something extra to make for convenience on those days you barely have time to cook at all because you’re running around crazy-like. 

2.  If you’re mixing up one batch, you might as well mix up two (or three) batches.  You’re already making a mess. You’re already getting out the needed ingredients. Why not double or triple up the recipe and make plenty of extra of whatever it is you’re making, then put the leftovers in the freezer for a busy day. I love doing this with Whole Wheat Waffles, Easy Lasagnas, Muffins…whatever freezes well and reheats easily.

Here are just a few pictures of the food items I made this week in my efforts to get ahead. Let me clarify something though:  Not every week is this productive for me in the kitchen. I happened to be home most of the week without many outside engagements, allowing me to really focus on teaching my kids and working in the kitchen. Now I  have several quick foods in the freezer to easily warm up on those days where we’re running to ball games and practices, or dentist appointments or any other event that makes it difficult to spend time cooking.


Chocolate Chip Cookies and Easy Lasagnas

Honey Whole Wheat Bread (x2)

Whole Wheat Waffles (x2)

Homemade Whole Wheat Rolls (recipe found in Heavenly Homemaker’s Guide to Holiday Hospitality)

Whole Wheat Tortillas (x4)

Meat and Cheese Burritos

Sloppy Cornbread Muffins

Banana Muffins (x2)

Whole Wheat Vanilla Wafers (x2)

What did my kids do while I was doing this extra cooking? Most of the time, they were sitting in the kitchen with me, doing their school work. They also spent a fair amount of time playing with a huge box, shooting things, and eating the food I was making. 

What did my dust and clutter do while I was doing all this extra cooking? Let’s not talk about it.

Heavenly Homemaker's Club Members: Access your homepage and all your fantastic resources here! Not a member yet? Please join us!

Join Our Community!

 Facebook Twitter E-mail Instagram Pinterest

Popular Posts

~ Will All of the Real Moms Please Stand Up?
~ Easy! Stir-and-Pour Whole Wheat Bread
~ How to Make Gatorade
~ 31 Real Food Breakfast Ideas
~ Dear Teenage Girls...
~ When Mom Takes a Step Back
~ The Inexpensive Health Insurance We Love!
~ Let's Talk Real Food Grocery Budgets

Check out our latest posts!

  • Big Family Food and Fun: April 19-25, 2026
  • Big Family Food and Fun: April 12-18, 2026
  • Big Family Food and Fun: April 5-11, 2026
  • Big Family Food and Fun: March 29-April 4, 2026
  • My 2026 NON-Grocery Budget Update
Home  ~  Simple Meals  ~  Club Membership  ~  Shop  ~  Privacy Policy  ~  Disclosure  ~ Contact

Copyright © 2026 · Beautiful Pro Theme on Genesis Framework · WordPress · Log in