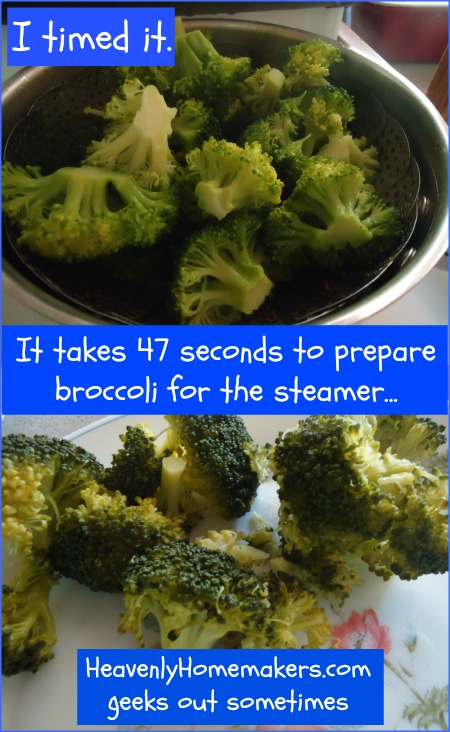
It’s true. It takes 47 seconds to prepare broccoli for the steamer.
I know this because I timed myself preparing broccoli to be steamed. Why are you looking at me like that? You would do something this geeky too if you heard people say, “making healthy food takes too long to make” as much as I do. I figure, I can keep saying, “does not, huh-uh, does not” or I can actually time myself making healthy food and prove people wrong with a stop watch.
Yeah, I’m a weirdo.
The good news? Timing myself preparing broccoli didn’t take long because preparing broccoli doesn’t take long. Okay then. Plus my 12 year old thought it was fun to use his stop watch to time me prepping broccoli. He only asked twice, “Wait, why are we doing this?”
I felt this information was worth documenting as sometimes even I don’t feel like I have the time to make healthy food. Sometimes I feel that it would take less effort and time to slap down something less than stellar from the freezer section of the store. Sometimes I don’t want to go to the trouble to put something nourishing on the table. Me. The one who knows the truth that healthy eating doesn’t take extra energy or time. Me, the one who has already proved this truth many times over. Me, the one who loves to cook.
Now that you and I have learned the 47 second truth, neither of us can fall back on “I just don’t have the energy to make anything healthy tonight.” Even if we are compromising by putting something on the table that is less than stellar (hey, I do it sometimes too when I’m in a pinch or when we just want a fun treat). That’s fine. Throw down a take-and-bake pizza or whatever. Just take the additional 47 seconds to steam broccoli or make a salad to go with the meal.
If you really want to save time and energy, prep your broccoli ahead of time, put it in a baggie, then dump it in your steamer at dinner time. Like this:
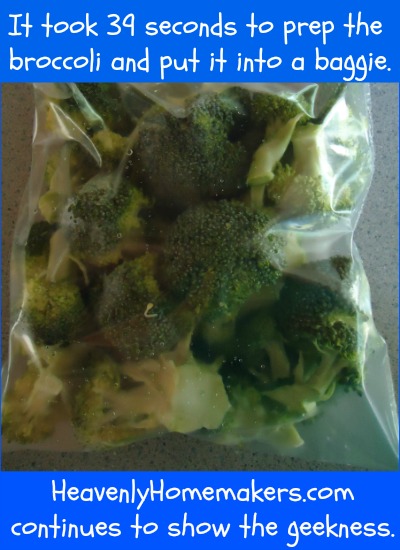
Once you’ve done that, you can pull it out of the fridge and take the remaining 8 seconds of the 47 seconds total broccoli prep time to pour it into your steamer and turn on the burner. Seriously people. It takes more energy to do all the math on this than it does to actually just go prepare the broccoli.
If you’re wondering the specifics of my 47 second broccoli preparation process, it is as follows:
- Get out pot, run water into the pot, place it on the stove.
- Set the metal steamer into the pot of water.
- Get the broccoli out of the fridge.
- Wash the broccoli under running water.
- Cut the broccoli off the stem directly into the steamer on the stove.
- Put the lid on the pot , turn on the burner, and walk away.
Boom. 47 seconds.
Not that you haven’t already thought of this, but using frozen broccoli is just as good for you and takes even less time. (Skip steps 4 and 5 above. Pour frozen broccoli directly into steamer. You’re welcome.)
I believe we can all agree that preparing broccoli (or other veggies) is incredibly fast and easy and none of us has any excuse to not make them, serve them, and eat them. Now how many of you are going to get out the stop watch tonight as you make your vegetables?