Heavenly Homemakers

Encouraging women in homemaking, healthy eating and parenting

  • Home
    • About
    • FAQs
  • Recipes
    • Bread and Breakfast
    • Condiments
    • Dairy
    • Main Dishes
    • Side Dishes and Snacks
    • Desserts
    • Gluten Free
    • Instant Pot
    • Crock Pot
    • Heavenly Homemaker’s Weekly Menus
  • Homemaking
    • Real Food Sources
  • Store
  • Contact
    • Advertise
    • Disclosure
    • Privacy Policy
  • Simple Meals
  • Club Members!

35 Minutes ~ 6 Winner Winner Chicken Dinners

June 17, 2015 by Laura 11 Comments

This post may contain affiliate links. For more information, please see our disclosure policy.

Hows that for a dumb title? Well, you too will feel like saying silly things and maybe even doing the chicken dance after you spend such a short amount of time creating so many delicious meals for your family. Plus, I just had a great cup of coffee so my typing fingers are under the influence of caffeine.

Last week – using ugly meat pictures – I showed you how I used my Eat Right Away: Beef Edition packet to make 6 Beef Meals in only 45 minutes. I promised you that I would do the same with the Chicken Edition. So here I am. But this time – I’m excited to report that it only took 35 minutes of work time to crank out 6 meals. We have big eaters at our house, so the only way I was able to turn 8 pounds of meat into only 6 meals for us is that I’ll be adding several fruit/veggie sides along with potatoes, tortillas, rice, or pasta to stretch that chicken. If your family is smaller than mine – you could do the same amount of work and end up with more than 6 meals!

Eat Right Away Chicken Edition 22

I’m really, really excited about this. One of my biggest goals here is to emphasize that it really doesn’t have to be difficult or time consuming to feed your family healthy, real food meals. Here is the run-down of my 35 minute date with 8 pounds of chicken.

On Friday, I picked up my Bountiful Basket meat order (the first one to come to our town!). I got 24 pounds of nitrite-free bacon and 24 pounds of nicely raised boneless/skinless chicken. I put 8 pounds of chicken in the fridge to thaw.

erwchicken1

On Saturday, I got to work making four out of five of the recipes included in the Chicken Edition packet. (I didn’t make the Teriyaki Chicken and Veggie Kabobs because while I had plenty of chicken, the other ingredients needed were not on sale. No need to pay full price – I’ll make a triple batch of those another time!)

These are the recipes I worked on:

  • Easy Apricot Chicken
  • Sloppy Salsa Chicken
  • Mexi-Chicken Pasta
  • Chicken Tostadas

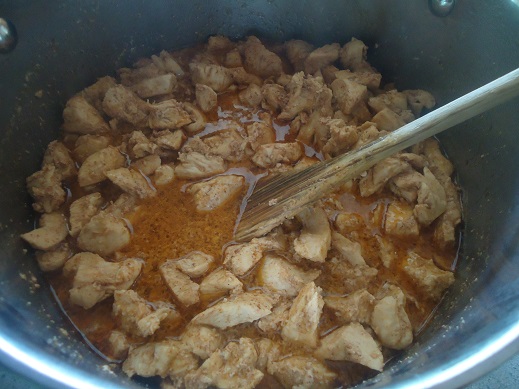
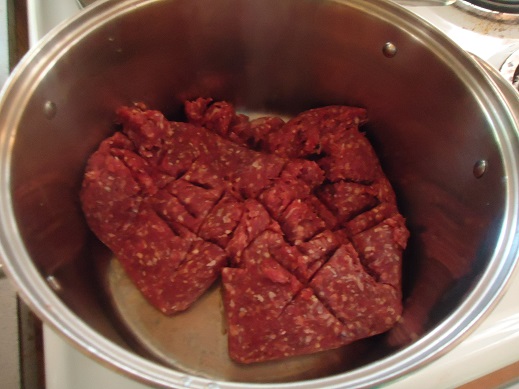
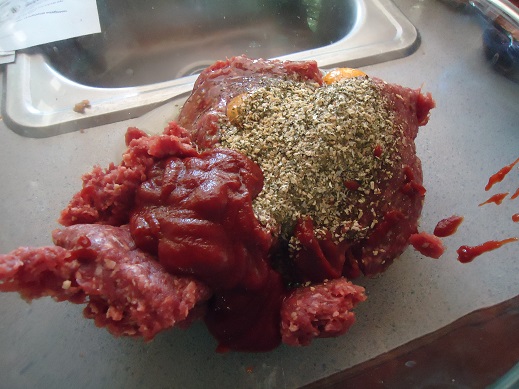
First I put 2 pounds of chicken into a pot with the Apricot Chicken ingredients, put a lid on the pot, and started it cooking on low. It was an exhausting five minutes. Thank you for your compassion.

erwchicken2

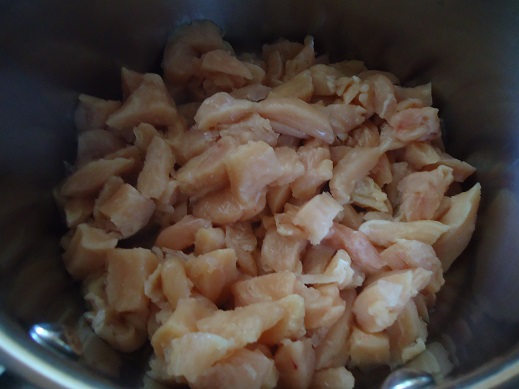
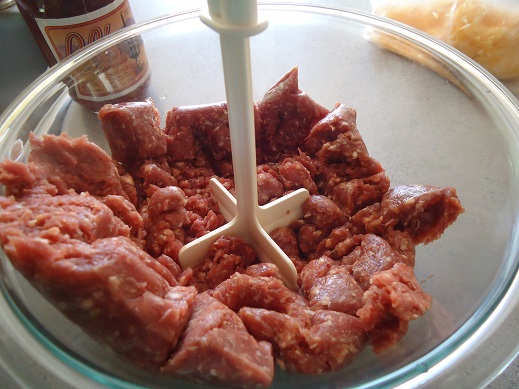
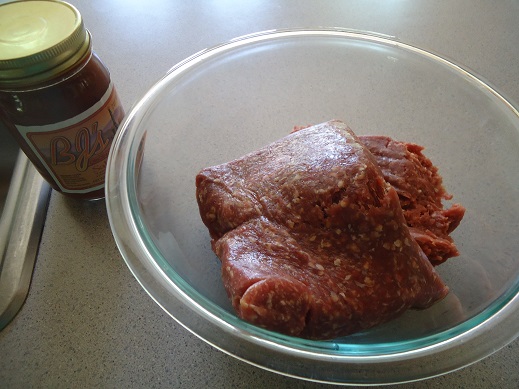
Next, I used kitchen shears (the best way to cut chicken, if you ask me) to cut 4 pounds of chicken into pieces for the Mexi-Chicken Pasta and Chicken Tostadas. Want to know what’s great? You use the same ingredients to cook the chicken for both of those recipes so this is super efficient!

erwchicken3

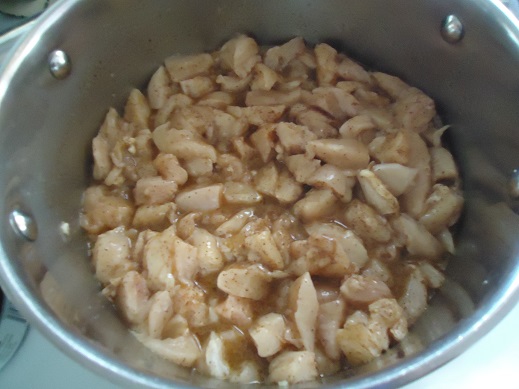
There it is. Seasoned and ready to cook. Prep took about 15 minutes. Onto the stove it went.

erwchicken5

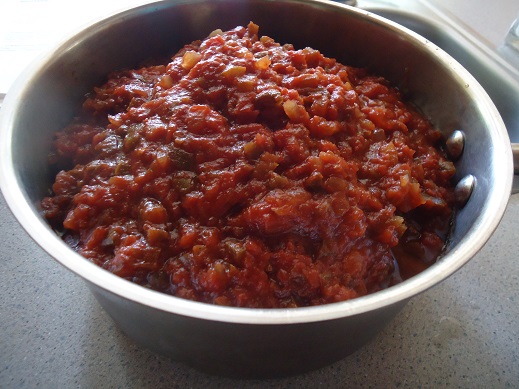
I put the remaining 2 pounds of chicken into a third pot along with the Sloppy Salsa Chicken ingredients. Two minutes later, it was cooking on the stove. Are you grasping how easy this is? I burn complicated recipes in my fireplace. I like simple foods.

erwchicken4

While all three pots of chicken cooked, I ate lunch with my family. (Tuna casserole, green beans, and raspberries – thanks for asking.) I stirred the chicken from time to time while our older boys shared about their week at camp. (They’d just gotten home a couple hours before lunch.)

After lunch, the Mexi-Chicken Pasta and Chicken Tostada meat was finished – so I set it aside to cool.

erwchicken6

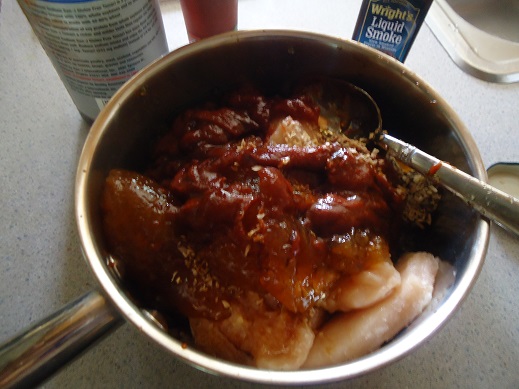
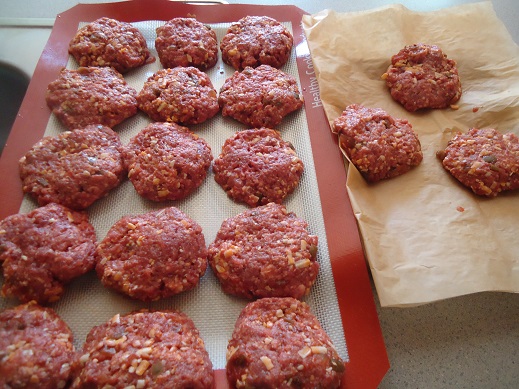
The Apricot Chicken was finished to I used a fork and knife to kind of shred it. I say kind of because it’s not completely shredded. I got to a point where I was like, eh good enough.

erwchicken7

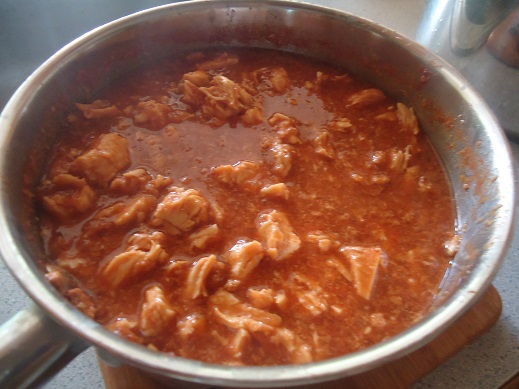
Same thing on the Sloppy Salsa Chicken. I shredded it until it was at the “good enough” stage. It’ll pull apart more when we rewarm and serve.

erwchicken8

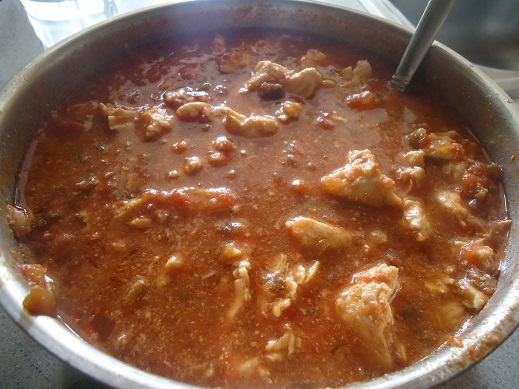
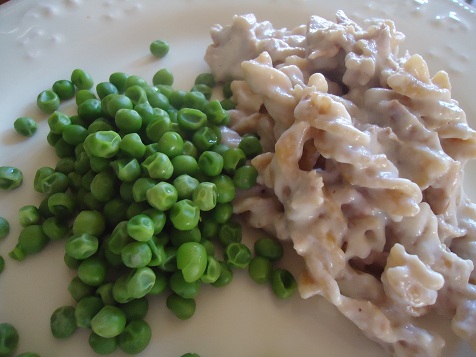
(I told you these chicken pictures were ugly. Good thing this stuff tastes so good.)

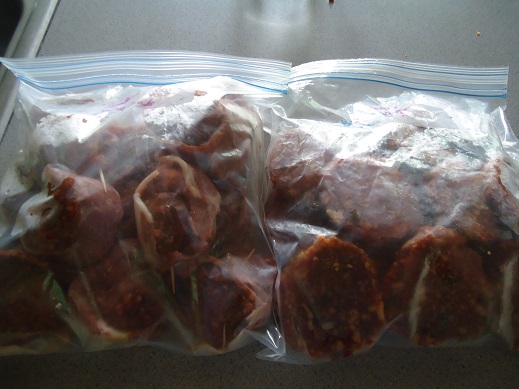
At this point, I let all three pots sit out to cool. Later, I filled five freezer bags: 2 with Sloppy Salsa Chicken, 2 with Apricot Chicken, and 1 with chicken for Mexi-Chicken Pasta. The remaining chicken was left in the pan to quickly rewarm after church Sunday for Tostadas. Lunch within five minutes of getting home from church? Yes please!

erwchicken9

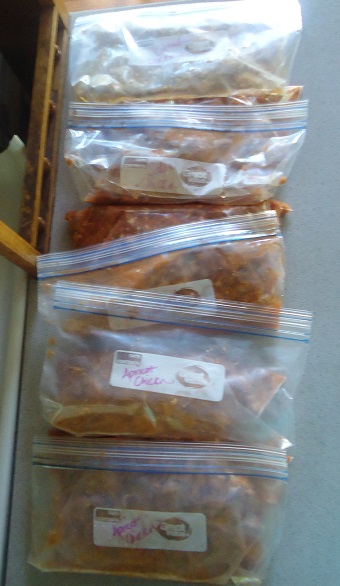
Those five bags of food joined the 6 beef meals from last week.

I’m going with your suggestions on which packets to work on next – focusing on meatless and slow cooker recipes. It is too much fun and oh so helpful to learn these new recipes.

Learn more about the Eat Right Away Packets here. Or just grab them here:

[wp_eStore_fancy1 id=5]


I love how easy it is now to pull out these prepared foods to serve to my family. Tuesday we put baked potatoes in the crock pot, set out a bag of frozen Apricot Chicken, then went to the swimming pool. We got home, warmed up the meat, cooked some green beans, cut up a cantaloupe, and had our meal. Crazy easy. Plus, all my men raved about how good the Apricot Chicken was. Bonus!

Have you tried any of the recipes in these packets yet? How’s it been going for you? Hope they are a blessing to you as they have been for us!

Heavenly Homemaker's Club Members: Access your homepage and all your fantastic resources here! Not a member yet? Please join us!

I Just Spent 45 Minutes in the Kitchen and Made 6 Meals! Boom!

June 11, 2015 by Laura 8 Comments

This post may contain affiliate links. For more information, please see our disclosure policy.

I decided to give you an idea of how our Eat Right Away Packets work, so I thawed 6 pounds of hamburger and took some really bad pictures of raw meat. My life is glamorous.

Eat Right Away Beef Edition 50
Knowing that your life is probably glamorous also – meaning you might have interruptions in the form of nursing babies, important phone calls, teenagers needing a ride, siblings who need to learn that nice words go a long way, or any other variety of real life stuff – we all know that 45 minutes can turn into an hour and an hour can turn into are you kidding me. So don’t set a timer on this. My 45 minutes of work began at 12:00 noon and didn’t end until 1:30 pm because someone stopped by to pick something up a few minutes after I started, my husband and 10 year old had some questions, and somewhere in there I realized I needed lunch because what was I thinking starting this project on an empty stomach?

In other words, I did 45 minutes of kitchen work, but those minutes were broken up a bit by life and lunch.

The beauty of the Eat Right Away Packets is that they help you be efficient with your time, they help you make the most of your effort in the kitchen, and they help you turn out some pretty awesome meals with very little effort. But there’s no right or wrong way to go about putting these meals together. Case in point:

Here are the five beef recipes in the Eat Right Away: Beef Edition Packet ~

  • Cheesy Salsa Burgers
  • One Dish Cheesy Beef and Potatoes
  • Bacon-Wrapped Individual Meatloaves
  • Easy Hamburger Soup 
  • Baked Ziti 

But seeing as we’re not into soup this summer, and knowing I was low on time – I decided to skip the Easy Hamburger Soup and the One Dish Cheesy Beef and Potatoes. I went with the crazy easy Cheesy Salsa Burgers, the almost as crazy easy Bacon-Wrapped Individual Meatloaves, and the no-brainer Baked Ziti.

I doubled the Baked Ziti. Why not, right? So when all was said and done, I had spent 45 minutes of work time to make 6 meals. Sweet!

NOTE: If your family is smaller than mine or eats less – these Eat Right Away Packets are going to turn out way more than 5 meals for you. How’s that for a bonus return on your time investment?!

So here’s an ugly picture run-down of my Eat Right Away: Beef Edition meal prep…

I threw 2 pounds of meat into a pot to begin cooking (for the double batch of Baked Ziti).

beef1

While it began cooking, I mushed up another two pounds of meat in a bowl, then stirred in the ingredients for Cheesy Salsa Burgers. Here and there, I stirred the meat cooking on the stove.

beef3

Side Note: My dad and his wife got me this amazing meat squisher
(spoken like a true professional) for Christmas. I super love it.

Before shaping the patties, I put a pot of water on to boil. (Had I not taken the time to snap a picture, you all would surely be left in the dark as to what this step looks like. You are very, very welcome.)

beef4

I shaped 18 Cheesy Salsa Burger patties – in a variety of sizes. See how great this is? You can make different sizes to accommodate different sized appetites. That, and you can just be a total non-perfectionist who really doesn’t care if all her patties are uniform in size. This may not work for you Type A’s. Shape your patties according to your personality type. We can all still be friends.

beef5

Somewhere in there, my water hit boiling point. I poured in the pasta and continued shaping patties.

beef6

The meat was finished cooking on the stove, so I added sauce ingredients.

beef7

If you look at my Baked Ziti recipe in the beef packet, you’ll see that I didn’t follow my own instructions correctly. I blame it on the fact that I hadn’t eaten lunch.

And it was at this point that I stopped my work and ate some tuna salad and cole slaw.

Revived by food, I stirred in other Ziti sauce ingredients, then began to build the casseroles.

beef8

beef9

beef12

Having this done, I went to work on the Bacon-Wrapped Individual Meatloaves. Two pounds of meat in a bowl, other ingredients dumped in (because life is too short to get out measuring spoons).

beef10

Meatloaves were shaped and wrapped in bacon. Husband walked in and said some really nice things about my bacon. ;)

beef11

I put the pans of Meatloaves and Salsa Patties into the freezer. Then, I loaded the dishwasher and hit “start.” While the meat froze and the dishes washed themselves, I took Malachi to meet some friends at the swimming pool because life is hard.

beef13

So much glorious vitamin D later, I came home and put the frozen meat items into freezer bags. I labeled them and put them back in the freezer for a quick meal another day. YAY!!

beef14

That night, I threw some of the Cheesy Salsa Burgers on the grill for our dinner (meal #1). In the freezer I have another meal of burgers (meal #2), two meals worth of bacon meat-loaves (meals #3 and #4) and two zitis (meals #5 and #6).

beef15

You guys – this is not hard!! If you don’t love cooking, I believe you will really love this way of prepping ahead to make your kitchen life easier. These recipes are super simple, and once the work of preparing these foods is done (and cleaned up after, woot!) – all you have to do at meal time is pull something out of the freezer and cook it. You don’t even have to think at that point. (I’m not ashamed to say that the not thinking is my favorite part of this.)

I’ve got many pounds of chicken coming in a Bountiful Basket order Friday, so this weekend I’ll be pulling out my Chicken Edition and taking more bad pictures to show you how that one works.

Get all the details on these Eat Right Away Packets here. Ready to add them to your kitchen collection? Download them right away and get started!

Eat Right Away: Beef Edition
$2.00

Add to Cart

Eat Right Away: Chicken Edition
$2.00

Add to Cart


Some of the links in this post are affiliate links.

Heavenly Homemaker's Club Members: Access your homepage and all your fantastic resources here! Not a member yet? Please join us!

Why Do My Homemade Extracts Smell and Taste Like Alcohol? Did I Do Something Wrong?

June 8, 2015 by Laura 25 Comments

This post may contain affiliate links. For more information, please see our disclosure policy.

Am I the only one who, as a little girl, loved the smell of vanilla so much that she just had to take a little taste – and then she gagged? Surely I’m not the only one. I remember the moment clearly. It was oh-so disappointing. The taste of vanilla extract was nothing like the smell. Bleh.

So now here we are, a few decades and a few gallons of Homemade Vanilla Extract later. I know now what I didn’t know as a little girl: vanilla extract is made with alcohol. Well, no wonder.

Still, one would think that after 4-6 months of sitting in vodka, the all-amazing vanilla beans would overpower the alcohol. Plus, how can something that tastes so terrible by itself be such a delicious flavoring in recipes?

My well thought out answer is, of course, this: I dunno.

All I know is that after you follow all the directions and make vanilla extract, you can take a little taste and think, “Oh no! I did something wrong. This tastes awful!” But you’ll be wrong. You did everything right and vanilla extract just smells good (in small whiffs) and tastes bad (by itself). See? Look.

extracts 2

It smells soooooo good.

extracts 3

But it tastes soooooo bad.

How about Cinnamon Extract?

extracts 6

Mmmm, smells good.

extracts 5

Wow. That tastes bad. And whoa – it also burns the tongue. I guess it is cinnamon, after all.

So what about Mint Extract?

extracts 1

Well, mine doesn’t even smell good at this point, so I didn’t dare taste it. In its defense, I only started it last week. Therefore, it still smells strongly of vodka. It’ll get better in a few weeks.

Now, if you take a deep, long whiff of your homemade extracts, the smell of alcohol will overpower the vanilla bean/cinnamon stick/mint. So waft gently, my friends, waft gently.

All these words and ridiculous selfies to say this: If your extracts smell strong (but good) and taste terrible, you have done a fine job. Well done. You’ve made delicious extracts.

What extracts do you have in the works right now? How do they smell? Good? Strong? Nasty? Do feel free to send me a extract sniffing or tasting selfie. 

Heavenly Homemaker's Club Members: Access your homepage and all your fantastic resources here! Not a member yet? Please join us!

The Right Way to Squeeze a Lime or Lemon (How cool is this?!)

June 7, 2015 by Laura 6 Comments

This post may contain affiliate links. For more information, please see our disclosure policy.

Brace yourself for the most amazing kitchen hack you’ll ever read between now and precisely three to five minutes from now. When you next see your friends, or you strike up a conversation with the fella bagging your groceries – you’ll be sure to tell them about this, won’t you? I mean, everyone needs to know that the squeezing of limes and lemons has been done wrong for years but you now know the correct way to do it – so you shall therefore enlighten the world on the correct squeezage procedure of limes and lemons.

The Right Way to Squeeze a Lime (or a lemon)

I recently learned this trick, and it’s a good thing. I think I was well on my way to being diagnosed with lime-squeezing-induced carpal tunnel in my right hand. This hack has saved me, no doubt. It’s here to save you too.

All nonsense aside (and by nonsense, I mean completely necessary life-changing information) – this tip is really cool. You’ll need a lime or a lemon (was that not obvious?) and you’ll need a strong pair of tongs.

First things first: Roll the unsliced lime or lemon along the counter-top, pressing it down as you roll. This will soften the fruit and make it easier to juice.

Next, cut your lime or lemon in half. Grab one half with your tongs, like so:

squeezing lime 1

Now (aiming downward, for the love) squeeze that lime or lemon with all your might (I use two hands because I’m a weakling like that). Continue the rolling, the slicing, and the squeezing until you have all the juice you need.

squeezing lime 2

The tong trick helps prevent juice from getting all over your hand and running down your arm and up your sleeve. Not that this would actually happen, but now it most definitely won’t. Plus you won’t get lime-squeezing-induced carpal tunnel, so I think we can all breathe a sigh of relief there.

I first tried this trick while making BLT Chopped Salad, and I’m pretty sure I’ve made it clear that I have been eating that salad three meals a day for the past eleventy days or so because I love it so much. I’ve learned to just squeeze the lime directly onto the salad because life’s too short to squeeze it into a jar for the purpose of making a dressing. Just squeeze it directly, then pour in the oil, and sprinkle with salt.

Then, because you are amazingly efficient, you can use your lime squeezing tongs to toss the salad altogether (thus mixing the lime juice, olive oil, and salt along with all the other ingredients) and then to serve the salad with those very tongs. If by now tongs are not your favorite kitchen gadget, I believe you need to go back and read this post more thoroughly. Or maybe you just haven’t made this salad yet, for reasons I will never understand.

Grab you some limes (or lemons) and grab you some tongs and commence the squeezing.

Now you tell me. Is that not the most amazing kitchen hack you’ve read in the last three to five minutes? And have you made this salad yet? Do it already.

Heavenly Homemaker's Club Members: Access your homepage and all your fantastic resources here! Not a member yet? Please join us!

How to Make Mint Extract

June 4, 2015 by Laura 27 Comments

This post may contain affiliate links. For more information, please see our disclosure policy.

Homemade Mint Extract!

Homemade Mint Extract 2

It is a fact that I went to the store last week with one purpose: To buy liquor. Not fruit, not vegetables, not butter…but rum. And also vodka.

I grabbed one bottle of each and walked to check-out. I certainly would have taken a selfie to show you all, but obviously that would have been impossible since I only have but two hands and they were both clearly full…of liquor bottles.

I should be used to this by now, but even after so many years of making Homemade Vanilla Extract, I still feel awkward about buying large quantities of liquor. Since I typically make so much extract at once, my cart full of liquor makes it look like I’m hosting a party for half the city.

Whatever. It’s just weird. But the worst (and I do mean worst) part is this:

The past three times I’ve purchased liquor for extracts – I have not even been carded. What?? Do I look like I’m over 21? Sheesh. (says the woman who has an almost 18 year-old son.)

Well, anyway. It seems that I just need to get used to it and deal. Why? Because it occurred to me as of late: Since it’s so easy and so cost effective to make Homemade Vanilla Extract – why have I not tried making other extracts?

Why indeed. Therefore, I bought rum and made Cinnamon Extract – which took a grand total of about two minutes (not counting the time it took to not get carded at the store). Last week I stole some fresh mint from a friend’s yard (and by stole, I definitely mean that she cut some for me, put it in a bag, and handed it to me with the promise that there was more where that came from and to feel free to help myself at any time) – and started a batch of Mint Extract.

This stuff is too easy. Why do we think homemade goodies are difficult? Do we know how to open a bottle of liquor and pour? Well then.

Be watching for instructions for making Orange Extract and Almond Extract. Click on the following to learn to make Vanilla Extract and Cinnamon Extract. And now…

How to Make Mint ExtractYum

1. Cut fresh mint leaves (or buy them at the grocery store), rinse, and pat dry.

2. Pull leaves off the stem.

3. Place about 1 cup worth of mint leaves into a pint-sized jar.

4. Pour in about 2 cups of vodka (the cheap kind is fine).

5. Cover and place in a dark cabinet for 1-2 months, shaking occasionally.

Homemade Mint Extract

Make enough for your family to use, and enough to offer as gifts. Wow your family and friends. They’ll be so impressed, and inside you’ll be thinking, “Well all I had to do is rip leaves and pour vodka. But yeah, I’m awesome.”

Have you tried making extracts? Which homemade extract recipes would you be interested in learning to make next?

Heavenly Homemaker's Club Members: Access your homepage and all your fantastic resources here! Not a member yet? Please join us!

Why I Rarely Make Big Meat and Potato Meals (Plus 9 of My Family’s Favorite Real Food, Real Simple Meals)

June 2, 2015 by Laura 44 Comments

This post may contain affiliate links. For more information, please see our disclosure policy.

My true confessions about meat and potato meals…

You know what I love about mashed potatoes? Eating them. Otherwise, I am so over mashed potatoes. Therefore, I kind of stopped making them.

Why did I stop? It’s not like they’re difficult. My family loves them. They make a filling side dish. They are a real food. And above all, we can stir lots of butter into them. Why wouldn’t I make them more often?

Because, this:

why i don't make big meals

I decided to make mashed potatoes a couple weeks ago since I had pretty much avoided the task since Thanksgiving. The family was thrilled. But making a meal of lamb chops, mashed potatoes, gravy, a veggie, another veggie – well by the time it’s all said and done – I had spent a very long time in the kitchen and had a sink and counter full of dirty dishes. That’s just one meal, people. (Except for the muffin tin and probably like, a spoon.)

I’m convinced that this is why so many people don’t enjoy cooking. Am I right? It takes too long. There are too many steps. There’s too much clean up. You know what? I don’t enjoy it either when it looks and feels like that.

Well, I’m not here to tell you what to do (except for never eat margarine). But as for me and my house, we’re only going to make mashed potatoes for special occasions. Otherwise, we’re going to stick with simple meals that don’t require many steps. Fast (real) foods that don’t dirty many dishes. Real food made easy.

Real Food, Real Simple Meal Ideas

Here, I’ll list a few of our favorite Not-So Meat and Potato Meals:

  • Easy Noodle Stir Fry with a side of fruit because it already includes lots of veggies
  • Crock Pot Barbecue Chicken Breasts with two to four easy “throw on the table” fruit and veggie sides
  • Black Bean Chicken Nachos with lettuce, tomatoes, olives, and fresh fruit
  • Taco Potatoes with lettuce, tomatoes, olives, and fresh fruit
  • Tuna Casserole with salad, peas, and fresh fruit
  • Italian Cream Cheese Chicken with salad and steamed veggies
  • Alfredo Sauce with Pasta with salad and steamed veggies
  • Baked Potatoes in the Crock Pot topped with meat, cheese, and veggies
  • Ham and Cheese Pasta Salad with raw veggies and fresh fruit

Instead of mashed potatoes, I’ve been making a lot of baked potatoes recently. I love this because they are so versatile and easy. Here’s a post detailing what I do with leftover baked potatoes.

taco potato skillet 3

‘Fess up. How often do you make mashed potatoes? (The real kind, not from a box. Don’t get me started.)

~~~~~~~~~~~~~~~~~~~~~~~~~~~~~~~~

If you love the idea of keeping your meals simple and good, you will LOVE Simple Meals!!

simplemeals300

Heavenly Homemaker's Club Members: Access your homepage and all your fantastic resources here! Not a member yet? Please join us!

Don’t Forget the Tuna

April 28, 2015 by Laura 25 Comments

This post may contain affiliate links. For more information, please see our disclosure policy.

This is probably the most exciting blog post you will ever read. Never mind all the insightful, scripture-filled, life-changing inspiration you might find online. I’m here to talk to you about tuna.

Don't Forget the Tuna and other deep thoughts

Yum

It’s an important topic and that’s all there is to it.

See, here’s the thing. You and I have busy schedules. Some of us love to spend time in the kitchen making nice meals for our families. Some of us don’t. Either way – we all want to be healthy and there are many days each week we need something quick to throw out on the table. For me, this need is most prevalent at lunchtime during our homeschool days. Shoot, right now it’s also very important at dinnertime when we’re running out the door to soccer games. You know what? I need simple meals three times a day, seven days a week. I just do. I’m sure you can relate.

I think this little convenience food can be overlooked as an easy meal option. So don’t forget the tuna. Remember the tuna.

Long live the tuna.

And now, the most frequently asked questions about this oft forgotten meat choice. Seriously, they are asked frequently. Like all the time. My email inbox is flooded with tuna talk. You have no idea.

How do you make your tuna salad?

I add Hain Safflower mayonnaise and homemade pickle relish. Usually I shake in a little salt. How much of each, you ask? Probably 2 Tablespoons of mayo and 2 teaspoons of relish per can of tuna.

How many cans do you go through in one meal?

Do you really want to know? This is the Coppinger family we’re talking about here. Our boys eat at least one can each. It’s alottatuna. (When I wrote that just now, I said it in an Arnold Schwarzenegger voice. Try it: It’s alottatuna. See? Is it just me, or can you just totally hear him say that? I am so weird.)

Where do you get your tuna?

There has been some tuna controversy through the years. Doesn’t tuna have too much mercury? Is it hurting the dolphins? Salted or unsalted? In oil or in water?

I’ve researched it. We don’t eat it every day, but I do feel okay eating and serving it every couple of weeks. I order cases of Yellow Fin Tuna from Natural Value. My understanding is that this variety has the lowest amount of mercury.

How do you serve your tuna salad?

I usually have my boys mix up a big bowl (yay for kids who can do this kind of work so that I can sit around talking like Arnold Schwarzenegger). Then we have it with crackers and whatever fruits and veggies we have in the fridge. It’s also great served on a bed of lettuce and a tomato slice. I like scooping tuna into a big bowl of mixed greens, chopped cucumbers, and diced tomatoes.

Or, if we’re really feeling creative (brace yourself for this one), we’ll spread some tuna salad on a slice of bread. We call them sandwiches. Incredible invention.

Don’t forget this wonderful idea: Tuna Melts on Spinach

Tuna Melts on Spinach

And also the ever wonderful real-food Tuna Casserole that makes for a very easy and fast meal:

Are you a tuna lover? What’s your favorite way to eat tuna? Join in the tuna talk!

Heavenly Homemaker's Club Members: Access your homepage and all your fantastic resources here! Not a member yet? Please join us!

Build a Simple Veggie Flower (Great for Showers and Holidays!)

April 9, 2015 by Laura 4 Comments

This post may contain affiliate links. For more information, please see our disclosure policy.

I just came across a picture on Pinterest showing me how to carve a swan out of a melon. I highly considered giving it a try for about negative .8 seconds – mostly because I knew for sure mine would turn out looking like a melon that fell out of my cart at the store and got ran over by a minivan.

Art and food? It’s not my thing. I think life’s too short to design owls out of kiwi, grapes, peaches, and blueberries when there are so many other important ways to spend time – like looking for lost shoes and sweeping up glass after a ball has been kicked through the kitchen (details not included). Also – I stink at art. Like, I draw a picture of a bunny and my kids say, “why did you draw a picture of our mailbox?”

But. Two weeks ago I saw a picture of veggies displayed in the shape of a flower and thought to myself: I can totally do that and I should do it for Easter. And so I did. It took less than 10 minutes (no joke) and people were like, “oh look it’s a flower.” Score one for me.

Build a Simple Veggie Flower

I think this is a great idea for a springtime wedding or baby shower, and it was definitely perfect for our Easter buffet. On a regular day, however? I will be throwing down the veggies and dip like my normal non-artist self.

What You Need to Build a Veggie FlowerYum

  • Broccoli
  • Baby Carrots
  • Celery
  • Cucumbers
  • Grape Tomatoes

Putting it all together is self explanatory – if you can do it I can do it. Just look at the picture above for the “how to.” Serve with these great dips:

  • Homemade Ranch Dressing

Ranch Dressing and Dip Mix

  • Easy Veggie Dip (Made With Homemade Seasoned Salt)

Easy Veggie Dip 1

Have you done much mixing of art and food? I draw the line at this veggie flower. :)

Heavenly Homemaker's Club Members: Access your homepage and all your fantastic resources here! Not a member yet? Please join us!

How To Clean Your Liver and Your Drinking Glasses At the Same Time

April 7, 2015 by Laura 51 Comments

This post may contain affiliate links. For more information, please see our disclosure policy.

It’s all about lemon juice.

Hey, I couldn’t make this stuff up if I tried. I simply learned this trick accidentally, so I decided to tell you to do it on purpose. After all, you might be like me and have water spots on your glasses and toxins in your liver. Not to worry – there’s a lemon for that.

Not sure if you have toxins in your liver? (And everybody looked down as if to examine their liver and check for toxins.)  I can just about guarantee we can all use a good liver cleanse. We all breathe in toxins when we’re outside or when we’re around chemicals of any kind, and surely we’re ingesting them – even if we are very careful about what we eat.

Oh no!! Our livers are toxic!  Relax. Our livers are made to process out toxins. Our world simply gives them a little more than they can handle sometimes. A lemon-liver boost is just what the doctor ordered.

Lemon Water Detox - Simple!

For me, this happened literally. One of my natural doctors suggested that my liver and immune system would benefit from drinking lemon juice in a glass of water each day. It sounded easy enough – plus, I love that this is such a super inexpensive de-tox option. So I started adding lemon juice to a glass of water once or twice each day.

How’s the taste? Well, pucker up. I don’t add sugar (because wouldn’t that just defeat the purpose?) so my lemon juice water is quite tart. Now that I’m used to the taste though, I find it to be rather refreshing and I’ve started to crave it each day.

And then. Then!!!!!! I noticed that when I rinse my glass afterward, all the spots that had been hanging out were wiped away. Just like that. So it would appear that lemon juice cleanses my liver and my drinking glasses at the same time because it’s just so efficient and awesome like that.

Here. I took a picture of two drinking glasses to show you the difference. I considered also putting two livers side by side so we could all see the effectiveness of drinking lemon water but wouldn’t you know it. My camera battery died. Seriously. That’s the only reason I didn’t stage that picture. The only reason.

spots on glass

What have we learned here today?

  • Laura has hard water.
  • Our livers love lemons.
  • Lemon juice beats hard water stains.

So here is my advice to you today (and tomorrow): Add about 2 Tablespoons of lemon juice to a 12 ounce glass of water. Drink it down. Do this once or twice or three times each day. Feel confident about this lovely boost you are giving your liver – helping it to do its job for you more effectively. And then watch as your drinking glasses become more sparkly each time you drink your lemon water.

After all, as they always say, if life gives you lemons – go cleanse your liver. Or your drinking glasses. Or both. At the same time. Rock on.

Ever tried drinking straight lemon water? How do you like it?!

Heavenly Homemaker's Club Members: Access your homepage and all your fantastic resources here! Not a member yet? Please join us!

Make Extra Baked Potatoes on Purpose Because…

March 24, 2015 by Laura 15 Comments

This post may contain affiliate links. For more information, please see our disclosure policy.

7 Ways to Use Baked Potatoes

What’s better than a baked potato? A baked potato with butter. Obviously.

But also, I have found that leftover baked potatoes can be a great meal-brain-time saver. This is why I typically bake twice (at least) as many baked potatoes as we will need for one meal.

First, let us be reminded of my favorite way to bake potatoes – particularly in the summertime – but also pretty much all the time because it’s just so easy:

How to Bake Potatoes in the Crock Pot (Without Foil)

I typically have my boys scrub enough potatoes to completely fill the crock pot since I know having the leftovers will give me another easy meal later in the week.

What do I make with leftover baked potatoes?

1. Homemade Frozen Hashbrowns or Hashbrown Patties

We shred baked potatoes into hashbrowns for the freezer. Oh how I love pulling these out for a fast side dish. If I take the time to freeze them into hashbrown patties, they are an extra special treat.

Homemade Hashbrown Patties

2. Fried Potatoes

Leftover baked potatoes make the best fried potatoes. We love to chop them up into a skillet with butter and sea salt. They cook up quickly since they have already been baked, and they have incredible flavor!

3. Potato and Egg Scramble

A favorite breakfast around here includes leftover baked potatoes fried in butter, then scrambled up with eggs.

4. Baked Potato and Bacon Casserole

This can be made and frozen, which makes an easy meal even easier. Grab the recipe here.

Bacon Baked Potato Casserole

5. Potato Veggie Skillet

Leftover baked potatoes, cut up and fried in butter with veggies like onions and sweet peppers (and mushrooms and broccoli and spinach and asparagus) is incredible.

 6. Baked Potato Soup

If I have leftover baked potatoes, I can make my Potato Soup recipe super quickly. The baked potatoes give the soup a great flavor!

7. Taco Potato Skillet

This makes a super fast meal! Simply brown meat, add taco seasoning, then add chopped leftover baked potatoes – cooking until it is heated through. Top with shredded cheese. Serve with veggies. My family loves this meal. I love it because I can make it in about 15 minutes with little effort.

taco potato skillet 3

What do you do with leftover baked potatoes?

Heavenly Homemaker's Club Members: Access your homepage and all your fantastic resources here! Not a member yet? Please join us!
« Previous Page
Next Page »

Join Our Community!

 Facebook Twitter E-mail Instagram Pinterest

Popular Posts

~ Will All of the Real Moms Please Stand Up?
~ Easy! Stir-and-Pour Whole Wheat Bread
~ How to Make Gatorade
~ 31 Real Food Breakfast Ideas
~ Dear Teenage Girls...
~ When Mom Takes a Step Back
~ The Inexpensive Health Insurance We Love!
~ Let's Talk Real Food Grocery Budgets

Check out our latest posts!

  • Big Family Food and Fun: May 3-9, 2026
  • Help Your Kids Become Independent in the Kitchen!
  • Big Family Food and Fun: April 26-May 2, 2026
  • Big Family Food and Fun: April 19-25, 2026
  • Big Family Food and Fun: April 12-18, 2026
Home  ~  Simple Meals  ~  Club Membership  ~  Shop  ~  Privacy Policy  ~  Disclosure  ~ Contact

Copyright © 2026 · Beautiful Pro Theme on Genesis Framework · WordPress · Log in