Heavenly Homemakers

Encouraging women in homemaking, healthy eating and parenting

  • Home
    • About
    • FAQs
  • Recipes
    • Bread and Breakfast
    • Condiments
    • Dairy
    • Main Dishes
    • Side Dishes and Snacks
    • Desserts
    • Gluten Free
    • Instant Pot
    • Crock Pot
    • Heavenly Homemaker’s Weekly Menus
  • Homemaking
    • Real Food Sources
  • Store
  • Contact
    • Advertise
    • Disclosure
    • Privacy Policy
  • Simple Meals
  • Club Members!

Breakfast anyone? Question #47

September 25, 2009 by Laura 43 Comments

This post may contain affiliate links. For more information, please see our disclosure policy.

I don’t know what the problem is around our house lately. Apparently the boys are all sick of breakfast food.

Oh, they all still want to eat breakfast. The boys are as hungry as ever in the morning. But for some reason nothing sounds good to them.

Grr

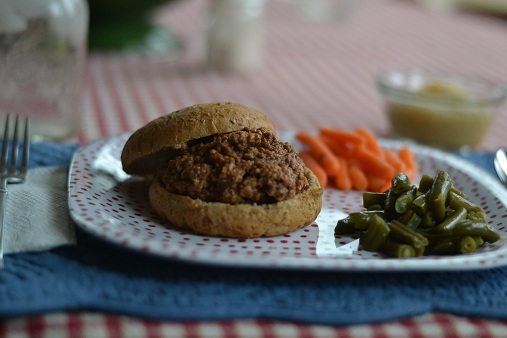
It’s not like I’m making gross stuff. Or the same thing every day. I make all kinds of yummy variety of pancakes, waffles, muffins, breads, eggs, smoothies, hashbrowns, oatmeal, milkshakes…. ALL kinds of things. 

When the kids turn up their noses at my breakfast foods these days, I don’t hesitate to (lovingly) remind them that “back in the day” children got to eat the same breakfast of “a bowl of gruel” morning after morning after morning and if they didn’t eat it, they would just go hungry and so they ate it day after day and they didn’t ever complain because if they did complain their mother would (lovingly) give them a shovel and a bucket and send them out to clean out the privy…

That little speech is always so effective.

Yeah, whatever.

Well…I will admit that I understand the boys’ issues somewhat. I was a TERRIBLE breakfast eater when I was little. There was hardly anything I would eat, so my mom finally resorted to feeding me “last night’s leftovers” for breakfast before I left for school. I’d eat macaroni and cheese, meat loaf…whatever in the world Mom could get into me before time to leave for the bus. 

So yeah…I get it. And I think we’re about to get over this hump. The boys tend to go through these anti-breakfast phases once in a while…then they get over it and start eating better again. (Probably because of my really, really good “back in the day” speech.)

My question for you today is:  Are you a breakfast person? Do you love it? Do you skip it? And…what’s your FAVORITE breakfast food?!

Heavenly Homemaker's Club Members: Access your homepage and all your fantastic resources here! Not a member yet? Please join us!

How to Make Whole Wheat Bread Tutorial

September 24, 2009 by Laura 475 Comments

This post may contain affiliate links. For more information, please see our disclosure policy.

Homemade Bread

This is my favorite, simple 100% Whole Wheat Bread recipe. This recipe makes two loaves. (I always double it for my family, so if the pictures in this tutorial look like twice the amount, that’s because it is.)

Honey Whole Wheat BreadYum

6 cups (give or take) whole wheat flour, divided
1 ¾ cups warm water, divided
1/3 cup honey
1 package active dry yeast (2 1/4 teaspoon)
1 teaspoon sea salt
3 Tablespoons melted butter

makingbread5sm

Mix 3 cups of whole wheat flour with 1 ½ cups of warm water in a large glass bowl. Allow this to sit for about 30 minutes. This will break down the gluten and help the bread to rise better.

makingbread3sm
In a small bowl mix together ¼ cup water, 2 1/4 teaspoons yeast and 1/3 cup honey. Allow this to sit for about 10 minutes, or until the yeast is activated and mixture becomes bubbly.

makingbread4sm
In the meantime, melt 3 Tablespoons butter in a small sauce pan. Remove from heat and allow to cool. You don’t want the hot butter to kill the yeast.

Add 1 teaspoon salt, melted butter and yeast mixture to the flour and water mixture. Gradually add the remaining three cups of flour and stir well. As the dough becomes harder to stir, pour it out onto a clean counter and begin to knead the dough. If you create a nice dough before adding all three cups of flour…you don’t need to continue to add it in. Just add enough to make a nice, non-sticky dough.

Here’s a video to show you how to knead the dough. Two things:  1) I was having a freaked out hair day. So glad I could share it with you. 2) I’m pretty sure “wetter” is not a real word, yet I use that word toward the end of the video. I are sorry.

Don’t you love how I “spank” the dough at the end of the clip? There’s something very gratifying about giving the dough a nice “spank”. You should try it sometime.

makingbread8sm

Once you’ve kneaded your dough, place it into a bowl to rise.

makingbread9sm

Cover the dough with a cloth and let it rise for at least one hour or until it has risen to twice  it’s starting size.

makingbread12sm

While you’re waiting for your dough to rise, get your bread pans buttered. You can also do some laundry, wash some dishes, or clean the bread dough out from under your fingernails.

makingbread11sm
There it is…doubled up.


makingbread13sm
Give the raised dough a nice punch.
(Punching? Spanking? Who knew making bread was so violent in nature?)

makingbread14sm

Using a floured hand, pull the dough out of the bowl onto the counter.

makingbread15sm
Knead for three or four minutes until the air bubbles are all gone.

Now you can watch how I shape my dough into loaves before baking. Again…more spanking…

makingbread22sm
Cover and allow 30 minutes to one hour to rise again. They should double in size, but the rising should happen more quickly this time because the yeast knows what to do by now.

makingbread23sm

See here how the loaves have doubled in size?

Bake the bread uncovered in a 350 degree oven for 45-50 minutes, or until the bread sounds hollow when you thump the top of it. (Great. Spanking, punching and thumping. I am really a bad influence.)

makingbread24sm
Allow the bread to cool in the pans for 10 minutes,
then remove it to finish cooling on a wire rack.

slicedbreadsm

The bread slices more easily after it’s cooled. However…it’s awfully hard to wait…and bread fresh out of the oven slathered in butter is really, really good. I say go for it.

A few notes:

  • Making bread from start to finish takes about 3 1/2 to 4 hours. Most of that time is waiting and baking time…but if you plan to make bread, you should block out an entire morning or afternoon.
  • If your water or butter is too cold or too hot, it will kill the yeast. If you can put your (clean) finger in the water or butter and it doesn’t burn you, but just feels warm… you’ve got the right temperature.
  • If the dough in your bowl has risen to double and suddenly you need to nurse the baby or wash cottage cheese out from between your toddler’s toes…just go punch down your dough and let it rise again before you shape it. It won’t hurt anything.
  • If you want to shape your dough into loaves, but bake them later:  Shape your loaves then put them directly into the freezer before they have a chance to rise. Allow them to sit in buttered loaf pans for several hours (or overnight) so that they can thaw and rise before baking.
  • Many of you have asked if I have a bread machine. I don’t, so I’m sorry I am not able to answer your questions about them. I’m assuming this recipe would work in a machine, but I don’t know. Maybe some of you with bread machines can chime in on this?

Click here to read through posts describing and explaining grains, grain mills and grinding flour!

Heavenly Homemaker's Club Members: Access your homepage and all your fantastic resources here! Not a member yet? Please join us!

Starting a New Job (No, not me…I’m still the Laundry Lady)

September 23, 2009 by Laura 26 Comments

This post may contain affiliate links. For more information, please see our disclosure policy.

Several weeks ago I asked you to pray about a major change going on at our house…and then  I was heartless enough to NOT tell you about it until almost a month later. Many of the details still needed to be ironed out and we had to “get all our ducks in a row”. Ever tried to line up a bunch of ducks? It’s kind of like trying to get your kids and their cousins to all stand still and smile AT THE SAME TIME so you can take a picture. 

Now that everything is all official and stuff…I can tell you about the new job my husband is taking on.

If you’ve been reading this blog for a long time, you might know how we’ve dabbled a little bit in “food service” work. Last summer we experimented with a Shaved Ice business…we purchased a trailer and have sold concessions at auctions and other events…we’ve sold food at our farmer’s market. 

All of these ideas have worked fairly well, but have been difficult to carry out since Matt needed to still work full time at construction, coach soccer, and work these businesses on the side as he could. Ultimately, Matt had a desire to open a restaurant some day. One that would serve good food. One that might serve locally grown food.

But of course…in order to carry out an idea like this you need two major things:  time and money. So, the restaurant idea was kind of placed on the back burner as a “maybe someday” kind of an idea.

In mid-July, a man from church (who somehow knew of Matt’s desire to run a restaurant) approached us with an opportunity. He planned to open a brand new restaurant in town…and would Matt like to help him run it?

Um, well let’s see. Matt would get to do what he’s been wanting to do, yet we wouldn’t have to back this plan financially? And he would be receiving a salary? With benefits?

Sounds like a no-brainer.

Except that it wasn’t. Matt  has worked HARD the past two years building up his construction business. It was just starting to really take off and jobs were rolling in quite consistently. He’d already committed to doing several jobs for people and was behind on the ones he was currently working on. Was he just supposed to stop all of that mid paint brush stroke and move on? 

And what about coaching soccer? Giving that up would be difficult. Would he have to give up coaching?

Long story short…all of the ducks got into their row. God has a way of helping ducks along. If it’s something God wants for you…all the details fall into place, don’t they?

Matt officially started his new job two weeks ago. The restaurant hasn’t opened yet. Right now he and the other manager, along with the owner, are working on ALL the details (lots and lots of ducks). Opening date is set for November 1st.

Matt will be the “morning guy”, which means that we’ll all be learning how to go to bed really early so that Daddy can get up and off to work by 5 am. Then he’ll be home around 2pm after the lunch rush. (Okay, except we all know restaurant managers work crazy hours sometimes, so we won’t count on this being a consistent schedule.)

But just imagine it…Daddy coming home from work most afternoons just about the time we finish with school for the day? What in the world might THAT be like? 

And…he’ll still be able to help coach soccer because most of that takes place after 2 pm.

So there you go. That’s the news. 

The boys and I got to go take a tour of the restaurant yesterday. Be still my heart, I got to walk through the BIGGEST commercial kitchen in town. Somebody hand me an apron.

I’ll try to keep you updated as time goes on. Thanks for your prayers during this transition. Change can be hard for me…even good change. Ah, but we’re trusting the One who never changes. The One who can always line up the ducks.

Ooh, I think some pictures are in order, huh?

Heavenly Homemaker's Club Members: Access your homepage and all your fantastic resources here! Not a member yet? Please join us!

Here it is!!! E-book Full of Preschool Activities and Ideas! Free to Everyone!! **UPDATED**

September 22, 2009 by Laura 52 Comments

This post may contain affiliate links. For more information, please see our disclosure policy.

Need some ideas for fun and educational preschool activities?

A few weeks ago, I asked my readers to help me out with some recipes, activities, crafts…whatever great ideas they had for keeping preschoolers busy and happy. I received SO MANY ideas they filled up an e-book!

I am so excited to finally be able to reveal to you the free pre-school activities and ideas e-book that many of YOU helped create!!

101 Pre-School Projects is filled with over 100 wonderful ideas for creative play with children. You’ll find eight fun categories in the e-book including:

  • Fun with Food
  • Seasonal Fun
  • Hands-On Fun
  • Fun with Arts and Crafts
  • Fun with Role Play and Make Believe
  • Fun with Music
  • Online Fun
  • All Kinds of Fun

This e-book is perfect for parents, babysitters, aunts or uncles,  grandparents,  friends, teachers…anyone who loves children.

AND it’s FREE!!!

Again, a great big thank you to EVERYONE who took the time to send me ideas and pictures. This e-book was made possible because of you! It’s sure a good thing you’re all so creative! Keep in mind that there are ideas for all seasons, indoor and outdoor. I love this!

Grab the e-book …grab the kids…and go have fun together!!

101 Preschool Projects Free Download

Grab this FREE 101 Pre-School Projects book here!

I’m excited to share that signing up for these freebies will connect you to our new Heavenly Homemaker’s Learning Zone. It’s free, of course. You can unsubscribe at any time, your info will never be shared or sold, and being on this list means that you’ll be the first to know of the other fun (yes, FUN!) educational tools we’re putting together!

Heavenly Homemaker's Club Members: Access your homepage and all your fantastic resources here! Not a member yet? Please join us!

Gratituesday: More Jars!!

September 21, 2009 by Laura 20 Comments

This post may contain affiliate links. For more information, please see our disclosure policy.

gratituesdayfall2

I can’t help but be grateful for jars today. Thank you all for putting up with me. :)

I thought I was the only one who loved jars at the level in which I love them. I was wrong. Take a look at Jodi’s jars!!!!!   I loved the beginning of her post with her pics…but as I kept reading and seeing more and more jars…I could hardly stay in my chair! Oh, beautiful jars!

Anyway, as the fresh fall produce just keeps making it’s way in abundance into my kitchen…I was suddenly running out of empty jars. That’s saying something because I have over 300 of the delightful jewels.

The day after I used my very last jar to can tomato sauce, I ran into my dear friend Lorna Mae. She asked if I would like some tomatoes. I told her I would LOVE some tomatoes, but I was out of jars to put them in!

Then she said,  “Oh Laura. If you need jars, I can give you some jars!!!!!!!!” (Okay, maybe she didn’t say it with that many exclamation marks, but I heard it with that many!)

The next day I went to her house and picked up a basketful of tomatoes and THREE big boxes of jars. And she THANKED ME. She’s hated that her jars have been sitting empty and unused…so she was thrilled that I would fill them up to feed my family.

Here’s where you say, “Laura can we please see your new jars?”

Why SURE. I thought you’d never ask:

batchofjarssm

Many of them are just your average jars waiting to be filled with delicious food. A dozen of them are wide mouth (my favorite!). A couple of them are antique.

But some of them.  Some of them are completely unique and special. It was all I could do to keep myself from jumping up and down in Lorna Mae’s basement!

Look at these beauties:

jar1sm

jar2sm

jar4sm

jar5sm

Can’t you just picture these with tomato soup, or applesauce? (She says with a long contented sigh…)

I’m so grateful that Lorna Mae was so willing to share her jars with me, and that she felt equally grateful that I helped her clear off some shelf space in her basement. 

I love how God gives simple gifts to his children.
—————————————————–

What are you grateful for this Gratituesday? Write about it on your blog, then come link back up with us here. If you don’t have a blog, be sure to leave a comment here letting us all know what you’re grateful for!

Heavenly Homemaker's Club Members: Access your homepage and all your fantastic resources here! Not a member yet? Please join us!

Menu Plan for the Week

September 20, 2009 by Laura 2 Comments

This post may contain affiliate links. For more information, please see our disclosure policy.

You know what I love about this time of year? The bounty! I’ve been overwhelmed by the blessing of having so much food in my kitchen I can hardly walk or find counter space. God is so good!! We’ve been really trying to help our kids understand what a blessing it is to have so much food (and so much variety) in our pantry, freezer, trunk, fridge…

And all over our kitchen floor.  We’ve been picking apples, pears and peaches from our friend’s trees. I also got to go pick raspberries and grapes! Right now, there is fruit everywhere in my kitchen!!! Time to make fruit leather and applesauce and canned peaches and pears. Ooh, and grape juice!

Menu planning right now is SO much fun. Here’s what we’ll be eating this week with our fruit:

Sunday, Sept. 20
Oatmeal, peaches
Lasagna, tossed salad, homemade bread and butter, sweet corn, death by chocolate (guests came over!)
Leftovers

Monday, Sept. 21
Homemade soft pretzels, mock frozen yogurt
Popcorn chicken, cottage cheese with peaches, green beans
Leg of lamb, mashed potatoes, gravy, steamed broccoli

Tuesday, Sept. 22
Honey whole wheat bagels,  pears
Tuna topped tomatoes, bell peppers, strawberry-peach slushies (with raspberries!)
Chicken and rice with carrots

Wednesday, Sept. 23
Peaches and cream, toast
Spanish rice with chicken, grapes
Beef stroganoff, green beans

Thursday, Sept. 24
Crepes with jelly, milkshakes
Lamb-burger patties, tomatoes, corn on the cob, okra
Creamy mac and cheese, peas, apple slices

Friday, Sept. 25
French toast with peach syrup and whipped cream
Cheeseburger zucchini boats, tossed salad
Homemade pizza, watermelon

Saturday, Sept. 26
Scrambled eggs, hashbrowns, pears
Grilled cheese sandwiches, tomato soup, applesauce
Tacos

Based on the response from this post, I was planning on showing you how to cut little boy’s hair this week. Over the weekend, I got three boys lined up and the scissors ready. Then the camera battery died. Haircuts needed to happen anyway…but the post will have to wait until Asa has his hair cut in a couple of weeks. Instead, I’ll be showing you a “How to Make Homemade Bread” tutorial. It seems that many of you “kneaded” that tutorial just as badly as you wanted the hair cut tutorial. Thanks for understanding!
—————————————–

Visit Organizing Junkie for more menu planning inspiration.


Heavenly Homemaker's Club Members: Access your homepage and all your fantastic resources here! Not a member yet? Please join us!

Do you kiss your pets? Question #46

September 18, 2009 by Laura 47 Comments

This post may contain affiliate links. For more information, please see our disclosure policy.

Let’s talk for a moment about pets.

I personally am not a big fan. I don’t usually care for wet noses on my neck. Hairy couches require frequent vacuuming. I also like breathing an awful lot. Animals tend to make that simple act a bit difficult for me.

I grew up on a farm. You’d think I’d be more of a pet lover. I wish I was. 

At this point in my life I really can’t handle the thought of bringing anything else into my home that I would need to take care of, feed, water, love, nurture, discipline, train, tell to be quiet…

And don’t suggest that we get a fish. They have tanks that get dirty and sometimes they float on top of water because they’re dead. And then you have to have fishy funerals. I don’t have time to hold a fishy funeral.

I know many of you feel differently about pets. I’m very much okay with YOU having pets. I know those of you with pets love ’em like crazy! I actually think it’s pretty neat that others love their pets so much. Way to go, animal lovers! Me not enjoying pets is simply my own personal opinion.

So tell me…do you have pets? Love pets? Kiss your pets on the mouth?  What kind of pets do you have? Take a moment to brag on your pets.

OR are you like me and leave the pets to someone else?

Heavenly Homemaker's Club Members: Access your homepage and all your fantastic resources here! Not a member yet? Please join us!

Heavenly Homemaker’s Guide to Gardening and Preserving

September 18, 2009 by Laura Leave a Comment

This post may contain affiliate links. For more information, please see our disclosure policy.

If you’d like a chance to win Heavenly Homemaker’s Guide to Gardening and Preserving ebook, head on over to Amy’s Finer Things where there’s a giveaway going on. 

Just thought you might like to know. :)

Heavenly Homemaker's Club Members: Access your homepage and all your fantastic resources here! Not a member yet? Please join us!

Yummy and EASY Sloppy Joes

September 17, 2009 by Laura 71 Comments

This post may contain affiliate links. For more information, please see our disclosure policy.

Call me weird, but I’ve about decided that Sloppy Joes are one of my favorite things to eat. I know – it’s just this spoonful of messy meat on a bun. But I love it.

sloppy_joe_1

They are just so simple to make and easy to eat, and they have such good flavor. I love making them for lunch. The meat mixture freezes well. It reheats easily. Ah, Sloppy Joes…what’s not to love?

TIP: Make 2-6 pounds of this Sloppy Joes recipe ahead of time and freeze in meal-sized portions. Thaw and reheat as needed.

TIP #2: Take this Sloppy Joe meat on the road with you! Re-heat in a crock pot in your hotel room for an easy, wholesome meal. This saves money on eating out when you travel!

Sloppy JoesYum

Yummy and EASY Sloppy Joes
 
Save Print
Author: Laura
Serves: 6 servings
Ingredients
  • 2 lbs ground meat (beef, turkey, venison or lamb)
  • 2 T. minced onion
  • 1 cup ketchup
  • 1 teaspoon mustard
  • ¼ teaspoon garlic powder
  • 1 Tablespoon worchestershire sauce
  • sea salt to taste
Instructions
  1. Brown meat and onion together.
  2. Add remaining ingredients, stirring well.
  3. Allow mixture to simmer in the skillet for a few minutes.
3.4.3177

(I’m experimenting with making my own ketchup, but in the meantime I love this brand.)

Easy Sloppy Joe Meat

We love Sloppy Joes served on these homemade buns. Shucks, I like them without a bun. A Sloppy Joe in a bowl with tortilla chips is delicious!

sloppy_joe_1

Ways to use Sloppy Joe Meat

Don’t just limit Sloppy Joes to a bun! Try using this Sloppy Joe recipe in these ways too:

  • Serve the meat in bowls, add your favorite nacho toppings, and scoop it into your mouth like nachos.
  • Make Sloppy Cornbread.
  • Make Sloppy Cornbread Muffins.

The Easiest Sloppy Joes

Join Simple Meals!

If you love simple recipes like these Sloppy Joes, you will love Simple Meals even more!

728x90

Want all the work of menu planning to be done for you? We invite you to subscribe to Simple Meals! We equip you – every single week – to put great money and time saving meals on the table – every single night!

Heavenly Homemaker's Club Members: Access your homepage and all your fantastic resources here! Not a member yet? Please join us!

Guest Post: The Joy of Baby Signs Pt. 2

September 16, 2009 by Laura 11 Comments

This post may contain affiliate links. For more information, please see our disclosure policy.

If you missed Katie’s previous post about Baby Signs, make sure you go read it here!
———————————————————-

If your baby waves bye-bye, lifts their arms to be picked up or shakes their head, they’re doing baby signs. If you can sing Itsy Bitsy Spider with the hand motions, you are ready to teach your child baby signs. And you thought it might be difficult!

How to Teach Baby Signs

First, remember that you can just make them up if you’d like, using simple motions that baby can imitate. This is not rocket science. The end goal is simply to be able to understand each other. Just like “Bah-ka” might be one baby’s “blankie”, another’s “Binky” and the neighbor’s dog “Barkley” to a third, but each parent knows exactly what their child is saying, you too will learn the nuances of your baby’s sign language.

Baby Signs Resources

I learned most of our vocabulary from a few books I got from the library, this ASL website and a baby sign website, and many from the Signing Time Videos (they used to play on PBS).

But wait! Don’t get overwhelmed yet! I can hear some of you saying what I so often think about something new:  “I’d really like to do that in my household, but I just don’t have the time and energy for one more thing.” I understand, believe me. The commitment is so low on this one, you almost can’t lose. Even if you learn only 3-5 basic signs, your baby is still able to tell you 3-5 more things than he would otherwise. If you have the time to read to the end of this post, you can start baby signs today.

10 Easy Signs to Start With

Here are a few basic signs to get you started. Most babies want to talk about eating and animals (the high chair and a walk outside are perfect opportunities to practice signing!):

  1. More: Touch your thumbs to your fingers on both hands and tap your fingertips together in front of you. 
    Some babies will clap their hands, tap just two fingers, or tap their fists.  Whatever works to communicate is golden! Some babies will clap their hands, tap just two fingers, or tap their fists. Whatever works to communicate is golden! 
  2. Eat: Tap your fingertips on your mouth.
  3. Drink: Tap one finger like a straw to your lips. 
    My daughter used to smack her face with her whole hand to say "drink".  We got it, but I'm glad she's refined it to the one-finger version.  It seems less painful! My daughter used to smack her face with her whole hand to say “drink”. We understood it, but I’m glad she’s refined it to the one-finger version. It seems less painful! 
  4. Please: With a flat hand, rub a circle on your upper chest. 
    If she REALLY wants something, she uses both hands vigorously! If she REALLY wants something, she uses both hands vigorously! 
  5. All Done: Either wave both hands across your body, palms down, in front of you (like “washed the spider out” in “Itsy Bitsy Spider”), OR wave both hands back and forth, palms out, near your shoulders.
  6. Banana: “Peel” one index finger with the other in a downward motion.
  7. Milk:  Open and close one hand into a fist and out, like you’re milking a cow. We use this sign for nursing from day one, but you can use it for milk in a cup, too. 
    See how hard she's trying to get me to put the camera down and nurse her?  Focused face and TWO hands doing the "milk" sign... See how hard she’s trying to get me to put the camera down and nurse her? Focused face and TWO hands doing the “milk” sign… 
  8. Dog: Stick your tongue out and pant like a dog. The baby can even tell you when they see a dog walking from the back seat of your vehicle with this one! 
    This was one of the first signs for both my kids, because it's so easy, has a sound that they can imitate, and dogs are everywhere. This was one of the first signs for both my kids, because it’s so easy, has a sound that they can imitate, and dogs are everywhere. 
  9. Bird: Either flap your arms like a bird or make a little beak by your mouth with two fingers and your thumb.
  10. Squirrel: Pat both palms on your cheeks, like a squirrel holding nuts in his cheeks.

You can start Baby Signs at any time. Most children are ready to repeat them back to you between 8-10 months, but just like talking, it doesn’t hurt to start early. It’s also fine to start later; a friend of mine had great success using baby signs for the first time at 14 months. I always start when the child goes into the high chair at 6 months, because that’s when I get face-to-face time, and it’s easy to remember to demonstrate the “more” sign for them.

I strongly encourage you to try baby signs with your child. It will reduce tantrums and increase the enjoyment of your children in so many ways. If you’re really lucky, you may find yourself rocking a child to sleep at one  in the morning who suddenly bolts upright at the sound of a loud hotel fan cutting out to ask you, “Why? (a sign) Fan (sign) off (spoken word)?”

Be sure to visit Katie at her blog, Kitchen Stewardship, where she offers weekly Monday Missions to help you take baby steps toward being a better steward of God’s gifts of the environment, your family’s health, your time and budget. Find healthy food information, recipes, tips and shortcuts, natural cleaning ideas and more.

Heavenly Homemaker's Club Members: Access your homepage and all your fantastic resources here! Not a member yet? Please join us!
« Previous Page
Next Page »

Join Our Community!

 Facebook Twitter E-mail Instagram Pinterest

Popular Posts

~ Will All of the Real Moms Please Stand Up?
~ Easy! Stir-and-Pour Whole Wheat Bread
~ How to Make Gatorade
~ 31 Real Food Breakfast Ideas
~ Dear Teenage Girls...
~ When Mom Takes a Step Back
~ The Inexpensive Health Insurance We Love!
~ Let's Talk Real Food Grocery Budgets

Check out our latest posts!

  • Big Family Food and Fun: June 14-20, 2026
  • Big Family Food and Fun: June 7-13, 2026
  • Big Family Food and Fun: May 31-June 6, 2026
  • Big Family Food and Fun: May 24-30, 2026
  • Free 7-Day Summer Menu Plan
Home  ~  Simple Meals  ~  Club Membership  ~  Shop  ~  Privacy Policy  ~  Disclosure  ~ Contact

Copyright © 2026 · Beautiful Pro Theme on Genesis Framework · WordPress · Log in