Heavenly Homemakers

Encouraging women in homemaking, healthy eating and parenting

  • Home
    • About
    • FAQs
  • Recipes
    • Bread and Breakfast
    • Condiments
    • Dairy
    • Main Dishes
    • Side Dishes and Snacks
    • Desserts
    • Gluten Free
    • Instant Pot
    • Crock Pot
    • Heavenly Homemaker’s Weekly Menus
  • Homemaking
    • Real Food Sources
  • Store
  • Contact
    • Advertise
    • Disclosure
    • Privacy Policy
  • Simple Meals
  • Club Members!

Easy Chicken With Cream Cheese Sauce

January 3, 2016 by Laura 4 Comments

This post may contain affiliate links. For more information, please see our disclosure policy.

I have a wonderful chicken recipe to share with you. But first, a story.

Cream Cheese Chicken

Once upon a time, I was dating my husband. I mean, my boyfriend. I mean, we weren’t married yet when we were dating but then we did get married and all of that barely has anything to do with this recipe.

But back in the days of our dating, engagement, and early marriage we drove an hour away from our college town each Sunday morning to a small church with a sweet youth group. Matt was their youth leader, teaching Bible classes and forming relationships with the teens. These dear ones became our church family, worshiping with us, throwing us a wedding shower, celebrating our marriage, being a part of our first pregnancy, and welcoming Baby #1 into the world with us.

Some of our fondest memories of those years are looking back to the Sunday afternoons in the homes of various church family members. They took turns signing up to feed us after church. Those meals!!! Talk about a church full of good cooks. The fellowship was precious and I can remember in detail many of the ladies’ specialties. We were very well taken care of, that is for sure.

Well, one of these ladies frequently made chicken that was slathered in the most delicious cream sauce. When we knew Carlene had signed up to feed us, I’d always say to Matt, “Ooooh, I hope she made that chicken this time!” Anytime she did make it and we sat there gushing over the meal, she’d always shake her head at us and say, “Oh. It’s just food.”

Right. Just food. Just the best chicken I’ve ever eaten!!!

Since that time, I’ve always regretted that I never got her recipe. I’m not even kidding you that 20 years later I still get hungry for that meal. Finally about a month ago I thought to myself, “Laura, are you or are you not the lady who invents recipes? For Pete’s sake, woman. Go to the kitchen and figure out how to make Carlene’s chicken.”

You’d think I would have considered this option before.

Well, my friends. I now present to you Not-Quite-Carlene’s Chicken with Cream Cheese Sauce. Make this.

Easy Chicken with Cream Cheese SauceYum

Easy Chicken With Cream Cheese Sauce
 
Save Print
Author: Laura
Serves: 6-8
Ingredients
  • 6 boneless, skinless chicken breasts or thighs
  • 1 beaten egg
  • ⅔ cup whole wheat flour
  • Sea salt and pepper to taste
  • ½ cup palm shortening or other oil for frying
  • 8 ounces softened cream cheese
  • 2 cups chicken broth
Instructions
  1. Mix flour, salt, and pepper.
  2. Dip chicken in egg, then coat in flour mixture.
  3. Fry in oil for just a few minutes on each side. (Do not over cook or the chicken will become dry.)
  4. Remove chicken from pan.
  5. Pour chicken broth into the pan, scraping up the chicken drippings.
  6. Add softened cream cheese, stirring until smooth.
  7. Place cooked chicken back into the pan, coating on both sides with sauce.
  8. Serve with rice or pasta.
3.4.3177

Make-Ahead Instructions

Prepare and fry meat as directed. Allow it to cool, then cover and store in the refrigerator for up to two days. Prepare sauce as directed and stir in the chicken, heating through.

Freezer Instructions

Prepare and fry meat as directed. Allow it to cool. Freeze in a well-sealed freezer bag for up to three months. To serve, thaw cooked meat. Prepare sauce as directed and stir in the chicken, heating through.

Easy Chicken with Cream Cheese Sauce Recipe

I can’t think of a brilliant way to end this post. Go make this chicken! There. That oughta do it.

Heavenly Homemaker's Club Members: Access your homepage and all your fantastic resources here! Not a member yet? Please join us!

Homemade French Onion Dip

December 30, 2015 by Laura 11 Comments

This post may contain affiliate links. For more information, please see our disclosure policy.

I’m getting ready to write this recipe for you, but suddenly I’m in a panic because I don’t know what makes French Onion Dip French. I get my onions from America and I don’t do anything Frenchy to them. Am I somehow supposed to Frenchify my onions? If so, what does that look like? My once super simple recipe has now become completely stressful.

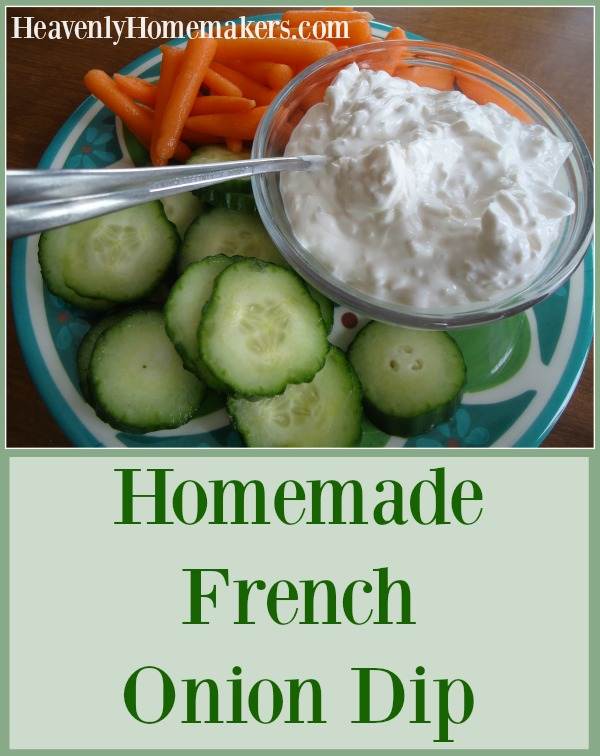
french onion dip

I therefore decided to do some research on the matter since I have plenty of time to waste, but mostly because I don’t want to steer you wrong with a recipe. The first thing I came across online was a packet of Simple Organics French Onion Dip. Its tagline? “America’s Most Popular Dip.” Well that clears all the questions right up.

I couldn’t let it go, so next I did an online search for “what makes French Onion Dip French?” Because the internet never lets us down, an actual article titled Why Is French Onion Dip called French? came up. It said a few things and some other stuff, but my favorite sentence was this:

“There are now recipes for French onion dip that combine actual caramelized onions with the usual dip ingredients (mayonnaise, sour cream) and other flavorings, but this is not a dip you’d find in France.”

What?? Well, we it appears that in our quest to discover the origin of this dip, we can conclude that this dip is not French at all. The dip has nothing to do with France or French people or French food. French Onion Dip is a made up name, just because it sounded good for marketing purposes. In defense of Lipton, I would concur that French Onion Dip is a better sounding title than White Onion Dip or the obvious, Just Onion Dip. The name French Onion Dip sounds more fun and fancy. Either that or I’ve gotten sucked into the marketing ploy.

Now that we’ve cleared that up, we can move on with life and learn the recipe.

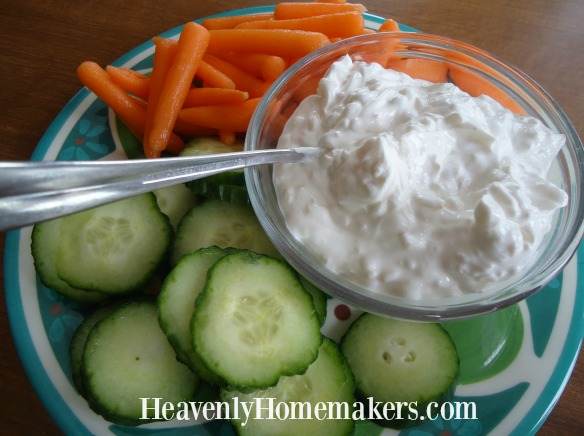
Homemade French Onion DipYum

Homemade French Onion Dip
 
Save Print
Author: Laura
Ingredients
  • 2 cups sour cream
  • 3 Tablespoons dried minced onion
  • ⅛ teaspoon sea salt
Instructions
  1. Stir the ingredients together.
  2. Chill for at least two hours before serving (or serve right away because who actually follows that instruction?).
  3. Serve with fresh veggies or potato chips.
3.4.3177

You can’t really mess up this recipe, so don’t worry about measuring exactly. Life’s too short to use (and wash) measuring spoons. Feel free to add a touch of garlic powder or black pepper. And about the potato chips mentioned in the recipe? I find the kind with the fewest ingredients and the healthiest oil (usually safflower) and go with it. Potato chips with this dip make a great party food.

Homemade French Onion Dip - Three Ingredients!

It goes without saying that the next item on my agenda was to see why fries are French, or if in fact they actually are at all. Low and behold, fries originated in the U.S. but were called French because they were “served in the French manner.” Huh.

Are you doing something fun for New Year’s Eve? I’ll probably make this dip. Then we can sit around with our friends and talk about the origin of food and where different foods got their names. I’ll be the life of the party.

Heavenly Homemaker's Club Members: Access your homepage and all your fantastic resources here! Not a member yet? Please join us!

Cinnamon Sugar Pecans ~ a Great Gift or Christmas Snack

December 13, 2015 by Laura 13 Comments

This post may contain affiliate links. For more information, please see our disclosure policy.

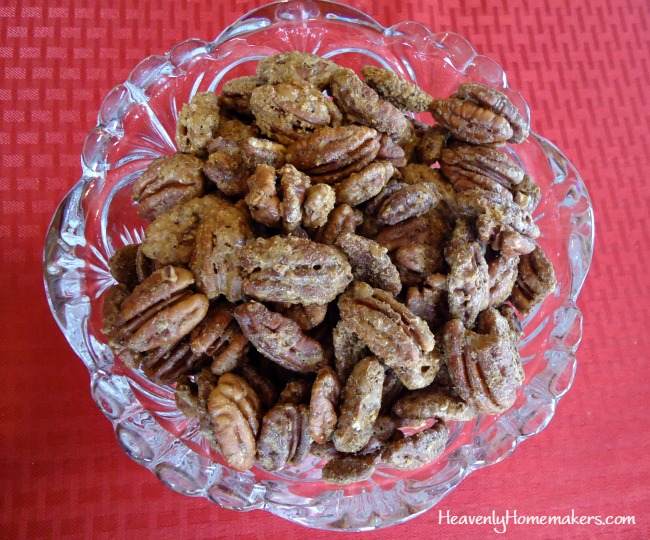
Cinnamon Sugar Pecans

I don’t know how much these cost in the mall. All I know is that last week when my friend munched on these Cinnamon Sugar Pecans that were sitting on my table she said, “You made these?? These are phenomenal! We buy these at the mall every Christmas – but you made these??!”

Ah, well. I sure do love it when my friends come over and say nice things about my food. I mean – I love it when friends honor me with their presence and I can, in turn, bless them with something tasty to eat. Well, shoot. The food and friends thing – it’s just a win-win you know?

So back to how much Cinnamon Sugar Pecans cost at the mall. I have no idea. They must cost a lot because making these at home is not the least expensive snack or gift you’ll make this Christmas. Pecans aren’t cheap. I prefer organic nuts, but the cost throws me a little bit. I’ll only make these for the occasional treat seeing as our family (along with some friends) downed almost an entire pound of these in a day and a half. Of course, this is not surprising. We are the Coppinger family after all. “Oh look at all her tall, thin boys. They must not eat as much as other teens.” {Laura passes out with laughter.}

The least I can do for us all is to provide a recipe so we can make these at home to avoid having to spend more on these specialty pecans at the mall. I’m guessing these are lower in sugar, too. You’ll love how easy these are to make. And they do make a great gift – if you can package them up before they all get eaten by your family. Christmas blessings to you on that one.

Here are some online sources I like for pecans:

  • Braga Farms – I love this source. We visited their farm. They are fantastic people. I buy from them when I can.
  • Amazon – These are about half the price as those above, but they aren’t organic. They are a good quality, though.

Cinnamon Sugar PecansYum

5.0 from 2 reviews
Cinnamon Sugar Pecans ~ a Great Gift or Christmas Snack
 
Save Print
Author: Laura
Ingredients
  • ½ cup sucanat or sugar
  • 2 teaspoons ground cinnamon
  • ½ teaspoon sea salt
  • 1 egg white
  • 1 teaspoon vanilla extract
  • 2 teaspoons water
  • 1 pound pecan halves
Instructions
  1. Mix sucanat, cinnamon, and salt in a gallon-sized ziploc-type bag.
  2. Set aside.
  3. Whisk egg white, vanilla, and water in a large bowl until frothy.
  4. Toss in pecans, coating them all with liquid.
  5. Pour the coated pecans into the bag with sucanat/cinnamon/salt mixture.
  6. Seal the bag and shake gently to coat the pecans as evenly as possible.
  7. Spread the coated pecans on a parchment paper or silicone mat lined cookie sheet.
  8. Bake in a 250° oven for 1 hour - stirring every 20 minutes.
3.4.3177

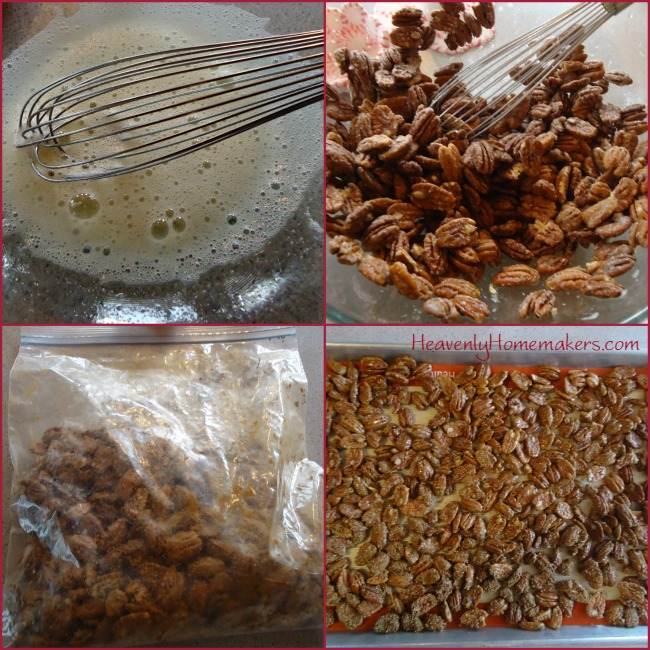
Here’s a little look at each easy step of making these pecan snacks: whisk the egg white mixture, stir in the pecans, shake them in a bag with the sugar mixture, spread them on a pan to bake. None of this is difficult.

Steps to Make Cinnamon Sugar Pecans

Easy Cinnamon Sugar Pecans
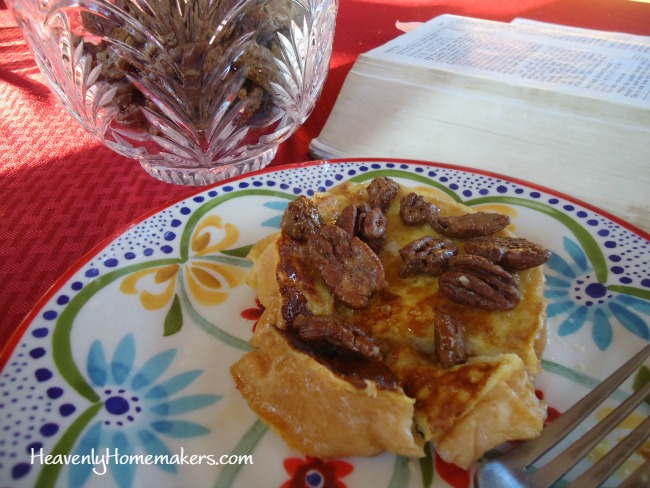
As a happy aside – my family enjoyed sprinkling some of these on our French toast this morning at breakfast. I’m so excited that these are now a part of our list of holiday goodies to enjoy!

cinnamon pecan french toast

I feel like I should now make a gift card to go with these pecans, just in case I can set any aside to give as gifts. Here are some pretty terrible options I came up with as to what the card should (not) say:

  • Hope your Christmas is as nutty as you are!
  • I think you’re nuts!
  • You’re gettin’ nuttin’ for Christmas.
  • Don’t open before Christmas -no pecan! (that one is truly horrible)

Please, Friends. Help me come up with a good gift card tag line. Or maybe we should just eat all of these without sharing.

Heavenly Homemaker's Club Members: Access your homepage and all your fantastic resources here! Not a member yet? Please join us!

Low Sugar Frosted Christmas Cookies

December 6, 2015 by Laura 8 Comments

This post may contain affiliate links. For more information, please see our disclosure policy.

Some might say that Christmas desserts are treats that should not be messed with. Perhaps whole wheat flour does not belong in a Christmas cookie. Maybe “low sugar” should not be included in a Christmas cookie title. It’s a treat, right? Can’t we just leave it well enough alone?

Sure.

But the more I experiment with cutting down the sweetener in my baked goods, the more I’m discovering that treats still taste like treats even with the sugar cut in half or more.

Low Sugar Frosted Sugar Cookies


Wait. I don’t know how to write that. “…with the sugar cut in half or more.” Or should it be “…with the sugar cut in half or less.” I’m talking about cutting out even more than half of the originally called for sugar. Less sugar. Cut it by more than half, so that it’s even less. That is what I’m trying to say. Sometimes writing good sentences is so hard. Who decided that fractions would be smaller every time their bottom number gets bigger? Do you know how hard it is to explain to a small child that 1/8 is bigger than 1/16?? It’s the fraction inventors that are making my sentence writing so complicated right now.

Just for that, I’m not giving the fraction people any of my cookies. They can figure out their own half or more or less sugar fraction in their own cookie recipes. Merry Christmas, fraction people.

Well, there’s no good way to segue after this slightly embarrassing but mostly justified outburst. All any of us really needs to know is that we can cut the sweetener in most baked good recipes and not taste the difference. Truly this sugar cookie is still so sweet I can barely eat it. My kids – who love sugar-covered-sugar just like all the other kids – cannot tell that these cookies are low in sugar. I daresay that if we left these on a plate for Santa, he’d be like, “Wow, these are the best cookies I’ve had all night, but without the sugar crash. This mother must have used half or more (or less) of the sugar called for in the recipe.”

Good ol’ Santa. He totally gets it.

Low Sugar Christmas Cookies (That Don't Taste Low Sugar)Low Sugar Christmas Cookies

Low Sugar Christmas Sugar Cookies
 
Save Print
Author: Laura
Serves: 24
Ingredients
  • 1 cup melted butter
  • ½ cup sucanat or raw sugar
  • 2 eggs
  • 1 teaspoon vanilla extract
  • 1 teaspoon baking powder
  • 3½ cups of whole wheat flour (give or take)
Instructions
  1. Stir together melted butter and sugar.
  2. Add eggs, vanilla, and baking powder.
  3. Stir in flour until a solid ball of dough forms.
  4. Cover the bowl and place it in the refrigerator to chill for about an hour.
  5. Roll chilled dough on a well-floured surface and thin or thick as you like.
  6. Cut with cookie cutters and place them about a half inch apart on a baking sheet.
  7. Bake in a 350° oven for about 12 minutes or until cookies are lightly browned.
  8. Makes 20-30 cookies depending on the thickness and size.
3.4.3177

If you’d like to frost your cookies but keep them low sugar, I recommend this stevia sweetened frosting.

Stevia Sweetened Cream Cheese FrostingYum

8 ounces softened cream cheese
1 cup heavy whipping cream
1/2 teaspoon vanilla extract
Liquid stevia to taste (I use 2 droppers full)

Whip ingredients together until smooth. Frost cookies just before serving.

This frosting is not like regular powdered sugar icing. It’s delicious on these cookies, but does not harden or hold up well for the long term. I recommend only frosting a few cookies at a time, as needed. I use the term “as needed” loosely because we are talking about cookies here. Although these are low in sugar so the half or more or less sugar fraction does the lessen the guilt.

Take that, fraction people.

Heavenly Homemaker's Club Members: Access your homepage and all your fantastic resources here! Not a member yet? Please join us!

Homemade Apple Cider in the Crock Pot

November 30, 2015 by Laura 8 Comments

This post may contain affiliate links. For more information, please see our disclosure policy.

Once upon a time, my friend Anne and I went to an orchard nearby and picked over 100 pounds of apples. At the time we had 6 children – ages 12 and under – between the two of us. Therefore, I think it is obvious that neither of us had enough to do with our time and we were frequently bored. That’s why we picked so many apples. That, and the fact that the apples were (mostly) organic, very delicious, and wonderfully priced. Most importantly of all though, it is so much fun to take your kids to an orchard to pick fruit. Days like this are some of my favorite memories of time spent with my boys when they were little.

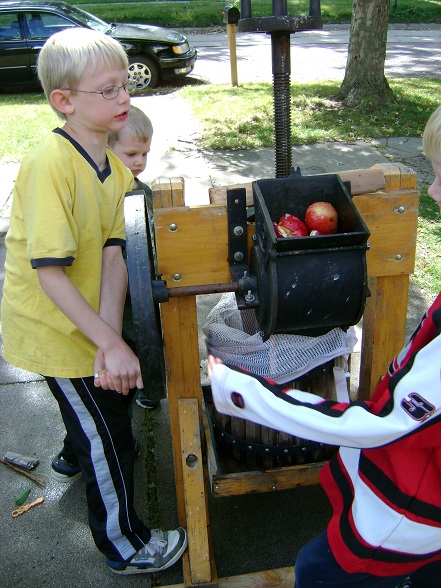
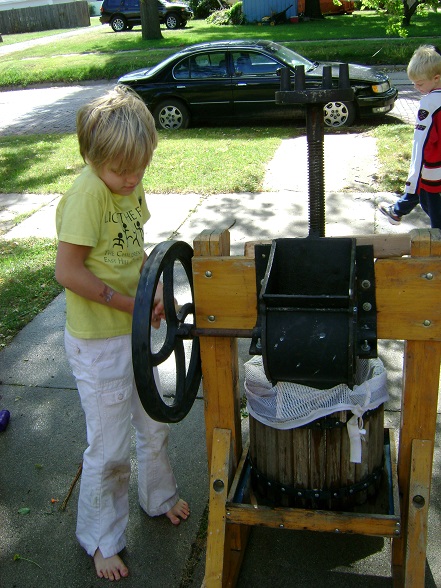
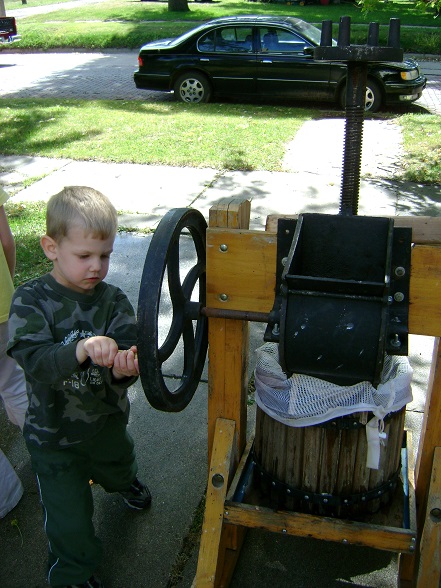
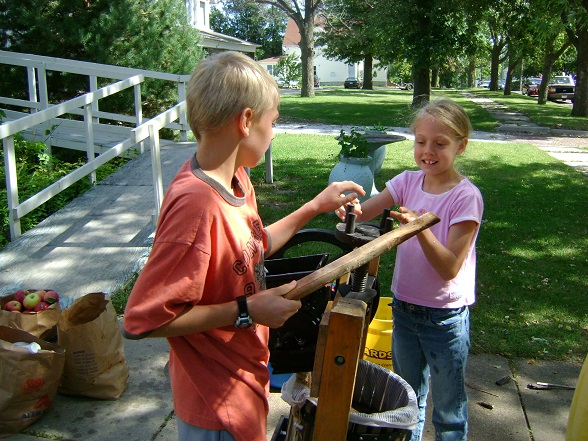
On that very 100-pound apple day, we borrowed the orchard owner’s apple cider press. He kindly came to our house to set it up, promising to come pick it up again when we were finished using it. Our plan was to get all of our kids involved with pressing cider the old fashioned way. Wouldn’t that be fun?! It was a good plan. A beautiful idea, really.

And so we began.

Oh my goodness, I just realized I have pictures. I have pictures!!! 

cider1 cider2 cider3 cider4 cider5 cider6 cider7 cider8 cider9 cider10

Those pictures make me so happy, I cannot stop giggling. Such precious memories!!! I am going to sit here looking at those for the next few hours. After all, five out of six of those kids are teenagers now, so we are more bored than ever.

Well anyway, it didn’t take long for Anne and I to realize that having our small children press 100 pounds of apples into cider all afternoon was probably a bit unrealistic (you think?). Each child took a turn, then they all headed off to play. Anne and I spend the next few hours pressing cider like super-heros. We got stiff. We got sore. We had a blast. We were a sticky mess. But we had gallons of apple cider by the end of the day.

applecider1

It was fresh. It was raw. It was the best apple cider ever to be made or consumed on this planet.

If I may, I encourage you to find opportunities to pick fruit with your children. There is something so sweet about this experience. Make cider in an apple press if you ever have a chance. It is so much fun. You will look back at this and the pictures you took whilst pressing apples and you will be so in love with the memories.

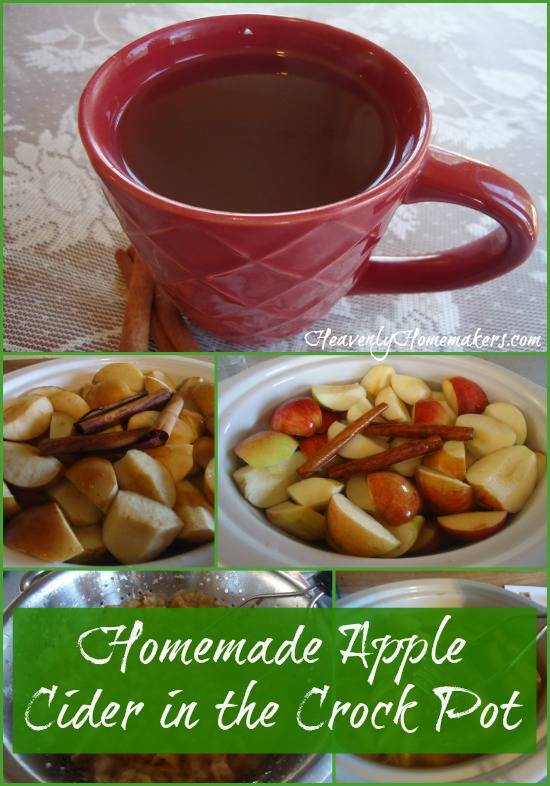
In the meantime, I have another homemade apple cider recipe option for you. Just this year, I learned to make apple cider in the crock pot. It is much less work than a cider press, though obviously not nearly as endearing. Still, this recipe turned out delicious. I added no sugar! It’s just apples, water, and cinnamon sticks. Deliciousness!

Hot Apple Cider

Homemade Apple Cider in the Crock PotYum

5.0 from 2 reviews
Homemade Apple Cider in the Crock Pot
 
Save Print
Author: Laura
Serves: about ½ gallon
Ingredients
  • 10-15 apples, any variety
  • 3 cinnamon sticks
  • 4-6 cups of water
Instructions
  1. Wash, core, and quarter apples.
  2. Place them in a crock pot with the cinnamon sticks.
  3. Add water, enough to fill the crock about ⅔ full of water (but not enough to cover the apples and cinnamon sticks).
  4. Cover and cook on low for 6-8 hours or until the apples are very soft.
  5. Use a potato masher to mash the apples and release the liquid.
  6. Cover and allow the cider to cook on low for another hour.
  7. Strain the chunky liquid through a thin cloth. (I saved the solids and blended them to make apple bread.)
  8. Serve warm or store in the fridge for up to two weeks.
3.4.3177

Homemade Apple Cider in the Crock Pot

This recipe isn’t super specific on measurements. I simply fill my crock pot with cored apples, throw in cinnamon sticks, pour in water to fill about 1/2-2/3 full, then let it cook. Your house will smell like the holidays all day long – an added bonus!

Have you ever made apple cider – using a press or a crock pot or another method?

Heavenly Homemaker's Club Members: Access your homepage and all your fantastic resources here! Not a member yet? Please join us!

Low Sugar Pumpkin Cheesecake Cups

November 24, 2015 by Laura 4 Comments

This post may contain affiliate links. For more information, please see our disclosure policy.

Pumpkin Cheesecake Bites

In preparation for Thanksgiving Day, I made a big Turkey, Cheesy Mashed Potatoes, Gravy, Stuffing Muffins, Green Bean Casseroles, Sweet Potatoes, Cranberry Sauce, Pineapple Fluff Salad , Pumpkin Pies, Pecan Pie Bites, Whipped Cream, and Apple Pies. I know what you’re thinking. You’re thinking the same thing I’m thinking. There may not be enough food! What will we do if we run out of food?

So I made more food. Just in case, you know?

Actually, I’m not worried about having enough food. But looking over that list, there is a definite shortage of cheesecake. It also occurred to me that I might enjoy a low sugar dessert on Thanksgiving day. That is why I took my Low Sugar Pumpkin Cheesecake recipe and adapted it to make fun these Pumpkin Cheesecake Cups.

We can all sleep better now knowing that along with the other 26 dishes on the Thanksgiving buffet, there will also be low sugar cheesecake. I’m not sure the day would have been complete otherwise.

Low Sugar Pumpkin Cheesecake Cups

Yum

Low Sugar Pumpkin Cheesecake Cups
 
Save Print
Author: Laura
Serves: 24
Ingredients
  • Shortbread Crust:
  • 3 cups whole wheat flour (I use freshly ground hard white wheat for this)
  • ½ cup sucanat (or brown sugar if you prefer)
  • 1½ cups melted butter
  • Pumpkin Cheesecake Filling:
  • 2 8-ounce packages softened cream cheese
  • 1½ cups heavy whipping cream
  • 2 cups pureed pumpkin
  • 1½ teaspoons ground cinnamon
  • ½ teaspoon ground nutmeg
  • ½ teaspoon ground cloves
  • Real maple syrup or liquid stevia to taste (I used 4 droppers full of stevia)
Instructions
  1. Make crust by stirring flour and sucanat together in a bowl.
  2. Add melted butter, combining well.
  3. Press mixture into 24 paper-lined muffin cups.
  4. Bake in a 350° oven for 10-15 minutes or until golden brown.
  5. Allow crust to cool completely.
  6. Blend all pumpkin cheesecake filling ingredients together until smooth.
  7. Scoop into prepared shortbread crust cups.
  8. Spread until smooth.
  9. Chill in refrigerator for at least two hours before serving.
3.4.3177

I found it fun to use fall-colored muffin cup liners for the occasion. Come Christmastime, I’ll use red and green. :)

Low Sugar Pumpkin Cheesecake Cups

I made the filling with stevia and was concerned that others might not like them as a result. But since the shortbread crust has a little sucanat and is so buttery and yummy, that balances the taste out for others. As for me, I think they are perfectly sweetened. In fact, I’m having to hold back to save the majority of these for Thanksgiving day. After all, there would be a definite void on the table if there were only 26 food choices and no cheesecake whatsoever.

Here’s to a wonderful holiday weekend! Happy Thanksgiving!

Heavenly Homemaker's Club Members: Access your homepage and all your fantastic resources here! Not a member yet? Please join us!

Stir-and-Pour Dinner Rolls ~ Freezer Edition

November 22, 2015 by Laura 7 Comments

This post may contain affiliate links. For more information, please see our disclosure policy.

stir and pour rolls 1

Guess what? 

One of my darling readers, Vicki, experimented with the Stir-and-Pour Dinner Rolls to see if we could make them even more convenient by making them ahead and freezing the dough. I won’t keep you in suspense!!! —–>

Okay, maybe just for a little bit.

I’m wearing a new sweater today. I got it on sale, of course. I got it the same day I got all the butter on sale. That was a great day for sales, no doubt. I sure do love good sales. And butter.

So how about those dinner rolls? Does it work to make and freeze the dough, just like we make and freeze muffin batter? Vicki tried it. She reported back. Drum roll please…

It worked!! This is great news, and much more relevant than pointless talk about my new sweater. Although the sweater led me back to talking about butter; and butter and rolls go together. Therefore everything I’m writing today makes sense and is on topic.

You must be wondering, is there even a way to make this very easy recipe even more convenient? I mean, how can it get easier than the Stir-and-Pour Bread and Stir-and-Pour Dinner Rolls recipes? But actually, it does. It gets easier. Vicki proved it.

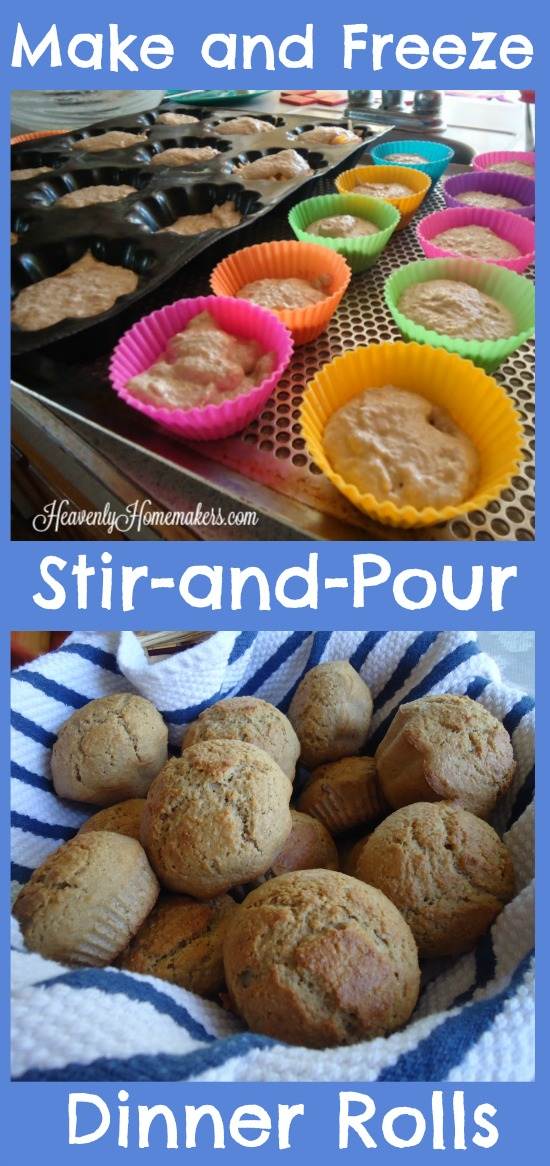
Make and Freeze Stir-and-Pour Dinner Rolls

1. Mix the ingredients as normal.
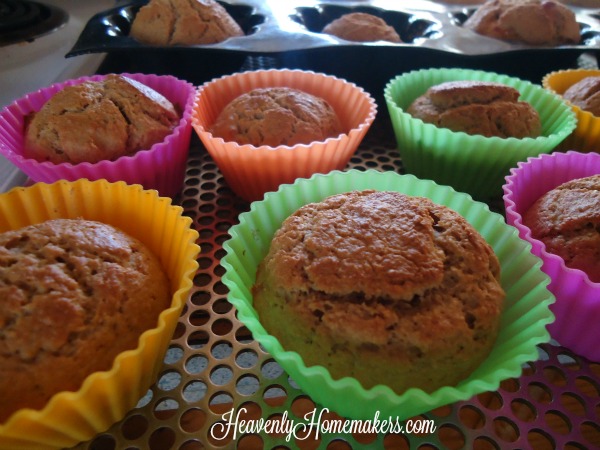
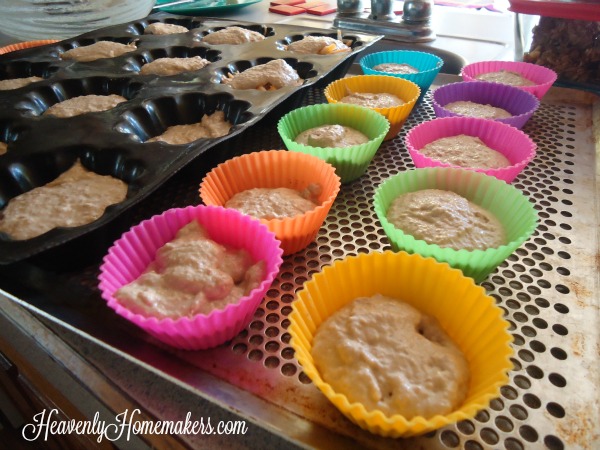
2. Scoop batter into muffin pans. I super love my new silicone baking cups. I use them alllll the time.
3. Freeze dough immediately.
4. Remove frozen dough from muffin cups and transfer them to a freezer bag. Store in the freezer for up to three months.
5. To bake: Place frozen dough into muffin cups. Cover with a cloth. Thaw on the countertop for 4-6 hours.
6. Bake as directed.

Vicki said that these taste just as good prepared this way as they do when prepared fresh. I mean, these are still fresh. They’re just frozen first before baking them. I love this time-saving tip!

This is especially helpful for days such as…I don’t know…Thanksgiving maybe? That day we’re putting forty-seven ~ give or take ~ other dishes on the table all at the same time? If there is a way to dirty up fewer dishes and execute fewer food preparation steps, by all means, let us do it!
Yum

5.0 from 1 reviews
Stir-and-Pour Dinner Rolls ~ Freezer Edition
 
Save Print
Author: Laura
Ingredients
  • 4 cups whole wheat flour (I use freshly ground hard white wheat)
  • 2 teaspoons active rise yeast
  • 2 Tablespoons sucanat or sugar or honey
  • 1 teaspoon sea salt
  • 1 egg (optional)
  • ¼ cup heavy cream (optional)
  • 2 cups warm water
Instructions
  1. Stir all ingredients together.
  2. Cover and allow it to sit for 30 minutes.
  3. Pour contents into buttered muffin tins or silicone muffin cups.
  4. Place filled muffin cups in freezer immediately.
  5. Once frozen, transfer frozen dough to freezer bags, storing for up to three months.
  6. To Bake:
  7. Place frozen dough back in prepared muffin cups.
  8. Cover and allow dough to thaw 4-6 hours on the counter-top.
  9. Bake in a 350° for 20-25 minutes or until lightly browned.
  10. Serve right away.
3.4.3177

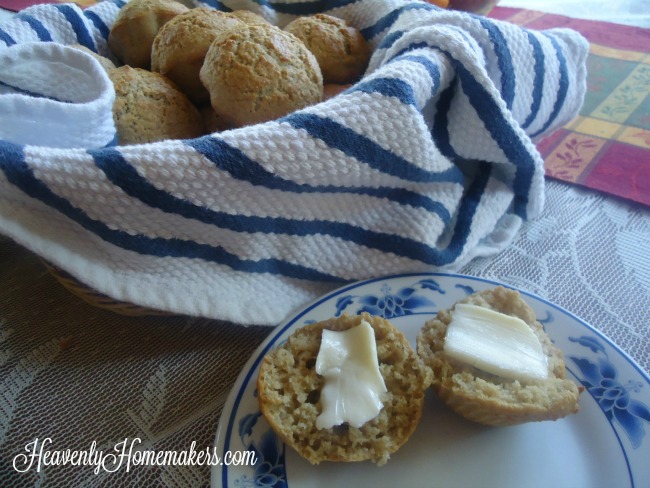
Make and Freeze Stir-and-Pour Dinner Rolls

Vicki said she used the leftover rolls to make Stuffing Muffins. I did the exact same thing a few days ago!

Let’s hear it for another great make-ahead tip!

This post contains an affiliate link.

Heavenly Homemaker's Club Members: Access your homepage and all your fantastic resources here! Not a member yet? Please join us!

Easy Pecan Pie Bites

November 19, 2015 by Laura 13 Comments

This post may contain affiliate links. For more information, please see our disclosure policy.

Fb.banner (1)

It’s my turn to be a part of the Thanksgiving Recipe Swap! Others have shared appetizers, main dishes, and side dishes. Now it’s dessert time! (I’m sharing Pecan Pie Bites below. You will love these!)

Click over here to find all of the recipes included in the swap. Just to temp you, I’ll tell you what recipes you’ll find there:

  • Goat Cheese Artichoke Dip
  • Cranberry and Pecan Stuffed Brussels Sprouts
  • Pumpkin Spice Fruit Dip
  • Perfect Roast Turkey Breast
  • Slow Cooker Cranberry Sauce
  • Gluten Free Stuffing
  • Roasted Garlic Green Beans
  • Balsamic Bacon Brussels Sprouts
  • Cranberry Orange Bars
  • Chocolate Candy Cane Cookies
  • Protein Packed Pumpkin Rolls

Don’t those all sound awesome?! Go help yourselves to any or all of the recipes!

Now for the Easy Pecan Pie Bites recipe. These will just take you a few minutes to whip up. What a great addition to your holiday table!

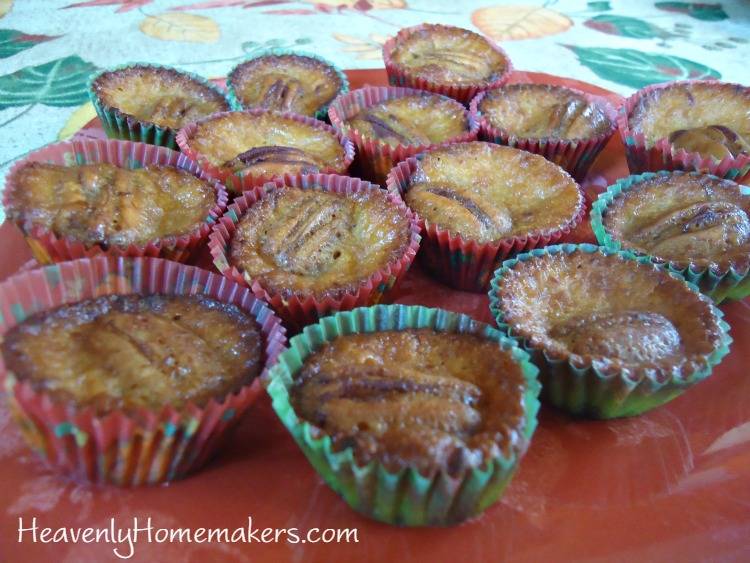
pecan pie bites4

Let us all take a moment to notice something about these Pecan Pie Bites that doesn’t even matter a little bit but that absolutely really does matter:

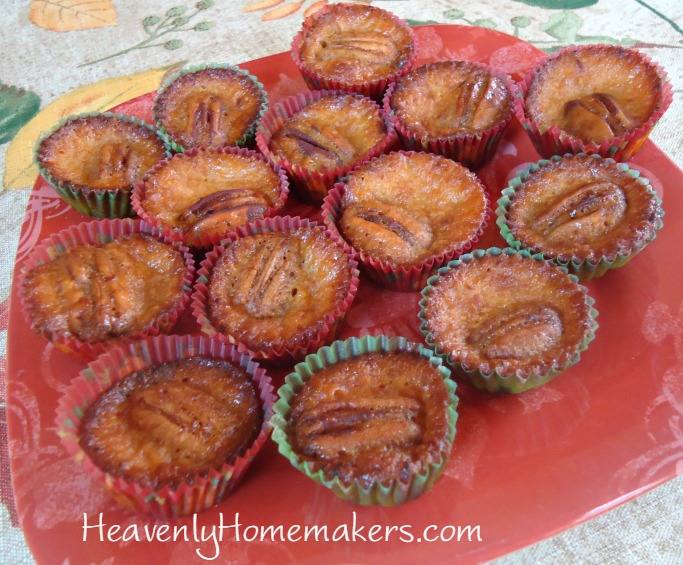
These Pecan Pie Bites are adorable and cute.

Cute food matters. Food tastes better when it’s cute. I’ve tried to convince my sons of this truth. I see cute food and think, oh look how cute this food is. They see cute food and they are like, why are these Pecan Pie Bites so tiny? These teenage sons of mine proceed to eat the treats in large quantity which almost, but not quite, negates the cuteness.

I suppose I should also let you  know that these Pecan Pie Bites are very easy to make. They are made with only five ingredients, which are of course, all real food ingredients. They are naturally gluten and dairy free, which is a lovely bonus if that is a need for you. You can put these together in just a few minutes – my favorite kind of recipe. And above all, they are cute. Cute, cute, cute.

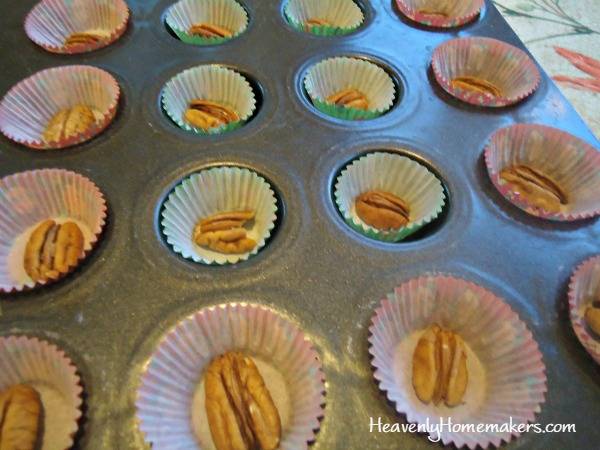
They are also magic, so prepare to be amazed. See, you put a pecan at the bottom of each muffin liner. Then you pour in the pie mixture. The pecan rises and bakes at the top, making magical cuteness.

pecan pie bites5

Easy Pecan Pie Bites

Yum

Easy Pecan Pie Bites
 
Save Print
Author: Laura
Serves: 24
Ingredients
  • ½ cup honey
  • 3 eggs
  • ⅓ cup melted coconut oil
  • 1 teaspoon vanilla extract
  • 24 pecans (about ½ cup)
Instructions
  1. Fill 24 mini muffin tins with paper liners.
  2. Place a pecan at the bottom of each liner.
  3. Whisk together honey, eggs, coconut oil, and vanilla.
  4. Scoop mixture into the prepared muffin tin, filling about ¾ full.
  5. Bake in a 350° oven for 15-25 minutes or until evenly browned.
3.4.3177

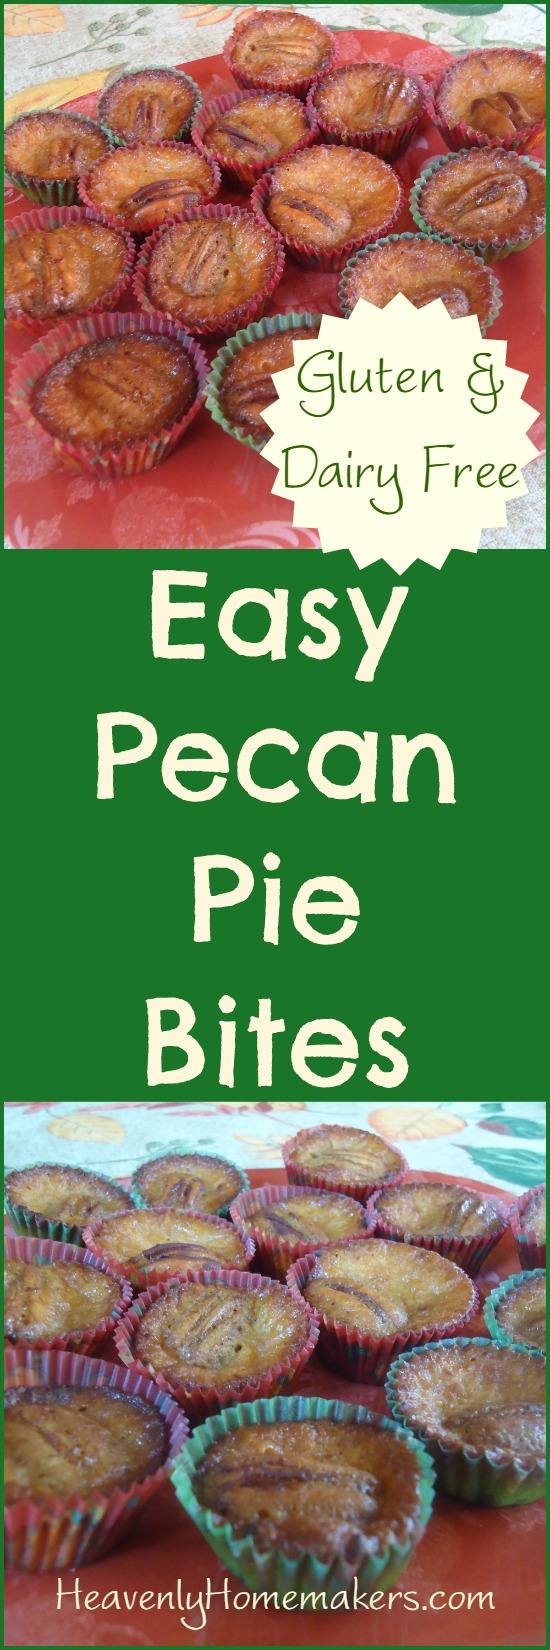
Easy Pecan Pie Bites ~ Naturally Gluten and Dairy Free

See? I told you they were easy. These will be wonderful to have on your holiday table so that when there are pumpkin pies and apple pies and cheesecakes and all the other desserts – people can take one (or five) of these cute little Pecan Pie Bites which have portion control already built in. How very practical of them.

Enjoy, and I’ll see you over at the Thanksgiving Recipe Swap!

Heavenly Homemaker's Club Members: Access your homepage and all your fantastic resources here! Not a member yet? Please join us!

2-Ingredient Cranberry Sauce ~ It’s Too Easy

November 16, 2015 by Laura 32 Comments

This post may contain affiliate links. For more information, please see our disclosure policy.

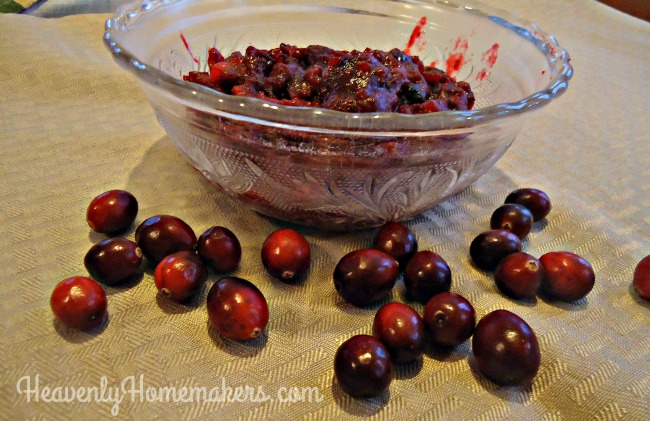
cranberry sauce

Why? Why do we make it hard? And the most important question of all, who loves how the cranberry sauce from the store plops out of the can and remains forever in the shape of the can? How do they do that, anyway?

Don’t answer that. I already know. It’s made with gelatin. I could make my cranberry sauce with gelatin too, if I wanted. It might be kind of fun, actually. I could use a tin can to make a cranberry sauce mold and I could plop it out on Thanksgiving morning. It would bring back fun memories of my childhood, because that was one of my favorite holiday jobs. I could re-live that suction sound it made as the jellied variety of cranberry sauce came out of the can. That would be way, way, way better than my memories of the sound a can of biscuits makes when it opens. I can’t even handle thinking about that one. (I’m a canned biscuit big baby scaredy cat chicken.)

So homemade cranberry sauce. It is so easy. I’d never even made it before last week because I figured it might be hard. Really, Laura? You put cranberries and sugar in a pot and you cook it for a few minutes to create cranberry sauce. Well, I had no idea.

This recipe is a total no-brainer. It’s as easy as Stir-and-Pour Bread. In fact, this sauce tastes very good on top of a slice of that particular bread. I promise to continue to make all of our real food cooking as easy as possible.

Please note though that while this is easy and made with real food – this recipe is very full of sugar. I tried to cut down the sugar – you know – to prove like so many other recipes that all the sugar is ridiculous. Unfortunately, this dish mocked me to my face. (Literally, to my very puckered up face.) It was like, “I dare you to cut the sugar down and not make weird faces. Go ahead. Try it. Heh. Nice face.”

Fine. My face was unbecoming. Make this cranberry sauce of the low sugar variety at your own risk. Keep your camera handy. Your cranberry sauce face photos will be a delight for years to come.

Whatever your sugar content choice, I promise you will love how ridiculously easy this side dish is to make. I will be making mine a couple days before Thanksgiving so that I can simply pull it out of the fridge to serve. I got my fresh cranberries for 99¢ so I was very excited. You probably wanted to know that.

2-Ingredient Cranberry Sauce

Yum

5.0 from 1 reviews
2-Ingredient Cranberry Sauce ~ It's Too Easy
 
Save Print
Author: Laura
Ingredients
  • 1½ cups fresh cranberries (12 ounce bag)
  • ⅓ to 1 cup sucanat or sugar
Instructions
  1. Rinse cranberries.
  2. Combine cranberries and sucanat in a small sauce pan.
  3. Cook on medium heat, stirring occasionally, for 10-15 minutes. Your work here is done.
  4. Place cranberry sauce in a serving dish, cover, and refrigerate for at least two hours before serving.
3.4.3177

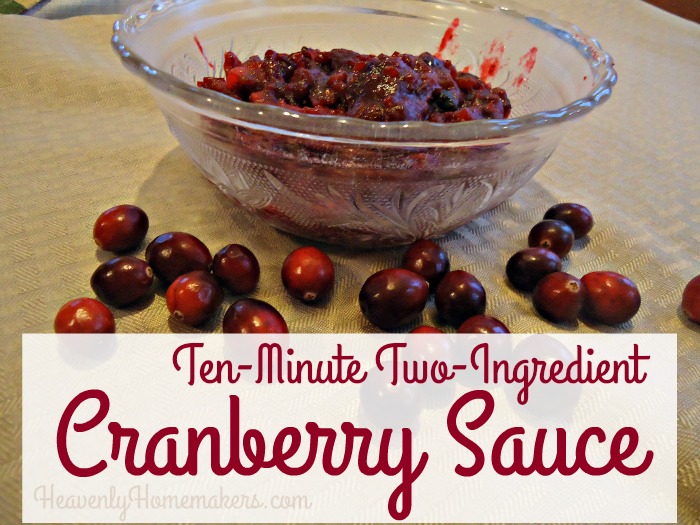
Ten Minute ~ Two Ingredient Cranberry Sauce

Make this several days before serving if you wish. Yes! It is another make-ahead dish to save you time on Thanksgiving or Christmas (or some Friday in February). Add this recipe to your Getting Ahead for the Holidays Check-List.

Have you tried making Cranberry Sauce? Ever tried it low sugar? Whoa. Who loves the canned, jellied cranberry sauce suction plop? Ah, the memories.

~~~~~~~~~~~~~~~~~~~~~~~

While I’ve got you, I am pleased to announce the three Getting Ahead for the Holidays winners of the $25 Gift Certificates good toward any of our eCourses or downloadable items in theHeavenly Homemakers Shop!

  • Jane J.: bnwalker@
  • Shelby: sixforemans@
  • Karen: kloumc21@

Winners, email me (laura at heavenlyhomemakers.com) and I’ll send you a certificate!

Heavenly Homemaker's Club Members: Access your homepage and all your fantastic resources here! Not a member yet? Please join us!

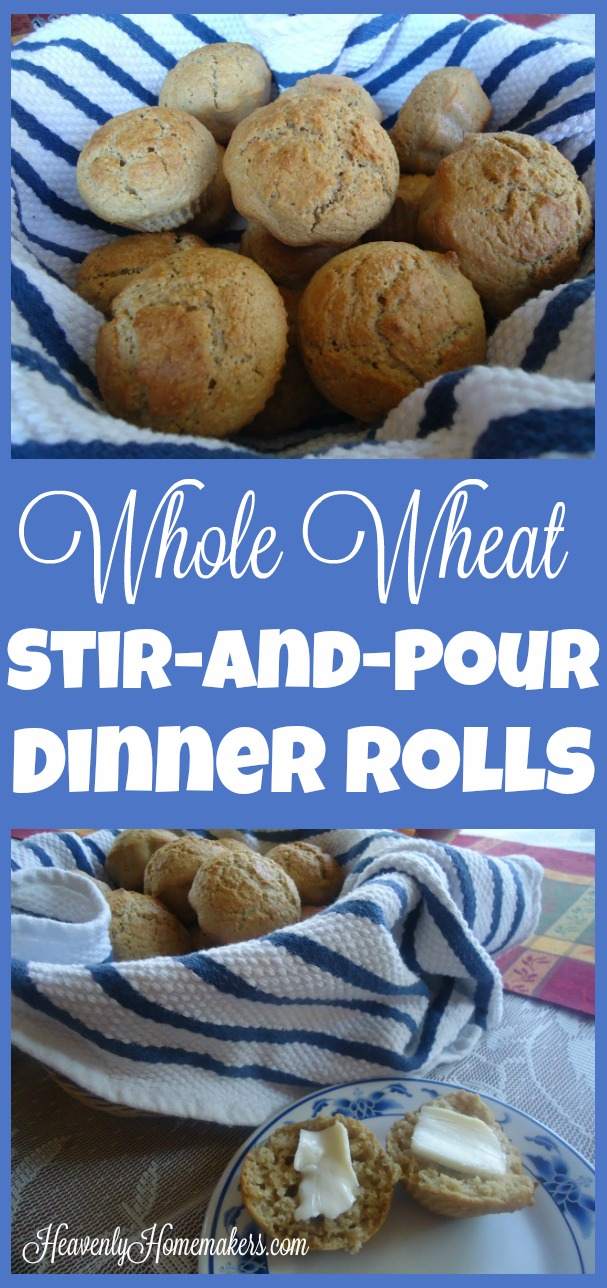
Whole Wheat Stir-and-Pour Dinner Rolls

November 12, 2015 by Laura 48 Comments

This post may contain affiliate links. For more information, please see our disclosure policy.

stir and pour rolls 1

The Stir-and-Pour Bread just keeps growing in all its amazing opportunities for easy baking.

First, we figured out that the concept of stirring together ingredients and pouring them into pans to make bread really does work.

Next, we experimented and learned that the recipe actually made a delicious variety of sandwich bread. We vowed to never knead dough again. (Well, not all of us vowed that. Maybe I’m the only one who vowed that. I guarantee that my kneading knowledge will be used less and less frequently from now on.)

Now, I am excited to share that by simply scooping the Stir-and-Pour dough into muffin cups, we can make dinner rolls!

Before

stir and pour rolls6

After

stir and pour rolls7

Voila

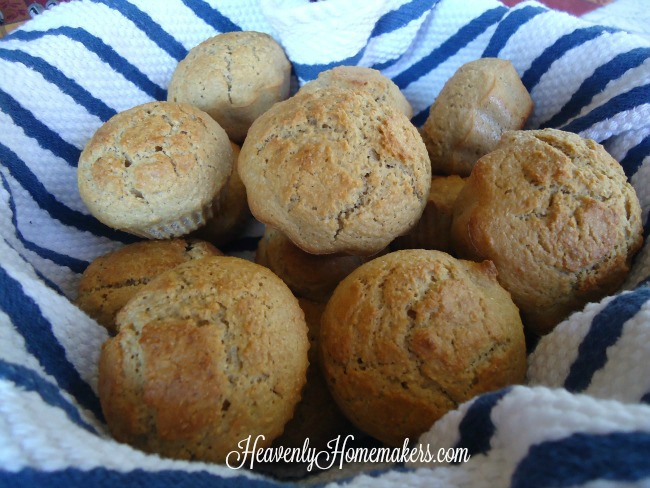
stir and pour rolls5

What did we ever do without this recipe?

Stir-and-Pour Dinner Rolls

Yum

4.8 from 6 reviews
Whole Wheat Stir-and-Pour Dinner Rolls
 
Save Print
Author: Laura
Serves: 20
Ingredients
  • 4 cups whole wheat flour (I use freshly ground hard white wheat)
  • 2 teaspoons active rise yeast
  • 2 Tablespoons sucanat or sugar or honey
  • 1 teaspoon sea salt
  • 1 egg (optional)
  • ¼ cup heavy cream (optional)
  • 2 cups warm water
Instructions
  1. Stir all ingredients together.
  2. Cover and allow it to sit for 30 minutes.
  3. Pour contents into buttered muffin tins or silicone muffin cups.
  4. Bake in a 350° for 20-25 minutes or until lightly browned.
  5. Serve right away.
3.4.3177

Can it get any easier?

Stir-and-Pour Dinner Roll Quick Tips

  • These Stir-and-Pour Dinner Rolls taste best fresh, right out of the oven. That means that while just about everything else on my holiday table will be made ahead of time and reheated while I put these rolls together about an hour before meal time.
  • Mix the dry ingredients the day before and set them aside for easy mixing as you prepare the rest of the meal.
  • A few hours before your meal, place a stick of butter on a plate to soften to serve with your rolls. You must butter these. It is a requirement.
  • The recipe makes 18-24 rolls, depending on how much dough you scoop into each muffin cup.

Whole Wheat Stir-and-Pour Dinner Rolls

If you’re interested in another real food dinner roll that I really love, you may want to check out these Whole Wheat Butterhorns. They do require kneading, but you can make them ahead and pull them out to bake right before meal time. Easy! You might also want to check out my No-Knead One Hour Dinner Rolls recipe. They are almost (but not quite) as easy as this Stir-and-Pour recipe. So many great options!

Other recipes in this series so far:

  • Make-Ahead Turkey
  • Stuffing Muffins
  • Cheesy Mashed Potatoes
  • Oh Good Gravy
  • Green Bean Casserole
  • How to Make Frozen Pies
  • Simple Whipped Sweet Potatoes
  • How to make Whipped Cream

Getting Ahead for the Holidays

~~~~~~~~~~~~~~~~~~~~~~~~~~~~~~~~~~~~~~~~~~~~~

Simple Meals is here! It’s saving my brain (and many of yours too!). If you haven’t joined yet, now’s the time. Get all the details here!

728x90

Heavenly Homemaker's Club Members: Access your homepage and all your fantastic resources here! Not a member yet? Please join us!
« Previous Page
Next Page »

Join Our Community!

 Facebook Twitter E-mail Instagram Pinterest

Popular Posts

~ Will All of the Real Moms Please Stand Up?
~ Easy! Stir-and-Pour Whole Wheat Bread
~ How to Make Gatorade
~ 31 Real Food Breakfast Ideas
~ Dear Teenage Girls...
~ When Mom Takes a Step Back
~ The Inexpensive Health Insurance We Love!
~ Let's Talk Real Food Grocery Budgets

Check out our latest posts!

  • Big Family Food and Fun: September 6-12, 2026
  • Big Family Food and Fun: August 30-September 5, 2026
  • Big Family Food and Fun: August 23-29, 2026
  • Big Family Food and Fun: August 16-22, 2026
  • Big Family Food and Fun: August 9-15, 2026
Home  ~  Simple Meals  ~  Club Membership  ~  Shop  ~  Privacy Policy  ~  Disclosure  ~ Contact

Copyright © 2026 · Beautiful Pro Theme on Genesis Framework · WordPress · Log in