Some might say that Christmas desserts are treats that should not be messed with. Perhaps whole wheat flour does not belong in a Christmas cookie. Maybe “low sugar” should not be included in a Christmas cookie title. It’s a treat, right? Can’t we just leave it well enough alone?
Sure.
But the more I experiment with cutting down the sweetener in my baked goods, the more I’m discovering that treats still taste like treats even with the sugar cut in half or more.
Wait. I don’t know how to write that. “…with the sugar cut in half or more.” Or should it be “…with the sugar cut in half or less.” I’m talking about cutting out even more than half of the originally called for sugar. Less sugar. Cut it by more than half, so that it’s even less. That is what I’m trying to say. Sometimes writing good sentences is so hard. Who decided that fractions would be smaller every time their bottom number gets bigger? Do you know how hard it is to explain to a small child that 1/8 is bigger than 1/16?? It’s the fraction inventors that are making my sentence writing so complicated right now.
Just for that, I’m not giving the fraction people any of my cookies. They can figure out their own half or more or less sugar fraction in their own cookie recipes. Merry Christmas, fraction people.
Well, there’s no good way to segue after this slightly embarrassing but mostly justified outburst. All any of us really needs to know is that we can cut the sweetener in most baked good recipes and not taste the difference. Truly this sugar cookie is still so sweet I can barely eat it. My kids – who love sugar-covered-sugar just like all the other kids – cannot tell that these cookies are low in sugar. I daresay that if we left these on a plate for Santa, he’d be like, “Wow, these are the best cookies I’ve had all night, but without the sugar crash. This mother must have used half or more (or less) of the sugar called for in the recipe.”
Good ol’ Santa. He totally gets it.
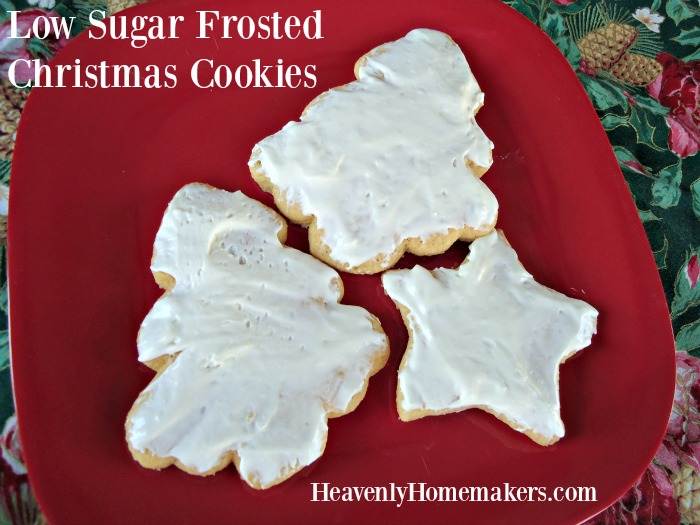
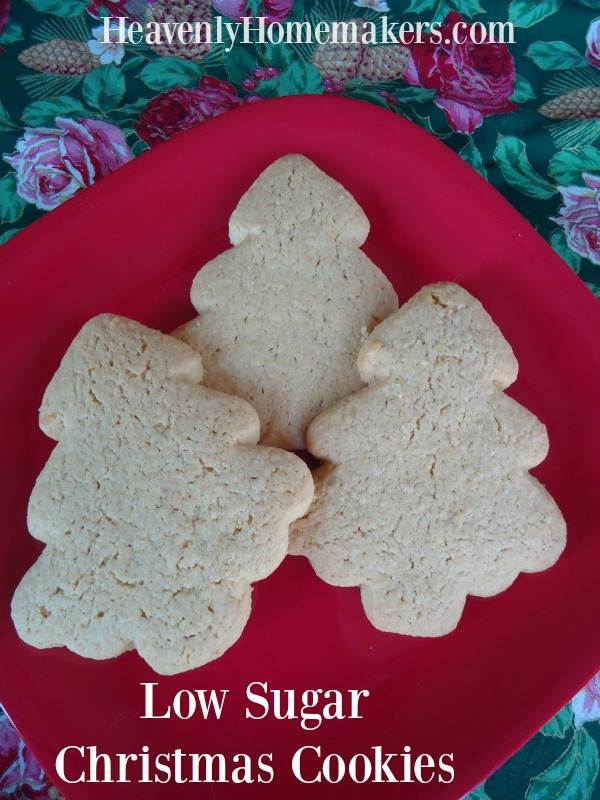 Low Sugar Christmas Cookies
- 1 cup melted butter
- ½ cup sucanat or raw sugar
- 2 eggs
- 1 teaspoon vanilla extract
- 1 teaspoon baking powder
- 3½ cups of whole wheat flour (give or take)
- Stir together melted butter and sugar.
- Add eggs, vanilla, and baking powder.
- Stir in flour until a solid ball of dough forms.
- Cover the bowl and place it in the refrigerator to chill for about an hour.
- Roll chilled dough on a well-floured surface and thin or thick as you like.
- Cut with cookie cutters and place them about a half inch apart on a baking sheet.
- Bake in a 350° oven for about 12 minutes or until cookies are lightly browned.
- Makes 20-30 cookies depending on the thickness and size.
If you’d like to frost your cookies but keep them low sugar, I recommend this stevia sweetened frosting.
Stevia Sweetened Cream Cheese Frosting
8 ounces softened cream cheese
1 cup heavy whipping cream
1/2 teaspoon vanilla extract
Liquid stevia to taste (I use 2 droppers full)
Whip ingredients together until smooth. Frost cookies just before serving.
This frosting is not like regular powdered sugar icing. It’s delicious on these cookies, but does not harden or hold up well for the long term. I recommend only frosting a few cookies at a time, as needed. I use the term “as needed” loosely because we are talking about cookies here. Although these are low in sugar so the half or more or less sugar fraction does the lessen the guilt.
Take that, fraction people.


![gratituesday[2]](https://www.heavenlyhomemakers.com/wp-content/uploads/2014/01/gratituesday2.png)