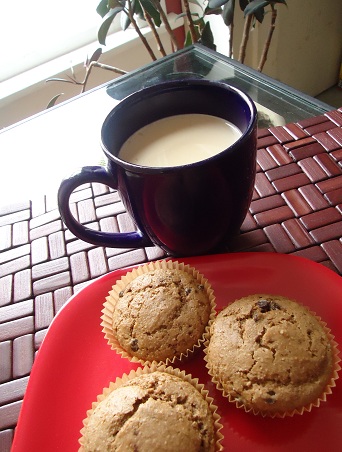
Heavenly Homemakers

Encouraging women in homemaking, healthy eating and parenting

  • Home
    • About
    • FAQs
  • Recipes
    • Bread and Breakfast
    • Condiments
    • Dairy
    • Main Dishes
    • Side Dishes and Snacks
    • Desserts
    • Gluten Free
    • Instant Pot
    • Crock Pot
    • Heavenly Homemaker’s Weekly Menus
  • Homemaking
    • Real Food Sources
  • Store
  • Contact
    • Advertise
    • Disclosure
    • Privacy Policy
  • Simple Meals
  • Club Members!

Easiest Bread Pudding

October 30, 2022 by Laura 2 Comments

This post may contain affiliate links which won’t change your price but will share some commission.

Can I claim that this is the Easiest Bread Pudding recipe when, in fact, I’ve never made a different recipe in which to compare it??

Just like any recipe, I wouldn’t share it if it wasn’t easy to make. I’d actually never attempted Bread Pudding until recently when I:

  • Had a bag of leftover pancakes in my fridge and
  • Needed something special to feed a large group.

So I did a little research, then adapted and created this. It’s a huge hit!

Easiest Bread PuddingYum

Easiest Bread Pudding
 
Save Print
Author: Laura
Serves: 6-8
Ingredients
  • 6 slices stale bread or leftover pancakes
  • 3 Tablespoons of melted butter
  • 4 eggs
  • 2 cups milk
  • ½ cup brown sugar
  • 1 teaspoon vanilla extract
  • 1 teaspoon cinnamon
  • Topping:
  • 3 tablespoon butter
  • 1 tablespoon brown sugar
  • 1 teaspoon vanilla extract
Instructions
  1. Butter a 9x13 inch baking dish.
  2. Tear bread or pancakes into small pieces and put them into the dish.
  3. Whisk together remaining ingredients and pour mixture over the bread pieces.
  4. Bake in a 350 degree oven for 35-45 minutes or until the middle doesn't jiggle.
  5. Just before Bread Pudding has finished baking, whisk the topping ingredients over low heat in a saucepan until melted and mixed.
  6. After removing pudding from the oven, drizzle topping over it right away.
3.5.3251

This is truly a great option to make with leftover pancakes. I find that re-warming pancakes isn’t as tasty as serving them fresh off a griddle. So to cut them up and douse them in this milk and egg mixture to make Bread Pudding? Such a perfect idea!

The soccer team enjoyed this treat, as did our family. Are you a Bread Pudding fan?

Heavenly Homemaker's Club Members: Access your homepage and all your fantastic resources here! Not a member yet? Please join us!

Blueberry Shortcake with Cream Topping

October 12, 2022 by Laura 2 Comments

This post may contain affiliate links which won’t change your price but will share some commission.

So, it takes three easy steps to make this Blueberry Shortcake with Cream Topping? It’s worth it!

Usually, I’m a “mix it together and throw it into the oven” kind of treat maker. But in the case of this case, we are making an exception and writing a recipe that takes three steps. THREE. What in the world?

Don’t worry. This is still an easy recipe. I’ll write it all out in the simplest of forms. And you really will see that it’s worth every bit of “effort!”

Blueberry Shortcake with Cream ToppingYum

Blueberry Shortcake with Cream Topping
 
Save Print
Author: Laura
Ingredients
  • 2⅔ cups flour (I use freshly ground whole wheat)
  • 1 teaspoon baking powder
  • 4 eggs
  • ½ cup honey or 1 cup sugar
  • ⅔ cup oil (I use coconut oil)
  • 1 teaspoon vanilla extract
  • 1 cup milk
Instructions
  1. Mix ingredients well.
  2. Pour mixture into a buttered 9x13 inch baking dish.
  3. Bake in a 350 degree oven for 25-30 minutes or until a toothpick inserted in the middle comes out clean. (While it's baking, prepare the blueberry topping.)
3.5.3251

Blueberry Topping

Blueberry Topping
 
Save Print
Author: Laura
Ingredients
  • 2 cups fresh or frozen blueberries
  • ¼ cup sugar
Instructions
  1. While the shortcake is baking, place blueberries and sugar in a small saucepan.
  2. Cook and stir, uncovered, over low heat for 10 minutes until blueberry syrup has formed.
  3. When the shortcake has finished baking, remove it from the oven and poke holes in the top with a toothpick.
  4. Pour warm blueberry topping over the cake while it is still warm.
  5. Allow cake to cool completely before adding Cream Topping.
3.5.3251

Cream Cheese Topping

Blueberry Shortcake with Cream Topping
 
Save Print
Author: Laura
Ingredients
  • 16-ounces softened cream cheese
  • 2 cups heavy whipping cream
  • 3 Tablespoons sugar, maple syrup, or honey
  • ½ teaspoon vanilla extract
Instructions
  1. Whip all ingredients together with a hand mixer or in a high power blender until it is thick and smooth.
  2. Spread topping over cooled cake.
3.5.3251


Heavenly Homemaker's Club Members: Access your homepage and all your fantastic resources here! Not a member yet? Please join us!

Super Soft Chocolate Cookies

December 18, 2019 by Laura Leave a Comment

This post may contain affiliate links which won’t change your price but will share some commission.

If I told you that these Super Soft Chocolate Cookies taste a little bit like an Oreo, would that make you want to try them?

The good news is that they won’t make your teeth all Oreo-y like Oreos do. (Don’t try and picture it. Oh wait, you just did.)

And of course, these are made with real food ingredients and I don’t know what Oreos are made with. So these Super Soft Chocolate Cookies are a win in every way!

My kids found that they like turning them into actual Oreos by frosting them. Well, I guess they’re still not actual Oreos because they are my homemade, real food version. But with the frosting, they taste almost exactly like an actual Oreo.

Tell me I haven’t made you all want to eat Oreos now?!

Just make these cookies, and your craving will subside. They stir up quickly and bake in 10 minutes. So you can have your Oreos – um, Super Soft Chocolate Cookies – in less time than it takes to go to the store to buy purchased cookies!

Super Soft Chocolate CookiesYum

Super Soft Chocolate Cookies
 
Save Print
Author: Laura
Serves: 20
Ingredients
  • ½ cup melted butter
  • ½ cup raw sugar or brown sugar
  • ½ cup unsweetened cocoa powder
  • ½ teaspoon baking soda
  • 1 teaspoon vanilla extract
  • 2 eggs
  • ¾-1 cup whole grain flour (I use freshly ground soft white wheat)
Instructions
  1. Cream butter, sugar, and cocoa together in a bowl.
  2. Add baking soda, vanilla, and egg - stirring until well combined.
  3. Add flour and mix well. (Start with ¾ cup then add more if needed.)
  4. Roll dough into 1 inch balls and place on a cookie sheet.
  5. Bake in a 350 degree oven for 8-10 minutes until cookies are barely set.
  6. Remove cookies from oven and allow the cookies to stay on the pan for at least 10 minutes so they will firm up.
3.5.3229

What’s on your holiday baking list this year?

Chocolate Hint:

Do yourself a favor and order any of the Cocoa Powders, Chocolate Chips, or Chocolate Chunks from Olive Nation. (And use the code home to get 20% off!) I can’t tell you what a wonderful difference these cocoa powders and chocolate chips have made in my chocolate recipes. The quality is MUCH better, and they do not cost more than I was spending on the lesser varieties.

Heavenly Homemaker's Club Members: Access your homepage and all your fantastic resources here! Not a member yet? Please join us!

Homemade (Real Food) Mint Oreos

December 7, 2014 by Laura 11 Comments

This post may contain affiliate links which won’t change your price but will share some commission.

This recipe needs no introduction. It’s a homemade mint oreo.  What more do I need to say? It’s happy, happy, delicious, happiness – perfect for a holiday gathering.

Besides the fact that these are made with whole food ingredients, perhaps the most exciting bragging point of these cookies is this:  After you eat one of these, you can smile at your friends without fear of having “oreo teeth.” You know what I’m talking about, right? Oh my goodness.

oreos 1

Allow me to introduce you to your new friend:

Homemade Oreo CookiesYum

1 cup melted butter
3/4 cup cocoa powder
1 cup sucanat or brown sugar
2 eggs
1/2 teaspoon baking soda
1/2 teaspoon sea salt
1 teaspoon vanilla extract
2 1/4 cups whole wheat flour (less or more as needed)

Stir together melted butter, cocoa powder, and sucanat. Add eggs, baking soda, salt, and vanilla until well combined. Stir in flour. Use a cookie scoop to place cookie dough two inches apart on a cookie sheet. Bake for 8-10 minutes in a 350° oven. Once the cookies have cooled, use the following filling recipe to create cookie sandwiches.

Filling

3 cups unbleached powdered sugar (more or less as needed)
2 Tablespoons melted butter
4 Tablespoons milk (more or less as needed)
Sprinkle of sea salt
1/2 teaspoon peppermint extract

Mix all ingredients together with a hand mixer until smooth and it has reached desired consistency. Spread filling onto cookies to form sandwiches like oreos.

Makes about 25 Mint Oreo Cookie Sandwiches. Want just a “plain” oreo? Simply leave out the peppermint extract in the filling recipe.

Homemade Mint Oreos

As you can see, some of mine are “regular” and some are “double stuffed.” This is because I care so much about perfection and consistency while I slap on the filling. Eh, life is entirely too short to spend time frosting cookies evenly. I especially feel this way because no one – I repeat no one –  cares about perfect cookies when they are eating a Homemade Mint Oreo. They are simply happy to be eating this treat.

Here is the part where I tell you to eat these in moderation, and to be sure to eat vegetables in great abundance before, after, and during your homemade oreo eating event. (You knew this was coming.)  After all, eating these may not leave you with oreo teeth, but you could end up with other issues, including but not limited to a suppressed immune system and cavities.

Wow, do I know how to ruin a great cookie recipe post or what? Never mind all the vegetable talk. You just make this recipe and enjoy your homemade oreo cookies!!! After you’ve eaten a large tossed green salad.

It has become clear that I cannot talk about sugar without encouraging vegetables. Hey, at least I didn’t tell you to add spinach to the cookie dough or frosting. Although now that I think about it…..
Heavenly Homemaker's Club Members: Access your homepage and all your fantastic resources here! Not a member yet? Please join us!

Hot Chocolate Souffle ~ A Recipe That Just So Happens To Naturally Be Grain Free and Dairy Free

October 2, 2014 by Laura 9 Comments

This post may contain affiliate links which won’t change your price but will share some commission.

hot chocolate souffle 2

Elias, our 12 year old, is my cookbook buddy. Just like me, he enjoys looking through new recipes, getting food ideas, looking at the food pictures. He’s my right hand man when it comes to finding new recipe ideas to play with.

During our past few trips to the library, Elias and I have picked up different cookbooks to look through and get ideas from. This Hot Chocolate Soufflé is one he found recently. He liked the look of the dessert and figured we could adapt it with our healthier ingredients pretty easily. Obviously, he cares so much about using healthier ingredients, just like all normal 12 year old boys. Ha. Haha. Ha. Ha.  Well, at least he knows his mom cares, and he sort of understands why. Really, all he was concerned about was that this recipe looked like a yummy chocolate dessert. What else matters, right?

Here’s what’s fun about this Hot Chocolate Soufflé recipe:

  • It’s very easy to make
  • It only has 4 ingredients
  • It can be made for those who need to avoid gluten and/or dairy

Hot Chocolate SouffléYum

1/2 cup dark chocolate chips
1/3 cup sucanat powdered sugar
5 eggs, separated
pinch of sea salt

Separate eggs – whites and yolks – into two separate bowls. Stir sucanat powdered sugar into the egg yolks until smooth. In a small saucepan, melt the chocolate, stirring constantly and removing from heat immediately after chocolate has melted. Stir melted chocolate into egg yolks and sucanat mixture. Beat egg whites and sea salt until stiff peaks form. Fold chocolate mixture into the egg whites until barely mixed. Pour mixture into a 8×8 inch baking pan. Bake in a 400° oven for about 15 minutes or until done through and through.

Grain Free, Dairy Free Hot Chocolate Souffle

These would be great for your Make-Ahead Lunch Box. Also, I looked into where you can purchase allergy free dark chocolate chips. Here’s what I found:

    Do you like looking through cookbooks and recipes? (Hope so – this site is full of ’em!)

    This post contains affiliate links.

Heavenly Homemaker's Club Members: Access your homepage and all your fantastic resources here! Not a member yet? Please join us!

Join Our Community!

 Facebook Twitter RSS E-mail Instagram Pinterest

Popular Posts

~ Will All of the Real Moms Please Stand Up?
~ Easy! Stir-and-Pour Whole Wheat Bread
~ How to Make Gatorade
~ 31 Real Food Breakfast Ideas
~ Dear Teenage Girls...
~ When Mom Takes a Step Back
~ The Inexpensive Health Insurance We Love!
~ Let's Talk Real Food Grocery Budgets

Check out our latest posts!

  • What to Make When It’s Too Hot to Make Dinner
  • How God Used My Cheesecake
  • Big Family Food and Fun: Meals and Photos from Last Week (May 17-27, 2023)
  • The Coppinger Castle
  • How Our Youngest Became Oldest of 9
Home  ~  Simple Meals  ~  Club Membership  ~  Shop  ~  Privacy Policy  ~  Disclosure  ~ Contact

Copyright © 2023 · Beautiful Pro Theme on Genesis Framework · WordPress · Log in