Heavenly Homemakers

Encouraging women in homemaking, healthy eating and parenting

  • Home
    • About
    • FAQs
  • Recipes
    • Bread and Breakfast
    • Condiments
    • Dairy
    • Main Dishes
    • Side Dishes and Snacks
    • Desserts
    • Gluten Free
    • Instant Pot
    • Crock Pot
    • Heavenly Homemaker’s Weekly Menus
  • Homemaking
    • Real Food Sources
  • Store
  • Contact
    • Advertise
    • Disclosure
    • Privacy Policy
  • Simple Meals
  • Club Members!

Sick Kid, God’s Care, and Last Day for Real Food eCourse Sale

October 26, 2015 by Laura 8 Comments

This post may contain affiliate links. For more information, please see our disclosure policy.

I’ve got some fun posts in the works for you, but I have been running and running and running…

Yes, definitely picture me actually running. Like, in tennis shoes, across miles of terrain, with a pink head band catching my sweat, while I look adorable and perky in a cute athletic outfit. Picture that. That is definitely what I mean by running. I just can’t stop running. I am such a runner.

Now, if you’re realistically thinking, “Yeah right, Laura” then you can instead picture a more accurate description of my running which involves barely being home during the past few days and if I was home, I had guests. I have posts in my head that have not yet come out of my fingers and onto this screen. Now that I’m finally sitting here at my keyboard, I’m too tired to write actual words. Therefore, I’m going to take a couple of days off to rest and find some complete sentences. I know they’re in there somewhere.

Before I sign off, I wanted to share a little Gratituesday with you, and also offer you a “last day of sale” reminder.

First, Gratituesday.

gratituesday[2]

Part of my running recently has been in the form of caring for a very sick boy. Most of us had a stomach bug a couple of weeks ago, which is no fun at all, of course. But one of our sons got a seemingly weird version that has been hanging on for way too long. When a teenage boy doesn’t feel like eating day after day after day, you know something is wrong.

It was beginning to get scary for us and for him. I am grateful to share, though, that today we got some answers. I was able to get him into our natural doctor in Lincoln who discovered the root of the problem and provided treatment solutions. He’ll likely still be weak for a few days, but I’m confident now that nothing is seriously wrong with him and that he is on his way to recovery. I don’t think any of us knew how worried we were until we got home from Lincoln and his brothers met us anxiously at the door asking for answers about what we learned from the doctor. (This is significant because these are boys who would normally say, “Oh were you gone? I didn’t realize. What’s for lunch?”)

I am so thankful for God’s provision in this. It is extremely difficult to get an appointment with this doctor right now as she just had a baby and is only back for very limited hours. In fact, I’ve had my next appointment scheduled months in advance. The fact that I called at 8:01 and got in because “there was a last minute cancellation” is amazing to me. Praise God for opening a slot that worked perfectly for us on the very day we needed it, and for providing answers that will put our son back on the road to good health.

Soooo after I got my sickie settled back at home in the recliner with food and drink and remedies, I got into the van again and headed south to a ranch with Malachi for a horse class he’s taking right now with some fellow homeschoolers. This class has been so fun and fascinating!

As you can see, I’m very gifted at photography with my phone camera. Also, you can see that as much as Malachi enjoys horses, he likes dogs even more.

horses1

horses2
Praise God for Make-Ahead Meals. Wearily, I slid a prepared casserole into the oven when I got home from the ranch (which we will eat with a salad consisting of whatever greens and veggies we pull out of the fridge). Then I plopped onto my computer chair to try to find some words (which I obviously found, thank you).

Thanks for letting me share. It’s great to reflect on God and His work and to be able to share it with people I care about (you!).

More fun posts coming back after I take a short Sabbath rest. :)

Heavenly Homemaker's Club Members: Access your homepage and all your fantastic resources here! Not a member yet? Please join us!

Getting Started on a Healthy Eating Path – Here’s Step-by-Step Help.

October 23, 2015 by Laura Leave a Comment

This post may contain affiliate links. For more information, please see our disclosure policy.

Of all the questions I get from readers, the one I hear the most is:

How do I get started eating healthy?

It can be overwhelming! Conflicting information is everywhere! There are too many things to change at once! What does healthy even mean anyway? And on it goes.

I want to tell you this basic truth I’ve learned on our healthy eating journey:

There is no one-size-fits-all plan. There is no perfect formula. There is not one right way or wrong way to do this.

What if you just did healthy the way that makes sense for your family right now?

What if?

Even as I look back on our healthy eating journey of the past 10 years, I see changes and shifts and different focus points. What used to work doesn’t work now. Some of what I used to prioritize, I no longer do. What my family needs now that our boys are teens is different than what we needed when they were little.

We keep making changes. We keep making improvements. I relax more instead of feeling like we have to do it all perfectly. I now go by these basic principles:

  • Food is nourishment. Let’s eat to nourish, not just to fill a hole.
  • Real food is simple and uncomplicated. Let’s just keep it simple.
  • Drink plenty of water.
  • Go easy on the sugar.
  • Stick with healthy, real fats (coconut oil, butter, olive oil, palm shortening)
  • Let God be God. Trust Him in this.

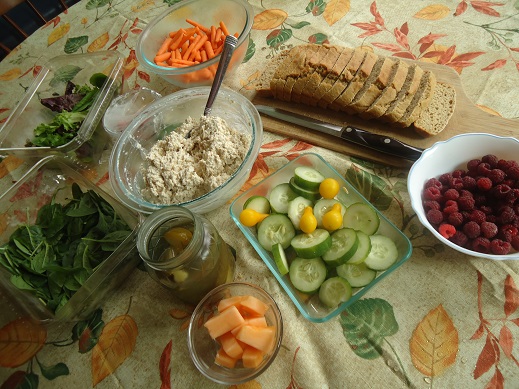
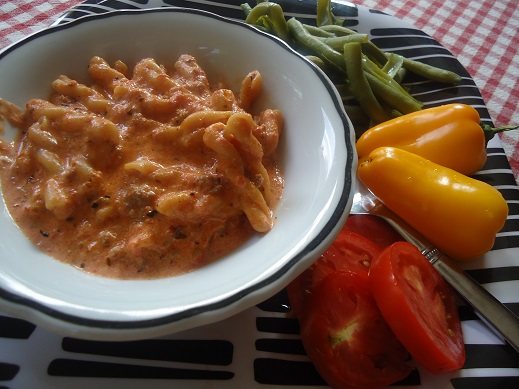
To give you a visual on this, here are some pictures sharing sample meals my family eats.

multitasking6

Garlic Cheese Biscuits

alfredo leftovers 2

What are some simple changes you’ve made through the years to make a healthy lifestyle easier?

Heavenly Homemaker's Club Members: Access your homepage and all your fantastic resources here! Not a member yet? Please join us!

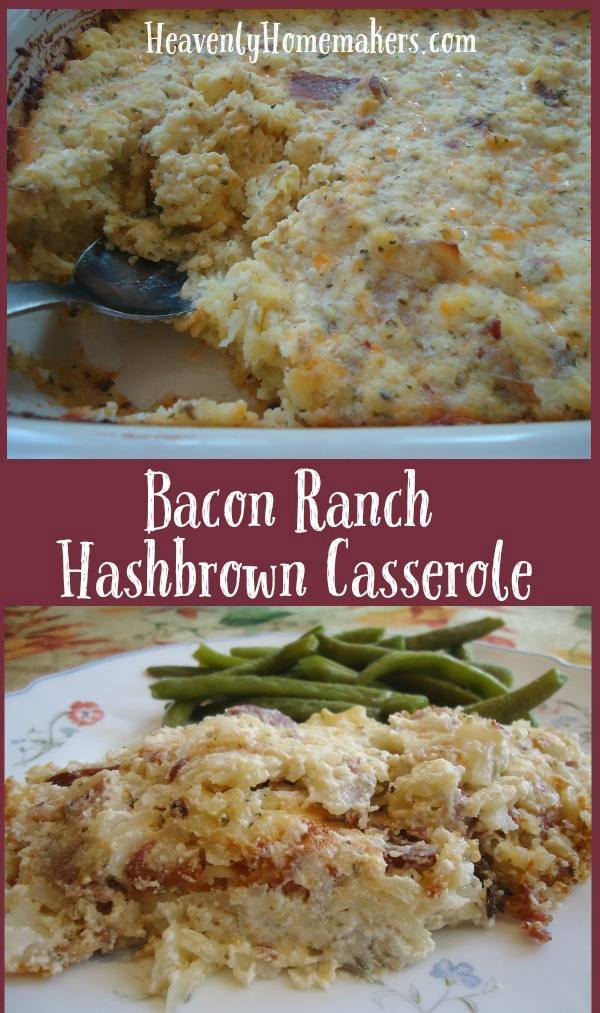
Bacon Ranch Hashbrown Casserole

October 21, 2015 by Laura 4 Comments

This post may contain affiliate links. For more information, please see our disclosure policy.

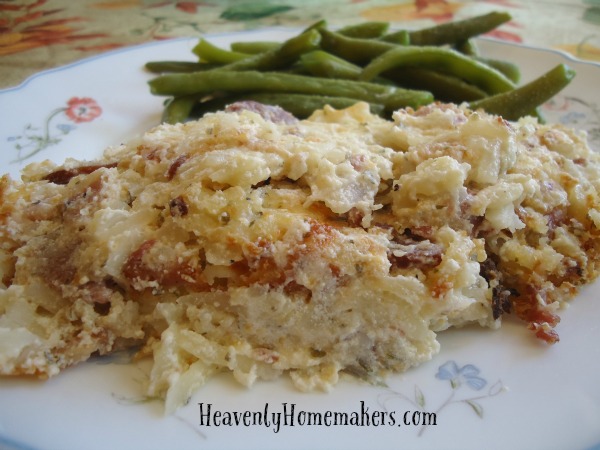
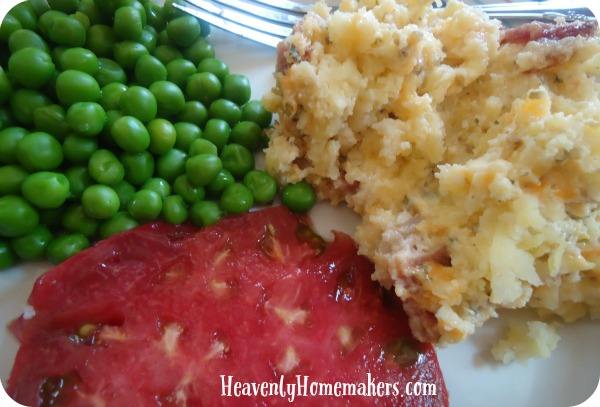
Bacon Hashbrown Casserole

Yum

A friend had just stopped by when I was pulling this dish out of the oven for lunch earlier this week. It smelled quite amazing. She asked what it was, so I went down the list of ingredients our lunch included, “bacon, ranch dressing, sour cream, cheese…” Then this is when she said,

“Bacon? Ranch? Cheese? With all that in it, you know it’s going to be good!”

Yep, pretty much. What’s not to love?

You might also love knowing how easy this is to make. Cook the bacon, stir in the other ingredients, spread it all in a cooking dish, put it into the oven. Easy. It does help if you have premade frozen hashbrowns and a jar of homemade ranch dressing mix ready to go. Just please put the lid on your ranch dressing before you shake it up. Please. I’m only here to help.

A big thanks to Plain Chicken for the idea for this recipe! I’m excited to think about possibilities of ways to continue tweaking this. Maybe add some cooked chicken to the mix? What else can you think of to add to this dish?

Bacon Ranch Hashbrown Casserole
 
Save Print
Author: Laura
Serves: 10 servings
Ingredients
  • 1 pound bacon
  • 2 cups shredded cheddar or Colby jack cheese
  • 3 cups sour cream
  • 3 Tablespoons Ranch Dressing Mix
  • 1 bag of frozen shredded hashbrowns (about 8 potatoes worth of homemade)
Instructions
  1. Cut bacon into bite-sized pieces and cook.
  2. Drain grease.
  3. In a large bowl, stir together cooked bacon, shredded cheese, sour cream, and ranch dressing mix.
  4. Fold in frozen hashbrowns until all ingredients are well combined.
  5. Bake uncovered in a 350° oven for 45-60 minutes or until casserole is lightly browned and bubbly.
3.4.3177

Some recipes you’ll need to go along with this one:

Homemade Ranch Dressing Mix

Homemade Hashbrowns

Lately I’ve been finding really great deals on packaged hashbrowns at the store, so I’ve picked up a few to save me some time. I much prefer homemade, but busyness doesn’t always allow me the luxury. It’s good to be relaxed and flexible about healthy eating, right? Right.

So far I’ve only served this casserole for lunch or dinner. But I also think it would be great for breakfast or brunch!

Want to make Bacon Ranch Hashbrown Casserole ahead and freeze it for later? Here’s how:

Make the casserole as directed. Before baking, cover well and freeze for up to three months. To cook and serve – thaw and bake as directed. Or, cover frozen casserole and place it into a cold oven. Turn the oven on to 225° and bake for 2-3 hours or until casserole has thawed, baked, and is heated through.

Bacon Ranch Hashbrown Casserole - Easy!

Note: This recipe is naturally gluten free. Hold onto this one if you have to avoid gluten – or so that you can bless friends who eat gluten free!

I’ll definitely be making this casserole often! Since it’s freezer-friendly, I’ll likely be making two or three at once so I can have no-brainer meals on hand for busy nights. After all, why dirty up more dishes tomorrow when tomorrow will have enough dirty dishes of its own? Right??

Heavenly Homemaker's Club Members: Access your homepage and all your fantastic resources here! Not a member yet? Please join us!

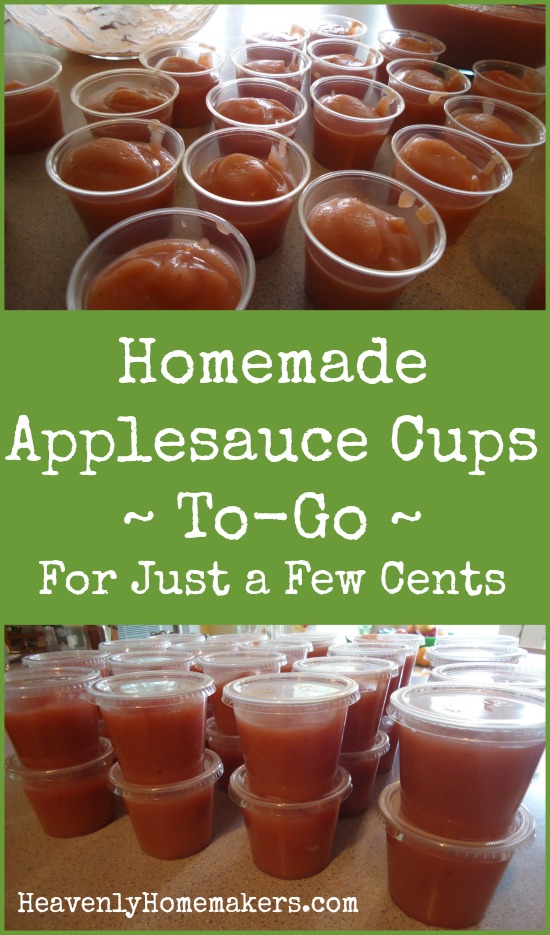
Homemade Applesauce Cups To-Go ~ For Just a Few Cents

October 19, 2015 by Laura 16 Comments

This post may contain affiliate links. For more information, please see our disclosure policy.

Brace yourself for the cuteness. 

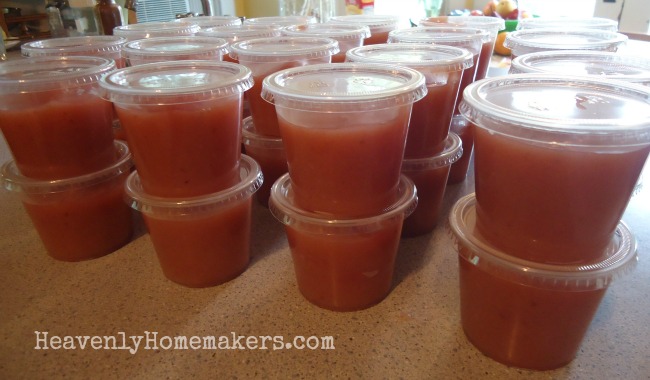
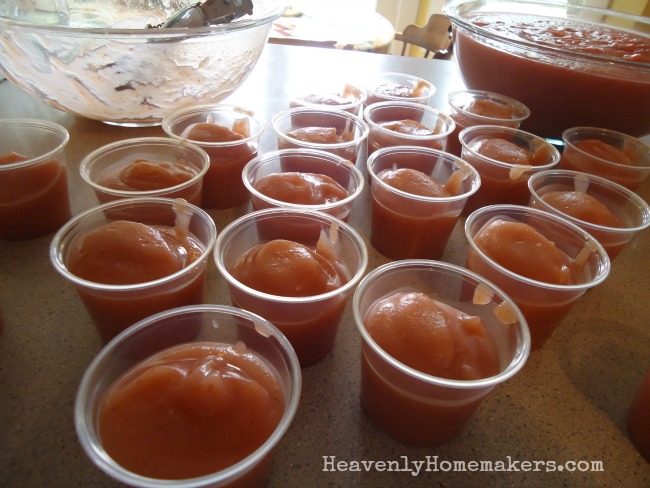
Homemade Applesauce Cups

Typically I make a boat load of canned applesauce each year. Still, there are always times I end up buying the little packaged applesauce cups to take on the road with us to soccer or basketball games. It feels so silly to spend money on the pre-made applesauce cups when I have home-canned applesauce in the pantry. Still, I do it. We need food for the road, after all.

This year, I got a brilliant idea. (My one and only of 2015. We’ve been waiting ten months for this.)

I checked online for little cups with lids to fill with applesauce to take on the road.

Small jars with lids work great for to-go applesauce, but those make our cooler weigh 380 pounds. Plus, I wanted to give some to Asa for his dorm fridge but didn’t want him to have to mess with saving all the jars to bring home. The cups with lids are a great solution!

~~Let us all pause here to say nice things about avoiding plastic and disposables in general. Plastic disposables are not our friend. I agree and I know there are strong opinions about this. Right now I’m the mother of many teenage boys who are active, hungry, and on-the-go frequently. It was either compromise and buy these plastic cups in an effort to save us money and help us eat well on the road – or spend more to buy them pre-made – or buy junk from concessions or McDonalds. I chose the plastic disposables and I am excited about what this provides for my family right now. Now, back to the cute applesauce cups.~~

Organic 100% fruit applesauce cups cost around 74¢ each. Non-organic are around 33¢ each. My homemade organic applesauce cups just cost me 15¢ each. This makes me very excited. Plus if it’s okay that I say so, my homemade applesauce tastes better than store-bought. :)
Applesauce Cups

This batch of applesauce turned out such a pretty shade of pink because I used a variety of dark red apples with very white flesh (Empire, I believe). No one who eats this can believe I didn’t add sugar. No need for sugar, my friends. Not when God made apples this good and sweet.

The cups with lids I chose are a perfect 5.5 ounce size. I filled them about 3/4 full, put the lids on top, then froze them. (I tested one to see if it froze/thawed well. It did. Now I have a freezer full!)

Next time we need travel food, we’ll grab several homemade applesauce cups from the freezer. I am so excited about this!

Homemade Applesauce Cups To-Go ~ For Just a Few Cents

Have any other good ideas to share for fun travel foods?

This post contains affiliate links.

Heavenly Homemaker's Club Members: Access your homepage and all your fantastic resources here! Not a member yet? Please join us!

Hamburger Pot Pie Recipe – Nourishing Comfort Food

October 14, 2015 by Laura 4 Comments

This post may contain affiliate links. For more information, please see our disclosure policy.

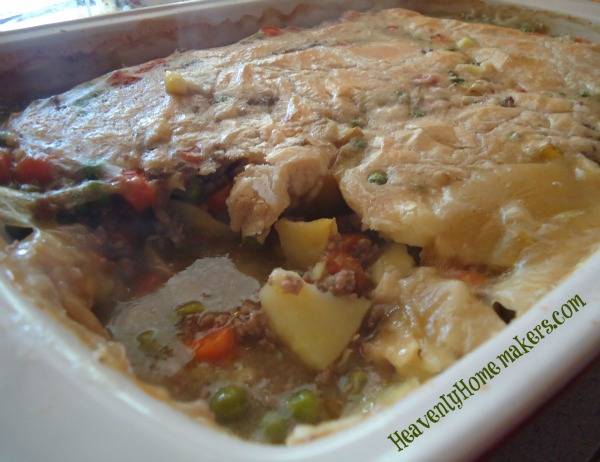
Hamburger Pot Pie22

Oh comfort food. You are so…comforting.

If you love Chicken Pot Pie, you will love this Hamburger Pot Pie. I actually think I like this one even better. (No surprise there. I’m a beef-loving girl.) Pin this recipe so you can use it to keep yourself warm all winter long.

For the record, if you need to eat gluten free – or if you’re like me and you’re more into meat and veggies than bread – you can skip the topping on this and just eat it in a bowl like Hamburger Soup.

Hamburger Pot PieYum

4.5 from 2 reviews
Hamburger Pot Pie
 
Save Print
Prep time
30 mins
Cook time
45 mins
Total time
1 hour 15 mins
 
Author: Laura
Serves: 8-10
Ingredients
  • 1 pound hamburger meat
  • 1 small chopped onion
  • 6 cups beef broth
  • 4 large carrots, peeled and cut into bite sized pieces
  • 6 medium potatoes, peeled and cut into bite sized pieces
  • 2 cups frozen peas
  • Sea salt and pepper to taste
  • ⅓ cup cold water
  • 2 Tablespoons organic corn starch, arrowroot powder, or wheat flour
  • 1 cup milk
  • 1 cup mayonnaise (I use Hain Safflower Mayonnaise)
  • 1 cup whole wheat flour (I use freshly ground flour from hard white wheat)
Instructions
  1. In a large cooking pot, brown hamburger and onion together.
  2. Stir in broth and prepared veggies.
  3. Cook until veggies are tender.
  4. Mix cornstarch with water until smooth. Stir mixture into the broth/veggies, cooking for about one minute on the stove to help the mixture thicken.
  5. Pour contents into a 9×13 inch baking dish.
  6. In a separate bowl, stir together milk, mayo, and flour.
  7. Spread mixture over the veggies in the baking dish.
  8. Bake in a 350° oven for about 45 minutes or until the crust is golden brown.
3.4.3177

To save money and add nourishment, I recommend making your own broth for recipes like this one. Here’s How to Make Beef Broth. While we’re at it, here’s How to Make Chicken Broth. :)
Hamburger Pot Pie

What are your favorite winter comfort foods? Which do you typically enjoy more – hamburger or chicken?

Heavenly Homemaker's Club Members: Access your homepage and all your fantastic resources here! Not a member yet? Please join us!

5 {Easy!} Real Food Dinners for About $1.00 Each

October 13, 2015 by Laura 6 Comments

This post may contain affiliate links. For more information, please see our disclosure policy.

Remember our $1.00 Real Food Breakfast ideas? I promised then that I would share some lunches and dinners too.

Undoubtedly, lunches and dinners are trickier than breakfasts if you want to eat on the cheap. And just to be clear – I’m not into cheap. I’m into nourishing. But it’s always great when cheap and nourishing collide, don’t you think? (I actually prefer the word inexpensive. Cheap sounds so…cheap.)

As I stated in my $1.00 Breakfast post, the following dinner servings are my size, not my teenage boys’ size. They usually eat what I eat multiplied times four or five. Technically, these dinners still cost about $1.00 per plate. It’s just that my kids eat 3-5 plates. Each. But who’s counting?

Ooh, good news not entirely related to food but about the cost of teenage boys! We just learned how to lower our 18-year old son’s car insurance bill. So now we shall proceed with allowing our 15-year old son to pursue his license. Hey, it was “you can either eat or you can drive, which do you want?” I’m kidding. Mostly.

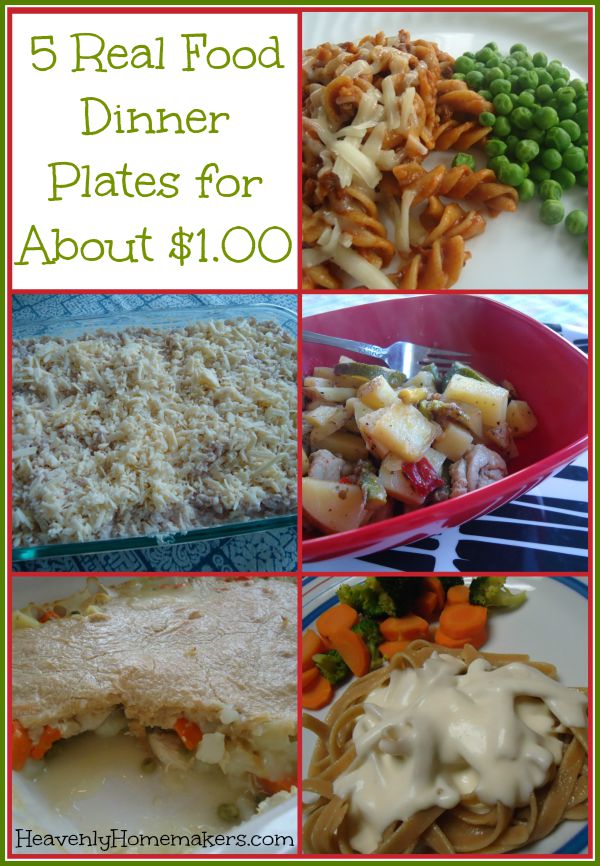
5 Real Food Dinner Plates for About $1.00

5 Real Food Dinners for $1.00Yum

Each of the following meals can be made for approximately $1.00 per plate. They are all made with real food ingredients. They are all served with 2-4 fruits or veggies (which ups the bill, but it’s worth it by a million).

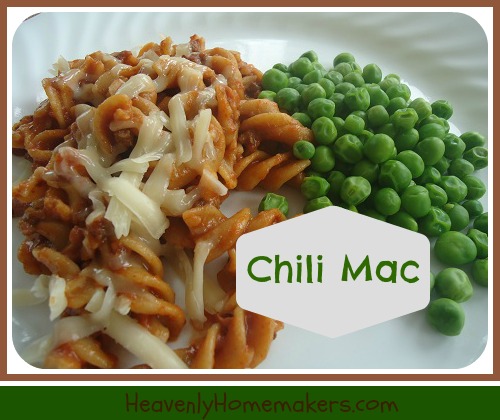
1. Chili or Chili Mac

The trick to this one is to go easy on the hamburger meat. Let the beans offer the protein. Stretch it with a little whole grain pasta. And if you happen to have home-grown, home-canned tomato sauce all the better on the money savings.

chili_mac_2

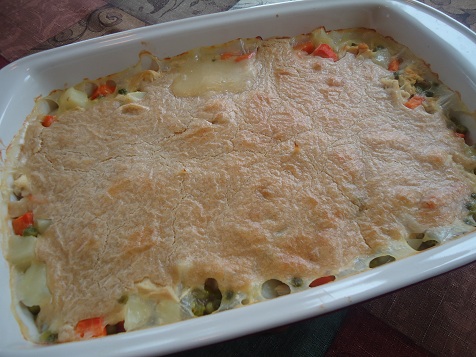
2. Chicken Pot Pie

The best thing about this recipe is that it is a one-pot meal. It comes with veggies baked right in. Serve a salad on the side. Maybe a fruit. It is so good.

chicken_pot_pie_5

P.S. I just figured out a Hamburger Pot Pie recipe that I’ll be sharing tomorrow!

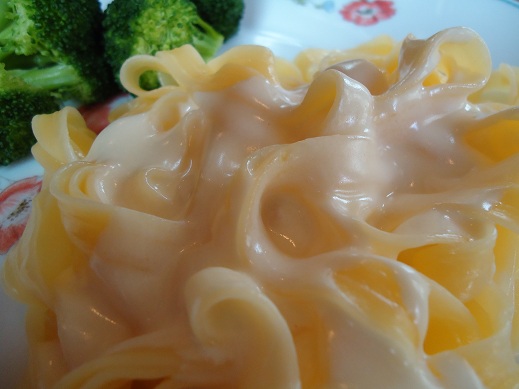
3. Pasta Alfredo

This is so delicious and tastes even better than a restaurant version (which you get for about twelve bucks a plate). Serve this with salad and steamed veggies. Adding some chicken will add to the cost, but it sure does taste delicious. If you have a little leftover chicken, stir it in, and you’ll still be keeping this low in cost.

alfredo_5

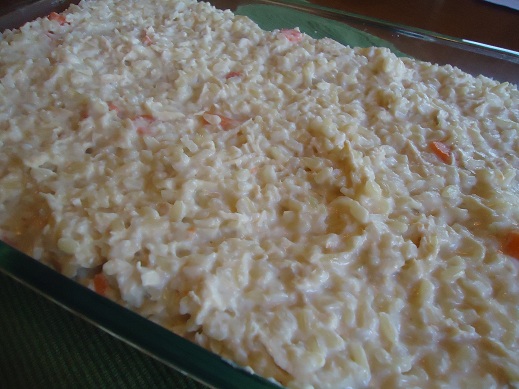
4. Creamy Chicken and Rice Casserole

This casserole is super nourishing because you’re cooking your rice in veggie-rich broth. Plus there are carrots in the casserole. Plus you can serve a salad on the side. Plus you can make extra and freeze it for another time. So convenient!

chicken_and_rice

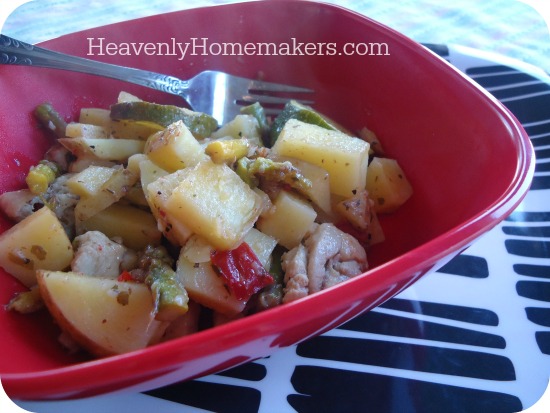
5. Garden Veggie Chicken Skillet

I love this recipe because you can use whatever veggies are on sale or that you have on hand. The potatoes help stretch this dish. Everything is flavorful.

Garden Veggie Chicken Skillet 2

I’ve got more $1.00 Breakfasts coming soon (here’s the first one I posted). Plus I’m working on some $1.00 Lunch ideas too!

I love all this proof that healthy eating doesn’t have to be expensive. :)
Heavenly Homemaker's Club Members: Access your homepage and all your fantastic resources here! Not a member yet? Please join us!

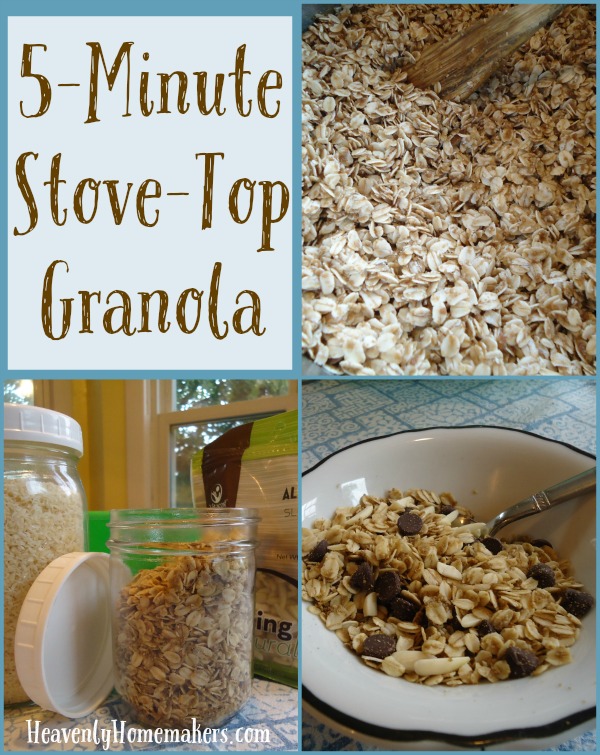
5-Minute Stove-top Granola Recipe – It is Too Easy!

October 12, 2015 by Laura 26 Comments

This post may contain affiliate links. For more information, please see our disclosure policy.

Stove-Top Granola

Once upon a time, I spent five minutes stirring together melted coconut oil, sucanat, and oats in order to top an Apple Crisp. (I was making it dairy free for a friend.) While making it, I didn’t measure my ingredients (surprise, surprise) so when it came time to top my apples, I had too much topping. Oh well. I’d store them for later. Into a jar they went (surprise, surprise).

Later, my 13-year old came into the kitchen and saw the jar of apple crisp topping, about which he said, “Ooh, what kind of granola is this?” It was at that moment that I realized that all we had to do was stir in coconut flakes, almonds, dried fruit – whatever we wanted – and we’d have granola.

It was in the next moment that I decided that I might make granola like this every single time because it only took five minutes and it was too easy.

Friends, I present to you:

5-Minute Stove-Top GranolaYum

Make it on the fly. Make it ahead of time. Serve it with add-in options. It will be one of the easiest breakfast or snack options ever.

4.7 from 3 reviews
5-Minute Stove-top Granola
 
Save Print
Prep time
5 mins
Total time
5 mins
 
Author: Laura
Serves: 6 servings
Ingredients
  • 4 cups whole oats
  • ¼ cup sucanat
  • 1 cup coconut oil
Instructions
  1. Melt coconut oil in a medium-sized pan on the stove.
  2. Remove from heat and stir in oats and sucanat.
  3. Serve immediately, or allow it to sit a while to dry somewhat. We like it both ways.
Notes
Add-in options:

Nuts like almonds, pecans, or walnuts
Coconut flakes
Dried fruit like cranberries, raisins, or blueberries
Chocolate Chips
3.4.3177

When you make granola this way, you can set it out with a variety of add-in options and have a Granola Bar. (Like my play on words there?) This is wonderful for people with food allergies or simply to appease people’s taste preferences.

5-Minute Stove-Top Granola

I’d love to hear your ideas for Granola Add-In options!

Heavenly Homemaker's Club Members: Access your homepage and all your fantastic resources here! Not a member yet? Please join us!

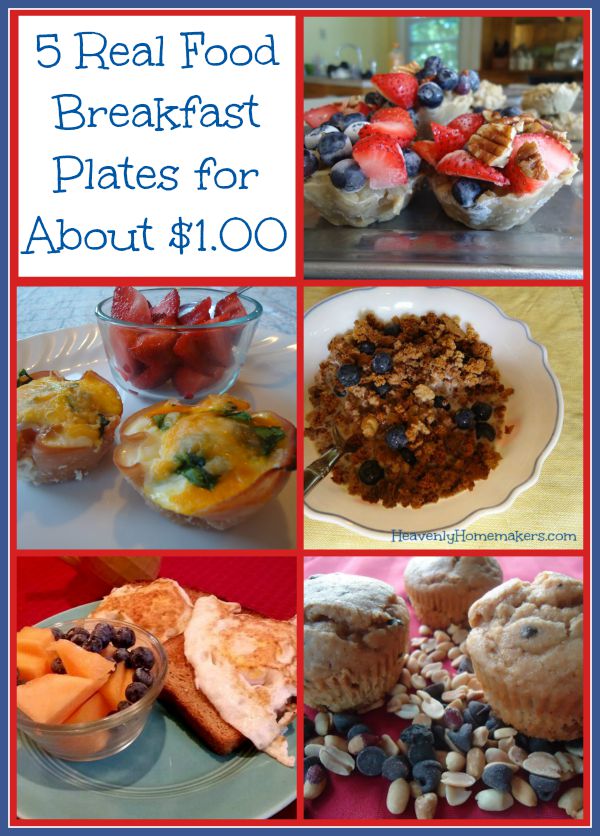
5 {Easy!} Real Food Breakfast Plates for About $1.00 Each

September 30, 2015 by Laura 6 Comments

This post may contain affiliate links. For more information, please see our disclosure policy.

Here’s what we’re going to do. We’re going to put together five different real food breakfast plans that are super simple and cost about $1.00 per plate. We’re going to save money, save time, and eat well…all at the same time.

Confession time – my family of teenage boys eats BIG. Three of my boys cannot eat these foods for $1.00 because they eat such a freakishly large amount of food in one sitting. I do all I can to keep our costs down, but their plate quantities are something else. So just know that when I say $1.00 per plate – we’re talking about normal people plates. Not active, growing, hungry all the time, teenager people plates. (Not that my boys aren’t normal. But just, you know.)

Other Disclaimers: Your costs and my costs are not going to match up exactly. Fruit prices fluctuate, so I recommend price-matching (if it is an option for you), ordering from Bountiful Baskets or Azure Standard (if it an option for you), and buying in season and on sale.

5 Real Food Breakfast Plates for About $1.00

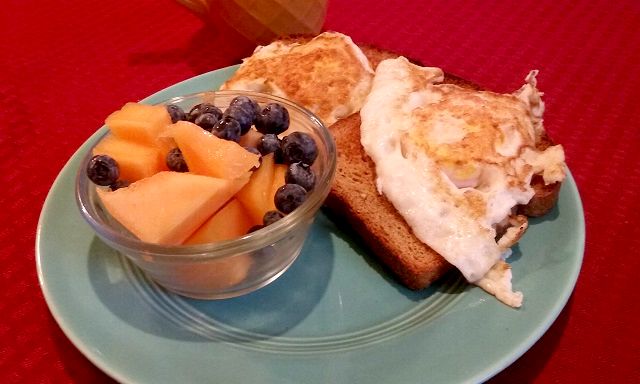
1. Fried or Scrambled Eggs, Whole Grain Toast with Butter, Fruit

I love that this meal can be prepared and put on the table in such a short time – and that is so packed with nourishment from protein to vitamins to minerals.

fried egg breakfast

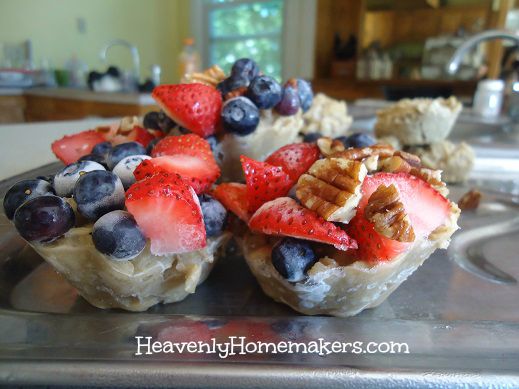
2. Oatmeal with Fruit and Nuts

Make this inexpensive meal easier than ever by making ahead Instant Oatmeal Packets or Frozen Oatmeal Cups. Add any fruit you have, whether fresh, frozen, or freeze-dried.

One Dollar Breakfast 2

3. Muffins, Eggs, Fruit Smoothies

Make muffin batter ahead as described here, then bake in the morning. So easy! Scramble or fry some eggs. Throw frozen fruits into the blender for a smoothie. Voila! Our favorite smoothie recipe is: Pineapple Mango Smoothie. It is so delicious! We also love Green Machine Milkshakes and Creamy Orange Coolers.

One Dollar Breakfast 3

Creamy Orange Cooler

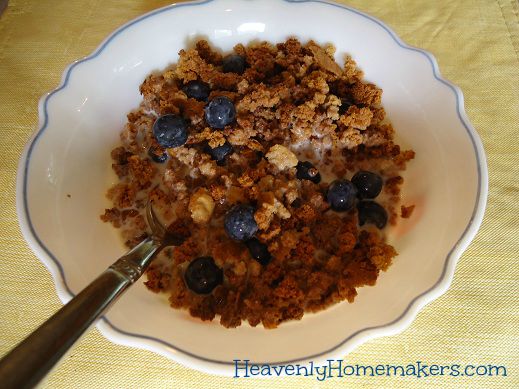
4. Homemade Grape Nuts Cereal, Fruit

This is super easy to make ahead of time, and the cereal is very filling! Throw berries into your cereal bowl or eat fresh fruit on the side. Need some protein to finish this off? How about a hard boiled egg? Perfection.

One Dollar Breakfast 1

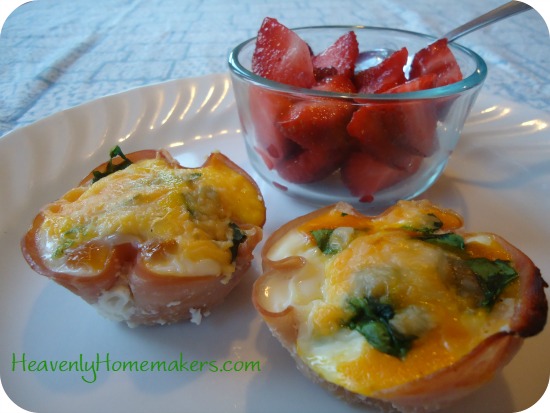
5. Ham and Egg Breakfast Bowls, Fruit

My family can’t get enough of these, and you can make them according to your veggie preferences. These can be made ahead and re-heated in the morning if you like. They are great for a grab and go breakfast!

ham and egg cups1

I’d love to hear what your inexpensive real food go-to breakfast plates look like! Because my wheels are turning now, I feel like I could put together another post with an additional 5 Breakfast Plates for About $1.00. I’ll see what I can come up with – and I’d love to include your ideas too!

Stay tuned for 5 {Easy!} Real Food Lunch Plates for Less Than $1.00 Each and 5 {Easy!} Real Food Dinner Plates for Less Than $1.00 Each coming up in the next couple of weeks. (If you’re new here, you may want to subscribe to our free newsletter so you won’t miss out! This one is daily; this one is weekly. Join us!)

~~~~~~~~~~~~~~~~~~~~~~~~~~~~~~~~~~~~~~~~~~~~~~~~~~~~

Huge savings here —> Check out our amazing Simple Meals program!

You will love this!

728x90

Heavenly Homemaker's Club Members: Access your homepage and all your fantastic resources here! Not a member yet? Please join us!

You Can Do This! Real Food Beginnings, Menu Planning Fun, Deals, and Freebies!

September 25, 2015 by Laura 3 Comments

This post may contain affiliate links. For more information, please see our disclosure policy.

If I could say one thing to encourage you as you work toward a real food kitchen, it would be to say this: You can do this (because you are amazing)!

I know cooking isn’t fun for everyone nor does it come easy to everyone. I know the transition from processed foods to real foods can be challenging. But as we all know, food is a necessary part of life, several times every day. Nourishment is necessary too.

I’m good at food. This is not a boast, it’s just that I love food and everything about it – just like you love what you love and are good at what you do. I also know that many of you are good at food, and some of you are better at it than you think you are! I’ve been working at this real food gig for 10 years now, and I love providing you with good recipes that are still easy and quick. I love putting together resources that will make your real food journey easier.

So this weekend, I had fun putting together a super inexpensive package deal of many of my favorite “You Can Do This! Real Food Resources.” I also compiled some of the free downloads from my archives that will help you on your journey. Real food deliciousness can be easy when you follow these simply laid out steps, ideas, and recipes.

Real Food Beginnings

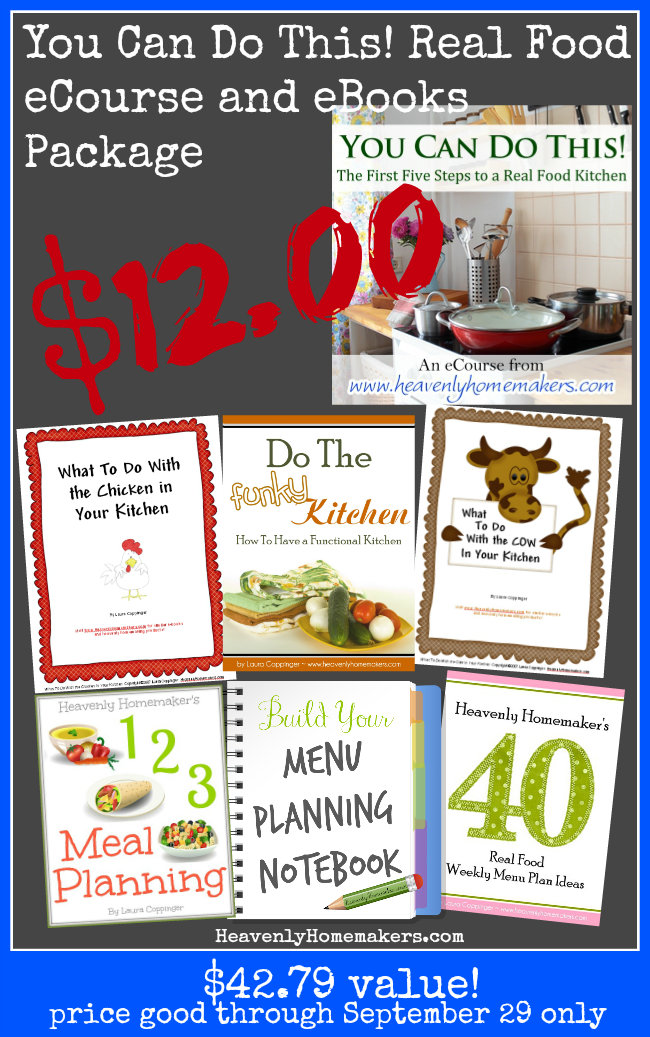
First, I’m offering our You Can Do This eCourse, along with 6 of our simple, real food kitchen eBooks – worth $42.79 – for only $12.00. Total. For all of it.This is to encourage you on your real food journey.

You Can Do This Real Food eCourse and eBook package

This package includes:
You Can Do This! The First Five Steps to a Real Food Kitchen eCourse
 $5.00
What to Do With the Chicken in Your Kitchen eBook
 $4.95
What to Do With the Cow in Your Kitchen eBook $4.95
Do the Funky Kitchen eBook $4.95
Heavenly Homemaker’s Real Food Weekly Menu Plan Ideas Packet $5.00
1-2-3 Menu Planning eBook $5.00
Build Your Menu Planning Notebook $5.99

$42.79
$12.00

Add to Cart

Next, I’ve put together a list of freebie resources you can enjoy on your real food journey!

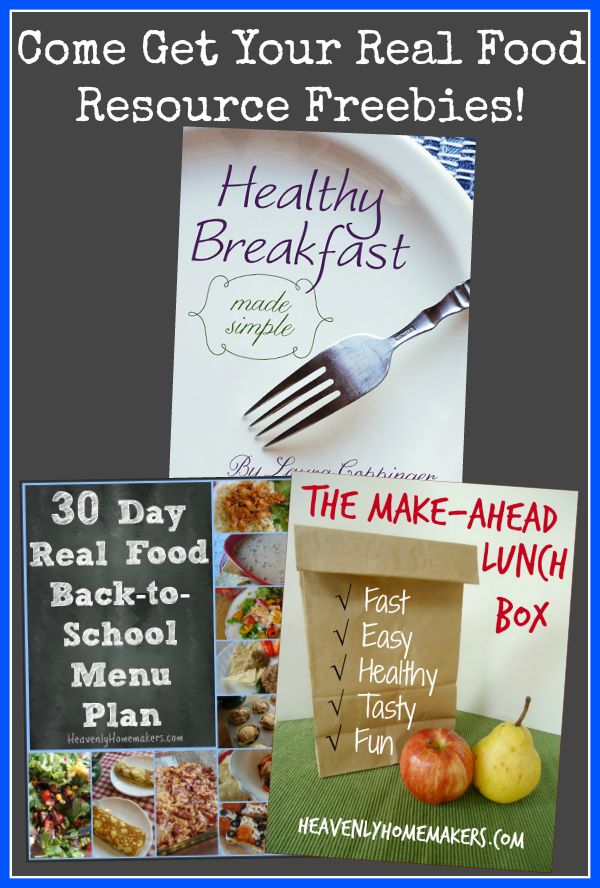
Come Get Your Real Food Resource Freebies!

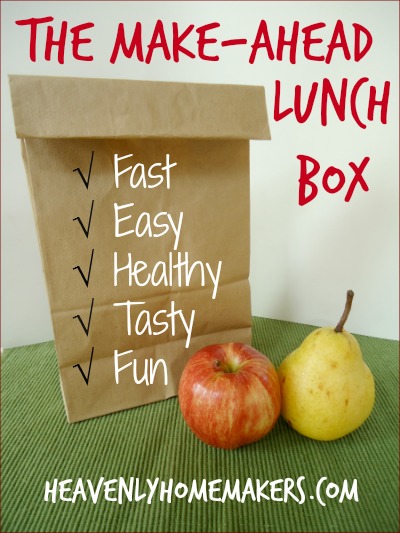
  • Download our brand new Make-Ahead {Real Food} Lunch Box mini-booklet. It’s totally free and includes links to 28 recipes plus has 20 mix-and-match add on ideas.The Make-Ahead Lunch Box
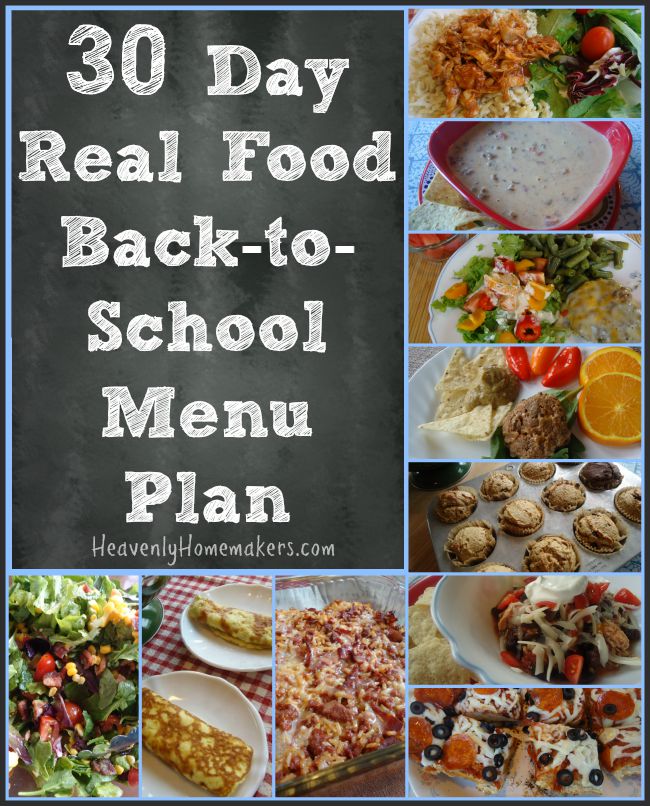
  • Download a 30-Day Real Food “Back to School” Menu Plan here. This is a helpful resource any day of the year!30 Day Real Food Back-to-School Menu Plan
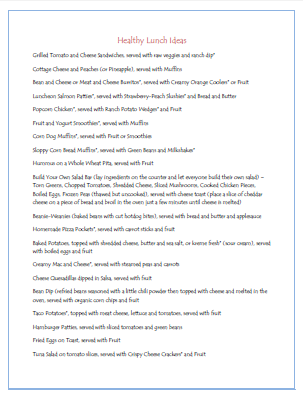
  • Download a list of Healthy, Inexpensive Lunch Ideas here.
  • Subscribers will receive a free copy of Healthy Breakfast Made Simple eBook. Subscribe to our free Daily Newsletter here or to our free Once-a-Week Newsletter here.

breakfast_e-book cover_sm

Enjoy these resources, and be sure to grab the big package of You Can Do This! Real Food Resources at a huge discount here now (discount ends Tuesday, September 29)!

You Can Do This! Real Food Resources
$12.00

Add to Cart

Heavenly Homemaker's Club Members: Access your homepage and all your fantastic resources here! Not a member yet? Please join us!

Baked Apple Pancake Recipe

September 23, 2015 by Laura 7 Comments

This post may contain affiliate links. For more information, please see our disclosure policy.

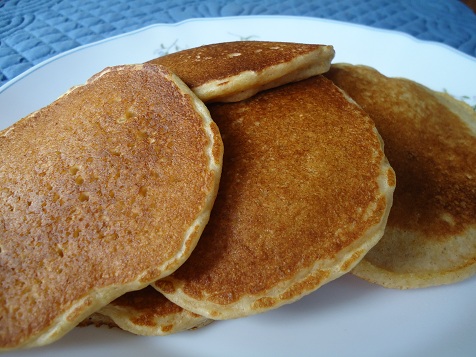
We all used to think that a pancake was just a pancake. But that made us all go to sleep with boredom and we all screamed for something different. Actually, none of us did that. Normal pancakes are the bomb-diggity and change is hard. Flipping regular round pancakes is nice, easy, and who doesn’t love a fresh pancake right off the griddle?

quick_mix_pancakes

But now we can also make Easy Pancake Muffins. They’re fun and easy too. Our people love them.

Easy Pancake Muffins - Great for the Freezer

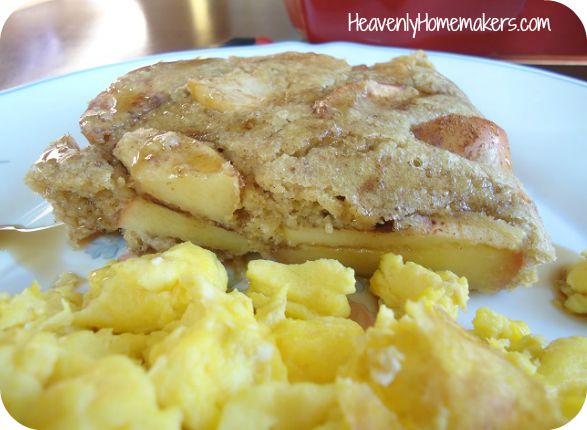
To go along with our newly discovered pancake experimentational adventures (seriously, it’s just a recipe idea but here I am trying to pull out big words to make it sound impressive) – we can now add this Baked Apple Pancake to the mix.

apple pancake31

This delicious idea came from “Busy Mom in AL” when I shared about making Easy Pancake Muffins. This long-time reader said,

“Put apples and cinnamon in the bottom of a 9×13 inch pan and then pour the pancake batter on top. Bake at 350 degrees for 20-30 minutes. Serve in squares with tons of maple syrup! :) It is called Apple Pancake Bake.”

Knowing my family would love it, a few mornings later I gave this idea a try. It earned the “take pictures and blog about it” award, so here you go!

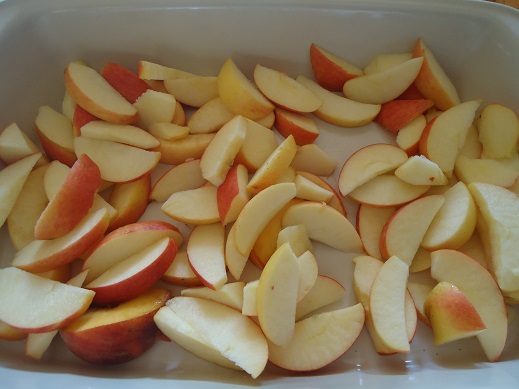
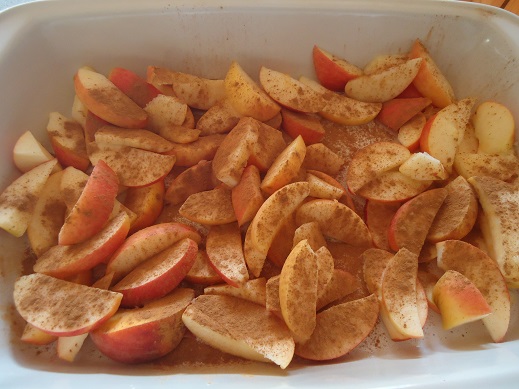
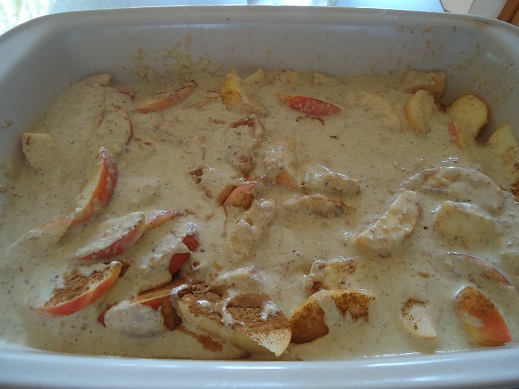
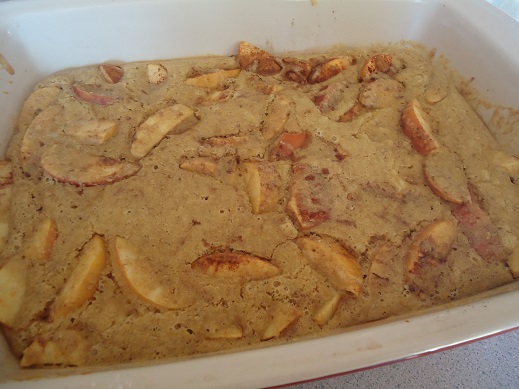
apple pancake4 apple pancake5 apple pancake6 apple pancake7

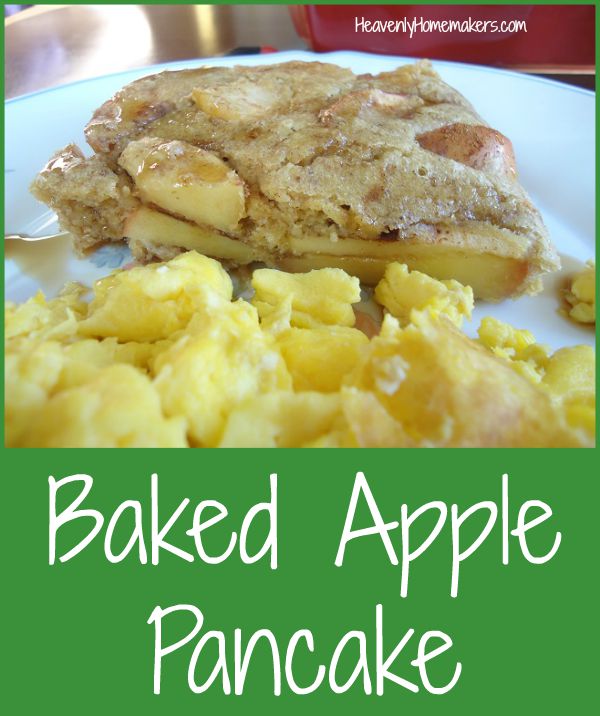
Baked Apple PancakeBaked Apple Pancake Yum

Baked Apple Pancake Recipe
 
Save Print
Author: Laura
Serves: 6-8
Ingredients
  • 5-6 apples, any variety
  • 1-2 Tablespoons ground cinnamon
  • 2 cups whole wheat flour (I use freshly ground hard or soft white wheat)
  • 1 teaspoon baking powder
  • ½ teaspoon sea salt
  • 2 eggs
  • 1½ cups milk
  • ¼ cup melted butter
Instructions
  1. Wash and slice apples, laying them evenly on the bottom of a 9x13 inch baking dish.
  2. Sprinkle liberally with cinnamon.
  3. Mix remaining ingredients well, then pour the mixture over the apples.
  4. Bake in a 350° oven for 20-30 minutes or until a toothpick inserted in the middle comes out clean. Slice and serve with real maple syrup.
3.4.3177

I think you’ll love this simple recipe idea! It’s perfect for this fall, what with its cinnamon awesomeness.

Once again we learn that pancakes don’t have to be just pancakes. Have any more pancake variations to share with us?

Heavenly Homemaker's Club Members: Access your homepage and all your fantastic resources here! Not a member yet? Please join us!
« Previous Page
Next Page »

Join Our Community!

 Facebook Twitter E-mail Instagram Pinterest

Popular Posts

~ Will All of the Real Moms Please Stand Up?
~ Easy! Stir-and-Pour Whole Wheat Bread
~ How to Make Gatorade
~ 31 Real Food Breakfast Ideas
~ Dear Teenage Girls...
~ When Mom Takes a Step Back
~ The Inexpensive Health Insurance We Love!
~ Let's Talk Real Food Grocery Budgets

Check out our latest posts!

  • Big Family Food and Fun: September 27-October 3, 2026
  • Big Family Food and Fun: September 20-26, 2026
  • Big Family Food and Fun: September 13-19, 2026
  • Big Family Food and Fun: September 6-12, 2026
  • Big Family Food and Fun: August 30-September 5, 2026
Home  ~  Simple Meals  ~  Club Membership  ~  Shop  ~  Privacy Policy  ~  Disclosure  ~ Contact

Copyright © 2026 · Beautiful Pro Theme on Genesis Framework · WordPress · Log in