Heavenly Homemakers

Encouraging women in homemaking, healthy eating and parenting

  • Home
    • About
    • FAQs
  • Recipes
    • Bread and Breakfast
    • Condiments
    • Dairy
    • Main Dishes
    • Side Dishes and Snacks
    • Desserts
    • Gluten Free
    • Instant Pot
    • Crock Pot
    • Heavenly Homemaker’s Weekly Menus
  • Homemaking
    • Real Food Sources
  • Store
  • Contact
    • Advertise
    • Disclosure
    • Privacy Policy
  • Simple Meals
  • Club Members!

How to Make Whipped Cream

November 11, 2015 by Laura 35 Comments

This post may contain affiliate links. For more information, please see our disclosure policy.

Of all the food I make from scratch, whipped cream is the one that tends to really surprise people who are unfamiliar with the simplicity (and deliciousness) of real food cooking.

“You can make whipped cream!?!?” they ask, incredulously. That’s when I tell them that they, too, can make this treat. Then I hand them the beaters and watch as they follow my ever so simple instructions to make whipped cream. (Stand, hold beaters in bowl of cream, move beaters around a little bit, watch fun patterns forming, stop when it’s thick.) After they’ve whipped the cream, thus creating whipped cream, they can’t believe that this is all it takes. I explain that this is how whipped cream got its name. It’s all very fascinating.
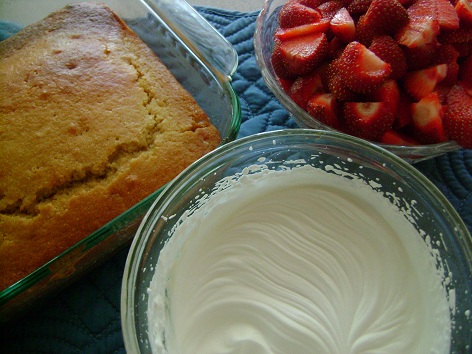
strawberry_shortcake_2

Cool Whip has us all a bit confused. I remember thinking that Cool Whip was whipped cream. As a matter of fact, Cool Whip used to be my favorite part of a holiday meal when I was a little girl. I did not even want the pie that went with it. Why would I want pie when there were tubs of Cool Whip in abundance? My cousin Rebecca and I would each get a bowl and fill it with Cool Whip. We’d sit back, giggling, licking spoonful after spoonful of Cool Whip. Our mothers and our aunts and our Nana would chuckle at us and we’d be like, “What?! This is the reason the pilgrims came over on the Mayflower.” We left the pie (and the coffee they drank with it) to the adults. Weirdos.

I’m all grown up now (she says, as she takes a sip of coffee). I’m over Cool Whip. I like the real stuff now. Real whipped cream is one of the easiest treats to make. Because it is real, it tastes absolutely amazing. Our bodies recognize it, so we don’t even have to be like “oh no, I’m eating so much fat, this is so bad for me.” On the contrary, our bodies don’t recognize and don’t know what to do with hydrogenated vegetable oil, high fructose corn syrup, sodium casienate, artificial flavor, xanthan and guar gums, polysorbate 60, sorbitan, monostearate, sodium polyphosphate.

Those are just some of the key ingredients in Cool Whip. Please don’t think it’s healthier. Or actual food. For the love of all things real, please whip cream.

How to Make Whipped Cream

Yum

5.0 from 2 reviews
How to Make Whipped Cream
 
Save Print
Author: Laura
Ingredients
  • 2 cups heavy whipping cream
  • 2 Tablespoons sugar or 10 drops liquid stevia
  • ½ teaspoon vanilla extract (optional)
Instructions
  1. Place ingredients in a high power blender. Whip on high speed for about 30 seconds or until cream has thickened. OR
  2. Put all ingredients into a large bowl. Whip with a hand mixer on high speed for 3-4 minutes or until cream thickens and forms stiff peaks.
3.4.3177

Make it Ahead

I recommend making Whipped Cream one day in advance or the morning of a big holiday meal. Prepare as directed, cover, and place in a bowl with a lid in the refrigerator until serving time. DO NOT STIR this after it has been whipped or it may deflate and become liquidy.
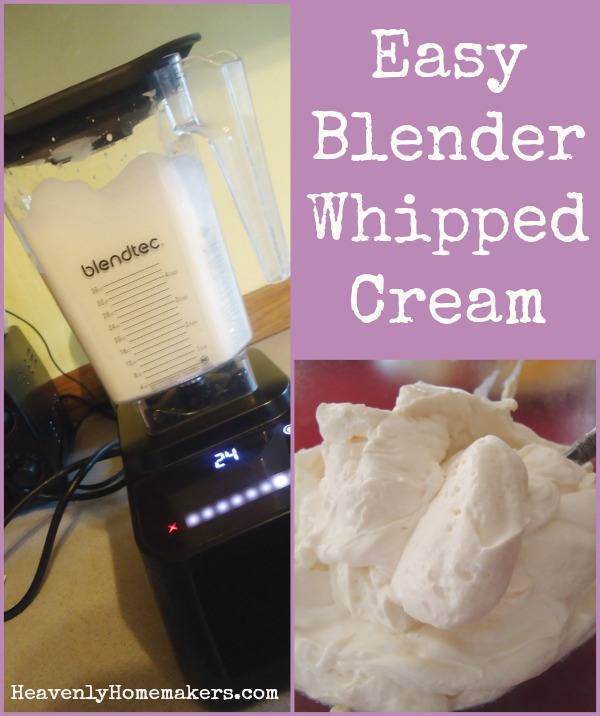
Easy Blender Whipped Cream

My new favorite way to make whipped cream is to pour cream, stevia, and vanilla into my Blendtec. I turn it on and have whipped cream 15-30 seconds later. It is so easy. The Blendtec is amazing in many ways (because hello, whipped cream in seconds). But beware: leaving the cream to whip much longer will produce butter. This is not a problem (because hello, butter in minutes) unless you wanted whipped cream for your pie. Butter is not the same.

How do you make Whipped Cream?

Here are the quick links to all the recipes we covered in this series:

  • Make-Ahead Turkey
  • Stuffing Muffins
  • Cheesy Mashed Potatoes
  • Oh Good Gravy
  • Green Bean Casserole
  • How to Make Frozen Pies
  • Simple Whipped Sweet Potatoes
  • How to make Whipped Cream
  • Whole Wheat Stir-and-Pour Dinner Rolls

Getting Ahead for the Holidays

Have you been a Cool Whip lover like I was in the past? Funny how now I can’t even stomach thinking about it. Now that I know the real deal is so easy and delicious, I don’t even see a comparison. Mmmm, real food how I love you.

~~~~~~~~~~~~~~~~~~~~~~~~~~~~~~~~~~~~~~~~~~~~~

Simple Meals is here! It’s saving my brain (and many of yours too!). If you haven’t joined yet, now’s the time. Get all the details here!

728x90

Heavenly Homemaker's Club Members: Access your homepage and all your fantastic resources here! Not a member yet? Please join us!

Simple Whipped Sweet Potatoes

November 10, 2015 by Laura 40 Comments

This post may contain affiliate links. For more information, please see our disclosure policy.

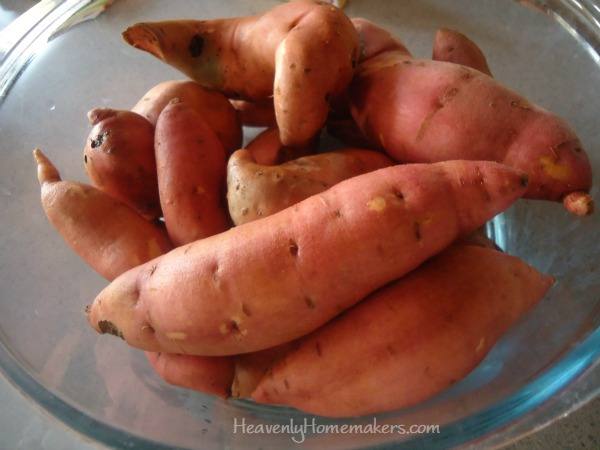
sweet potatoes2

Matt grew these beauties in our garden this summer!

Will your feelings be hurt if the sweet potatoes for your holiday meal don’t have marshmallows?

I don’t want marshmallows. My husband doesn’t want marshmallows. I’ve never even liked marshmallows (even in a s’more). But some people want marshmallows.

For example:

According to my 13-year old, the sweet potato recipe below isn’t sweet enough. Therefore I asked him, “Do you think I should add more maple syrup? Maybe even some brown sugar? Extra butter? Do you think I should salt it to bring out the natural sweetness? What do you think this recipe needs?”

With a grin, he quietly said, “Probably just marshmallows.”

Stinker. 

I do love to accommodate, especially for a holiday. Therefore, even though I vowed I never would, I looked again at homemade marshmallow recipes. Maybe for a special occasion, I thought, I could go to the trouble to make some. I searched for the marshmallow recipes that said “easy” and “quick.” But once again, I realized why I’ve never wanted to make homemade marshmallows. They might be easy, but they aren’t quick. They instruct, “Stand and whip the mixture until your legs cramp and you can no longer remember your name.”

Have I mentioned I don’t even like marshmallows?

I tell you what. If you want to add marshmallows to this recipe, I won’t even care. You can make them homemade. You can buy a package of them at the store. I will probably just skip the sweet potatoes and eat extra Green Bean Casserole. We can all still be friends. The good news is that this recipe (without the marshmallows) is incredibly simple to make, and you can make it ahead if you like!

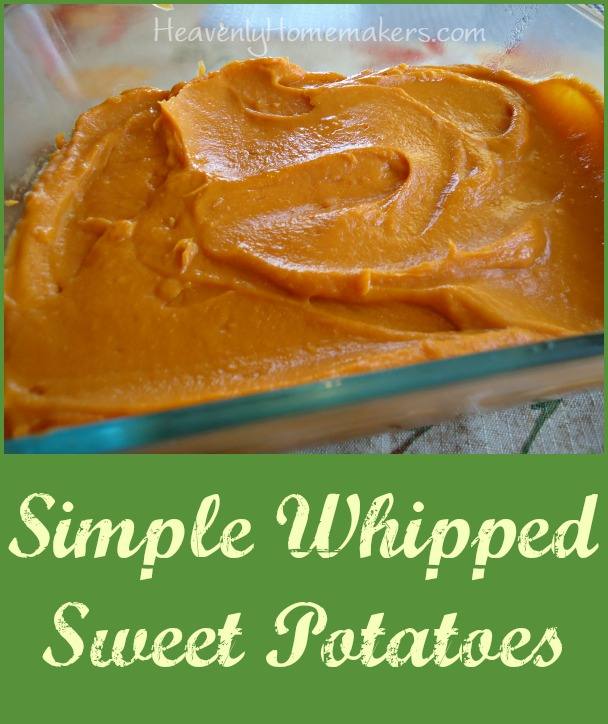
Simple Whipped Sweet Potatoes

Simple Whipped Sweet Potatoes

Simple Whipped Sweet Potatoes
 
Save Print
Author: Laura
Serves: 6-8 servings
Ingredients
  • 4-6 medium sized sweet potatoes
  • 3 Tablespoons butter
  • 3 Tablespoons real maple syrup, sucanat, or brown sugar
  • Sea salt to taste
Instructions
  1. Scrub sweet potatoes and place them in a covered baking pan.
  2. Bake them in a 350° oven for about one hour or until they are tender.
  3. The skins should peel right off!
  4. Place peeled potatoes and remaining ingredients into a high power blender or into a mixing bowl. Blend until smooth either with a blender or a hand mixer.
  5. Serve right away or follow directions below to prepare ahead of time.
3.4.3177

Make Ahead Whipped Sweet Potatoes

Yum
Make sweet potatoes according to directions above. Allow them to cool completely. Cover and refrigerate for up to two days before rewarming to serve. Or, cover and freeze the dish for up to 3 months. To reheat and serve, thaw potato dish, cover, and place in a 350° oven for about 30 minutes or until they are warm through and through.

Truly, you will want to embellish these sweet potatoes to fit your tastes. Add more sugar if you like. Toss on some marshmallows (I’ll look away). It’s a holiday! Do whatever you enjoy!

Are you a fan of marshmallows? 

Here are the quick links to all the recipes we covered in this series:

  • Make-Ahead Turkey
  • Stuffing Muffins
  • Cheesy Mashed Potatoes
  • Oh Good Gravy
  • Green Bean Casserole
  • How to Make Frozen Pies
  • Simple Whipped Sweet Potatoes
  • How to make Whipped Cream
  • Whole Wheat Stir-and-Pour Dinner Rolls

Getting Ahead for the Holidays

~~~~~~~~~~~~~~~~~~~~~~~~~~~~~~~~~~~~~~~~~~~~~

Simple Meals is here! It’s saving my brain (and many of yours too!). If you haven’t joined yet, now’s the time. Get all the details here!
728x90

Heavenly Homemaker's Club Members: Access your homepage and all your fantastic resources here! Not a member yet? Please join us!

How To Make Your Own Frozen Pies

November 9, 2015 by Laura 40 Comments

This post may contain affiliate links. For more information, please see our disclosure policy.

Last I checked, Sara Lee charges over $3 for her frozen pies. I don’t blame her. I’d charge $5. But when I make my own pies, it can cost as little as $1 and I know what ingredients I’m including. Plus I’m making mine with love and all that. (Priceless, no doubt.)

Making a frozen pie is as easy as making a not frozen pie. Not that making a pie is easy. Nor is it really hard. You just have to commit, you know? You have to be like, “Today I am going to mix together and roll out pie crusts. I’m just going to do it and get this job out of the way. Everyone will love the pie. It’s not as hard as it sounds. Let’s do this.”

Then, after you mix and roll your crusts, you add whatever filling you want (pumpkin, apple, etc). You wrap them well, and you freeze them.

This is exactly how Sara Lee does it. Only she puts hers in a box. We’ll skip that part.

This post is chuck full of pie-making tips, recipes, and instructions. Shall we begin?

How to Make a Whole Wheat Pie Crust

Yum

1.0 from 1 reviews
How To Make Your Own Frozen Pies
 
Save Print
Author: Laura
Serves: 1 crust
Ingredients
  • 1¼ cup whole wheat flour
  • ¼ teaspoon sea salt
  • ⅓ cup Palm Shortening (or butter)
  • 4-5 Tablespoons cold water
Instructions
  1. Place flour, salt and shortening in food processor.
  2. Blend until shortening is cut throughout the flour and the mixture resembles crumbs.
  3. Drizzle in the water while the food processor is still whirling.
  4. Continue until a ball of dough forms.
  5. Roll out your dough into a circle on a well floured surface.
  6. Fold the circle in half. Then fold it in half again.
  7. Place your dough in your pie dish with the folded corner in the center.
  8. Unfold the dough, shape it into the dish and make the edges pretty. (see tutorial video below)
  9. Poke your dough a few times with a fork to keep it from poofing up in the oven.
  10. Bake at 450° for 10-12 minutes or until the crust is golden brown. Or, fill it with pie filling and bake as directed in specific pie recipe.
3.4.3177

How to Shape a Pie Crust

You can look through a picture tutorial on this post to see the specifics of how to roll a pie crust and place it in a pie pan.

Want to watch me shaping a pie crust a few years ago? Watch the video below. (Click here if the video doesn’t show up for you.)

How to Make a Frozen Pie

How to Make Your Own Frozen Pies

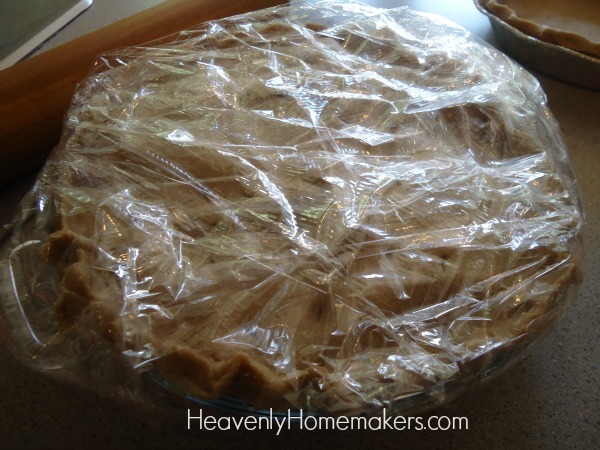
To make a frozen pumpkin or fruit pie, make it according to the directions but do not bake. Wrap the unbaked pie very well in plastic wrap. You might even consider putting the wrapped pie into a freezer bag for extra freezer protection. Label the pie. Freeze for up to three months.

To bake your frozen pie, take it out of the freezer and put it directly into a cold oven. Turn on the oven and bake as directed allowing a little extra baking time if necessary. See how easy this is?!

apple pie freezer 2

If you plan to make a cream pie, bake your crust as directed, allow it to cool, then wrap and freeze. Thaw crust and add your cream filling before serving.

Holiday Pie Recipes

Pumpkin Pie Recipe

2 cups canned or frozen pumpkin
2/3 cup brown sugar or sucanat
1 teaspoon cinnamon
½ teaspoon ginger
½ teaspoon nutmeg
3 eggs
1 ¼ cup heavy cream

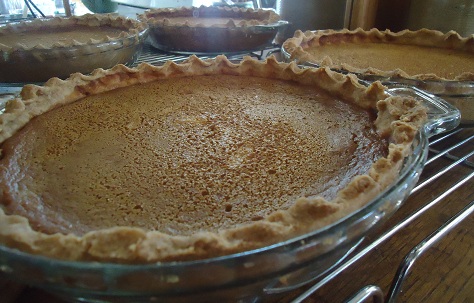
Whisk together all ingredients. Pour into unbaked pie crust. Freeze if desired. Bake at 350° for 50-60 minutes, or until a toothpick inserted in the middle of the pie comes out clean.

pumpkin_pies

Apple Pie Recipe

5-6 apples (any variety)
1/4 cup sucanat or brown sugar
1 teaspoon ground cinnamon

Wash and slice apples. Stir in sucanat and cinnamon. Make a double pie crust recipe. Place one crust on the bottom of a pie pan. Spread apple pie filling into the unbaked crust. Place the second pie crust on top. Seal and shape as shown in the video above. Freeze if desired. Bake at 350° for 50-60 minutes.

I usually have prepared Apple Pie Filling in my freezer, making this super simple.

Dutch Apple Pie Recipe

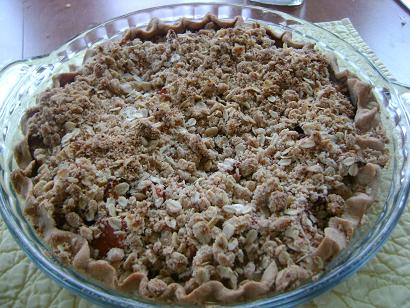
Make as directed above, only make a single pie crust. Top apples with crumb topping recipe found here.

apple_pie_palm_shortening_sm

If you’re hoping to Get Ahead for the Holidays, I highly recommend making your pies soon and putting them into the freezer to pull out for easy baking the day before your meal!

Here are the quick links to all the recipes we covered in this series:

  • Make-Ahead Turkey
  • Stuffing Muffins
  • Cheesy Mashed Potatoes
  • Oh Good Gravy
  • Green Bean Casserole
  • How to Make Frozen Pies
  • Simple Whipped Sweet Potatoes
  • How to make Whipped Cream
  • Whole Wheat Stir-and-Pour Dinner Rolls

~~~~~~~~~~~~~~~~~~~~~~~~~~~~~~~~~~~~~~~~~~~~~

Simple Meals is here! It’s saving my brain (and many of yours too!). If you haven’t joined yet, now’s the time. Get all the details here!
728x90

Heavenly Homemaker's Club Members: Access your homepage and all your fantastic resources here! Not a member yet? Please join us!

Real Food Green Bean Casserole (a Make-Ahead Dish)

November 8, 2015 by Laura 43 Comments

This post may contain affiliate links. For more information, please see our disclosure policy.

gb_casserole_2

If I had to choose a favorite holiday dish, it would have to be Green Bean Casserole. It’s not something I remember eating when I was growing up. I discovered it sometime after Matt and I got married. So yum.

The recipe I learned to make? It was the one with canned cream of mushroom and french fried onions. Man, I loved that stuff.

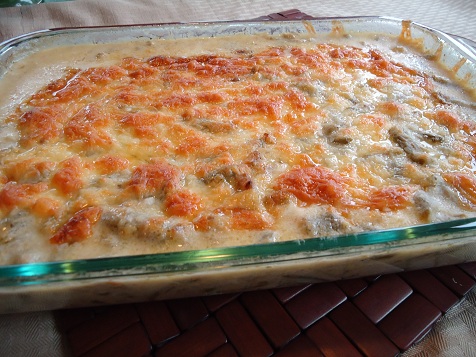
Once I learned more about cooking with real food ingredients, I knew that the canned cream of mushroom soup and French fried onions didn’t make the cut. But this casserollllllle! How to make a real food version?

gb_casserole

I learned long ago how to make cream soups. French fried onions had me stumped though – mostly because of the time I felt it would take to create them. Then all my plans to keep my real food kitchen simple would be out the window.

Finally I figured out how I could make this casserole without mushroom soup or French fried onions. It goes without saying, then, that this casserole is very easy to make. Just wait until you see how easy!

Green Bean Casserole

Yum

5.0 from 1 reviews
Real Food Green Bean Casserole (a Make-Ahead Dish)
 
Save Print
Author: Laura
Serves: 6-8 servings
Ingredients
  • 3 cups fresh or frozen green beans
  • 2 Tablespoons minced onion
  • 3 Tablespoons butter (if needed)
  • 1 Tablespoon cornstarch or whole wheat flour
  • 2 cups milk
  • Sea salt
  • 2 cups grated cheddar cheese
Instructions
  1. Steam green beans until tender. Set aside.
  2. In a large saucepan, saute onion and butter together until the minced onion is lightly toasted.
  3. Turn heat down to low.
  4. Stir in cornstarch, then add milk.
  5. Turn heat up to thicken cream sauce, stirring constantly until sauce is thick and bubbly.
  6. Stir in cooked green beans, salting liberally.
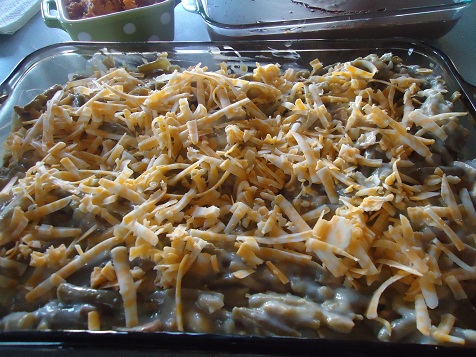
  7. Pour the mixture into a 9x13 inch casserole dish.
  8. Top with grated cheese.
  9. Cover and bake in a 350° oven for 30 minutes.
  10. Uncover and bake for 10 minutes more.
  11. Serve.
3.4.3177

To Freeze Green Bean Casserole:

Make the casserole as directed in the recipe above. All it to cool completely. Cover and freeze for up to three months.

To bake and serve, thaw casserole in the refrigerator and bake as directed. OR, cover the frozen dish with foil. Place it in a cold oven*. Turn the oven on to 250° and bake for 2 hours. Turn the oven up to 350° to continue baking to heat through.

*Be sure your oven is cold when you put in the frozen dish! Otherwise, the pan will crack because of the extreme temperature change.

Real Food Green Bean Casserole ~ a Make-Ahead Dish!

There is a One-Dish Meal version of this casserole in my Oh, For Real Cookbook called Hearty Green Bean Casserole. It includes hamburger and it is awesome.

Note that if you use corn starch instead of wheat flour to make the sauce for this recipe, it will be completely gluten free.

I think this will soon become one of your favorite holiday dishes! Then, of course, you will find yourself making it many times all year round. No need to wait for Thanksgiving and Christmas for this one!

Here are the quick links to all the recipes we covered in this series:

  • Make-Ahead Turkey
  • Stuffing Muffins
  • Cheesy Mashed Potatoes
  • Oh Good Gravy
  • Green Bean Casserole
  • How to Make Frozen Pies
  • Simple Whipped Sweet Potatoes
  • How to make Whipped Cream
  • Whole Wheat Stir-and-Pour Dinner Rolls

Getting Ahead for the Holidays

~~~~~~~~~~~~~~~~~~~~~~~~~~~~~~~~~~~~~~~~~~~~~

Simple Meals is here! It’s saving my brain (and many of yours too!). If you haven’t joined yet, now’s the time. Get all the details here!

728x90

Heavenly Homemaker's Club Members: Access your homepage and all your fantastic resources here! Not a member yet? Please join us!

Oh Good Gravy ~ How to Make Turkey Gravy

November 5, 2015 by Laura 42 Comments

This post may contain affiliate links. For more information, please see our disclosure policy.

I’ve probably told you about the first time I made gravy for Matt (who was my boyfriend at the time). It was so thick he had to spread it onto his potatoes with a knife. I’m pretty sure it was flavorless. He still married me a year later.

Thankfully, I’ve improved my gravy-making skills. I think it gets easier with practice. Sometimes I still mess it up. I’ve been known to strain out lumps while distracting my guests by sending them outside to look for the black squirrels we sometimes have on our property. Straining works, and black squirrels are fascinating.

Below you’ll find step-by-step instructions (with pictures!) to make your gravy-making experiences easier.

While this series is called “Getting Ahead for the Holidays,” gravy is actually one part of the meal I save for the last minute. This still isn’t hard though. Here’s why:

  1. I’ve already made the broth for this gravy a couple of days before the holiday meal when I made the turkey. Therefore, I just have to rewarm some broth and whisk it into gravy (details below).
  2. I’ve made so many of our other dishes ahead of time that I have plenty of time to make gravy just before serving the meal.
  3. Turkey Gravy can be made in only about 10 minutes.

Why do I wait until the last minute to make gravy?

Because it tastes best this way. You can make it ahead of time and rewarm it before serving (we do this with leftover gravy, after all). But I prefer to make a fresh batch for a special meal on Thanksgiving or Christmas.

How to Make Turkey Gravy

Oh Good Gravy

Yum

Oh Good Gravy ~ How to Make Turkey Gravy
 
Save Print
Author: Laura
Ingredients
  • Turkey broth
  • Cornstarch, arrowroot powder, or wheat flour (about 2 Tablespoons for every 2 cups of broth)
  • Cold water (about ⅓ cup for each of your 2 Tablespoons of corn starch/arrowroot/flour)
  • Sea salt
Instructions
  1. Spoon cornstarch (or arrowroot or flour) into a small jar or glass.
  2. Add water to to the jar and whisk smooth with a fork.
  3. Pour broth into a medium saucepan. Heat to boiling.
  4. Slowly pour cornstarch (or arrowroot or flour) and water mixture into boiling broth, whisking while you pour.
  5. Stir at medium to high heat until gravy thickens.
  6. Turn down the heat and allow the gravy to simmer for a minute or two.
  7. Salt to taste and serve your gravy.
3.4.3177

You’ll notice my recipe gives the option of using cornstarch, arrowroot powder, or wheat flour to thicken your gravy. Any will work. I prefer cornstarch because it’s easiest. Arrowroot powder works well but can sometimes result in a gooey gravy. Wheat flour works well, but I’d rather avoid it so that people with a gluten or wheat intolerance can still enjoy it.

Trouble Shooting Your Gravy

  • If it isn’t thick enough for your liking, simply stir 2 Tablespoons cornstarch/arrowroot/flour into about 3 Tablespoons of water – making a consistency just thinner than paste. Stir it into your gravy while it is hot, whisking until smooth. This should thicken it up as it cooks.
  • Lumpy gravy? Whisk like you’ve never whisked before.
  • Still lumpy? Strain out the lumps the best you can. Pray your guests like lumpy gravy. Hey, you never know.

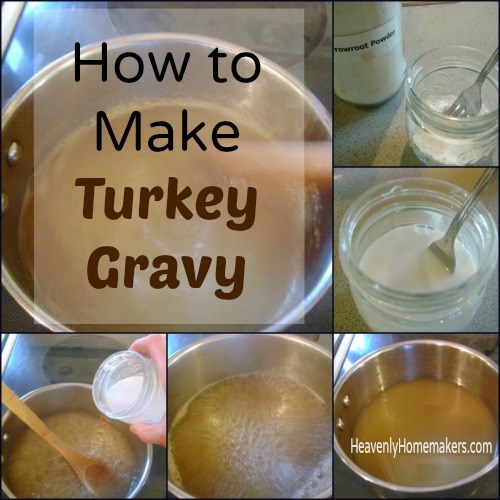
Here is a picture tutorial to show you the specifics of making Turkey Gravy:

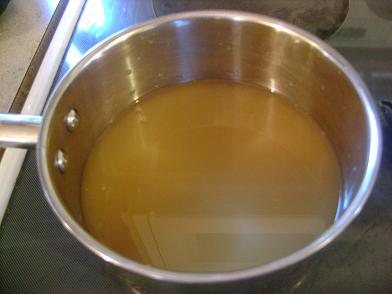
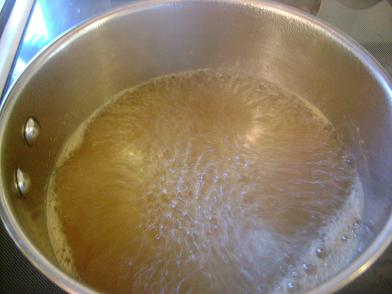
Step One: Pour broth into a medium saucepan.

gravy2sm

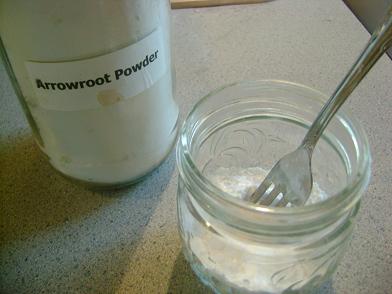
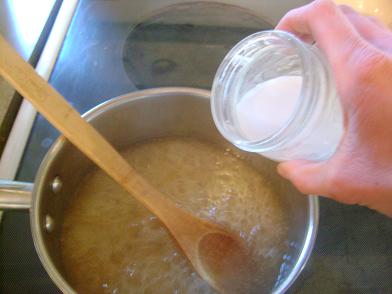
Step Two: Spoon cornstarch (or arrowroot or flour) into a small jar or glass.
(Surprise, surprise…I use  a jar.)

gravy1sm

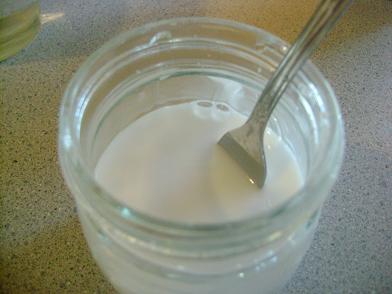
Step Three: Add cold water to cornstarch/arrowroot/flour and whisk smooth with a fork.

gravy3sm

Step Four: Bring broth to a boil.

gravy4sm

Step Five: Slowly pour cornstarch (or arrowroot, or flour)/water mixture into boiling broth, stirring while you pour. (I usually use a whisk. On picture taking day, I used a wooden spoon. Either one works, but a whisk usually helps in case lumps want to form.

gravy5sm

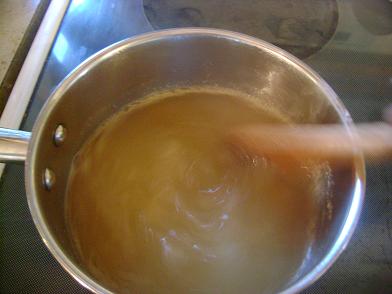
Step Six: Stir at medium to high heat until mixture thickens.
Turn down the heat and allow the gravy to simmer for a minute or two.
Salt to taste.

gravy6sm

What has been your gravy making experience? Do you find it easy? Hard? Lumpy?

Here are the quick links to all the recipes we covered in this series:

  • Make-Ahead Turkey
  • Stuffing Muffins
  • Cheesy Mashed Potatoes
  • Oh Good Gravy
  • Green Bean Casserole
  • How to Make Frozen Pies
  • Simple Whipped Sweet Potatoes
  • How to make Whipped Cream
  • Whole Wheat Stir-and-Pour Dinner Rolls

~~~~~~~~~~~~~~~~~~~~~~~~~~~~~~~~~~~~~~~~~~~~~

Simple Meals is here! It’s saving my brain (and many of yours too!). If you haven’t joined yet, now’s the time. Get all the details here!

728x90

Heavenly Homemaker's Club Members: Access your homepage and all your fantastic resources here! Not a member yet? Please join us!

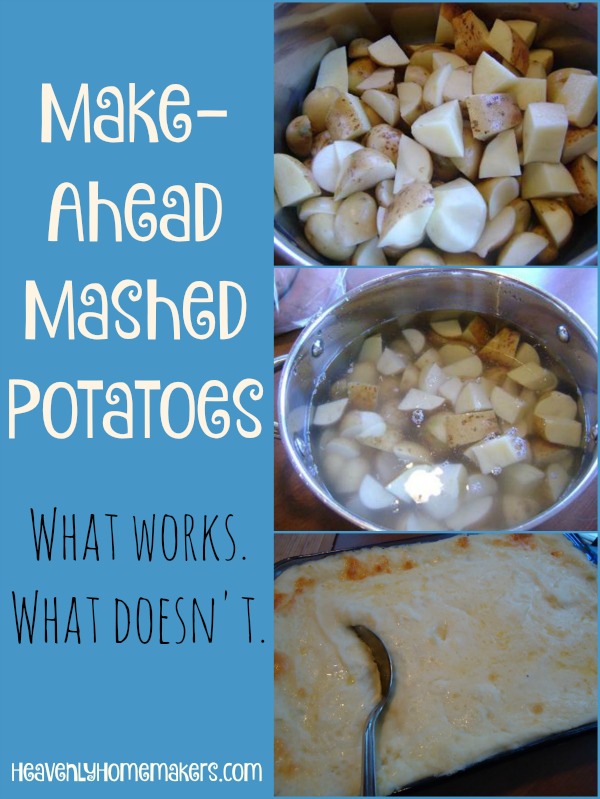
Can You Make Mashed Potatoes Ahead of Time?

November 4, 2015 by Laura 53 Comments

This post may contain affiliate links. For more information, please see our disclosure policy.

Oh yes. You can. You can make mashed potatoes ahead of time.

potatoes_2

Now, there are some things you’ll need to avoid. Here are two mashed potato tricks that do not work:

1. Do not boil potatoes with the plan to mash and serve them later.

While this seems like such a good idea, this will turn them into a sticky, gooey mess.

2. Do not make mashed potatoes and freeze them as-is.

I’ve never had success with this. Plain mashed potatoes freeze fine but thaw weird. They are always watery and unappetizing. These are not the kind of potatoes I want to include on my holiday table. If you do freeze them as-is, you must cook the frozen/thawed potatoes in a pot to steam off excess water that has formed in the freezing process. More info to come.

Make-Ahead Mashed Potatoes ~ What Works, What Doesn't.

Ways to prepare this side dish favorite ahead of time:

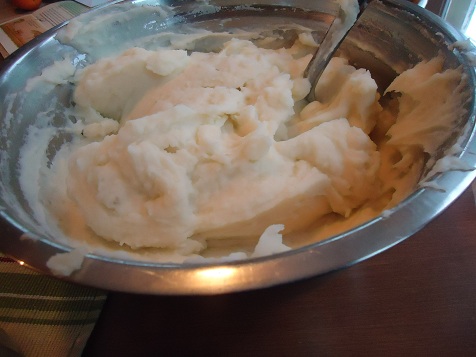
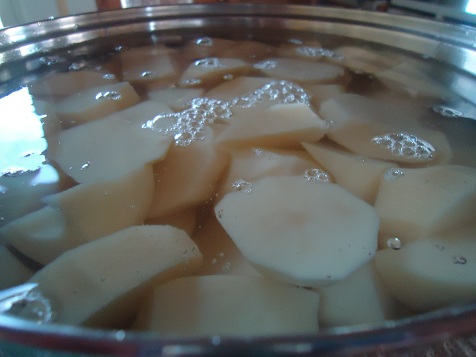
1. Scrub or peel the potatoes and put them into a pot of cold water.

Want to get the prep work out of the way on a busy day filled with meal preparations? Typically I pull my family into the kitchen the night before the holiday meal. Together, we scrub and chop potatoes. We put them into a large pot, cover them with cold water, put on a lid, and leave them until boiling and mashing time the next day.

potatoes

2. Make mashed potatoes, then use your crock pot to keep them warm.

What I find very helpful is to follow all the instructions detailed in #1 to prep the potatoes the night before. The next morning – hours before our meal – I cook, drain, and mash. I then put them into a crock pot (with butter, always) on the “keep warm” setting until serving time. In the meantime, I can wash and put away the potato pot, then focus on other meal prep that needs to be done.

3. Embellish the mashed potatoes before freezing them.

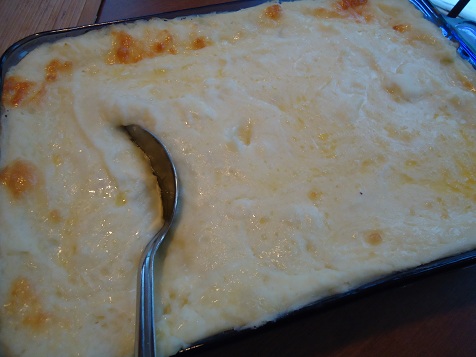
While mashed potatoes don’t freeze well as-is, they do freeze well if you add some goodies to them. Take a look at the recipe below for all the specifics! When made like that, they do freeze well. Or, at the very least, you can make them a few days before your holiday meal, refrigerate them, then bake them on serving day. This is the method I plan on using this holiday season.

cheesy_mashed_potatoes

Cheesy Mashed Potatoes are always a huge hit. You can’t go wrong with sour cream and cheese right?

Make-Ahead Cheesy Mashed Potatoes

Yum

5.0 from 1 reviews
Make-Ahead Cheesy Mashed Potatoes
 
Save Print
Author: Laura
Serves: 8-10 servings
Ingredients
  • 8 medium-sized potatoes
  • 1 cup milk (more or less as needed)
  • sea salt to taste
  • 3 Tablespoons butter
  • 1 cup sour cream
  • 1 cup shredded cheese
Instructions
  1. Scrub and cube potatoes.
  2. Boil them in water until tender.
  3. Drain water and mash potatoes with milk and salt until smooth.
  4. Stir together the mashed potatoes, butter, and sour cream.
  5. Spread into a 3 quart casserole dish.
  6. Sprinkle cheese on top.
  7. Refrigerate until you are ready to bake this dish.
  8. Bake in a 350° oven for 45 minutes.
3.4.3177

Freezing Instructions:

Make the potatoes as directed in the recipe above. All it to cool completely. Cover and freeze for up to three months.

To bake and serve, thaw potatoes in the refrigerator and bake as directed. OR, cover the frozen dish with foil. Place the frozen dish of potatoes into a cold oven*. Turn the oven on to 250° and bake for 2 hours. Turn the oven up to 350° to continue baking to heat through.

*Be sure your oven is cold when you put in the frozen dish! Otherwise, the pan will crack because of the extreme temperature change.

What has been your experience with making potatoes ahead of time?

Here are the quick links to all the recipes we covered in this series:

  • Make-Ahead Turkey
  • Stuffing Muffins
  • Cheesy Mashed Potatoes
  • Oh Good Gravy
  • Green Bean Casserole
  • How to Make Frozen Pies
  • Simple Whipped Sweet Potatoes
  • How to make Whipped Cream
  • Whole Wheat Stir-and-Pour Dinner Rolls

~~~~~~~~~~~~~~~~~~~~~~~~~~~~~~~~~~~~~~~~~~~~~

Simple Meals is here! It’s saving my brain (and many of yours too!). If you haven’t joined yet, now’s the time. Get all the details here!
728x90

Heavenly Homemaker's Club Members: Access your homepage and all your fantastic resources here! Not a member yet? Please join us!

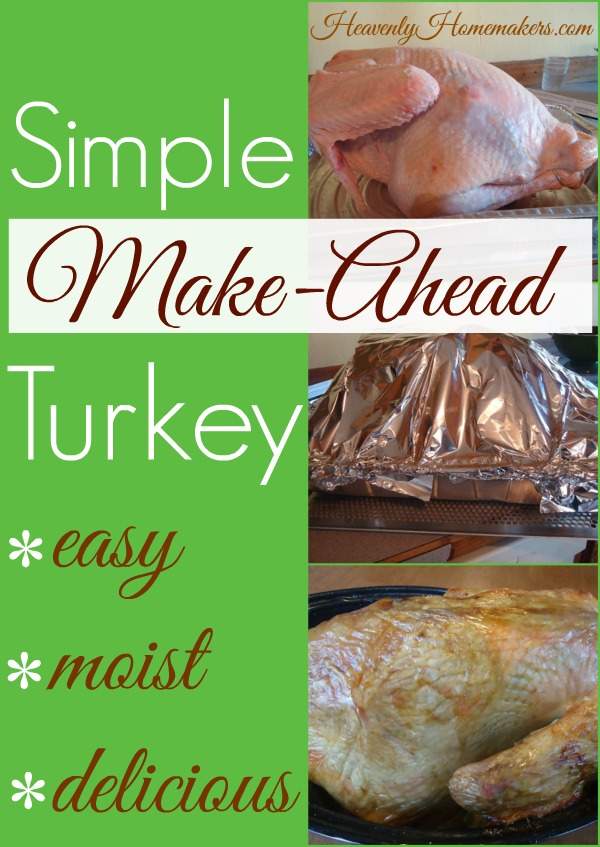
Make-Ahead Turkey ~ Yes You Can!

November 3, 2015 by Laura 73 Comments

This post may contain affiliate links. For more information, please see our disclosure policy.

Make-Ahead Turkey? Oh yes, indeed!

turkey22sm

There are people who wake up in the middle of the night to begin cooking their turkey for a holiday meal. There are people who baste and stuff and rub down their bird. These people are so very nice and dedicated to poultry perfection.

And then there’s me.

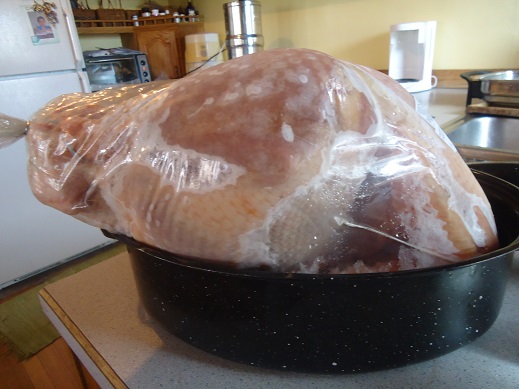
huge turkey 1

That is one huge bird.
Read the whole tale here.

I cannot find it within myself to do any of this to my turkey. I’m just not as devoted of a holiday baker as some. I’m a plop the bird in a pan, add nothing to it, cover it, put it in the oven, and take it out a few hours later kind of girl.

And…my favorite turkey baking tip of all: I cook my bird before the holiday. Like, two days before, usually.

I bake it, de-bone it, prepare all the broth, dispose of the carcass – basically I do all the messy, tedious, laborious turkey work ahead of time. Then on the day of the holiday feast, I take out my big dish of cooked meat, pour on a little broth, cover it, rewarm it, and we eat it. This is stress-free turkey baking.

My turkey always still tastes delicious.

That’s why I keep doing it this way.

No, our table doesn’t hold a big un-carved turkey. There is no turkey carving tradition at our house. For those who love traditions like this, I say go for it! Baste and carve and enjoy that special tradition.

But for those who find the turkey to be tedious, you might instead consider making it ahead of time.

But won’t the meat be dry?

Not if you don’t over-bake it in the first place.

The trick is to drizzle broth over your cooked, de-boned meat (I’d say one-two cups of broth per 9×13 inch dish full of meat), then cover the dish well. I warm it on Thanksgiving day for 30-45 minutes in a 300-350° oven along with other dishes that are baking. I pull it out and have a steaming, moist, delicious pan of turkey.

Make-Ahead Turkey

Yum

4.8 from 5 reviews
Make-Ahead Turkey
 
Save Print
Author: Laura
Ingredients
  • 1 Turkey
  • Seasonings of your choosing
  • 1 Large Roasting Pan
  • Foil if necessary
Instructions
  1. Place the turkey in the refrigerator for 3-4 days until thawed.
  2. Remove the bag of giblets from the inside of the turkey.
  3. Empty the giblets into your roasting pan as they help make a good, rich broth.
  4. Place the bird, breast side up, into a large baking pan or roaster.
  5. Season however you like.
  6. Cover with foil or with your roaster lid.
  7. Cook at 325° for 15-20 minutes per pound.
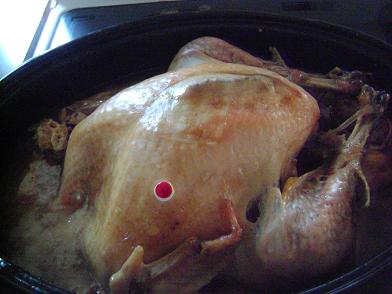
  8. You know your turkey is done cooking when the red thing pops up, or when the legs start to pull away from the body. It should be golden brown and slightly crisp looking.
  9. Be sure to save the broth that formed naturally!
  10. Allow the turkey to cool, then de-bone completely. Store meat in baggies or in covered pyrex dishes in the refrigerator.
  11. Save turkey carcass to make another round of broth for gravy, soup, and other nourishing meals.
  12. On serving day, drizzle a liberal amount of broth (one-two cups per 9x13 inch pan of meat) over turkey, cover and warm in 300°-350° oven for 30-45 minutes or until meat is hot and steamy.
  13. Serve right away.
3.5.3251

Simple Make-Ahead Turkey ~ Easy, Moist, Delicious

Additional Turkey Tips:

  • Adding a few onions to the turkey while baking is an effortless way to add more flavor.
  • Be sure to save the broth that forms naturally while your bird bakes.
  • Do not wait until your turkey is cold to take the meat off the bones. This makes the job much harder!
  • After you’ve taken all the meat off the bones, save the bones and put them into a stock pot. Fill the pot with water, carrots, onions, and any other veggies you like. Salt liberally. Cook on low for 4-6 hours to create a wonderful broth. Strain out bones. Blend the veggies until smooth and stir them back into the broth for added richness.
  • Use turkey broth for gravy. Use it to make Turkey and Noodles a few days after Thanksgiving. Use it for any soup or recipe that calls for chicken broth.
  • While making your turkey ahead of time is wonderfully helpful in cutting down work on your holiday meal serving day, you don’t want to make it too far in advance! I recommend making it on Tuesday or Wednesday, then serving it on Thanksgiving Thursday.

What’s your turkey tradition? To carve, or not to carve? To baste, or not to baste? Ever made a turkey ahead of time?

Here are the quick links to all the recipes we covered in this series:

  • Make-Ahead Turkey
  • Stuffing Muffins
  • Cheesy Mashed Potatoes
  • Oh Good Gravy
  • Green Bean Casserole
  • How to Make Frozen Pies
  • Simple Whipped Sweet Potatoes
  • How to make Whipped Cream
  • Whole Wheat Stir-and-Pour Dinner Rolls

~~~~~~~~~~~~~~~~~~~~~~~~~~~~~~~~~~~~~~~~~~~~~

Simple Meals is here! It’s saving my brain (and many of yours too!). If you haven’t joined yet, now’s the time. Get all the details here!
728x90


~~~~~~~~~~~~~~~~~~~~~~~~~~~~~~~~~~~~~~~~~~~~~~~~~~

Subscribe for FREE to Heavenly Homemakers so you won’t miss all the new Simple Recipes and ideas we share to save you money!

Heavenly Homemaker's Club Members: Access your homepage and all your fantastic resources here! Not a member yet? Please join us!

When Thanksgiving and Christmas Collide ~ And It’s a Good Thing

November 26, 2014 by Laura 6 Comments

This post may contain affiliate links. For more information, please see our disclosure policy.

give thanks

Today, my family is celebrating Thanksmas. Hey, it’s a real thing. It’s when Thanksgiving and Christmas collide because of travel plans and family circumstances. We won’t be able to see my Kansas family on December 25. Instead, we’re celebrating both holidays together – today, at the same time.

“Oh no!” one might think. “We should never skip through Thanksgiving and jump into Christmas, forgetting to be thankful.”

I’ll agree with you completely on one point:  We should never forget to be thankful.  Never, ever.  But blending the two holidays? I have decided that it’s perfect. I’ve also decided that this same concept is perfect in the middle of February, early in April, and during summer break. After all, if I only choose to consider “what I’m thankful for” during Thanksgiving season and “how wonderful it is that God sent Jesus to earth” during the Christmas season – I have completely missed some major Truths in the Bible about who I’m called to be, and where my heart should be focused.

Hooray for holidays that bring our attention back to these important areas of focus! But not only do I disagree that we shouldn’t blend the holidays, I believe we’ve actually missed something very important if we don’t.

Our God is an amazing God – today, on December 25, and even on Black Friday, if you can possibly imagine. But, ack! What about all the commercialism?! Marketing tools! Flyers and ads and sales – they are everywhere this time of year! That is a true fact.

Also a true fact:  There are gimmicks and commercials and marketing ploys 365 days of the year – all of which are insisting I need their product in order to have a full and happy life. The only difference right now is that commercials slap the words “gift giving” on the reason they’re asking us to buy stuff. At least it’s better than telling us to buy something for ourselves because “we’re worth it,” wouldn’t you say?

Are we losing Thanksgiving because of all the Christmas hype? My thought is that it’s not up to what time the stores open their doors, or the fact that some are not closing theirs at all. It’s not up to sale flyers or commercials. It’s up to you and me.  It’s about our heart focus. Nothing in our lives can be separated. I don’t care when you shop, what you buy, how much you spend, or whether you ate turkey or ham. Jesus and a thankful heart go hand in hand, every single day – no matter the holiday, season, or date on a calendar.

For the record, today, not only am I celebrating Thanksgiving (so much to be thankful for!) and Christmas (how exciting that God sent His Son!) – I’m also celebrating Easter (praise God, Jesus died and rose again!) and Valentine’s Day (Love you, Matt!! XOXOXO). I’ll celebrate it all over again tomorrow. And since tomorrow just so happens to be Black Friday, I might also pick up a good deal or two. Bonus!

Have a blessed holiday season! May our hearts yearn for Truth, may our souls find peace, may we always be grateful.

Heavenly Homemaker's Club Members: Access your homepage and all your fantastic resources here! Not a member yet? Please join us!

The Tale of the Huge Turkey

November 26, 2013 by Laura 45 Comments

This post may contain affiliate links. For more information, please see our disclosure policy.

I decided this year to order the biggest bird I could find. It made sense. The local farmer I was purchasing from offered all free-range turkeys over 18 pounds at a flat rate. I told him I would take one of their biggest, and on delivery day, the hugest turkey I’d ever seen showed up on our porch.

This week, in preparation for our big Thanksgiving feast, I thawed Mr. Turkey so that I could get him baked and deboned. (Here’s my easy method for preparing the turkey ahead of time and re-warming it on Thanksgiving day.)  All was well until I got out my big roasting pan.

huge turkey 1

Uh-huh. I could actually hear the turkey laughing out loud at the very idea of me trying to bake him in what now appeared to be a very tiny pan.

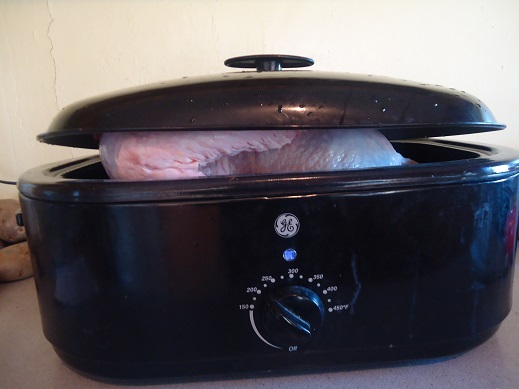
No problem, I thought. I’ll just get out my large roaster oven. Surely that would be plenty big enough.

huge turkey 2

At least the turkey fit inside. But no way, no how was that lid going on. And a lidless roasting pan would not bake a turkey. Okay then. Plan C?

Hmmm, Plan C. Plan C. I had not foreseen the need for a Plan C. As I stared at the huge bird (who by now was rolling his eyes, shrugging his wings, and getting bored with the entire situation), I racked my brain for options. Go to the store and fork out money for….yeah right. Just a few days before the holiday? What would my store even carry that would be big enough to bake this bird?

It occurred to me that maybe I could bake the turkey directly on the oven rack, with a pan underneath to catch the drippings. I immediately recognized that this was a silly idea since I didn’t have a pan large enough in the first place, so all the drippings couldn’t be caught. I could just envision a dried out turkey with lots of drippings crusted all over the bottom of my oven. Not to mention the fact that when drippings drip in a hot oven, the coils can catch fire, smoke can fill a kitchen, smoke alarms can scream for way too long, houses can smell horrible, and Thanksgiving dinners can be ruined.

You realize all these thoughts went through my head in a time span of about 45 seconds? Nonetheless, I was practically waving a tea towel in front of the smoke alarm just picturing the entire scene.

I moved on to Plan Q – which involved texting a friend. I remembered that she had mentioned that she had an extra large aluminum pan at her house. I don’t love baking in aluminum, and I doubted that such a pan existed that would fit my gigantic-sized turkey, but I figured it was worth a shot. Within an hour, my friend arrived with two roasting pan options. One pan was tiny – as in, it was made for normal sized turkeys. But the other one? Well, I could have leapt for joy. That pan fit my turkey with several inches to spare!

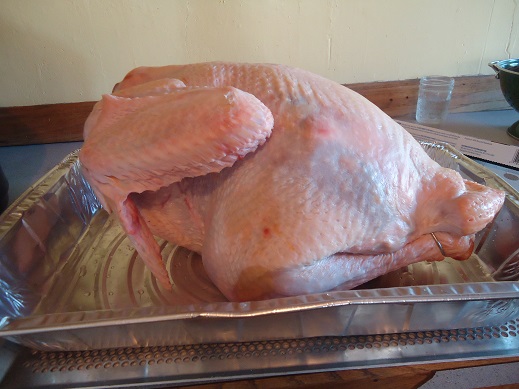
huge turkey 3

As you can see, the turkey feels exposed, being photographed in all his glory. He’s even blushing a slight pink. Here – I’ll cover him:

huge turkey 4

And into the oven he went. My friend saved the day. The turkey turned out tasty. And even though we’ll be feeding 15 people on Thanksgiving, I do believe we might have a bite or two of leftover turkey to enjoy in a sandwich this weekend.

Have you ever seen a turkey that big? Do you have any fun Thanksgiving preparation stories to tell?

Heavenly Homemaker's Club Members: Access your homepage and all your fantastic resources here! Not a member yet? Please join us!

Free Printables at Heavenly Homemakers ~ Be Thankful Wreath Craft

November 21, 2013 by Laura 2 Comments

This post may contain affiliate links. For more information, please see our disclosure policy.

freeprintables2

Here’s a fun and simple craft you or your kids can make to decorate for Thanksgiving! Here’s what to do:

  1. Print the two downloads we have provided.
  2. Cut out the leaves.
  3. Glue or tape the leaves together in a circle. You may find it works better to affix them to a wire hanger that has been pulled into a circular shape.
  4. If you like, give your leaves personality by adding some googly eyes.
  5. Hang your Be Thankful Wreath.

In addition, your family might enjoy writing on the leaves, sharing what you are thankful for.

Printable-Wreath-prev2

These fun printables are available for free for all of our Learning Zone members. 

Why be a Learning Zone member? Because you’ll get loads of free printables that will bless your family as you learn and grow together!

Sign up to join our free Learning Zone here!

Heavenly Homemaker's Club Members: Access your homepage and all your fantastic resources here! Not a member yet? Please join us!
« Previous Page
Next Page »

Join Our Community!

 Facebook Twitter E-mail Instagram Pinterest

Popular Posts

~ Will All of the Real Moms Please Stand Up?
~ Easy! Stir-and-Pour Whole Wheat Bread
~ How to Make Gatorade
~ 31 Real Food Breakfast Ideas
~ Dear Teenage Girls...
~ When Mom Takes a Step Back
~ The Inexpensive Health Insurance We Love!
~ Let's Talk Real Food Grocery Budgets

Check out our latest posts!

  • Big Family Food and Fun: May 17-23, 2026
  • Easy Side Dishes for Summer
  • Big Family Food and Fun: May 10-16, 2026
  • Big Family Food and Fun: May 3-9, 2026
  • Help Your Kids Become Independent in the Kitchen!
Home  ~  Simple Meals  ~  Club Membership  ~  Shop  ~  Privacy Policy  ~  Disclosure  ~ Contact

Copyright © 2026 · Beautiful Pro Theme on Genesis Framework · WordPress · Log in