Heavenly Homemakers

Encouraging women in homemaking, healthy eating and parenting

  • Home
    • About
    • FAQs
  • Recipes
    • Bread and Breakfast
    • Condiments
    • Dairy
    • Main Dishes
    • Side Dishes and Snacks
    • Desserts
    • Gluten Free
    • Instant Pot
    • Crock Pot
    • Heavenly Homemaker’s Weekly Menus
  • Homemaking
    • Real Food Sources
  • Store
  • Contact
    • Advertise
    • Disclosure
    • Privacy Policy
  • Simple Meals
  • Club Members!

How to Have a Successful Freezer Cooking Day

March 22, 2020 by Laura Leave a Comment

This post may contain affiliate links. For more information, please see our disclosure policy.

Hoping to get ahead by having a successful freezer cooking day? Here’s how!
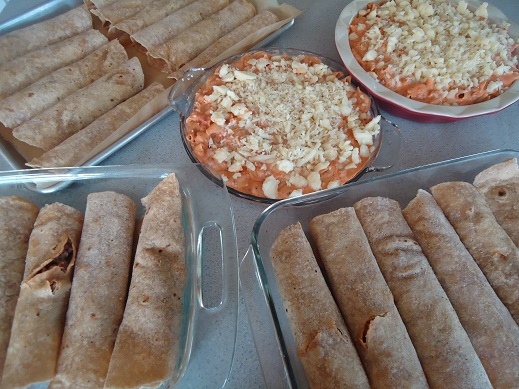
Why have a freezer cooking day?

I love to have food pre-made and in the freezer to pull out and use as convenience foods on extra busy days! It’s beyond great to have a casserole in the freezer that I can slide into the oven for dinner without any prep (because I’ve already done the prep!).

In addition, it’s great to have muffins or cookies ready to pull out to bake or serve with just a few minutes’ notice.

If you have extra freezer space, it is worth your time to spend a few hours getting head so you can save time and energy later!
How to Have a Successful Freezer Cooking Day

Here are my top bullet points, with details to follow:

  1. Make a plan
  2. But don’t over plan
  3. Consider how you can multitask
  4. Get out everything possible the night before
  5. Be prepared for a mess, and save energy to clean it up!
  6. Have your evening meal already prepared and ready to serve.

1. Make a plan.

It’s a great idea to jot down a list of food you want to make ahead of time for your freezer so that you can prepare for your freezer cooking hours. Buy the groceries you’ll need, block out the time necessary for your freezer cooking extravaganza, and consider how you can make your time most efficient.

2. But don’t over plan.

But wait! Take it from me, the one who used to almost pass out during her freezer cooking days by trying to execute too much then becoming exhausted and grouchy at the kids (sorry, boys).

Be reasonable when you make your freezer cooking plan. If you only have two hours, your to-do list needs to be able to be fulfilled within just an hour and a half so you still have the energy to clean up afterward (see #5).

It’s easy to become overexcited, thinking of ALL THE THINGS you want to put into the freezer. Yay, you! But make your lofty list, then consider paring down to what is actually doable and reasonable. Perhaps break your lofty list into two or three different freezer cooking time slots.

3. Consider how you can multitask.

When making your list, look at what will help you be the most efficient with your time and energy. For instance:

Perhaps your freezer cooking day can focus on chicken dishes so that you can get out fewer ingredients, cut up several meals worth of chicken at once, and knock out more work in less time.

Or maybe your freezer cooking day is all about baked goods this time. Again, you can get out fewer ingredients so instead of working with meat and vegetables and flour and sugar – you are instead only focused on putting together sides, snacks, and desserts this time.

4. Get out everything possible the night before.

Say you’ve decided to make three batches of muffins, a double batch of cookies, and a pan of oatmeal bars during your freezer cooking session. The night before you are ready to take on the task set out all possible ingredients like baking powder, salt, sugar, flour, etc. Thaw your butter, lay out your recipes (or pull them up on your computer), get out bowls and measuring cups.

Whatever you can do to make the job easier tomorrow, do it today. Thaw meat, grate cheese, prep veggies, get out freezer bags. If you grind flour for baked goods, get that flour ready so you’ll save time tomorrow.

5. Be prepared for a mess, and save energy to clean it up!

In my experience, freezer cooking makes a pretty big mess. It’s worth it though, because of how easy it is to use and serve these prepared foods later! So remember that the mess you’re making now saves many messes later!

But also keep in mind that after you’ve spent an hour or four prepping food for the freezer, you’ll be a bit tired from your work. Plan ahead to save some of your energy and time to wash dishes, wipe down messy countertops, and sweep the floor.

6. Have your evening meal already prepared and ready to serve.

Is it just me, or do you ever not feel like cooking after you’ve spent the day cooking?

It is a good idea to plan ahead for this because, for some reason, everyone will still want to eat the night of your freezer cooking day. Crazy.

My suggestion is to have something in the crockpot already cooking, or better yet, if you’re making some casseroles for the freezer, save one to bake for dinner tonight.

7. It is worth noting that…

If you have big kids, they should be put to work with you on this endeavor! My big kids are my cheese graters, my floor sweepers, and my general go-to taskers. I have gotten very good at handing out small jobs left and right, which makes every big job (including freezer cooking!) so much easier!
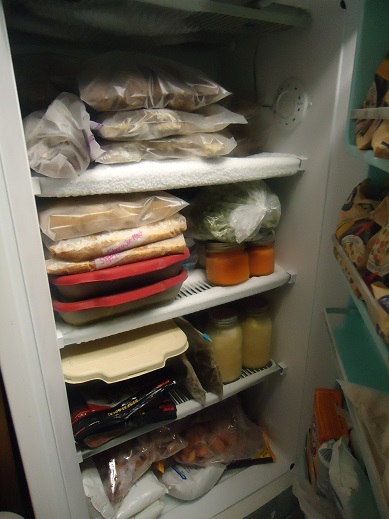
Want some freezer cooking ideas?

Here are some great ideas to get you started!

  • 49 Favorite Freezer Breakfast Foods
  • 24 Favorite Lunch and Dinner Freezer Foods

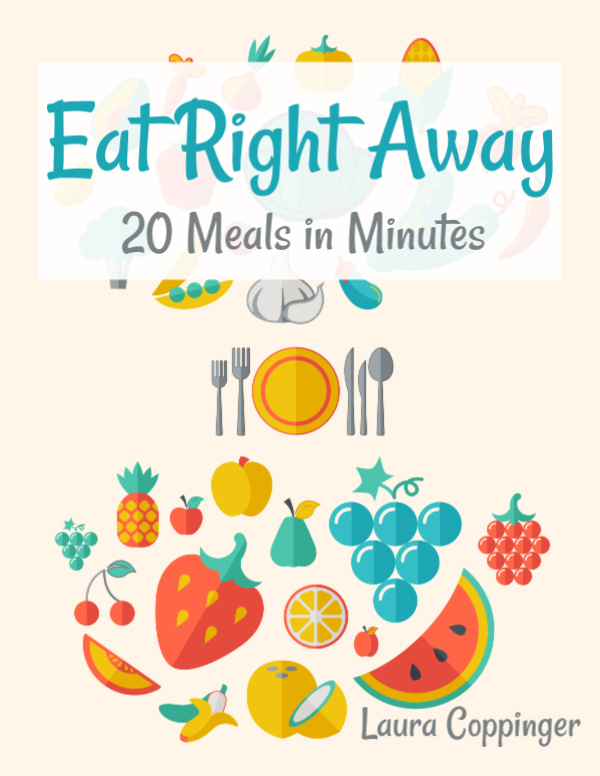
Eat Right Away!

You can buy this awesome eBook that includes all the details, recipes, and grocery lists 20 meals you can make ahead for your freezer. Or become a club member and access it any time!
Heavenly Homemaker's Club Members: Access your homepage and all your fantastic resources here! Not a member yet? Please join us!

Lilla Rose Spring Sale!

March 19, 2020 by Laura Leave a Comment

This post may contain affiliate links. For more information, please see our disclosure policy.

Ready to celebrate spring? Treat yourself to a hair-pretty from Lilla Rose! They are having a “Spring is in the Hair” Sale!

Starting at 10 am Eastern time on Thursday, you can get…

50% Off Surprise Flexi Clips!

50% Off Surprise Items!
50% Off Retiring Styles!
20% off EVERYTHING Else!
Plus…
FREE SHIPPING on orders of $40 or more!

What a fun way to welcome spring!

Please let Paula, my sweet Lilla Rose stylist, know if you have any questions whatsoever! She will be happy to help so you can find a Flexi you love!

Sale ends at midnight, Pacific time on Saturday, March 21.

Fine print:
Must select free shipping at check out.
Percent off amounts are as shown on the website.
All items are while supplies last, no backorders.

Heavenly Homemaker's Club Members: Access your homepage and all your fantastic resources here! Not a member yet? Please join us!

Learn How to Do a French Twist

March 16, 2020 by Laura Leave a Comment

This post may contain affiliate links. For more information, please see our disclosure policy.

I know that many of you have super-long hair, so that doing a French Twist may be a little tricky. I found this fun tutorial, provided by Paula, our Lilla Rose consultant, to be super helpful!!

Here is a quick and easy video tutorial showing you how to do a French Twist in any length of hair, from medium to extra long. This is so simple that you can easily do it for every day to get your hair up and out of the way, yet look classy at the same time!

Click the image below to watch:

How to Do a French Twist


The Flexi Kathleen is wearing in this video is the beautiful Turquoise Tranquility…so pretty!

If you’d like to get more simple hairstyling tutorials like this, be sure to sign up for Paula’s 7 Days of Quick and Easy Hairstyles. Most can be done in a minute or less!

Heavenly Homemaker's Club Members: Access your homepage and all your fantastic resources here! Not a member yet? Please join us!

How to Make Perfect French Toast

March 15, 2020 by Laura 3 Comments

This post may contain affiliate links. For more information, please see our disclosure policy.

Want to know the secret ingredient that makes Perfect French Toast? How about two secret ingredients? Mhmm, these ingredients are about to become not-so-secret…

I realize that these tricks may be what you’ve been doing all along to make Perfect French Toast. Still, it’s fun to share, just in case. Nothing like taking a delicious and easy breakfast, brunch, or dinner and making it just that much better!

How to Make Perfect French ToastYum

Here are the two tricks I use to take our French toast up a notch:

1. Add Vanilla Extract to the egg mixture.

2. Use Cinnamon Swirl Bread.

The vanilla adds a wonderful flavor to your French Toast. And using Cinnamon Swirl Bread instead of “regular ol’ bread” is a huge game-changer for the better. THIS MAKES FRENCH TOAST SO GOOD!!

I used to always make Cinnamon Swirl Bread at home. I started using:

  1. This Cinnamon Swirl Bread Recipe, then switched to an easier method which turned into:
  2. This Stir-and-Pour Cinnamon Swirl Bread Recipe

But now that we’ve added little ones to our home again and I find myself juggling my bigs, my littles, my marriage, my home, my work, court dates, case worker visits/meetings, appointments, my own health – well…

I happily and un-guiltily buy the cinnamon swirl bread.

Does it need to be said? Ok. Let’s review:

God is bigger than store-bought bread.

Amen.

Hallelujah.

However you would like to make your Perfect French Toast, with whatever bread works best for you, go for it and enjoy! But oh making it with Cinnamon Swirl Bread does make it so much better!

Perfect French Toast

5.0 from 1 reviews
How to Make Perfect French Toast
 
Save Print
Author: Laura
Serves: 4-6
Ingredients
  • 10 slices of Cinnamon Swirl Bread
  • 3 eggs
  • 3 Tablespoons cream
  • 1 teaspoon vanilla extract
  • Butter for cooking French Toast
  • Fruit and Real Maple Syrup
Instructions
  1. In a bowl, whisk together eggs, cream, and vanilla extract.
  2. Heat butter in a skillet until melted.
  3. Dip bread into the egg mixture, coating each slice entirely.
  4. Fry each coated slice of bread in the buttered skillet until both sides are golden brown.
  5. Serve with real maple syrup and fruit
3.5.3229

What about making homemade vanilla? Goodness I would but is the price of vanilla beans ever going to go back down?? C’mon beans. We need you. And we need you to cost less than our sons’ college tuition.

Have you tried using Cinnamon Swirl Bread when you make French Toast? And do you add a little shot of vanilla? Mmm, so good.

Heavenly Homemaker's Club Members: Access your homepage and all your fantastic resources here! Not a member yet? Please join us!

Should You Give Kids an Allowance?

March 11, 2020 by Laura Leave a Comment

This post may contain affiliate links. For more information, please see our disclosure policy.

Should you give kids an allowance? That’s a great question with many different opinions!

I’m not going to answer with a simple yes or no. But I will share with you what we’ve done!

Why should you listen to my advice? You maybe shouldn’t, simply because every family is different, every kid is different, and there are many ways to handle allowance and teach your kids how to handle money!

My experience spans 22 years of parenting. Our oldest son, the 22-year-old, is a great money manager, as is our 20-year-old, our 18-year-old, and our 15-year-old. Some of them are a little more willing to spend their money on occasional splurges while some of them much prefer more padding in their savings accounts. But what I want to say is this: The way we handled allowance with our kids when they were little and as they became big? It worked.

But ha, there’s more! God blessed us with Bonus Boys!! So we’ll be starting this method all over again with our six-year-old and later when our 1-year-old “comes of age.” Seems it’s a good thing I’m dusting off this old trick so we can use it all over again in a few months!

Should You Give Kids an Allowance?

We did give our kids an allowance – for a time.

When they turned the magic age of 7, we started giving our kids a whopping $4/month, which usually equaled $1/week. (By the way, we tried it when our oldest turned 5 but found he was a bit too young to understand saving and spending concepts we were trying to teach.)

We made this allowance-giving experience kind of a big deal by presenting them with a brand new wallet on their 7th birthday. Then we gave them 4 one-dollar bills to put inside their new wallets – beautiful pieces of green to an eager 7-year-old!

While we’d already started talking about simple money spending and saving concepts long before they turned 7 – this is when we started giving them more responsibility and freedom. Why?

So that they could begin to learn how to manage their very own money.

$4 isn’t very much. But we found it didn’t take much to help them learn some basic healthy money skills.

It is worth noting that we didn’t require them to do chores in order to earn this $4 allowance. It was simply a monthly allowance. The chores?? Oh, they did them! They just didn’t get money for them. And they didn’t even know they were called “chores” ha! (I learned this one day when they were at a friend’s house and they shrugged when their friend asked what chores they did at home. “I don’t know. We don’t have chores.” The friends were so jealous…until I cleared it up that my kids helped around the house all day long, we just never called this kind of family teamwork “doing chores.” But anyway…)

We didn’t set up specific guidelines for how they were to go about using their $4 allowance. We simply offered guidance and talked them through options for how they might enjoy their new money freedom.

  • We let them know that the money they gave at church would now be from their own wallet instead of from ours. Usually, we helped them break one of their dollars into 4 quarters so they could give one quarter each week. They BEAMED when they put their very own quarter in the offering plate!!
  • We helped them recognize more about the cost of items from the store. Our kids already knew by then not to ask for “things” when we shopped. But now we were able to say “you can save your money for that if you’d like to buy it” if they saw something they liked while shopping. Often the desire for said “things” would fade quickly when they realized how long it would take to save for the purchase. So they began to learn more about saving and investing in what truly meant something to them.
  • We emphasized how nice it is to save money for bigger needs or desires. If our kids would have chosen to spend their entire allowance money amount each month (after setting aside some for giving) – we would have let them. But would you believe – not one of them ever did. It took very little time for them to learn the joy of watching the stash of dollar bills grow in their wallets.

Every once in awhile, one of our little allowance-receivers would spend a dollar here or there on a dollar store item. This was fine and fun and good for their learning experience too! We always talked about a purchase before taking the plunge!

But I believe they had learned from our example of being more of a saver than a spender. We don’t buy stuff for the sake of buying stuff. And so their money-saving mindset began.

How long did we give our kids allowance?

We gave our kids an allowance until they started earning money in other ways.

About the time $4/month became a laughably small amount to our sons – around the age of 10 or 11 – we continued the monthly allowance. But as soon as they found ways to earn money, the allowance allotment stopped. They didn’t complain about this because they were now able to earn $10 on one Saturday morning by reffing a youth soccer game or by mowing a lawn – so they were getting much more than a tiny $4 allowance!

In addition, by that time, they had learned the very basics of money management – our very reason for giving our kids an allowance. By the time our boys started to find ways to earn money, they had a strong sense of ownership and the beginning of wisdom when it came to saving, giving, and spending.

So should you give kids an allowance?

I can’t give you a firm yes or no. But I will tell you this: We’re glad we did! And we’ll do it again when Brayden turns 7.

At this point, he and I talk often at the store about how we spend our money and how we make purchasing choices. He’s catching on quickly – and as much as he already loves putting coins from our pockets into the offering jars at church (specifically earmarked for children in Ecuador!) – I can’t wait to see how much he loves using his very own money!

How have you handled allowance at your house?

Heavenly Homemaker's Club Members: Access your homepage and all your fantastic resources here! Not a member yet? Please join us!

Ways Eating Healthy Foods Actually Saves Us Money

March 5, 2020 by Laura 1 Comment

This post may contain affiliate links. For more information, please see our disclosure policy.

I’m very serious. Never buy into the lie that eating healthy is expensive. And in fact, I am coming to realize more and more that eating healthy foods actually saves us money.

I’ve been working at this nourishing food thing for 14+ years now, and while our food budget has increased substantially during these years, I’m certain the blame goes to growing appetites and an increased number of family members, not to the cost of apples.

Today I am here to present a few simple ways eating healthy foods saves us money:

1. Eating Out is a Budget Buster

When our family of nine (or seven or however many of our crew is around at the time) goes out to eat after church, even fast food costs a minimum of $40, but usually somewhere around $60. I don’t even want to talk about how much it costs to eat at a sit-down restaurant.

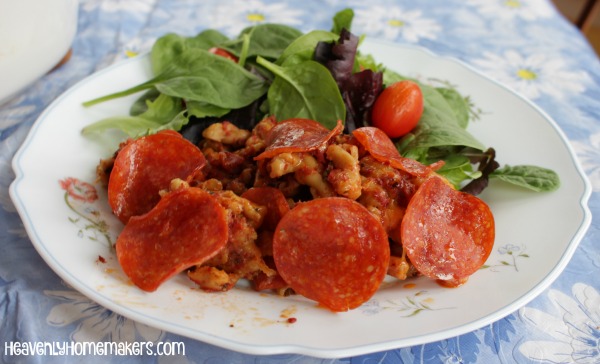
Meanwhile, I can take 5-minutes to throw together a Crock Pot Pizza Casserole before church. It’s ready when we get home, we can get out salad stuff and a bowl of grapes, and when it’s all said and done, the cost of our meal was around $15. The cost difference is enormous, the workload is minimal, and the taste? Well, have you tried making this pizza casserole? It’s incredible.

So except for when we’re traveling or for the very occasional splurge, we eat at home. It’s obviously healthier and saves thousands of dollars for our big family.

And yeah, I know we all know that, but it seemed worth mentioning again and comparing the cost! ;)

2. Nourishing food satisfies; junk food…doesn’t

Your honor, may I present as evidence the bag of potato chips?

I will admit that chips are my junk food of choice and I splurge on them sometimes. But when I do, we plow through them in about five minutes and are then ready for an actual meal. Why? Because chips only fill a hole; they do not nourish. So while our bodies are craving substance, we fill it with the nothing that chips provide, then we go in search of something to satisfy our bodies’ needs (protein, vitamins, minerals, etc).

So in essence, chips are tasty but kind of a money waster. The dollars I spend on chips could be used to buy actual food that leaves us satisfied.

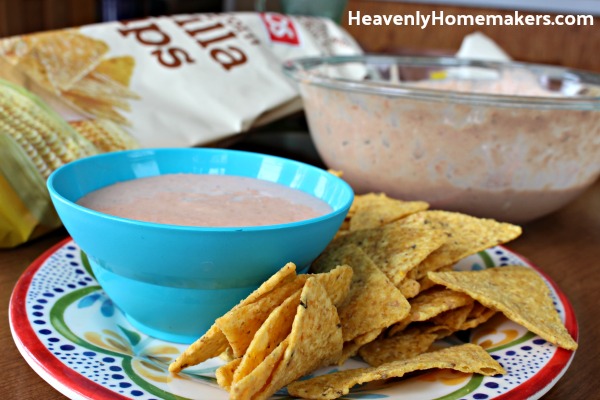
The only exception to this, in my experience, has been corn chips. We almost never eat corn chips by themselves but instead use them as vehicles to eat nourishing dips. Long live the corn chips. They help us eat avocados. :)

Here are our favorite corn chip dips:

  • Black Bean Salsa
  • Easiest and Best Guacamole
  • Cream Cheese Salsa Dip
  • Simple Bean and Cheese Salsa Dip
  • Easy Cheesy Bean Dip
  • Real Food “Velveeta” and Rotel Dip

3. Real food ingredients cost much less than pre-made boxed foods.

This is a fact. As we’ve added foster children to our lives, I’ll admit it: I’ve splurged more on processed foods than I used to. I’ve needed it for survival some days, and I have no guilt over it.

But goodness do those boxed foods cost more!! And they almost always include ingredients I don’t feel great about. (I just don’t read the box. If I don’t know there’s MSG in there, it can’t hurt us, right? Heh.)

Most of the time, while taking care of all the kids, I try to fall back on all of our Simple Real Food Recipes that are just as convenient but made completely with real food ingredients.

When I fill my grocery cart with ingredients – yes – the cost adds up. It takes a lot to feed a large family with big appetites! But the cost is still lower – much lower – than filling my cart with corndogs and pizza rolls. It goes without saying that the real food ingredients I buy nourish us as opposed to whatever it is those pizza rolls do. Yikes.

~~~~~~~~~~~~~~~~~~~~~~~~~~~~~~~~~~~~~~~~~~~~~~~

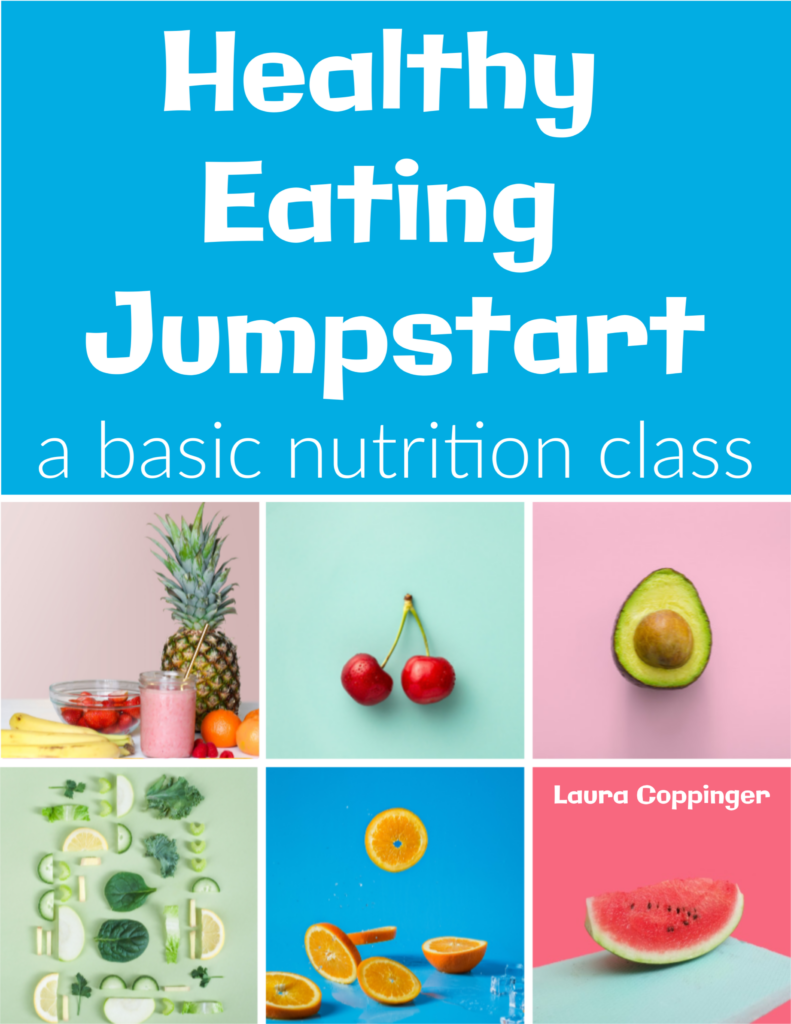
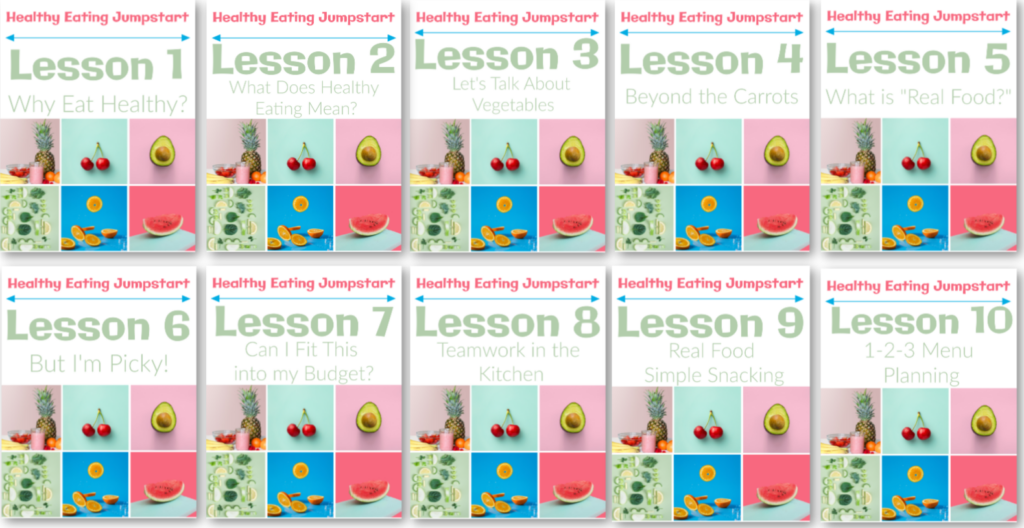
Want to easily learn more about healthy eating, saving money, and more? Our brand new Healthy Eating Jumpstart Class is fun, practical, and simple. Work through it on your own or work through it as a family.

Get the Details and Join Here!

~~~~~~~~~~~~~~~~~~~~~~~~~~~~~~~~~~~~~~~~~~~~~~~

So there you have it. These are the most basic ways that eating healthy foods saves money. These are no brainers, but I think it’s good to be reminded and encouraged that eating healthy and saving money is easier than we often think!

Heavenly Homemaker's Club Members: Access your homepage and all your fantastic resources here! Not a member yet? Please join us!

How Your Entire Family Can Learn About Eating Healthy!

March 4, 2020 by Laura Leave a Comment

This post may contain affiliate links. For more information, please see our disclosure policy.

Looking for a simple way for your entire family to learn about eating healthy? It doesn’t get any easier than this!

We just rolled this out, and it’s packed with great information while being as simple as can be!

What is the Healthy Eating Jumpstart Basic Nutrition Class?

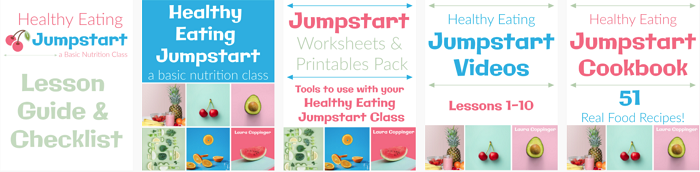
You won’t believe all that you’ll get in this fantastic online class! Healthy Eating Jumpstart includes:

  • 10 easy lessons to walk you through the basics of eating well
  • 10 fun videos to watch and use with each lesson
  • A practical packet full of worksheets and printables to use with each lesson
  • A beautiful bonus Jumpstart eCookbook filled with 51 easy recipes that will jumpstart your entire family on a journey to healthy eating
  • A Lesson Guide and Checklist packet to walk you through completing each lesson

How can you best use this Healthy Eating Jumpstart Basic Nutrition Class?

  • Work through it as a family and set goals together toward taking steps for healthier eating
  • Work through it on your own and start making small changes in your kitchen for your family
  • Hand it to your older kids to work through as part of their homeschool lessons or life skills learning
  • Hold on to it and utilize it again and again for yourself, your kids, and your entire family as needed

Your Entire Family Can Learn About Eating Healthy!

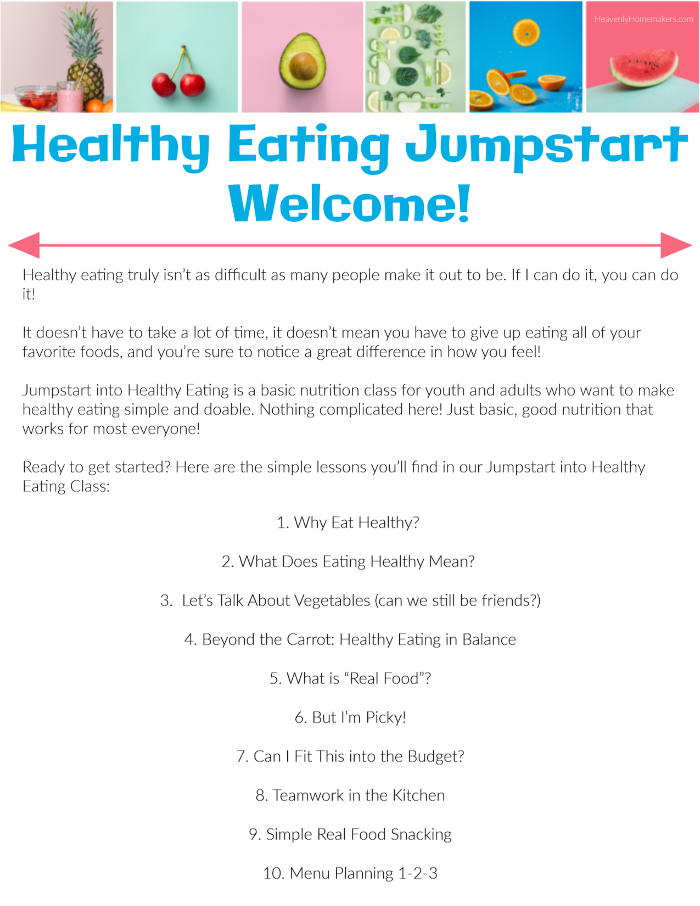
Here’s a peek at the Lesson Book intro page so you can get an idea of what this class will cover…

~~~~~~~~~~~~~~~~~~~~~~~~~~~~~~~~~~~~~~~~~~~~~~~~~~~~

Ready to begin your Healthy Eating Jumpstart Class?

GREAT NEWS!!!! If you are a Heavenly Homemaker’s Club Member, this fantastic product is already yours!!! Find it on your eCurriculum page (because this is a great educational resource for your family!) and on your Kitchen Tips page. Then dive right in!!!

Not a Club Member yet? It is WORTH IT to be a member so you’ll have access to this amazing new Healthy Eating Jumpstart resource plus ALL of our eBooks, eCurriculum, printables, and so much more (over $1000 worth!) for just $10/month!

Join us here! You won’t believe all you get for such a low monthly cost!!

~~~~~~~~~~~~~~~~~~~~~~~~~~~~~~~~~~~~~~~~~~~~~~~~~~~~

If you prefer, you can purchase this online class separately. Ready to get started? Purchase here:

Maximum quantity exceeded
Minimum purchase amount of 0 is required
Maximum purchase amount of 0 is allowed
27.000

Make healthy eating EASY!!!!! This class will help!

Heavenly Homemaker's Club Members: Access your homepage and all your fantastic resources here! Not a member yet? Please join us!

Busy Day Baked Chicken

March 1, 2020 by Laura 2 Comments

This post may contain affiliate links. For more information, please see our disclosure policy.

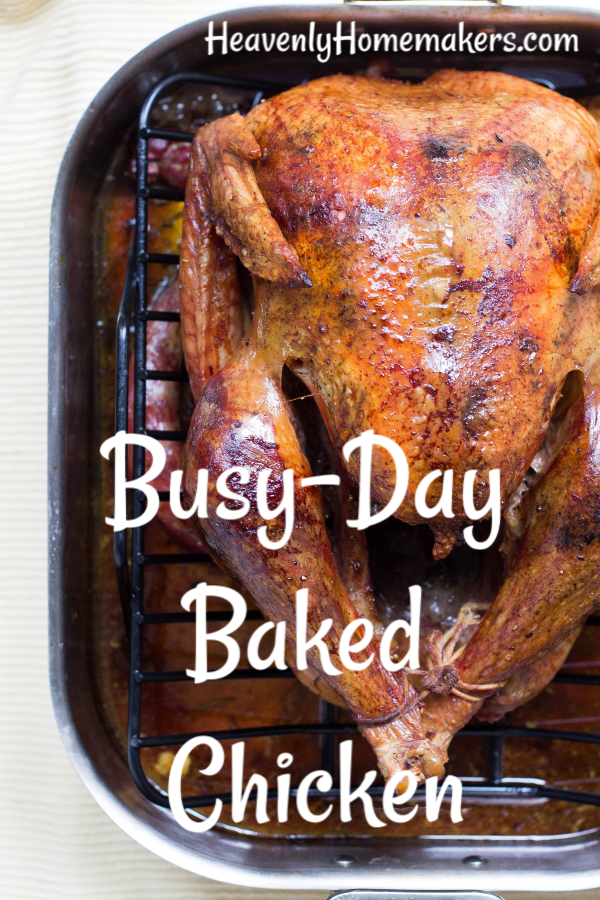
Bring on the Busy Day Baked Chicken!

Every day is a busy day! (Though it’s important that we are intentional about taking time to slow down and find restful days too!)

But for those extra-busy days – I am loving this idea for Busy-Day Baked Chicken!

This idea came from Anne, a cherished HeavenlyHomemakers.com reader. She says:

Laura, I have a favorite recipe idea to share! It was a lifesaver for me when I was a working mother (now retired). We call it “Wishbone Chicken.”

Wash and trim the fat on a whole chicken and place it in a pan. Sprinkle it with Lawry’s Seasoned Salt and slather it with Wishbone Italian Dressing. That’s it. Bake about an  hour at 350 degrees. Smells divine! Easy peasy!

As a working mom, I’d buy 3 or 4 whole chickens when on sale. I’d lay each cleaned chicken in foil and cover with the salt and dressing. Then I’d wrap each tightly in the foil and put in the freezer. On a work day, I’d take one out before I left for work, unwrap it, place in a pan, and put it in the oven (frozen). I’d set the oven to come on at 2:00 pm at 325 degrees. The chicken would be partly thawed when the oven came on. The kids and I came home from school around 3:30. We’d walk into a luscious smelling house and a delicious homemade dinner was all ready for us! – Anne

I’ve taken Anne’s great idea and we love it so much! I especially love the idea of buying the chickens on sale and making several ahead of time to freeze, then pull out and bake as needed!

This chicken is delicious and ridiculously easy!!

Busy-Day Baked ChickenYum

5.0 from 1 reviews
Busy Day Baked Chicken
 
Save Print
Author: Laura
Serves: 4-6 servings
Ingredients
  • Whole chicken
  • Seasoning Salt
  • 1½ cups Italian Dressing
Instructions
  1. Place a whole chicken on a rack, placed on a baking sheet.
  2. Sprinkle liberally with seasoning salt.
  3. Drizzle Italian Dressing over the chicken.
  4. Cover and bake for 1 hour at 350 degrees.
3.5.3229

This is my favorite Seasoning Salt. And here’s our great and easy recipe for Homemade Italian Dressing if you’d like!

Do yourself a favor and make this chicken! Serve it with a salad and steamed veggie and you have the easiest meal in the world that is extremely delicious and nourishing.

Thank you, Anne!

Psssst! Everyone be sure to grab our Simple Real Food Recipes cookbook full of amazingly tasty and simple real food recipes like this one!

Heavenly Homemaker's Club Members: Access your homepage and all your fantastic resources here! Not a member yet? Please join us!

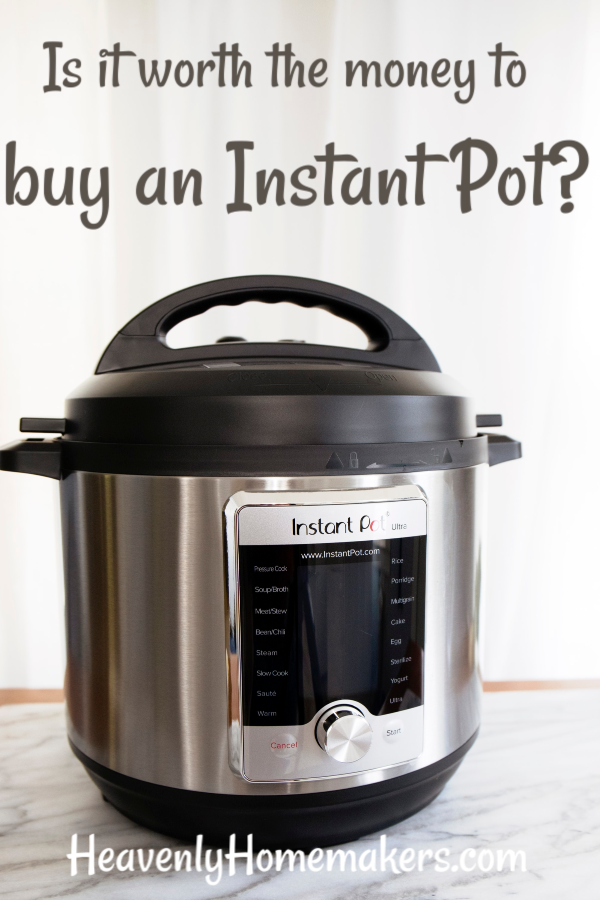
Is it Worth the Money to Buy an Instant Pot?

February 27, 2020 by Laura 5 Comments

This post may contain affiliate links. For more information, please see our disclosure policy.

What do you think? Is it worth the money to buy an Instant Pot? Here’s what I think…

Is it worth the money to buy an Instant Pot?

I stubbornly refused to get an Instant Pot for several years after they became popular (silly me), and now I am one of the biggest advocates for them! This gem saves so much time and keeps us eating healthy too!

I love that it makes wholesome, rich beef or chicken broth with so little effort on my part. I LOVE that I can cook 7 pounds of frozen hamburger meat in it in just 30 minutes!! And I love the many meals and side dishes I can make in it within just a few minutes.

So in my opinion, yes, it is worth the money to buy an Instant Pot. Not only has mine saved me time, it truly saves me money! So your investment in this appliance can be paid back and earning money for you in no time!

How? Well, think of all the convenience foods or fast food options one might fall back on when time is limited at mealtime! This money-saving perk alone makes the Instant Pot worth it.

In addition, the Instant Pot allows you to make wonderful, rich broth for soups that offer super nourishment and costs very, very little!

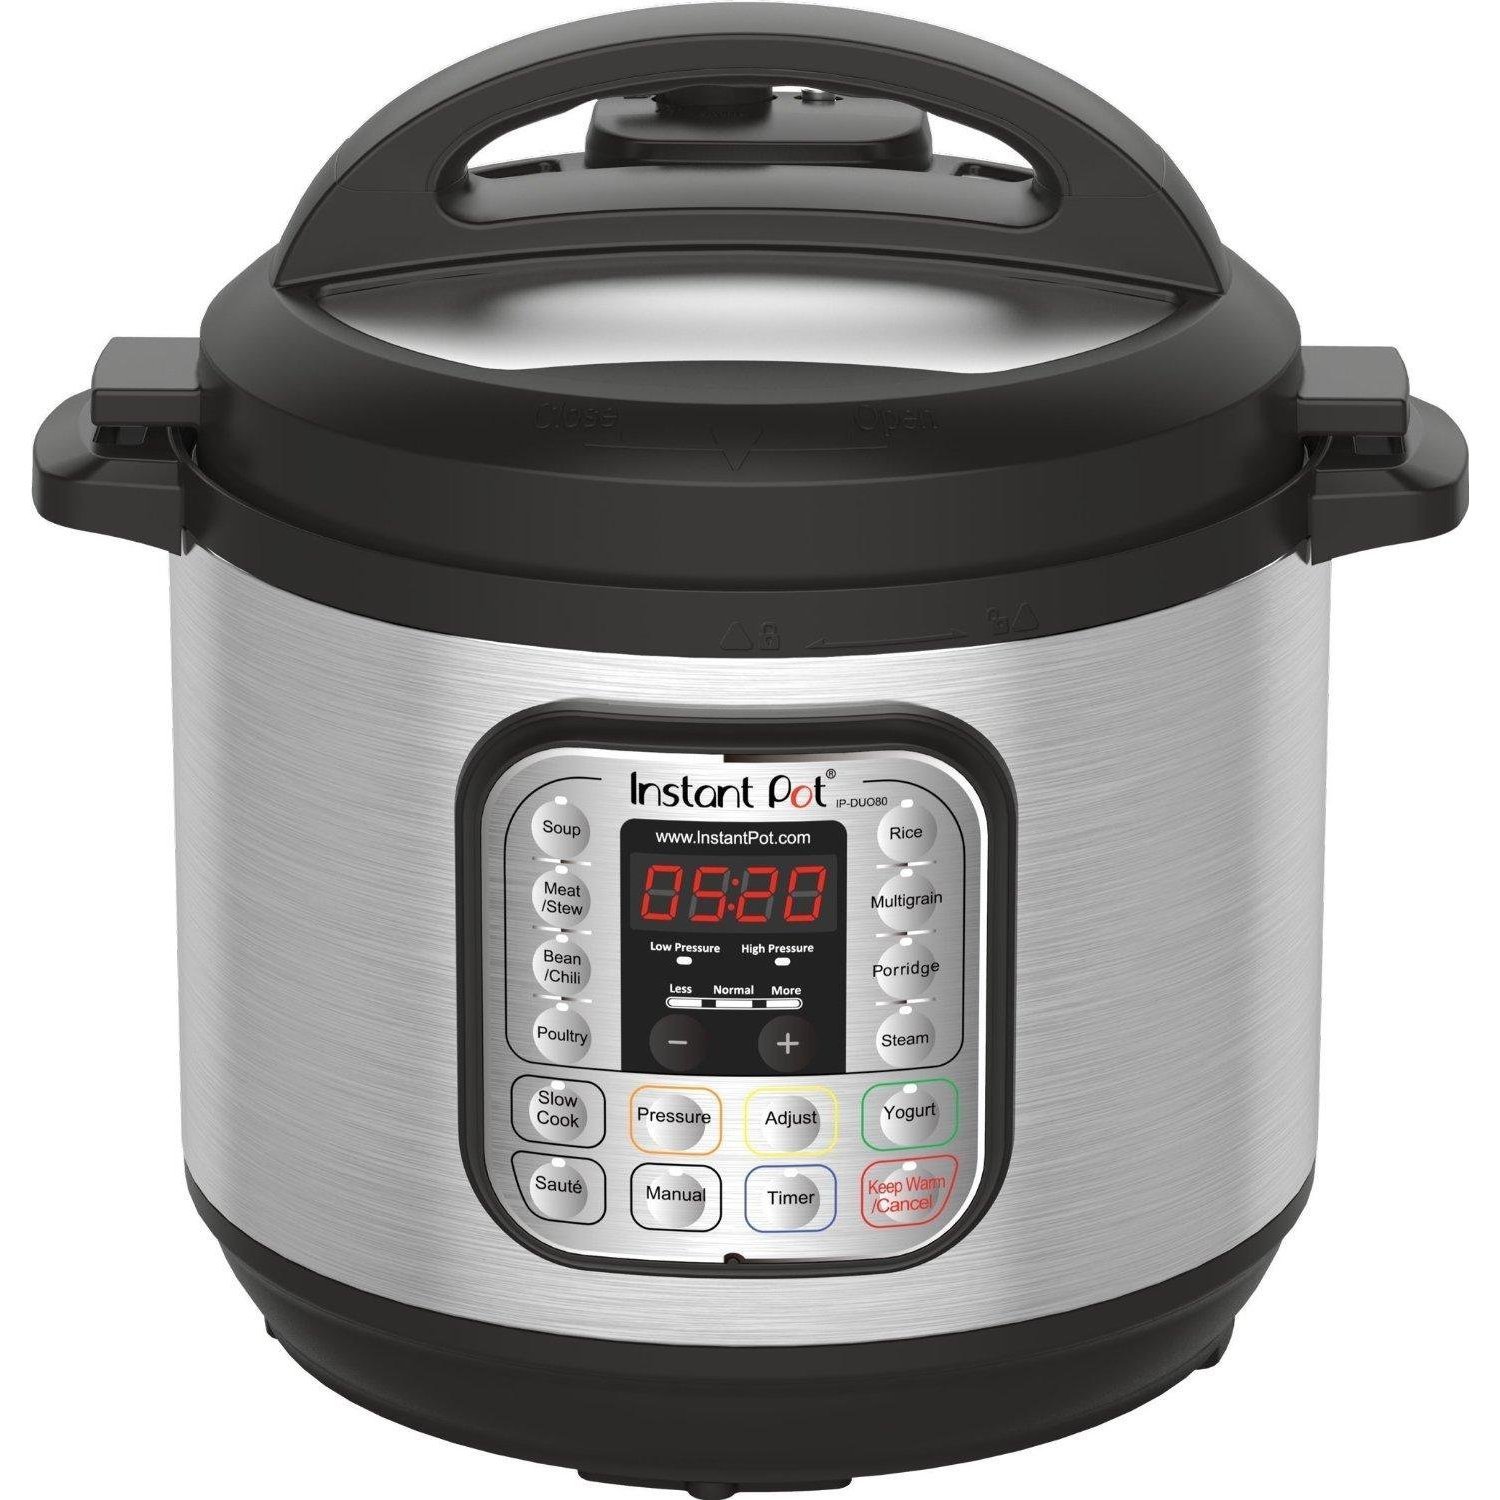
If you can swing it, get yourself an Instant Pot. I have the 8-quart variety for my large family. Here’s the 6-quart Instant Pot if that fits your needs more!

Recipes you’ll need for your Instant Pot:

Here are our favorites so far!

  • Bone Broth
  • Simple Creamy Chicken Soup
  • Simple 10-Minute Mac and Cheese
  • Simple One Dish Chicken Florentine
  • Mashed Potatoes
  • Beef Roast
  • Simple Chili Mac
  • Simple Lasagna Casserole
  • How to Cook 5 lbs of Frozen Hamburger Meat in 30 minutes
  • Simple Hashbrown Casserole

Psst: I highly recommend that you bookmark our Instant Pot Recipes page for easy access as we continue to update it!

Heavenly Homemaker's Club Members: Access your homepage and all your fantastic resources here! Not a member yet? Please join us!

Introducing, Keith Coppinger!

February 21, 2020 by Laura 2 Comments

This post may contain affiliate links. For more information, please see our disclosure policy.

Here’s the precious face I’ve been looking forward to sharing with you!

He’s learning to feed himself, and he’s oh-so proud.

His name is Keith, and as of today, he is Coppinger Boy #6.

Foster care and adoption is an emotional experience in at least a thousand ways. There’s joy and there’s sorrow. Adding to the family also means there is loss in some form. We don’t take that lightly.

But today, we fully embrace the joy of adding to our family. We embrace it so much that the tears won’t stop. This little boy, who has been a part of our family since he was just 2 months old, has overcome so much in his short life. That we get to be a part of this and learn more about victory in Jesus because of him humbles us greatly.

Keith loves Mommy and Daddy. He thinks all of his older brothers are THE BEST. But when Brayden walks into the room, there’s no doubt who he thinks is the BEST BEST.

These two have a special bond – so much so that Keith’s first word was actually “Brayden.” I was lobbying for “mama.” We all asssumed it would be “dada.” But when the big day came, Keith looked up at his beloved Brayden and said, “Dudden! Dudden!” It is the sweetest thing ever.

We continue to foster Boy Babe #2. Our older sons continue to embrace this new life with grace and love. Matt and I stand in amazement as we experience all God is doing and teaching us through this.

Thank you for walking this journey with us. Your love and support has meant so much – and I’ll thank you by sharing lots of adorable Keith pictures now that I can!!!

Here he is with Justus, age 20. Because yes, we now have sons aged 1-22!!!!!

He’s already learning to cook. I’m pretty sure he was making me some coffee…

Keith got to wear Elias’ hat!

Yes, he truly is as sweet as he looks.

And most days, he’s happy as can be!

God bless YOU in whatever ways He is working in YOUR lives. I have no doubt He is doing great things!

Heavenly Homemaker's Club Members: Access your homepage and all your fantastic resources here! Not a member yet? Please join us!
« Previous Page
Next Page »

Join Our Community!

 Facebook Twitter E-mail Instagram Pinterest

Popular Posts

~ Will All of the Real Moms Please Stand Up?
~ Easy! Stir-and-Pour Whole Wheat Bread
~ How to Make Gatorade
~ 31 Real Food Breakfast Ideas
~ Dear Teenage Girls...
~ When Mom Takes a Step Back
~ The Inexpensive Health Insurance We Love!
~ Let's Talk Real Food Grocery Budgets

Check out our latest posts!

  • Big Family Food and Fun: September 20-26, 2026
  • Big Family Food and Fun: September 13-19, 2026
  • Big Family Food and Fun: September 6-12, 2026
  • Big Family Food and Fun: August 30-September 5, 2026
  • Big Family Food and Fun: August 23-29, 2026
Home  ~  Simple Meals  ~  Club Membership  ~  Shop  ~  Privacy Policy  ~  Disclosure  ~ Contact

Copyright © 2026 · Beautiful Pro Theme on Genesis Framework · WordPress · Log in