Heavenly Homemakers

Encouraging women in homemaking, healthy eating and parenting

  • Home
    • About
    • FAQs
  • Recipes
    • Bread and Breakfast
    • Condiments
    • Dairy
    • Main Dishes
    • Side Dishes and Snacks
    • Desserts
    • Gluten Free
    • Instant Pot
    • Crock Pot
    • Heavenly Homemaker’s Weekly Menus
  • Homemaking
    • Real Food Sources
  • Store
  • Contact
    • Advertise
    • Disclosure
    • Privacy Policy
  • Simple Meals
  • Club Members!

Healthy Strawberry Shortcake

June 10, 2010 by Laura 67 Comments

This post may contain affiliate links. For more information, please see our disclosure policy.

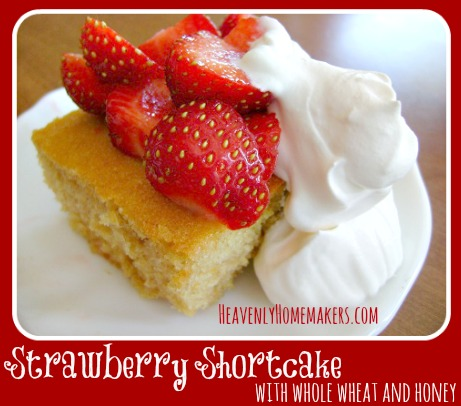
When fresh strawberries are in season, nothing much tastes better than Strawberry Shortcake. This variation of Strawberry Shortcake is lightly sweetened with honey and made with whole wheat flour. We had the entire cake eaten up in just a few minutes!

strawberry_shortcake_2

Yum

 Strawberry Shortcake

1 1/3 cups whole wheat flour (I use freshly ground whole wheat)
1 teaspoon baking powder
2 eggs
1/2 cup honey
1/3 cup oil (I use coconut oil)
1 teaspoon vanilla extract
1/2 cup milk

4-5 cups of fresh, sliced strawberries
Whipped cream (fresh cream whipped to form soft peaks, with a bit of stevia added for sweetness)

Mix together flour and baking powder. Add in eggs, honey, oil, vanilla and milk. Stir well (or mix well with hand mixer). Pour into a well buttered 8×8 inch baking pan. Bake at 350° for 20-25 minutes.

Allow cake to cool completely. Top with fresh strawberries and whipped cream. (9 servings)

Strawberry Shortcake with Whole Wheat and Honey

If you’d like more ideas for what to do with all the fresh strawberries that are in season right now, you may want to take a look at this fun recipe list!

Heavenly Homemaker's Club Members: Access your homepage and all your fantastic resources here! Not a member yet? Please join us!

Healthy Celebrations: Double Lemon Cupcakes (a guest post!)

May 11, 2010 by Laura 13 Comments

This post may contain affiliate links. For more information, please see our disclosure policy.

healthy_celebrations_med

Yum

Please join me in welcoming Holly, who is guest posting today to share her awesome Double Lemon Cupcake recipe with us! I can’t wait to give these a try!
—————————————————–

Hello Heavenly Homemakers readers! My name is Holly. I am a Christian, a military wife and momma to an 18 month old son, and I am really excited to be sharing a recipe (or three) with you. The past year I have been learning about traditional foods; I have reinvented how I shop, cook, eat, and feel about food. The most recent milestone in this journey was birthday cake. Remember when Laura asked us to choose between chocolate and vanilla? Well, to celebrate my 24th birthday I chose option C.  

I wanted  a birthday dessert that satisfied my emotional desire for cake, but also fulfilled my sensible need to eat wholesomely. I knew that if I did not satisfy both halves I would be left either feeling like a whole wheat martyr or a big sugar-filled failure. Yuck. Blessedly, I found a happy medium with these  sweet and tangy cupcakes. 

lemon_cupcakes_6

Let me just say that I am normally very relaxed baker, I never sift. I fudge the temperatures and can be lazy with the mixing. But for this recipe, if I say sift I do mean sift. The same goes for temperatures and times. It may seem fussy for some of you, but the results are rewarding. 

Double Lemon Cupcakes


3 c whole wheat flour
1 tbsp baking powder
½  tsp sea salt
1 c butter, room temperature
1 c orange blossom honey
4 large eggs, room temperature
the zest of 3 lemons (I recommend organic because you are consuming the peel), plus 2 tbsp lemon juice
1 tsp vanilla extract
1 c buttermilk 

Preheat oven to 325° F. Butter and flour the inside of two round cake pans or two dozen muffin tins. Zest the lemons (just the yellow part, try to avoid the white pith because it is bitter), you want this to be very fine. Sift the dry ingredients together and set aside. Add the lemon juice to the buttermilk. 

Cream the butter and the honey until they are nice and fluffy. Add the eggs one at a time, until well mixed in. Add the zest and vanilla. Add the flour and buttermilk in three parts. Beat until just combined. Pour the batter into the prepped pans and bake until golden brown and they pass the toothpick test, 30-35 minutes for a cake, 25 minutes for cupcakes. 

lemon_cupcakes_2

While the cakes are baking, mix up a nice batch of… 

Lemon Curd   

8 large egg yolks
Finely grated zest of 2 lemons
½  c plus 2 tbsp lemon juice (about 3-4 lemons)
½ c orange blossom honey
teeny pinch of salt, about 1/8 tsp
¾ c unsalted butter (10 tbsp or 1 ¼ sticks) cold, cut in pieces  

Wisk together all ingredients except butter and salt in a medium saucepan. Cook over medium-high heat, stirring constantly with a wooden spoon. When the mixture registers 160° F on an instant-read thermometer and is thick enough to coat the back of the spoon, remove from heat. This should take about 8-10 minutes. If you don’t have a thermometer, just do what I did and use good quality eggs. 

Remove pan from heat and add salt and butter, one piece at a time, stirring until smooth after each addition. Strain through a sieve. It is normal for small bits of cooked egg to strain out, don’t worry you did it right. :) Cover this with plastic wrap and let it cool in the fridge at least one hour.

lemon_cupcakes_3  

Fill your cupcakes with lemon curd. You can use a pastry bag and large tip, or poke a hole with the wrong end of a wooden spoon and use a plastic baggie with a corner snipped off. Spread extra curd on top of the cupcake. If you’re making a cake, spread the lemon curd between the two layers. Then whip up your frosting. 

Soft and Fluffy Frosting

8 egg whites
¾ c orange blossom honey
1 tsp vanilla extract. 

Combine egg whites and honey in a large heat-proof mixing bowl (or the bowl for your stand mixer if you have one and it’s heat-proof) set over a pan of simmering water. Wisk rapidly for two minutes  Make sure your water does not boil! You will end up with scrambled egg frosting and it will be gross. Cook this until it reaches 160° F on an instant-read thermometer (or if like me you don’t have one, use good eggs and cook for two minutes). Remove from the heat and beat on your mixer’s highest speed for  until soft and fluffy, about 7-9 minutes. Beat in the vanilla. Use this frosting immediately. 

lemon_cupcakes_4

I used (some of the) leftover curd to decorate the tops of some of the cupcakes. Or you could eat it with a spoon and not tell anyone there were leftovers. I won’t look. 

lemon_cupcakes

Thanks Laura for letting me share my recipes with you and your readers!

Holly wanted me to be sure to let you know that the curd will keep in the fridge about 3 days, but it is best served in the first 24-36 hours, and the frosting should be used immediately after it’s made, because it will start to deflate after a few hours. It’s still edible for several days, but the quality goes down after 6-8 hours.
——————————————————-

This post is linked to Works for me Wednesday.

Heavenly Homemaker's Club Members: Access your homepage and all your fantastic resources here! Not a member yet? Please join us!

Whole Wheat Pie Crust

April 20, 2010 by Laura 247 Comments

This post may contain affiliate links. For more information, please see our disclosure policy.

Making pie crusts has never come easy to me. In fact, if you recall…I put out an all call many months ago and used YOUR recipes to put together the free ebook, For the Love of Pie!

Since that time, I have discovered a delicious and healthy way to make whole wheat pie crust! I am SO excited!

The secret ingredient is Tropical Traditions Palm Shortening. We all know to stay away from regular shortening (like crisco) right? I’ve tried making pie crusts with butter, and that works too (especially in these Mini Apple Pies). But, since I tried using Palm Shortening from Tropical Traditions, I feel like my days of frustration with pie crust may be over. When I tried making a whole wheat crust with Palm Shortening, it formed perfectly. It rolled out like a dream. I could be heard shouting out Whooops and Woohoos from my kitchen for miles around. I’m telling you, this from the lady who never could make a pie crust.

Here’s how you make the crust…

Whole Wheat Pie CrustYum

1 1/4 cup whole wheat flour
1/4 teaspoon sea salt
1/3 cup Palm Shortening (or butter)
4-5 Tablespoons cold water

I found this recipe to work best in my food processor. If you don’t have a food processor, you can cut the shortening into the flour with a pastry blender.

Place flour, salt and shortening in food processor. Blend until shortening is cut throughout the flour and the mixture resembles crumbs.

pie_crus_palm_shortening_three_sm

Admire the crumbs…

pie_crust_palm_shortening_8sm

Begin adding water and processing (or stirring). If your dough looks like this, it doesn’t have enough water in it yet…

pie_crust_palm_shortening_five_sm

Add little bits of water until your dough will form a nice round ball.

pie_crust_palm_shortening_sm9

Roll out your dough  on a well floured surface. Fold it in half.

pie_crust_palm_shortening_10sm

Then fold it in half again.

pie_crust_palm_shortening_11sm

Place your dough in your pie dish with the folded corner in the center.

pie_crust_palm_shortening_12sm

Unfold the dough, shape it into the dish and make the edges pretty.

Whole Wheat Pie Crust

Here’s a little video tutorial I made that will maybe (hopefully) give you an idea about how I shape my pie crust. There are all kinds of different ways to make it pretty…this is just the way my grandma taught me.

Poke your dough a few times with a fork to keep it from poofing up in the oven.

Bake at 450° for 10-12 minutes or until the crust is golden brown.

Mmmm…pretty dutch apple pie! (I just used this Mini Apple Pie filling and crumb topping recipe with the crust for this pie…in case you feel like you must try it right NOW!)  I must say, a glass of milk helps this pie go down real nice.

apple_pie_palm_shortening_sm


Heavenly Homemaker's Club Members: Access your homepage and all your fantastic resources here! Not a member yet? Please join us!

Mini Apple Pies (A Part of This Complete Breakfast)

February 25, 2010 by Laura 169 Comments

This post may contain affiliate links. For more information, please see our disclosure policy.

Who decided that sugar coated sugar dobbers and frosted sprinked poptarts were the best way to start the day? I also want to know why the aforementioned choices…or a pancake drenched in syrup is considered a great breakfast food…yet an apple pie is considered to be a dessert.

Remember, I like to think outside the box when it comes to breakfast. I’m all about Giant Breakfast Cookies, Breakfast Cake, Funnel Cake, Whole Wheat Donuts…and if you recall…even Homemade Ice Cream for breakfast. And what about our Valentine’s day Peach Cobbler? Yes, I think breakfast should be enticing, delicious, nutritious and sometimes even fun. And I think Apple Pie should be okay to eat for breakfast.

This Mini Apple Pie recipe is a new one I’ve come up with as I work on creating more Healthy Make-Ahead Meals. These freeze well (unbaked) – then you can just pull out a little pie (or 3) per person and bake.

Make them for breakfast…and your family will smell them baking, jump out of bed and come running into the kitchen and plow you over onto the kitchen floor (out of joy and love of course).

You can make these a couple of different ways:  Mini Apple Pies, or Apple Pie Pockets…depending on what works best for you. I use the same crust recipe I use for my Homemade Pizza Pockets. Follow the same instructions for the pizza pockets to create an Apple Pie Pocket…

applepiepockets2sm

Yum

The following directions are for Mini Apple Pies:

Crust:

3 1/2 cups whole wheat flour
1 t. sea salt
1 cup melted butter
1 cup plain yogurt

Stir ingredients together until thoroughly mixed. Use the dough right away to create pockets or pies…or let the dough sit overnight on the countertop to break down the phytates and make the grains more digestable. This dough is MUCH easier to work with if you work it like playdough in your hands a while before you try to roll it out.

Filling:

3 pounds of apples – about 11-12 smallish apples (any kind you like)
1/4 – 3/4 cup sucanat (your preference)
1 Tablespoon ground cinnamon

Topping:

1/2 cup whole wheat flour
1/2 cup rolled oats
2-4 Tablespoons sucanat
3 Tablespoons melted butter

To make Mini Apple Pies:

miniapplepies1smPeel apples and cut them into bite sized chunks.

miniapplepies2smAdd sucanat and cinnamon.

miniapplepies3smStir well and cook over medium heat until apples are
tender and a syrup has formed (about 10 minutes).

miniapplepies5sm
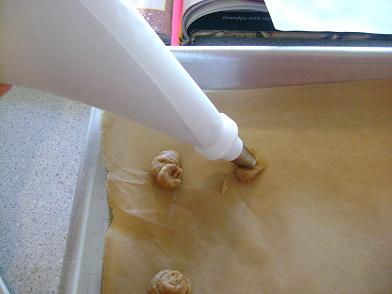
In the meantime, separate dough into 21-24 pieces.
Roll each piece into a little circle with a rolling pen.
As you can see, I am NOT a perfectionist. If I was making these for a
ladies’ brunch or something…I might take the time to make them pretty.
But for my family of boys?
Do you think they really care if their pies are pretty?
They eat them in three minutes flat. Thus my sloppy dough squishing.

Squish (or place nicely) your dough circles into well buttered MUFFIN PANS. Using a muffin pan for these Mini Apple Pies eliminates the need to go buy 24 little mini pie pans.

miniapplepies4smFill each (unbaked) crust with apple pie filling.

miniapplepies6smIn a bowl, stir together topping ingredients until the dry ingredients are moistened.
I find that melting the butter and stirring it into the flour, oats and sucanat makes a great crumb topping…much less effort than “cutting in the butter”.

miniapplepies7smSprinkle topping all over the top of your little pies.
Try if you can to be as messy about this process as I am. Sheesh.

Freeze your pies in your buttered muffin pans for a couple of hours.

miniapplepies8smRemove your muffin pans from the freezer and allow them to sit on the counter for 10-15 minutes.  Use a fork to gently pry the pies out of the pan. Place them carefully into freezer bags and put them bag into the freezer.

To bake your Mini Apple Pies:

Take desired number of pies out of the freezer and place them on a baking pan. Bake in a 375° oven for 35-45 minutes. You can let them thaw first if you want…but I find that the frozen pies bake just fine!

Mini_Apple_Pies

And now I’d like to point out that (depending on how much you use) there is about 1/2 cup of sucanat divided by 24 little pies…making this a very healthy, very low in sugar breakfast. Much less even than my Applesauce Bread or something otherwise considered a breakfast food.

Bring on the Breakfast Pie! Shucks…maybe we should even serve it with Ice Cream!

What’s your opinion about serving cobbler or pie for breakfast? Do I sound like a weirdo?  (Wait, don’t answer that.)
——————————————-

Need more healthy and family friendly breakfast recipes? I’ve got a whole page of ’em here! And yes, would you believe…you can easily make Homemade Poptarts!!

Heavenly Homemaker's Club Members: Access your homepage and all your fantastic resources here! Not a member yet? Please join us!

Special Valentines Day Treats: Peanut Butter Truffles and Chocolate Caramel Truffles

February 11, 2010 by Laura 52 Comments

This post may contain affiliate links. For more information, please see our disclosure policy.

I have always loved the idea of making truffles, yet it always seemed so daunting to me. Truffles sound so…gourmet or something. I finally decided that this year for Valentine’s Day I was going to give truffles a try.

Delicious Homemade Truffles

I learned that not only are truffles easy to make…they are quite an inexpensive Valentine’s Day treat. Do you KNOW how much truffles cost at the store? Yeah, a lot more than homemade ones. Not only are the homemade truffles less expensive, these treats don’t have high fructose corn syrup or hydrogenated oils in them!

This first recipe is SO easy to make! Try this one first if you want to prove to yourself that you can make truffles.

Peanut Butter TrufflesYum

2 cups milk chocolate chips
1/2 cup heavy cream
2 T. butter
1/2 cup natural peanut butter (I used homemade peanut butter)
1/4 cup organic, unbleached powdered sugar (optional)

In a saucepan stir together chocolate chips, cream and butter over medium heat.

pbtruffles1sm
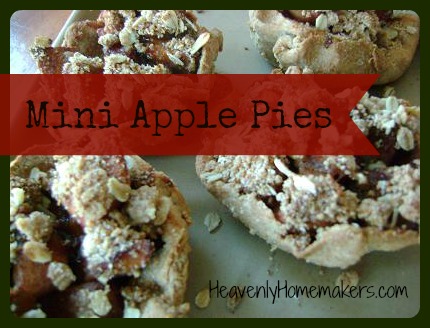
About the time the chocolate chips are almost melted,
add peanut butter and stir until smooth.

pbtruffles2smSpread mixture into a pie pan and chill for about two hours.

pbtruffles3smLick the pan while you wait for truffles to chill because…
well…do I actually need to give you a reason?

pbtruffles4smRoll mixture into 1 inch balls.
Dip in unbleached powdered sugar.
Place on parchment paper and chill until set.

This next truffle recipe takes a little more time to make, but it is SO WORTH IT.

Chocolate Caramel Truffles

1 cup sugar (I used sucanat)
2/3 cup heavy cream
1 cup chocolate chips (milk chocolate or semi-sweet)
1 t. vanilla extract
1/4 t. sea salt

carameltruffles1smIn a saucepan, cook and melt sugar, stirring with a fork.
It will clump up at first while it melts, but it will melt if you keep stirring and heating.
(Trust me, use a fork. A spoon doesn’t work.)

carameltruffles2smRemove melted sugar from heat and stir in cream.
Pouring in the cream will immediately create a crazy big blob thing of caramel,
so take it back to the stove and heat and stir until it melts.
It will seem to take forever but don’t worry,
it really will melt eventually (about 15 minutes).

carameltruffles3smSee, it finally melted. Now you have caramel.

carameltruffles4smRemove from heat and stir in chocolate chips, vanilla and salt.
Pour mixture into a pie pan and chill for about two hours.

carameltruffles5smRoll mixture into 1 inch balls and chill on parchment paper until set.
You can dip your truffles in a bit of cocoa powder if you want them to look pretty. They look pretty without the cocoa though, because hello? Chocolate and caramel all rolled into a ball? How could that not be pretty?

Place your truffles into little Valentine muffin papers and you’re all set!

I will present these truffles to Matt on Valentine’s Day, at which time we will have a conversation about whether caramel is pronounced Kare-uh-mel or Car-ml. He will say that he is pretty sure that it is Kare-uh-mel because there’s an “a” in the middle, and I will just sit there eating his truffles.

How do you say caramel, by the way?

It may seem like Matt and I argue over word pronunciation often, but really we don’t. Just KYOOPON vs. KOOPON and the occasional Kare-a-mel vs. Car-ml. And if those two marital issues are among our biggest, I’d say we’ll have a pretty great Valentine’s day.

Heavenly Homemaker's Club Members: Access your homepage and all your fantastic resources here! Not a member yet? Please join us!

Warm Chocolate Soother

January 19, 2010 by Laura 74 Comments

This post may contain affiliate links. For more information, please see our disclosure policy.

Warm Chocolate Soother

So, chocolate…or vanilla? That is the question.

I’d almost always say “chocolate” and yet…depending on the day, the occasion or the item…I may want vanilla. I’d say just about nothing beats this Warm Vanilla Soother.

And yet, last week the boys asked if I could try making my Warm Vanilla Soother into a Warm Chocolate Soother, just for fun. The kids thought it sounded yummy and hey, who am I to argue when it comes to making something chocolatey?

This recipe is almost exactly like Warm Vanilla Soother…just a couple of ingredients added.

Warm Chocolate SootherYum

Warm Chocolate Soother
 
Save Print
Author: Laura
Serves: 4-6
Ingredients
  • 3 cups whole milk
  • 4 egg yolks
  • ¼ cup real maple syrup
  • 3 Tablespoons brown sugar or sucanat
  • ¼ cup cocoa powder
  • 2 Tablespoons arrowroot powder or corn starch
  • 1 Tablespoon butter
  • 1 teaspoon vanilla extract
Instructions
  1. In a medium saucepan, whisk together milk, egg yolks, maple syrup, sucanat, cocoa and arrowroot powder.
  2. Cook over medium heat, stirring constantly (I use a whisk) until mixture begins to thicken.
  3. Remove from heat and add butter and vanilla.
  4. Stir until creamy.
  5. Pour into mugs and serve warm.
3.5.3251


Once this finally cooled down enough to drink, my eight year old proclaimed, “Mom!! It tastes just like you’re drinking a brownie!”

For real?!  Drinking a brownie?  I want to drink a brownie!!!

Mmmm, he was right!

This has the appearance of hot cocoa, but it’s thicker and heartier. Oh. My.

So chocolate…or vanilla? That is still the question.

Maybe we’ll assign days to flavors.

Monday, Wednesday, Friday and every other Sunday will be Warm Chocolate Soother days. Tuesday, Thursday, Saturday and every other Sunday will be Warm Vanilla Soother days.

Unless I have a hankering for vanilla on a Friday or feel a deep need for chocolate on a Tuesday, which I very well may. I’ll have to be flexible and leave the options open.

Let’s see, today is Tuesday. Which one are you gonna make?

Heavenly Homemaker's Club Members: Access your homepage and all your fantastic resources here! Not a member yet? Please join us!

Homemade Whole Wheat Vanilla Wafers

December 17, 2009 by Laura 65 Comments

This post may contain affiliate links. For more information, please see our disclosure policy.

We have become a household of the “eat it while you can because it won’t be around long, hurry they’re almost gone already” sort. That’s definitely how it was the day I first made homemade vanilla wafers. Now I double the recipe when I make these.

Homemade Whole Wheat Vanilla WafersYum

5.0 from 1 reviews
Homemade Whole Wheat Vanilla Wafers
 
Save Print
Author: Laura
Ingredients
  • ½ cup butter, softened
  • ½ cup sucanat or brown sugar
  • 1 egg
  • 1 teaspoon vanilla extract (this is a great recipe to use with your homemade vanilla extract!!)
  • 1 cup whole wheat flour (I use freshly ground whole wheat flour made from hard white wheat)
  • ¼ teaspoon sea salt
  • ½ teaspoon baking powder
Instructions
  1. Cream butter and sucanat together. Beat in egg and vanilla extract. Stir in flour, salt and baking powder.
  2. Line a baking sheet with parchment paper. Scrape the dough into a pastry bag with a large, plain piping tip.
  3. Pipe nickel sized amounts of dough onto the parchment paper. (If you don't have the tools you need to "pipe" these onto your cookie sheet...I think just plopping tiny plops down with a spoon will work okay too.)
  4. If, after you are done piping dough, you have a big pan full of ugly, weird shaped blobs, you have done very, very well.
  5. Bake at 325° for five to fifteen minutes. (This is a broad range of time, but each oven is different. Check them after five minutes to see how they're doing!)
  6. Turn off the oven and let the cookies sit inside for a half hour or so to crisp up.
3.4.3177

vanillawafers1sm

vanillawafers2sm

vanillawafers3sm

See? The ugly blobs spread out while they bake and make nice circle shaped Vanilla Wafers that your children will devour before their daddy comes home.

vanilla_wafers

And two days later when their daddy hears about the homemade vanilla wafers he will say to you, “What? Vanilla wafers? You made vanilla wafers? I never saw any vanilla wafers.”

Or something like that.

I have got to remember to set some of these aside next time.
————————————————————————–

Other snacks you might be interested in making:  Homemade Graham Crackers; Crispy Cheese Crackers; Chewy Granola Bars

Heavenly Homemaker's Club Members: Access your homepage and all your fantastic resources here! Not a member yet? Please join us!

Snickerdoodle Cookie Recipe and Red Ape Organic Cinnamon Giveaway!

September 8, 2009 by Laura 179 Comments

This post may contain affiliate links. For more information, please see our disclosure policy.

It’s too bad you can’t smell my house right now. The boys and I have been baking Snickerdoodles and the whole house smells SO GOOD!!! 

snickerdoodles3sm
It seems that my boys think sitting on the
countertop is the best way to bake.

Last week I received some of this yummy organic Red Ape Cinnamon from KestrelGrowth.com. I don’t know why I’ve never tried to make a healthier version of Snickerdoodles. But…when my Red Ape Cinnamon came in the mail that’s the first thing I knew I wanted to make!

snickerdoodlessm

SnickerdoodlesYum

1/2 cup butter, melted
1 cup sucanat or rapadura
1 egg
1/2 teaspoon vanilla
1/4 teaspoon baking soda
1/4 teaspoon cream of tartar
1 1/2 cups whole wheat flour
2 Tablespoons sucanat mixed with 2 teaspoons cinnamon

Stir together melted butter and sucanat. Add egg, vanilla, baking soda and cream of tartar, stirring well. Mix in flour. Cover bowl and chill dough in refrigerator for one hour. Roll dough into one inch balls. Roll balls in the sucanat/cinnamon mixture. Place balls about two inches apart on a cookie sheet. Bake at 350° for 10 minutes or until the cookies are golden brown.

These cookies turned out SO good!! Now, I want to use my new cinnamon in Applesauce Bread and Cinnamon Swirl Bread!! I love baking in the fall…

This week, just in time for YOUR fall baking, KestrelGrowth.com is offering to give one of my readers a FREE jar of Red Ape Cinnamon!! Leave a comment here letting us know why you’d love to win!

I’ll draw a random winner on Tuesday, September 15. Woohoo for Red Ape Cinnamon!

Heavenly Homemaker's Club Members: Access your homepage and all your fantastic resources here! Not a member yet? Please join us!

Make Your Own Funnel Cake!

August 13, 2009 by Laura 43 Comments

This post may contain affiliate links. For more information, please see our disclosure policy.

What comes to mind when you think of funnel cakes? I think of two things:  Greasy and Expensive

Okay…three things:  Greasy, Expensive and Yummy

Funnel cakes are one of the most popular items at the fair. People stand in long lines for them. But I never can make myself buy one (because of the greasy and expensive part).

Recently my kids asked me, “Mom can you MAKE a funnel cake at home?”

Oh wow…I never thought about trying that. Sure, why not? And so I did.

Do you know how EASY it is to make a funnel cake? I whipped some up in just a few minutes. (And the family wolfed them down in just a few minutes too…)

Homemade Funnel CakesYum

1 1/4 cups flour (I used freshly ground whole wheat)
2 T. sucanat
1 t. baking powder
1/4 t. sea salt
1 egg
2/3 cup milk
Oil for frying (I used coconut oil)
Organic powdered sugar or raw honey

Whisk together flour, sucanat, baking powder, salt, egg and milk. Heat oil in a skillet.

There are different ways to create your funnel cake. You can pour your batter through a funnel…or you can do what I did:  Use a cake decorating tip (the one with the biggest hole) and a plastic baggie.

funnelcake2sm

Squirt batter into hot oil (I used my electric skillet heated to 350° with a few tablespoons of oil). Cook thoroughly on one side, then flip and cook the other side (about two minutes per side).

Sprinkle with powdered sugar or drizzle with honey!!

funnelcake1sm

With these few ingredients, it is amazing what you’ll save by making these treats yourself at home. Now if I could figure out how to recreate the rides at the county fair so that allowing our kids to ride on them won’t require taking out a second mortgage. Any suggestions? :)


Heavenly Homemaker's Club Members: Access your homepage and all your fantastic resources here! Not a member yet? Please join us!

Zucchini Recipes: Zucchini Brownies

August 11, 2009 by Laura 28 Comments

This post may contain affiliate links. For more information, please see our disclosure policy.

If you know me very well, you know I love brownies. These fudgy brownies to be exact. So while coming up with zucchini recipes, of course I experimented to come up with a zucchini brownie recipe. 

Zucchini BrowniesYum

1/2 cup butter, melted
1 1/2 cups sucanat or rapadura
1/3 cup cocoa
1 cup shredded zucchini
1 egg
2 cups whole wheat flour

Mix butter, sucanat and cocoa. Stir in zucchini and egg. Gradually mix in flour until well combined. Pour batter into a 9×13 inch pan. Bake in a 350° oven for 25 minutes or until a toothpick inserted into the middle comes out clean.

zucchinibrowniessm

Since I’m getting vegetable in every moist, chocolaty bite…do you think I can justify eating twice as many?

Just wondering. :)

Be sure to check out these zucchini recipes also: 

  •  Zucchini Cake
  • Cheeseburger Zucchini Boats
  • Whole Wheat and Honey Zucchini Bread and Muffins
  • Chocolate Chip Zucchini Cookies and Bars

AND, if you want even more zucchini recipes, check out Tammy’s Recipe swap today! We really might just all turn into zucchinis.
—————————————————————

This post is linked to the In Season Recipe Swap and Works for me Wednesday.

Heavenly Homemaker's Club Members: Access your homepage and all your fantastic resources here! Not a member yet? Please join us!
« Previous Page
Next Page »

Join Our Community!

 Facebook Twitter E-mail Instagram Pinterest

Popular Posts

~ Will All of the Real Moms Please Stand Up?
~ Easy! Stir-and-Pour Whole Wheat Bread
~ How to Make Gatorade
~ 31 Real Food Breakfast Ideas
~ Dear Teenage Girls...
~ When Mom Takes a Step Back
~ The Inexpensive Health Insurance We Love!
~ Let's Talk Real Food Grocery Budgets

Check out our latest posts!

  • Big Family Food and Fun: May 3-9, 2026
  • Help Your Kids Become Independent in the Kitchen!
  • Big Family Food and Fun: April 26-May 2, 2026
  • Big Family Food and Fun: April 19-25, 2026
  • Big Family Food and Fun: April 12-18, 2026
Home  ~  Simple Meals  ~  Club Membership  ~  Shop  ~  Privacy Policy  ~  Disclosure  ~ Contact

Copyright © 2026 · Beautiful Pro Theme on Genesis Framework · WordPress · Log in